Category: Breakfast

  • Copycat Brown Sugar Pop Tart Cookies Better Than Crumbl – Soft, Cinnamon-Swirl Treats

    Copycat Brown Sugar Pop Tart Cookies Better Than Crumbl – Soft, Cinnamon-Swirl Treats

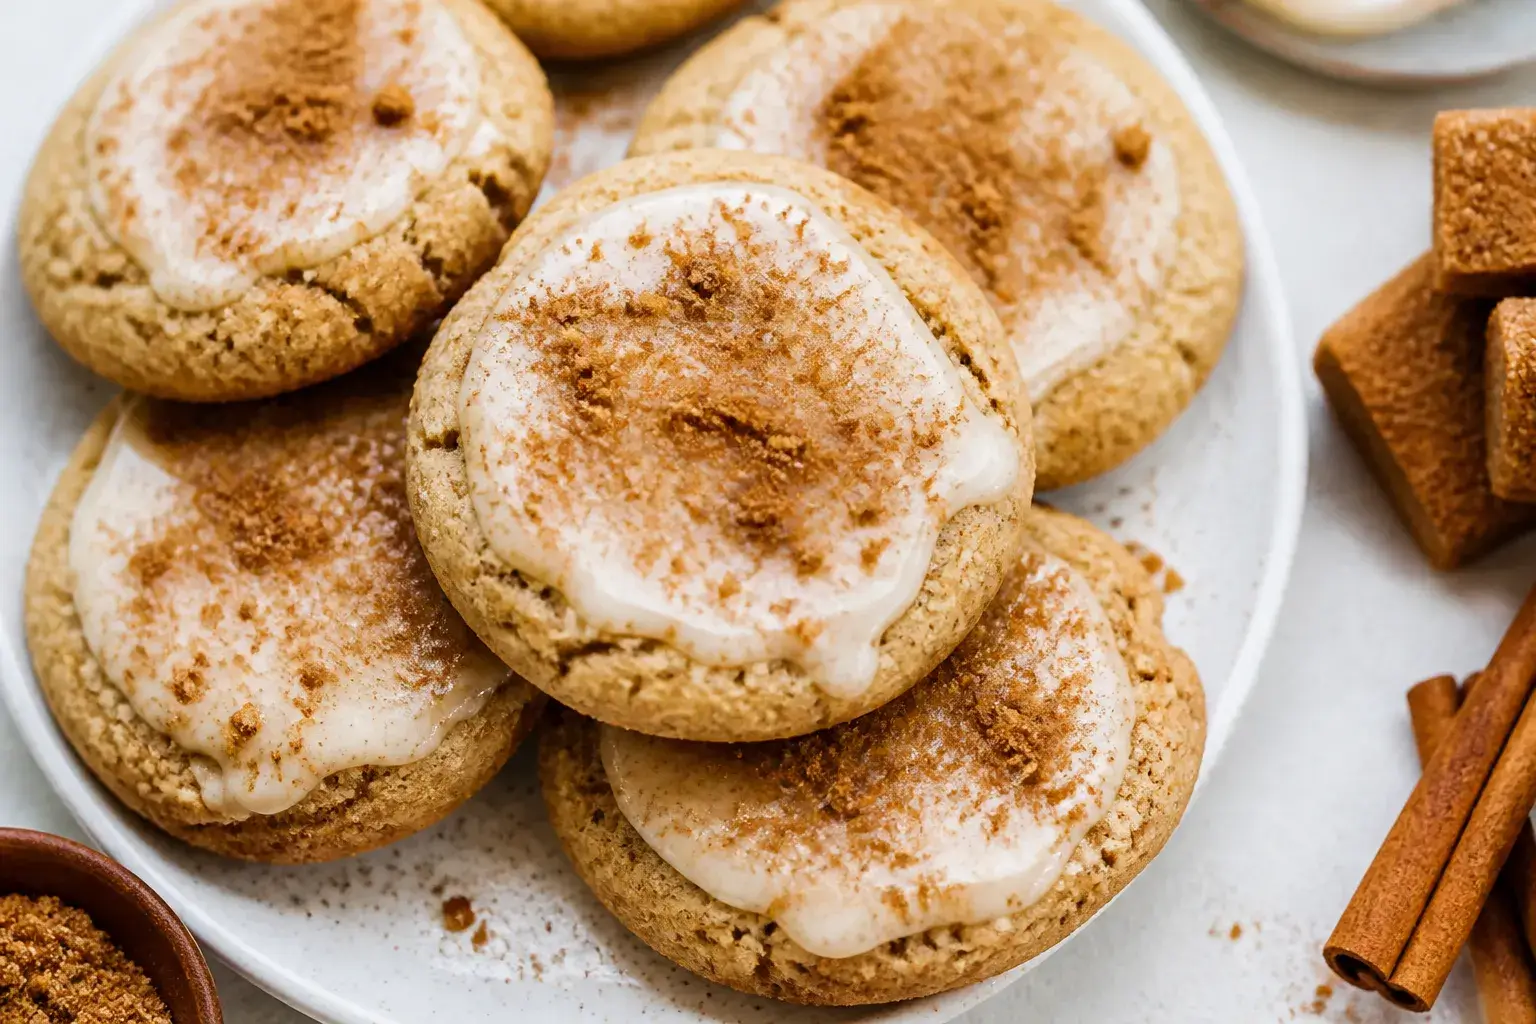
    These cookies hit all the nostalgic notes of a brown sugar Pop-Tart, but with a bakery-style twist: thick, soft centers, crisp edges, and a buttery cinnamon-brown sugar swirl. They’re simple to make, no special equipment needed, and the icing sets into that classic toaster pastry finish. If you love Crumbl’s version, this copycat brings the same vibe with cleaner ingredients and bigger flavor.

    Make a batch for a weekend treat, a bake sale, or just because you want something cozy.

    Why This Recipe Works
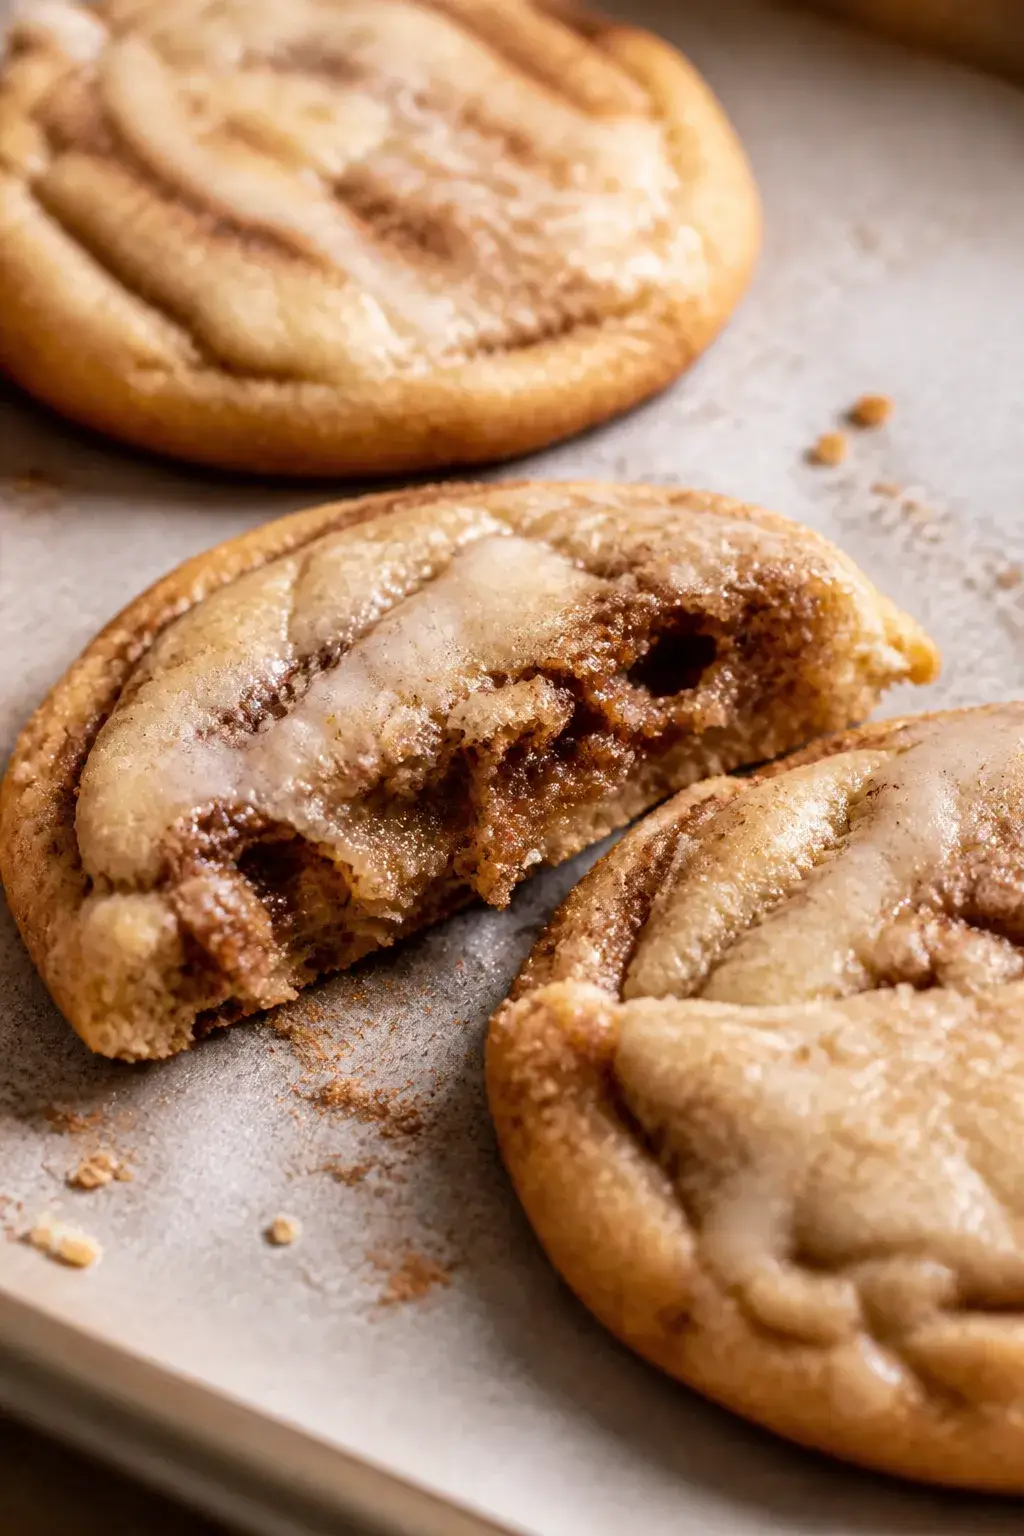
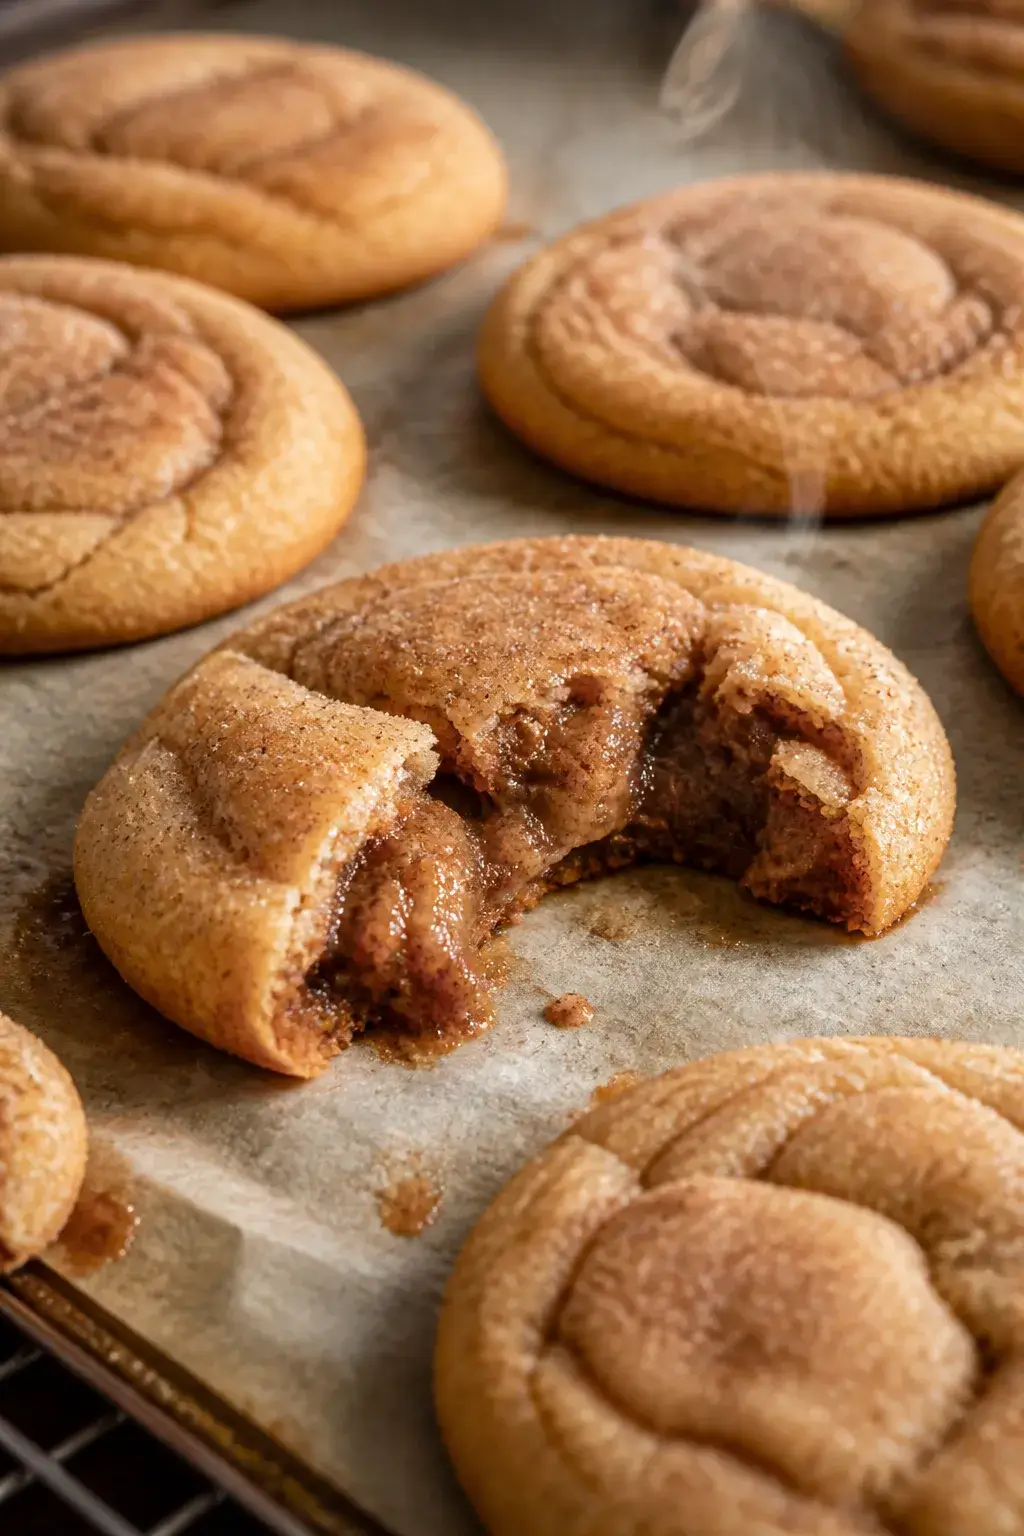
    Close-up detail shot of a freshly baked Brown Sugar Pop Tart Cookie on a parchment-lined baking shee
    • Brown sugar + cinnamon swirl: A quick, sandy filling melts into the dough and creates ribbons of caramel flavor.
    • Chilled dough: Keeps the cookies thick and prevents spreading, giving you that bakery-style height.
    • Cornstarch in the dough: Adds softness without making the cookies cakey.
    • Browned butter option: Boosts toasty, pastry-like flavor if you want to level up.
    • Simple icing: Sets with a slight crust, just like a Pop-Tart, but stays soft underneath.

    Ingredients

    • For the cookies:
      • 2 3/4 cups all-purpose flour
      • 1 tablespoon cornstarch
      • 1 teaspoon baking powder
      • 1/2 teaspoon baking soda
      • 3/4 teaspoon fine salt
      • 3/4 cup unsalted butter, softened (or browned and cooled to solid-soft)
      • 1 cup packed light brown sugar
      • 1/2 cup granulated sugar
      • 2 large eggs, room temperature
      • 2 teaspoons pure vanilla extract
    • For the cinnamon filling:
      • 1/3 cup packed light brown sugar
      • 2 tablespoons granulated sugar
      • 1 tablespoon ground cinnamon
      • 2 tablespoons melted unsalted butter
      • Pinch of salt
    • For the icing:
      • 1 1/4 cups powdered sugar, sifted
      • 1 1/2 tablespoons milk (plus more as needed)
      • 1 teaspoon pure vanilla extract
      • 1/2 teaspoon ground cinnamon
      • Pinch of salt

    Step-by-Step Instructions
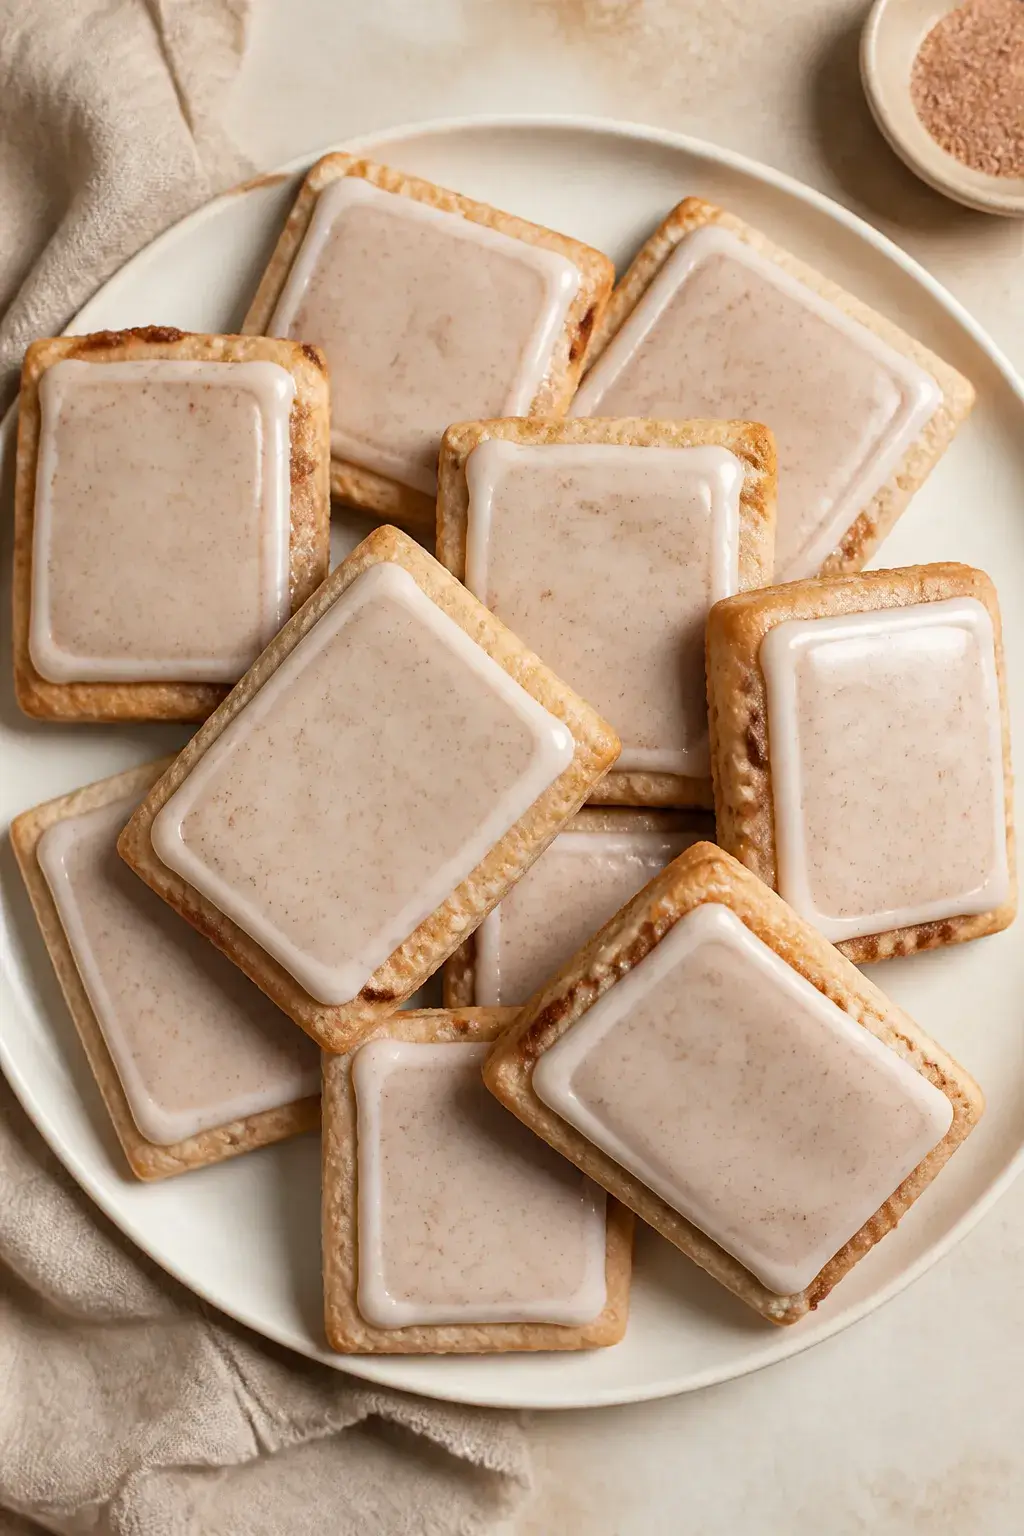
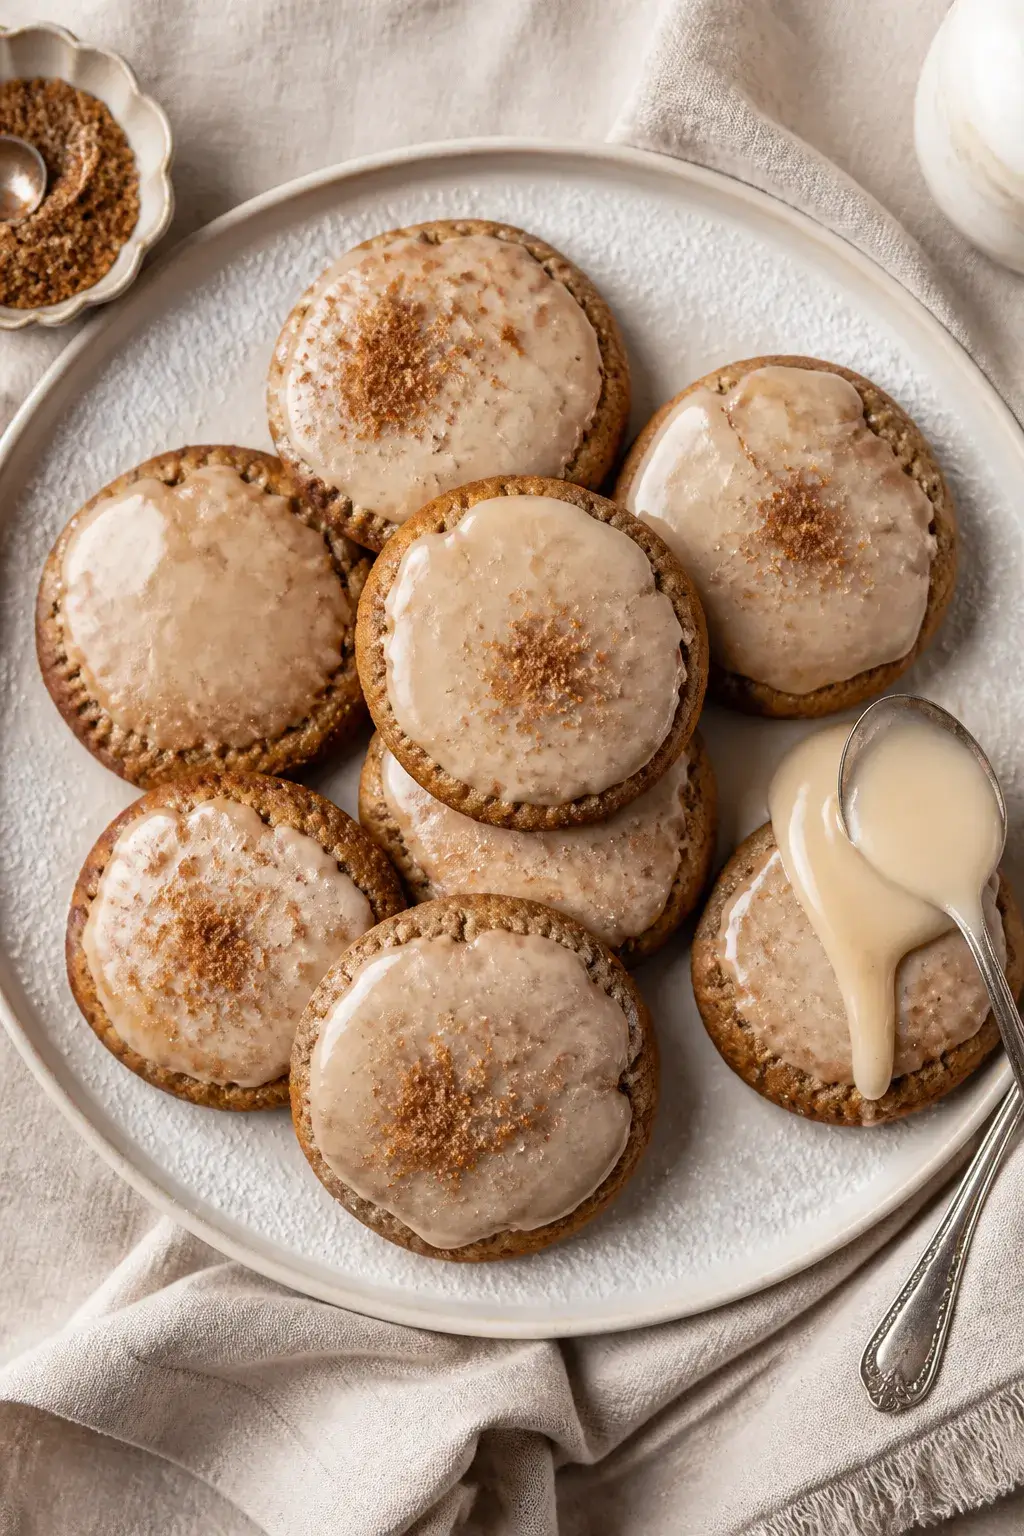
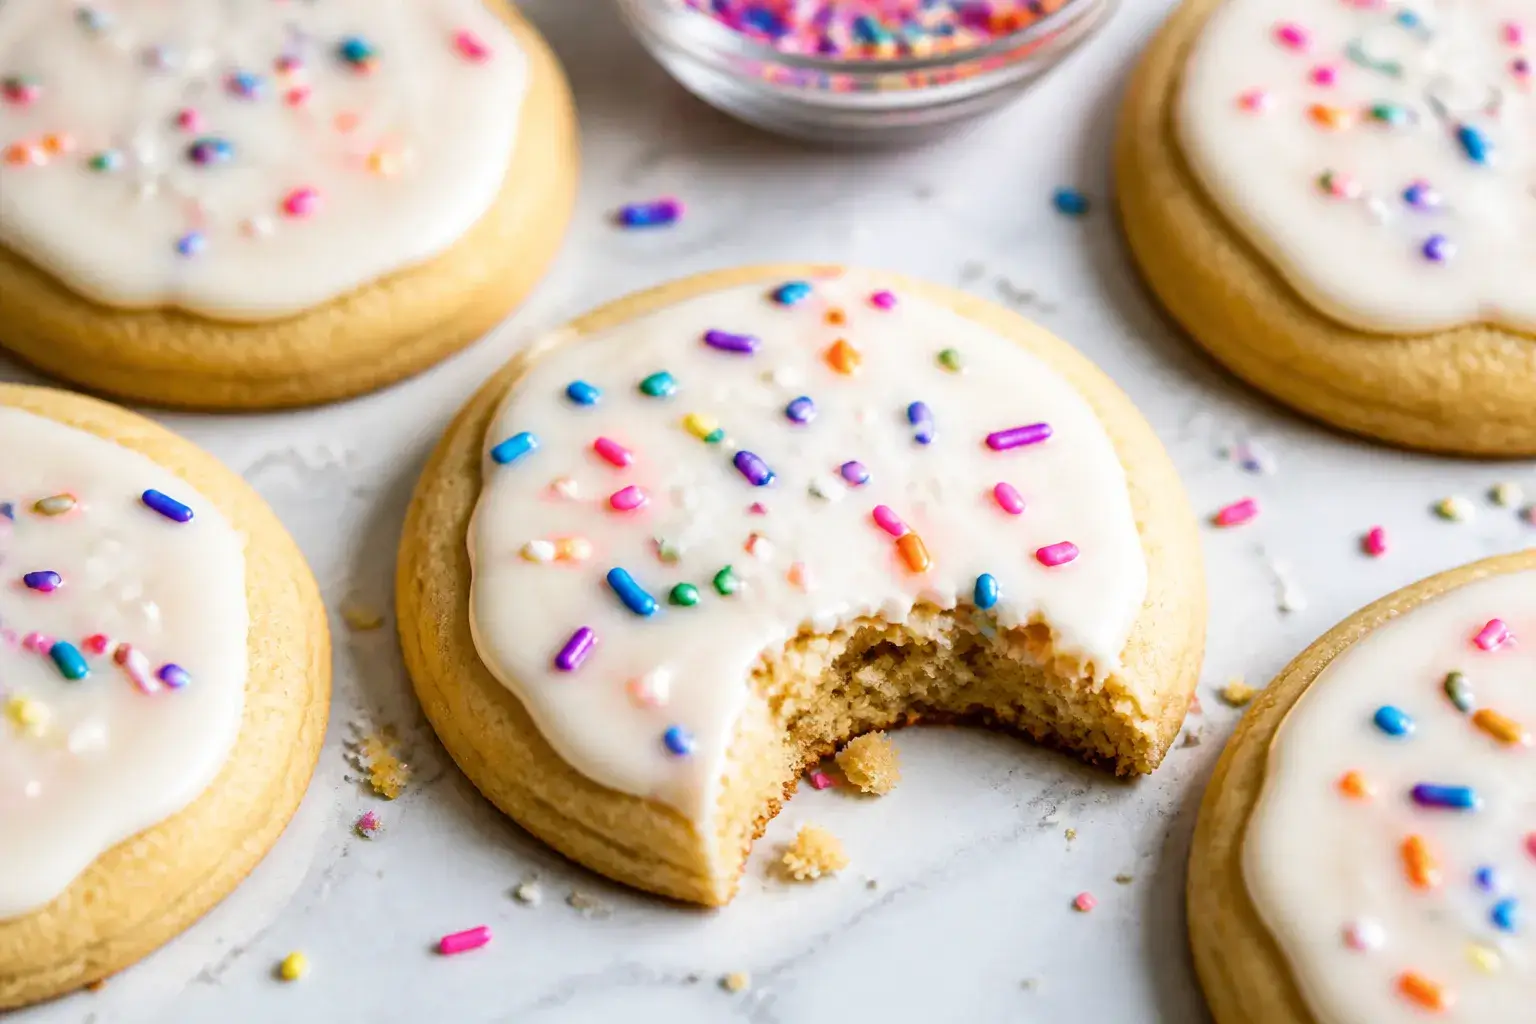
    Overhead final presentation of fully cooled and glazed Brown Sugar Pop Tart Cookies arranged on a ma
    1. Prep the pans: Line two baking sheets with parchment. Set oven to 350°F (175°C), but you’ll chill the dough before baking.
    2. Make the filling: In a small bowl, mix brown sugar, granulated sugar, cinnamon, melted butter, and a pinch of salt until sandy. Set aside.
    3. Whisk dry ingredients: In a medium bowl, whisk flour, cornstarch, baking powder, baking soda, and salt.
    4. Cream the butter and sugars: Beat softened butter with brown and granulated sugar until light and fluffy, 2–3 minutes.
    5. Add eggs and vanilla: Mix in eggs one at a time, then vanilla.

      Scrape the bowl.

    6. Combine: Add dry ingredients to wet on low speed until just combined. Do not overmix.
    7. Swirl the filling: Sprinkle the cinnamon filling over the dough. Fold gently 2–3 times with a spatula to create ribbons. Do not fully blend; you want streaks.
    8. Portion and chill: Scoop 1/4-cup mounds (about 12 large cookies).

      Roll into balls, then gently press the tops to flatten slightly. Chill 30–45 minutes.

    9. Bake: Arrange 6 cookies per sheet. Bake 10–12 minutes until edges are set and centers look slightly underdone.

      They’ll finish on the pan.

    10. Cool: Let cookies rest on the sheet 10 minutes, then transfer to a rack. Cool completely before icing.
    11. Make the icing: Stir powdered sugar, milk, vanilla, cinnamon, and salt until smooth and thick but pourable. Adjust with a few drops of milk if needed.
    12. Glaze: Spoon icing over the cooled cookies, leaving a small border to mimic Pop-Tart frosting.

      Let set 20–30 minutes.

    Keeping It Fresh

    • Room temp: Store in an airtight container for 3–4 days with a piece of bread or a sugar cube to maintain softness.
    • Freeze unglazed: Freeze baked, un-iced cookies up to 2 months. Thaw, then ice.
    • Freeze dough: Freeze portioned dough balls up to 2 months. Bake from frozen, adding 1–2 minutes.

    Why This is Good for You

    • Made at home: You control the ingredients—no artificial flavors or preservatives.
    • Balanced sweetness: Brown sugar and cinnamon deliver big flavor, so you don’t need a super-sweet dough.
    • Mindful portions: These are rich.

      One cookie satisfies a craving without a long list of additives.

    Pitfalls to Watch Out For

    • Overmixing: Makes cookies tough. Stop when the flour vanishes.
    • Skipping the chill: Leads to spreading and thinner cookies.
    • Overbaking: Pull them when centers look slightly soft. They firm up as they cool.
    • Runny icing: Add extra powdered sugar 1 tablespoon at a time if it won’t hold a soft ribbon.

    Variations You Can Try

    • Browned butter: Brown the butter, cool to a soft-solid, and proceed.

      Extra toasty notes.

    • Maple twist: Swap 1 teaspoon vanilla in the icing for 1 teaspoon pure maple extract.
    • Filled center: Press a thumb into each dough ball, add 1/2 teaspoon cinnamon filling, pinch closed, then bake.
    • Gluten-free: Use a 1:1 gluten-free baking blend with xanthan gum. Chill a bit longer.
    • Mini size: Scoop 2 tablespoons dough, bake 8–9 minutes for bite-size treats.

    FAQ

    Can I make these without a mixer?

    Yes. Use a sturdy spatula or whisk.

    Cream butter and sugars by hand until fluffy, then proceed as written.

    Do I have to chill the dough?

    Chilling is strongly recommended. It keeps the cookies thick and helps the cinnamon swirl stay defined.

    What if I only have dark brown sugar?

    Use it. The flavor will be deeper and a bit more molasses-forward, which is delicious here.

    How do I know when they’re done?

    Edges should look set and lightly golden; centers should look slightly underbaked.

    They’ll firm up as they cool on the pan.

    Can I reduce the sugar?

    You can reduce the granulated sugar in the dough by 2–3 tablespoons without affecting texture. Keep the brown sugar for moisture and flavor.

    How long does the icing take to set?

    About 20–30 minutes at room temperature. For faster setting, place the cookies in the fridge for 10 minutes.

    In Conclusion

    These Copycat Brown Sugar Pop Tart Cookies Better Than Crumbl bring warm cinnamon flavor, soft centers, and that iconic glazed top—all from your own kitchen.

    With a quick swirl, a short chill, and a simple icing, you’ll have bakery-level cookies that taste like your childhood favorite, only better. Bake a batch once, and they’ll become your go-to cozy cookie.
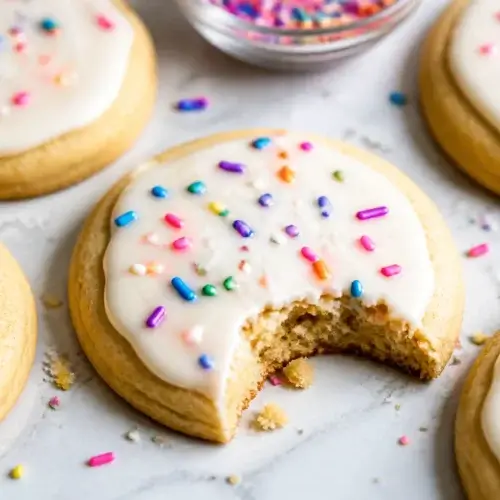
    Copycat Brown Sugar Pop Tart Cookies Better Than Crumbl – Soft, Cinnamon-Swirl Treats

    Prep Time 15 minutes
    Cook Time 13 minutes
    Total Time 28 minutes
    Servings 12 servings

    Ingredients
      

    • For the cookies:
    • 2 3/4 cups all-purpose flour
    • 1 tablespoon cornstarch
    • 1 teaspoon baking powder
    • 1/2 teaspoon baking soda
    • 3/4 teaspoon fine salt
    • 3/4 cup unsalted butter, softened (or browned and cooled to solid-soft)
    • 1 cup packed light brown sugar
    • 1/2 cup granulated sugar
    • 2 large eggs, room temperature
    • 2 teaspoons pure vanilla extract
    • For the cinnamon filling:
    • 1/3 cup packed light brown sugar
    • 2 tablespoons granulated sugar
    • 1 tablespoon ground cinnamon
    • 2 tablespoons melted unsalted butter
    • Pinch of salt
    • For the icing:
    • 1 1/4 cups powdered sugar, sifted
    • 1 1/2 tablespoons milk (plus more as needed)
    • 1 teaspoon pure vanilla extract
    • 1/2 teaspoon ground cinnamon
    • Pinch of salt

    Instructions
     

    • Prep the pans: Line two baking sheets with parchment. Set oven to 350°F (175°C), but you’ll chill the dough before baking.
    • Make the filling: In a small bowl, mix brown sugar, granulated sugar, cinnamon, melted butter, and a pinch of salt until sandy. Set aside.
    • Whisk dry ingredients: In a medium bowl, whisk flour, cornstarch, baking powder, baking soda, and salt.
    • Cream the butter and sugars: Beat softened butter with brown and granulated sugar until light and fluffy, 2–3 minutes.
    • Add eggs and vanilla: Mix in eggs one at a time, then vanilla. Scrape the bowl.
    • Combine: Add dry ingredients to wet on low speed until just combined. Do not overmix.
    • Swirl the filling: Sprinkle the cinnamon filling over the dough. Fold gently 2–3 times with a spatula to create ribbons. Do not fully blend; you want streaks.
    • Portion and chill: Scoop 1/4-cup mounds (about 12 large cookies). Roll into balls, then gently press the tops to flatten slightly. Chill 30–45 minutes.
    • Bake: Arrange 6 cookies per sheet. Bake 10–12 minutes until edges are set and centers look slightly underdone. They’ll finish on the pan.
    • Cool: Let cookies rest on the sheet 10 minutes, then transfer to a rack. Cool completely before icing.
    • Make the icing: Stir powdered sugar, milk, vanilla, cinnamon, and salt until smooth and thick but pourable. Adjust with a few drops of milk if needed.
    • Glaze: Spoon icing over the cooled cookies, leaving a small border to mimic Pop-Tart frosting. Let set 20–30 minutes.
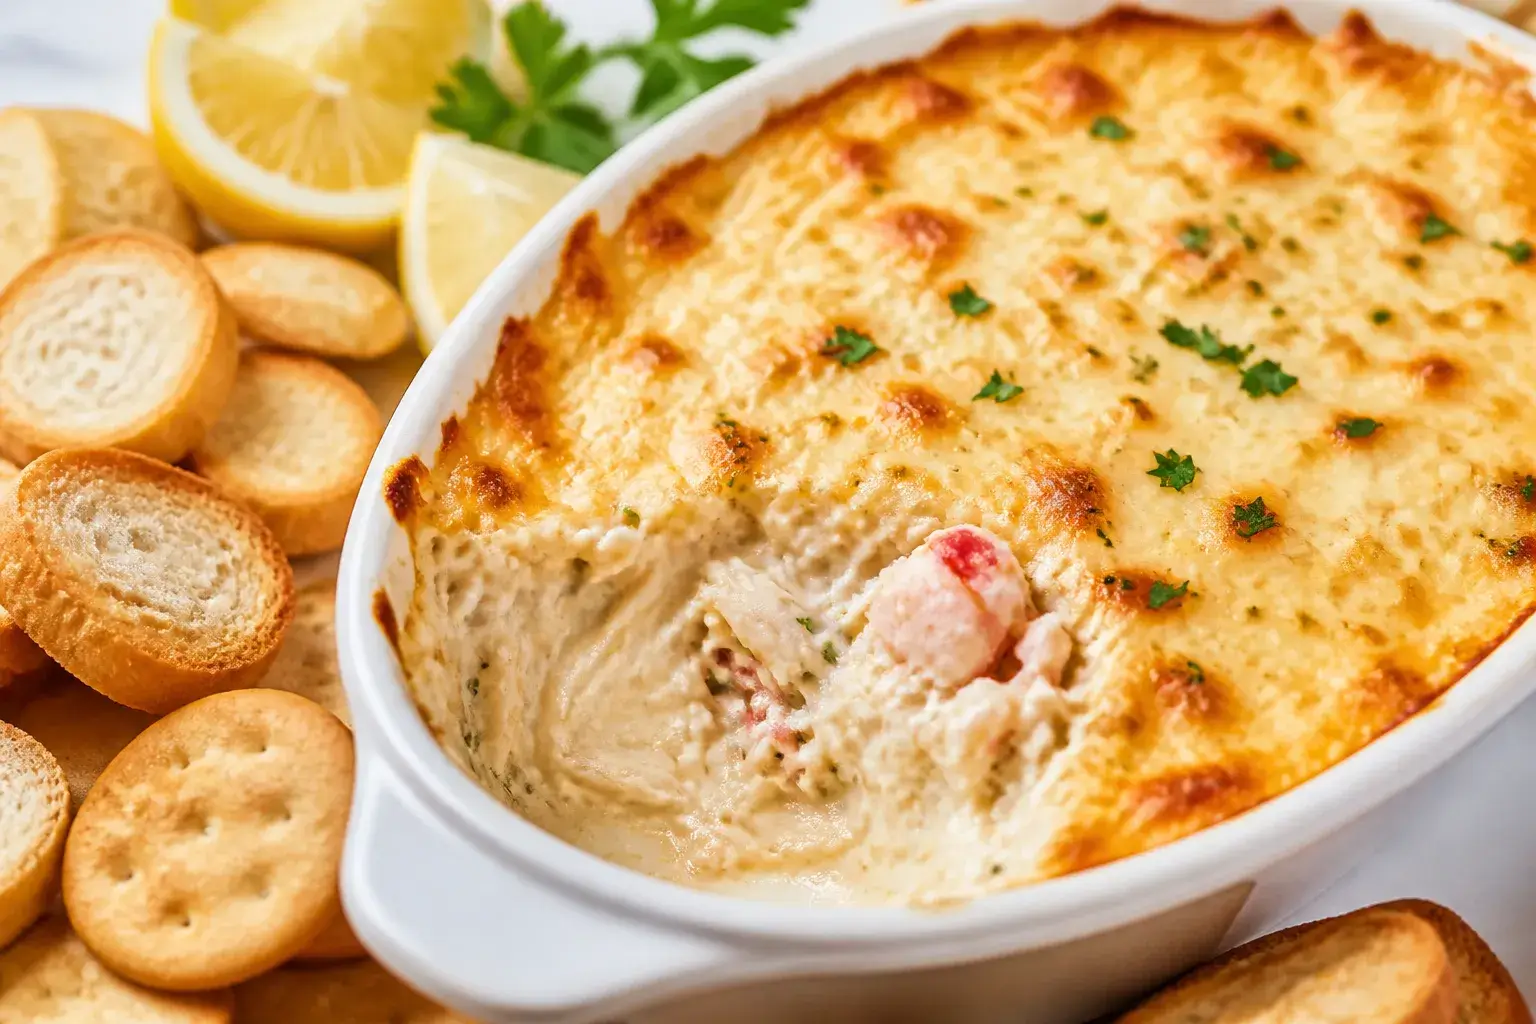
  • Hot Crab Dip Recipe With Cream Cheese – Warm, Creamy, Crowd-Pleasing Appetizer

    Hot Crab Dip Recipe With Cream Cheese – Warm, Creamy, Crowd-Pleasing Appetizer

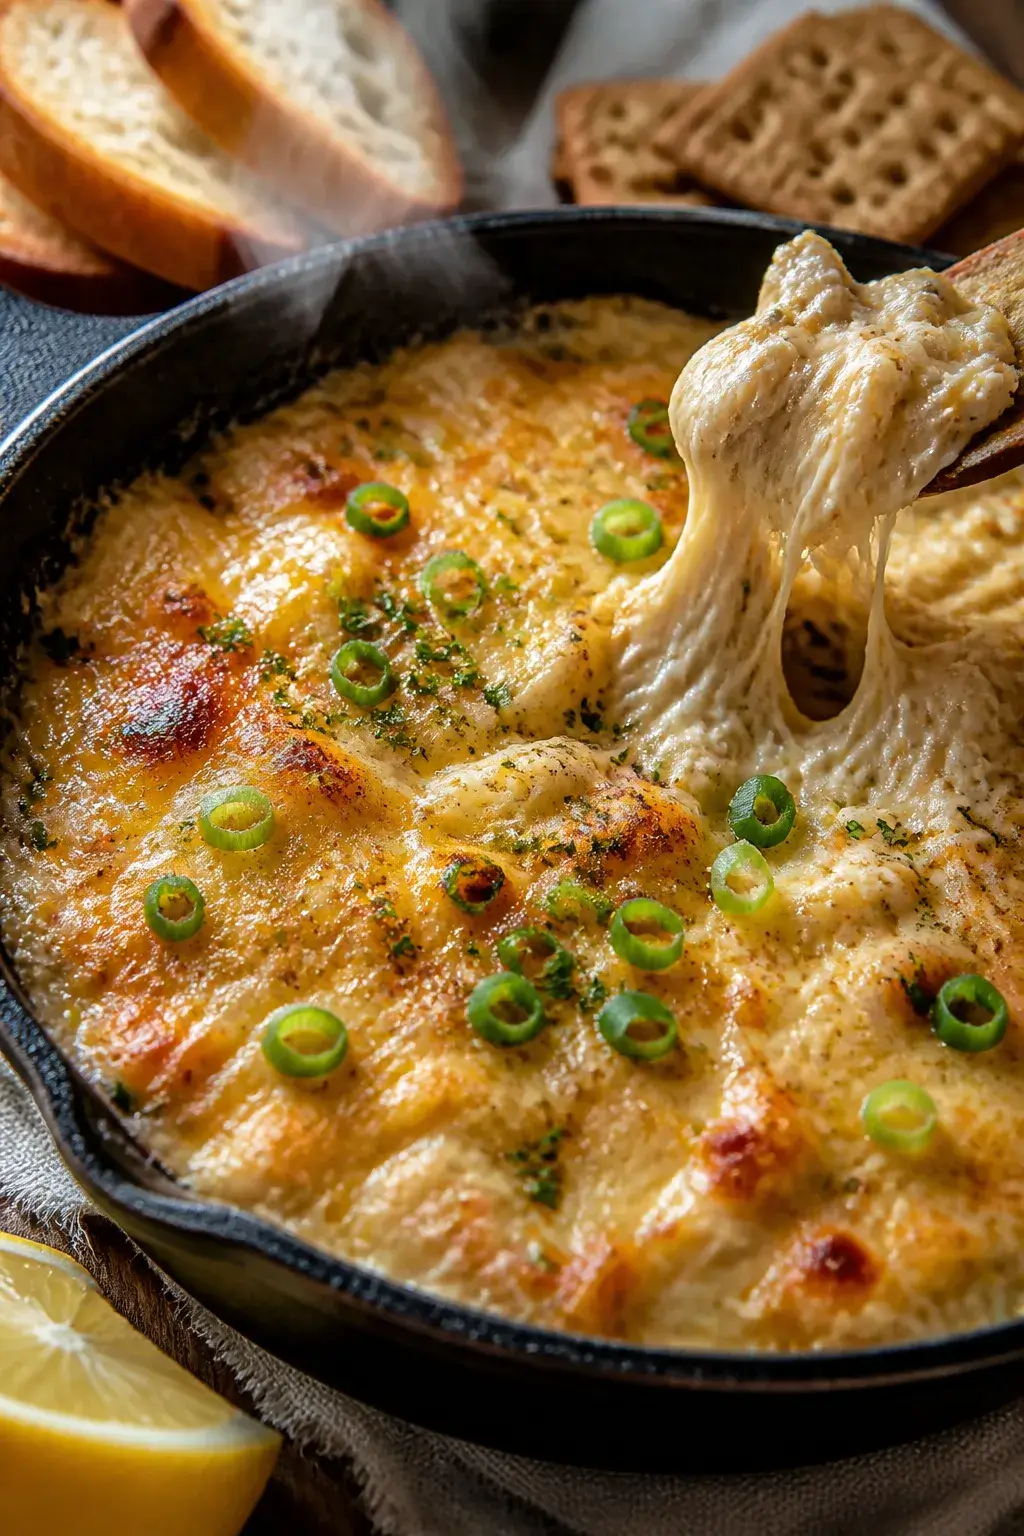
    This hot crab dip is the kind of appetizer that disappears fast. It’s creamy, cheesy, and full of tender crab, with a hint of lemon and Old Bay to keep it bright and savory. You can mix it up in minutes, then bake until bubbly and golden.

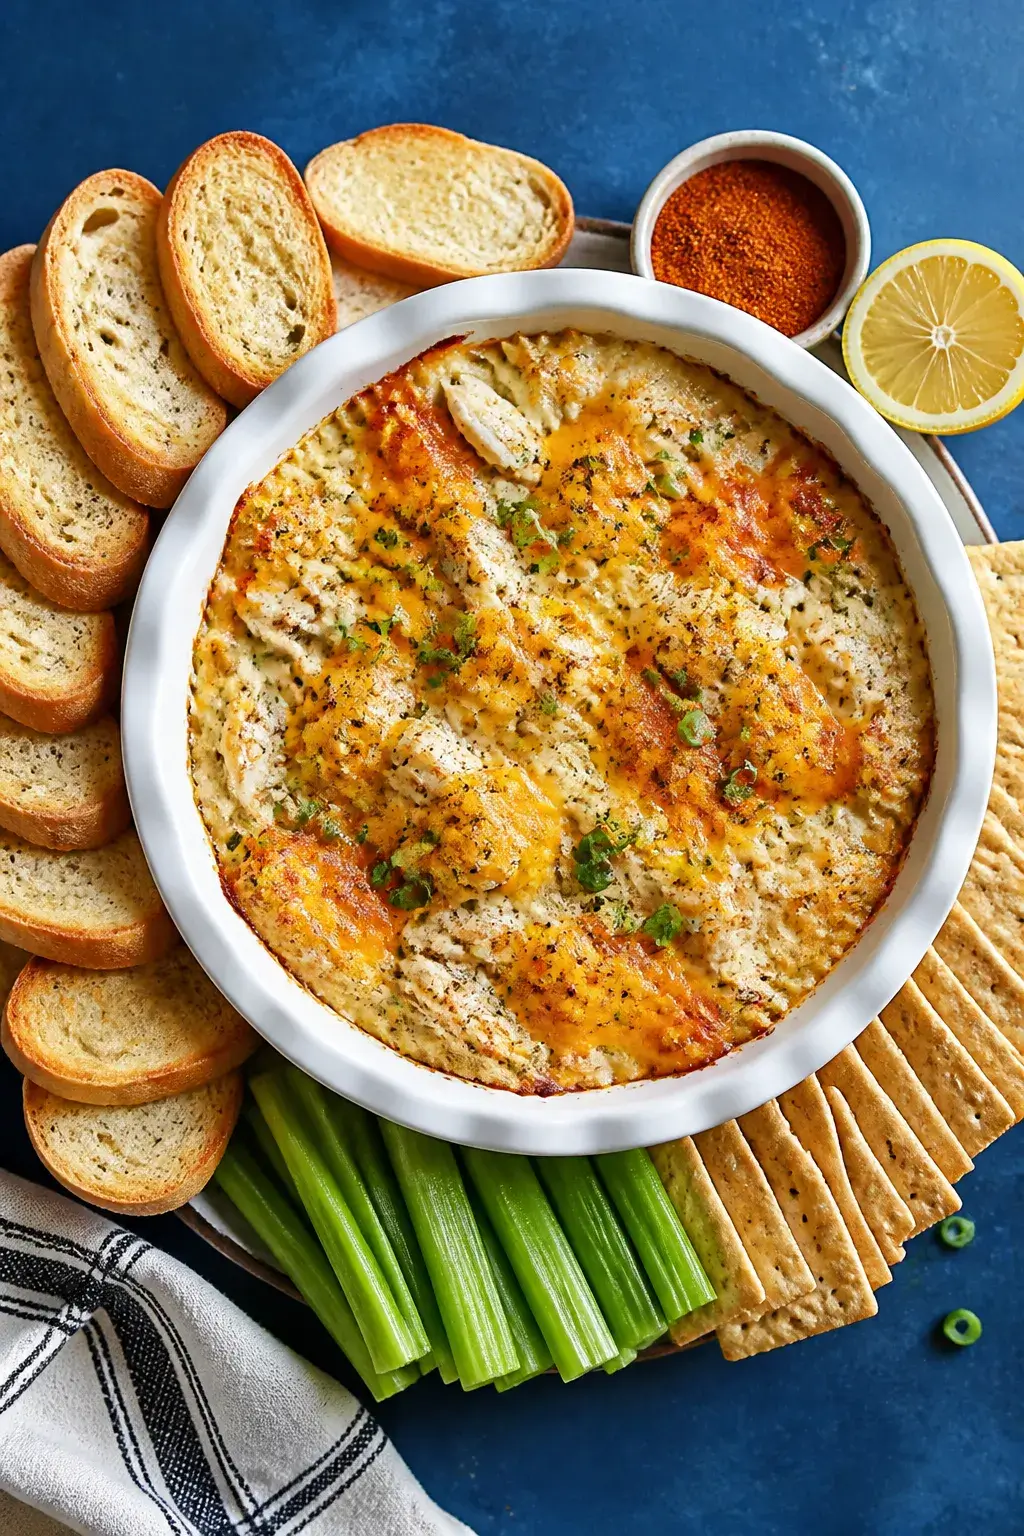
    Serve it with toasted baguette slices, sturdy crackers, or celery sticks, and watch it become the star of your table.

    What Makes This Special

    Cooking process close-up: Hot crab dip just out of the oven in a small, oven-safe cast-iron skillet,

    This version leans into cream cheese for a rich, velvety base that holds up well to baking. A splash of lemon and Worcestershire balances the richness without overpowering the crab. Old Bay adds that classic seafood warmth, while a little cheddar and Parmesan bring gooey pull and a salty finish.

    It’s simple, reliable, and always tastes like more effort than it is.

    What You’ll Need

    • 8 oz cream cheese, softened
    • 1/2 cup sour cream (or plain Greek yogurt)
    • 1/4 cup mayonnaise
    • 8–12 oz lump crab meat (fresh, canned, or pasteurized), picked over for shells
    • 1 cup shredded cheddar (divided)
    • 1/4 cup grated Parmesan
    • 1 tablespoon lemon juice (plus more to taste)
    • 1 teaspoon Old Bay seasoning (adjust to preference)
    • 1 teaspoon Worcestershire sauce
    • 1 small garlic clove, finely minced (or 1/4 teaspoon garlic powder)
    • 2 green onions, thinly sliced (plus extra for garnish)
    • 1–2 tablespoons chopped parsley (optional)
    • Pinch of cayenne or hot sauce (optional, for heat)
    • Salt and black pepper, to taste
    • Olive oil or butter, for greasing the baking dish

    Instructions

    Final presentation overhead: Tasty top-down shot of hot crab dip transferred to a low, white ceramic
    1. Preheat the oven to 375°F (190°C). Lightly grease a small baking dish or oven-safe skillet.
    2. Mix the creamy base: In a bowl, beat the softened cream cheese until smooth. Stir in sour cream and mayonnaise until fully combined and silky.
    3. Season it up: Add lemon juice, Old Bay, Worcestershire, garlic, half the green onions, parsley, and cayenne or hot sauce if using.

      Mix well. Taste and adjust with a little more lemon, salt, and pepper.

    4. Add the cheese: Fold in 3/4 cup cheddar and all the Parmesan.
    5. Fold in the crab: Gently mix in the crab meat, keeping lumps intact. Don’t over-stir.
    6. Top and bake: Spread into the baking dish.

      Sprinkle the remaining cheddar on top. Bake 18–22 minutes, until hot and bubbly with light golden spots.

    7. Finish and serve: Let it sit 5 minutes. Garnish with remaining green onions and a squeeze of lemon.

      Serve warm with toasted baguette, crackers, or veggies.

    How to Store

    Cool completely, then cover and refrigerate for up to 3 days. Reheat in a 350°F (175°C) oven until warmed through, about 10–15 minutes. If it seems thick, stir in a spoonful of sour cream after reheating.

    You can also assemble it a day ahead, cover, and bake just before serving.

    Why This is Good for You

    • Protein-rich: Crab provides lean protein to keep you satisfied.
    • Minerals: Crab is a good source of selenium and zinc.
    • Portion-flexible: Pair with veggie dippers to lighten things up while keeping the flavor front and center.

    What Not to Do

    • Don’t use imitation crab if you want real crab flavor. It will taste sweeter and less briny.
    • Don’t skip tasting the mixture before baking. Adjust lemon, salt, and Old Bay now.
    • Don’t overbake. Too long in the oven can make it oily or dry.

      Pull it when it’s just bubbly.

    • Don’t shred the crab. Fold gently to keep those tender chunks intact.

    Variations You Can Try

    • Spicy Jalapeño: Stir in 1–2 minced jalapeños and a dash of hot sauce.
    • Artichoke Twist: Add 1/2 cup chopped marinated artichokes for tang and texture.
    • Smoky Bacon: Fold in 1/3 cup crispy crumbled bacon and a pinch of smoked paprika.
    • Herby Lemon: Use extra parsley plus dill or chives, and bump the lemon to 1.5 tablespoons.
    • Extra-Cheesy: Swap half the cheddar for Monterey Jack or Gruyère for more melt and depth.
    • Cold-Serve Option: Skip baking and serve chilled; loosen with a bit more sour cream and lemon.

    FAQ

    Can I use canned crab?

    Yes. Look for lump or claw meat packed in the refrigerated section if possible. Drain well and pick out any shells.

    Fresh or pasteurized lump will have the best texture, but canned works in a pinch.

    Can I make this ahead?

    Absolutely. Mix everything, spread in the dish, cover, and refrigerate up to 24 hours. Bake just before serving, adding a few extra minutes if it’s going in cold.

    What should I serve with it?

    Toasted baguette slices, sturdy crackers, bagel chips, pretzel crisps, endive leaves, celery sticks, and carrot coins are all great.

    Offer a mix so guests can choose lighter or crunchier options.

    How do I keep it warm for a party?

    After baking, transfer to a small slow cooker on the Warm setting, or keep it in a covered oven-safe dish at 200°F (95°C). Stir occasionally so the top doesn’t dry out.

    Can I freeze hot crab dip?

    It’s not ideal. Cream cheese can turn grainy after freezing.

    If you must, freeze unbaked dip tightly wrapped for up to 1 month, thaw overnight, stir, then bake. Fresh is best.

    Wrapping Up

    This hot crab dip with cream cheese is creamy, comforting, and party-ready with minimal effort. Keep the base, season boldly, and let the crab shine.

    Bake until bubbly, garnish with something fresh, and serve it warm—simple as that. Once you make it, you’ll keep it in your back pocket for every get-together.

    Hot Crab Dip Recipe With Cream Cheese – Warm, Creamy, Crowd-Pleasing Appetizer

    Prep Time 10 minutes
    Cook Time 20 minutes
    Total Time 30 minutes
    Servings 8 servings

    Ingredients
      

    • 8 oz cream cheese, softened
    • 1/2 cup sour cream (or plain Greek yogurt)
    • 1/4 cup mayonnaise
    • 8–12 oz lump crab meat (fresh, canned, or pasteurized), picked over for shells
    • 1 cup shredded cheddar (divided)
    • 1/4 cup grated Parmesan
    • 1 tablespoon lemon juice (plus more to taste)
    • 1 teaspoon Old Bay seasoning (adjust to preference)
    • 1 teaspoon Worcestershire sauce
    • 1 small garlic clove, finely minced (or 1/4 teaspoon garlic powder)
    • 2 green onions, thinly sliced (plus extra for garnish)
    • 1–2 tablespoons chopped parsley (optional)
    • Pinch of cayenne or hot sauce (optional, for heat)
    • Salt and black pepper, to taste
    • Olive oil or butter, for greasing the baking dish

    Instructions
     

    • Preheat the oven to 375°F (190°C). Lightly grease a small baking dish or oven-safe skillet.
    • Mix the creamy base: In a bowl, beat the softened cream cheese until smooth. Stir in sour cream and mayonnaise until fully combined and silky.
    • Season it up: Add lemon juice, Old Bay, Worcestershire, garlic, half the green onions, parsley, and cayenne or hot sauce if using. Mix well. Taste and adjust with a little more lemon, salt, and pepper.
    • Add the cheese: Fold in 3/4 cup cheddar and all the Parmesan.
    • Fold in the crab: Gently mix in the crab meat, keeping lumps intact. Don’t over-stir.
    • Top and bake: Spread into the baking dish. Sprinkle the remaining cheddar on top. Bake 18–22 minutes, until hot and bubbly with light golden spots.
    • Finish and serve: Let it sit 5 minutes. Garnish with remaining green onions and a squeeze of lemon. Serve warm with toasted baguette, crackers, or veggies.
  • Brown Sugar Cinnamon Pop Tart Cookies You Need to Try ASAP – Soft, Buttery, and Nostalgic

    Brown Sugar Cinnamon Pop Tart Cookies You Need to Try ASAP – Soft, Buttery, and Nostalgic

    These cookies taste like your favorite toaster pastry in chewy, bakery-style form. Think warm cinnamon, caramel-y brown sugar, and a creamy glaze that sets with a gentle crackle. They’re simple enough for a weeknight and special enough for a party platter.

    If you grew up loving Pop-Tarts, this is a fun, grown-up twist. And if you didn’t, you’ll still love the cozy flavors and soft, thick bite.

    What Makes This Special

    Close-up detail shot of freshly baked Brown Sugar Cinnamon Pop Tart Cookies on a parchment-lined bak

    These cookies take the best parts of a Brown Sugar Cinnamon Pop-Tart—sweet filling, toasty cinnamon, and vanilla icing—and pack them into a soft, thick cookie. The dough is rich with brown sugar for a deep, caramel flavor and soft texture.

    A quick cinnamon-sugar swirl runs through the center, giving each bite that Pop-Tart signature. The glaze goes on last for a glossy, nostalgic finish. They’re easy to make, but they taste like a bakery treat.

    Ingredients

    • For the cookies:
    • 2 1/4 cups all-purpose flour
    • 1 teaspoon baking soda
    • 1/2 teaspoon baking powder
    • 3/4 teaspoon fine salt
    • 1 tablespoon ground cinnamon
    • 3/4 cup unsalted butter, softened
    • 1 cup packed light brown sugar
    • 1/3 cup granulated sugar
    • 1 large egg
    • 1 large egg yolk
    • 2 teaspoons vanilla extract
    • For the brown sugar cinnamon filling:
    • 1/3 cup packed light brown sugar
    • 1 tablespoon all-purpose flour
    • 1 teaspoon ground cinnamon
    • 1 tablespoon melted butter
    • For the glaze:
    • 1 cup powdered sugar
    • 1 teaspoon ground cinnamon
    • 1 teaspoon vanilla extract
    • 2–3 tablespoons milk (as needed)
    • Pinch of salt

    Instructions

    Overhead final presentation of glazed Brown Sugar Cinnamon Pop Tart Cookies arranged in a relaxed cl
    1. Preheat your oven to 350°F (175°C).

      Line two baking sheets with parchment paper.

    2. In a bowl, whisk together flour, baking soda, baking powder, salt, and cinnamon. Set aside.
    3. In a large bowl, beat softened butter, brown sugar, and granulated sugar until fluffy, about 2 minutes.
    4. Add the egg, egg yolk, and vanilla. Mix until smooth and creamy.
    5. Stir in the dry ingredients just until combined.

      Do not overmix.

    6. Make the filling: In a small bowl, combine brown sugar, flour, cinnamon, and melted butter until sandy and clumpy.
    7. Scoop cookie dough into 2-tablespoon balls. Flatten each slightly in your palm, add about 1 teaspoon of filling to the center, then fold the edges up and seal. Roll gently back into a ball.
    8. Arrange on the baking sheets, spacing 2 inches apart.

      Chill the trays in the fridge for 10 minutes for thicker cookies.

    9. Bake for 9–11 minutes, until edges are set and centers look slightly underdone. They’ll continue to set as they cool.
    10. Cool on the sheet for 5 minutes, then transfer to a rack.
    11. Make the glaze: Whisk powdered sugar, cinnamon, vanilla, salt, and 2 tablespoons milk. Add more milk as needed for a thick, slightly pourable glaze.
    12. Spoon glaze over cooled cookies.

      Let it set for 15–20 minutes before serving.

    How to Store

    Keep cookies in an airtight container at room temperature for up to 4 days. For longer storage, refrigerate for up to a week, then bring to room temp before serving. You can also freeze unglazed cookies for up to 2 months; thaw, then glaze.

    If stacking glazed cookies, place parchment between layers to prevent sticking.

    Health Benefits

    • Portion control: These are rich, so one cookie goes a long way, helping you enjoy a treat without overdoing it.
    • Balanced ingredients: Butter and egg provide some protein and fat for satiety, which can help prevent sugar spikes when paired with a meal.
    • Spices matter: Cinnamon brings warm flavor and pairs well with lower-sugar coffee or tea, helping you keep the overall sweetness in check.

    Pitfalls to Watch Out For

    • Overbaking: Pull them when the centers look slightly soft. Overbaked cookies turn dry instead of chewy.
    • Skipping the chill: A short chill helps prevent spreading and keeps the filling centered.
    • Runny glaze: If it drips right off, add more powdered sugar. It should be thick enough to cling but still smooth.
    • Loose seal: If the dough isn’t sealed around the filling, it can leak.

      Pinch seams well.

    Recipe Variations

    • Toaster-crumb topping: Add a sprinkle of cinnamon-sugar on the wet glaze for a Pop-Tart look and extra crunch.
    • Brown butter upgrade: Brown the butter, cool until solid but soft, then proceed. Expect deeper, nutty flavor.
    • Maple twist: Swap 1 teaspoon vanilla in the glaze for maple extract, and add 1 tablespoon maple syrup to the dough (reduce granulated sugar by 1 tablespoon).
    • Whole wheat blend: Use 1 cup white whole wheat flour plus 1 1/4 cups all-purpose for a heartier cookie.
    • Stuffed with Pop-Tart bits: Fold 1/2 cup chopped Brown Sugar Cinnamon Pop-Tart pieces into the dough for texture.

    FAQ

    Can I make the dough ahead?

    Yes. Chill the dough up to 48 hours.

    Let it sit 15–20 minutes at room temperature before scooping if it’s too firm to handle.

    Do I have to fill the cookies?

    No, but the filling adds that signature Pop-Tart vibe. If you skip it, roll dough balls in cinnamon-sugar before baking for extra flavor.

    Why did my cookies spread too much?

    Warm dough usually spreads more. Chill the shaped dough briefly, and make sure your butter isn’t melted.

    Also check that your baking soda is fresh.

    Can I make them gluten-free?

    Use a good 1:1 gluten-free baking flour with xanthan gum. Texture will be slightly more delicate, so don’t overbake.

    How do I get perfectly round cookies?

    As soon as they come out of the oven, use a wide circular cutter or a mug to “scoot” them into shape while still hot.

    In Conclusion

    These Brown Sugar Cinnamon Pop Tart Cookies are soft, cozy, and full of nostalgic flavor. They’re easy to make, big on cinnamon, and topped with a simple glaze that ties everything together.

    Bake a batch for a weekend treat or a sweet gift—just be ready for them to disappear fast.

    Brown Sugar Cinnamon Pop Tart Cookies You Need to Try ASAP – Soft, Buttery, and Nostalgic

    Prep Time 15 minutes
    Cook Time 10 minutes
    Total Time 25 minutes
    Servings 12 servings

    Ingredients
      

    • For the cookies:
    • 2 1/4 cups all-purpose flour
    • 1 teaspoon baking soda
    • 1/2 teaspoon baking powder
    • 3/4 teaspoon fine salt
    • 1 tablespoon ground cinnamon
    • 3/4 cup unsalted butter, softened
    • 1 cup packed light brown sugar
    • 1/3 cup granulated sugar
    • 1 large egg
    • 1 large egg yolk
    • 2 teaspoons vanilla extract
    • For the brown sugar cinnamon filling:
    • 1/3 cup packed light brown sugar
    • 1 tablespoon all-purpose flour
    • 1 teaspoon ground cinnamon
    • 1 tablespoon melted butter
    • For the glaze:
    • 1 cup powdered sugar
    • 1 teaspoon ground cinnamon
    • 1 teaspoon vanilla extract
    • 2–3 tablespoons milk (as needed)
    • Pinch of salt

    Instructions
     

    • Preheat your oven to 350°F (175°C). Line two baking sheets with parchment paper.
    • In a bowl, whisk together flour, baking soda, baking powder, salt, and cinnamon. Set aside.
    • In a large bowl, beat softened butter, brown sugar, and granulated sugar until fluffy, about 2 minutes.
    • Add the egg, egg yolk, and vanilla. Mix until smooth and creamy.
    • Stir in the dry ingredients just until combined. Do not overmix.
    • Make the filling: In a small bowl, combine brown sugar, flour, cinnamon, and melted butter until sandy and clumpy.
    • Scoop cookie dough into 2-tablespoon balls. Flatten each slightly in your palm, add about 1 teaspoon of filling to the center, then fold the edges up and seal. Roll gently back into a ball.
    • Arrange on the baking sheets, spacing 2 inches apart. Chill the trays in the fridge for 10 minutes for thicker cookies.
    • Bake for 9–11 minutes, until edges are set and centers look slightly underdone. They’ll continue to set as they cool.
    • Cool on the sheet for 5 minutes, then transfer to a rack.
    • Make the glaze: Whisk powdered sugar, cinnamon, vanilla, salt, and 2 tablespoons milk. Add more milk as needed for a thick, slightly pourable glaze.
    • Spoon glaze over cooled cookies. Let it set for 15–20 minutes before serving.
  • Sopapilla Cheesecake Easy Crescent Rolls – A Crowd-Pleasing Shortcut Dessert

    Sopapilla Cheesecake Easy Crescent Rolls – A Crowd-Pleasing Shortcut Dessert

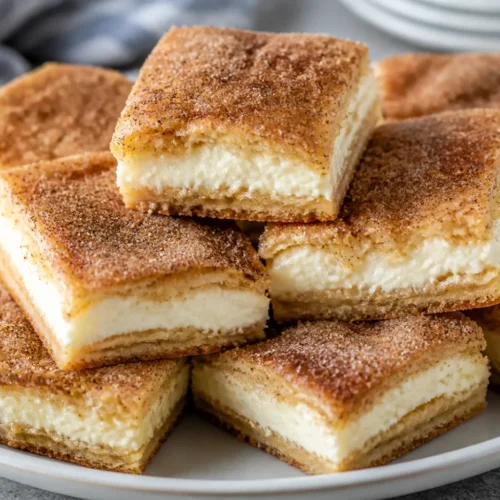
    This sopapilla cheesecake hits that sweet spot between creamy and crispy, with just the right amount of cinnamon-sugar on top. It’s made with crescent roll dough, so you get bakery-style layers without much effort. The filling is smooth, lightly tangy, and not too sweet.

    If you need a reliable dessert for a potluck, holiday, or weeknight treat, this one earns repeat requests. Best of all, it uses simple pantry staples you probably already have.

    Why This Recipe Works

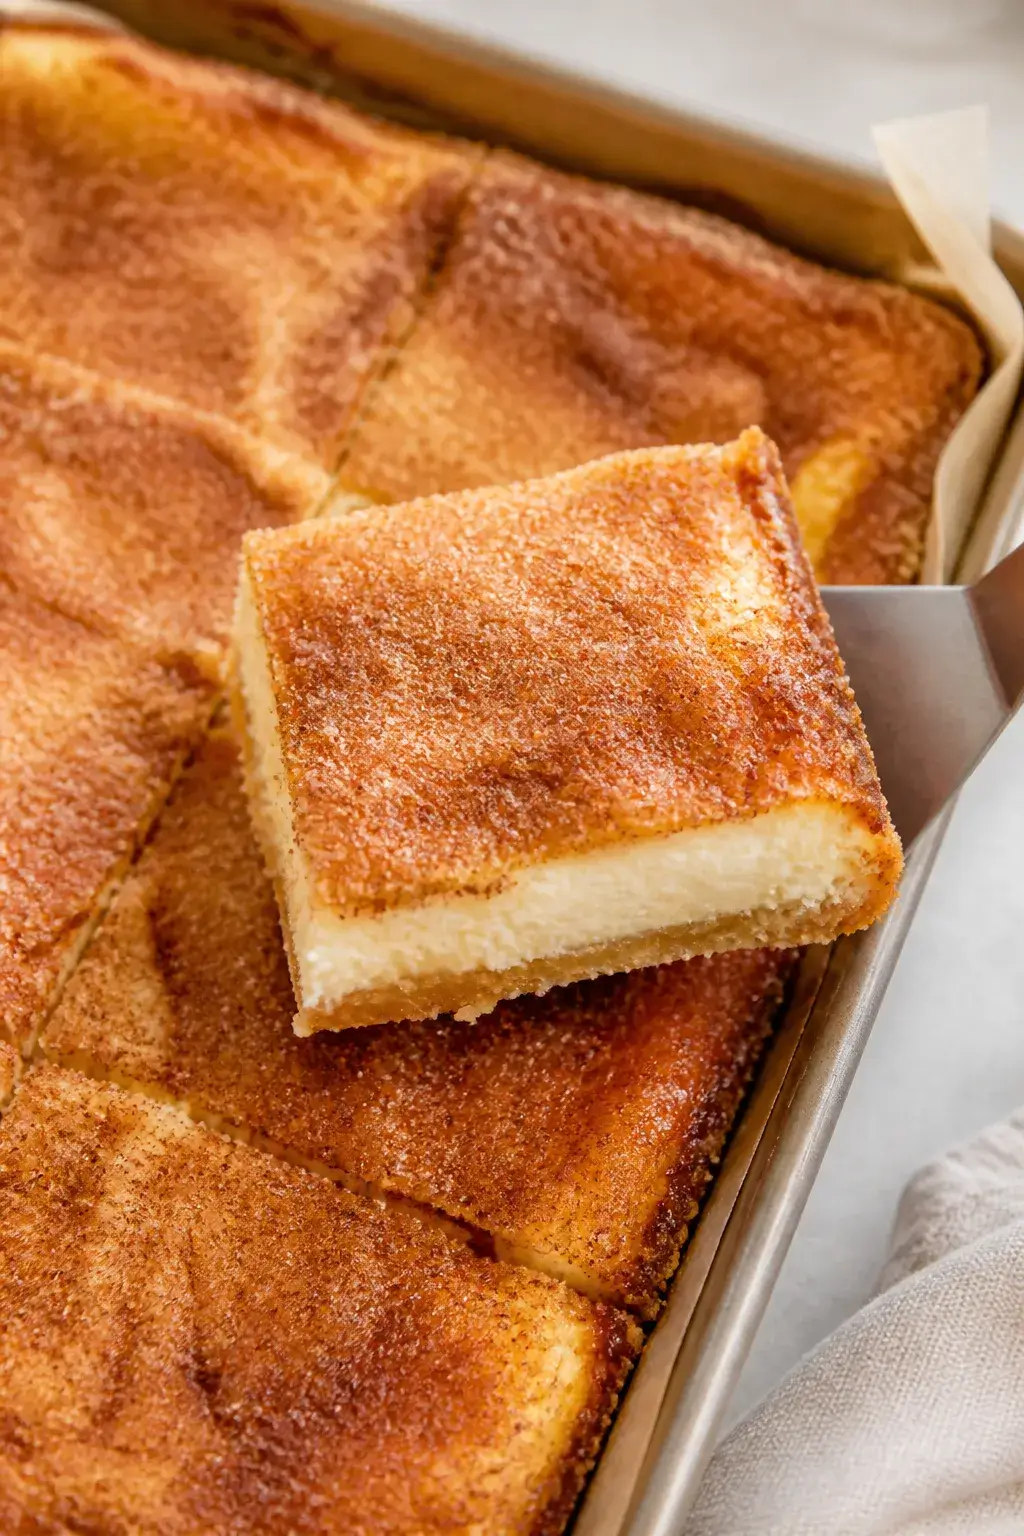
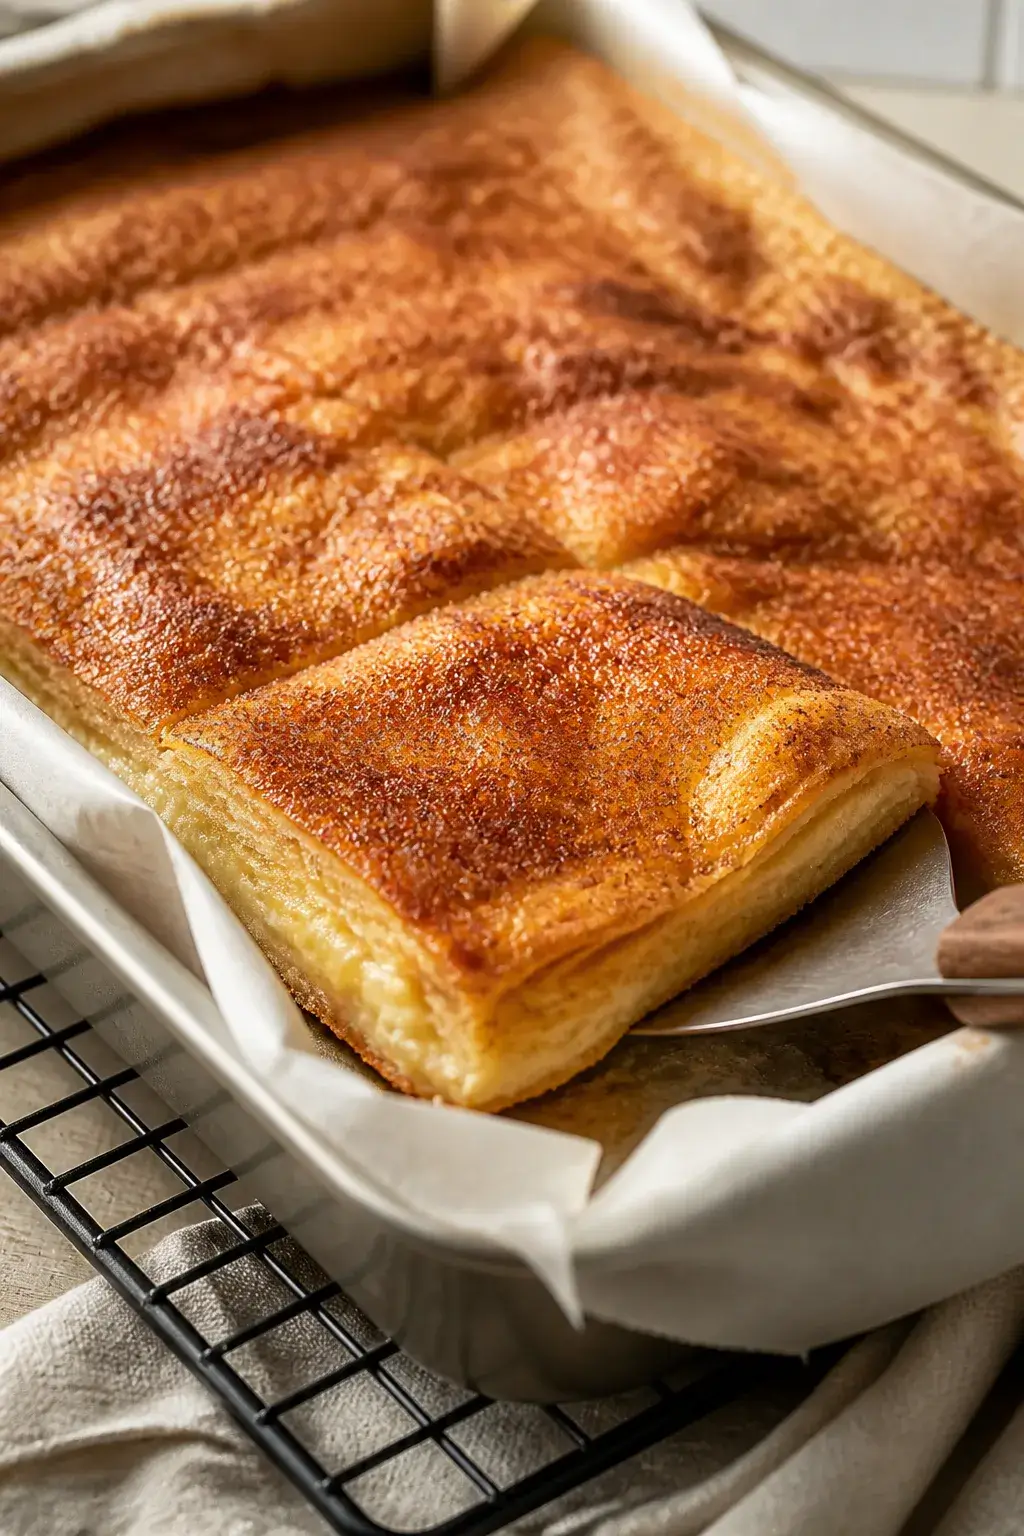
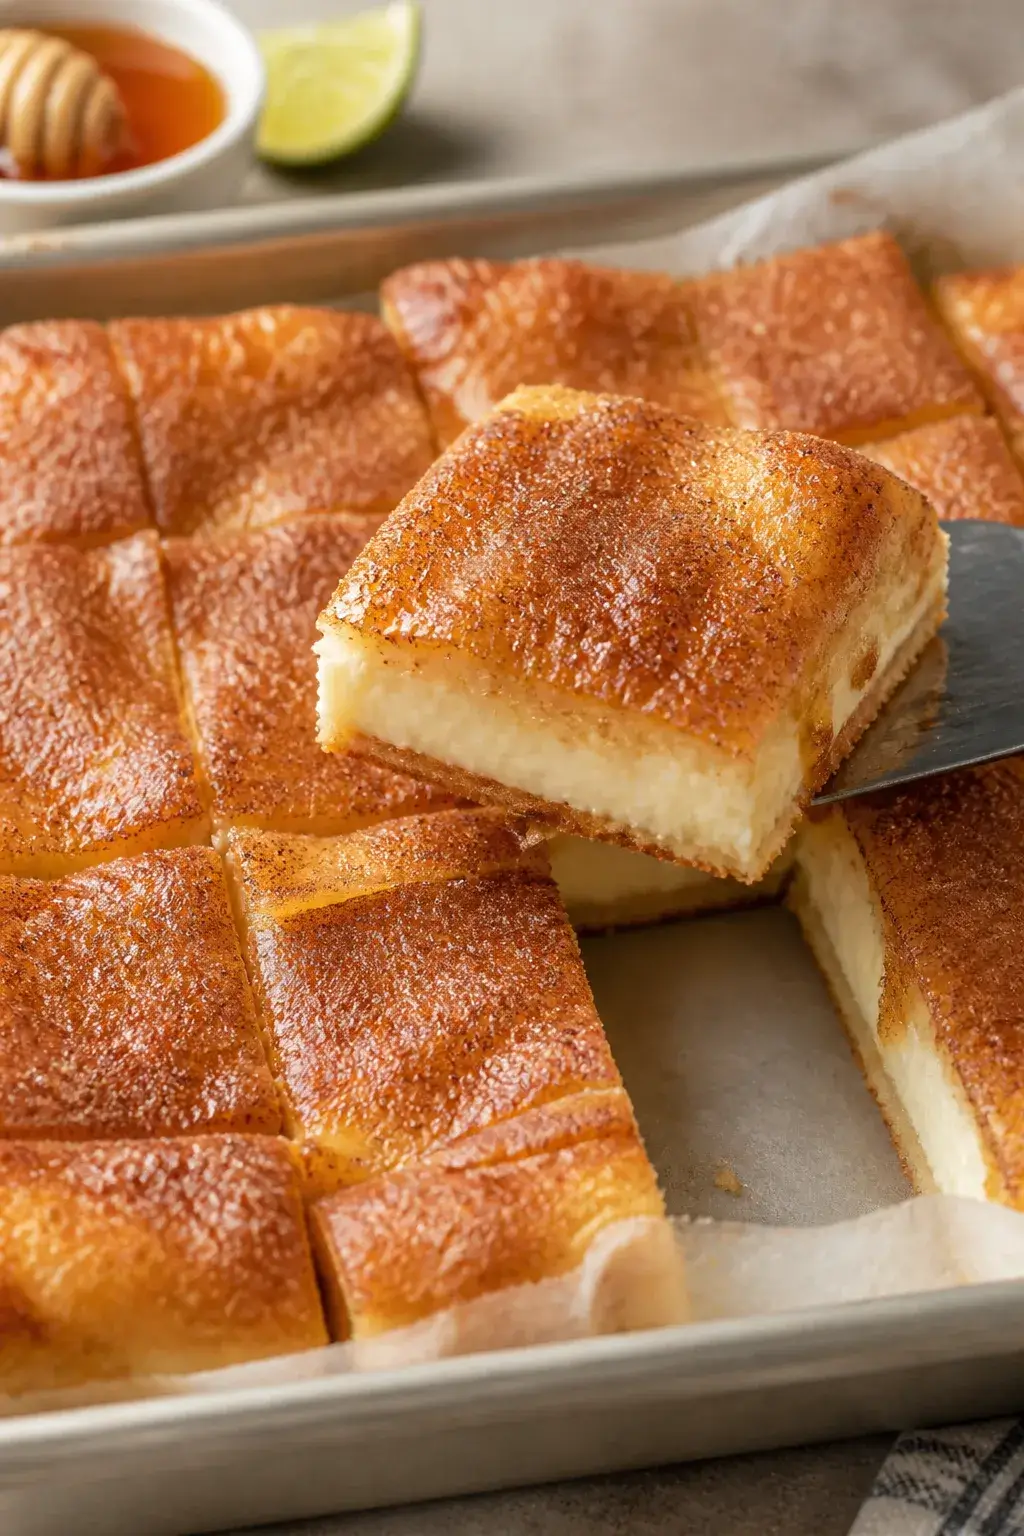
    Close-up detail shot: A freshly baked pan of sopapilla cheesecake just out of the oven, showing the
    • Crescent rolls save time: They mimic a flaky crust without mixing or rolling dough.
    • Two textures in one bite: Creamy cheesecake inside, buttery cinnamon-sugar crust outside.
    • Balanced sweetness: A touch of tang from cream cheese keeps it from being cloying.
    • Foolproof technique: Straightforward steps that deliver consistent results.
    • Customizable: Easy to add citrus zest, honey, or fruit for a twist.

    Shopping List

    • 2 cans refrigerated crescent roll dough (8 ounces each)
    • 2 packages cream cheese, softened (8 ounces each)
    • 3/4 cup granulated sugar (plus 1/2 cup for topping)
    • 1/4 cup unsalted butter, melted
    • 1 tablespoon ground cinnamon
    • 2 teaspoons vanilla extract
    • Pinch of salt
    • Optional: 2–3 tablespoons honey for drizzling
    • Optional add-ins: 1 teaspoon lemon or orange zest, or 1/4 teaspoon almond extract

    Instructions

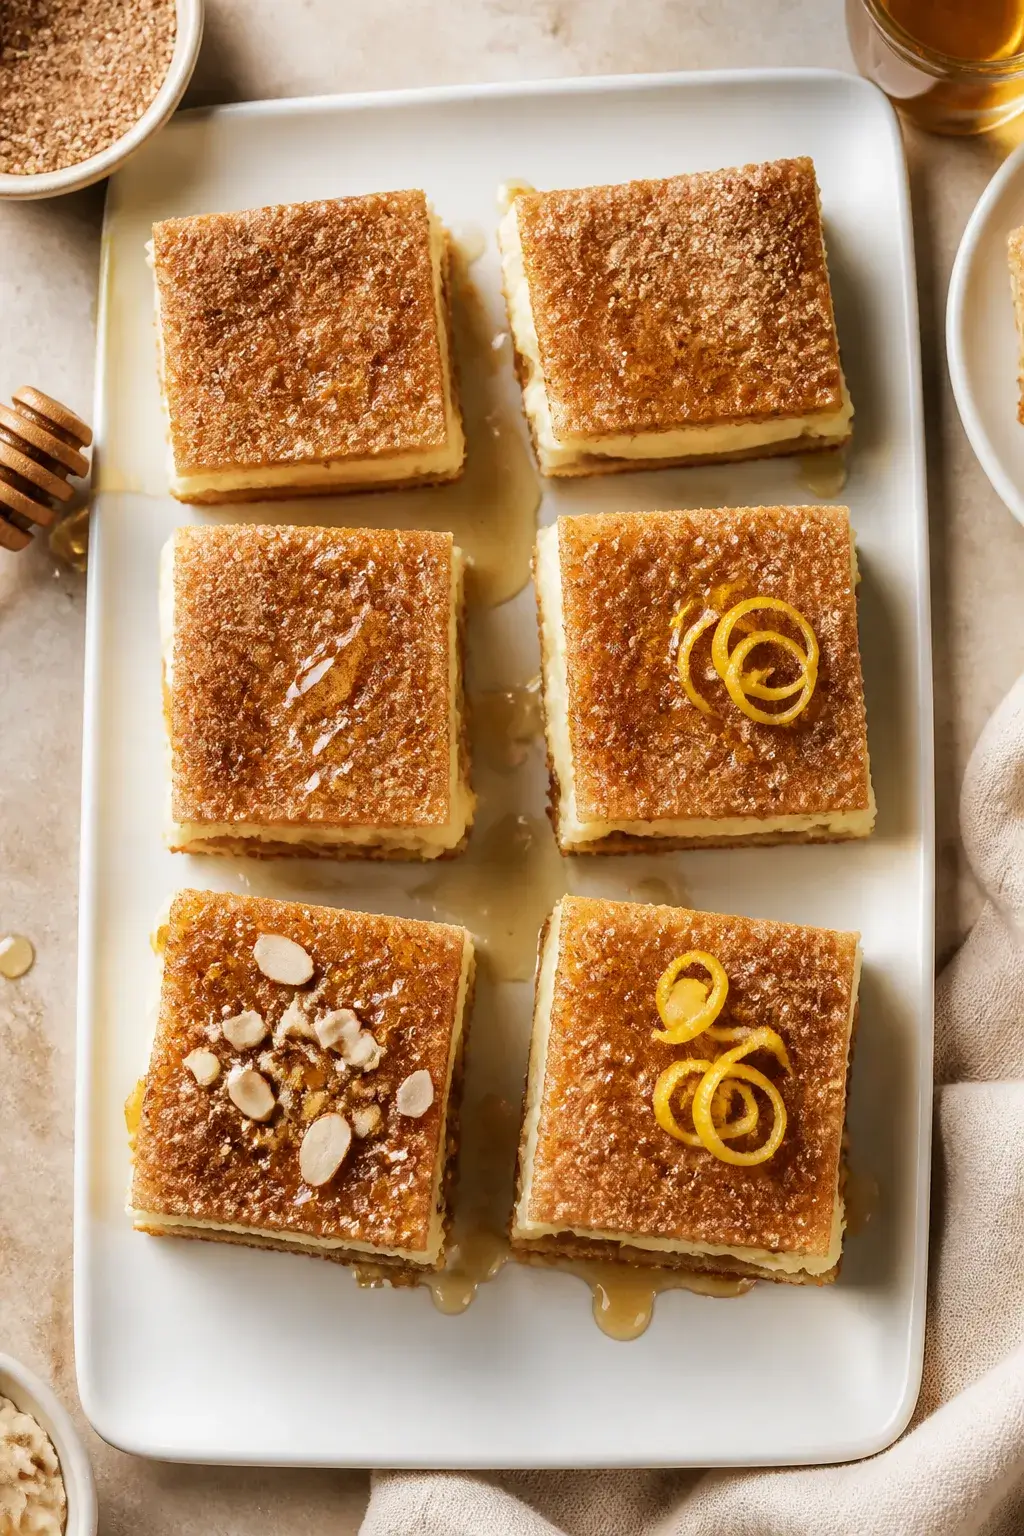
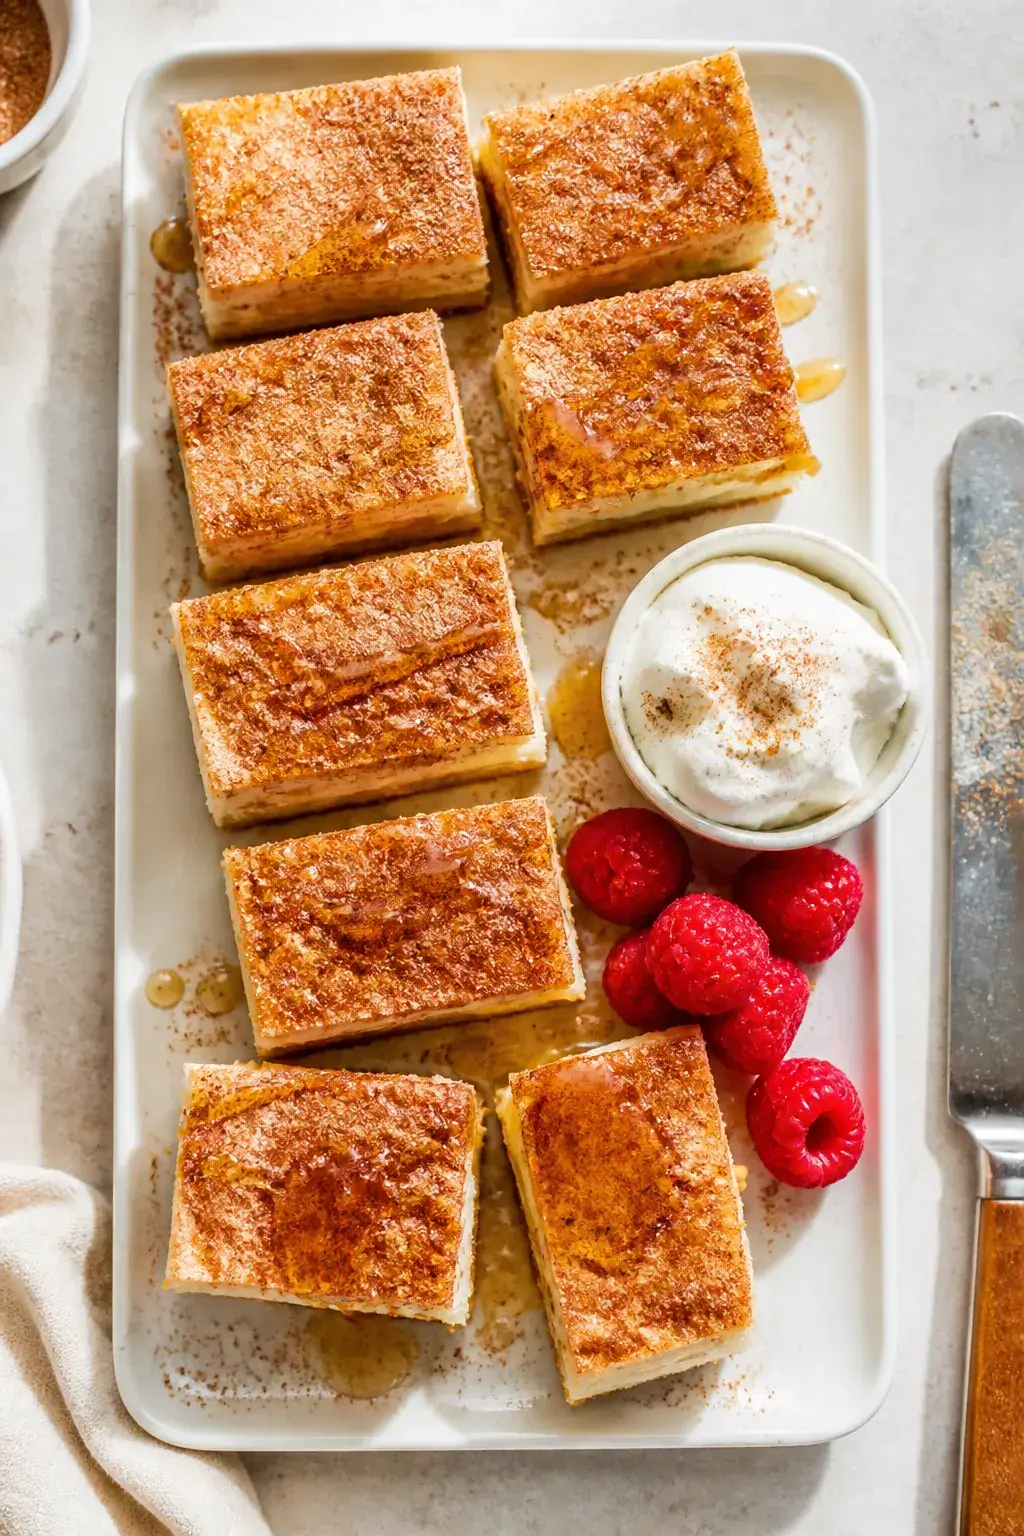
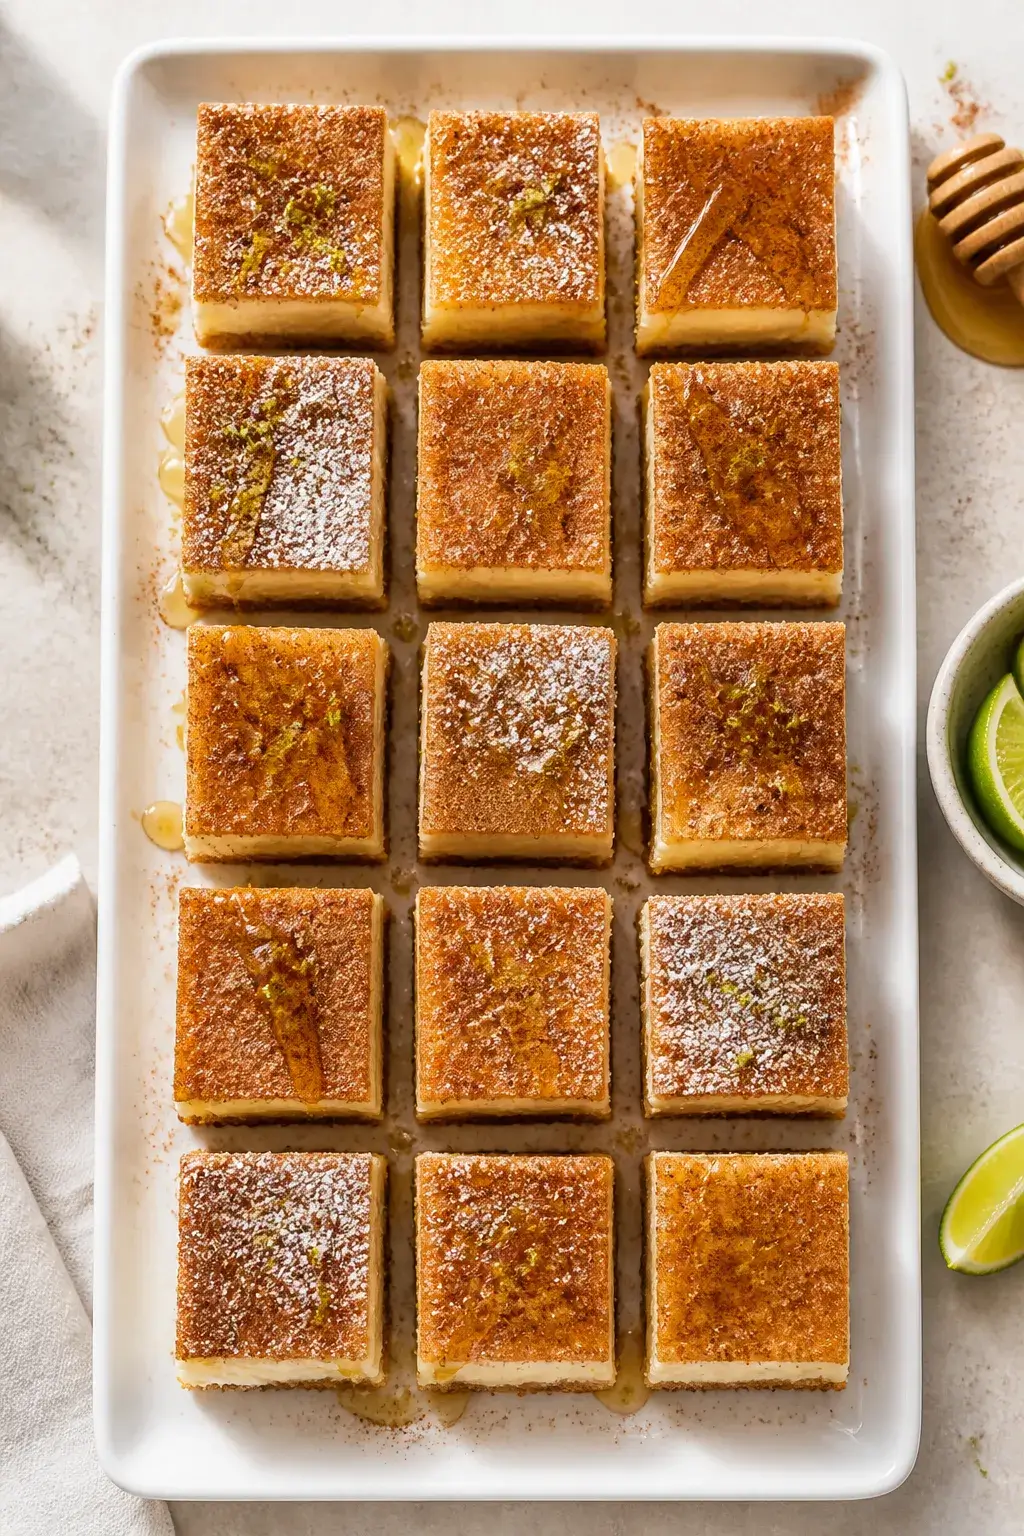
    Tasty top view final presentation: Overhead shot of neat bar squares of sopapilla cheesecake arrange
    1. Prep the pan: Heat oven to 350°F (175°C). Grease a 9×13-inch baking dish or line with parchment for easy lifting.
    2. Make the filling: Beat cream cheese, 3/4 cup sugar, vanilla, and a pinch of salt until smooth and fluffy, 1–2 minutes.

      Scrape the bowl for a silky texture.

    3. Layer the bottom crust: Unroll one can of crescent dough. Press seams together and lay it in the pan to cover the bottom.
    4. Spread the cheesecake: Spoon the cream cheese mixture over the dough and spread evenly to the edges.
    5. Top crust: Unroll the second can of dough. Gently place it over the filling, pressing seams together.

      It’s okay if it doesn’t look perfect.

    6. Add cinnamon-sugar: Mix 1/2 cup sugar with cinnamon. Brush the top with melted butter, then sprinkle the cinnamon-sugar evenly. Use it all for a crisp, caramelized top.
    7. Bake: Bake 28–35 minutes, until the top is golden and the edges bubble slightly.

      The center should look set, not jiggly.

    8. Cool and chill: Cool at room temp for 30 minutes, then chill at least 1–2 hours. Chilling firms the layers and makes slicing clean.
    9. Serve: Slice into squares or bars. Drizzle with honey if you like an authentic sopapilla touch.

    Keeping It Fresh

    Let the bars cool completely before covering. Store covered in the fridge for up to 4 days.

    For best texture, enjoy within 48 hours.

    To freeze, wrap the whole slab or individual bars tightly and freeze up to 2 months. Thaw overnight in the fridge. Re-crisp the top by warming slices in a 300°F oven for 5–8 minutes if desired.

    Health Benefits

    • Protein and calcium: Cream cheese adds some protein and calcium, which support bones and satiety.
    • Portion control: Cutting into small bars makes it easy to enjoy a treat without overdoing it.
    • Customizable sugar: You can reduce the topping sugar slightly or swap in a light honey drizzle.

    This is still a dessert, but mindful portions and small tweaks can make it fit into a balanced meal plan.

    Common Mistakes to Avoid

    • Using cold cream cheese: It won’t blend smoothly and can cause lumps. Soften it at room temp for 30–45 minutes.
    • Skipping the chill: Slicing too soon leads to messy, soft bars.

      Chilling helps the layers set.

    • Underbaking: Pale tops won’t have that signature cinnamon-sugar crust. Bake until lightly golden.
    • Not sealing seams: Gaps in the dough can let filling leak. Press seams together with your fingertips.
    • Overloading with toppings: Too much honey or syrup can make the top soggy.

      Add just a light drizzle.

    Recipe Variations

    • Citrus Kiss: Add 1 teaspoon lemon or orange zest to the filling for a bright lift.
    • Honey Almond: Swap 1/2 teaspoon almond extract for part of the vanilla and finish with a honey drizzle.
    • Berry Swirl: Dollop 1/3 cup raspberry or strawberry preserves over the filling and swirl lightly.
    • Churro Crunch: Add 2 tablespoons turbinado sugar to the cinnamon-sugar for extra texture.
    • Brown Butter Upgrade: Brown the butter before brushing on top for a nutty depth.

    FAQ

    Can I use reduced-fat cream cheese?

    Yes, but the texture will be slightly less rich and may set a bit softer. Avoid fat-free cream cheese, which can turn gummy.

    Do I have to use crescent roll dough sheets?

    No. Regular crescent rolls work fine; just pinch the perforated seams to seal.

    If you find dough sheets, they make layering even easier.

    How do I know it’s done baking?

    The top should be golden with tiny bubbles at the edges. The center should look set, not glossy or wobbly.

    Can I make this ahead?

    Absolutely. Bake a day ahead, chill overnight, and slice before serving.

    The flavors meld and the bars cut cleanly.

    What if I don’t have cinnamon?

    You can use pumpkin pie spice or a mix of cinnamon-adjacent spices like nutmeg and allspice. Start with less and taste the sugar mix first.

    Final Thoughts

    This sopapilla cheesecake with easy crescent rolls brings bakery-level results with weeknight effort. It’s simple, reliable, and easy to adapt to your taste.

    Keep a couple of crescent dough cans on hand, and you’re always just a few steps away from a crowd-pleasing dessert. Serve it chilled with a light honey drizzle, and expect second helpings.

    Sopapilla Cheesecake Easy Crescent Rolls – A Crowd-Pleasing Shortcut Dessert

    Prep Time 15 minutes
    Cook Time 30 minutes
    Total Time 45 minutes
    Servings 12 servings

    Ingredients
      

    • 2 cans refrigerated crescent roll dough (8 ounces each)
    • 2 packages cream cheese, softened (8 ounces each)
    • 3/4 cup granulated sugar (plus 1/2 cup for topping)
    • 1/4 cup unsalted butter, melted
    • 1 tablespoon ground cinnamon
    • 2 teaspoons vanilla extract
    • Pinch of salt
    • Optional: 2–3 tablespoons honey for drizzling
    • Optional add-ins: 1 teaspoon lemon or orange zest, or 1/4 teaspoon almond extract

    Instructions
     

    • Prep the pan: Heat oven to 350°F (175°C). Grease a 9×13-inch baking dish or line with parchment for easy lifting.
    • Make the filling: Beat cream cheese, 3/4 cup sugar, vanilla, and a pinch of salt until smooth and fluffy, 1–2 minutes. Scrape the bowl for a silky texture.
    • Layer the bottom crust: Unroll one can of crescent dough. Press seams together and lay it in the pan to cover the bottom.
    • Spread the cheesecake: Spoon the cream cheese mixture over the dough and spread evenly to the edges.
    • Top crust: Unroll the second can of dough. Gently place it over the filling, pressing seams together. It’s okay if it doesn’t look perfect.
    • Add cinnamon-sugar: Mix 1/2 cup sugar with cinnamon. Brush the top with melted butter, then sprinkle the cinnamon-sugar evenly. Use it all for a crisp, caramelized top.
    • Bake: Bake 28–35 minutes, until the top is golden and the edges bubble slightly. The center should look set, not jiggly.
    • Cool and chill: Cool at room temp for 30 minutes, then chill at least 1–2 hours. Chilling firms the layers and makes slicing clean.
    • Serve: Slice into squares or bars. Drizzle with honey if you like an authentic sopapilla touch.
  • Easy Sopapilla Cheesecake Recipe – A Cozy, Crowd-Pleasing Dessert

    Easy Sopapilla Cheesecake Recipe – A Cozy, Crowd-Pleasing Dessert

    This easy sopapilla cheesecake brings together creamy cheesecake, flaky pastry, and warm cinnamon sugar in the most comforting way. It’s simple to make, no fancy tools needed, and it tastes like something you’d get from a bakery. If you love churros, cinnamon rolls, or classic cheesecake, this hits all the same notes.

    It’s perfect for potlucks, holidays, or a lazy weekend treat, and it reheats beautifully. Make it once and it’ll become your go-to dessert.

    Why This Recipe Works

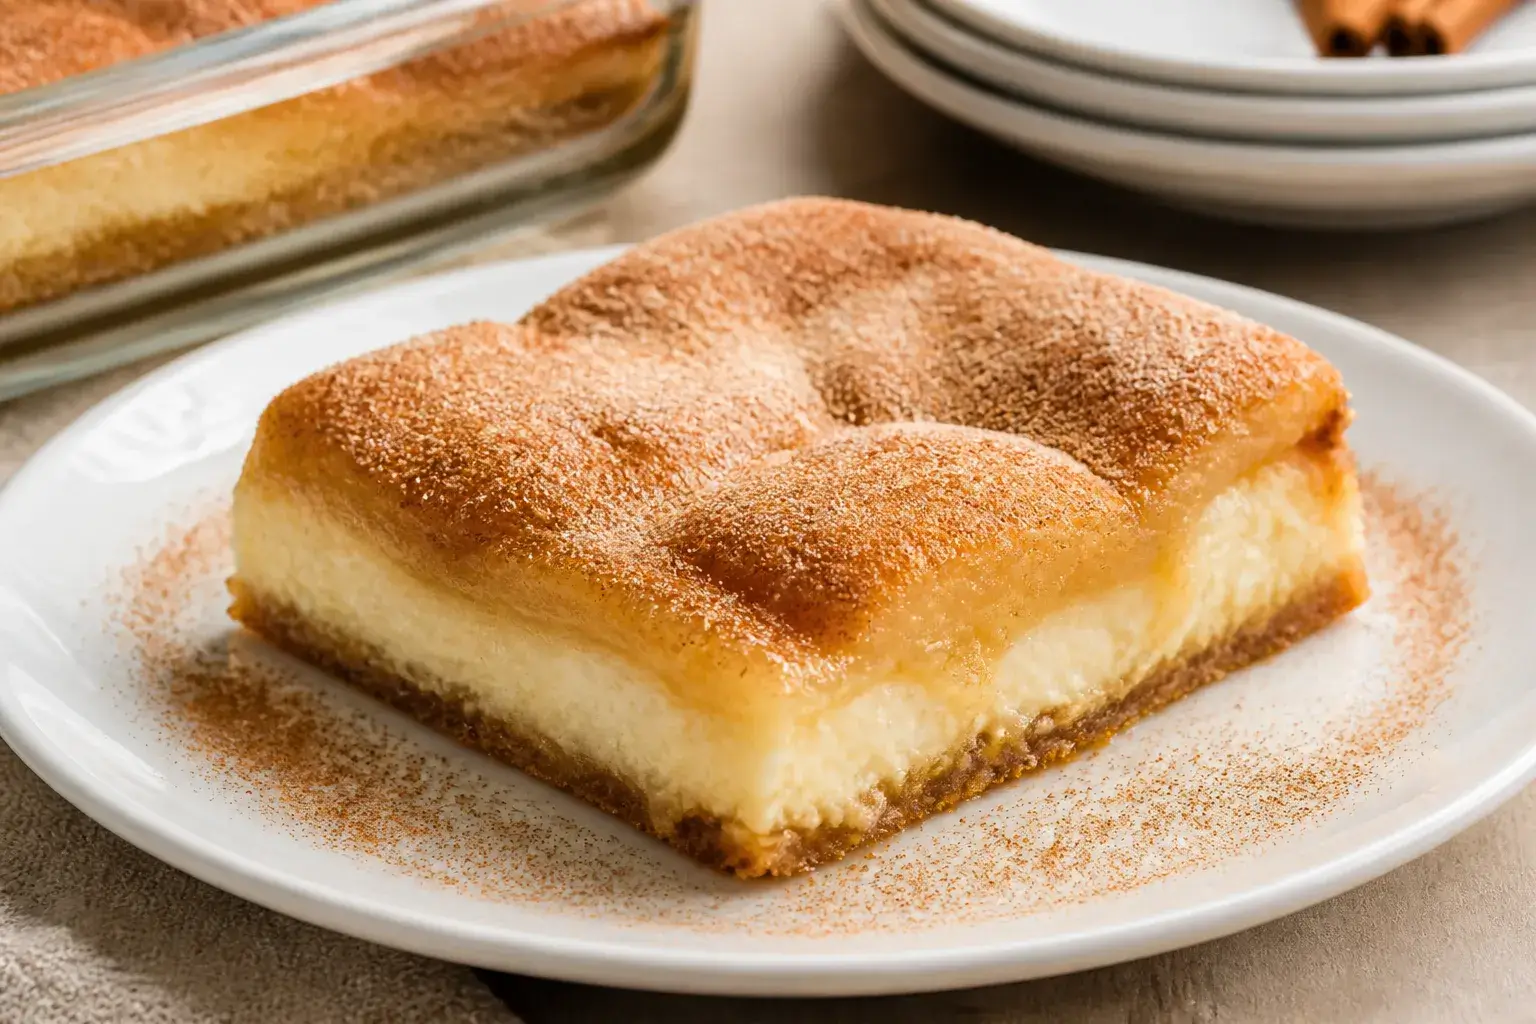
    Close-up process shot: The sopapilla cheesecake just out of the oven in a 9x13 pan, golden top crust

    This recipe uses store-bought crescent dough for a quick, foolproof crust and top layer. A simple cream cheese filling keeps things silky without cracking or fuss.

    The butter and cinnamon sugar on top caramelize in the oven, giving you that signature sopapilla flavor and a golden, crisp finish. Everything bakes in one pan, so cleanup is easy, and the bars slice neatly once chilled.

    Shopping List

    • 2 cans refrigerated crescent roll dough (8 oz each)
    • 16 oz cream cheese, softened (full-fat recommended)
    • 3/4 cup granulated sugar (plus 1/2 cup for topping)
    • 1/4 cup unsalted butter, melted
    • 1 1/2 teaspoons ground cinnamon
    • 2 teaspoons vanilla extract
    • Pinch of salt
    • Optional: honey for drizzling, fresh berries, or whipped cream

    Instructions

    Overhead final presentation: Neatly sliced sopapilla cheesecake bars arranged on a matte white platt
    1. Preheat your oven to 350°F (175°C). Lightly grease a 9×13-inch baking pan or line it with parchment, leaving overhang for easy lifting.
    2. Unroll one can of crescent dough and press it into the pan.

      Pinch seams together to make a smooth bottom crust.

    3. In a mixing bowl, beat cream cheese with 3/4 cup sugar, vanilla, and a pinch of salt until smooth and fluffy, about 1–2 minutes.
    4. Spread the cream cheese mixture evenly over the bottom crust. Take your time so it reaches all corners.
    5. Unroll the second can of crescent dough. Lay it gently over the filling, pinching seams to create a smooth top.
    6. Stir together 1/2 cup sugar and 1 1/2 teaspoons cinnamon.

      Brush the top with melted butter, then sprinkle the cinnamon sugar evenly over the surface.

    7. Bake for 28–35 minutes, until the top is golden and the edges are bubbling slightly. The center should look set, not jiggly.
    8. Cool on a rack for 30–45 minutes, then refrigerate at least 2 hours (overnight is best). This helps the bars slice cleanly.
    9. Slice into squares or rectangles.

      Serve chilled or slightly warmed, with a drizzle of honey if you like.

    Keeping It Fresh

    Store leftovers covered in the fridge for up to 5 days. For best texture, keep the pan chilled and slice as needed. To rewarm, heat individual pieces in the microwave for 10–15 seconds or in a 300°F oven for 8–10 minutes.

    If freezing, wrap tightly and freeze for up to 2 months; thaw overnight in the fridge.

    Health Benefits

    While this is a dessert, there are a few silver linings. The cream cheese provides protein and calcium. Portioning into small squares helps with mindful serving.

    You can also reduce sugar slightly or opt for reduced-fat cream cheese to lighten it up a bit, though full-fat gives the silkiest texture.

    Pitfalls to Watch Out For

    • Warm cream cheese = lumps. Make sure it’s softened to room temp so the filling mixes smooth.
    • Underbaking. If the center jiggles, give it a few more minutes. You want a set top and golden edges.
    • Skipping the chill time. Cutting too soon leads to messy slices. Chill at least 2 hours.
    • Seams not sealed. Pinch crescent dough seams well to avoid gaps or leaking.
    • Too much butter pooling. Brush evenly; puddles can soak the crust near the edges.

    Recipe Variations

    • Lemon Twist: Add 1 tablespoon lemon zest and 1 tablespoon lemon juice to the filling.

      Top with a light glaze instead of honey.

    • Pumpkin Spice: Mix 1/2 cup pumpkin puree and 1 teaspoon pumpkin pie spice into the filling; reduce vanilla to 1 teaspoon.
    • Chocolate Swirl: Melt 1/2 cup chocolate chips and swirl into the filling before topping with dough.
    • Nut Lover’s: Sprinkle 1/2 cup finely chopped pecans over the cinnamon sugar before baking.
    • Honey-Lime: Drizzle with honey and a touch of lime zest before serving for a bright finish.
    • Gluten-Free: Use gluten-free crescent dough and confirm all other ingredients are certified gluten-free.

    Can I make this ahead?

    Yes. Bake, cool, and chill overnight. Slice just before serving.

    It actually tastes better the next day.

    Do I have to use crescent dough sheets?

    No, regular perforated crescent rolls work. Just pinch the seams well to create a continuous sheet.

    Can I cut the sugar?

    You can reduce the filling sugar to 1/2 cup and the topping to 1/3 cup. Flavor will be slightly less sweet, but still delicious.

    How do I prevent a soggy bottom?

    Use a fully preheated oven, don’t overdo the butter, and cool completely before chilling so steam can escape.

    What’s the best way to slice clean bars?

    Chill thoroughly, then use a sharp knife wiped clean between cuts.

    A bench scraper also works well.

    Final Thoughts

    This easy sopapilla cheesecake recipe is the definition of low effort, high reward. With a handful of pantry staples and a single pan, you get creamy layers, a crisp top, and that warm cinnamon sugar finish everyone loves. Keep it classic or play with the variations—either way, it’s a guaranteed hit.

    Serve it at your next gathering and watch it disappear fast.

    Easy Sopapilla Cheesecake Recipe – A Cozy, Crowd-Pleasing Dessert

    Prep Time 15 minutes
    Cook Time 30 minutes
    Total Time 45 minutes
    Servings 12 servings

    Ingredients
      

    • 2 cans refrigerated crescent roll dough (8 oz each)
    • 16 oz cream cheese, softened (full-fat recommended)
    • 3/4 cup granulated sugar (plus 1/2 cup for topping)
    • 1/4 cup unsalted butter, melted
    • 1 1/2 teaspoons ground cinnamon
    • 2 teaspoons vanilla extract
    • Pinch of salt
    • Optional: honey for drizzling, fresh berries, or whipped cream

    Instructions
     

    • Preheat your oven to 350°F (175°C). Lightly grease a 9×13-inch baking pan or line it with parchment, leaving overhang for easy lifting.
    • Unroll one can of crescent dough and press it into the pan. Pinch seams together to make a smooth bottom crust.
    • In a mixing bowl, beat cream cheese with 3/4 cup sugar, vanilla, and a pinch of salt until smooth and fluffy, about 1–2 minutes.
    • Spread the cream cheese mixture evenly over the bottom crust. Take your time so it reaches all corners.
    • Unroll the second can of crescent dough. Lay it gently over the filling, pinching seams to create a smooth top.
    • Stir together 1/2 cup sugar and 1 1/2 teaspoons cinnamon. Brush the top with melted butter, then sprinkle the cinnamon sugar evenly over the surface.
    • Bake for 28–35 minutes, until the top is golden and the edges are bubbling slightly. The center should look set, not jiggly.
    • Cool on a rack for 30–45 minutes, then refrigerate at least 2 hours (overnight is best). This helps the bars slice cleanly.
    • Slice into squares or rectangles. Serve chilled or slightly warmed, with a drizzle of honey if you like.
  • Sopapilla Cheesecake Bars – A Cinnamon-Sugar Favorite With Creamy Cheesecake

    Sopapilla Cheesecake Bars – A Cinnamon-Sugar Favorite With Creamy Cheesecake

    These sopapilla cheesecake bars are the kind of treat people ask you to bring again and again. They’re buttery, cinnamon-sugary on top, and rich with a smooth cream cheese layer in the middle. Best of all, they use simple ingredients and come together fast—no fussy techniques, no specialty tools.

    Whether you’re feeding a crowd or just want an easy dessert for the weekend, this one delivers. Expect empty plates and lots of happy faces.

    What Makes This Special

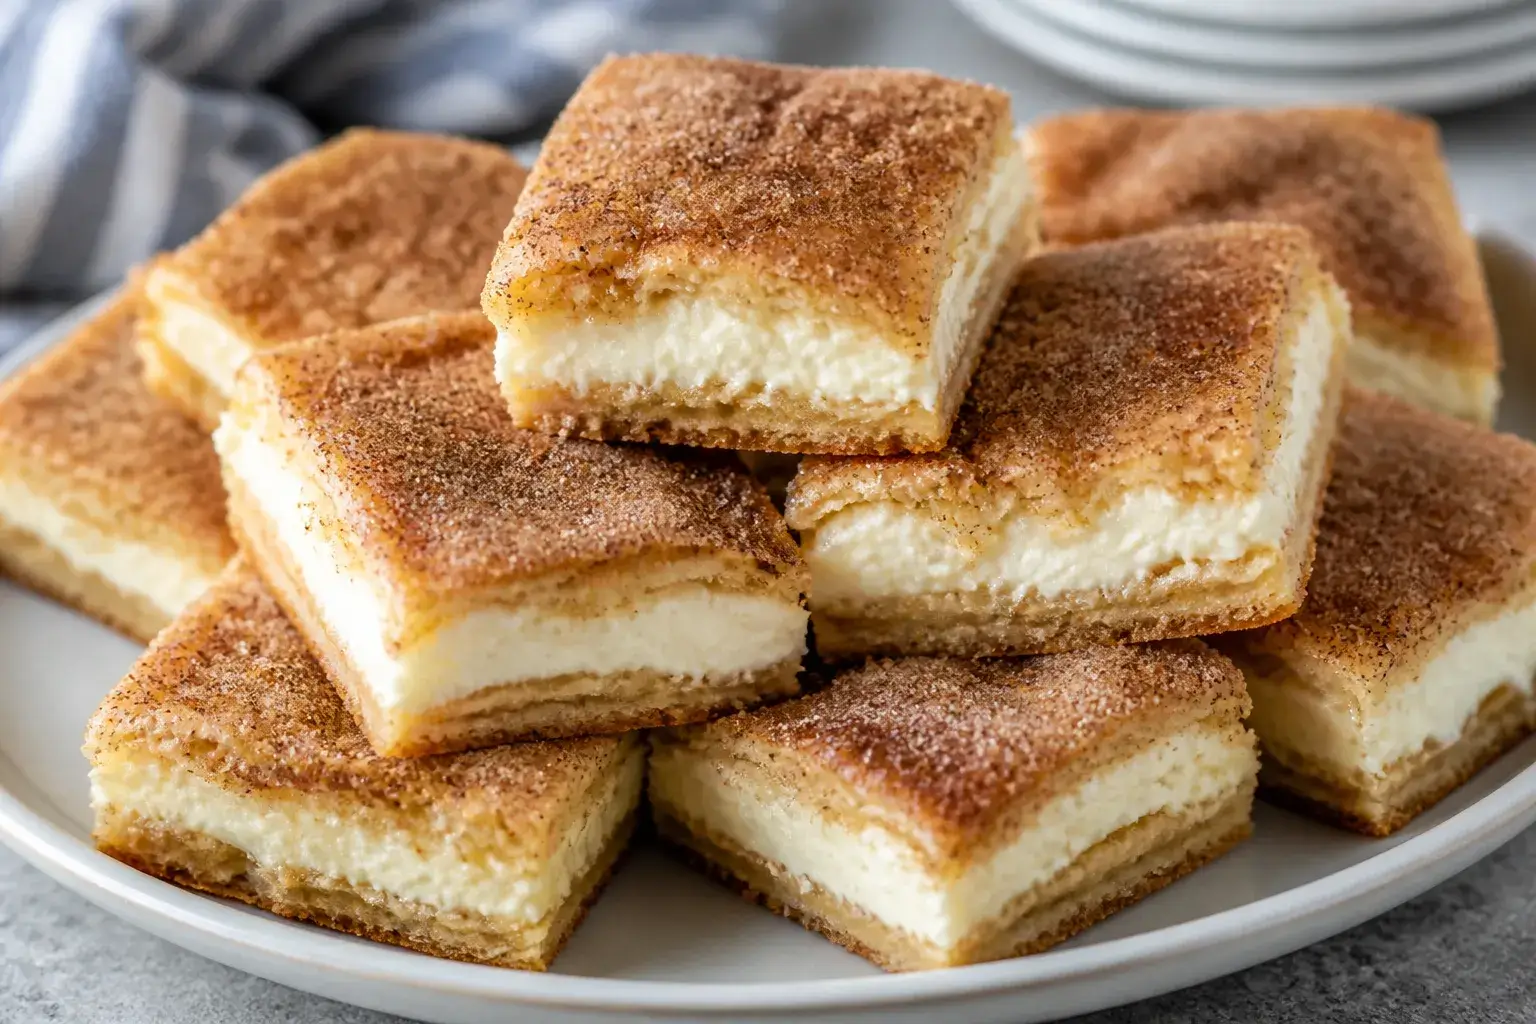
    Close-up detail shot of freshly baked sopapilla cheesecake bars just out of the oven, top layer glis

    These bars combine the comfort of sopapillas with the creaminess of classic cheesecake. You get crisp edges, a flaky top, and a soft, tangy center—every bite is balanced and satisfying.

    They’re also beginner-friendly and bake in one pan. If you love cinnamon sugar and cheesecake, this is your sweet spot.

    What You’ll Need

    • 2 cans (8 oz each) refrigerated crescent roll dough (or one 16-oz sheet of crescent dough sheets)
    • 16 oz cream cheese, softened
    • 3/4 cup granulated sugar (for the filling)
    • 1/4 cup granulated sugar (for the topping)
    • 1 1/2 teaspoons ground cinnamon
    • 1 teaspoon pure vanilla extract
    • 1/2 cup unsalted butter, melted
    • Pinch of salt
    • Optional: honey for drizzling, a squeeze of fresh lime, or a dusting of powdered sugar

    Step-by-Step Instructions

    Overhead final presentation of neatly sliced, chilled sopapilla cheesecake bars arranged in a tidy g
    1. Preheat the oven. Heat to 350°F (175°C). Lightly grease a 9×13-inch baking pan or line it with parchment for easy lifting.
    2. Mix the cinnamon sugar. In a small bowl, combine 1/4 cup sugar with the cinnamon.

      Set aside.

    3. Make the cheesecake filling. In a medium bowl, beat the softened cream cheese, 3/4 cup sugar, vanilla, and a pinch of salt until smooth and fluffy, about 1–2 minutes.
    4. Lay down the first dough layer. Unroll one can of crescent dough and press it into the bottom of the pan. Pinch seams together to seal if using perforated dough.
    5. Spread the filling. Spoon the cream cheese mixture over the dough and spread into an even layer, reaching all corners.
    6. Top with the second dough layer. Unroll the second can of dough and gently place it over the filling. Pinch seams to seal and tuck edges slightly along the pan.
    7. Add butter and cinnamon sugar. Pour or brush the melted butter evenly over the top.

      Sprinkle the cinnamon sugar over all the buttered dough, covering completely.

    8. Bake. Place in the oven and bake for 28–35 minutes, until the top is golden and the edges are bubbling slightly.
    9. Cool, then chill. Let the bars cool at room temperature for 30 minutes. For the cleanest slices, chill in the fridge for at least 2 hours.

    10. Serve. Cut into squares. Finish with a light drizzle of honey or a squeeze of lime for a bright touch, if you like.

    Storage Instructions

    • Refrigerate: Store bars in an airtight container in the fridge for up to 4 days.
    • Freeze: Wrap tightly and freeze for up to 2 months.

      Thaw in the fridge overnight.

    • Serve cold or room temp: They’re best slightly chilled; if you prefer softer texture, let them sit out for 10–15 minutes before serving.

    Benefits of This Recipe

    • Fast prep: Crescent dough saves time and effort.
    • Reliable texture: Crisp, buttery top with a silky center.
    • Scales easily: Double the recipe for parties; it bakes in standard pans.
    • Customizable: Add citrus, spice, or fruit without changing the base method.

    What Not to Do

    • Don’t skip chilling. Cutting too soon can make the filling ooze and edges crumble.
    • Don’t overbake. If the top gets too dark, the bottom can dry out. Pull when golden and set.
    • Don’t use cold cream cheese. It won’t blend smoothly and can leave lumps.
    • Don’t forget to seal seams. Open seams let filling leak around the edges.

    Variations You Can Try

    • Lemon Twist: Add 1 teaspoon lemon zest and 1 tablespoon lemon juice to the filling. Finish with a light powdered sugar dusting.
    • Caramel Pecan: Sprinkle 1/2 cup chopped toasted pecans over the filling and drizzle with 2–3 tablespoons caramel before adding the top dough.
    • Apple Pie: Layer 1 cup finely chopped sautéed apples (with a pinch of cinnamon and brown sugar) over the filling.
    • Chocolate Swirl: Melt 1/3 cup chocolate chips and swirl into the filling with a knife before topping.
    • Spiced Honey: Warm 2 tablespoons honey with a pinch of cayenne and drizzle over the baked, cooled bars.

    FAQ

    Can I use low-fat cream cheese?

    Yes, but the texture will be slightly less rich and creamy.

    For the best set and flavor, use full-fat cream cheese.

    What if I can’t find crescent dough sheets?

    Use regular perforated crescent rolls and pinch the seams tightly. A quick roll with a rolling pin helps smooth it out.

    How do I know when it’s done?

    The top should be golden and slightly crisp, and you’ll see a bit of bubbling at the edges from the butter. The center will set further as it cools.

    Can I cut them warm?

    You can, but they’ll be messy.

    For clean edges and neat squares, let them cool and then chill before slicing.

    Do these taste good the next day?

    Absolutely. Many people like them even more after a night in the fridge, when the flavors meld and the filling firms up.

    Is honey required?

    No. It’s a classic nod to sopapillas, but the bars are sweet enough on their own.

    Add it if you like that extra glossy finish and floral note.

    Wrapping Up

    Sopapilla cheesecake bars are simple, crowd-pleasing, and big on flavor. With a cinnamon-sugar crunch and a creamy middle, they feel special without demanding much time. Keep the ingredients on hand, and you’ll always have a standout dessert ready to go.

    Sopapilla Cheesecake Bars – A Cinnamon-Sugar Favorite With Creamy Cheesecake

    Prep Time 15 minutes
    Cook Time 30 minutes
    Total Time 45 minutes
    Servings 12 servings

    Ingredients
      

    • 2 cans (8 oz each) refrigerated crescent roll dough (or one 16-oz sheet of crescent dough sheets)
    • 16 oz cream cheese, softened
    • 3/4 cup granulated sugar (for the filling)
    • 1/4 cup granulated sugar (for the topping)
    • 1 1/2 teaspoons ground cinnamon
    • 1 teaspoon pure vanilla extract
    • 1/2 cup unsalted butter, melted
    • Pinch of salt
    • Optional: honey for drizzling, a squeeze of fresh lime, or a dusting of powdered sugar

    Instructions
     

    • Preheat the oven. Heat to 350°F (175°C). Lightly grease a 9×13-inch baking pan or line it with parchment for easy lifting.
    • Mix the cinnamon sugar. In a small bowl, combine 1/4 cup sugar with the cinnamon. Set aside.
    • Make the cheesecake filling. In a medium bowl, beat the softened cream cheese, 3/4 cup sugar, vanilla, and a pinch of salt until smooth and fluffy, about 1–2 minutes.
    • Lay down the first dough layer. Unroll one can of crescent dough and press it into the bottom of the pan. Pinch seams together to seal if using perforated dough.
    • Spread the filling. Spoon the cream cheese mixture over the dough and spread into an even layer, reaching all corners.
    • Top with the second dough layer. Unroll the second can of dough and gently place it over the filling. Pinch seams to seal and tuck edges slightly along the pan.
    • Add butter and cinnamon sugar. Pour or brush the melted butter evenly over the top. Sprinkle the cinnamon sugar over all the buttered dough, covering completely.
    • Bake. Place in the oven and bake for 28–35 minutes, until the top is golden and the edges are bubbling slightly.
    • Cool, then chill. Let the bars cool at room temperature for 30 minutes. For the cleanest slices, chill in the fridge for at least 2 hours.
    • Serve. Cut into squares. Finish with a light drizzle of honey or a squeeze of lime for a bright touch, if you like.
  • Quick & Easy Ham and Cheese Crescent Rolls – A Fast, Comforting Snack

    Quick & Easy Ham and Cheese Crescent Rolls – A Fast, Comforting Snack

    There’s something special about warm, flaky crescent rolls stuffed with melty cheese and savory ham. They’re cozy, quick to make, and friendly for busy weeknights or weekend brunch. Whether you’re feeding kids after school or pulling together a last-minute appetizer, these rolls never disappoint.

    You’ll only need a handful of pantry staples, and the whole thing comes together in minutes. Simple, satisfying, and always a crowd-pleaser.
    What Makes This Recipe So Good

    Close-up detail shot of freshly baked ham and cheese crescent rolls just out of the oven: golden-bro
    • Quick prep: You can assemble a batch in about 10 minutes, then bake until golden.
    • Family-friendly: The familiar flavors win over picky eaters and adults alike.
    • Customizable: Swap in your favorite cheese, add a dab of mustard, or sprinkle with herbs.
    • Budget-conscious: Uses affordable ingredients and stretches deli meat into a filling snack.
    • Perfect for any time: Great as a snack, light lunch, party bite, or brunch side.

    What You’ll Need

    • 1 can refrigerated crescent roll dough (8-count)
    • 8 thin slices deli ham (or leftover baked ham, thinly sliced)
    • 8 small slices cheese (Cheddar, Swiss, Provolone, or American)
    • 1 tablespoon Dijon or yellow mustard (optional, for a savory kick)
    • 1 tablespoon honey (optional, if you like sweet-and-savory)
    • 1 tablespoon melted butter (for brushing)
    • Pinch of garlic powder or everything bagel seasoning (optional topping)
    • Nonstick spray or parchment paper

    Step-by-Step Instructions

    Overhead final presentation of ham and cheese crescent rolls arranged in a warm, inviting spiral on
    1. Preheat and prep: Heat your oven to 375°F (190°C). Line a baking sheet with parchment or lightly coat with nonstick spray.
    2. Open the dough: Unroll the crescent dough and separate it into 8 triangles.

      Keep them on a flat surface with the wide ends closest to you.

    3. Add condiments (optional): Stir mustard and honey together if using. Lightly spread a small amount on each triangle, leaving the edges clean.
    4. Layer ham and cheese: Place one slice of ham and one slice of cheese on the wide end of each triangle. If the cheese is large, cut it to fit without too much overhang.
    5. Roll tightly: Starting at the wide end, roll each triangle toward the tip.

      Tuck in any loose edges so the filling stays put.

    6. Brush and season: Arrange the rolls tip-side down on the baking sheet. Brush with melted butter and sprinkle a pinch of garlic powder or seasoning if desired.
    7. Bake: Cook for 10–13 minutes, or until the rolls are puffed and golden brown and the cheese is melted.
    8. Cool slightly and serve: Let them rest for 3–5 minutes. Serve warm with extra mustard or a creamy dipping sauce.

    How to Store

    • Refrigerator: Store cooled rolls in an airtight container for up to 3 days.
    • Reheat: Warm in a 325°F (165°C) oven or toaster oven for 6–8 minutes until crisp again.

      Microwave works in a pinch but softens the crust.

    • Freezer: Freeze baked rolls in a single layer, then transfer to a bag. Reheat from frozen at 325°F (165°C) for 12–15 minutes.
    Health Benefits

    • Protein boost: Ham and cheese provide protein to keep you fuller longer.
    • Calcium and B vitamins: Cheese offers calcium, while ham provides B vitamins like B12.
    • Portion control: Individual rolls make it easier to track servings and avoid overeating.
    • Customizable nutrition: Use reduced-sodium ham, part-skim cheese, or add spinach for extra nutrients.

    Pitfalls to Watch Out For

    • Overfilling: Too much ham or cheese can cause leaks and soggy bottoms.
    • Underbaking: Pale rolls can taste doughy. Bake until deep golden at the edges.
    • Soggy storage: Sealing while hot traps steam.

      Let rolls cool before packing.

    • Wet condiments: Excess mustard or sauce can thin the dough. Use a light hand.

    Alternatives

    • Different cheeses: Try Swiss with honey mustard, Pepper Jack for heat, or Brie for richness.
    • Meat swaps: Turkey, roast beef, or crispy bacon are all great options.
    • Add-ins: Thin apple slices, pickled jalapeños, caramelized onions, or baby spinach.
    • Glaze ideas: Brush with maple-butter, garlic-herb butter, or a light egg wash with sesame seeds.
    • No crescent dough? Use puff pastry strips or small rectangles of pizza dough and bake until golden.

    FAQ

    Can I make these ahead?

    Yes. Assemble up to 6 hours in advance, cover, and refrigerate.

    Bake right before serving, adding 1–2 extra minutes if needed.

    What cheese melts best?

    Cheddar, Swiss, Provolone, and Mozzarella melt smoothly and pair well with ham. Avoid very hard cheeses that don’t melt easily.

    How do I keep the cheese from leaking out?

    Don’t overfill, roll snugly, and place the tip on the bottom of the sheet. A tight roll helps seal everything in.

    Can I air-fry them?

    Yes.

    Air-fry at 350°F (175°C) for 7–9 minutes, checking at the 6-minute mark. Work in batches to avoid crowding.

    Are these good for kids’ lunches?

    Definitely. Bake, cool fully, and pack with an ice pack.

    They’re tasty at room temperature and hold up well.

    Wrapping Up

    Quick & Easy ham and cheese crescent rolls check every box: fast, flavorful, and flexible. With simple ingredients and minimal cleanup, they’re perfect for snacks, party trays, or a no-fuss lunch. Keep a can of dough on hand and you’ll always have a warm, cheesy bite just minutes away.

    Quick & Easy Ham and Cheese Crescent Rolls – A Fast, Comforting Snack

    Prep Time 10 minutes
    Cook Time 12 minutes
    Total Time 22 minutes
    Servings 8 servings

    Ingredients
      

    • 1 can refrigerated crescent roll dough (8-count)
    • 8 thin slices deli ham (or leftover baked ham, thinly sliced)
    • 8 small slices cheese (Cheddar, Swiss, Provolone, or American)
    • 1 tablespoon Dijon or yellow mustard (optional, for a savory kick)
    • 1 tablespoon honey (optional, if you like sweet-and-savory)
    • 1 tablespoon melted butter (for brushing)
    • Pinch of garlic powder or everything bagel seasoning (optional topping)
    • Nonstick spray or parchment paper

    Instructions
     

    • Preheat and prep: Heat your oven to 375°F (190°C). Line a baking sheet with parchment or lightly coat with nonstick spray.
    • Open the dough: Unroll the crescent dough and separate it into 8 triangles. Keep them on a flat surface with the wide ends closest to you.
    • Add condiments (optional): Stir mustard and honey together if using. Lightly spread a small amount on each triangle, leaving the edges clean.
    • Layer ham and cheese: Place one slice of ham and one slice of cheese on the wide end of each triangle. If the cheese is large, cut it to fit without too much overhang.
    • Roll tightly: Starting at the wide end, roll each triangle toward the tip. Tuck in any loose edges so the filling stays put.
    • Brush and season: Arrange the rolls tip-side down on the baking sheet. Brush with melted butter and sprinkle a pinch of garlic powder or seasoning if desired.
    • Bake: Cook for 10–13 minutes, or until the rolls are puffed and golden brown and the cheese is melted.
    • Cool slightly and serve: Let them rest for 3–5 minutes. Serve warm with extra mustard or a creamy dipping sauce.
  • Pumpkin Sopapilla Cheesecake – Cozy, Cinnamon-Sugar Bliss

    Pumpkin Sopapilla Cheesecake – Cozy, Cinnamon-Sugar Bliss

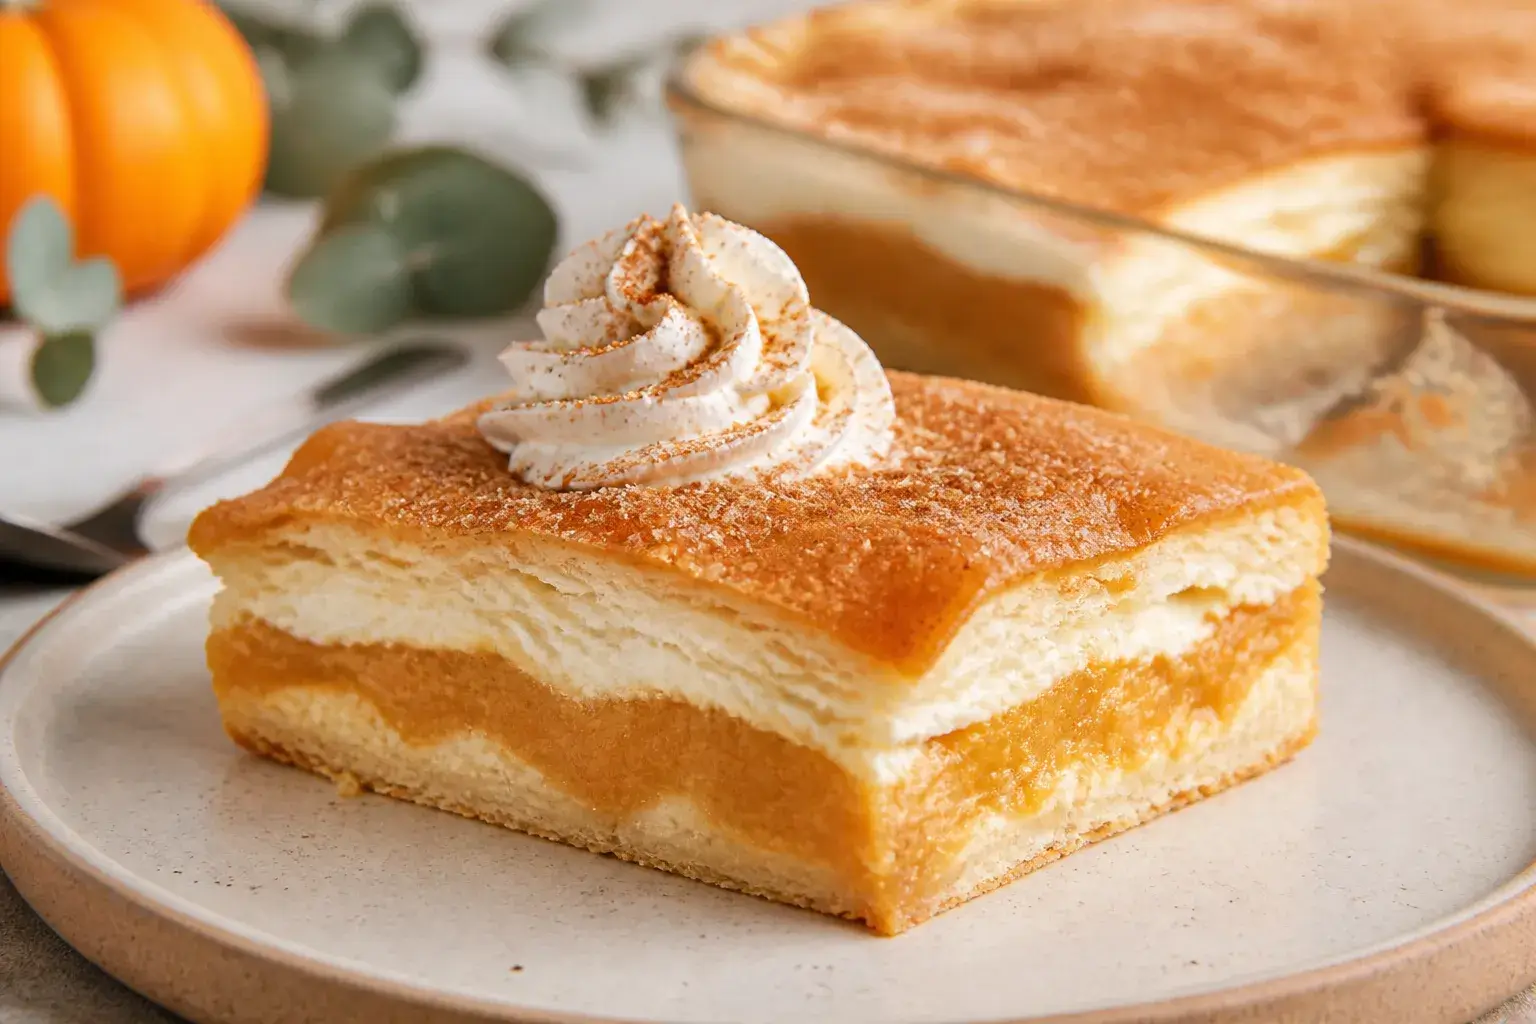
    Pumpkin sopapilla cheesecake is the fall dessert people ask for year after year. It’s creamy, warmly spiced, and wrapped in flaky layers with a cinnamon-sugar crunch on top. Think pumpkin cheesecake meets churro, with a buttery finish that makes it hard to stop at one slice.

    It’s also shockingly easy, thanks to store-bought crescent dough and simple pantry ingredients. Perfect for potlucks, holidays, or a night in with coffee or tea.

    What Makes This Recipe So Good

    • Big payoff, minimal effort: Crescent rolls stand in for sopapilla layers, so you get flaky pastry without fuss.
    • Ultra-creamy filling: The pumpkin cheesecake layer is silky and gently spiced, not heavy.
    • Crackly cinnamon-sugar top: Melted butter plus cinnamon sugar bakes into a sweet, crisp lid.
    • Feeds a crowd: Baked in a 9×13 pan, it’s easy to slice and share.
    • Make-ahead friendly: Tastes even better after a chill, when the flavors settle and the layers set.

    Shopping List

    • 2 cans refrigerated crescent roll dough (8 ounces each)
    • 16 ounces cream cheese, softened
    • 1 cup granulated sugar (divided: 3/4 cup for filling, 1/4 cup for topping)
    • 1/3 cup brown sugar
    • 1 cup canned pumpkin puree (not pumpkin pie mix)
    • 2 large eggs
    • 2 teaspoons vanilla extract (divided: 1 1/2 teaspoons for filling, 1/2 teaspoon for topping)
    • 1 1/2 teaspoons ground cinnamon (plus extra pinch if you like)
    • 1/4 teaspoon ground nutmeg
    • 1/4 teaspoon ground ginger
    • 1/8 teaspoon ground cloves (optional, for warmth)
    • 1/4 teaspoon fine salt
    • 4 tablespoons unsalted butter, melted
    • Optional finishes: honey drizzle, whipped cream, or powdered sugar

    Instructions

    1. Prep the pan: Heat oven to 350°F (175°C). Lightly grease a 9×13-inch baking dish or line with parchment for easy lifting.
    2. Bottom layer: Unroll one can of crescent dough.

      Press seams together and fit it into the bottom of the pan. Prick lightly with a fork.

    3. Make the filling: In a large bowl, beat softened cream cheese with 3/4 cup granulated sugar and 1/3 cup brown sugar until smooth. Mix in pumpkin puree, eggs, 1 1/2 teaspoons vanilla, cinnamon, nutmeg, ginger, cloves (if using), and salt until creamy.
    4. Assemble: Spread the pumpkin cheesecake filling evenly over the bottom dough.
    5. Top dough layer: Unroll the second can of crescent dough.

      Gently place it over the filling, pressing seams together. It’s okay if it doesn’t look perfect.

    6. Cinnamon-sugar topping: Stir remaining 1/4 cup granulated sugar with 1 teaspoon cinnamon (add a pinch more if you love spice). Whisk melted butter with 1/2 teaspoon vanilla.
    7. Finish and bake: Brush the top dough with the vanilla butter.

      Sprinkle the cinnamon sugar evenly over the top. Bake 32–38 minutes, until the top is golden and you see a slight set around the edges.

    8. Cool and chill: Let the pan cool to room temp, then refrigerate at least 3 hours (overnight is best) for clean slices and full flavor.
    9. Serve: Slice into squares. Add a drizzle of honey, a spoon of whipped cream, or a dusting of powdered sugar if you like.

    How to Store

    • Refrigerate: Cover tightly and keep in the fridge for up to 4 days.
    • Freeze: Wrap slices individually in plastic, then foil, and freeze up to 2 months.

      Thaw overnight in the fridge.

    • Best texture: Enjoy chilled or let sit at room temp for 10–15 minutes for a softer bite.

    Why This is Good for You

    • Pumpkin perks: Pumpkin is rich in vitamin A and fiber, which support vision and digestion.
    • Portion control made easy: It’s baked in a slab, so you can cut small squares for a lighter treat.
    • Satisfying flavors: Warm spices deliver big taste, so you don’t need oversized servings.

    Pitfalls to Watch Out For

    • Soggy bottom: Don’t skip chilling before slicing. It helps the layers set and prevents weeping.
    • Overbaking: If the top darkens too quickly, tent with foil for the last 10 minutes.
    • Seams separating: Pinch crescent seams well so filling doesn’t seep to the top layer.
    • Using pumpkin pie mix: Stick to plain pumpkin puree to control sweetness and spice.

    Recipe Variations

    • Maple twist: Swap 2 tablespoons of granulated sugar in the filling for pure maple syrup and add a splash more vanilla.
    • Pecan crunch: Sprinkle 1/2 cup chopped toasted pecans over the cinnamon sugar before baking.
    • Gluten-free route: Use gluten-free crescent dough and confirm all spices are certified gluten-free.
    • Lighter version: Use neufchâtel (1/3 less fat) cream cheese and reduce sugar by 2–3 tablespoons.
    • Extra spice: Add 1/4 teaspoon cardamom for a fragrant lift.

    FAQ

    Can I make this a day ahead?

    Yes. It actually improves overnight as the layers firm up.

    Assemble, bake, cool, and chill until serving.

    Do I need to blind-bake the bottom layer?

    No. The dough bakes through under the cheesecake layer as long as you bake until golden and allow proper chilling.

    Can I use homemade dough?

    You can. Roll out two thin rectangles of puff pastry or a sweet shortcrust.

    Adjust bake time as needed and watch for golden edges.

    What if I don’t have all the spices?

    Use 2–2 1/2 teaspoons pumpkin pie spice in place of the individual spices. Still add the salt and vanilla.

    How do I get clean slices?

    Chill thoroughly, then use a sharp knife wiped clean between cuts. A quick dip of the blade in hot water helps.

    Is this very sweet?

    It’s sweet but balanced by the tangy cream cheese and warm spices.

    For less sweetness, cut the topping sugar by a tablespoon or two.

    In Conclusion

    Pumpkin sopapilla cheesecake delivers cozy fall flavor with very little work. The creamy pumpkin center, flaky layers, and cinnamon-sugar top make it a crowd favorite every time. Keep a pan in the fridge for gatherings, holiday dinners, or a treat alongside coffee.

    Simple, nostalgic, and absolutely delicious.

  • Baked Ham and Cheese Pinwheels Recipe – Easy, Golden, and Crowd-Pleasing

    Baked Ham and Cheese Pinwheels Recipe – Easy, Golden, and Crowd-Pleasing

    These baked ham and cheese pinwheels make weeknights feel special and game days a little more fun. They’re buttery, melty, and roll up in minutes with simple ingredients you probably already have. Great as an appetizer, lunch, or quick dinner, they hit that perfect balance of savory, cheesy, and slightly toasty.

    Serve them warm with a dipping sauce, and watch them disappear fast.

    What Makes This Special

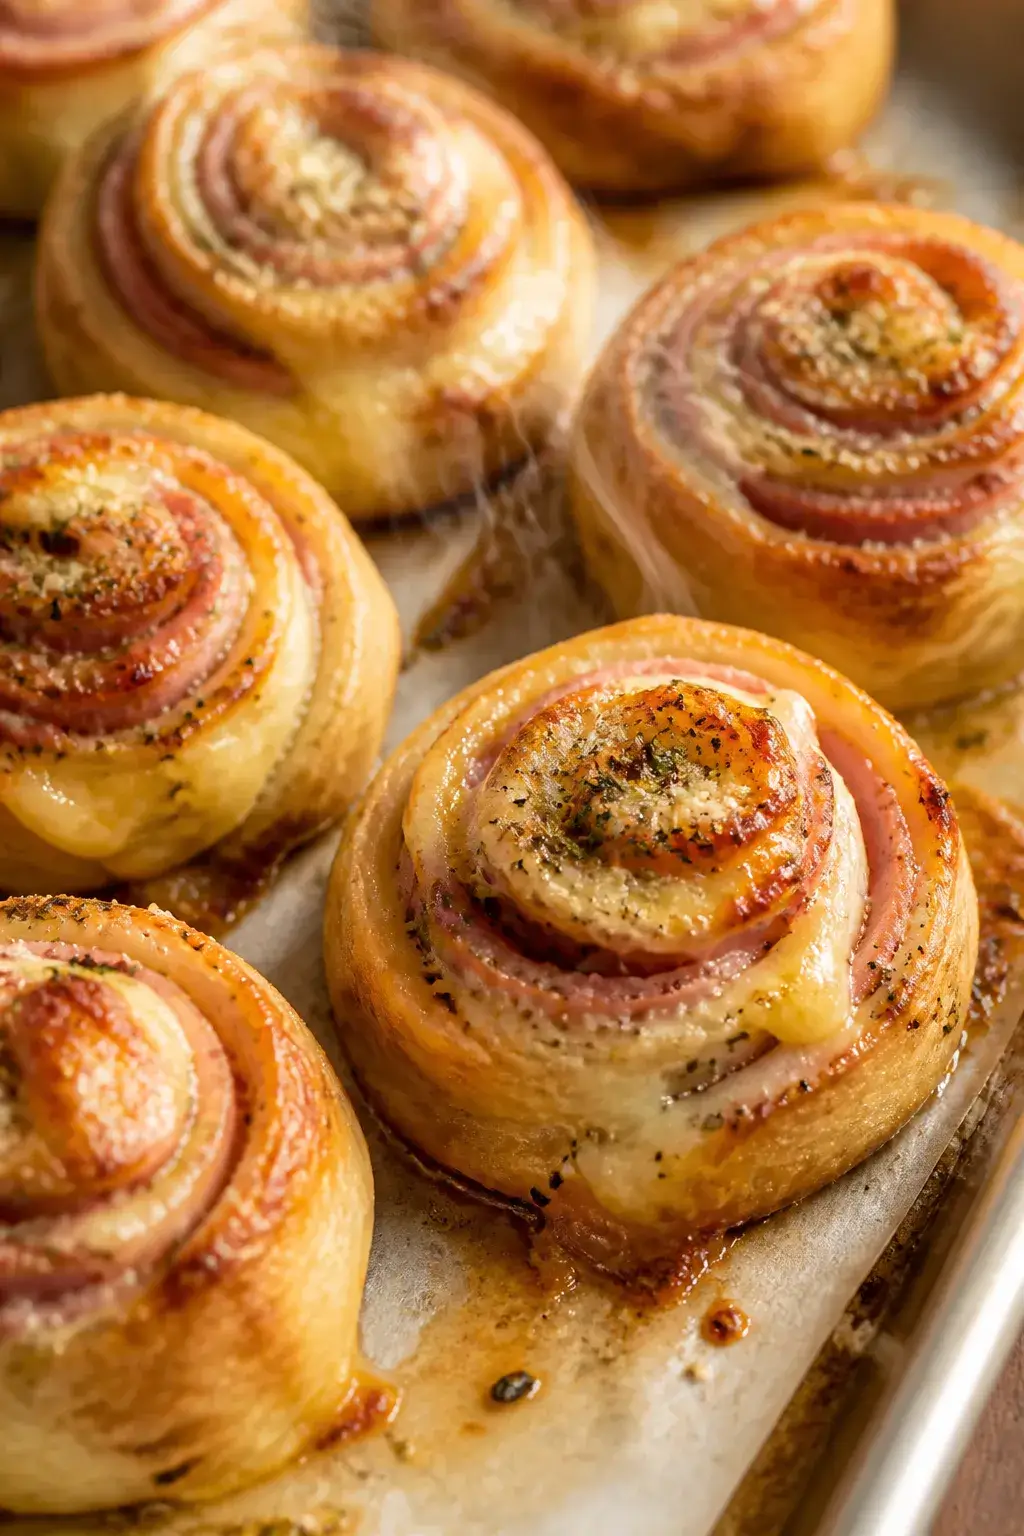
    Close-up detail of freshly baked ham and cheese pinwheels just out of the oven, golden-brown spirals

    These pinwheels use store-bought dough, so you skip complicated steps and get straight to the good part. A quick brush of garlic butter adds a bakery-style finish without extra work. They’re also easy to customize with different cheeses, deli meats, and add-ins.

    Best of all, they’re great hot from the oven or reheated for easy meals the next day.

    Ingredients

    • 1 sheet refrigerated pizza dough or crescent roll dough
    • 2 tablespoons unsalted butter, melted
    • 1 small garlic clove, minced (or 1/4 teaspoon garlic powder)
    • 1 tablespoon Dijon or yellow mustard (optional but recommended)
    • 8–10 slices deli ham, thinly sliced
    • 1 1/2 cups shredded cheese (Swiss, cheddar, or mozzarella)
    • 1 teaspoon Italian seasoning (or a mix of dried oregano and parsley)
    • 1/4 teaspoon black pepper
    • Pinch of red pepper flakes (optional)
    • 1 tablespoon grated Parmesan (optional, for topping)
    • Nonstick spray or parchment paper, for the pan

    Instructions

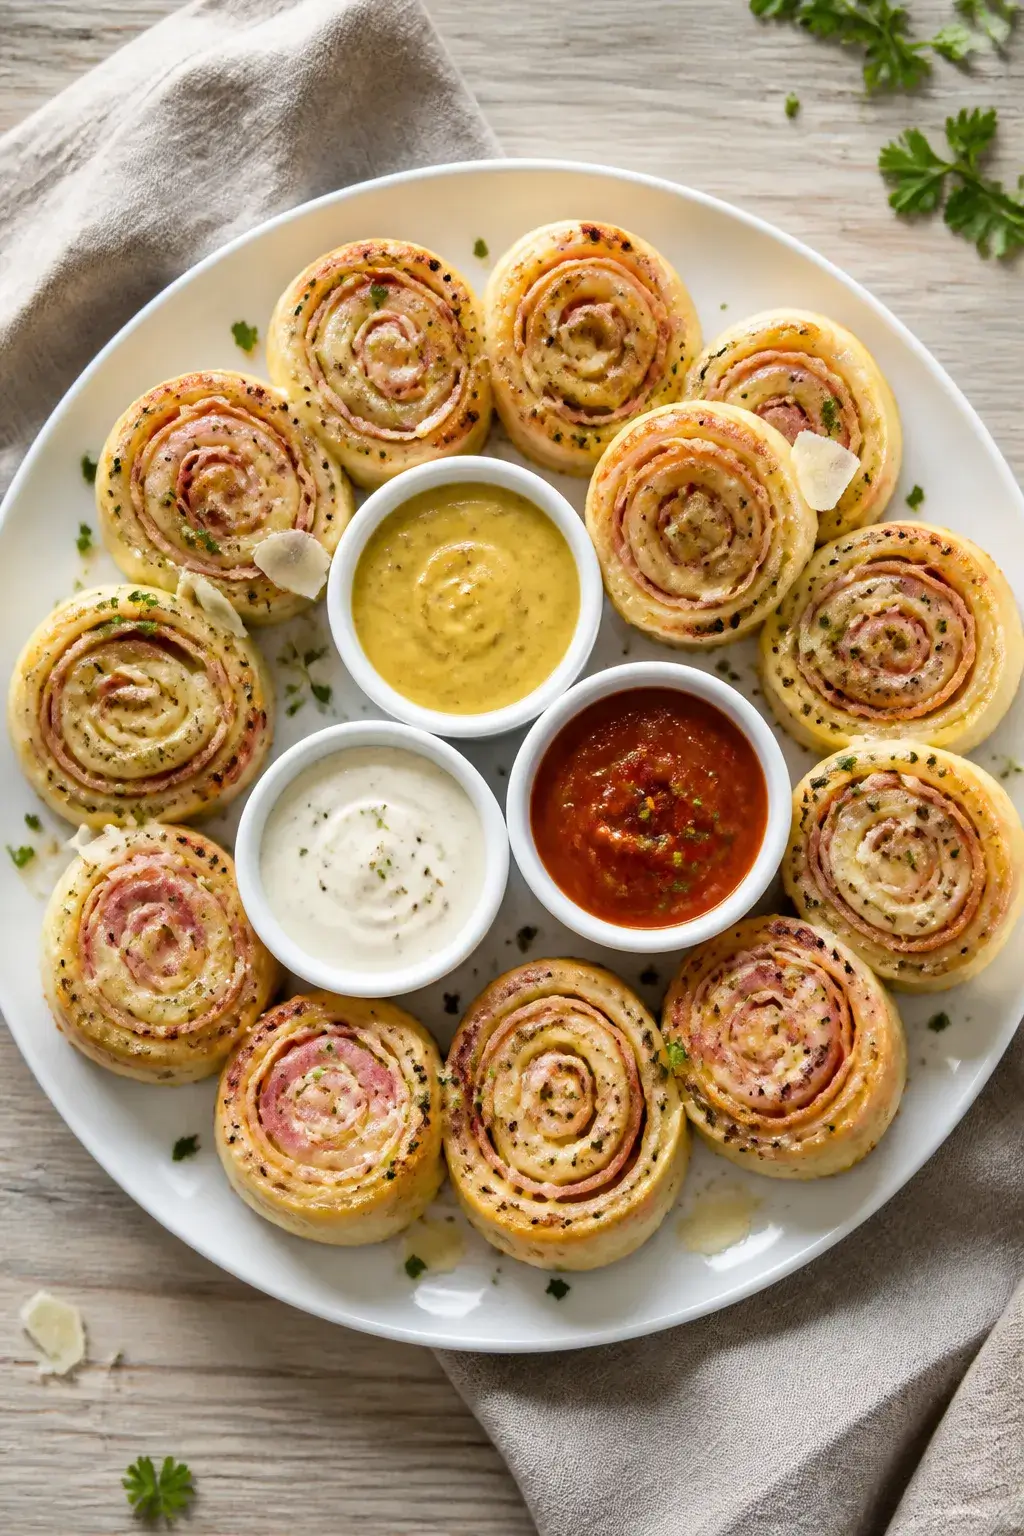
    Overhead final presentation of ham and cheese pinwheels arranged in a loose circular pattern on a ma
    1. Preheat your oven to 375°F (190°C). Line a baking sheet with parchment paper or lightly coat with nonstick spray.
    2. In a small bowl, mix the melted butter with the garlic. Set aside.

      If using crescent dough, pinch seams together to form one rectangle.

    3. On a lightly floured surface, roll the dough into a 12×8-inch rectangle. Spread a thin layer of mustard over the dough, leaving a 1/2-inch border on the long side farthest from you.
    4. Layer the ham slices evenly over the dough. Sprinkle the shredded cheese on top, then add the Italian seasoning, black pepper, and red pepper flakes if using.
    5. Starting from the long edge closest to you, roll the dough up tightly into a log.

      Pinch the seam to seal.

    6. Using a sharp knife or unflavored dental floss, slice the log into 12 equal pinwheels. Place them cut-side up on the prepared baking sheet, spacing slightly apart.
    7. Brush the tops with the garlic butter. Sprinkle with Parmesan if you like.
    8. Bake for 15–20 minutes, until golden brown and the cheese is bubbling.

      If the centers look doughy, give them 2–3 more minutes.

    9. Cool for 5 minutes, then serve warm. Great with honey mustard, ranch, or marinara.

    How to Store

    • Refrigerate: Cool completely, then store in an airtight container for up to 4 days.
    • Freeze: Wrap tightly and freeze for up to 2 months. Reheat from frozen at 350°F (175°C) for 10–15 minutes.
    • Reheat: Oven or air fryer at 350°F for 5–8 minutes keeps them crisp.

      The microwave works in a pinch but softens the crust.

    Benefits of This Recipe

    • Fast and forgiving: Minimal prep, and it still looks impressive.
    • Kid- and crowd-friendly: Familiar flavors that please everyone.
    • Budget-friendly: Deli ham and basic cheese go a long way.
    • Make-ahead friendly: Assemble, chill, and bake when ready.

    What Not to Do

    • Don’t overload with fillings. Too much cheese or ham makes the roll hard to slice and bake through.
    • Don’t skip the seal. Failing to pinch the seam leads to unrolling in the oven.
    • Don’t bake at too low a temperature. You’ll get pale, undercooked centers.
    • Don’t slice too thick. Over 1 inch thick can cause soggy middles.

    Variations You Can Try

    • Turkey and Swiss: Add a smear of cranberry sauce or honey mustard.
    • Pepperoni Pizza: Use mozzarella, pepperoni, and a little pizza sauce inside.
    • Ham and Pineapple: A few small pineapple tidbits for a sweet-savory twist.
    • Spinach and Feta: Swap ham for spinach and use mozzarella + feta.
    • Jalapeño Popper: Cream cheese, cheddar, diced jalapeños, and ham or bacon.
    • Everything Bagel Topping: Sprinkle on top with the butter before baking.

    FAQ

    Can I make these ahead?

    Yes. Assemble the roll, wrap tightly, and refrigerate up to 24 hours. Slice and bake just before serving.

    You may need to add 1–2 minutes to the bake time if starting cold.

    What dough works best?

    Refrigerated pizza dough gives a slightly chewier, bakery-style texture. Crescent roll dough is softer and more buttery. Both work well; just seal the seams if using crescents.

    How do I keep them from getting soggy?

    Use a light hand with sauces, avoid overly wet add-ins, and bake on parchment for good airflow.

    If needed, bake on the upper-middle rack for even browning.

    Can I use pre-shredded cheese?

    Yes, but freshly shredded cheese melts smoother. Pre-shredded has anti-caking agents that can make the melt slightly less creamy.

    What dip goes best?

    Honey mustard, ranch, spicy mayo, or warm marinara are all great options. Choose based on your filling variation.

    In Conclusion

    These baked ham and cheese pinwheels are simple, reliable, and seriously tasty.

    They deliver golden edges, gooey centers, and a savory hit in every bite. Keep the ingredients on hand, and you’ve got an easy win for parties, lunches, or weeknight dinners. Make them once, and they’ll earn a regular spot in your rotation.

    Baked Ham and Cheese Pinwheels Recipe – Easy, Golden, and Crowd-Pleasing

    Prep Time 15 minutes
    Cook Time 20 minutes
    Total Time 35 minutes
    Servings 12 servings

    Ingredients
      

    • 1 sheet refrigerated pizza dough or crescent roll dough
    • 2 tablespoons unsalted butter, melted
    • 1 small garlic clove, minced (or 1/4 teaspoon garlic powder)
    • 1 tablespoon Dijon or yellow mustard (optional but recommended)
    • 8–10 slices deli ham, thinly sliced
    • 1 1/2 cups shredded cheese (Swiss, cheddar, or mozzarella)
    • 1 teaspoon Italian seasoning (or a mix of dried oregano and parsley)
    • 1/4 teaspoon black pepper
    • Pinch of red pepper flakes (optional)
    • 1 tablespoon grated Parmesan (optional, for topping)
    • Nonstick spray or parchment paper, for the pan

    Instructions
     

    • Preheat your oven to 375°F (190°C). Line a baking sheet with parchment paper or lightly coat with nonstick spray.
    • In a small bowl, mix the melted butter with the garlic. Set aside. If using crescent dough, pinch seams together to form one rectangle.
    • On a lightly floured surface, roll the dough into a 12×8-inch rectangle. Spread a thin layer of mustard over the dough, leaving a 1/2-inch border on the long side farthest from you.
    • Layer the ham slices evenly over the dough. Sprinkle the shredded cheese on top, then add the Italian seasoning, black pepper, and red pepper flakes if using.
    • Starting from the long edge closest to you, roll the dough up tightly into a log. Pinch the seam to seal.
    • Using a sharp knife or unflavored dental floss, slice the log into 12 equal pinwheels. Place them cut-side up on the prepared baking sheet, spacing slightly apart.
    • Brush the tops with the garlic butter. Sprinkle with Parmesan if you like.
    • Bake for 15–20 minutes, until golden brown and the cheese is bubbling. If the centers look doughy, give them 2–3 more minutes.
    • Cool for 5 minutes, then serve warm. Great with honey mustard, ranch, or marinara.
  • Slow Cooker Pineapple Barbecue Meatballs – Sweet, Tangy, and Effortless

    Slow Cooker Pineapple Barbecue Meatballs – Sweet, Tangy, and Effortless

    These slow cooker pineapple barbecue meatballs are a weeknight hero and a party favorite. They deliver that perfect balance of sweet, smoky, and tangy with almost no hands-on work. Toss everything in the slow cooker, walk away, and come back to glossy, tender meatballs coated in a sticky sauce.

    Serve them over rice for dinner, spear them with toothpicks for appetizers, or tuck them into sliders. They’re simple, satisfying, and incredibly versatile.

    What Makes This Special

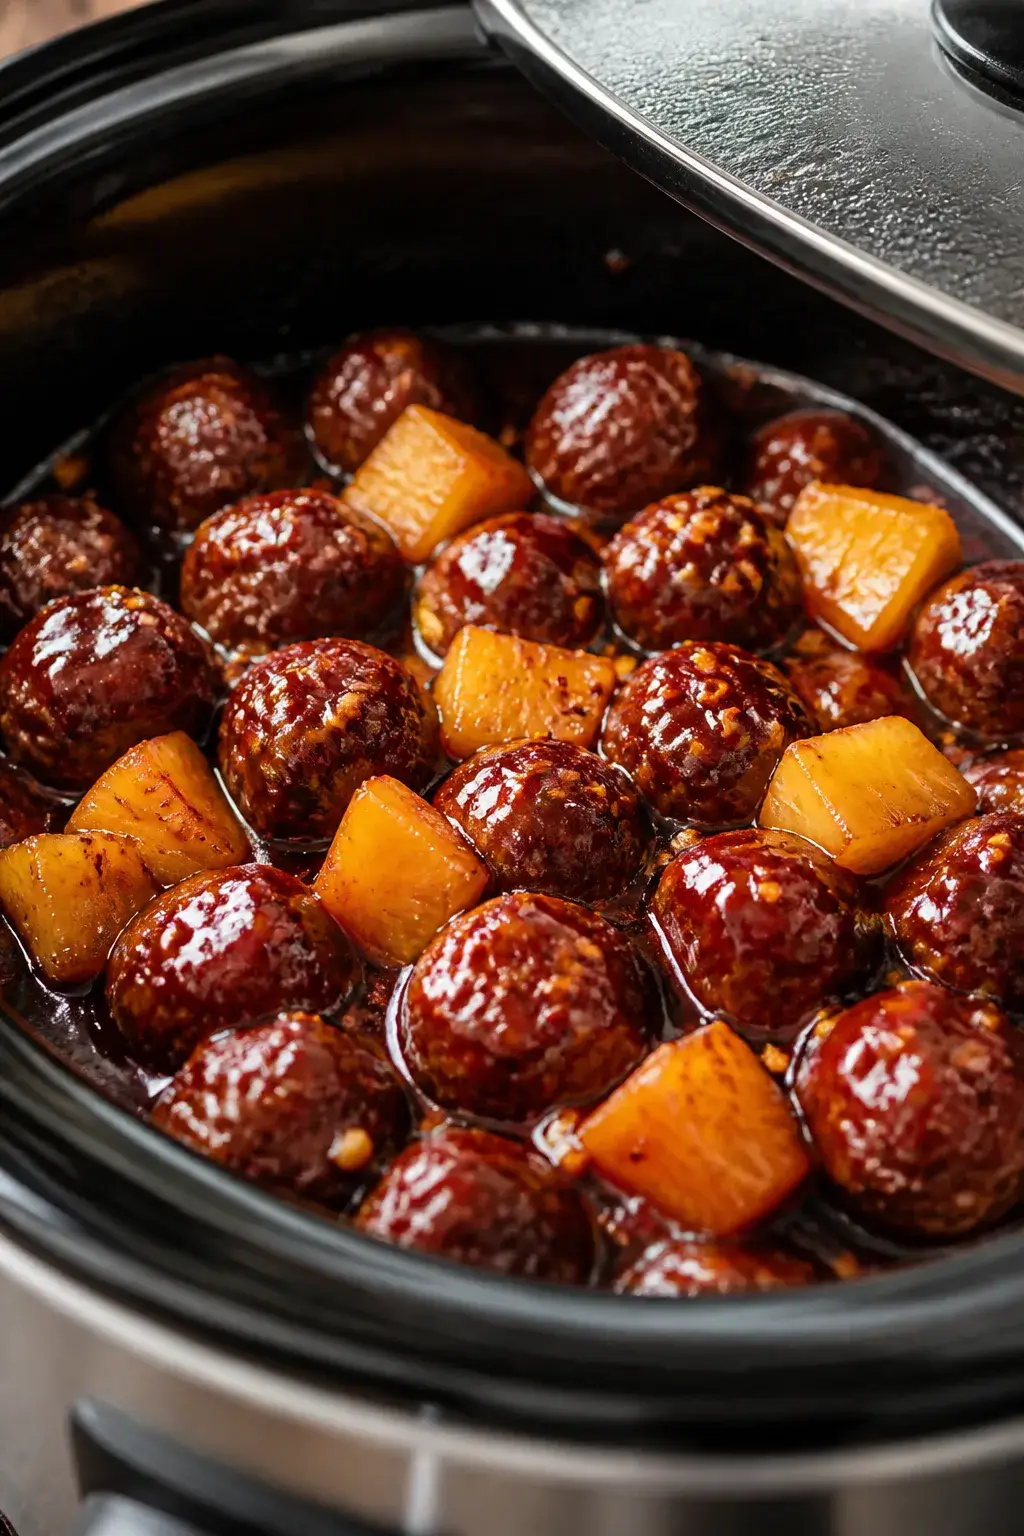
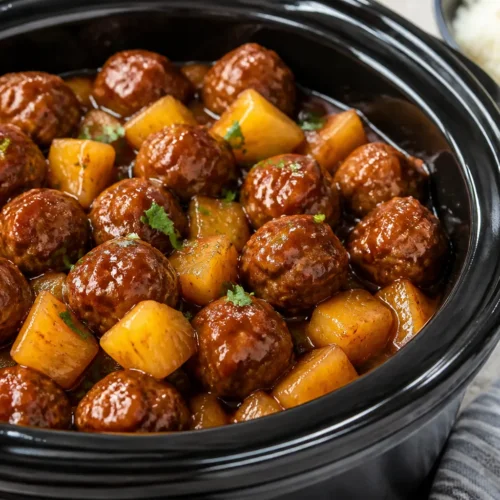
    Close-up detail of glossy pineapple barbecue meatballs simmering in a slow cooker, sauce clinging an

    This recipe nails the sweet-heat combo with pineapple juice and your favorite barbecue sauce. The slow cooker does the heavy lifting, so the meatballs soak up flavor without drying out.

    You can use store-bought frozen meatballs to save time or make your own if you’re feeling ambitious. It scales easily for tailgates, potlucks, and holidays. Best of all, the ingredients are pantry-friendly and budget-conscious.

    Shopping List

    • Frozen meatballs (beef, pork, turkey, or plant-based), about 2 pounds
    • Barbecue sauce, 2 cups (choose a brand you love)
    • Pineapple: 1 can (20 ounces) pineapple chunks in juice, not syrup
    • Pineapple juice, 1/2 cup (use reserved juice from the can)
    • Soy sauce, 1 tablespoon (or tamari for gluten-free)
    • Brown sugar, 1–2 tablespoons (optional, for extra sweetness)
    • Apple cider vinegar, 1 tablespoon (adds brightness)
    • Garlic, 2 cloves minced (or 1 teaspoon garlic powder)
    • Red pepper flakes, 1/2 teaspoon (adjust for heat)
    • Green onions, 2–3, sliced for garnish
    • Sesame seeds (optional garnish)
    • Cooked rice or slider buns, for serving

    Instructions

    Overhead final presentation of pineapple barbecue meatballs served family-style in a shallow white c
    1. Prep the slow cooker: Lightly grease the insert or use a liner to make cleanup easy.
    2. Make the sauce: In a bowl, whisk barbecue sauce, 1/2 cup pineapple juice, soy sauce, brown sugar, apple cider vinegar, garlic, and red pepper flakes until smooth.
    3. Add meatballs: Place frozen meatballs and pineapple chunks in the slow cooker.

      Pour the sauce over the top and stir to coat everything evenly.

    4. Cook low and slow: Cover and cook on Low for 3–4 hours or on High for 1.5–2 hours, until the meatballs are heated through and the sauce is glossy.
    5. Thicken if needed: For a stickier glaze, remove the lid during the last 20–30 minutes, or stir in a slurry of 1 teaspoon cornstarch mixed with 2 teaspoons water and cook 10–15 minutes more.
    6. Finish and serve: Taste and adjust salt, heat, or sweetness. Garnish with sliced green onions and sesame seeds. Serve over rice, with roasted veggies, or in slider buns.

    Keeping It Fresh

    Refrigerate leftovers in an airtight container for up to 4 days.

    The flavors deepen as they sit, so day-two meatballs taste fantastic. For longer storage, freeze in portions for up to 3 months. Thaw overnight in the fridge and reheat gently on the stove or in the microwave, adding a splash of pineapple juice or water if the sauce thickens too much.

    Health Benefits

    • Lean protein: Using turkey or chicken meatballs cuts saturated fat while keeping you full.
    • Pineapple perks: Pineapple adds vitamin C and bromelain, which may support digestion.
    • Controlled sweetness: You decide the sauce and sugar level, which helps manage added sugars.
    • Balanced meal: Pair with brown rice and a green veggie for fiber, vitamins, and steady energy.

    Common Mistakes to Avoid

    • Watery sauce: Don’t use pineapple in heavy syrup.

      Stick to juice and reduce the lid time at the end to thicken.

    • Overcooking: Frozen meatballs only need to heat through. Long cooks can toughen the texture.
    • Overcrowding: If you double the recipe, use a larger slow cooker or stir once midway for even heating.
    • Skipping taste checks: Barbecue sauces vary. Always taste and tweak salt, heat, and sweetness before serving.

    Variations You Can Try

    • Hawaiian heat: Add 1–2 tablespoons sriracha or diced jalapeños for a spicy kick.
    • Ginger-garlic: Stir in 1 teaspoon grated fresh ginger and extra garlic for a brighter, zesty sauce.
    • Smoky chipotle: Blend in 1 chopped chipotle pepper in adobo for deeper smoke and warmth.
    • Teriyaki twist: Swap barbecue sauce for teriyaki and finish with toasted sesame oil.
    • Homemade meatballs: Use your favorite recipe; brown lightly in a skillet first for better texture.
    • Veg-forward: Toss in bell peppers or snap peas during the last 30 minutes for color and crunch.

    FAQ

    Can I use homemade meatballs instead of frozen?

    Yes.

    Brown them in a skillet to help them hold together, then cook on Low for 3–4 hours. Aim for small, bite-size balls so the sauce coats evenly.

    What barbecue sauce works best?

    A thick, smoky-sweet sauce is ideal. If your sauce is very sweet, reduce the brown sugar or add an extra splash of vinegar to balance.

    Can I make this on the stovetop?

    Yes.

    Simmer covered over low heat for 20–30 minutes, stirring occasionally, until heated through. Uncover for a few minutes to thicken the sauce.

    How do I keep them warm for a party?

    Set the slow cooker to Warm, stir occasionally, and add a few tablespoons of pineapple juice if the sauce gets too thick.

    Is this recipe gluten-free?

    It can be. Use gluten-free meatballs, a certified gluten-free barbecue sauce, and tamari instead of soy sauce.

    What should I serve with these meatballs?

    Steamed rice, coconut rice, or cauliflower rice are great.

    For sides, try roasted broccoli, grilled pineapple, or a crunchy slaw.

    In Conclusion

    Slow cooker pineapple barbecue meatballs are the kind of low-effort, high-reward dish everyone appreciates. They’re sweet, tangy, and easy to customize, whether you’re feeding family or hosting friends. Keep a bag of meatballs and a bottle of barbecue sauce on hand, and dinner practically makes itself.

    Simple, reliable, and downright tasty—that’s a win any night of the week.

    Slow Cooker Pineapple Barbecue Meatballs – Sweet, Tangy, and Effortless

    Prep Time 10 minutes
    Cook Time 4 hours
    Total Time 4 hours 10 minutes
    Servings 8 servings

    Ingredients
      

    • Frozen meatballs (beef, pork, turkey, or plant-based), about 2 pounds
    • Barbecue sauce, 2 cups (choose a brand you love)
    • Pineapple: 1 can (20 ounces) pineapple chunks in juice, not syrup
    • Pineapple juice, 1/2 cup (use reserved juice from the can)
    • Soy sauce, 1 tablespoon (or tamari for gluten-free)
    • Brown sugar, 1–2 tablespoons (optional, for extra sweetness)
    • Apple cider vinegar, 1 tablespoon (adds brightness)
    • Garlic, 2 cloves minced (or 1 teaspoon garlic powder)
    • Red pepper flakes, 1/2 teaspoon (adjust for heat)
    • Green onions, 2–3, sliced for garnish
    • Sesame seeds (optional garnish)
    • Cooked rice or slider buns, for serving

    Instructions
     

    • Prep the slow cooker: Lightly grease the insert or use a liner to make cleanup easy.
    • Make the sauce: In a bowl, whisk barbecue sauce, 1/2 cup pineapple juice, soy sauce, brown sugar, apple cider vinegar, garlic, and red pepper flakes until smooth.
    • Add meatballs: Place frozen meatballs and pineapple chunks in the slow cooker. Pour the sauce over the top and stir to coat everything evenly.
    • Cook low and slow: Cover and cook on Low for 3–4 hours or on High for 1.5–2 hours, until the meatballs are heated through and the sauce is glossy.
    • Thicken if needed: For a stickier glaze, remove the lid during the last 20–30 minutes, or stir in a slurry of 1 teaspoon cornstarch mixed with 2 teaspoons water and cook 10–15 minutes more.
    • Finish and serve: Taste and adjust salt, heat, or sweetness. Garnish with sliced green onions and sesame seeds. Serve over rice, with roasted veggies, or in slider buns.