Category: Desserts

  • Chocolate Bundt Cake With Cake Mix Boxes – Easy, Moist, and Crowd-Pleasing

    Chocolate Bundt Cake With Cake Mix Boxes – Easy, Moist, and Crowd-Pleasing

    This cake is for the days you want something rich and chocolatey without spending all afternoon in the kitchen. Using cake mix boxes keeps things simple, while a few smart add-ins make it taste like it came from a bakery. The result is a Bundt cake that’s deeply chocolatey, super moist, and great for birthdays, potlucks, or weeknight dessert.

    You’ll mix, pour, bake, and feel like a hero when you slice it.

    Why This Recipe Works
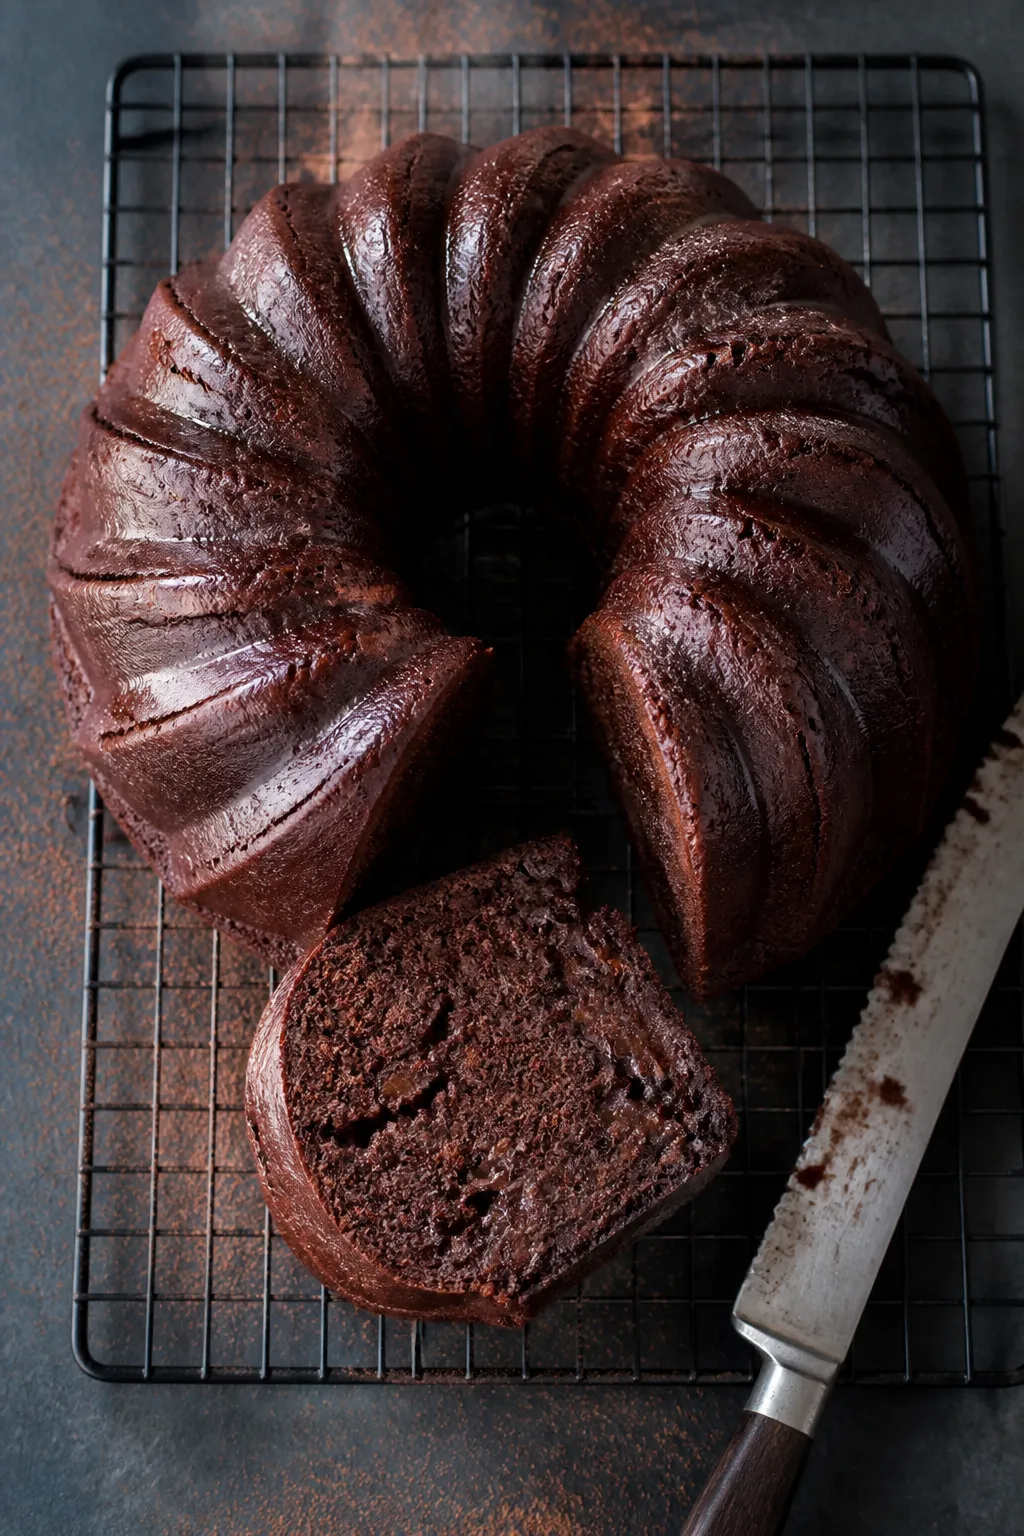
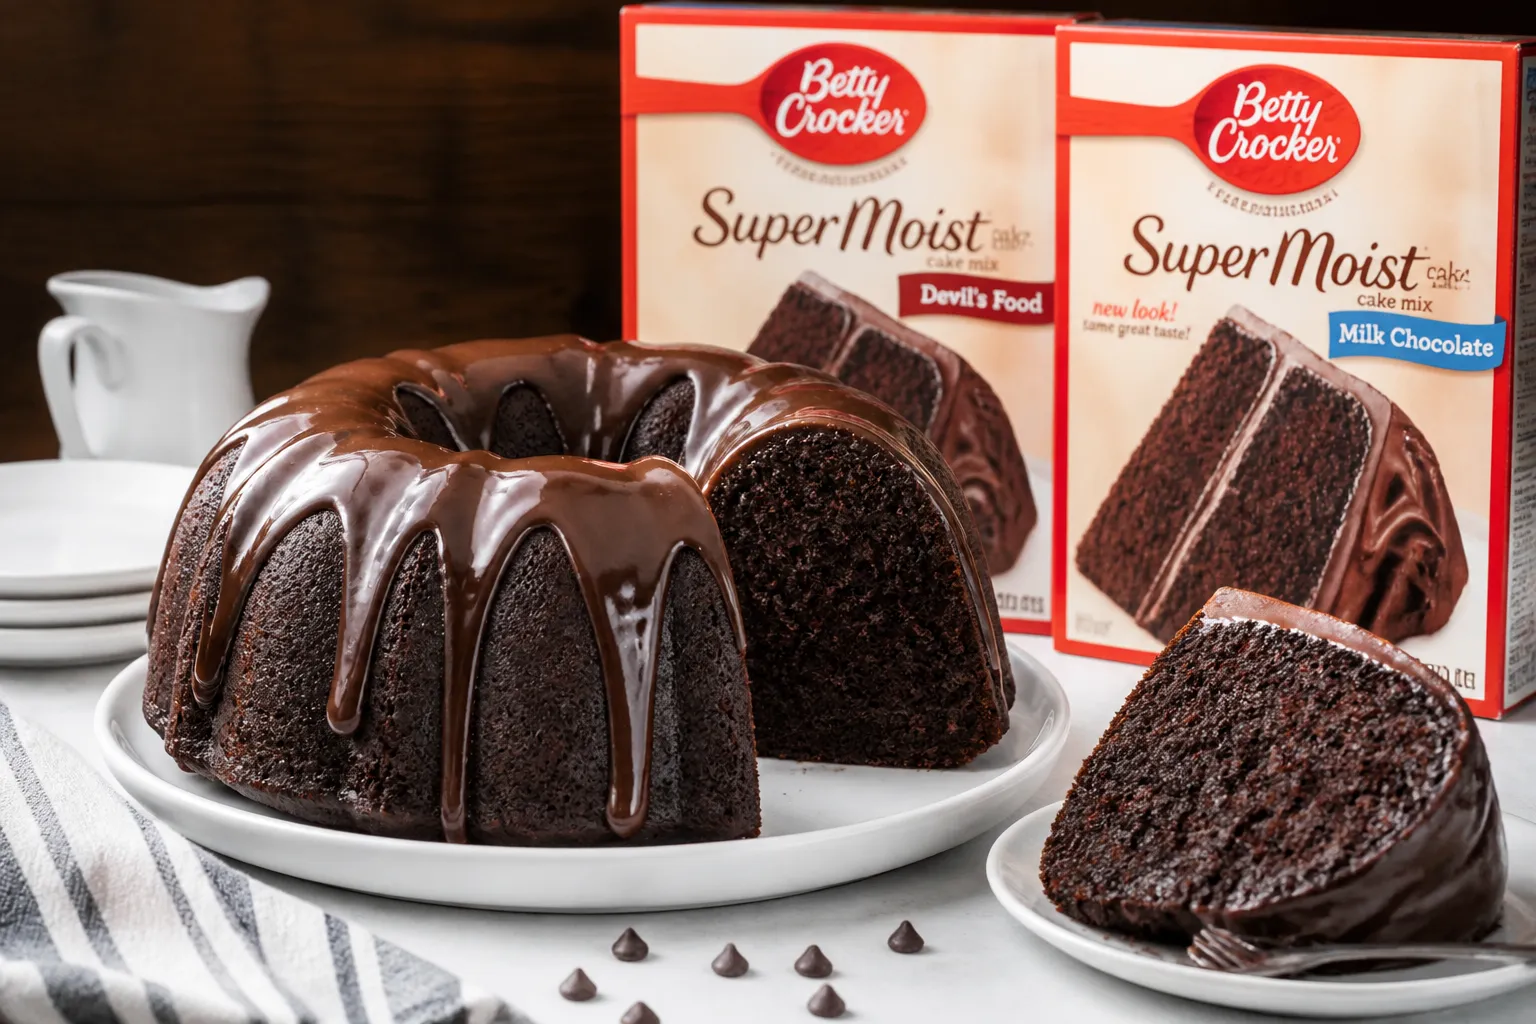
    Overhead shot of a freshly baked chocolate Bundt cake just turned out onto a wire rack, no pan in si

    This recipe pairs the reliability of boxed cake mix with a few upgrades for flavor and texture. Sour cream adds moisture and richness, and instant pudding mix boosts the dense, velvety crumb Bundt cakes are known for. Using oil instead of butter keeps the cake tender for days. A handful of chocolate chips melts into little pockets of fudge throughout.

    It’s the kind of shortcut baking that tastes like you didn’t cut any corners.

    Shopping List

    • 1 box chocolate cake mix (15.25 oz)
    • 1 box instant chocolate pudding mix (3.4 oz)
    • 4 large eggs
    • 1 cup sour cream (full-fat preferred)
    • 1/2 cup vegetable oil (or canola oil)
    • 1/2 cup milk (or water, but milk adds richness)
    • 1 teaspoon vanilla extract
    • 1 cup semisweet chocolate chips
    • Nonstick baking spray (with flour) or butter and cocoa powder for the pan
    • Optional glaze: 1 cup powdered sugar, 2–3 tablespoons milk, 1 tablespoon cocoa powder, pinch of salt

    Instructions
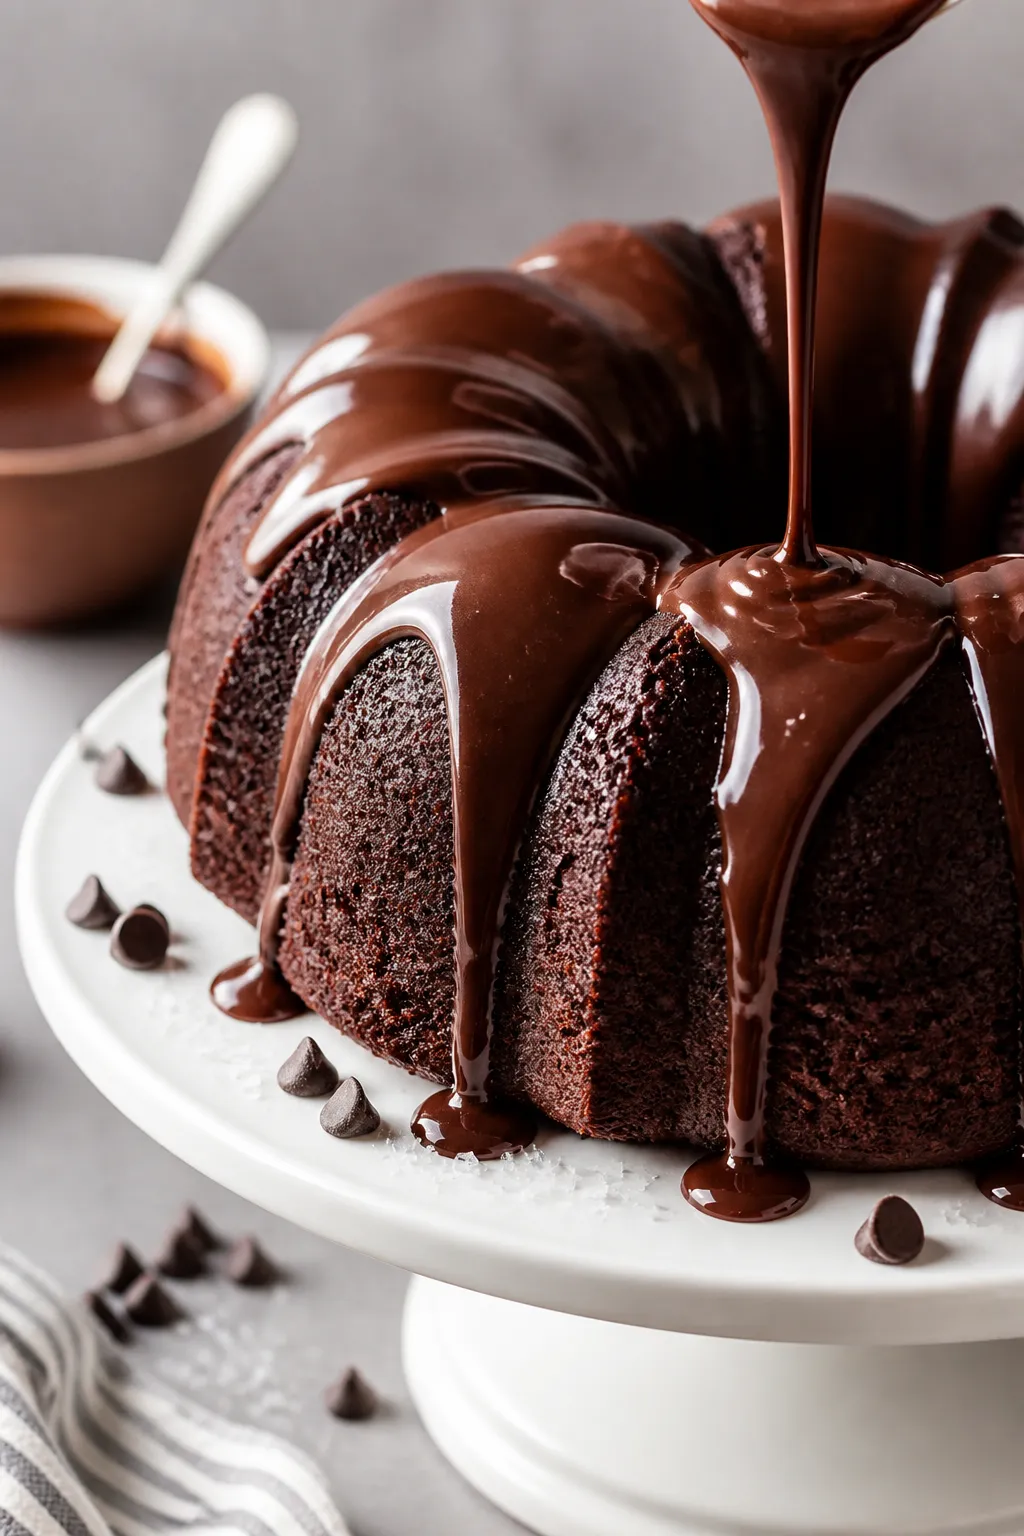
    Close-up, three-quarter angle of the cooled Bundt being finished with the optional chocolate glaze:
    1. Prep the pan and oven: Preheat oven to 350°F (175°C). Generously coat a 10–12 cup Bundt pan with baking spray, or butter it well and dust with cocoa powder.
    2. Mix the batter: In a large bowl, whisk cake mix and pudding mix to break up lumps. Add eggs, sour cream, oil, milk, and vanilla.

      Beat on medium speed for 2 minutes until smooth and thick.

    3. Fold in chips: Stir in chocolate chips with a spatula so they’re evenly distributed.
    4. Fill the pan: Pour batter into the prepared Bundt pan and smooth the top. Tap the pan gently on the counter to pop any air bubbles.
    5. Bake: Bake 40–50 minutes, until a toothpick inserted near the center comes out with a few moist crumbs. If the top is browning too fast, tent loosely with foil for the last 10 minutes.
    6. Cool properly: Let the cake cool in the pan for 10–15 minutes.

      Turn out onto a wire rack and cool completely before glazing or slicing.

    7. Glaze (optional): Whisk powdered sugar, cocoa, milk, and a pinch of salt until smooth and pourable. Drizzle over the cooled cake.
    8. Serve: Slice with a serrated knife for clean cuts. Enjoy at room temperature or slightly warmed.

    Keeping It Fresh

    Store the cake covered at room temperature for up to 3 days.

    For longer storage, wrap slices tightly and refrigerate for up to 5 days. You can also freeze well-wrapped slices for up to 2 months; thaw at room temperature. To revive that fresh-baked feel, warm a slice in the microwave for 10–15 seconds.

    Health Benefits

    It’s dessert, so think balance.

    That said, portioning reasonable slices lets you enjoy a satisfying treat without going overboard. Using milk instead of water adds a bit of protein and calcium. Darker chocolate chips can bring a touch more cocoa antioxidants.

    Pair with berries for fiber and freshness.

    What Not to Do

    • Don’t skip greasing the pan well. Bundt pans have ridges that love to grab cake.
    • Don’t overbake. Pull it when there are moist crumbs on the tester, not a dry stick.
    • Don’t frost while warm. Glaze will slide off and pool.
    • Don’t overmix after adding chips. It can sink the mix-ins and toughen the crumb.
    • Don’t rush the release. Let it sit 10–15 minutes before unmolding to prevent breakage.

    Recipe Variations

    • Mocha Bundt: Swap milk for 1/2 cup strong brewed coffee cooled to room temp. Add 1 teaspoon espresso powder.
    • Triple Chocolate: Use dark chocolate cake mix and add a mix of milk, semisweet, and white chocolate chips.
    • Peanut Butter Swirl: Warm 1/3 cup creamy peanut butter and swirl into the batter before baking.
    • Mint Chocolate: Add 1/2 teaspoon peppermint extract and use dark chocolate chips.
    • Salted Caramel: Drizzle store-bought caramel over the cooled cake and finish with flaky sea salt.
    • Gluten-Friendly: Use a certified gluten-free chocolate cake mix and confirm your pudding mix is gluten-free.

    FAQ

    Can I skip the pudding mix?

    You can, but the texture will be lighter and less fudgy. The pudding mix helps create that dense, moist Bundt crumb.

    If skipping, consider adding an extra tablespoon of cocoa and a tablespoon of cornstarch.

    Why did my cake stick to the Bundt pan?

    Most likely, the pan wasn’t thoroughly greased or dusted. Use a baking spray with flour or butter plus cocoa powder, and make sure to get into every ridge. Let the cake rest 10–15 minutes before inverting.

    How do I keep chocolate chips from sinking?

    Toss the chips with a teaspoon of the dry cake mix before folding them in, and avoid overmixing.

    A thicker batter (thanks to sour cream and pudding) also helps suspend them.

    Can I make this ahead?

    Yes. Bake the day before, cool completely, and wrap tightly. Glaze just before serving.

    The flavor actually deepens overnight.

    What size Bundt pan should I use?

    A 10–12 cup Bundt pan works best. If your pan is smaller, fill it two-thirds full and bake remaining batter as cupcakes.

    Final Thoughts

    This chocolate Bundt cake proves that boxed mixes can turn out bakery-worthy results with a few smart tweaks. It’s simple to make, easy to customize, and reliably delicious.

    Keep the ingredients on hand, and you’ll always be 60 minutes away from a rich, impressive dessert. Happy baking—and enjoy every chocolatey slice.
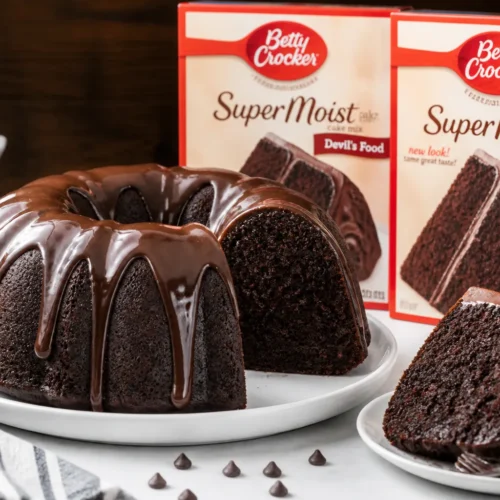
    Chocolate Bundt Cake With Cake Mix Boxes – Easy, Moist, and Crowd-Pleasing

    Prep Time 15 minutes
    Cook Time 45 minutes
    Total Time 1 hour
    Servings 12 servings

    Ingredients
      

    • 1 box chocolate cake mix (15.25 oz)
    • 1 box instant chocolate pudding mix (3.4 oz)
    • 4 large eggs
    • 1 cup sour cream (full-fat preferred)
    • 1/2 cup vegetable oil (or canola oil)
    • 1/2 cup milk (or water, but milk adds richness)
    • 1 teaspoon vanilla extract
    • 1 cup semisweet chocolate chips
    • Nonstick baking spray (with flour) or butter and cocoa powder for the pan
    • Optional glaze: 1 cup powdered sugar, 2–3 tablespoons milk, 1 tablespoon cocoa powder, pinch of salt

    Instructions
     

    • Prep the pan and oven: Preheat oven to 350°F (175°C). Generously coat a 10–12 cup Bundt pan with baking spray, or butter it well and dust with cocoa powder.
    • Mix the batter: In a large bowl, whisk cake mix and pudding mix to break up lumps. Add eggs, sour cream, oil, milk, and vanilla. Beat on medium speed for 2 minutes until smooth and thick.
    • Fold in chips: Stir in chocolate chips with a spatula so they’re evenly distributed.
    • Fill the pan: Pour batter into the prepared Bundt pan and smooth the top. Tap the pan gently on the counter to pop any air bubbles.
    • Bake: Bake 40–50 minutes, until a toothpick inserted near the center comes out with a few moist crumbs. If the top is browning too fast, tent loosely with foil for the last 10 minutes.
    • Cool properly: Let the cake cool in the pan for 10–15 minutes. Turn out onto a wire rack and cool completely before glazing or slicing.
    • Glaze (optional): Whisk powdered sugar, cocoa, milk, and a pinch of salt until smooth and pourable. Drizzle over the cooled cake.
    • Serve: Slice with a serrated knife for clean cuts. Enjoy at room temperature or slightly warmed.
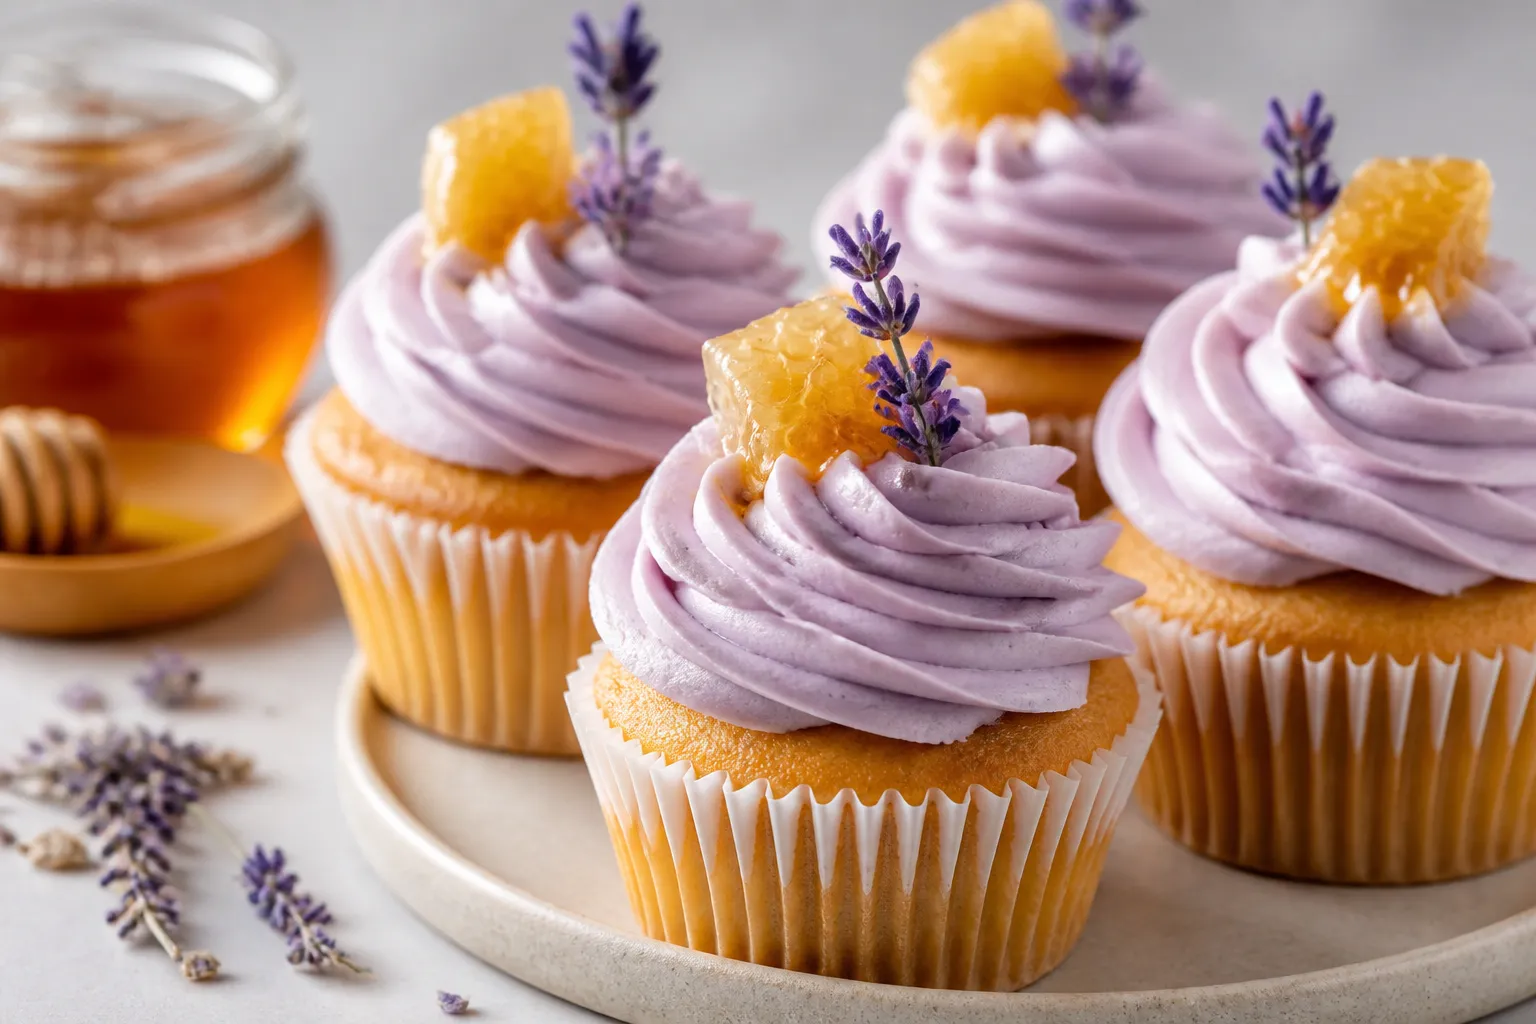
  • Lavender Honey Cupcakes Recipe – Soft, Moist & Easy to Make

    Lavender Honey Cupcakes Recipe – Soft, Moist & Easy to Make

    Lavender and honey make a beautiful pair—floral, gently sweet, and soothing. These cupcakes are soft, moist, and simple enough for a weekday bake, yet special enough for a celebration. You’ll get a tender crumb, a hint of vanilla, and a whisper of lavender that doesn’t overwhelm.

    The honey keeps them moist and adds a natural sweetness you can taste in every bite. If you’re new to baking with lavender, this recipe is a friendly place to start.

    What Makes This Special

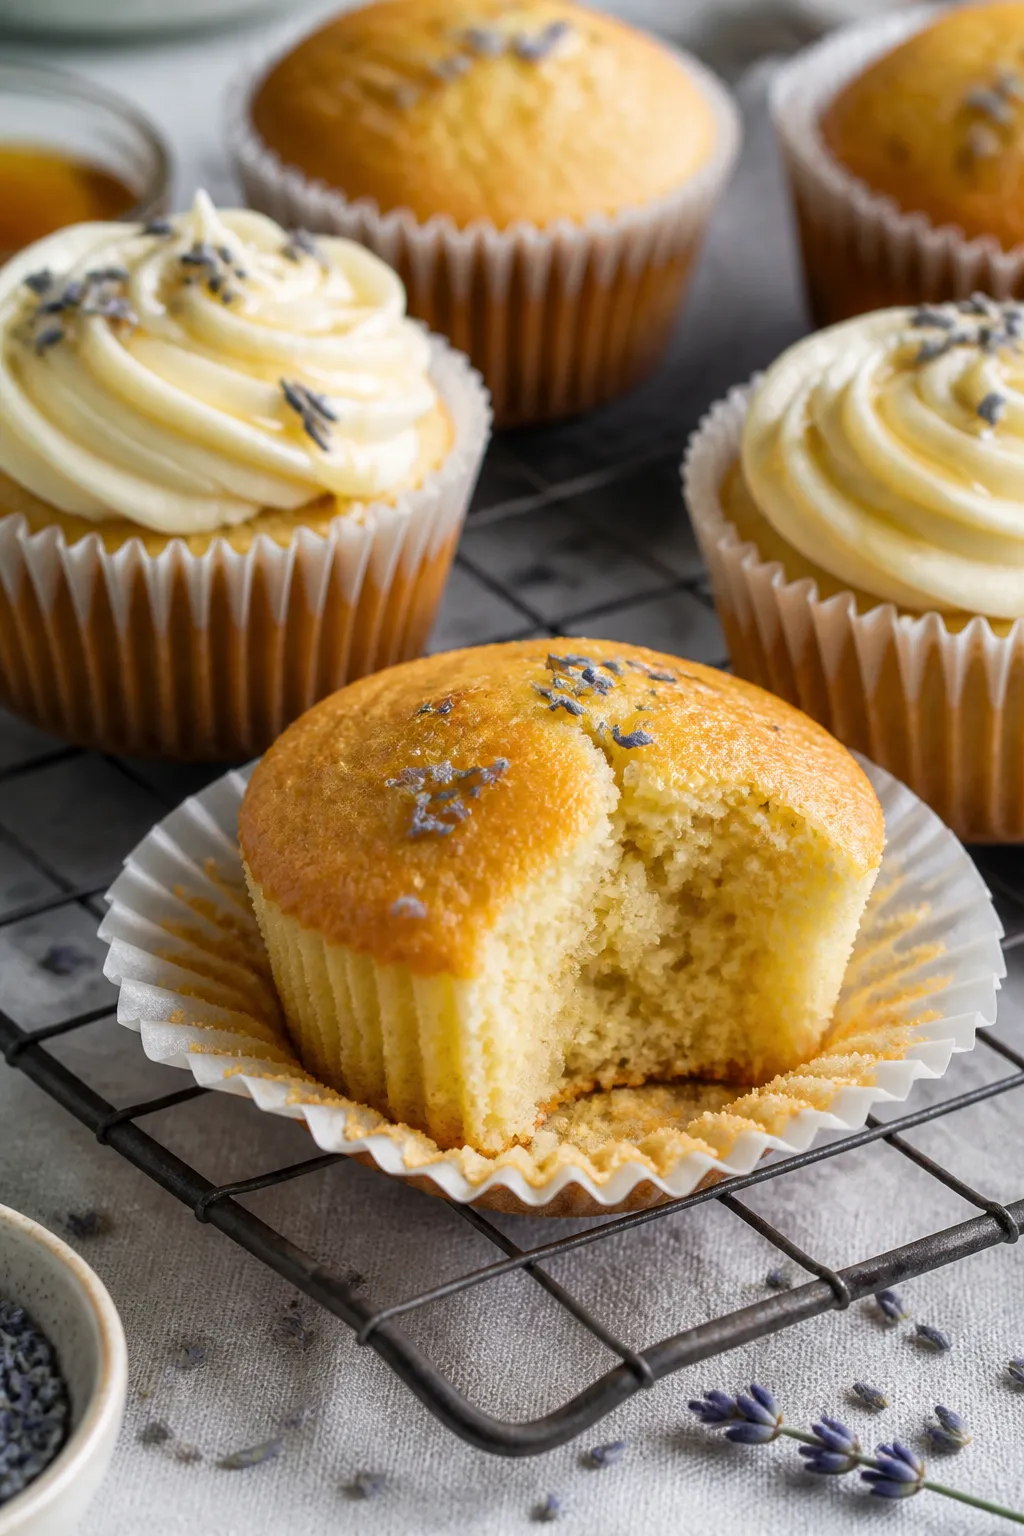
    Close-up detail of freshly baked lavender honey cupcakes cooling on a wire rack, golden domed tops w
    • Balanced flavor: Light floral notes from lavender, rounded by warm honey and vanilla.
    • Moist texture: Honey and buttermilk keep the cupcakes soft for days.
    • Beginner-friendly: Straightforward steps with simple tools.
    • Not too sweet: A gentle honey buttercream complements rather than overpowers.
    • Customizable: Easy swaps for dairy-free or gluten-free options.

    Shopping List

    • For the cupcakes:
      • 1 1/2 cups all-purpose flour
      • 1 1/2 tsp baking powder
      • 1/4 tsp fine salt
      • 1/2 cup unsalted butter, softened
      • 1/2 cup granulated sugar
      • 1/3 cup honey (mild, such as clover or wildflower)
      • 2 large eggs, room temperature
      • 1 tsp pure vanilla extract
      • 1/2 cup buttermilk, room temperature
      • 1–1 1/2 tsp dried culinary lavender buds, finely crushed
      • Optional: zest of 1 small lemon
    • For the honey buttercream:
      • 1/2 cup unsalted butter, softened
      • 1 3/4–2 cups powdered sugar, sifted
      • 2–3 tbsp honey
      • 1–2 tbsp heavy cream or milk
      • Pinch of salt
      • 1/2 tsp vanilla extract
    • Garnish (optional): Extra lavender buds or a drizzle of honey

    Step-by-Step Instructions

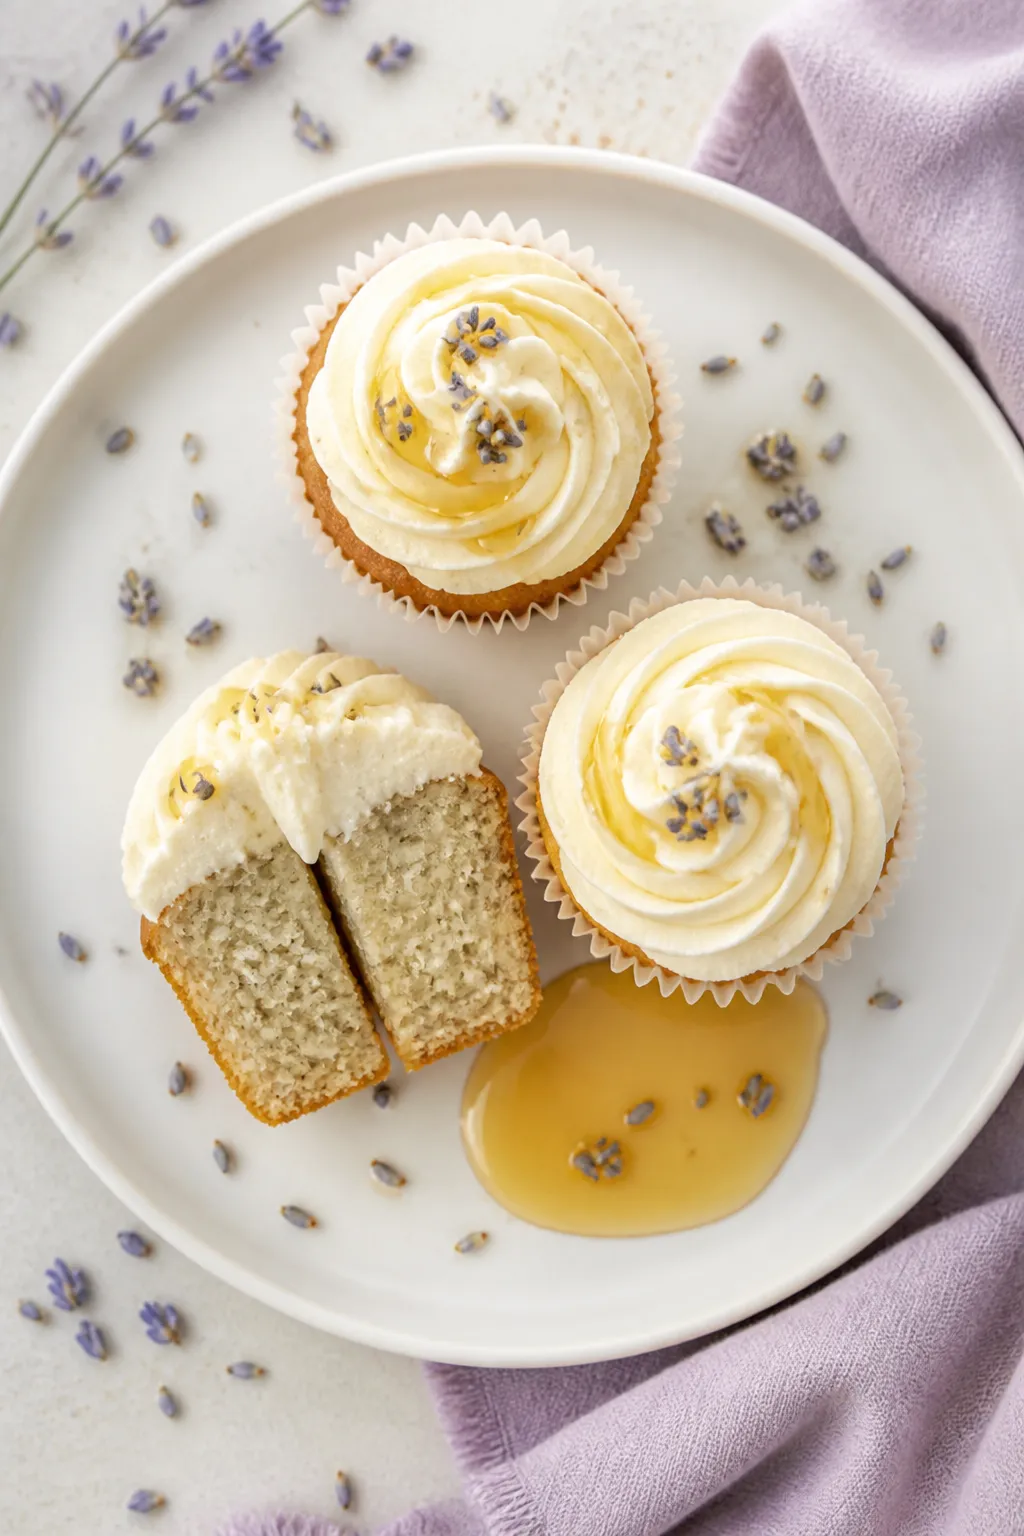
    Overhead final presentation of a trio of lavender honey cupcakes on a matte white dessert plate, eac
    1. Prep the oven and pan: Heat oven to 350°F (175°C). Line a 12-cup muffin pan with paper liners.
    2. Crush the lavender: Using a mortar and pestle or the back of a spoon, crush the dried lavender until fine.

      This releases flavor and avoids chewy bits.

    3. Whisk dry ingredients: In a bowl, whisk flour, baking powder, salt, and crushed lavender.
    4. Cream butter and sugars: In a large bowl, beat butter, granulated sugar, and honey on medium-high until pale and fluffy, about 2–3 minutes.
    5. Add eggs and vanilla: Beat in eggs one at a time, then vanilla (and lemon zest if using), scraping the bowl as needed.
    6. Combine with buttermilk: On low speed, add half the dry mix, then buttermilk, then the remaining dry mix. Mix just until combined. Do not overmix.
    7. Fill and bake: Divide batter evenly among liners (about 2/3 full).

      Bake 16–20 minutes, until tops spring back and a toothpick comes out clean.

    8. Cool completely: Let cupcakes cool in the pan 5 minutes, then transfer to a rack to cool fully.
    9. Make the frosting: Beat butter until creamy. Add powdered sugar in two additions with honey, vanilla, and a pinch of salt. Thin with cream or milk to your desired texture.

      Taste and adjust honey or salt.

    10. Frost and garnish: Swirl frosting onto cooled cupcakes. Finish with a tiny pinch of lavender or a light honey drizzle.

    Storage Instructions

    • Room temperature: Store frosted cupcakes in an airtight container for up to 2 days.
    • Refrigerator: Keep up to 5 days; bring to room temp before serving for best texture.
    • Freezer: Freeze unfrosted cupcakes up to 2 months. Thaw at room temp, then frost.

    Health Benefits

    • Honey offers antioxidants: It provides natural sweetness and flavor, so you can often use less refined sugar.
    • Lavender is soothing: Its aroma may promote relaxation and a calm mood.
    • Portion-friendly: Cupcakes help with built-in portion control compared to slicing a large cake.

    Pitfalls to Watch Out For

    • Too much lavender: Overdoing it can turn soapy.

      Stick to the measured amount and crush it well.

    • Overmixing: This can make cupcakes dense. Mix just until the flour disappears.
    • Dry cupcakes: Overbaking dries them out. Start checking at 16 minutes.
    • Runny frosting: Add more powdered sugar or chill briefly to firm it up.

    Recipe Variations

    • Lemon-Lavender: Add 1–2 tsp fresh lemon zest to the batter and 1 tsp zest to the frosting.
    • Dairy-Free: Use plant-based butter and non-dairy milk with 1 tsp vinegar in place of buttermilk.
    • Gluten-Free: Swap in a 1:1 gluten-free baking flour with xanthan gum.
    • Lavender Syrup Soak: Brush warm cupcakes with a quick syrup (equal parts water and honey, a pinch of lavender, simmered and strained) for extra moisture.
    • Whipped Honey Mascarpone: Top cooled cupcakes with a lightly sweetened mascarpone whip instead of buttercream.

    FAQ

    How strong should the lavender flavor be?

    Aim for subtle.

    You should taste a gentle floral note, not perfume. Start with 1 teaspoon crushed buds and increase slightly if desired.

    Can I use fresh lavender?

    Yes, but make sure it’s culinary lavender and use about double the amount since fresh is less concentrated. Finely chop and avoid woody stems.

    What kind of honey works best?

    Mild, light honeys like clover, acacia, or wildflower let the lavender shine.

    Strong varieties like buckwheat can overpower the cupcakes.

    Do I need buttermilk?

    It helps with tenderness and flavor. If you don’t have it, mix 1/2 cup milk with 1 1/2 teaspoons lemon juice or vinegar, rest 5 minutes, then use.

    How do I keep the cupcakes moist?

    Don’t overbake, measure flour accurately, and store airtight. A quick honey syrup brush also locks in moisture.

    Can I make them ahead?

    Yes.

    Bake the cupcakes a day ahead and store airtight. Frost close to serving, or refrigerate frosted cupcakes and bring to room temp before eating.

    In Conclusion

    These lavender honey cupcakes are soft, fragrant, and easy to make. The flavors stay delicate, the crumb stays moist, and the process is beginner-friendly.

    Whether for afternoon tea or a special treat, this recipe delivers a calm, elegant sweetness without fuss. Enjoy every gentle, floral bite.

    Lavender Honey Cupcakes Recipe – Soft, Moist & Easy to Make

    Prep Time 15 minutes
    Cook Time 20 minutes
    Total Time 35 minutes
    Servings 12 servings

    Ingredients
      

    • For the cupcakes:
    • 1 1/2 cups all-purpose flour
    • 1 1/2 tsp baking powder
    • 1/4 tsp fine salt
    • 1/2 cup unsalted butter, softened
    • 1/2 cup granulated sugar
    • 1/3 cup honey (mild, such as clover or wildflower)
    • 2 large eggs, room temperature
    • 1 tsp pure vanilla extract
    • 1/2 cup buttermilk, room temperature
    • 1–1 1/2 tsp dried culinary lavender buds, finely crushed
    • Optional: zest of 1 small lemon
    • For the honey buttercream:
    • 1/2 cup unsalted butter, softened
    • 1 3/4–2 cups powdered sugar, sifted
    • 2–3 tbsp honey
    • 1–2 tbsp heavy cream or milk
    • Pinch of salt
    • 1/2 tsp vanilla extract
    • Garnish (optional): Extra lavender buds or a drizzle of honey

    Instructions
     

    • Prep the oven and pan: Heat oven to 350°F (175°C). Line a 12-cup muffin pan with paper liners.
    • Crush the lavender: Using a mortar and pestle or the back of a spoon, crush the dried lavender until fine. This releases flavor and avoids chewy bits.
    • Whisk dry ingredients: In a bowl, whisk flour, baking powder, salt, and crushed lavender.
    • Cream butter and sugars: In a large bowl, beat butter, granulated sugar, and honey on medium-high until pale and fluffy, about 2–3 minutes.
    • Add eggs and vanilla: Beat in eggs one at a time, then vanilla (and lemon zest if using), scraping the bowl as needed.
    • Combine with buttermilk: On low speed, add half the dry mix, then buttermilk, then the remaining dry mix. Mix just until combined. Do not overmix.
    • Fill and bake: Divide batter evenly among liners (about 2/3 full). Bake 16–20 minutes, until tops spring back and a toothpick comes out clean.
    • Cool completely: Let cupcakes cool in the pan 5 minutes, then transfer to a rack to cool fully.
    • Make the frosting: Beat butter until creamy. Add powdered sugar in two additions with honey, vanilla, and a pinch of salt. Thin with cream or milk to your desired texture. Taste and adjust honey or salt.
    • Frost and garnish: Swirl frosting onto cooled cupcakes. Finish with a tiny pinch of lavender or a light honey drizzle.
  • American Buttercream Frosting – Simple, Sweet, and Reliable

    American Buttercream Frosting – Simple, Sweet, and Reliable

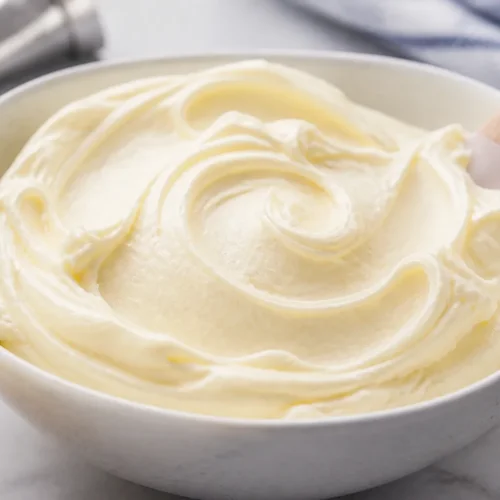
    American buttercream is the classic frosting most of us grew up with: sweet, creamy, and easy to whip up with pantry staples. It spreads smoothly, pipes beautifully, and holds its shape without any tricky techniques. If you’re frosting cupcakes for a party or finishing a birthday cake, this is the no-fuss recipe you can count on.

    You only need a few ingredients and about 10 minutes. Let’s make a batch that tastes great and looks polished, every time.

    Why This Recipe Works

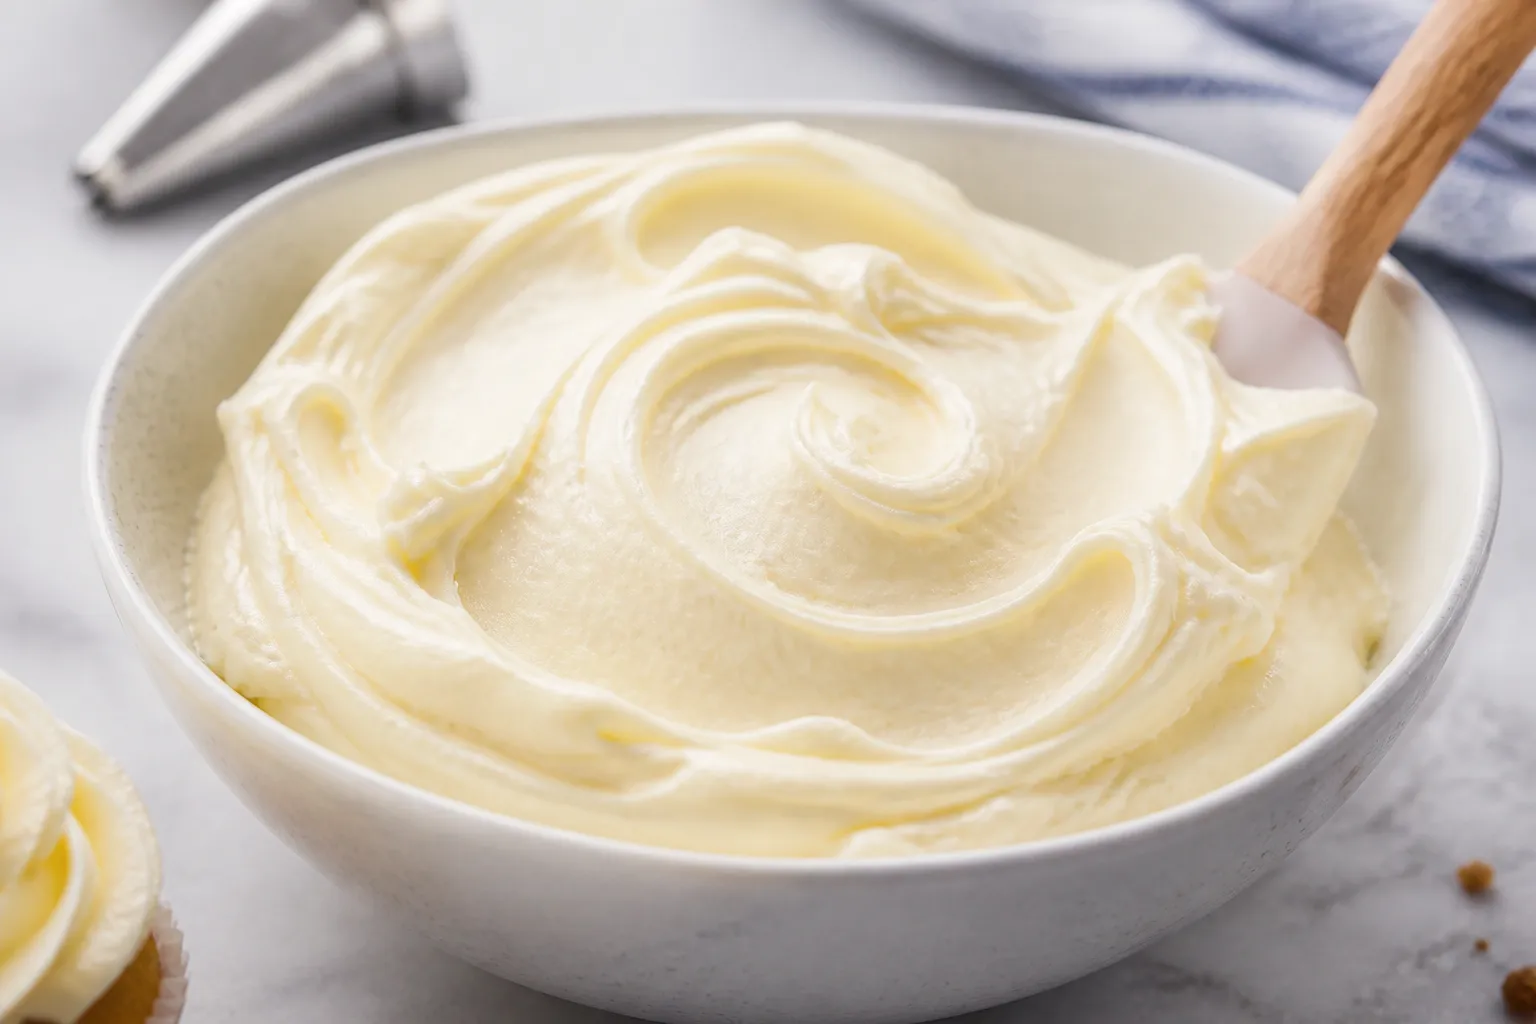
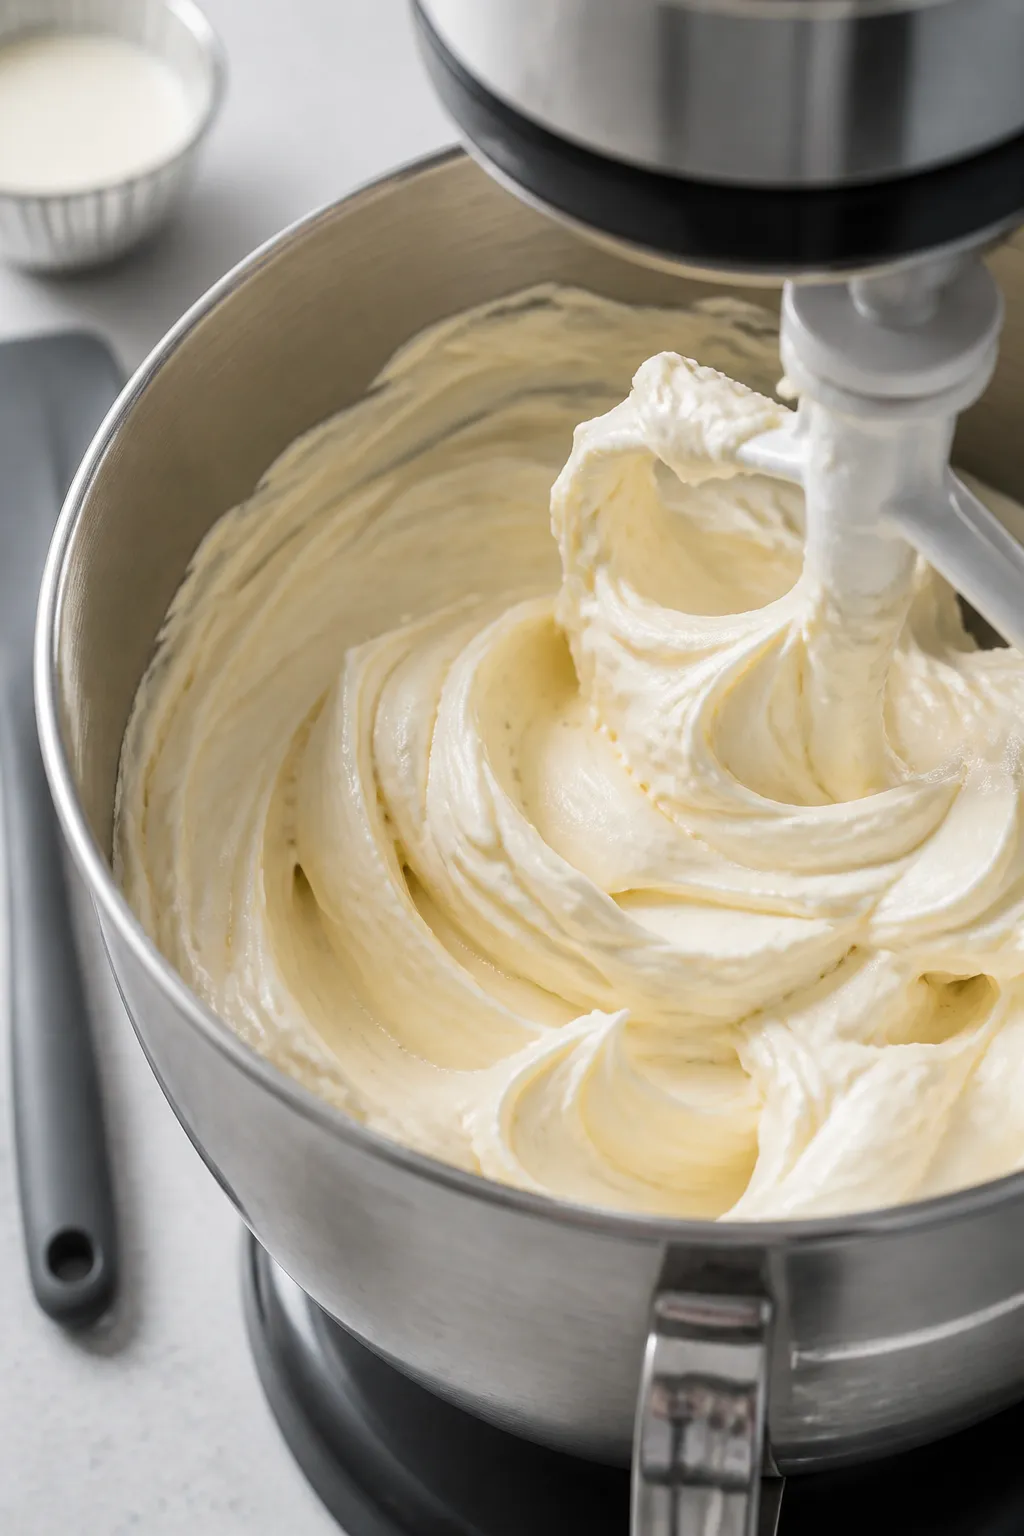
    Close-up detail: Silky American buttercream mid-whip in a stand mixer bowl using the paddle attachme
    • High butter-to-sugar balance: The ratio keeps it rich without feeling greasy, and sweet without being cloying.
    • Heavy cream for texture: Cream loosens the frosting so it’s fluffy and easy to spread, with a silky finish.
    • Salt and vanilla: A pinch of salt and pure vanilla extract round out the sweetness for a more grown-up flavor.
    • Quick and stable: No cooking or tempering—just whip and use. It pipes well and holds up at room temperature.

    Shopping List

    • Unsalted butter (1 cup/226 g), softened to room temperature
    • Powdered sugar (also called confectioners’ sugar), 4 cups/480 g, sifted
    • Heavy cream or whole milk, 2–4 tablespoons
    • Pure vanilla extract, 2 teaspoons
    • Fine salt, 1/8–1/4 teaspoon, to taste
    • Optional add-ins: Almond extract, cocoa powder, lemon zest, gel food coloring

    Step-by-Step Instructions

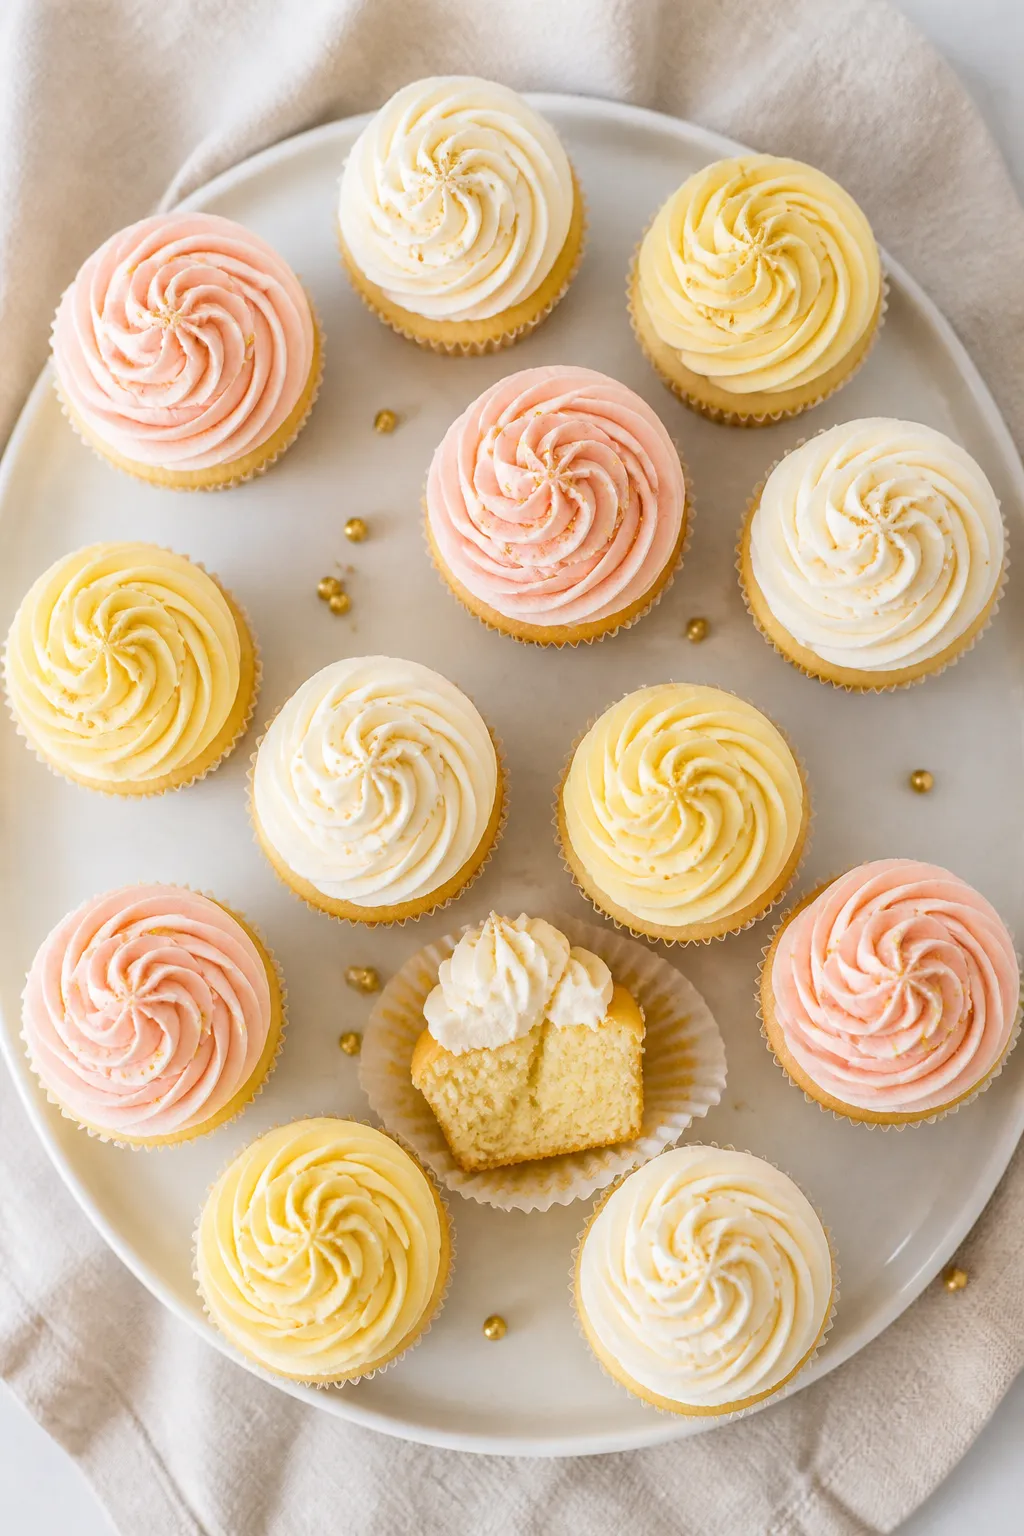
    Final dish, tasty top view: Overhead shot of a dozen vanilla cupcakes topped with tall, clean butter
    1. Soften the butter: Let butter sit at room temperature until it yields to a gentle press but isn’t greasy.

      Slightly cool butter whips best.

    2. Beat the butter: In a stand mixer with the paddle (or a hand mixer), beat butter on medium for 2–3 minutes until pale and creamy. Scrape the bowl.
    3. Add sugar gradually: With the mixer on low, add powdered sugar 1 cup at a time. Mix on low until mostly incorporated to avoid a sugar cloud.
    4. Flavor it: Add vanilla and salt.

      Mix on low to combine.

    5. Adjust consistency: Add 2 tablespoons cream. Beat on medium-high for 1–2 minutes until fluffy. If it’s too thick, add more cream 1 teaspoon at a time.

      If too loose, add a spoonful of sugar.

    6. Whip and smooth: Increase to medium-high and whip for 30–60 seconds for extra lightness. Don’t over-beat or it can trap too much air and create bubbles.
    7. Taste and tweak: Adjust salt or vanilla. For chocolate, beat in 1/3–1/2 cup sifted cocoa powder and add an extra splash of cream.
    8. Use or store: Frost your cooled cake or cupcakes right away, or cover and store as noted below.

    Keeping It Fresh

    • Room temperature: Covered, it’s fine for 1–2 days if your kitchen is cool (below 72°F/22°C).
    • Refrigerator: Store in an airtight container up to 1 week.

      Bring to room temp and re-whip briefly before using.

    • Freezer: Freeze up to 3 months. Thaw overnight in the fridge, then bring to room temp and beat for 30–60 seconds.
    • Crusting: American buttercream lightly crusts on the surface, which helps with smoothing and transport.

    Benefits of This Recipe

    • Beginner-friendly: No eggs, no thermometer, no stress.
    • Customizable: Switch extracts, add cocoa, swirl in citrus zest, or tint with gel colors.
    • Reliable for decorating: Holds sharp edges for piping and buttercream flowers.
    • Budget-conscious: Common ingredients, no specialty items needed.

    Pitfalls to Watch Out For

    • Greasy feel: Butter too warm can make frosting slick. Aim for cool room temperature butter.
    • Gritty texture: Unsifted sugar or under-mixing can leave specks.

      Sift and beat long enough to dissolve.

    • Air bubbles: Over-whipping or using a whisk attachment introduces excess air. Use a paddle and finish on low to smooth.
    • Too sweet: Balance with a pinch more salt, a splash of vanilla, or a tablespoon of cream cheese for tang.

    Alternatives

    • Chocolate American Buttercream: Add 1/3–1/2 cup sifted cocoa powder and a bit more cream.
    • Almond or Lemon: Swap half the vanilla for almond extract, or add lemon zest and a teaspoon of lemon juice.
    • Cream Cheese Buttercream: Replace 4 ounces of butter with cream cheese for a softer, tangier frosting.
    • Swiss Meringue Buttercream: For a silkier, less sweet option, make a cooked egg-white meringue base and add butter.

    FAQ

    How much frosting does this make?

    About 3 cups, enough for 12–16 cupcakes with simple swirls or a 2-layer 8-inch cake with a light crumb coat and finish.

    Can I use salted butter?

    Yes. If using salted butter, skip the added salt and adjust to taste at the end.

    Why is my frosting separating?

    Butter may be too warm.

    Chill the bowl for 10 minutes, then beat again. If too cold and stiff, let it sit at room temperature and re-whip.

    Is powdered sugar the same as icing sugar?

    Yes. Use powdered/confectioners’/icing sugar with cornstarch added.

    Sifting helps avoid lumps.

    Can I color this frosting?

    Use gel food coloring for vivid shades without thinning the frosting. Add a little at a time and mix thoroughly.

    Will it hold up in heat?

    It’s stable at cool room temps but softens in warm weather. For outdoor events, keep desserts chilled and set out shortly before serving.

    Can I make it less sweet?

    Use a pinch more salt, add 1–2 tablespoons of cream cheese, or switch to Swiss meringue buttercream for a less-sweet style.

    Wrapping Up

    American buttercream frosting is the dependable classic: quick to make, easy to spread, and perfect for decorating.

    With the right balance of butter, sugar, cream, and vanilla, you get a smooth, flavorful frosting that works for any occasion. Keep this base recipe on hand, then tweak flavors and colors to match your cake and your crowd.

    American Buttercream Frosting – Simple, Sweet, and Reliable

    Prep Time 10 minutes
    Total Time 10 minutes
    Servings 24 servings

    Ingredients
      

    • Unsalted butter (1 cup/226 g), softened to room temperature
    • Powdered sugar (also called confectioners’ sugar), 4 cups/480 g, sifted
    • Heavy cream or whole milk, 2–4 tablespoons
    • Pure vanilla extract, 2 teaspoons
    • Fine salt, 1/8–1/4 teaspoon, to taste
    • Optional add-ins: Almond extract, cocoa powder, lemon zest, gel food coloring

    Instructions
     

    • Soften the butter: Let butter sit at room temperature until it yields to a gentle press but isn’t greasy. Slightly cool butter whips best.
    • Beat the butter: In a stand mixer with the paddle (or a hand mixer), beat butter on medium for 2–3 minutes until pale and creamy. Scrape the bowl.
    • Add sugar gradually: With the mixer on low, add powdered sugar 1 cup at a time. Mix on low until mostly incorporated to avoid a sugar cloud.
    • Flavor it: Add vanilla and salt. Mix on low to combine.
    • Adjust consistency: Add 2 tablespoons cream. Beat on medium-high for 1–2 minutes until fluffy. If it’s too thick, add more cream 1 teaspoon at a time. If too loose, add a spoonful of sugar.
    • Whip and smooth: Increase to medium-high and whip for 30–60 seconds for extra lightness. Don’t over-beat or it can trap too much air and create bubbles.
    • Taste and tweak: Adjust salt or vanilla. For chocolate, beat in 1/3–1/2 cup sifted cocoa powder and add an extra splash of cream.
    • Use or store: Frost your cooled cake or cupcakes right away, or cover and store as noted below.
  • Easy Gluten Free Carrot Cake Recipe That Always Turns Out Perfect ⭐ – Soft, Moist, and Foolproof

    Easy Gluten Free Carrot Cake Recipe That Always Turns Out Perfect ⭐ – Soft, Moist, and Foolproof

    This carrot cake is the kind you make once and keep making forever. It’s tender, perfectly spiced, and topped with creamy frosting that melts into every slice. Even if you’re new to gluten-free baking, this one is simple and dependable.

    No hard-to-find ingredients, no tricky steps—just a joyful, bakery-style cake that tastes like a celebration. Make it for birthdays, brunch, or a cozy weekend treat.

    Why This Recipe Works

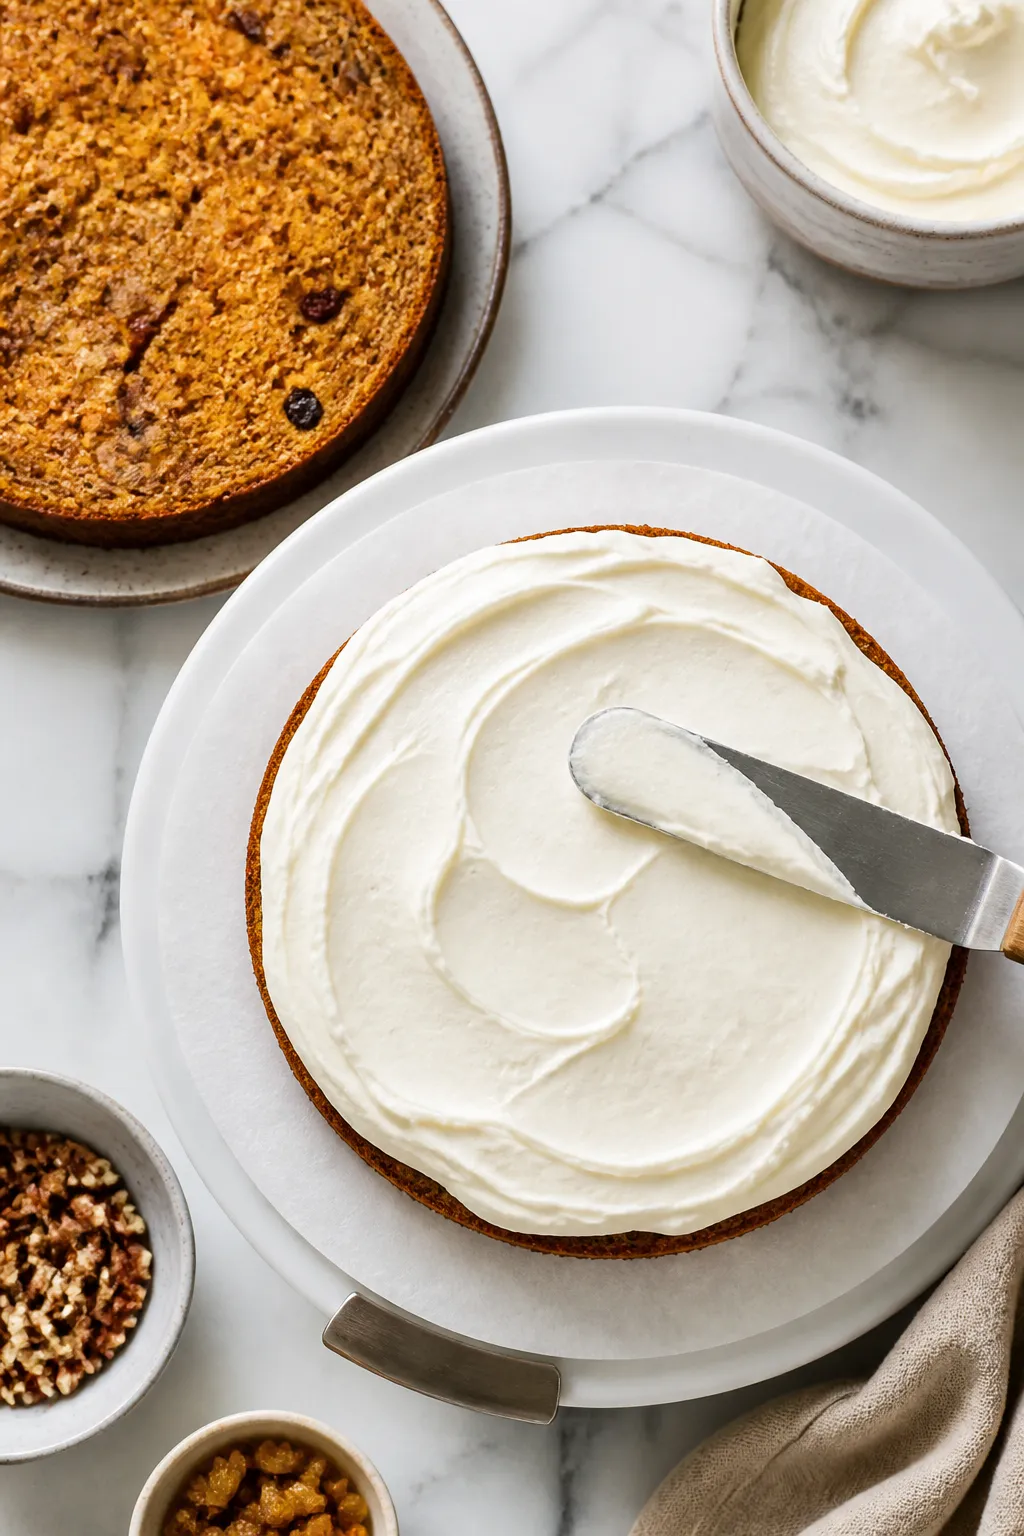
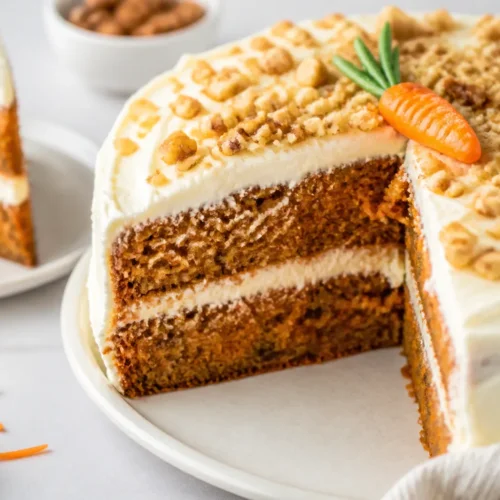
    Overhead shot of freshly frosted gluten-free carrot cake layer being assembled on a turntable: one 8
    • Simple flour blend: Using a quality gluten-free all-purpose blend with xanthan gum gives the cake a soft, springy crumb.
    • Moisture from carrots and oil: Freshly grated carrots and neutral oil keep it tender for days without turning dense.
    • Balanced sweetness: Brown sugar adds depth while keeping the cake moist, and cinnamon brings classic carrot cake flavor.
    • No mixer needed for the batter: Two bowls and a whisk—easy cleanup and consistent results.
    • Foolproof structure: Eggs and a touch of yogurt help the cake rise evenly and stay soft.

    Shopping List

    • Dry Ingredients:
      • Gluten-free all-purpose flour blend (with xanthan gum) – 2 cups (260 g)
      • Baking powder – 2 teaspoons
      • Baking soda – 1/2 teaspoon
      • Fine sea salt – 1/2 teaspoon
      • Ground cinnamon – 2 teaspoons
      • Ground nutmeg – 1/4 teaspoon (optional)
    • Wet Ingredients:
      • Light brown sugar – 3/4 cup (packed)
      • Granulated sugar – 1/2 cup
      • Large eggs – 3
      • Neutral oil (avocado, canola, or light olive) – 3/4 cup
      • Plain yogurt or sour cream – 1/2 cup
      • Vanilla extract – 2 teaspoons
      • Fresh carrots, finely grated – 2 cups (about 3–4 medium)
    • Optional Mix-Ins:
      • Crushed pineapple (well drained) – 1/2 cup
      • Chopped walnuts or pecans – 1/2 cup
      • Raisins – 1/2 cup
    • Cream Cheese Frosting:
      • Cream cheese, softened – 8 oz (225 g)
      • Unsalted butter, softened – 1/2 cup (115 g)
      • Powdered sugar – 2 to 2 1/2 cups
      • Vanilla extract – 1 teaspoon
      • Pinch of salt

    Step-by-Step Instructions

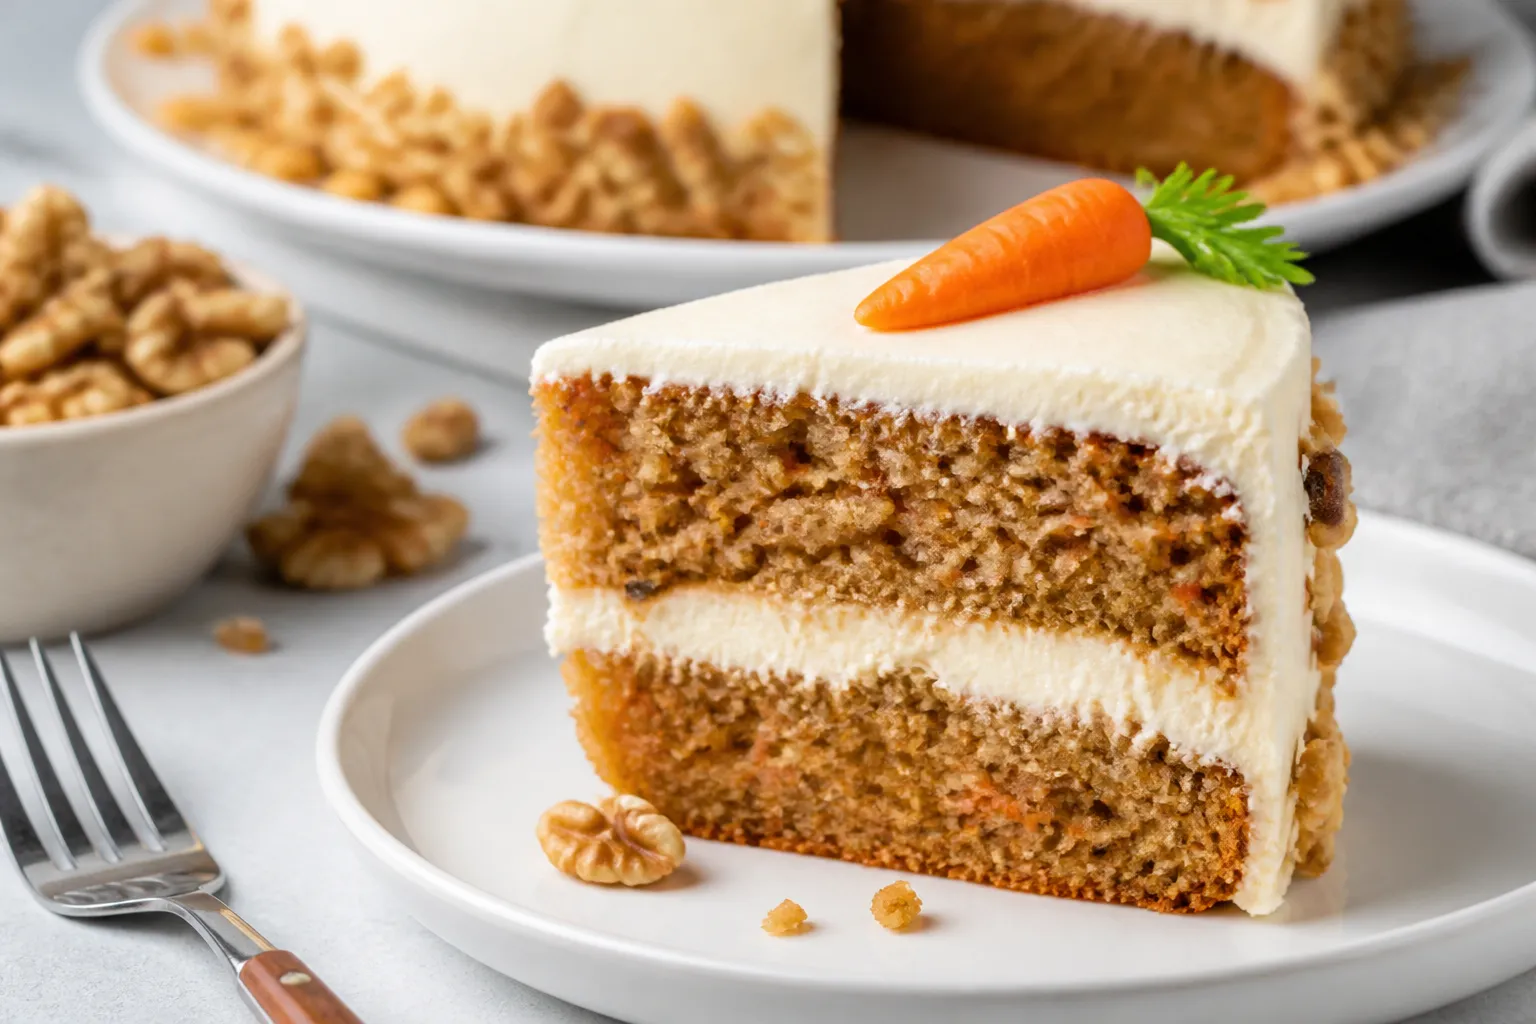
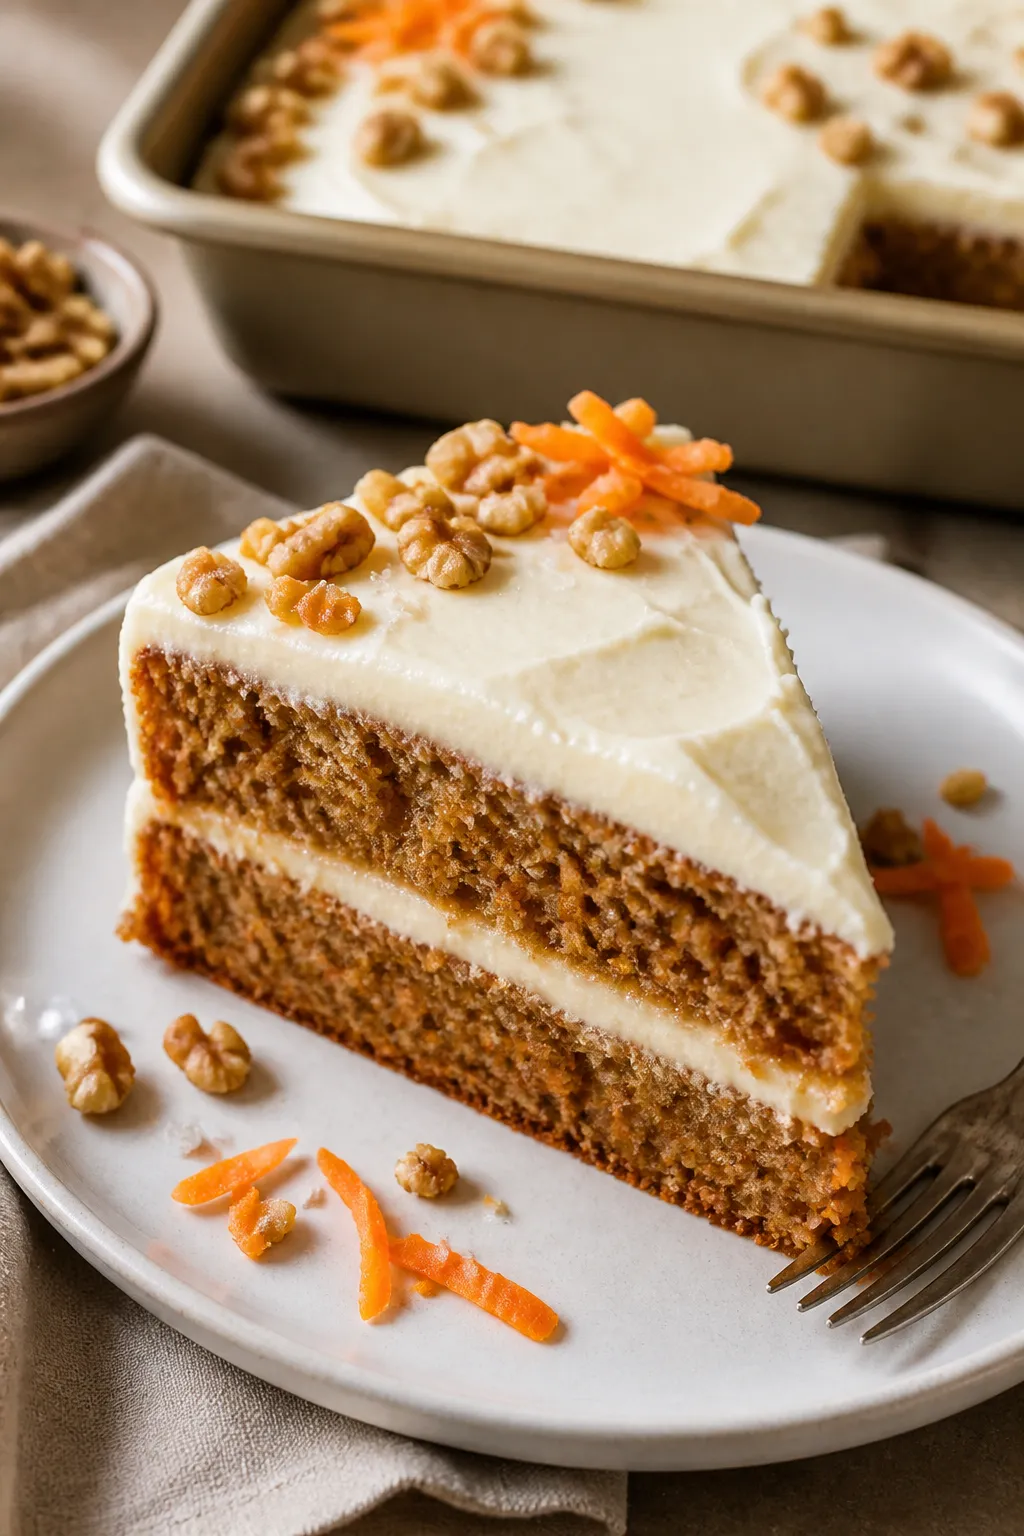
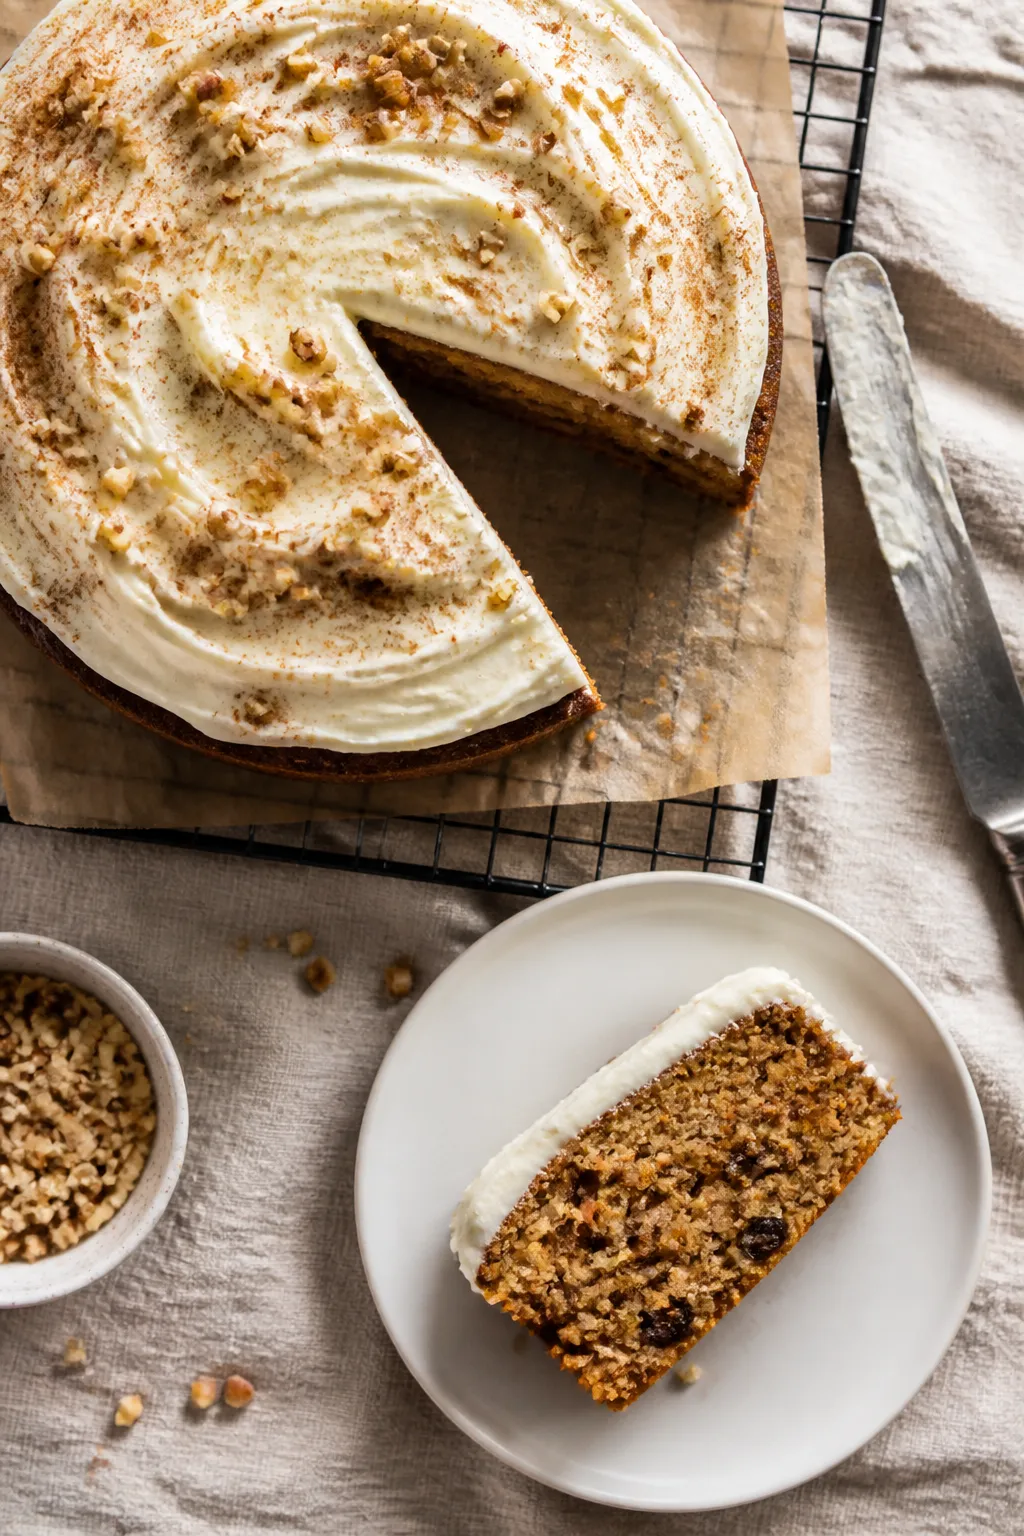
    Close-up, slightly angled top-down hero shot of the finished gluten-free carrot cake slice on a matt
    1. Prep: Heat oven to 350°F (175°C). Grease and line two 8-inch round pans or one 9×13-inch pan with parchment.

      Lightly grease the parchment.

    2. Mix dry ingredients: In a large bowl, whisk flour, baking powder, baking soda, salt, cinnamon, and nutmeg until evenly combined.
    3. Mix wet ingredients: In another bowl, whisk brown sugar, granulated sugar, eggs, oil, yogurt, and vanilla until smooth and slightly thick.
    4. Combine: Pour wet into dry. Stir with a spatula until just combined. Do not overmix.
    5. Fold in carrots and mix-ins: Add grated carrots and any extras (pineapple, nuts, raisins).

      Fold gently until evenly distributed.

    6. Bake: Divide batter between pans. Bake 22–28 minutes for rounds or 30–35 minutes for a 9×13. The cake is done when the center springs back and a toothpick comes out with a few moist crumbs.
    7. Cool: Let cakes cool in the pan 10 minutes, then transfer to a wire rack to cool completely before frosting.
    8. Make frosting: Beat cream cheese and butter until fluffy.

      Add powdered sugar, vanilla, and salt. Beat until smooth and spreadable.

    9. Frost: For layers, spread frosting between the layers and over the top and sides. For a 9×13, frost the top generously.

      Chill 15–20 minutes to set clean slices.

    Storage Instructions

    • Refrigerate: Cover and refrigerate for up to 5 days. The flavor deepens by day two.
    • Freeze: Wrap unfrosted layers tightly and freeze up to 2 months. Thaw in the fridge overnight, then frost.
    • Leftover slices: Store in an airtight container.

      Let sit at room temperature 15–20 minutes before serving for best texture.

    Why This is Good for You

    • Carrots add nutrients: They bring beta-carotene and fiber without weighing down the crumb.
    • Balanced fats: Oil keeps the cake moist, so you can enjoy a smaller portion that still feels satisfying.
    • Gluten-free friendly: A reliable flour blend means more people can enjoy dessert together without compromise.

    Common Mistakes to Avoid

    • Overmixing the batter: This can make the cake tough. Stir until ingredients are just combined.
    • Using coarse carrot shreds: Finely grate the carrots so they blend smoothly and release moisture evenly.
    • Skipping parchment: Gluten-free cakes are tender; parchment prevents sticking and broken layers.
    • Too much pineapple: If using, drain well and measure accurately or the cake may be soggy.
    • Frosting warm cake: Cool completely or the frosting will slide and melt.

    Alternatives

    • Dairy-free: Use dairy-free yogurt and vegan cream cheese and butter. The cake texture stays soft.
    • Lower sugar: Reduce granulated sugar by 1/4 cup and use 2 cups powdered sugar in frosting.

      Still sweet, just lighter.

    • Spice it up: Add 1/2 teaspoon ground ginger or a pinch of cloves for a warmer profile.
    • Cupcakes: Bake 18–22 minutes for about 18–20 cupcakes. Great for portion control and parties.
    • No nuts: Skip them or swap with pumpkin seeds for crunch.

    FAQ

    Can I make this cake ahead?

    Yes. Bake the layers a day in advance, wrap well, and refrigerate.

    Frost the day you plan to serve for best texture.

    What if my flour blend doesn’t have xanthan gum?

    Add 1 teaspoon xanthan gum to the dry ingredients to help the cake hold together and stay tender.

    Can I use coconut sugar?

    You can replace the granulated sugar with coconut sugar. Expect a slightly deeper color and a mild caramel note.

    Do I have to peel the carrots?

    Peeling is optional if the carrots are fresh and clean. If the skin is tough or bitter, peel for a smoother flavor.

    How do I prevent a domed top?

    Bake at the correct temperature, avoid overmixing, and rotate pans halfway through.

    You can also level cooled layers with a serrated knife.

    Is this recipe safe for celiac disease?

    Use a certified gluten-free flour blend and check that all add-ins (nuts, spices, baking powder) are labeled gluten-free to avoid cross-contact.

    Can I halve the recipe?

    Yes. Bake in one 8-inch round or an 8-inch square pan. Start checking for doneness around 20 minutes.

    In Conclusion

    This gluten-free carrot cake is soft, fragrant, and reliably delicious, whether you bake it as a layer cake or a simple sheet cake.

    With everyday ingredients and clear steps, it turns out moist and tender every time. Keep the frosting classic, add your own spin with mix-ins, and enjoy a slice that tastes like home.

    Easy Gluten Free Carrot Cake Recipe That Always Turns Out Perfect ⭐ – Soft, Moist, and Foolproof

    Prep Time 15 minutes
    Cook Time 35 minutes
    Total Time 50 minutes
    Servings 12 servings

    Ingredients
      

    • Dry Ingredients: Gluten-free all-purpose flour blend (with xanthan gum) – 2 cups (260 g)
    • Baking powder – 2 teaspoons
    • Baking soda – 1/2 teaspoon
    • Fine sea salt – 1/2 teaspoon
    • Ground cinnamon – 2 teaspoons
    • Ground nutmeg – 1/4 teaspoon (optional)
    • Wet Ingredients: Light brown sugar – 3/4 cup (packed)
    • Granulated sugar – 1/2 cup
    • Large eggs – 3
    • Neutral oil (avocado, canola, or light olive) – 3/4 cup
    • Plain yogurt or sour cream – 1/2 cup
    • Vanilla extract – 2 teaspoons
    • Fresh carrots, finely grated – 2 cups (about 3–4 medium)
    • Optional Mix-Ins: Crushed pineapple (well drained) – 1/2 cup
    • Chopped walnuts or pecans – 1/2 cup
    • Raisins – 1/2 cup
    • Cream Cheese Frosting: Cream cheese, softened – 8 oz (225 g)
    • Unsalted butter, softened – 1/2 cup (115 g)
    • Powdered sugar – 2 to 2 1/2 cups
    • Vanilla extract – 1 teaspoon
    • Pinch of salt

    Instructions
     

    • Prep: Heat oven to 350°F (175°C). Grease and line two 8-inch round pans or one 9×13-inch pan with parchment. Lightly grease the parchment.
    • Mix dry ingredients: In a large bowl, whisk flour, baking powder, baking soda, salt, cinnamon, and nutmeg until evenly combined.
    • Mix wet ingredients: In another bowl, whisk brown sugar, granulated sugar, eggs, oil, yogurt, and vanilla until smooth and slightly thick.
    • Combine: Pour wet into dry. Stir with a spatula until just combined. Do not overmix.
    • Fold in carrots and mix-ins: Add grated carrots and any extras (pineapple, nuts, raisins). Fold gently until evenly distributed.
    • Bake: Divide batter between pans. Bake 22–28 minutes for rounds or 30–35 minutes for a 9×13. The cake is done when the center springs back and a toothpick comes out with a few moist crumbs.
    • Cool: Let cakes cool in the pan 10 minutes, then transfer to a wire rack to cool completely before frosting.
    • Make frosting: Beat cream cheese and butter until fluffy. Add powdered sugar, vanilla, and salt. Beat until smooth and spreadable.
    • Frost: For layers, spread frosting between the layers and over the top and sides. For a 9×13, frost the top generously. Chill 15–20 minutes to set clean slices.
  • The Best Gluten Free Vegan Carrot Cake Recipe You’ll Make Again ⭐ – Moist, Cozy, and Crowd-Pleasing

    The Best Gluten Free Vegan Carrot Cake Recipe You’ll Make Again ⭐ – Moist, Cozy, and Crowd-Pleasing

    This carrot cake checks every box: tender crumb, warm spices, and a creamy frosting that tastes like the classic version. It’s completely gluten free and vegan, but you’d never guess. The batter comes together with pantry staples, and the texture is soft without being gummy.

    Whether it’s for a celebration or a cozy weekend bake, this is the kind of recipe you’ll bookmark and make on repeat.

    What Makes This Special

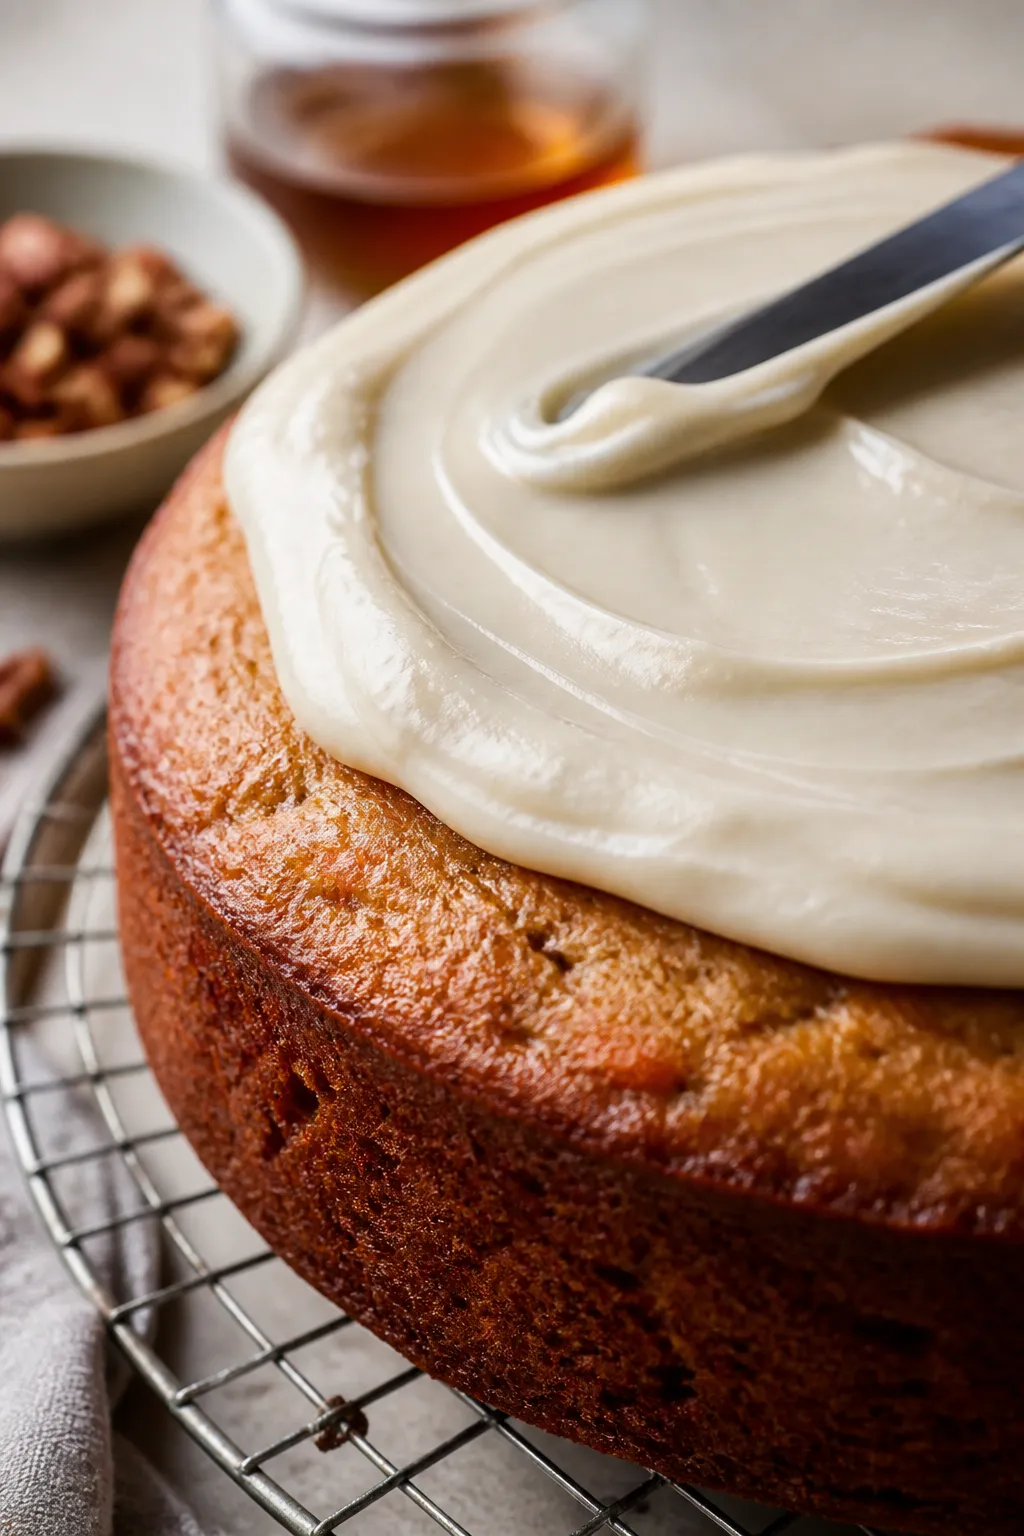
    Overhead shot of a freshly frosted gluten free vegan carrot cake on a parchment-lined cooling rack,
    • Perfect texture: Moist, fluffy, and not dense or gritty.
    • No hard-to-find ingredients: Uses a simple gluten free flour blend and everyday dairy-free staples.
    • Balanced sweetness: Maple and brown sugar give depth without making it cloying.
    • Foolproof method: Clear steps prevent gumminess or sinking centers.
    • Make-ahead friendly: The flavor actually improves the next day.

    What You’ll Need

    • Dry Ingredients
      • 2 cups gluten free all-purpose flour blend (with xanthan gum; if your blend has none, add 1/2 tsp xanthan)
      • 1 cup light brown sugar, packed
      • 2 tsp baking powder
      • 1/2 tsp baking soda
      • 1/2 tsp fine sea salt
      • 2 tsp ground cinnamon
      • 1/2 tsp ground nutmeg
      • 1/4 tsp ground ginger
    • Wet Ingredients
      • 1 cup unsweetened non-dairy milk (almond, oat, or soy)
      • 2 tsp apple cider vinegar or lemon juice
      • 1/3 cup neutral oil (avocado, grapeseed, or light olive)
      • 1/4 cup pure maple syrup
      • 2 tsp vanilla extract
      • 1/2 cup unsweetened applesauce
    • Add-Ins
      • 2 cups finely grated carrots (tightly packed, about 3–4 medium)
      • 1/2 cup chopped walnuts or pecans (optional)
      • 1/2 cup raisins (optional)
    • Vegan Cream Cheese Frosting
      • 8 oz vegan cream cheese, chilled
      • 1/2 cup vegan butter, slightly softened
      • 2 1/2–3 cups powdered sugar, sifted
      • 1 tsp vanilla extract
      • Pinch of salt

    Instructions

    Close-up process shot of the baked carrot cake just out of the pan on a wire rack, surface slightly
    1. Preheat the oven to 350°F (175°C). Line a 9-inch round cake pan (or 8×8 square) with parchment and lightly grease the sides.
    2. In a small bowl, stir the non-dairy milk and vinegar. Let it sit 5 minutes to make a quick vegan “buttermilk”.
    3. In a large bowl, whisk flour, brown sugar, baking powder, baking soda, salt, cinnamon, nutmeg, and ginger until no lumps remain.
    4. Whisk the buttermilk, oil, maple syrup, vanilla, and applesauce together.

      Pour into the dry ingredients. Mix with a spatula until just combined. Do not overmix.

    5. Fold in grated carrots and any add-ins. The batter will be thick—this is right.
    6. Transfer to the pan and smooth the top.

      Tap the pan gently on the counter to release air bubbles.

    7. Bake for 35–42 minutes, until the center is set and a toothpick comes out with a few moist crumbs.
    8. Cool in the pan 15 minutes, then lift out to a rack to cool completely before frosting.
    9. Make the frosting: Beat vegan butter until smooth. Add vegan cream cheese and beat until just combined. Gradually add powdered sugar, vanilla, and salt.

      Beat until creamy and spreadable. Chill 15 minutes if too soft.

    10. Frost the cooled cake. Sprinkle with chopped nuts if you like. Slice and enjoy.

    Storage Instructions

    • Refrigerator: Store covered for 4–5 days.

      The crumb stays moist.

    • Freezer: Freeze slices (frosted or unfrosted) tightly wrapped for up to 2 months. Thaw overnight in the fridge.
    • Make ahead: Bake the cake a day in advance, wrap well, and frost just before serving.

    Why This is Good for You

    • Carrots bring beta-carotene and fiber for a feel-good treat.
    • Plant-based fats support a tender crumb without dairy.
    • Lower refined sugar load thanks to applesauce and maple syrup adding moisture and flavor.
    • Gluten free means more people at the table can enjoy it without compromise.

    Common Mistakes to Avoid

    • Overmixing: This creates a gummy texture. Stir until the flour streaks vanish, then stop.
    • Too-wet carrots: If your carrots are very juicy, gently squeeze a handful to avoid excess moisture.
    • Cutting too soon: Let the cake cool fully or it may crumble and the frosting will melt.
    • Wrong flour blend: Use a trusted gluten free all-purpose blend designed for baking.
    • Overbaking: Check at 35 minutes.

      A few moist crumbs on the tester are perfect.

    Variations You Can Try

    • Layer cake: Bake in two 6-inch pans for 25–30 minutes and stack with frosting.
    • Pineapple twist: Fold in 1/3 cup well-drained crushed pineapple for extra moisture.
    • Coconut flair: Add 1/2 cup shredded coconut and a pinch of cardamom.
    • Nut-free: Skip nuts and use raisins or chopped dates for chew.
    • Spice-forward: Increase cinnamon to 2 1/2 tsp and add a pinch of cloves.

    FAQ

    Can I make this without xanthan gum?

    If your blend has no xanthan, add 1/2 teaspoon to help with structure. Without it, the cake may crumble. Some blends use psyllium or guar; follow the blend’s guidance.

    Can I use coconut sugar instead of brown sugar?

    Yes.

    The cake will be slightly less moist and a bit darker, but still delicious. Keep the maple syrup for balance.

    What’s the best oil to use?

    A neutral oil like avocado or grapeseed works best. Light olive oil is fine, but avoid strong flavors like extra-virgin olive oil.

    Can I bake this as cupcakes?

    Yes.

    Divide into 12 liners and bake 18–22 minutes. Start checking at 18 minutes.

    How do I prevent a sinking middle?

    Measure accurately, don’t overmix, and bake until the center springs back. Also avoid opening the oven in the first 25 minutes.

    In Conclusion

    This gluten free vegan carrot cake delivers everything you love about the classic—moist crumb, warm spice, and luscious frosting—without complicated steps.

    It’s weeknight-easy and celebration-worthy. Keep this one in your rotation, because once you make it, you’ll want it again and again. Enjoy every slice.

    The Best Gluten Free Vegan Carrot Cake Recipe You’ll Make Again ⭐ – Moist, Cozy, and Crowd-Pleasing

    Prep Time 15 minutes
    Cook Time 35 minutes
    Total Time 50 minutes
    Servings 12 servings

    Ingredients
      

    • Dry Ingredients 2 cups gluten free all-purpose flour blend (with xanthan gum; if your blend has none, add 1/2 tsp xanthan)
    • 1 cup light brown sugar, packed
    • 2 tsp baking powder
    • 1/2 tsp baking soda
    • 1/2 tsp fine sea salt
    • 2 tsp ground cinnamon
    • 1/2 tsp ground nutmeg
    • 1/4 tsp ground ginger
    • Wet Ingredients 1 cup unsweetened non-dairy milk (almond, oat, or soy)
    • 2 tsp apple cider vinegar or lemon juice
    • 1/3 cup neutral oil (avocado, grapeseed, or light olive)
    • 1/4 cup pure maple syrup
    • 2 tsp vanilla extract
    • 1/2 cup unsweetened applesauce
    • Add-Ins 2 cups finely grated carrots (tightly packed, about 3–4 medium)
    • 1/2 cup chopped walnuts or pecans (optional)
    • 1/2 cup raisins (optional)
    • Vegan Cream Cheese Frosting 8 oz vegan cream cheese, chilled
    • 1/2 cup vegan butter, slightly softened
    • 2 1/2–3 cups powdered sugar, sifted
    • 1 tsp vanilla extract
    • Pinch of salt

    Instructions
     

    • Preheat the oven to 350°F (175°C). Line a 9-inch round cake pan (or 8×8 square) with parchment and lightly grease the sides.
    • In a small bowl, stir the non-dairy milk and vinegar. Let it sit 5 minutes to make a quick vegan “buttermilk”.
    • In a large bowl, whisk flour, brown sugar, baking powder, baking soda, salt, cinnamon, nutmeg, and ginger until no lumps remain.
    • Whisk the buttermilk, oil, maple syrup, vanilla, and applesauce together. Pour into the dry ingredients. Mix with a spatula until just combined. Do not overmix.
    • Fold in grated carrots and any add-ins. The batter will be thick—this is right.
    • Transfer to the pan and smooth the top. Tap the pan gently on the counter to release air bubbles.
    • Bake for 35–42 minutes, until the center is set and a toothpick comes out with a few moist crumbs.
    • Cool in the pan 15 minutes, then lift out to a rack to cool completely before frosting.
    • Make the frosting: Beat vegan butter until smooth. Add vegan cream cheese and beat until just combined. Gradually add powdered sugar, vanilla, and salt. Beat until creamy and spreadable. Chill 15 minutes if too soft.
    • Frost the cooled cake. Sprinkle with chopped nuts if you like. Slice and enjoy.
  • Soft Gluten Free Carrot Cake Cookies with Cream Cheese Frosting ⭐ – Tender, Cozy, and Easy

    Soft Gluten Free Carrot Cake Cookies with Cream Cheese Frosting ⭐ – Tender, Cozy, and Easy

    These carrot cake cookies are everything you love about classic carrot cake, but in soft, handheld form. They’re tender, gently spiced, and topped with a silky cream cheese frosting that melts in your mouth. No gritty texture here—just a soft, cakey crumb that happens to be gluten free.

    They’re perfect for spring gatherings, lunchbox treats, or a sweet afternoon pick-me-up. Make a batch, frost them generously, and watch them disappear.

    What Makes This Recipe So Good

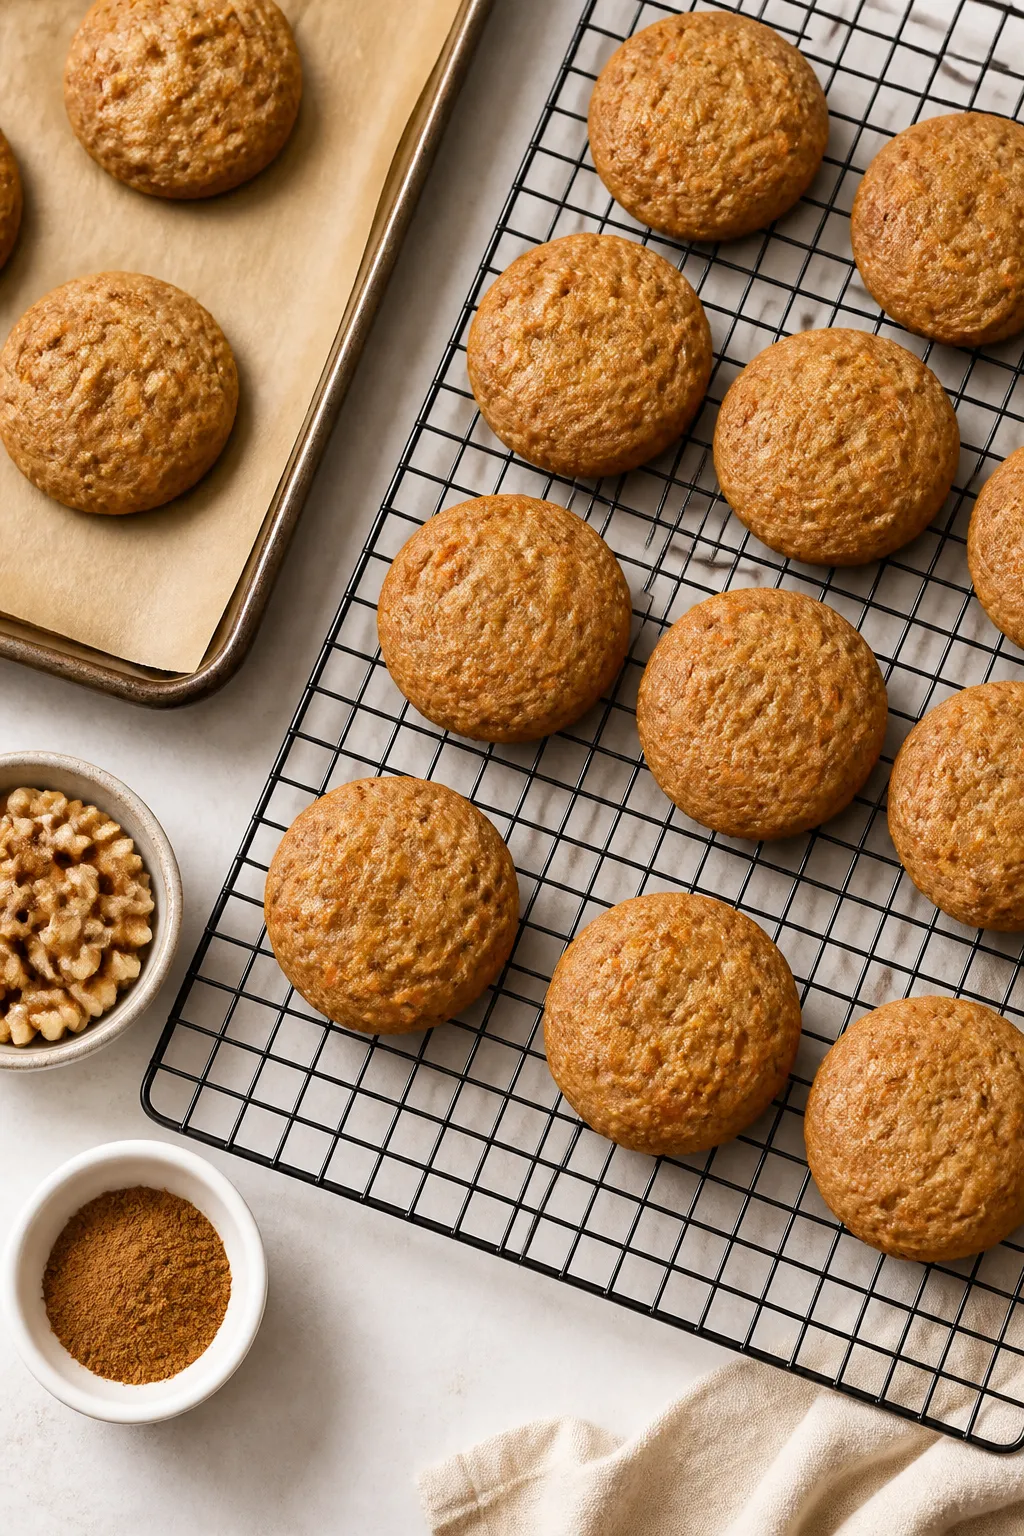
    Overhead shot of freshly baked gluten free carrot cake cookies cooling on a wire rack, unfrosted and
    • Soft and cakey texture: Almond flour and gluten free flour blend keep these cookies moist and tender.
    • Balanced sweetness: Brown sugar adds warmth without being overly sweet.
    • Classic carrot cake flavor: Cinnamon, nutmeg, and vanilla bring cozy bakery vibes.
    • No chill time: The dough is scoop-and-bake, so you can have cookies fast.
    • Flexible add-ins: Raisins, chopped walnuts, or coconut fit right in.

    Shopping List

    • Dry ingredients: 1 cup gluten free all-purpose flour (with xanthan gum), 1 cup blanched almond flour, 1 teaspoon baking powder, 1/2 teaspoon baking soda, 1/2 teaspoon fine sea salt, 1 1/2 teaspoons ground cinnamon, 1/4 teaspoon ground nutmeg
    • Sugars: 1/2 cup light brown sugar, 1/4 cup granulated sugar
    • Fats and liquids: 1/2 cup unsalted butter, softened; 1 large egg; 2 teaspoons vanilla extract
    • Carrots: 1 1/4 cups finely grated carrots (about 2 medium), gently patted dry
    • Optional add-ins: 1/2 cup chopped walnuts or pecans, 1/3 cup raisins, 1/4 cup unsweetened shredded coconut
    • Cream cheese frosting: 6 ounces cream cheese (brick style), 4 tablespoons unsalted butter, softened; 1 1/2 cups powdered sugar; 1 teaspoon vanilla extract; pinch of salt

    Step-by-Step Instructions

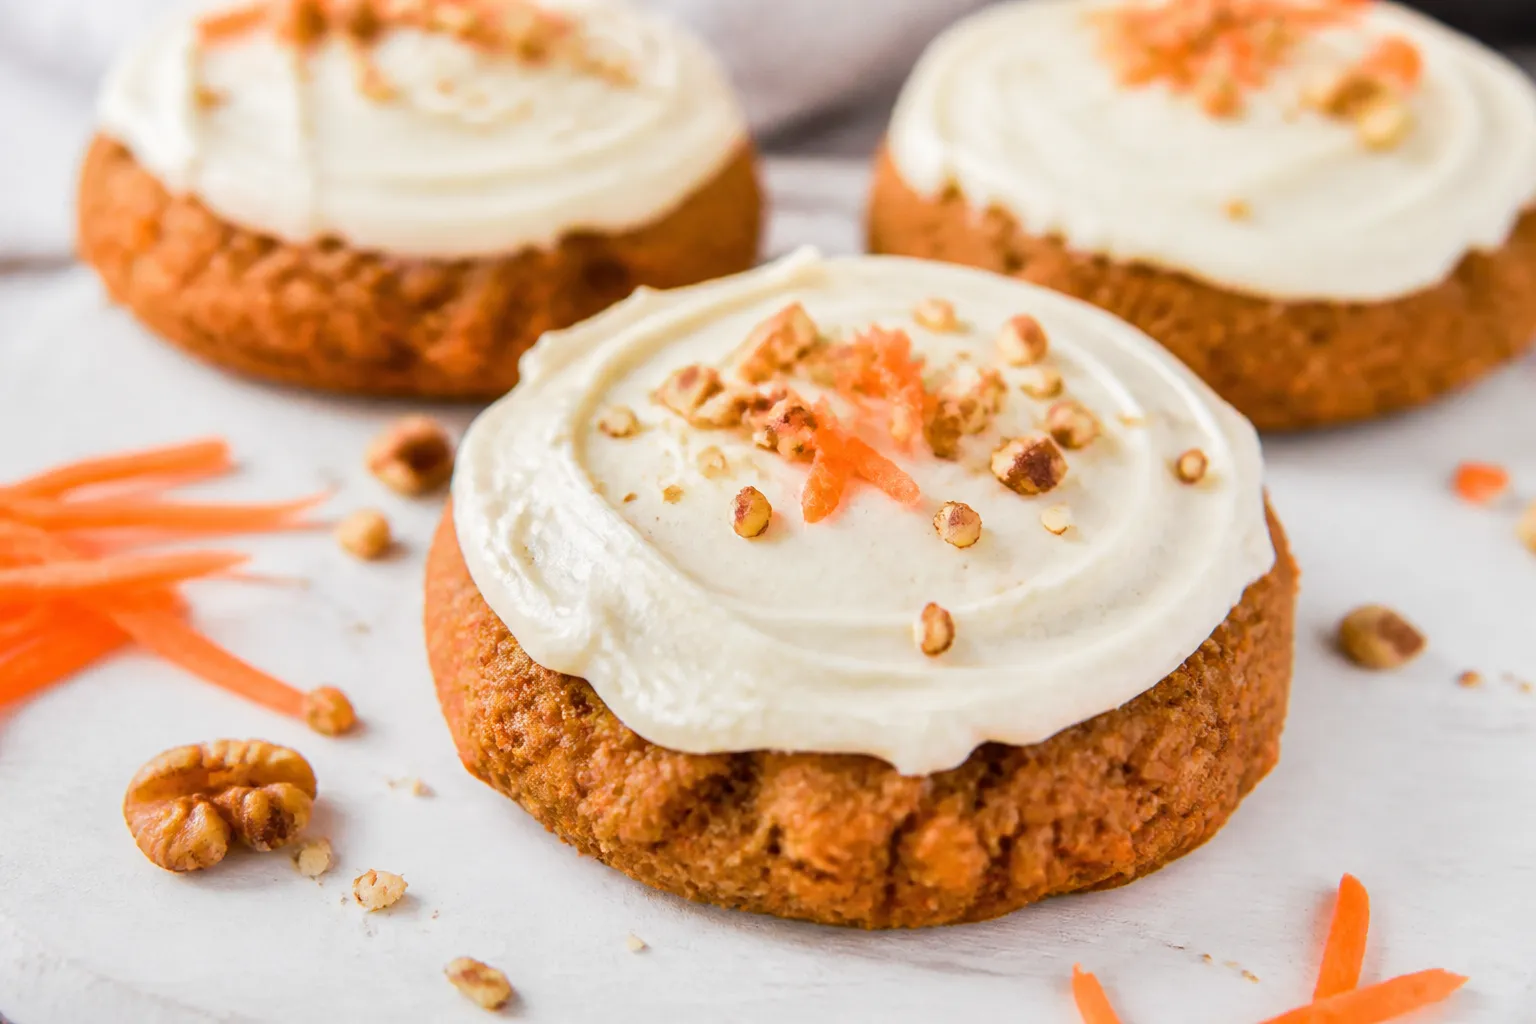
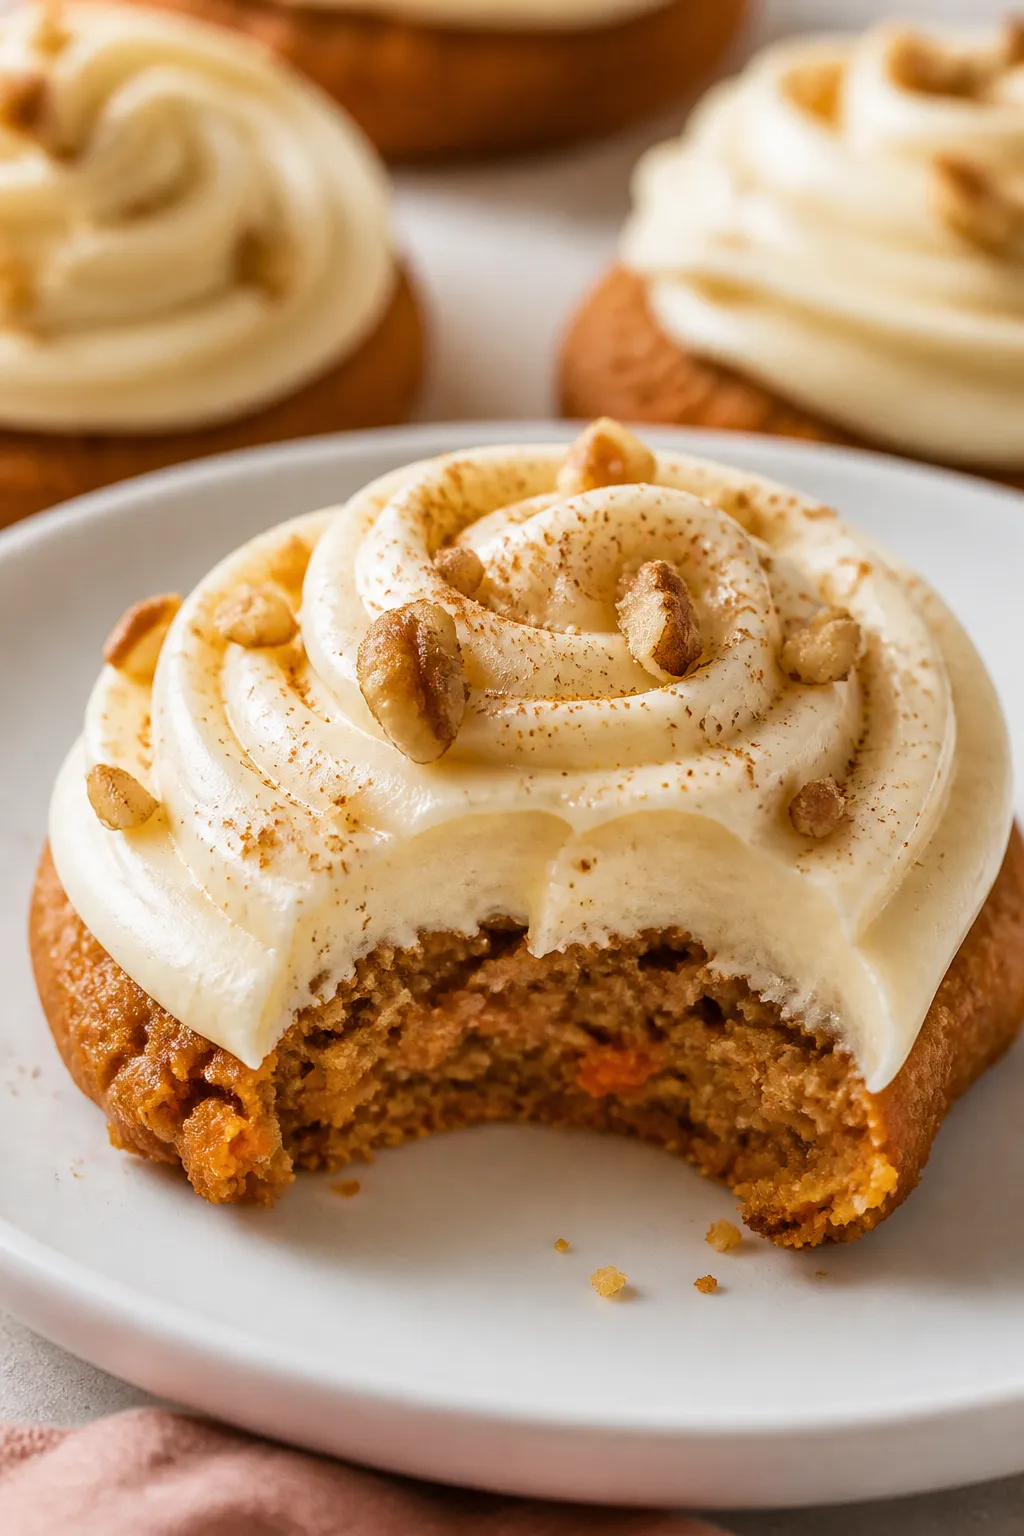
    Close-up detail of a fully frosted gluten free carrot cake cookie on a matte white plate, silky crea
    1. Prep the oven and pans: Heat oven to 350°F (175°C). Line two baking sheets with parchment paper.
    2. Whisk dry ingredients: In a bowl, whisk gluten free flour, almond flour, baking powder, baking soda, salt, cinnamon, and nutmeg.
    3. Cream butter and sugars: In a large bowl, beat butter, brown sugar, and granulated sugar until light and fluffy, about 2 minutes.
    4. Add egg and vanilla: Beat in the egg and vanilla until smooth.
    5. Combine wet and dry: Add dry ingredients to the wet mixture and mix on low until just combined.

      Do not overmix.

    6. Fold in carrots and add-ins: Stir in grated carrots and any optional nuts, raisins, or coconut. The dough will be soft and thick.
    7. Scoop: Use a 1 1/2-tablespoon cookie scoop to portion dough onto trays, spacing about 2 inches apart. Gently pat the tops to level.
    8. Bake: Bake 10–12 minutes, until edges are set and centers look slightly soft.

      They’ll finish setting as they cool.

    9. Cool completely: Let cookies rest on the sheet 5 minutes, then transfer to a rack to cool fully before frosting.
    10. Make frosting: Beat cream cheese and butter until smooth. Add powdered sugar, vanilla, and a pinch of salt. Beat until fluffy, 1–2 minutes.
    11. Frost: Spread or pipe frosting on cooled cookies.

      Garnish with a sprinkle of chopped nuts or cinnamon if you like.

    How to Store

    • Refrigerator: Store frosted cookies in an airtight container for up to 5 days. Separate layers with parchment.
    • Room temperature: Unfrosted cookies keep in a sealed container for 2–3 days.
    • Freezer: Freeze unfrosted cookies for up to 2 months. Thaw at room temp, then frost.

      Frosted cookies can be frozen flat, then stacked once solid.

    Health Benefits

    • Gluten free: Ideal for those with gluten intolerance or celiac disease when using certified GF ingredients.
    • Carrots: Provide beta-carotene and fiber, adding nutrients and natural moisture.
    • Almond flour: Offers healthy fats, vitamin E, and a bit more protein than regular flour.
    • Portion control: Cookies give you carrot cake flavor in a smaller, satisfying serving.

    Pitfalls to Watch Out For

    • Too much moisture: Squeeze or pat carrots dry. Excess liquid can make cookies spread or turn gummy.
    • Wrong flour blend: Use a gluten free all-purpose blend with xanthan gum. Without it, cookies may crumble.
    • Overbaking: Pull them when centers look just set.

      Overbaked cookies lose their soft, cakey texture.

    • Frosting too runny: If it’s loose, chill 10–15 minutes or add a little more powdered sugar.

    Recipe Variations

    • Nut-free: Skip nuts and use seeds like pumpkin or sunflower for crunch.
    • Maple twist: Replace half the brown sugar with pure maple syrup and add 2 tablespoons more GF flour.
    • Spice lovers: Add 1/4 teaspoon ground ginger and a pinch of cloves.
    • Dairy free: Use dairy-free butter in the cookies and a vegan cream cheese and butter for the frosting.
    • Breakfast-style: Reduce frosting by half and add 1/4 cup rolled oats (certified GF) to the dough.

    FAQ

    Can I make these cookies without almond flour?

    Yes. Replace the almond flour with an equal amount of your gluten free all-purpose blend. Texture will be slightly less moist, so watch the bake time closely.

    Do I need to peel the carrots?

    You don’t have to.

    If the skins are clean and fresh, a good scrub is enough. Peeling gives a slightly smoother texture, but both work.

    Can I chill the dough?

    You can. Chill 30–60 minutes to reduce spread and make scooping easier.

    Add 1–2 minutes to the bake time if the dough is cold.

    How do I make the frosting pipeable?

    Beat in an extra 1/4–1/2 cup powdered sugar and chill briefly. Use a medium round or star tip for neat swirls.

    What if I only have salted butter?

    Use it and reduce added salt in the dough to a small pinch. Skip the pinch in the frosting.

    In Conclusion

    Soft, warmly spiced, and topped with a cloud of cream cheese frosting, these gluten free carrot cake cookies are a cozy, crowd-pleasing treat.

    They come together easily, hold well in the fridge, and welcome your favorite add-ins. Keep this recipe on hand for holidays, potlucks, or any day that could use a little sweetness.

    Soft Gluten Free Carrot Cake Cookies with Cream Cheese Frosting ⭐ – Tender, Cozy, and Easy

    Prep Time 15 minutes
    Cook Time 12 minutes
    Total Time 27 minutes
    Servings 18 servings

    Ingredients
      

    • Dry ingredients: 1 cup gluten free all-purpose flour (with xanthan gum), 1 cup blanched almond flour, 1 teaspoon baking powder, 1/2 teaspoon baking soda, 1/2 teaspoon fine sea salt, 1 1/2 teaspoons ground cinnamon, 1/4 teaspoon ground nutmeg
    • Sugars: 1/2 cup light brown sugar, 1/4 cup granulated sugar
    • Fats and liquids: 1/2 cup unsalted butter, softened; 1 large egg; 2 teaspoons vanilla extract
    • Carrots: 1 1/4 cups finely grated carrots (about 2 medium), gently patted dry
    • Optional add-ins: 1/2 cup chopped walnuts or pecans, 1/3 cup raisins, 1/4 cup unsweetened shredded coconut
    • Cream cheese frosting: 6 ounces cream cheese (brick style), 4 tablespoons unsalted butter, softened; 1 1/2 cups powdered sugar; 1 teaspoon vanilla extract; pinch of salt

    Instructions
     

    • Prep the oven and pans: Heat oven to 350°F (175°C). Line two baking sheets with parchment paper.
    • Whisk dry ingredients: In a bowl, whisk gluten free flour, almond flour, baking powder, baking soda, salt, cinnamon, and nutmeg.
    • Cream butter and sugars: In a large bowl, beat butter, brown sugar, and granulated sugar until light and fluffy, about 2 minutes.
    • Add egg and vanilla: Beat in the egg and vanilla until smooth.
    • Combine wet and dry: Add dry ingredients to the wet mixture and mix on low until just combined. Do not overmix.
    • Fold in carrots and add-ins: Stir in grated carrots and any optional nuts, raisins, or coconut. The dough will be soft and thick.
    • Scoop: Use a 1 1/2-tablespoon cookie scoop to portion dough onto trays, spacing about 2 inches apart. Gently pat the tops to level.
    • Bake: Bake 10–12 minutes, until edges are set and centers look slightly soft. They’ll finish setting as they cool.
    • Cool completely: Let cookies rest on the sheet 5 minutes, then transfer to a rack to cool fully before frosting.
    • Make frosting: Beat cream cheese and butter until smooth. Add powdered sugar, vanilla, and a pinch of salt. Beat until fluffy, 1–2 minutes.
    • Frost: Spread or pipe frosting on cooled cookies. Garnish with a sprinkle of chopped nuts or cinnamon if you like.
  • Easy Key Lime Cupcakes with Creamy Lime Frosting ⭐ – Bright, Tangy, and Foolproof

    Easy Key Lime Cupcakes with Creamy Lime Frosting ⭐ – Bright, Tangy, and Foolproof

    These key lime cupcakes bring sunny flavor to any day. They’re soft, citrusy, and topped with a silky lime frosting that melts in your mouth. No complicated steps, no hard-to-find tools—just bright lime flavor and a tender crumb.

    If you love key lime pie, you’ll love these cupcakes. They’re perfect for birthdays, potlucks, or a simple weekend treat.

    Why This Recipe Works

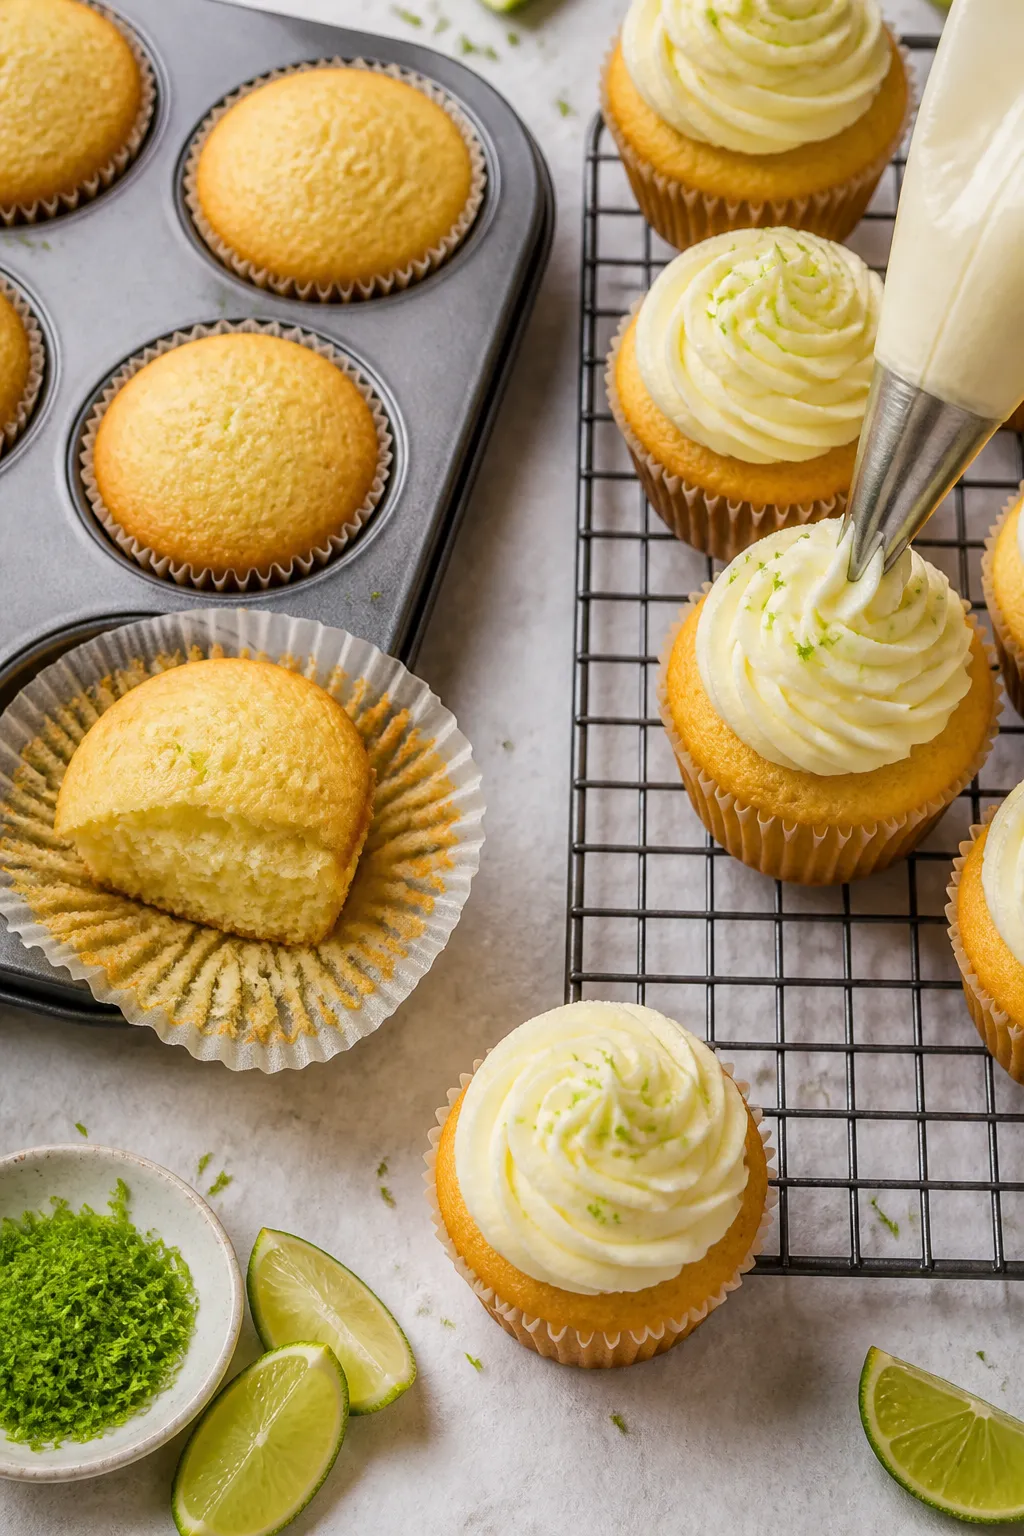
    Overhead shot of freshly baked key lime cupcakes still in the muffin pan and a cooling rack beside i

    Simple ingredients, big flavor: Fresh lime zest and juice add bright, natural citrus without needing fancy extracts.

    Moist and tender: A touch of oil keeps the cupcakes soft for days, while buttermilk adds gentle tang.

    Balanced sweetness: The frosting is creamy and sweet, but the lime keeps it from being heavy.

    Beginner-friendly: Clear steps, common pantry staples, and reliable results every time.

    What You’ll Need

    • For the cupcakes:
      • 1 1/2 cups all-purpose flour
      • 1 cup granulated sugar
      • 1 1/2 teaspoons baking powder
      • 1/2 teaspoon baking soda
      • 1/2 teaspoon fine salt
      • 2 large eggs, room temperature
      • 1/2 cup buttermilk, room temperature
      • 1/2 cup neutral oil (canola or vegetable)
      • 1/4 cup fresh key lime juice (regular lime works in a pinch)
      • 1 tablespoon key lime zest (about 4–6 key limes, or 1–2 regular limes)
      • 1 teaspoon vanilla extract
    • For the creamy lime frosting:
      • 8 ounces cream cheese, softened
      • 1/2 cup unsalted butter, softened
      • 3 to 3 1/2 cups powdered sugar, sifted
      • 2 tablespoons fresh key lime juice
      • 1 teaspoon key lime zest
      • 1/2 teaspoon vanilla extract
      • Pinch of salt
    • Optional garnish: Extra lime zest or thin lime slices

    Step-by-Step Instructions

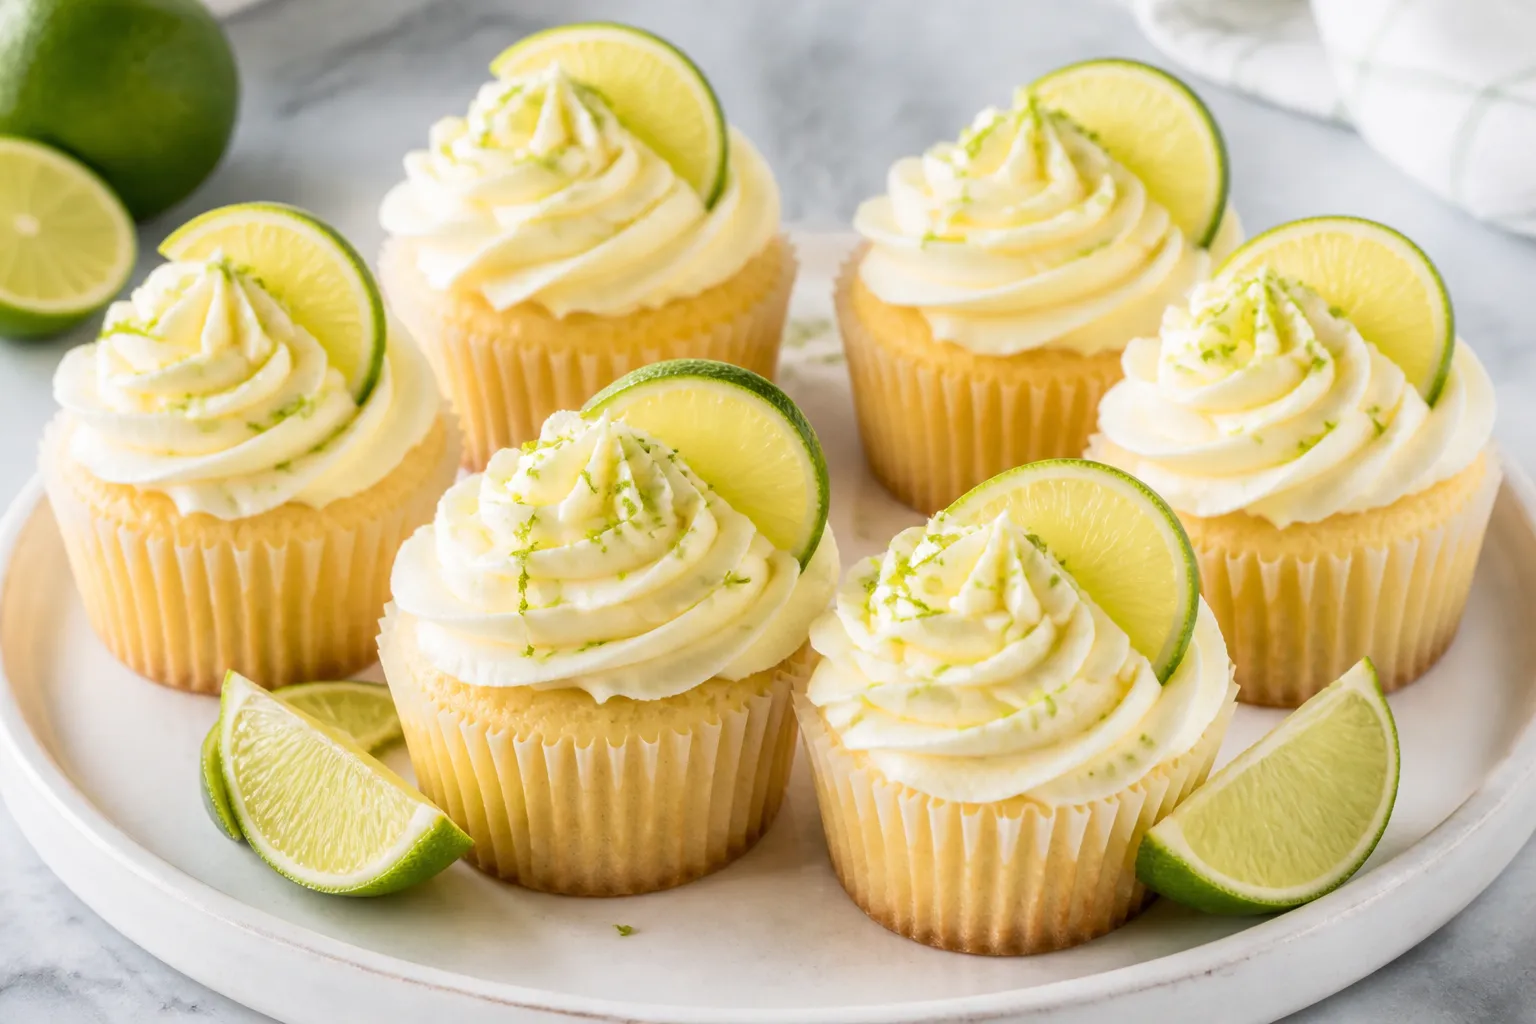
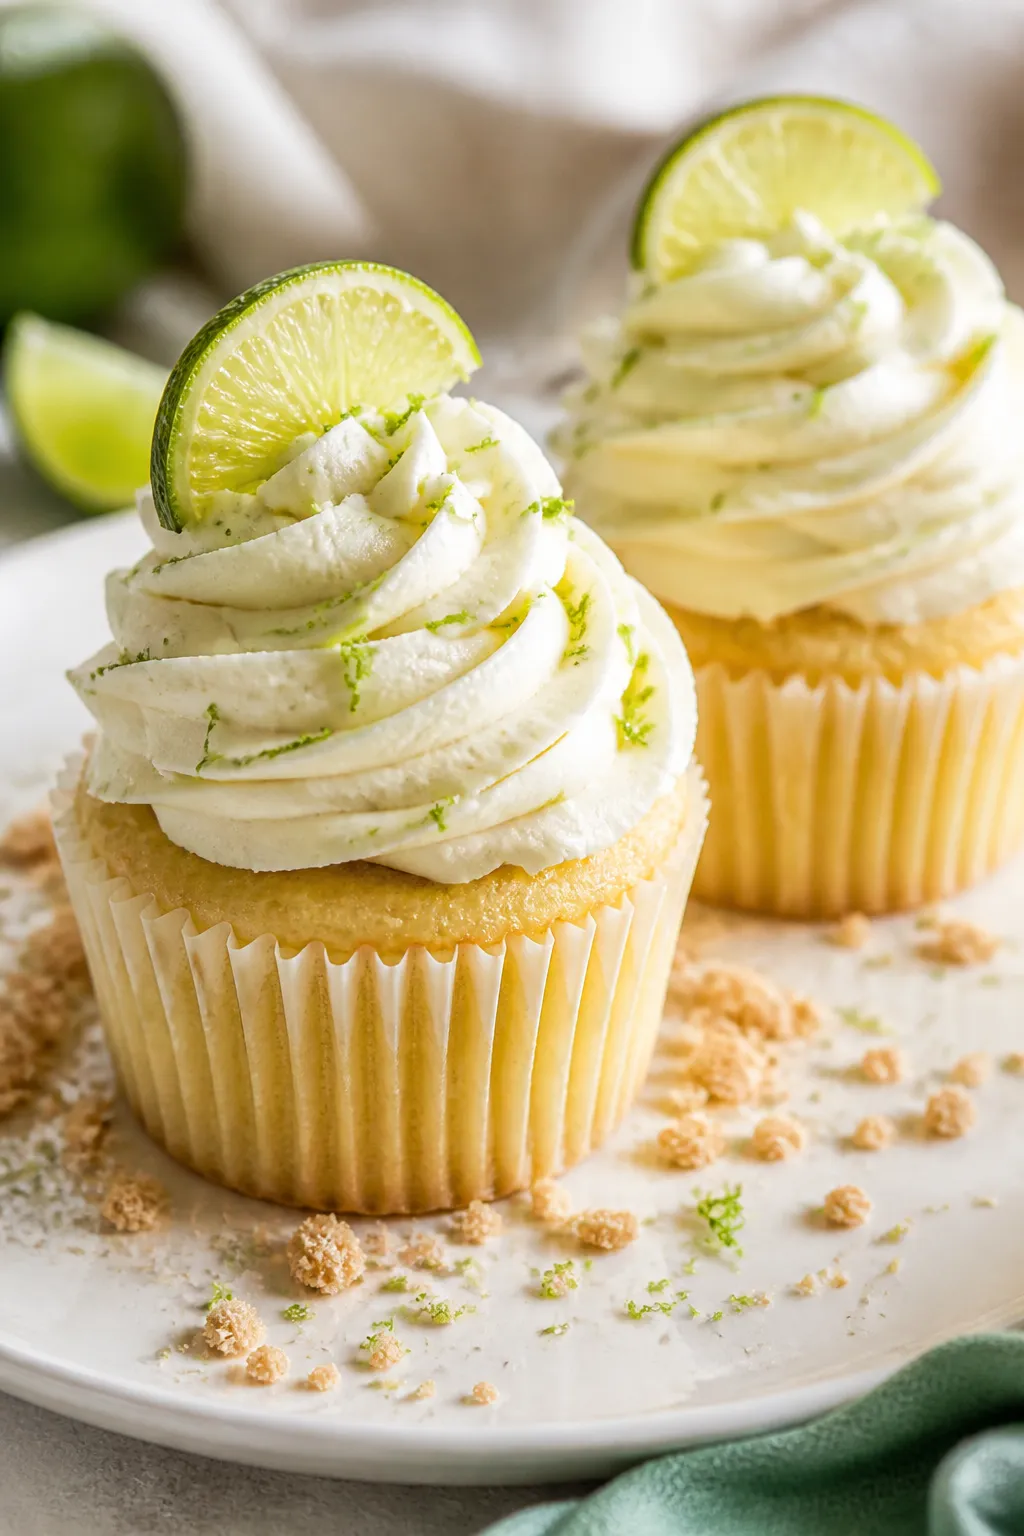
    Close-up final presentation of two key lime cupcakes on a matte white dessert plate, generously swir
    1. Prep the pan: Heat oven to 350°F (175°C). Line a 12-cup muffin pan with paper liners.
    2. Mix dry ingredients: In a medium bowl, whisk flour, sugar, baking powder, baking soda, and salt.
    3. Combine wet ingredients: In a large bowl, whisk eggs, buttermilk, oil, lime juice, lime zest, and vanilla until smooth.
    4. Bring it together: Add dry ingredients to wet and whisk just until combined. Do not overmix.

      Batter should be smooth with no dry pockets.

    5. Fill and bake: Divide batter evenly among liners (about 2/3 full). Bake 16–19 minutes, until tops spring back and a toothpick comes out clean.
    6. Cool completely: Let cupcakes cool in the pan 5 minutes, then transfer to a rack to cool fully before frosting.
    7. Make the frosting: Beat cream cheese and butter on medium speed until creamy and fluffy, 2–3 minutes. Add powdered sugar 1 cup at a time, then mix in lime juice, zest, vanilla, and a pinch of salt.

      Beat until smooth. Adjust sugar to reach a pipeable but creamy consistency.

    8. Frost and garnish: Spread or pipe frosting on cooled cupcakes. Top with a sprinkle of zest or a tiny lime wedge.

    How to Store

    • Refrigerate: Because of the cream cheese frosting, store cupcakes covered in the fridge for up to 4 days.

      Bring to room temp for 15–20 minutes before serving.

    • Freeze: Freeze unfrosted cupcakes up to 2 months. Thaw at room temperature, then frost fresh.
    • Make ahead: Frosting can be made 2 days ahead. Keep chilled, then beat briefly before using.

    Benefits of This Recipe

    • Quick and easy: One bowl for wet, one for dry, and you’re done.
    • Fresh, real flavor: Lime zest and juice deliver a bright, clean taste.
    • Reliable texture: Moist, tender crumb that stays soft.
    • Great for sharing: Portable, pretty, and crowd-pleasing.

    Common Mistakes to Avoid

    • Overmixing the batter: This can make cupcakes dense.

      Mix just until combined.

    • Using cold ingredients: Room-temperature eggs, buttermilk, and butter help everything blend smoothly.
    • Overbaking: Check early. Dry cupcakes lose that lovely tender crumb.
    • Too much lime juice in frosting: It can make frosting runny. Add juice slowly and balance with powdered sugar.
    • Skipping the zest: The zest adds most of the lime aroma and depth.

    Variations You Can Try

    • Coconut-lime: Fold 1/2 cup toasted shredded coconut into the batter and sprinkle more on top of the frosting.
    • Graham cracker crunch: Add a spoonful of crushed graham crackers over the frosting for a key lime pie vibe.
    • Lime-berry: Core cooled cupcakes and fill with a teaspoon of raspberry or strawberry jam.
    • Glazed top: Brush baked cupcakes with a quick lime syrup (equal parts sugar and lime juice) before frosting.
    • Sheet cake twist: Bake batter in an 8-inch square pan (extend bake time) and spread frosting over the top.

    FAQ

    Can I use regular limes instead of key limes?

    Yes.

    Regular Persian limes work well and still give a bright citrus taste. Key limes are a bit more floral and tart, but both are delicious.

    What can I use instead of buttermilk?

    Mix 1/2 cup milk with 1 1/2 teaspoons white vinegar or lemon juice. Let it sit for 5 minutes, then use as directed.

    Can I reduce the sugar?

    In the cupcakes, you can reduce by 2–3 tablespoons without much change.

    For the frosting, balance less sugar with slightly less lime juice to keep the texture stable.

    How do I know when the cupcakes are done?

    The tops should spring back when lightly pressed, and a toothpick inserted in the center should come out clean or with a few moist crumbs.

    Can I make the frosting thicker for piping?

    Add more powdered sugar, a few tablespoons at a time, until it holds stiff peaks. Chill for 10–15 minutes if it’s warm in your kitchen.

    Do I need a stand mixer?

    No. A hand mixer works great.

    You can whisk the batter by hand and use the mixer for the frosting.

    Final Thoughts

    These easy key lime cupcakes are bright, cheerful, and incredibly satisfying. The tender cake and creamy lime frosting strike the perfect sweet-tart balance. Keep this recipe on hand for when you want something simple that still feels special.

    One bite, and you’ll see why they’re a crowd favorite.

    Easy Key Lime Cupcakes with Creamy Lime Frosting ⭐ – Bright, Tangy, and Foolproof

    Prep Time 15 minutes
    Cook Time 20 minutes
    Total Time 35 minutes
    Servings 12 servings

    Ingredients
      

    • For the cupcakes: 1 1/2 cups all-purpose flour
    • 1 cup granulated sugar
    • 1 1/2 teaspoons baking powder
    • 1/2 teaspoon baking soda
    • 1/2 teaspoon fine salt
    • 2 large eggs, room temperature
    • 1/2 cup buttermilk, room temperature
    • 1/2 cup neutral oil (canola or vegetable)
    • 1/4 cup fresh key lime juice (regular lime works in a pinch)
    • 1 tablespoon key lime zest (about 4–6 key limes, or 1–2 regular limes)
    • 1 teaspoon vanilla extract
    • For the creamy lime frosting: 8 ounces cream cheese, softened
    • 1/2 cup unsalted butter, softened
    • 3 to 3 1/2 cups powdered sugar, sifted
    • 2 tablespoons fresh key lime juice
    • 1 teaspoon key lime zest
    • 1/2 teaspoon vanilla extract
    • Pinch of salt
    • Optional garnish: Extra lime zest or thin lime slices

    Instructions
     

    • Prep the pan: Heat oven to 350°F (175°C). Line a 12-cup muffin pan with paper liners.
    • Mix dry ingredients: In a medium bowl, whisk flour, sugar, baking powder, baking soda, and salt.
    • Combine wet ingredients: In a large bowl, whisk eggs, buttermilk, oil, lime juice, lime zest, and vanilla until smooth.
    • Bring it together: Add dry ingredients to wet and whisk just until combined. Do not overmix. Batter should be smooth with no dry pockets.
    • Fill and bake: Divide batter evenly among liners (about 2/3 full). Bake 16–19 minutes, until tops spring back and a toothpick comes out clean.
    • Cool completely: Let cupcakes cool in the pan 5 minutes, then transfer to a rack to cool fully before frosting.
    • Make the frosting: Beat cream cheese and butter on medium speed until creamy and fluffy, 2–3 minutes. Add powdered sugar 1 cup at a time, then mix in lime juice, zest, vanilla, and a pinch of salt. Beat until smooth. Adjust sugar to reach a pipeable but creamy consistency.
    • Frost and garnish: Spread or pipe frosting on cooled cupcakes. Top with a sprinkle of zest or a tiny lime wedge.