Category: Recipes

  • Easy Homemade Focaccia Bread Recipe – Soft, Chewy, and Perfectly Crispy

    Easy Homemade Focaccia Bread Recipe – Soft, Chewy, and Perfectly Crispy

    Focaccia is one of those breads that looks impressive but is surprisingly easy to make at home. With a golden, crisp crust and a soft, airy center, it’s the kind of bread that makes any meal feel special. You don’t need special equipment or advanced baking skills—just a bowl, a pan, and a little patience.

    This version is forgiving, flavorful, and flexible, so you can top it with your favorite herbs, onions, or olives. Once you make it, you’ll want it on repeat for weeknights and gatherings alike.

    Why This Recipe Works
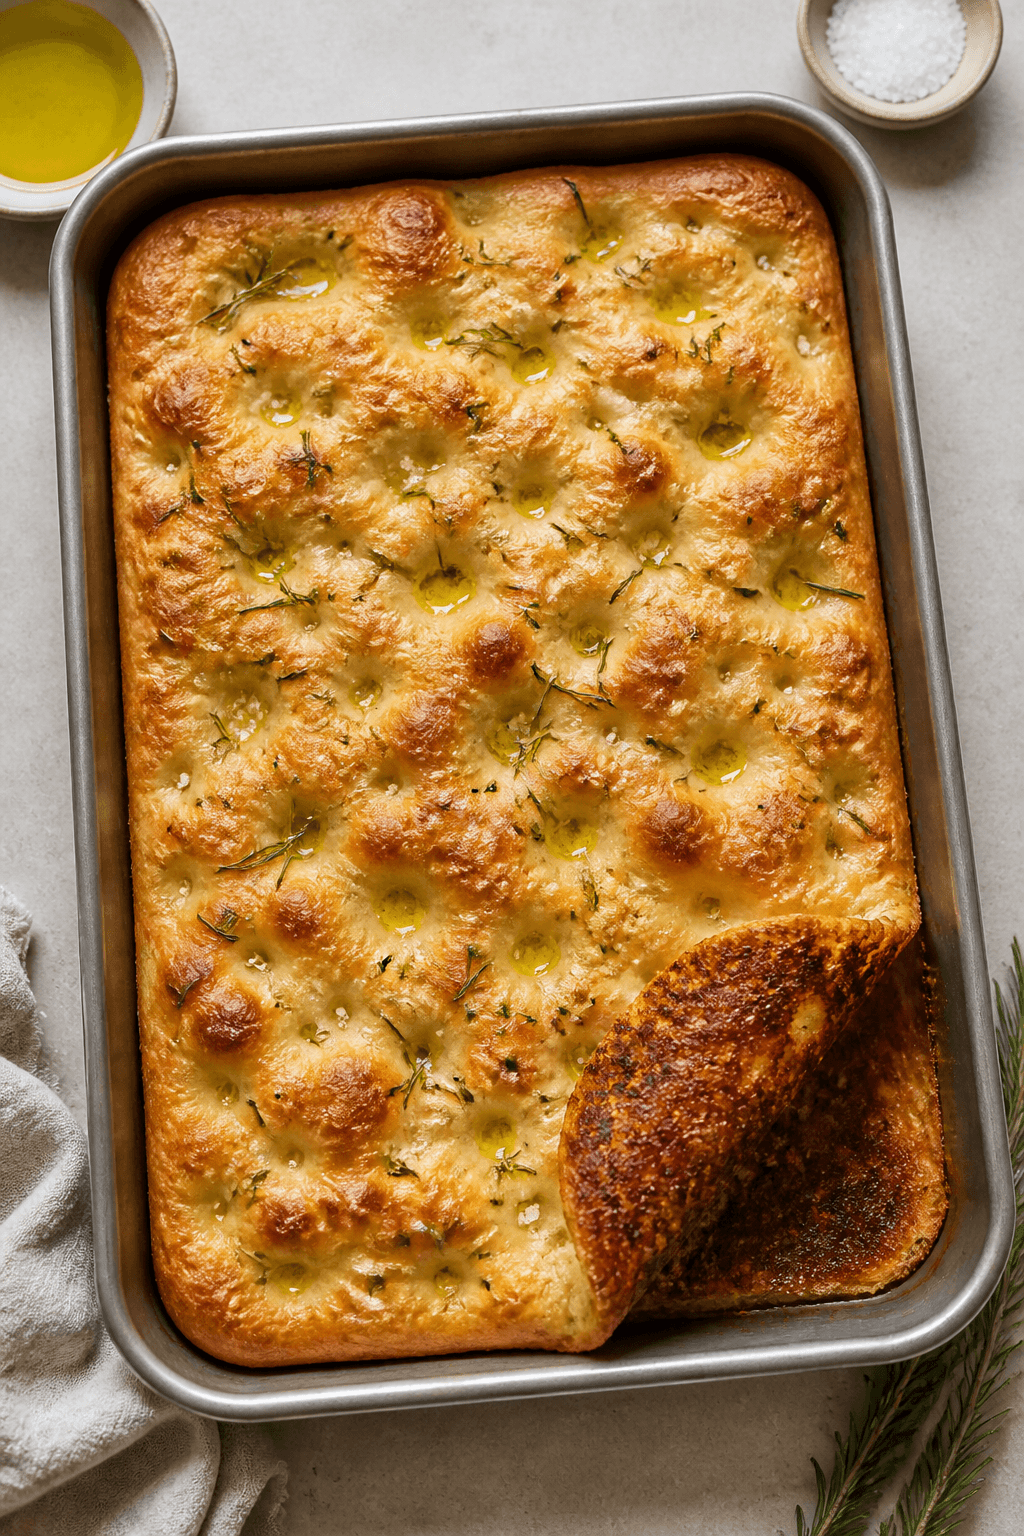
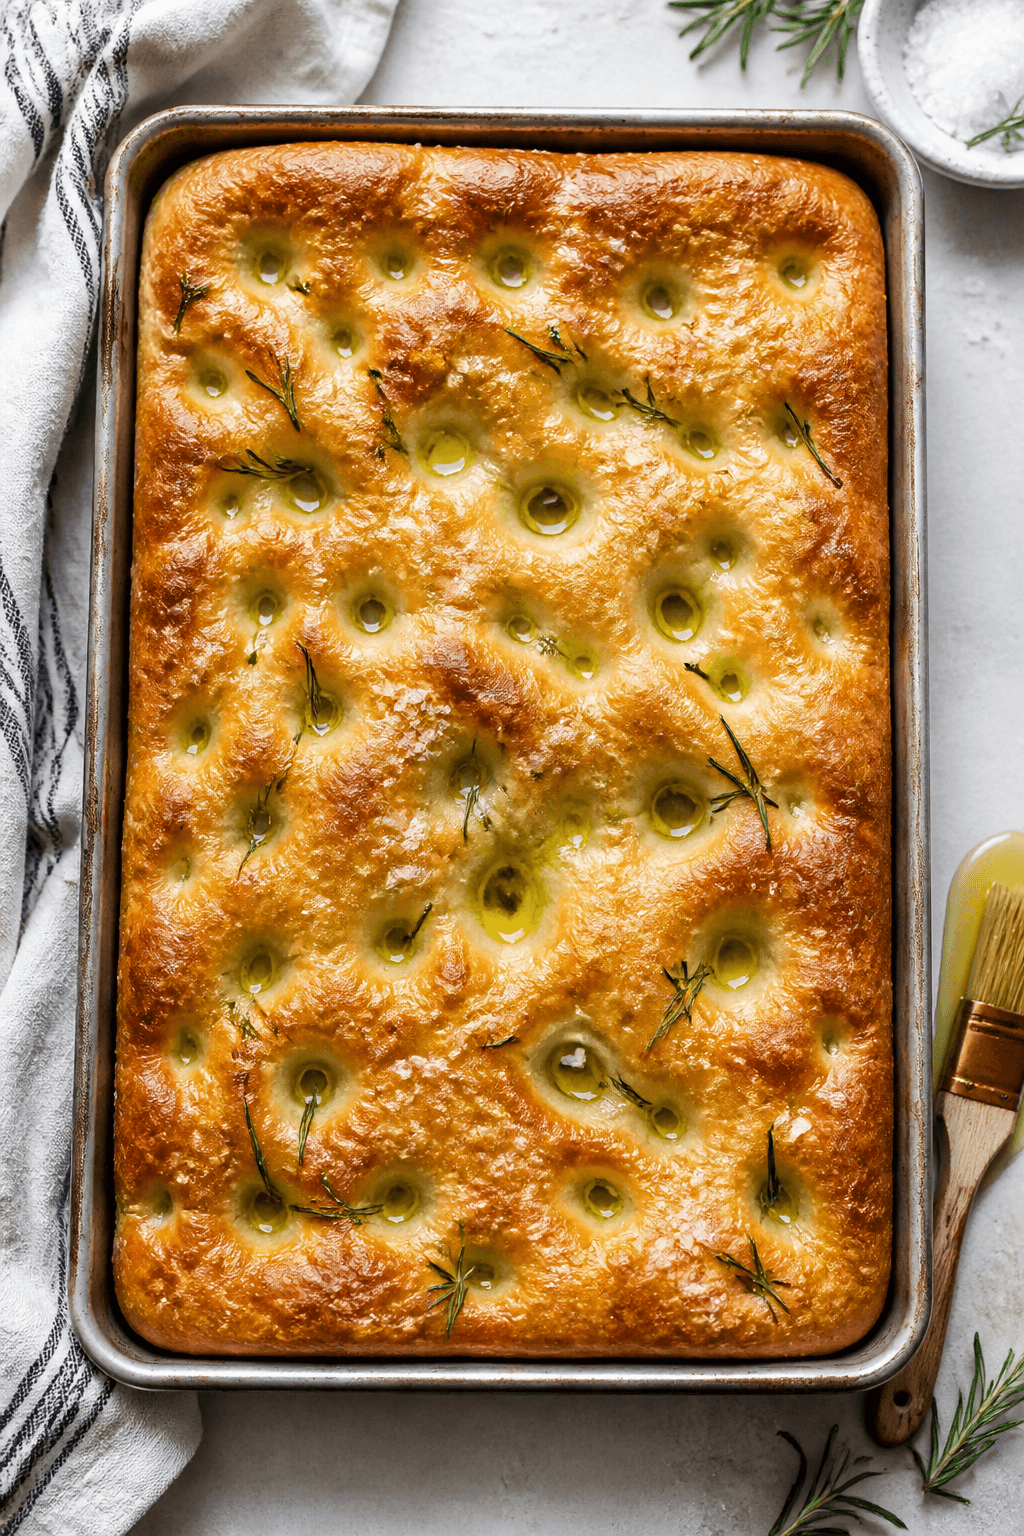
    Overhead shot of freshly baked focaccia in a well-oiled 9x13 metal pan just out of the oven, showing
    • High hydration dough: A wetter dough creates that signature open, airy crumb and chewy texture.
    • Olive oil at every step: Oil in the dough and pan gives focaccia its rich flavor and crisp, golden bottom.
    • Overnight (or quick) rise option: A long, cold proof builds flavor, but a same-day rise still delivers great results.
    • Generous dimpling: Pressing deep dimples helps the dough rise evenly and holds oil and toppings.
    • Simple ingredients: Just flour, water, yeast, salt, and oil—no fancy techniques needed.

    What You’ll Need

    • 4 cups (500 g) bread flour (all-purpose works too, but bread flour gives more chew)
    • 2 teaspoons kosher salt
    • 2 teaspoons sugar or honey (helps activate the yeast and browning)
    • 2 1/4 teaspoons instant or active dry yeast (one standard packet)
    • 1 3/4 cups (415 ml) warm water (about 105–110°F/40–43°C)
    • 1/4 cup (60 ml) extra-virgin olive oil for the dough, plus more for the pan and topping
    • Flaky sea salt for finishing
    • Optional toppings: fresh rosemary, thinly sliced red onion, cherry tomatoes, olives, garlic, or shredded cheese

    Step-by-Step Instructions
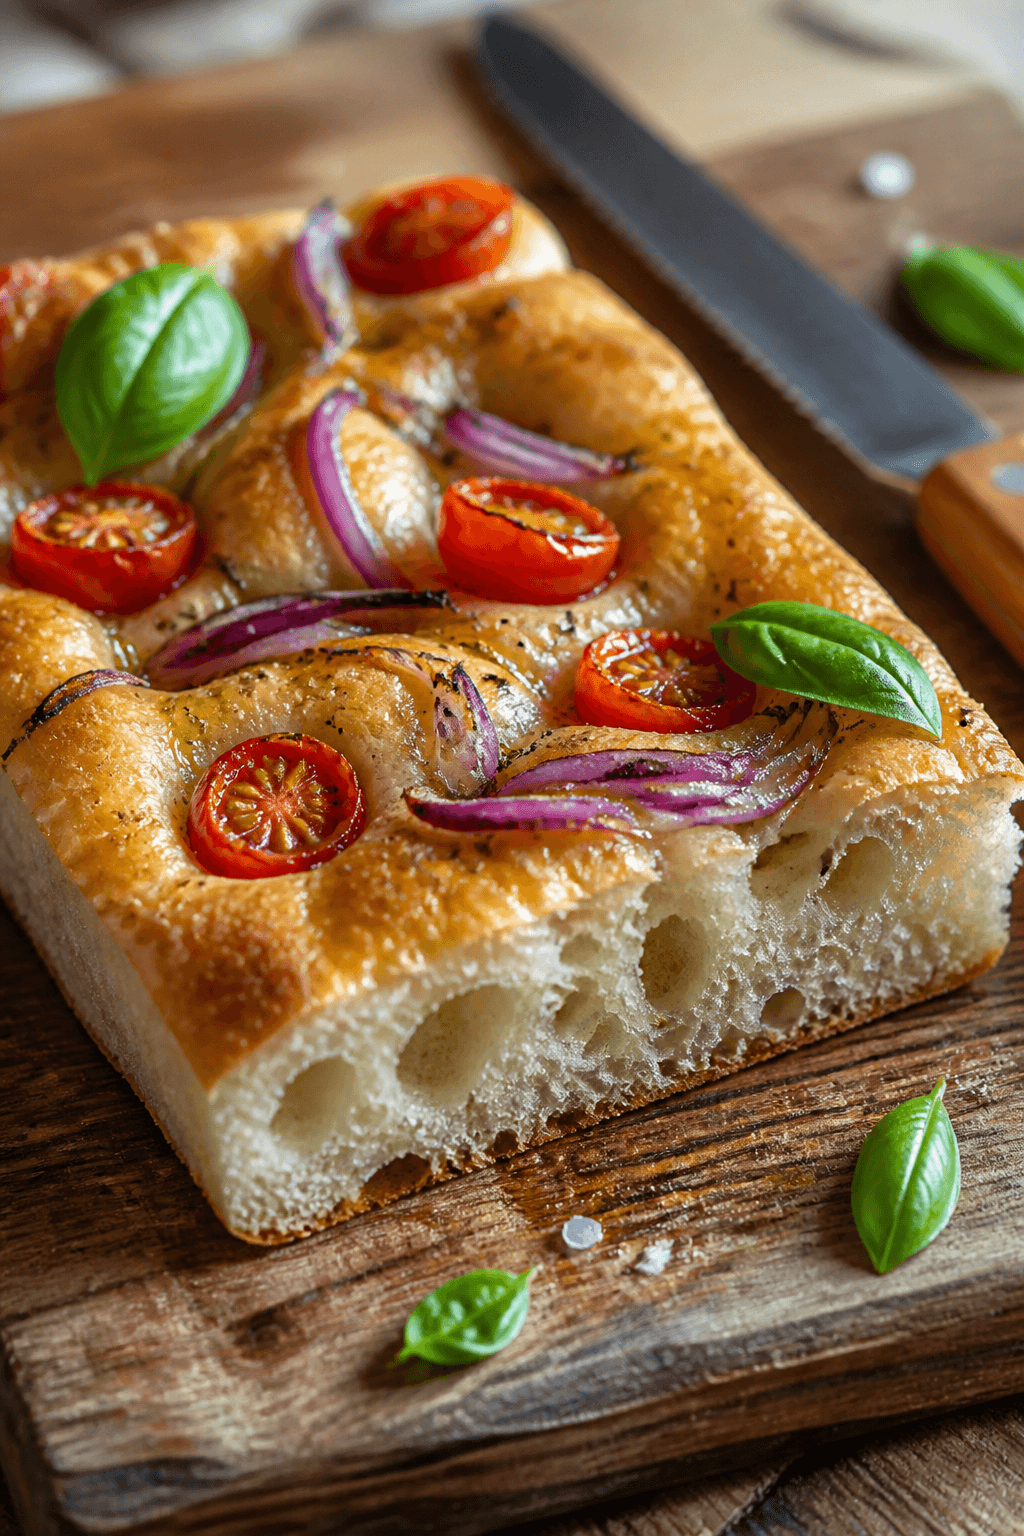
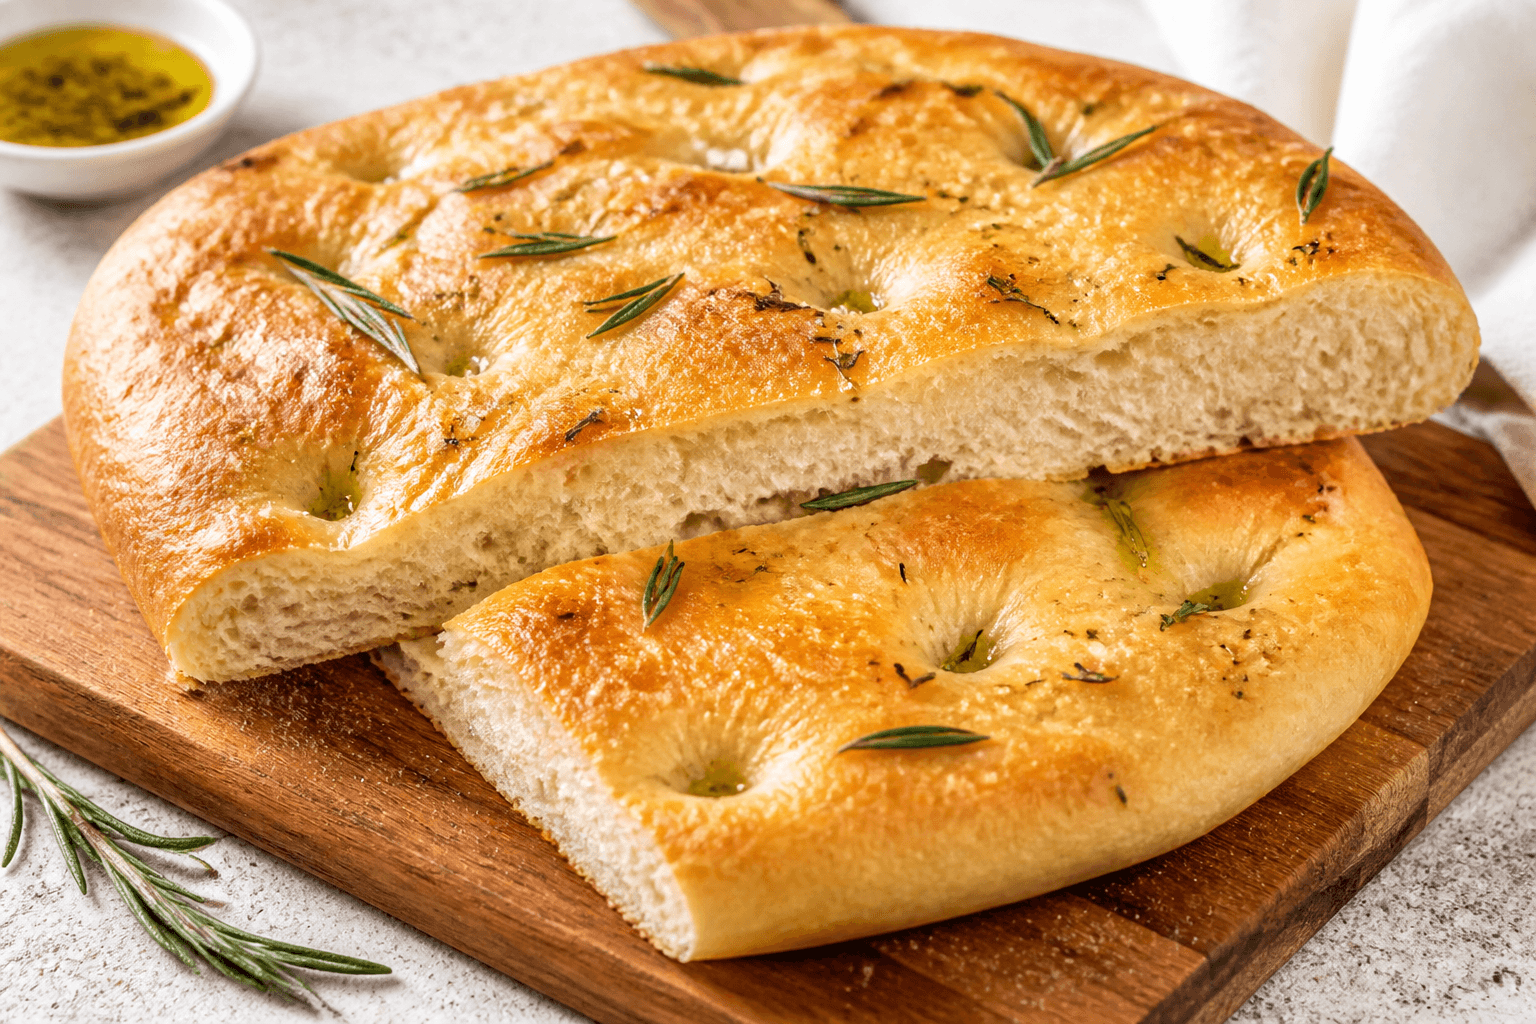
    Close-up detail of a sliced focaccia square on a rustic wooden board, focus on the open, airy crumb
    1. Mix the dough: In a large bowl, whisk flour, salt, and sugar. Add yeast, warm water, and 2 tablespoons of olive oil.Stir with a spoon until no dry spots remain. The dough will be sticky—this is good.
    2. First rise: Cover the bowl with plastic wrap or a damp towel. Let it rise at room temperature until doubled, about 60–90 minutes.For deeper flavor, refrigerate overnight (up to 24 hours), then let it warm up for 45 minutes before shaping.
    3. Prep the pan: Generously oil a 9×13-inch pan or a large sheet pan (about 2–3 tablespoons). Tilt to coat the bottom and sides.
    4. Transfer and fold: Scrape the dough into the pan. Drizzle 1 tablespoon olive oil on top.With oiled hands, gently stretch the dough toward the corners. If it springs back, let it rest 10 minutes, then stretch again.
    5. Second rise: Cover loosely and let the dough puff until about 50% larger, 30–45 minutes. It should look bubbly and lively.
    6. Dimple and top: Heat oven to 450°F (230°C).Oil your fingertips and press straight down into the dough to make deep dimples all over. Drizzle 1–2 tablespoons olive oil on top. Sprinkle flaky salt and add toppings like rosemary, onions, or tomatoes.
    7. Bake: Bake 20–25 minutes until the top is golden and the edges are crisp.If using a dark pan, start checking at 18 minutes.
    8. Finish and cool: Brush or drizzle a little more olive oil over the hot bread for shine and flavor. Cool in the pan 5–10 minutes, then transfer to a rack. Slice and serve warm or at room temperature.

    Keeping It Fresh

    • Room temperature: Wrap loosely in foil or store in a paper bag for up to 2 days.Avoid airtight containers—they soften the crust.
    • Reheat: Warm slices in a 350°F (175°C) oven for 8–10 minutes to revive the crisp edges.
    • Freeze: Wrap tightly in plastic, then foil. Freeze up to 2 months. Reheat from frozen at 350°F (175°C) for 15–20 minutes.

    Why This is Good for You

    • Olive oil benefits: Extra-virgin olive oil provides heart-healthy fats and a satisfying richness.
    • Customizable toppings: Add tomatoes, onions, herbs, or olives for extra fiber, antioxidants, and flavor.
    • Portion-friendly: It’s easy to cut into small squares for controlled servings without feeling deprived.

    Common Mistakes to Avoid

    • Using too little oil: Skimping on oil leads to a pale crust and sticky bottom.Be generous in the pan and on top.
    • Rushing the rise: Under-proofed dough won’t bubble or brown well. Wait for visible puffiness and bubbles.
    • Shallow dimpling: Light pokes don’t do much. Press firmly to create deep wells that hold oil and toppings.
    • Overloading toppings: Too many wet toppings can make soggy bread.Pat juicy items dry and don’t pile them on.
    • Cutting too soon: Let it rest a few minutes so the crumb sets and stays airy.

    Variations You Can Try

    • Classic rosemary and sea salt: Keep it simple with fresh rosemary needles and flaky salt.
    • Tomato and basil:</-strong> Halved cherry tomatoes pressed into the dough, finished with fresh basil after baking.
    • Olive and red onion: Sliced Kalamata olives and thin red onion for a savory bite.
    • Garlic and cheese: Thin garlic slices and a light shower of Parmesan during the final 5 minutes of baking.
    • Whole wheat twist:</-strong> Swap 25–30% of the flour for whole wheat; add 1–2 tablespoons extra water if needed.

    FAQ

    Can I use all-purpose flour instead of bread flour?

    Yes. All-purpose flour works well and makes a slightly softer crumb. Bread flour adds more chew, but both are delicious.

    Do I have to cold-proof the dough overnight?

    No.

    A same-day rise makes great focaccia. The overnight rest just develops more flavor and a bit more structure.

    Why is my dough so sticky?

    Focaccia dough is meant to be wet. Oil your hands and the pan, and avoid adding extra flour.

    Stickiness leads to better bubbles.

    How do I get a super crispy bottom?

    Use plenty of oil in the pan, preheat your oven fully, and bake on a lower rack for strong bottom heat. A dark metal pan helps, too.

    What size pan should I use?

    A 9×13-inch pan gives a thicker, pillowy focaccia. A large sheet pan yields a thinner, crisper version.

    Adjust bake time slightly.

    Can I make this gluten-free?

    Use a high-quality 1:1 gluten-free flour blend designed for yeast breads and add 1 teaspoon xanthan gum if your blend doesn’t include it. Expect a denser crumb but good flavor.

    How do I know it’s done?

    The top should be deep golden with crisp edges, and the bottom should be well browned. If unsure, bake 2–3 minutes more.

    Wrapping Up

    Homemade focaccia is simple, rewarding, and endlessly adaptable.

    With a well-oiled pan, a patient rise, and bold dimples, you’ll get that bakery-style crust and airy crumb every time. Keep this recipe handy for weeknight dinners, party platters, or a cozy slice with soup. Once you bake it, you’ll understand why it becomes a house favorite.
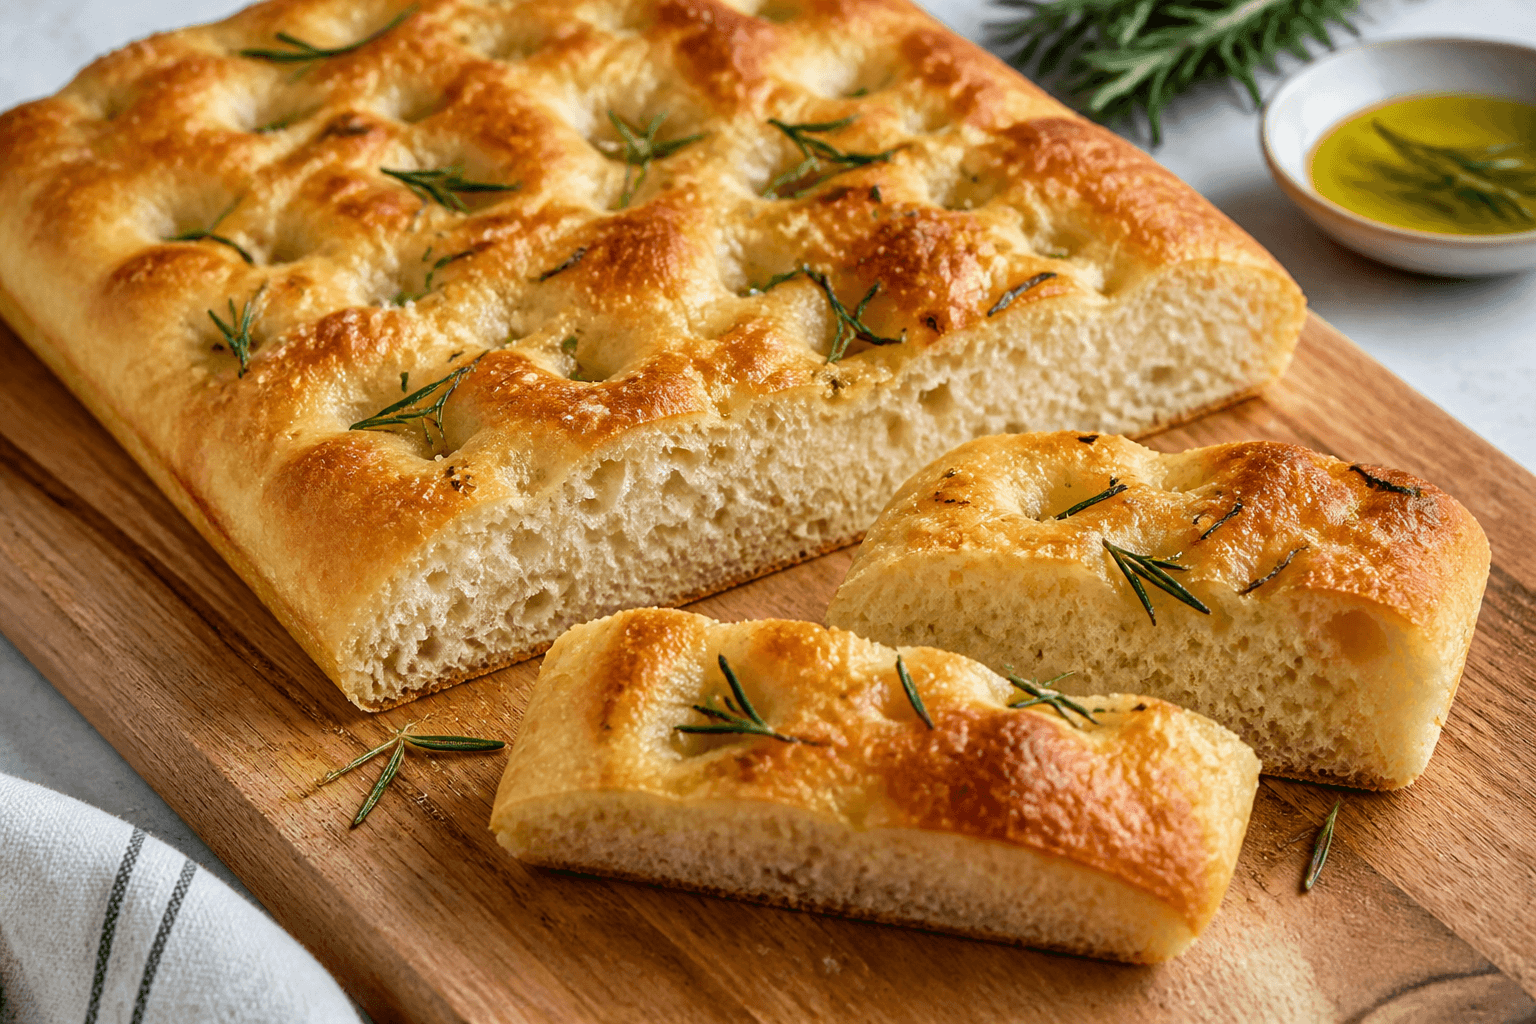
    Easy Homemade Focaccia Bread Recipe – Soft, Chewy, and Perfectly Crispy

    Prep Time 20 minutes
    Cook Time 25 minutes
    Total Time 45 minutes
    Servings: 12 servings

    Ingredients
      

    • 4 cups (500 g) bread flour (all-purpose works too, but bread flour gives more chew)
    • 2 teaspoons kosher salt
    • 2 teaspoons sugar or honey (helps activate the yeast and browning)
    • 2 1/4 teaspoons instant or active dry yeast (one standard packet)
    • 1 3/4 cups (415 ml) warm water (about 105–110°F/40–43°C)
    • 1/4 cup (60 ml) extra-virgin olive oil for the dough, plus more for the pan and topping
    • Flaky sea salt for finishing
    • Optional toppings: fresh rosemary, thinly sliced red onion, cherry tomatoes, olives, garlic, or shredded cheese

    Method
     

    1. Mix the dough: In a large bowl, whisk flour, salt, and sugar. Add yeast, warm water, and 2 tablespoons of olive oil. Stir with a spoon until no dry spots remain. The dough will be sticky—this is good.
    2. First rise: Cover the bowl with plastic wrap or a damp towel. Let it rise at room temperature until doubled, about 60–90 minutes. For deeper flavor, refrigerate overnight (up to 24 hours), then let it warm up for 45 minutes before shaping.
    3. Prep the pan: Generously oil a 9×13-inch pan or a large sheet pan (about 2–3 tablespoons). Tilt to coat the bottom and sides.
    4. Transfer and fold: Scrape the dough into the pan. Drizzle 1 tablespoon olive oil on top. With oiled hands, gently stretch the dough toward the corners. If it springs back, let it rest 10 minutes, then stretch again.
    5. Second rise: Cover loosely and let the dough puff until about 50% larger, 30–45 minutes. It should look bubbly and lively.
    6. Dimple and top: Heat oven to 450°F (230°C). Oil your fingertips and press straight down into the dough to make deep dimples all over. Drizzle 1–2 tablespoons olive oil on top. Sprinkle flaky salt and add toppings like rosemary, onions, or tomatoes.
    7. Bake: Bake 20–25 minutes until the top is golden and the edges are crisp. If using a dark pan, start checking at 18 minutes.
    8. Finish and cool: Brush or drizzle a little more olive oil over the hot bread for shine and flavor. Cool in the pan 5–10 minutes, then transfer to a rack. Slice and serve warm or at room temperature.
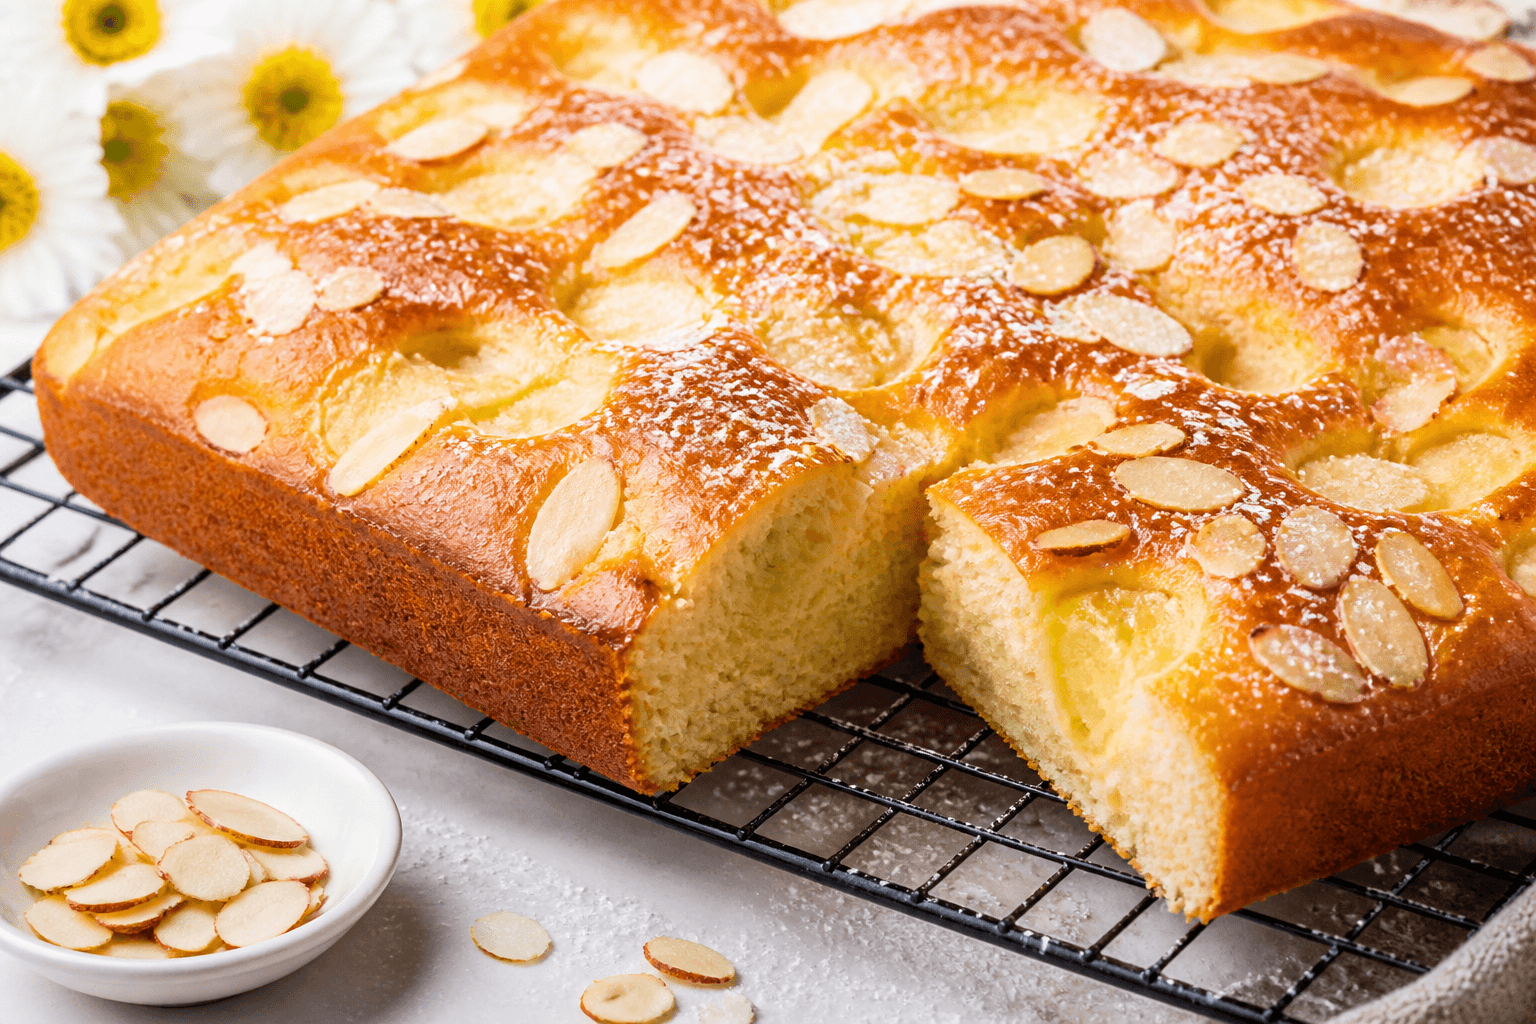
  • Sweet Focaccia Bread – Soft, Golden, and Gently Sugared

    Sweet Focaccia Bread – Soft, Golden, and Gently Sugared

    Sweet focaccia bread is the kind of treat that feels special without being fussy. It’s soft, slightly chewy, and kissed with a crunchy sugar top that caramelizes in the oven. Think of it as a cross between a tender brioche and a classic Italian flatbread.

    It’s perfect for slow mornings, afternoon snacks, or an easy dessert with fruit. You don’t need expert baking skills—just a little time and a good olive oil.

    What Makes This Special

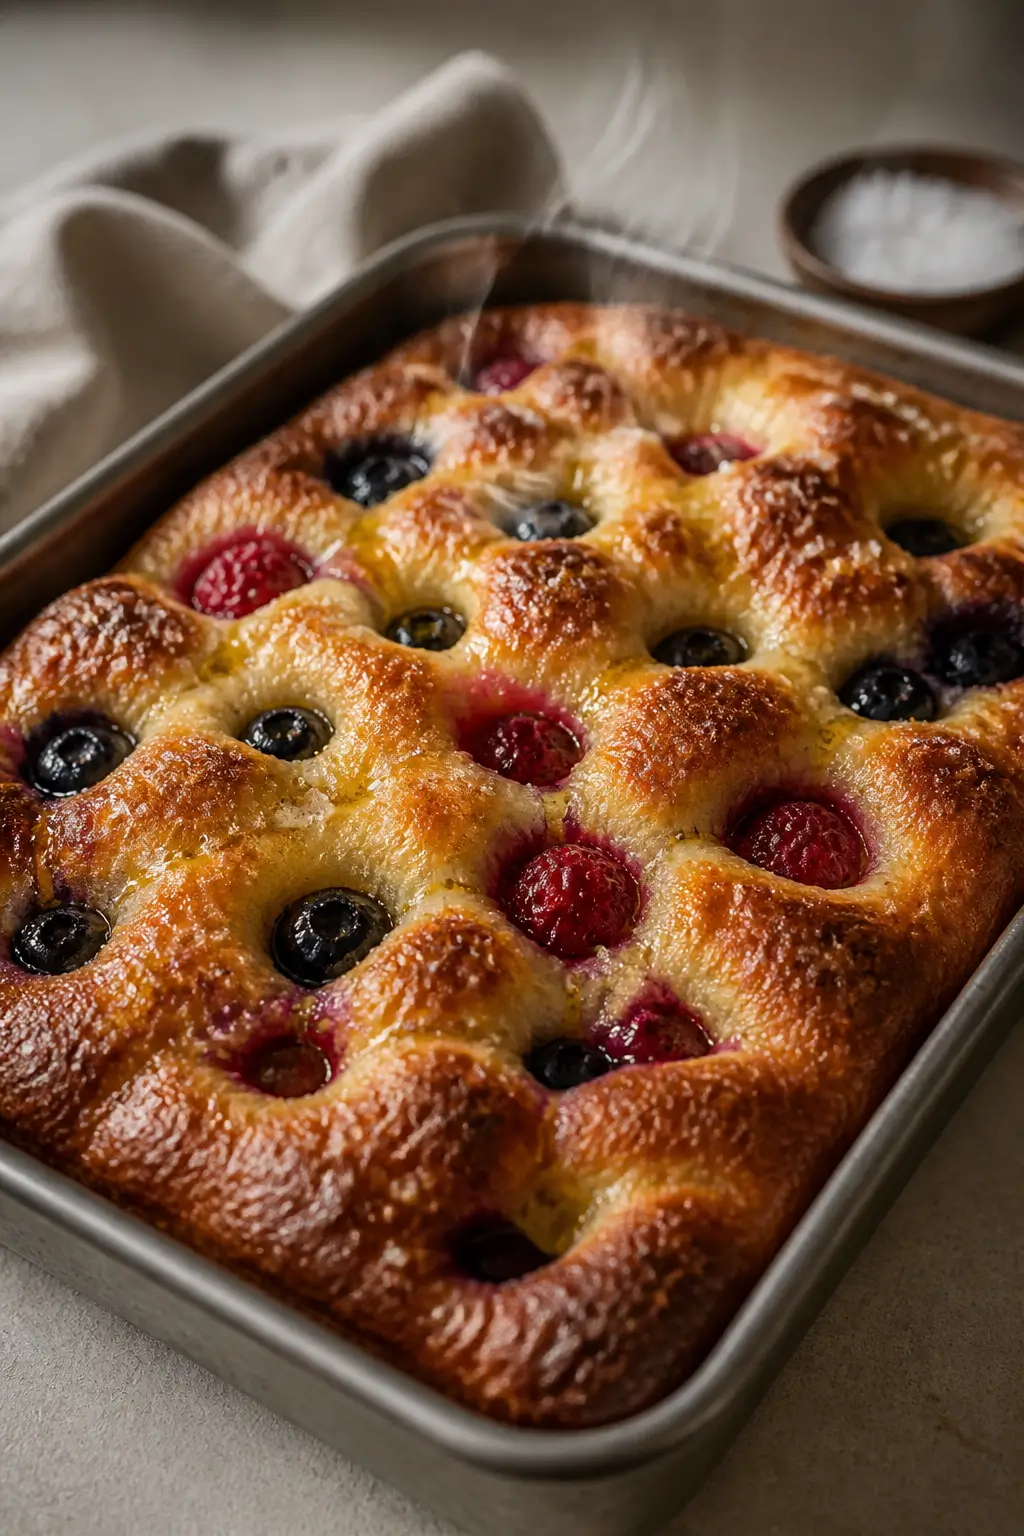
    Cooking process close-up: Puffy sweet focaccia just out of the oven in a 9x13 metal pan, golden top

    This sweet focaccia has the signature airy crumb and dimpled top you expect, but with a lightly sweet dough and a sparkling sugar crust. A touch of honey boosts flavor without making it cloying.

    Olive oil keeps it moist for days and adds a lovely, rounded richness. It’s flexible, too—top it with berries, thin-sliced apples, or leave it simple and serve with mascarpone.

    What You’ll Need

    • All-purpose flour – 4 cups (500 g)
    • Warm water – 1 3/4 cups (415 ml), about 105–110°F
    • Active dry yeast – 2 1/4 tsp (1 packet)
    • Granulated sugar – 1/4 cup (plus extra for topping)
    • Honey – 2 tbsp
    • Kosher salt – 1 1/2 tsp (plus flaky salt for topping, optional)
    • Extra-virgin olive oil – 1/3 cup (plus more for pan and drizzling)
    • Vanilla extract – 1 tsp
    • Optional toppings – thin-sliced apples or pears, blueberries, raspberries, lemon zest, orange zest, cinnamon sugar

    Instructions

    Final dish top view: Overhead shot of sliced sweet focaccia arranged on a parchment-lined board, sho
    1. Activate the yeast: In a large bowl, whisk warm water, honey, and yeast. Let sit until foamy, 5–10 minutes.

      If it doesn’t foam, your yeast may be expired or the water too hot/cold.

    2. Make the dough: Stir in sugar, vanilla, and salt. Add flour and olive oil. Mix with a spatula until a shaggy dough forms.

      It will be sticky—that’s good.

    3. Knead briefly: Knead in the bowl or on a lightly oiled surface for 2–3 minutes, just until smooth. Avoid adding extra flour. The dough should feel soft and slightly tacky.
    4. First rise: Oil a clean bowl, add the dough, and turn to coat.

      Cover and let rise in a warm spot until doubled, about 60–90 minutes.

    5. Pan and rest: Generously oil a 9×13-inch pan or a large sheet pan. Gently transfer dough to the pan, stretching it toward the edges. If it springs back, rest 10 minutes and stretch again until it fits.
    6. Second rise: Cover and let rise 30–45 minutes, until puffy.

      Meanwhile, heat oven to 400°F (200°C).

    7. Dimple and top: Drizzle 2–3 tbsp olive oil over the dough. With oiled fingers, press deep dimples all over. Sprinkle generously with sugar (2–3 tbsp).

      Add fruit, zest, or a light dusting of cinnamon sugar, if using. For a sweet-salty edge, add a pinch of flaky salt.

    8. Bake: Bake 20–25 minutes, until golden with caramelized edges. The top should feel set and lightly crisp.
    9. Finish and cool: Drizzle a final thread of olive oil while warm.

      Cool 10–15 minutes before slicing so the crumb sets.

    Storage Instructions

    • Room temperature: Wrap loosely in parchment or store in an airtight container for up to 2 days.
    • Reheating: Warm slices at 325°F (165°C) for 5–7 minutes to refresh the crust.
    • Freezer: Wrap slices tightly and freeze for up to 2 months. Thaw at room temperature, then reheat.
    • Avoid the fridge: Refrigeration can dry it out and dull the flavor.

    Benefits of This Recipe

    • Approachable: No special equipment needed and very forgiving dough.
    • Make-ahead friendly: Stays moist thanks to olive oil.
    • Customizable sweetness: Sugar on top lets you control how sweet it tastes.
    • Versatile: Works for breakfast, brunch, dessert, or gifting.

    Pitfalls to Watch Out For

    • Water too hot or cold: Yeast won’t bloom if the temperature is off.
    • Adding too much flour: The dough should be sticky; extra flour makes it dense.
    • Under-dimpling: Deep dimples help hold oil and sugar and prevent uneven bubbles.
    • Overbaking: It should be golden, not dark brown; watch in the last 5 minutes.

    Recipe Variations

    • Lemon Sugar Focaccia: Mix zest of 1–2 lemons with sugar before sprinkling.
    • Berry Burst: Press blueberries or raspberries into the dough before baking.
    • Apple-Cinnamon: Fan thin apple slices on top; dust with cinnamon sugar.
    • Orange & Almond: Add orange zest and sprinkle sliced almonds for crunch.
    • Chocolate Drizzle: After baking, drizzle melted dark chocolate and finish with flaky salt.
    • Vanilla Bean: Swap vanilla extract for seeds from 1 vanilla pod for deeper aroma.

    Can I make the dough the night before?

    Yes. After the first rise, press into the oiled pan, cover tightly, and refrigerate up to 18 hours.

    Bring to room temperature for 30–45 minutes, dimple, top, and bake.

    Can I use instant yeast instead of active dry?

    Absolutely. Use the same amount. Skip the bloom step and mix it directly with the dry ingredients, then add warm water and oil.

    Is there a vegan option?

    Yes.

    Replace honey with maple syrup or extra sugar. Everything else is already plant-based.

    How do I keep the fruit from sinking?

    Use small, firm pieces and press them lightly into the top right before baking. Avoid heavy fruit piles in one spot.

    Why is my focaccia pale?

    It may need a few more minutes, or your oven runs cool.

    A darker pan also promotes better browning. Don’t skip the olive oil—it helps caramelization.

    In Conclusion

    Sweet focaccia bread brings together a soft, airy crumb and a lightly caramelized top that feels special any time of day. With simple steps and flexible toppings, it’s a no-stress bake that tastes bakery-fresh.

    Keep it plain and golden, or dress it up with fruit and spice—you can’t go wrong. Slice warm, share generously, and enjoy the gentle sweetness in every bite.

    Sweet Focaccia Bread – Soft, Golden, and Gently Sugared

    Prep Time 20 minutes
    Cook Time 25 minutes
    Total Time 45 minutes
    Servings: 8 servings

    Ingredients
      

    • All-purpose flour – 4 cups (500 g)
    • Warm water – 1 3/4 cups (415 ml), about 105–110°F
    • Active dry yeast – 2 1/4 tsp (1 packet)
    • Granulated sugar – 1/4 cup (plus extra for topping)
    • Honey – 2 tbsp
    • Kosher salt – 1 1/2 tsp (plus flaky salt for topping, optional)
    • Extra-virgin olive oil – 1/3 cup (plus more for pan and drizzling)
    • Vanilla extract – 1 tsp
    • Optional toppings – thin-sliced apples or pears, blueberries, raspberries, lemon zest, orange zest, cinnamon sugar

    Method
     

    1. Activate the yeast: In a large bowl, whisk warm water, honey, and yeast. Let sit until foamy, 5–10 minutes. If it doesn’t foam, your yeast may be expired or the water too hot/cold.
    2. Make the dough: Stir in sugar, vanilla, and salt. Add flour and olive oil. Mix with a spatula until a shaggy dough forms. It will be sticky—that’s good.
    3. Knead briefly: Knead in the bowl or on a lightly oiled surface for 2–3 minutes, just until smooth. Avoid adding extra flour. The dough should feel soft and slightly tacky.
    4. First rise: Oil a clean bowl, add the dough, and turn to coat. Cover and let rise in a warm spot until doubled, about 60–90 minutes.
    5. Pan and rest: Generously oil a 9×13-inch pan or a large sheet pan. Gently transfer dough to the pan, stretching it toward the edges. If it springs back, rest 10 minutes and stretch again until it fits.
    6. Second rise: Cover and let rise 30–45 minutes, until puffy. Meanwhile, heat oven to 400°F (200°C).
    7. Dimple and top: Drizzle 2–3 tbsp olive oil over the dough. With oiled fingers, press deep dimples all over. Sprinkle generously with sugar (2–3 tbsp). Add fruit, zest, or a light dusting of cinnamon sugar, if using. For a sweet-salty edge, add a pinch of flaky salt.
    8. Bake: Bake 20–25 minutes, until golden with caramelized edges. The top should feel set and lightly crisp.
    9. Finish and cool: Drizzle a final thread of olive oil while warm. Cool 10–15 minutes before slicing so the crumb sets.
  • The Creamiest Bacon and Mushroom Pasta – Comfort in a Bowl

    The Creamiest Bacon and Mushroom Pasta – Comfort in a Bowl

    Nothing beats a bowl of silky pasta coated in a rich, savory sauce. This bacon and mushroom version is the kind of weeknight dinner that feels special without asking much from you. It’s smoky, garlicky, and ultra-creamy, with just enough brightness to keep every bite balanced.

    If you love comfort food that still tastes fresh, this one belongs in your rotation. It’s simple to make, easy to customize, and guaranteed to satisfy.

    What Makes This Special

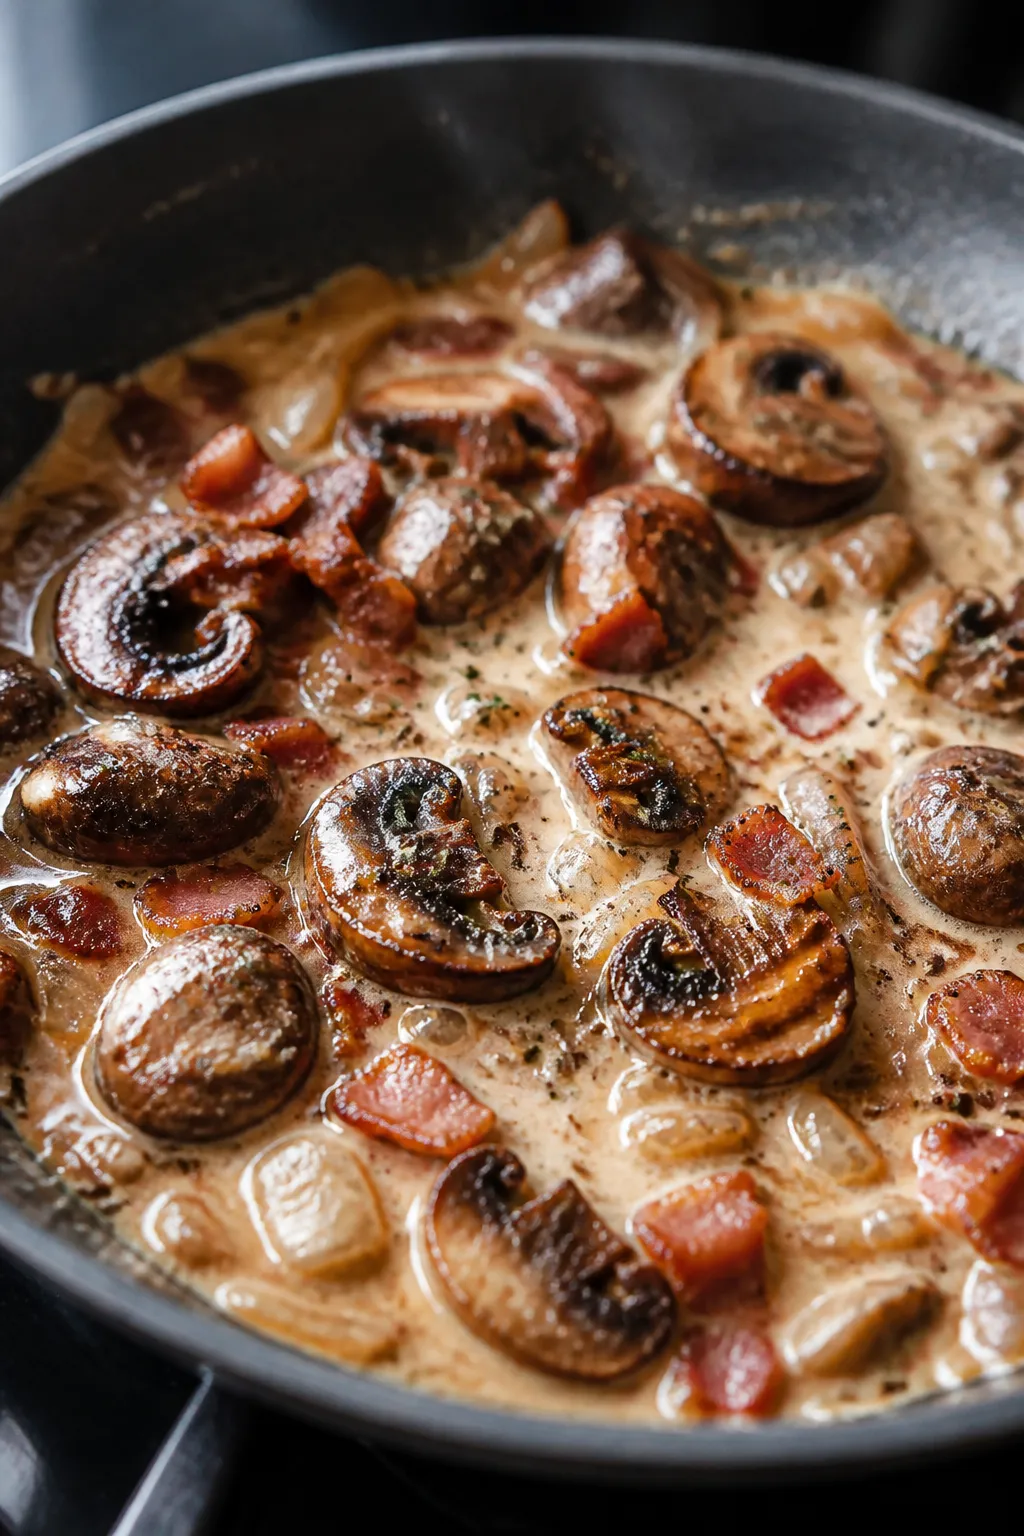
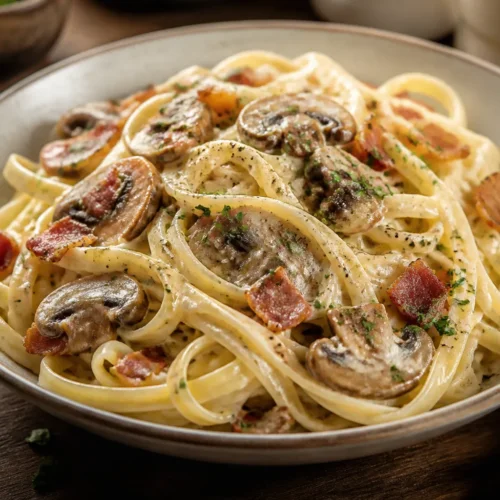
    Cooking process close-up: In a wide skillet, golden-crisp bacon bits scattered among deeply browned

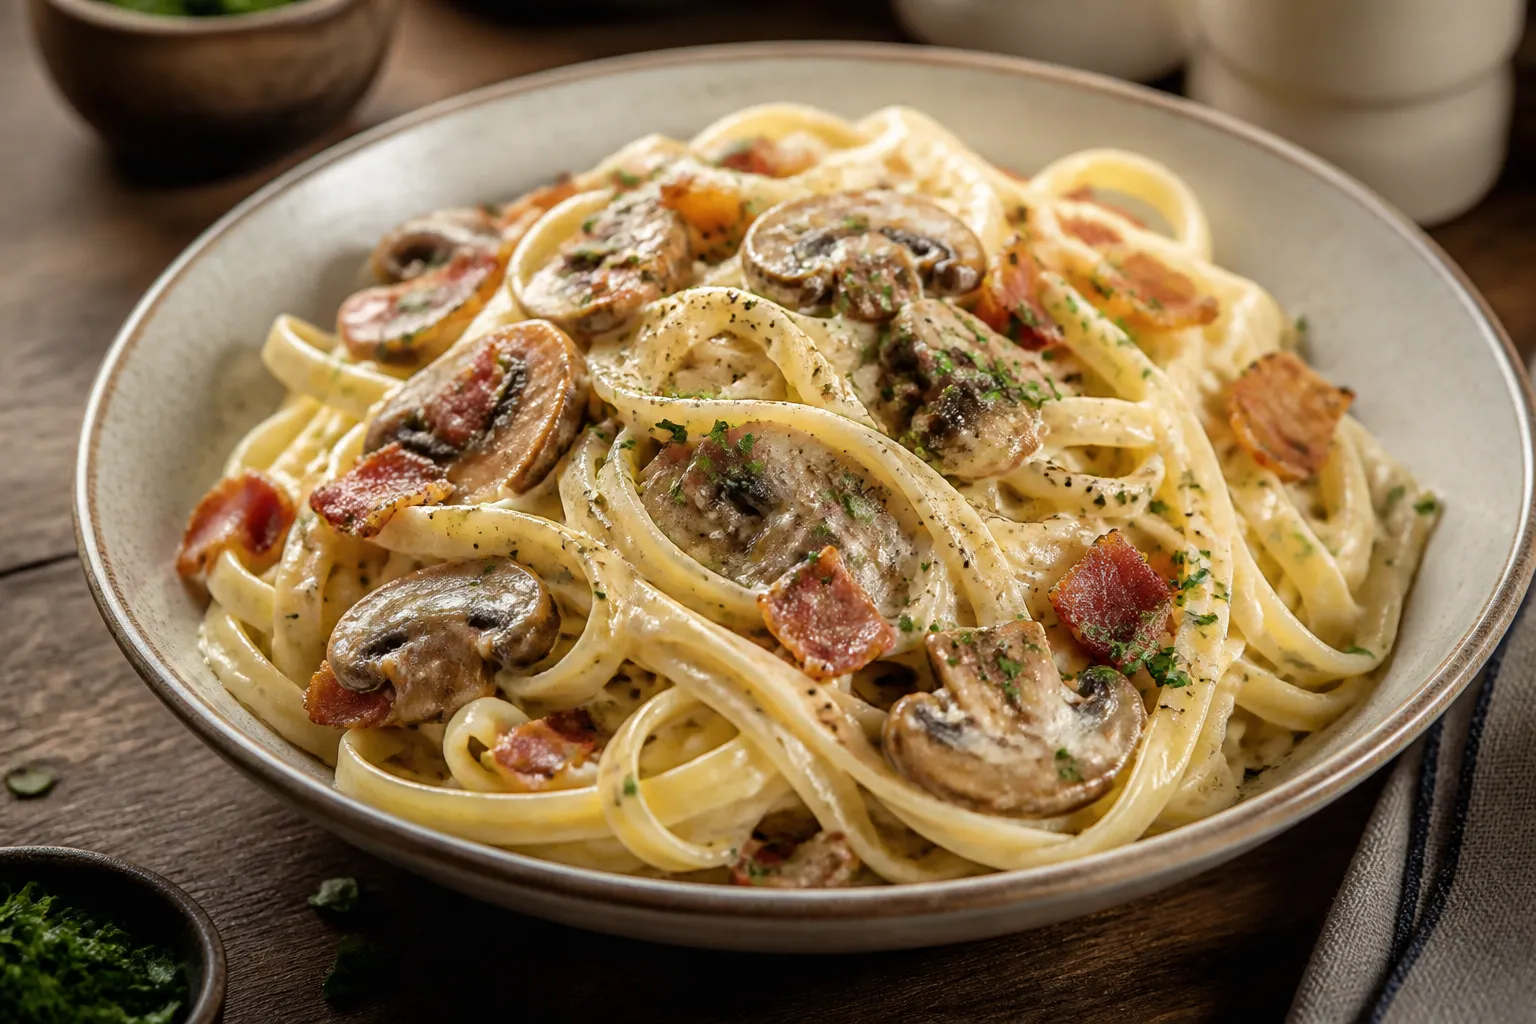
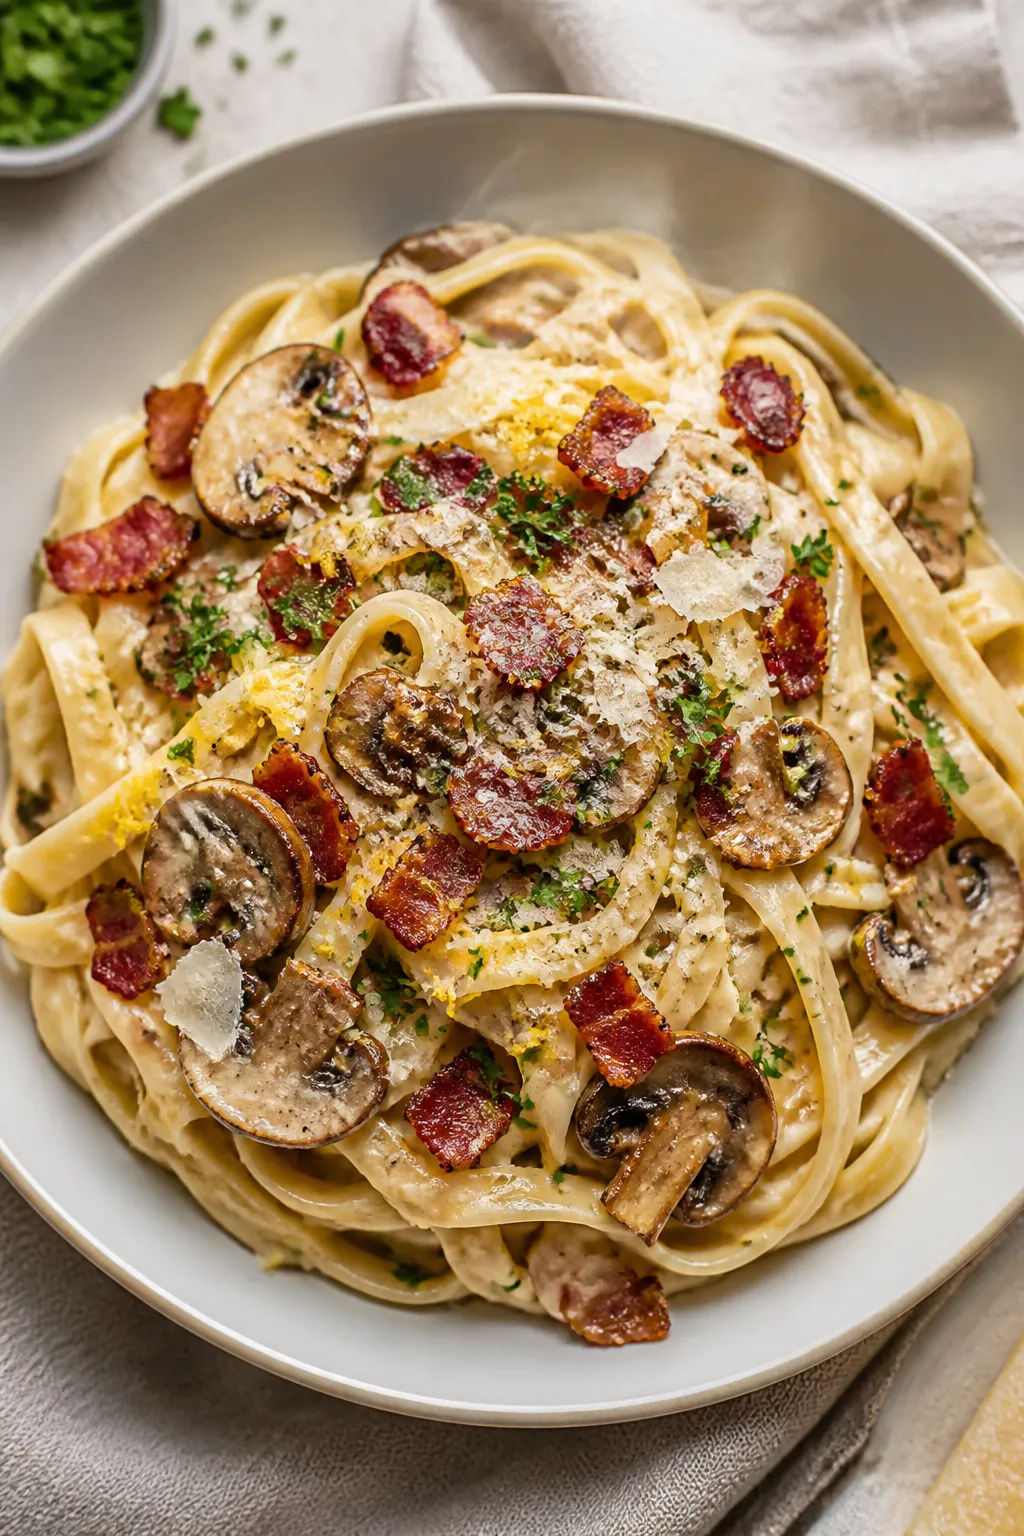
    This pasta nails the balance of flavor and texture. You get crisp, salty bacon; deep, earthy mushrooms; and a velvety sauce that clings to every strand.

    A splash of pasta water brings the sauce together without heaviness. Fresh lemon and parsley brighten the dish so it never feels too rich. It’s the kind of recipe that feels restaurant-worthy but uses pantry and grocery staples.

    Shopping List

    • Pasta: 12 oz fettuccine, linguine, or rigatoni
    • Bacon: 6–8 slices, cut into small pieces
    • Mushrooms: 12 oz cremini or baby bella, sliced
    • Onion or shallot: 1 small, finely chopped
    • Garlic: 3–4 cloves, minced
    • Heavy cream: 1 cup (or half-and-half for lighter)
    • Parmesan: 3/4 cup finely grated, plus more to serve
    • Chicken or vegetable broth: 1/2 cup (optional, for depth)
    • Butter: 1 tablespoon
    • Olive oil: 1 tablespoon
    • Lemon: 1, for zest and a squeeze of juice
    • Fresh parsley: Small handful, chopped
    • Salt and black pepper
    • Red pepper flakes: Pinch (optional)

    How to Make It

    Final plated overhead: The creamiest bacon and mushroom pasta (fettuccine) tossed to a glossy finish
    1. Boil the pasta: Bring a large pot of well-salted water to a boil.

      Cook pasta until just shy of al dente. Reserve 1 cup of pasta water, then drain.

    2. Crisp the bacon: In a wide skillet over medium heat, cook bacon until golden and crisp. Scoop out to a plate, leaving 1–2 tablespoons of bacon fat in the pan.
    3. Sauté the aromatics: Add olive oil if needed.

      Cook onion with a pinch of salt until soft, 3–4 minutes. Add garlic and cook 30 seconds, just until fragrant.

    4. Brown the mushrooms: Add mushrooms and a small pinch of salt. Let them sit to sear, then stir occasionally until browned and any liquid cooks off, 6–8 minutes.
    5. Deglaze and build flavor: Pour in broth (if using) to lift browned bits.

      Let it reduce by half. Stir in butter for extra gloss.

    6. Make it creamy: Lower heat. Add heavy cream and a small splash of pasta water.

      Simmer gently 2–3 minutes until slightly thickened.

    7. Add cheese and bacon: Stir in Parmesan until melted and smooth. Return bacon to the pan. Season with black pepper and a pinch of red pepper flakes.
    8. Toss the pasta: Add pasta to the skillet and toss, adding more pasta water a little at a time until the sauce is silky and coats the noodles.
    9. Brighten it up: Finish with lemon zest and a tiny squeeze of juice.

      Fold in parsley. Taste and adjust salt and pepper.

    10. Serve: Plate with extra Parmesan and a crack of pepper. Eat right away for peak creaminess.

    How to Store

    Cool leftovers, then store in an airtight container in the fridge for up to 3 days.

    Reheat gently on the stove with a splash of water, milk, or cream to loosen the sauce. Avoid microwaving on high; use medium power in short bursts and stir. This dish doesn’t freeze well due to the cream sauce.

    Why This is Good for You

    • Mushrooms add nutrients: They bring fiber, B vitamins, and savory depth without extra fat.
    • Protein from bacon and cheese: Helps keep you full and satisfied.
    • Balanced richness: Lemon, parsley, and black pepper keep flavors bright, so you enjoy the dish without it feeling heavy.
    • Customizable: You can lighten the cream or swap in yogurt to suit your goals.

    Common Mistakes to Avoid

    • Overcooking pasta: It should be just al dente before tossing with the sauce to avoid mushy noodles.
    • Crowding mushrooms: Overloading the pan steams them.

      Cook in batches if needed for real browning.

    • Boiling the cream: Keep the heat gentle so the sauce stays smooth and doesn’t split.
    • Skipping pasta water: The starch helps the sauce cling. Add it gradually for a glossy finish.
    • Underseasoning: Taste at the end—Parmesan and bacon are salty, but you’ll still need pepper and a touch of acid.

    Alternatives

    • Meat swaps: Pancetta or prosciutto work well. For a lighter option, try turkey bacon.
    • Mushroom mix: Combine cremini with shiitake or oyster for more complexity.
    • Dairy tweaks: Use half-and-half, or swap part of the cream with whole milk and a spoon of cream cheese for body.
    • Herb switch: Thyme or chives instead of parsley for a different vibe.
    • Pasta shape: Rigatoni, tagliatelle, or shells all hold the sauce beautifully.
    • Vegetarian: Skip bacon, sauté mushrooms in butter and olive oil, and add a splash of soy sauce for umami.
    • Gluten-free: Use your favorite gluten-free pasta and watch the cook time closely.

    FAQ

    Can I make this ahead?

    It’s best fresh, but you can prep components.

    Cook bacon and slice mushrooms in advance. Reheat the sauce gently and cook pasta right before serving.

    What if my sauce is too thick?

    Add warm pasta water a little at a time, stirring until the sauce loosens and turns glossy again.

    Can I use milk instead of cream?

    Yes, but the sauce will be thinner. Use whole milk and a small spoon of cream cheese or extra Parmesan to help it thicken.

    How do I keep the bacon crisp?

    Stir most of the bacon in, but reserve a bit to sprinkle on top right before serving.

    Which mushrooms are best?

    Cremini are reliable and flavorful.

    Mixing in shiitake or oyster adds meatiness and a deeper, savory note.

    Is wine a good addition?

    Absolutely. Swap part of the broth for 1/4 cup dry white wine when deglazing. Let it reduce before adding cream.

    In Conclusion

    This creamy bacon and mushroom pasta delivers big flavor with simple steps.

    It’s rich yet balanced, cozy yet bright, and endlessly adaptable. Keep it in your weeknight toolkit, and you’ll have a reliable, crowd-pleasing dinner any time you need a little comfort in a bowl.

    The Creamiest Bacon and Mushroom Pasta – Comfort in a Bowl

    Prep Time 10 minutes
    Cook Time 20 minutes
    Total Time 30 minutes
    Servings 4 servings

    Ingredients
      

    • Pasta: 12 oz fettuccine, linguine, or rigatoni
    • Bacon: 6–8 slices, cut into small pieces
    • Mushrooms: 12 oz cremini or baby bella, sliced
    • Onion or shallot: 1 small, finely chopped
    • Garlic: 3–4 cloves, minced
    • Heavy cream: 1 cup (or half-and-half for lighter)
    • Parmesan: 3/4 cup finely grated, plus more to serve
    • Chicken or vegetable broth: 1/2 cup (optional, for depth)
    • Butter: 1 tablespoon
    • Olive oil: 1 tablespoon
    • Lemon: 1, for zest and a squeeze of juice
    • Fresh parsley: Small handful, chopped
    • Salt and black pepper
    • Red pepper flakes: Pinch (optional)

    Instructions
     

    • Boil the pasta: Bring a large pot of well-salted water to a boil. Cook pasta until just shy of al dente. Reserve 1 cup of pasta water, then drain.
    • Crisp the bacon: In a wide skillet over medium heat, cook bacon until golden and crisp. Scoop out to a plate, leaving 1–2 tablespoons of bacon fat in the pan.
    • Sauté the aromatics: Add olive oil if needed. Cook onion with a pinch of salt until soft, 3–4 minutes. Add garlic and cook 30 seconds, just until fragrant.
    • Brown the mushrooms: Add mushrooms and a small pinch of salt. Let them sit to sear, then stir occasionally until browned and any liquid cooks off, 6–8 minutes.
    • Deglaze and build flavor: Pour in broth (if using) to lift browned bits. Let it reduce by half. Stir in butter for extra gloss.
    • Make it creamy: Lower heat. Add heavy cream and a small splash of pasta water. Simmer gently 2–3 minutes until slightly thickened.
    • Add cheese and bacon: Stir in Parmesan until melted and smooth. Return bacon to the pan. Season with black pepper and a pinch of red pepper flakes.
    • Toss the pasta: Add pasta to the skillet and toss, adding more pasta water a little at a time until the sauce is silky and coats the noodles.
    • Brighten it up: Finish with lemon zest and a tiny squeeze of juice. Fold in parsley. Taste and adjust salt and pepper.
    • Serve: Plate with extra Parmesan and a crack of pepper. Eat right away for peak creaminess.
  • Easy Focaccia Bread Recipe – Soft, Golden, and Foolproof

    Easy Focaccia Bread Recipe – Soft, Golden, and Foolproof

    Focaccia is one of those breads that looks fancy but is wonderfully simple to make at home. It’s soft inside, crisp at the edges, and full of olive oil flavor. With a few pantry staples and a little patience, you can pull a golden, dimpled loaf from your oven that tastes like it came from a bakery.

    This version keeps things straightforward without sacrificing texture or taste. Perfect for sandwiches, snacking, or soaking up sauce.

    Why This Recipe Works

    Overhead shot of freshly baked focaccia in a 9x13-inch pan just out of the oven, golden surface with
    • High-hydration dough keeps the crumb moist and airy, giving you those classic focaccia bubbles.
    • Olive oil in the dough and pan creates a crisp, flavorful crust and prevents sticking.
    • Two rises develop flavor and structure without complicated shaping.
    • Coarse salt and dimpling help trap little pools of oil for extra flavor in every bite.

    Ingredients

    • 4 cups (500 g) bread flour or all-purpose flour
    • 1 1/2 cups (360 ml) warm water, about 100–110°F (38–43°C)
    • 2 1/4 tsp (1 packet) active dry yeast or instant yeast
    • 2 tsp fine sea salt
    • 2 tbsp granulated sugar or honey
    • 1/4 cup (60 ml) extra-virgin olive oil, plus more for the pan and topping
    • 2–3 tbsp olive oil for topping
    • 1–2 tsp flaky or coarse sea salt, for finishing
    • Optional toppings: fresh rosemary, thin red onion slices, cherry tomatoes, olives, garlic

    Step-by-Step Instructions

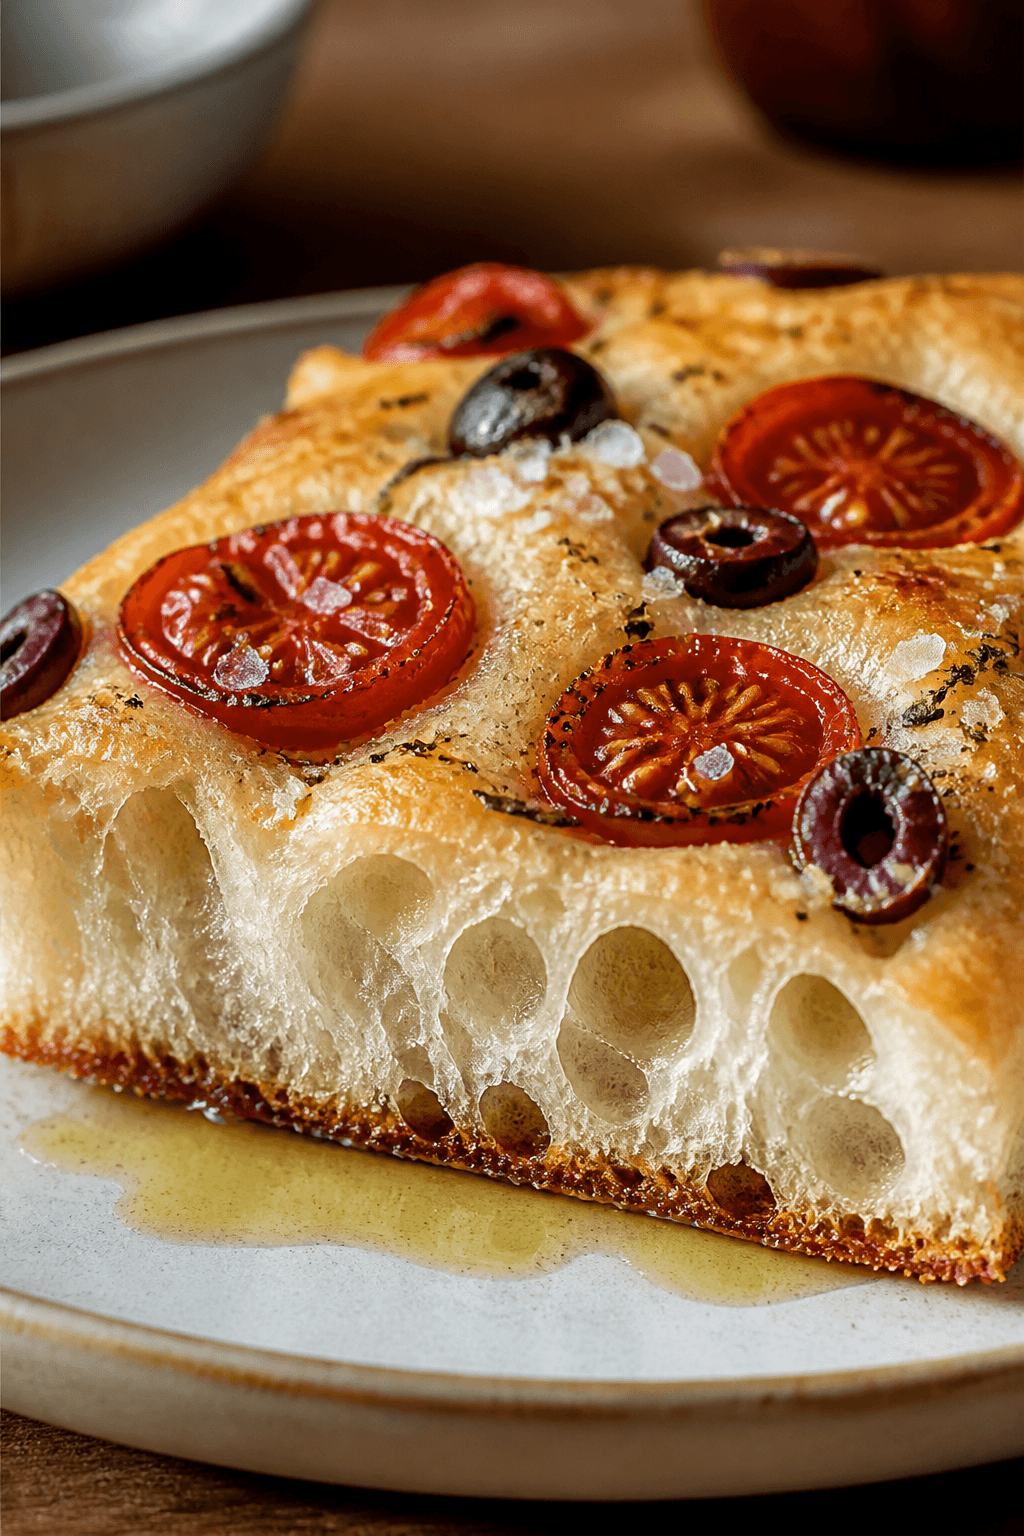
    Close-up detail of a sliced square of focaccia on a simple ceramic plate, showing the moist, high-hy
    1. Activate the yeast (if using active dry): In a large bowl, stir warm water with sugar or honey. Sprinkle the yeast over the top, wait 5–10 minutes until foamy.If using instant yeast, skip the proof and add it directly to the flour.
    2. Make the dough: Add flour, fine salt, and 1/4 cup olive oil to the bowl. Mix with a spoon until a shaggy dough forms. The dough will be sticky—that’s good.
    3. Knead briefly: Turn the dough onto a lightly oiled surface and knead 2–3 minutes, or perform 2–3 sets of stretch-and-folds in the bowl.Aim for a smooth, elastic dough. Don’t overwork it.
    4. First rise: Place dough in a lightly oiled bowl, turn to coat, cover, and let rise in a warm spot until doubled, about 60–90 minutes.
    5. Prep the pan: Generously oil a 9×13-inch pan or large sheet pan (about 2–3 tbsp). This oil helps the crust crisp and prevents sticking.
    6. Pan the dough: Transfer the dough to the pan.Gently stretch it toward the edges. If it resists, let it rest 10 minutes, then stretch again until it mostly fills the pan.
    7. Second rise: Cover and let the dough puff until slightly jiggly and airy, 30–45 minutes.
    8. Dimple and top: Drizzle 2–3 tbsp olive oil over the surface. With oiled fingers, press deep dimples all over.Sprinkle flaky salt and add toppings like rosemary, tomatoes, or olives.
    9. Bake: Preheat oven to 425°F (220°C). Bake 20–25 minutes, until golden with crisp edges. Rotate the pan once for even color.
    10. Finish and cool: Brush or drizzle a little more olive oil on top.Cool in the pan 10 minutes, then transfer to a rack. Slice warm or at room temp.

    Storage Instructions

    • Room temperature: Wrap loosely in parchment or store in a paper bag inside a plastic bag for up to 2 days. Re-crisp in a 375°F (190°C) oven for 5–8 minutes.
    • Freezer: Wrap tightly in plastic, then foil, for up to 2 months.Thaw at room temp, then refresh in the oven.
    • Avoid the fridge: Refrigeration dries bread out faster. Freeze instead.

    Why This is Good for You

    • Olive oil provides heart-friendly fats and great flavor without butter.
    • Homemade means control: You manage the salt, toppings, and oil, keeping it cleaner than many store-bought versions.
    • Complex carbs offer steady energy, and pairing with protein or veggies makes a balanced snack or meal.

    Common Mistakes to Avoid

    • Water too hot: Anything above 120°F (49°C) can kill yeast. Aim for warm, not hot.
    • Under-oiling the pan: Leads to sticking and a pale crust.Be generous.
    • Skipping the second rise: You’ll miss the airy texture and signature bubbles.
    • Overloading toppings: Too much moisture (like wet tomatoes) can make the top soggy. Pat juicy toppings dry.
    • Cutting too soon: Let it rest 10 minutes so the crumb sets and stays fluffy.

    Recipe Variations

    • Garlic-Rosemary: Add 2–3 minced garlic cloves and a handful of chopped fresh rosemary before baking.
    • Tomato-Basil: Press halved cherry tomatoes into the dough and finish with torn basil after baking.
    • Olive and Onion: Scatter sliced Kalamata olives and thin red onion for a savory bite.
    • Cheesy Focaccia: Sprinkle 1/2 cup grated Parmesan or shredded mozzarella in the last 5 minutes of baking.
    • Whole-Wheat Twist: Swap 1 cup of the white flour for whole-wheat flour. Add 1–2 tbsp extra water if needed.

    FAQ

    Can I make the dough ahead?

    Yes.

    After mixing, let it rise 30 minutes at room temp, then refrigerate up to 24 hours. Bring to room temp, spread in the pan, let it puff, then bake.

    Do I need bread flour?

    No. All-purpose flour works well.

    Bread flour gives a chewier texture and a bit more structure, but both are great.

    How do I get bigger air pockets?

    Use a wetter dough, don’t over-knead, and give it a full second rise. Gentle handling preserves the bubbles.

    Why is my focaccia dense?

    Common causes are old yeast, cool rising conditions, or cutting the rises short. Check yeast freshness and allow enough time to double.

    Can I bake on a sheet pan instead of a 9×13?

    Absolutely.

    Use a rimmed sheet pan, oil it well, and stretch the dough to your desired thickness. Thinner dough bakes a bit faster.

    Final Thoughts

    This easy focaccia delivers bakery-quality results with minimal fuss. With a few simple steps, you’ll get a golden, olive oil–kissed loaf that fits any meal.

    Keep the base recipe handy, switch up the toppings, and make it your go-to for weeknights or gatherings. Once you try it, you’ll wonder why you ever bought it.

    Easy Focaccia Bread Recipe – Soft, Golden, and Foolproof

    Prep Time 20 minutes
    Cook Time 25 minutes
    Total Time 45 minutes
    Servings: 12 servings

    Ingredients
      

    • 4 cups (500 g) bread flour or all-purpose flour
    • 1 1/2 cups (360 ml) warm water, about 100–110°F (38–43°C)
    • 2 1/4 tsp (1 packet) active dry yeast or instant yeast
    • 2 tsp fine sea salt
    • 2 tbsp granulated sugar or honey
    • 1/4 cup (60 ml) extra-virgin olive oil, plus more for the pan and topping
    • 2–3 tbsp olive oil for topping
    • 1–2 tsp flaky or coarse sea salt, for finishing
    • Optional toppings: fresh rosemary, thin red onion slices, cherry tomatoes, olives, garlic

    Method
     

    1. Activate the yeast (if using active dry): In a large bowl, stir warm water with sugar or honey. Sprinkle the yeast over the top, wait 5–10 minutes until foamy. If using instant yeast, skip the proof and add it directly to the flour.
    2. Make the dough: Add flour, fine salt, and 1/4 cup olive oil to the bowl. Mix with a spoon until a shaggy dough forms. The dough will be sticky—that’s good.
    3. Knead briefly: Turn the dough onto a lightly oiled surface and knead 2–3 minutes, or perform 2–3 sets of stretch-and-folds in the bowl. Aim for a smooth, elastic dough. Don’t overwork it.
    4. First rise: Place dough in a lightly oiled bowl, turn to coat, cover, and let rise in a warm spot until doubled, about 60–90 minutes.
    5. Prep the pan: Generously oil a 9×13-inch pan or large sheet pan (about 2–3 tbsp). This oil helps the crust crisp and prevents sticking.
    6. Pan the dough: Transfer the dough to the pan. Gently stretch it toward the edges. If it resists, let it rest 10 minutes, then stretch again until it mostly fills the pan.
    7. Second rise: Cover and let the dough puff until slightly jiggly and airy, 30–45 minutes.
    8. Dimple and top: Drizzle 2–3 tbsp olive oil over the surface. With oiled fingers, press deep dimples all over. Sprinkle flaky salt and add toppings like rosemary, tomatoes, or olives.
    9. Bake: Preheat oven to 425°F (220°C). Bake 20–25 minutes, until golden with crisp edges. Rotate the pan once for even color.
    10. Finish and cool: Brush or drizzle a little more olive oil on top. Cool in the pan 10 minutes, then transfer to a rack. Slice warm or at room temp.