Category: Breakfast

  • Crescent Rolls Recipes – Easy, Flaky, and Versatile

    Crescent Rolls Recipes – Easy, Flaky, and Versatile

    Crescent rolls are the kind of comfort bake that always hits the spot. They’re buttery, flaky, and perfect for both sweet and savory fillings. Whether you’re planning a quick weeknight side or a crowd-pleasing appetizer, these rolls are a reliable go-to.

    This recipe keeps things simple while giving you options to make them your own. You’ll get crisp edges, tender layers, and that classic crescent shape we all love.

    What Makes This Special

    Cooking process, close-up detail: Golden crescent roll wedges mid-rise on a parchment-lined sheet pa

    This crescent rolls recipe is all about speed and flexibility. You can use homemade dough for a bakery-style finish or opt for store-bought crescent dough when you’re short on time.

    The technique ensures flaky layers without complicated steps. Plus, the base dough is neutral, so it pairs well with everything from cheese and herbs to cinnamon sugar.

    What You’ll Need

    • All-purpose flour – 2 3/4 cups
    • Instant yeast – 2 1/4 tsp (one packet)
    • Granulated sugar – 2 tbsp
    • Salt – 1 tsp
    • Warm milk (about 110°F/43°C) – 3/4 cup
    • Unsalted butter, melted and cooled – 6 tbsp (plus 2 tbsp for brushing)
    • Large egg – 1
    • Optional fillings: shredded cheese, ham, pepperoni, pesto, chocolate chips, jam, or cinnamon sugar
    • Optional topping: flaky salt, sesame seeds, or everything seasoning
    • Egg wash – 1 egg beaten with 1 tbsp water (optional for shine)

    Instructions

    Final dish, tasty top view: Overhead shot of a mixed platter of freshly baked crescent rolls—half
    1. In a large bowl, whisk flour, yeast, sugar, and salt.
    2. Stir in warm milk, melted butter, and the egg until a shaggy dough forms. Knead by hand or with a mixer for 5–7 minutes until smooth and slightly tacky.
    3. Shape into a ball, place in a lightly greased bowl, cover, and let rise in a warm spot until doubled, about 60–90 minutes.
    4. Punch down the dough.

      Divide into two equal pieces. Roll each piece into a 10–12 inch circle on a lightly floured surface.

    5. Brush the circle with a thin layer of melted butter. Using a pizza cutter, slice each circle into 8 wedges (like a pizza).
    6. Add a small amount of filling at the wide end if using.

      Roll each wedge from the wide end toward the tip to form crescents. Curve slightly into a crescent shape.

    7. Place on a parchment-lined baking sheet, tip side down. Cover loosely and let rise for 20–30 minutes while you heat the oven to 375°F (190°C).
    8. Brush with egg wash or melted butter.

      Add toppings if desired.

    9. Bake 12–16 minutes, until puffed and golden. Brush with a little more melted butter right out of the oven for extra flavor.
    10. Cool for 5–10 minutes before serving so the layers set.

    How to Store

    • Room temperature: Keep in an airtight container for up to 2 days.
    • Refrigerator: Store for up to 5 days; rewarm in a 300°F (150°C) oven for 5–7 minutes.
    • Freezer: Freeze baked rolls for up to 2 months. Thaw at room temp and refresh in the oven for 8–10 minutes.
    • Make-ahead: Shape and freeze unbaked crescents on a sheet until firm, then bag.

      Bake from frozen at 350°F (175°C) for 18–22 minutes.

    Health Benefits

    These rolls offer carbs for quick energy and can be balanced with protein-rich fillings like turkey, ham, or cheese. Using unsalted butter lets you control sodium. You can swap part of the flour with white whole wheat flour for more fiber.

    For a lighter option, brush lightly with olive oil instead of extra butter after baking.

    Common Mistakes to Avoid

    • Overfilling: Keep fillings modest to prevent tearing or leaking.
    • Cold dough: If dough is too cold, it won’t rise well. Let it proof in a warm, draft-free spot.
    • Rolling too thin: Ultra-thin dough leads to dry rolls. Aim for about 1/8 inch thick.
    • Skipping the second rise: That short rest makes the rolls lighter and fluffier.
    • Underbaking: Pale rolls can taste doughy.

      Look for even golden color and a dry bottom.

    Recipe Variations

    • Garlic Herb: Brush with garlic butter and sprinkle parsley before rolling.
    • Cheddar Jalapeño: Add shredded cheddar and a few jalapeño slices to the wide end.
    • Ham and Swiss: Classic combo for a quick lunch or brunch tray.
    • Pesto Parmesan: Spread a thin layer of pesto and finish with grated Parmesan.
    • Cinnamon Sugar: Brush with butter, sprinkle cinnamon sugar, roll, and glaze lightly after baking.
    • Chocolate Hazelnut: A teaspoon of chocolate spread turns them into an easy dessert.

    FAQ

    Can I use store-bought crescent dough?

    Yes. Skip the dough steps and start at slicing and filling. Bake per package instructions, usually around 10–12 minutes at 375°F (190°C).

    How do I keep the tips from unrolling?

    Roll snugly and place the tip underneath each crescent on the baking sheet.

    A light egg wash also helps seal the edge.

    Can I make them gluten-free?

    Use a 1:1 gluten-free baking flour that contains xanthan gum. Texture will be more tender than flaky, but still tasty.

    Why are my rolls dense?

    Likely under-proofing or old yeast. Make sure the dough doubles on the first rise and use fresh, active yeast.

    What’s the best way to reheat?

    Warm in a 300°F (150°C) oven for 5–7 minutes to revive flakiness.

    The microwave works in a pinch but softens the crust.

    Wrapping Up

    These crescent rolls deliver buttery layers and endless flavor options with minimal fuss. Keep the base recipe handy, then mix and match fillings to fit the moment. Whether you serve them with dinner, pack them for lunch, or turn them into dessert, they’re a sure win every time.

    Crescent Rolls Recipes – Easy, Flaky, and Versatile

    Prep Time 15 minutes
    Cook Time 12 minutes
    Total Time 27 minutes
    Servings 8 servings

    Ingredients
      

    • All-purpose flour – 2 3/4 cups
    • Instant yeast – 2 1/4 tsp (one packet)
    • Granulated sugar – 2 tbsp
    • Salt – 1 tsp
    • Warm milk (about 110°F/43°C) – 3/4 cup
    • Unsalted butter, melted and cooled – 6 tbsp (plus 2 tbsp for brushing)
    • Large egg – 1
    • Optional fillings: shredded cheese, ham, pepperoni, pesto, chocolate chips, jam, or cinnamon sugar
    • Optional topping: flaky salt, sesame seeds, or everything seasoning
    • Egg wash – 1 egg beaten with 1 tbsp water (optional for shine)

    Instructions
     

    • In a large bowl, whisk flour, yeast, sugar, and salt.
    • Stir in warm milk, melted butter, and the egg until a shaggy dough forms. Knead by hand or with a mixer for 5–7 minutes until smooth and slightly tacky.
    • Shape into a ball, place in a lightly greased bowl, cover, and let rise in a warm spot until doubled, about 60–90 minutes.
    • Punch down the dough. Divide into two equal pieces. Roll each piece into a 10–12 inch circle on a lightly floured surface.
    • Brush the circle with a thin layer of melted butter. Using a pizza cutter, slice each circle into 8 wedges (like a pizza).
    • Add a small amount of filling at the wide end if using. Roll each wedge from the wide end toward the tip to form crescents. Curve slightly into a crescent shape.
    • Place on a parchment-lined baking sheet, tip side down. Cover loosely and let rise for 20–30 minutes while you heat the oven to 375°F (190°C).
    • Brush with egg wash or melted butter. Add toppings if desired.
    • Bake 12–16 minutes, until puffed and golden. Brush with a little more melted butter right out of the oven for extra flavor.
    • Cool for 5–10 minutes before serving so the layers set.
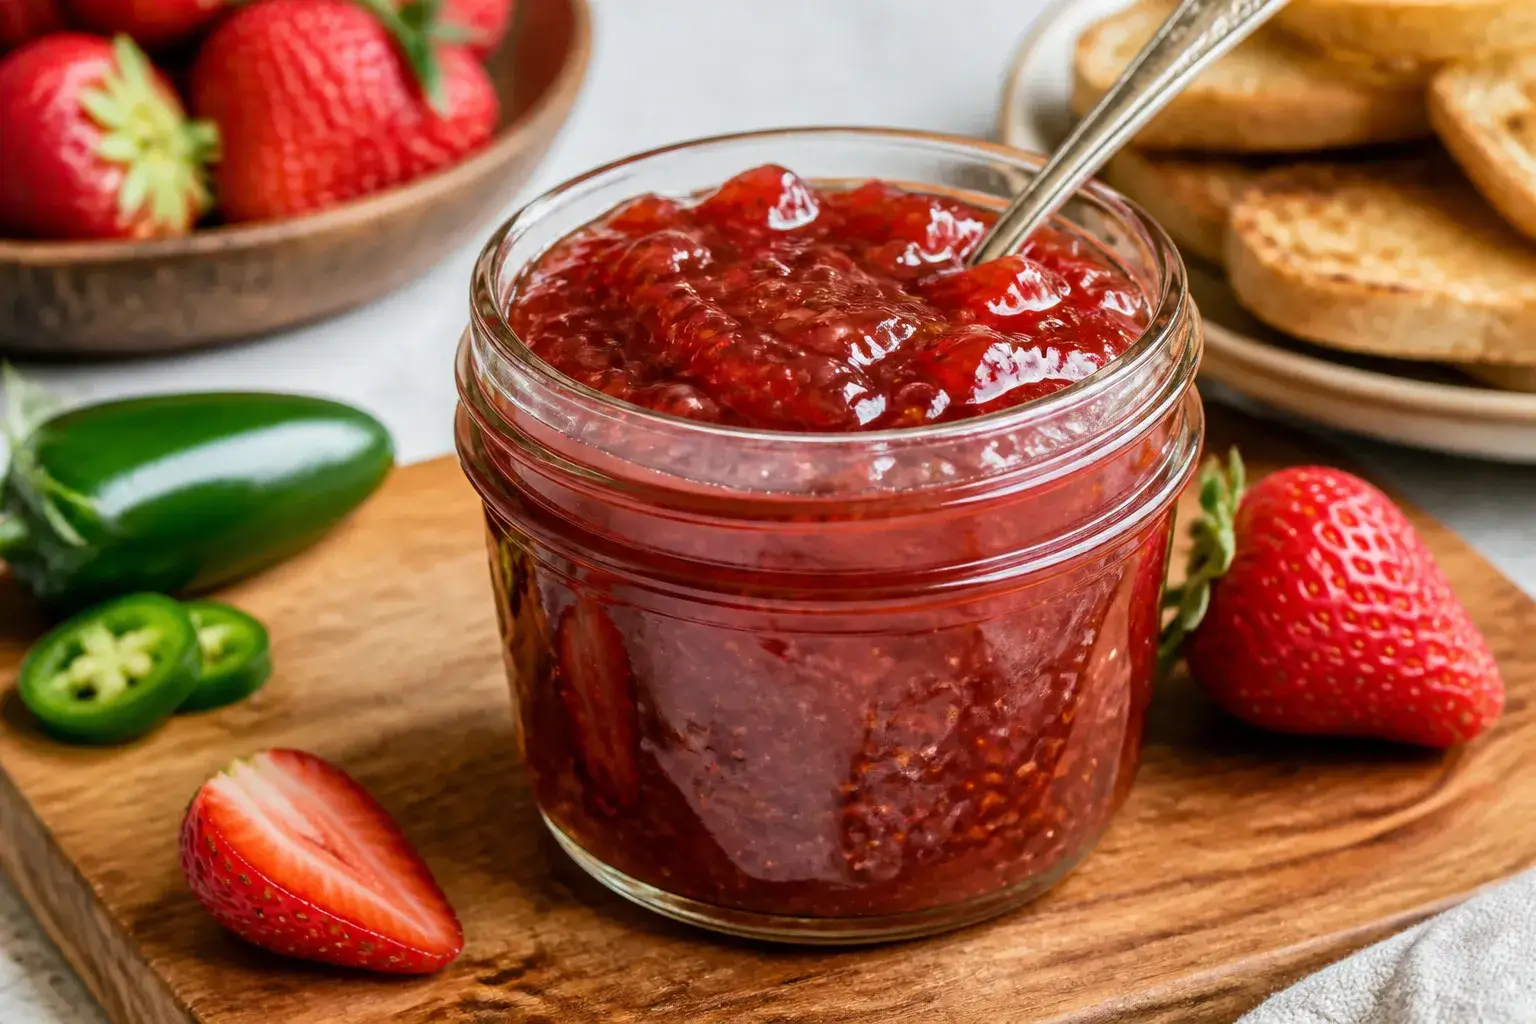
  • Strawberry Jalapeno Jam – Sweet, Spicy, and Easy to Make

    Strawberry Jalapeno Jam – Sweet, Spicy, and Easy to Make

    Strawberry jalapeno jam is the kind of recipe that surprises people in the best way. It’s sweet, bright, and just spicy enough to wake up your taste buds. Spread it on toast, pair it with cheese, or use it as a glaze for chicken or salmon.

    This is a small effort, big payoff kind of jam. If you love strawberries and enjoy a mild kick, this one belongs in your fridge.

    What Makes This Special

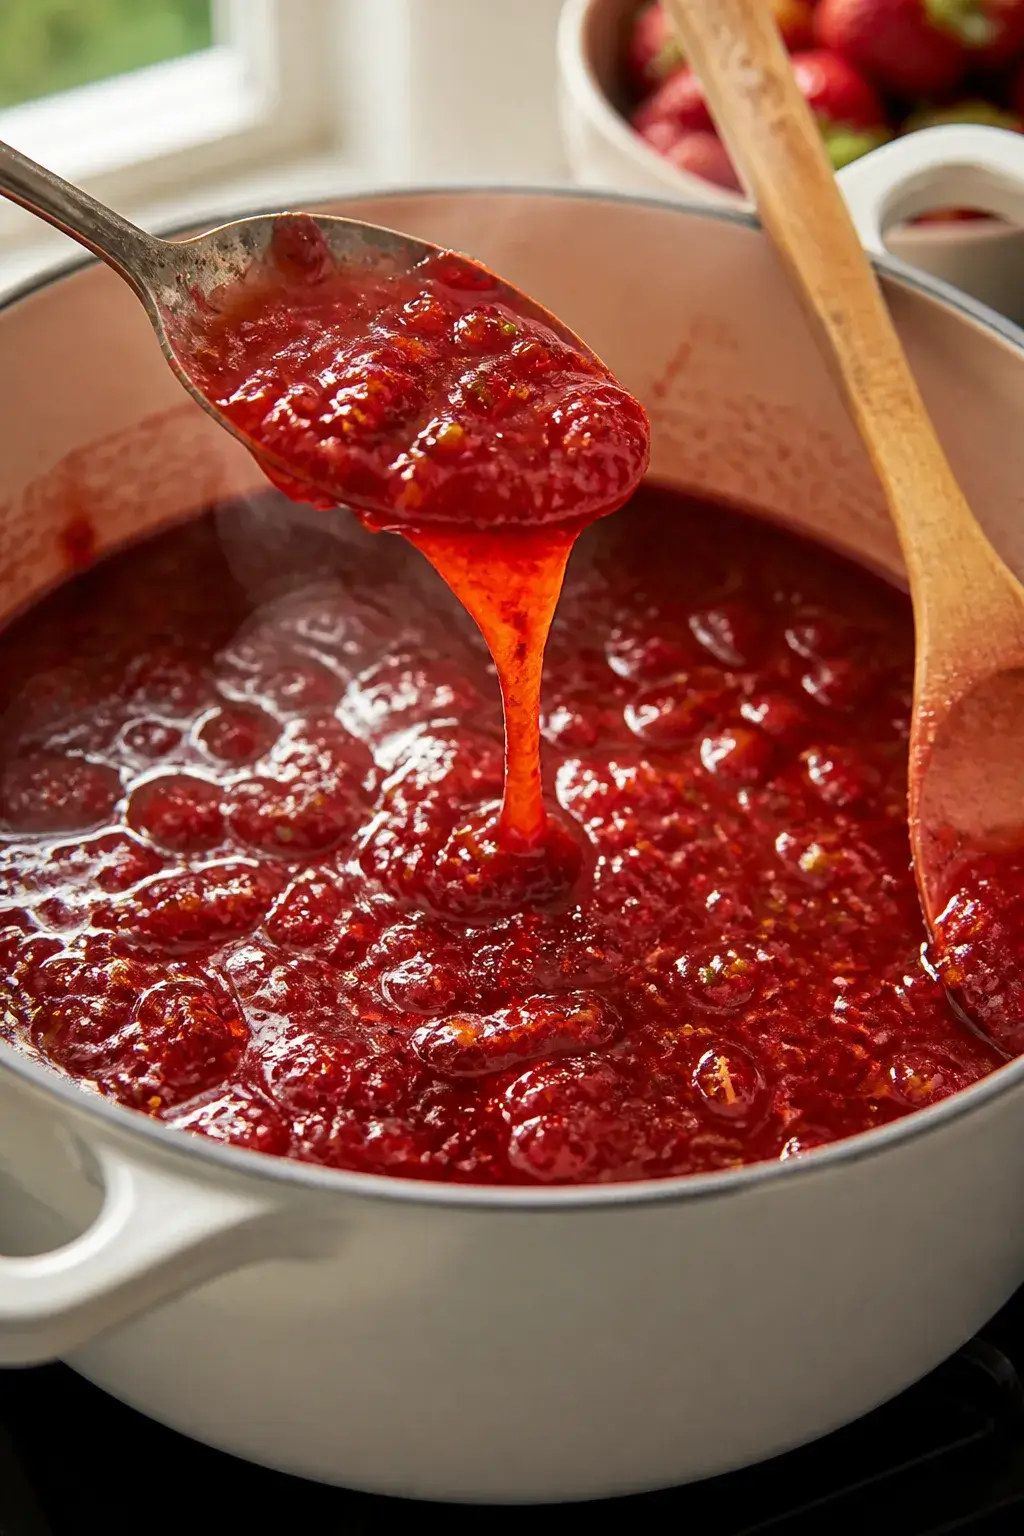
    Cooking process, close-up detail: A simmering pot of strawberry jalapeno jam at a gentle bubble, rub

    This jam balances ripe strawberry sweetness with the fresh heat of jalapenos. The flavor isn’t overpowering—just a gentle warmth that lingers.

    A splash of lemon juice keeps it vibrant and helps set the jam naturally. It’s also small-batch friendly, so you can make it in under an hour without special equipment. Best of all, it’s incredibly versatile, working with breakfast, snacks, and dinner ideas alike.

    What You’ll Need

    • 2 pounds fresh strawberries, hulled and roughly chopped
    • 2–3 jalapenos, seeded and finely minced (leave some seeds for more heat)
    • 2 cups granulated sugar (adjust to taste)
    • 2 tablespoons lemon juice (fresh is best)
    • 1 teaspoon lemon zest (optional, for brightness)
    • Pinch of salt
    • Optional: 1–2 tablespoons apple cider vinegar for extra tang
    • Optional: 1 packet low-sugar pectin if you prefer a firmer set

    Step-by-Step Instructions

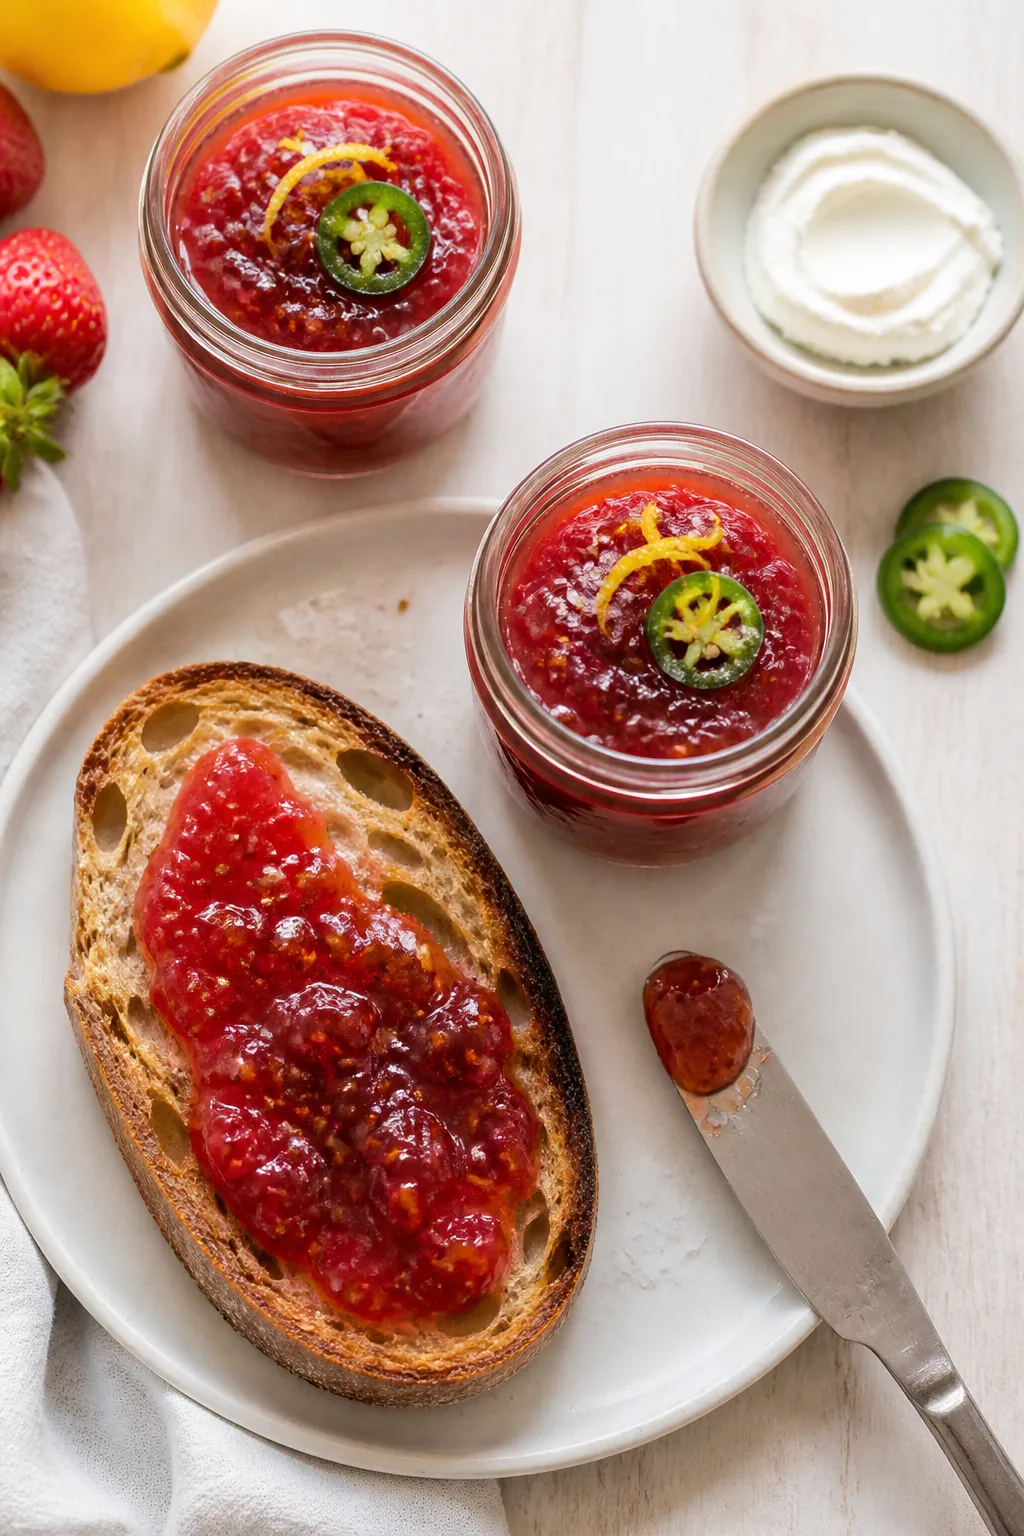
    Final dish, tasty top view: Overhead shot of finished strawberry jalapeno jam showcased in two small
    1. Prep the fruit and peppers. Hull and chop strawberries.

      Wear gloves to mince jalapenos and decide how many seeds to keep based on your heat preference.

    2. Mac­erate the mixture. In a large, heavy pot, combine strawberries, jalapenos, sugar, lemon juice, zest, and a pinch of salt. Stir and let sit 10–15 minutes until the fruit releases juices.
    3. Bring to a boil. Set over medium-high heat and stir until the sugar dissolves. Once bubbling, reduce to a steady simmer.
    4. Cook and skim. Simmer 20–30 minutes, stirring often to prevent sticking.

      Skim off any foam for a clearer jam.

    5. Check the set. Use a chilled plate test: place a spoonful on a cold plate, wait 30 seconds, then nudge it. If it wrinkles and moves slowly, it’s ready. If not, cook 5 more minutes and test again.
    6. Adjust flavor. If you want more tang, stir in apple cider vinegar at the end.

      Taste and adjust sweetness or heat as needed.

    7. Blend for texture (optional). For a smoother jam, pulse with an immersion blender a few times. Keep some chunks for a rustic feel.
    8. Jar it. Transfer hot jam to clean, warm jars, leaving a little headspace. Wipe rims and seal.

      Let cool at room temperature, then refrigerate.

    Storage Instructions

    • Refrigerator: Keeps well for 3–4 weeks in clean, tightly sealed jars.
    • Freezer: Store in freezer-safe containers with headspace for up to 6 months. Thaw in the fridge.
    • Canning (optional): If you’re experienced with water-bath canning, process hot-filled jars for 10 minutes (adjust for altitude) for shelf-stable storage. Always follow up-to-date canning safety guidelines.

    Health Benefits

    • Strawberries: Rich in vitamin C and antioxidants that support immune health and skin.
    • Jalapenos: Contain capsaicin, which may support metabolism and reduce inflammation.
    • Lemon juice: Adds vitamin C and helps reduce the need for excessive sugar by brightening flavor.
    • Small-batch control: You can manage sugar levels and choose fresher, whole ingredients.

    What Not to Do

    • Don’t skip the acid. Lemon juice helps the jam set and keeps flavors lively.
    • Don’t rush the simmer. Boiling too hard can scorch the jam.

      Gentle, steady heat is key.

    • Don’t overblend. Pureeing too much can make it gummy. Aim for a balance of smooth and chunky.
    • Don’t ignore safety. Wear gloves when chopping jalapenos and avoid touching your eyes.
    • Don’t guess jar cleanliness. Use clean, hot jars to reduce risk of spoilage.

    Variations You Can Try

    • Honey-sweetened: Replace part of the sugar with honey for a softer, floral sweetness.
    • Smoky heat: Add a pinch of chipotle powder or use a roasted jalapeno for depth.
    • Balsamic twist: Stir in 1–2 teaspoons aged balsamic at the end for a savory note.
    • Herb lift: Add a few leaves of fresh basil or mint after cooking for a bright finish.
    • Citrus swap: Use lime juice and zest instead of lemon for a Mexican-inspired vibe.
    • Low-sugar set: Use low-sugar pectin and reduce sugar to 1–1½ cups.

    FAQ

    How spicy is this jam?

    It’s mild to medium, depending on how many jalapeno seeds you include. Start with seeded peppers for mild heat and add seeds to taste.

    Can I use frozen strawberries?

    Yes.

    Thaw and drain excess liquid before cooking so the jam isn’t too runny. You may need a few extra minutes of simmering.

    Do I need pectin?

    No. Strawberries and lemon provide enough pectin for a soft set.

    If you want a firmer jam or prefer lower sugar, use low-sugar pectin.

    What should I serve it with?

    Try it on toast, biscuits, or cornbread. It’s fantastic with cream cheese and crackers, or as a glaze for grilled chicken, pork chops, or salmon.

    Why didn’t my jam set?

    It may need more time to cook, more acid, or a cooler test. Reheat and simmer a few more minutes, then test again.

    Pectin can also help if you prefer a firmer set.

    How much does this recipe make?

    Expect about 3 to 4 cups, depending on how much you reduce the mixture.

    Final Thoughts

    Strawberry jalapeno jam is a simple way to make everyday meals feel special. It’s bright, gently spicy, and endlessly useful—from breakfast to dinner. Make a small batch this weekend, stash a jar in the fridge, and enjoy that sweet-heat magic whenever you like.

    Strawberry Jalapeno Jam – Sweet, Spicy, and Easy to Make

    Prep Time 15 minutes
    Cook Time 20 minutes
    Total Time 35 minutes
    Servings 24 servings

    Ingredients
      

    • 2 pounds fresh strawberries, hulled and roughly chopped
    • 2–3 jalapenos, seeded and finely minced (leave some seeds for more heat)
    • 2 cups granulated sugar (adjust to taste)
    • 2 tablespoons lemon juice (fresh is best)
    • 1 teaspoon lemon zest (optional, for brightness)
    • Pinch of salt
    • Optional: 1–2 tablespoons apple cider vinegar for extra tang
    • Optional: 1 packet low-sugar pectin if you prefer a firmer set

    Instructions
     

    • Prep the fruit and peppers. Hull and chop strawberries. Wear gloves to mince jalapenos and decide how many seeds to keep based on your heat preference.
    • Mac­erate the mixture. In a large, heavy pot, combine strawberries, jalapenos, sugar, lemon juice, zest, and a pinch of salt. Stir and let sit 10–15 minutes until the fruit releases juices.
    • Bring to a boil. Set over medium-high heat and stir until the sugar dissolves. Once bubbling, reduce to a steady simmer.
    • Cook and skim. Simmer 20–30 minutes, stirring often to prevent sticking. Skim off any foam for a clearer jam.
    • Check the set. Use a chilled plate test: place a spoonful on a cold plate, wait 30 seconds, then nudge it. If it wrinkles and moves slowly, it’s ready. If not, cook 5 more minutes and test again.
    • Adjust flavor. If you want more tang, stir in apple cider vinegar at the end. Taste and adjust sweetness or heat as needed.
    • Blend for texture (optional). For a smoother jam, pulse with an immersion blender a few times. Keep some chunks for a rustic feel.
    • Jar it. Transfer hot jam to clean, warm jars, leaving a little headspace. Wipe rims and seal. Let cool at room temperature, then refrigerate.
  • Ginger Lime Pork With Coconut Rice – Bright, Zesty, and Comforting

    Ginger Lime Pork With Coconut Rice – Bright, Zesty, and Comforting

    This is the kind of weeknight dinner that feels special without making a mess of your kitchen. Juicy pork kissed with fresh ginger and lime, served over fluffy coconut rice that tastes creamy yet light. It smells incredible while it cooks, and the flavors are clean and balanced.

    You get tang, warmth, a touch of sweetness, and a little char on the pork that keeps you going back for more. If you need a low-effort, high-reward meal, this one earns a spot in the regular rotation.

    What Makes This Special

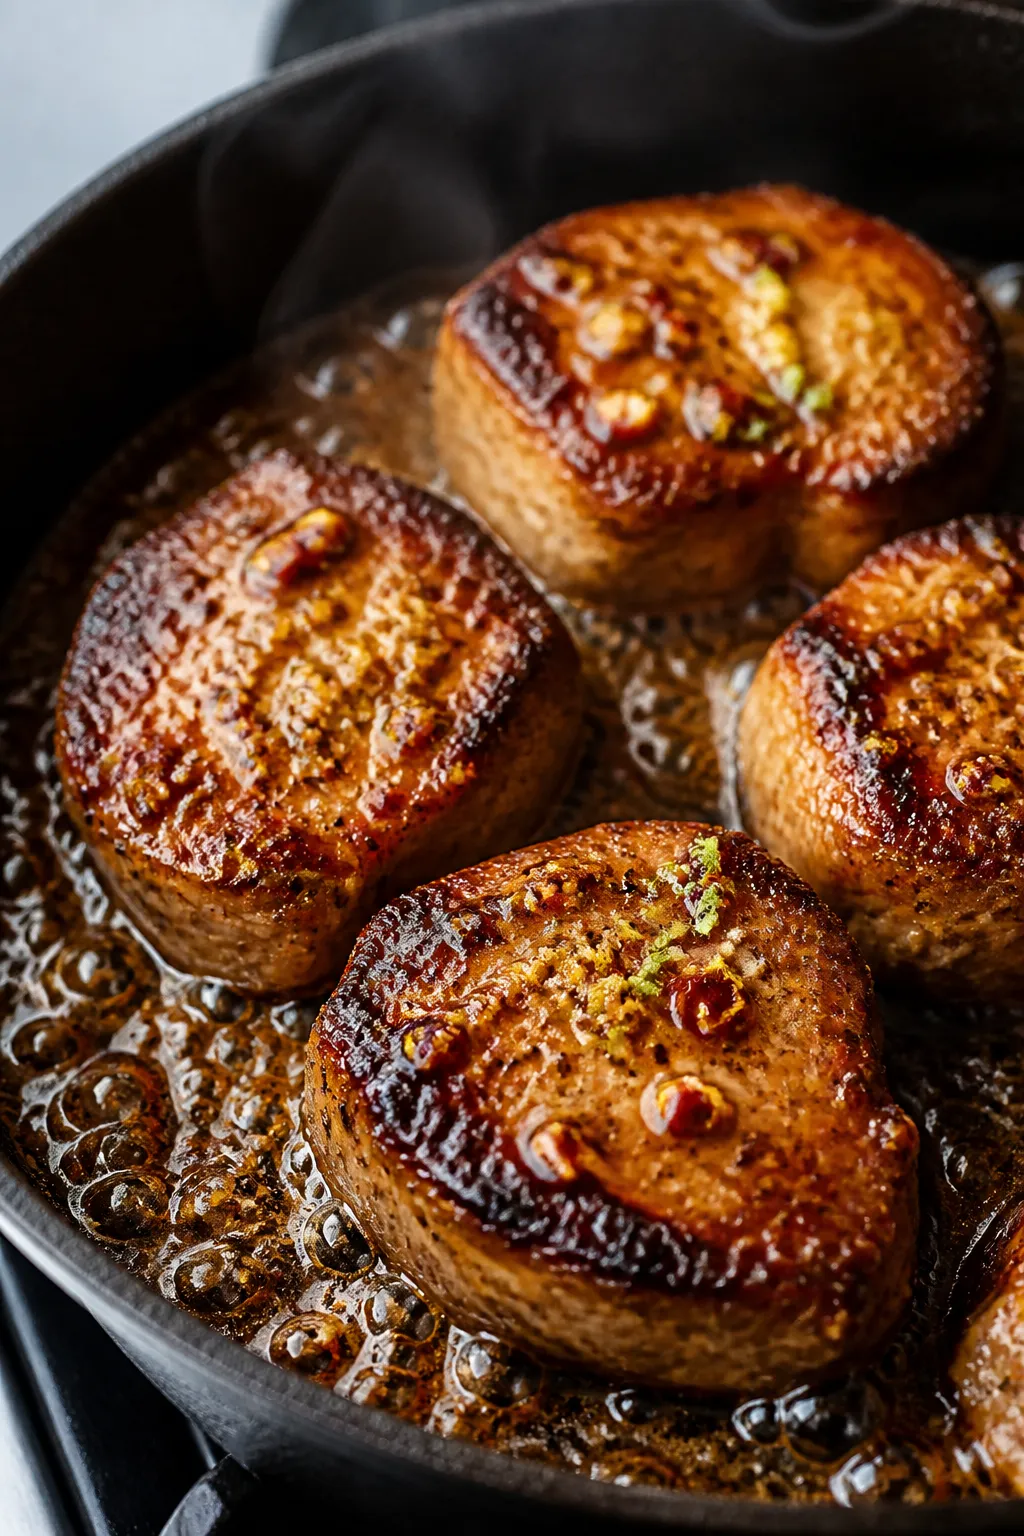
    Cooking process, close-up sear: Close-up of caramelized pork medallions sizzling in a dark cast-iron

    This recipe brings together bright citrus, peppery ginger, and the gentle richness of coconut. The coconut rice is a set-it-and-forget-it base that turns out tender and fragrant.

    The pork cooks quickly, so you get dinner on the table fast. It’s also flexible—lean chops, tenderloin, or thinly sliced shoulder all work well. Everything uses pantry-friendly ingredients you can find easily.

    Shopping List

    • Pork: 1 to 1.25 lb pork tenderloin (or 4 thin-cut boneless pork chops)
    • Ginger: 2 tablespoons fresh ginger, finely grated
    • Limes: 2 limes (zest and juice)
    • Garlic: 2 cloves, minced
    • Soy sauce: 2 tablespoons (or tamari)
    • Honey or brown sugar: 1 tablespoon
    • Red pepper flakes: 1/2 teaspoon (optional)
    • Neutral oil: 1 to 2 tablespoons (canola, avocado, or grapeseed)
    • Salt and black pepper
    • Jasmine rice: 1 cup (uncooked)
    • Coconut milk: 1 can (13.5–14 oz, full-fat or light)
    • Water: 1/2 cup (adjust if using light coconut milk)
    • Sugar: 1 teaspoon (optional, balances the coconut)
    • Fresh herbs: Cilantro, green onions, or mint for garnish
    • Lime wedges for serving

    Instructions

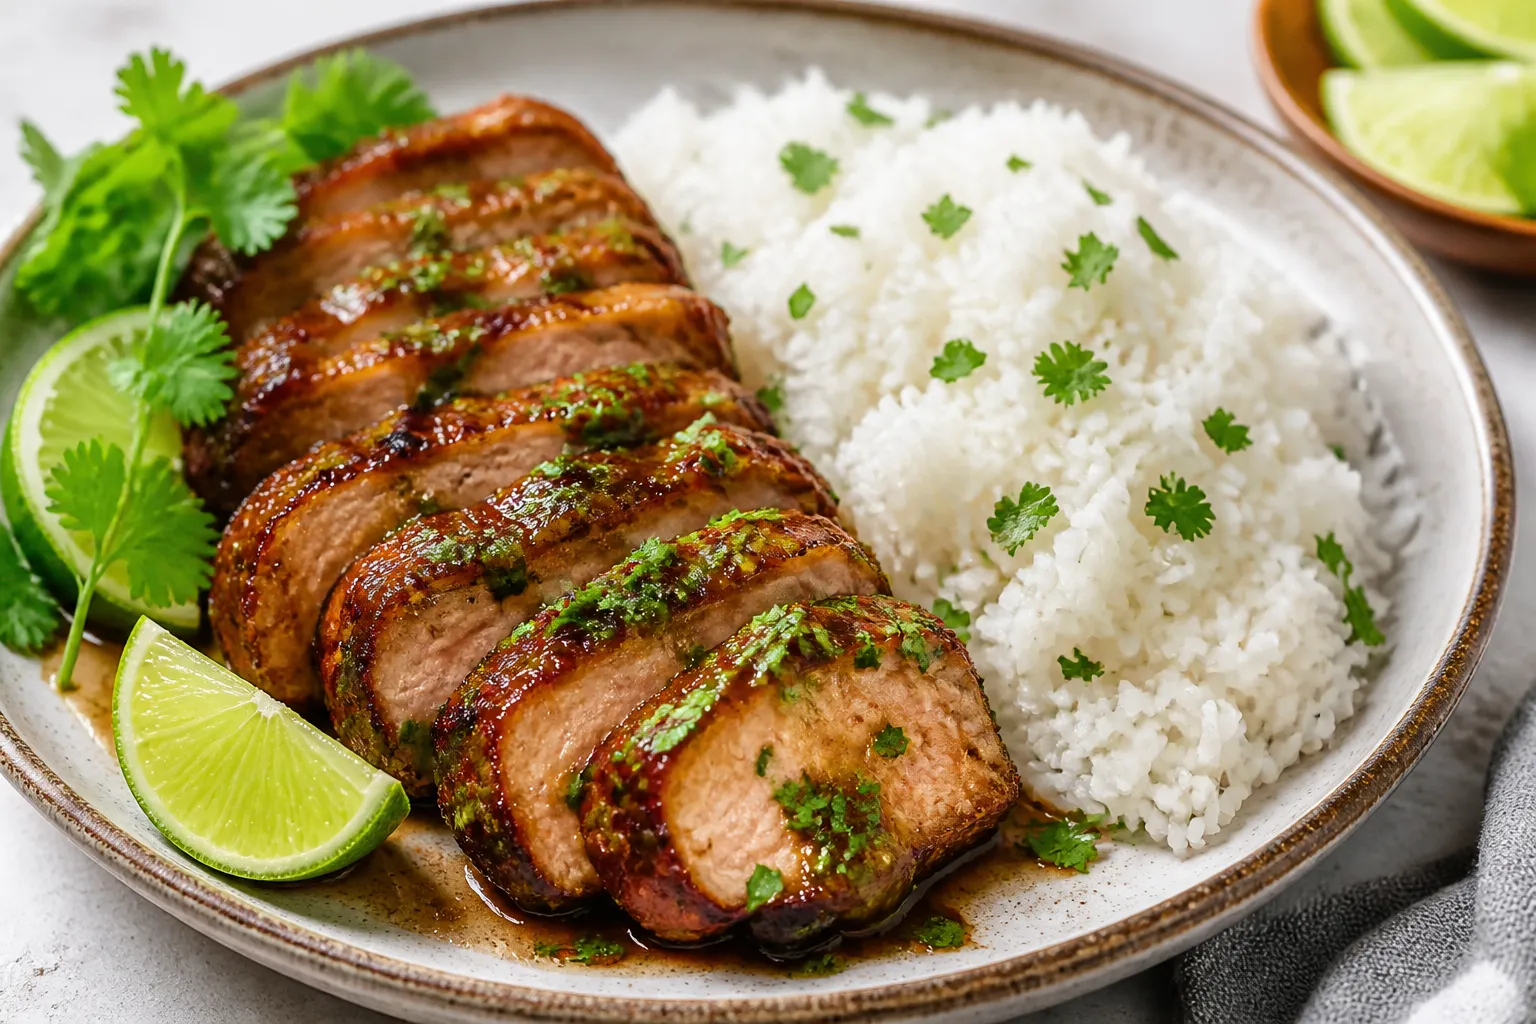
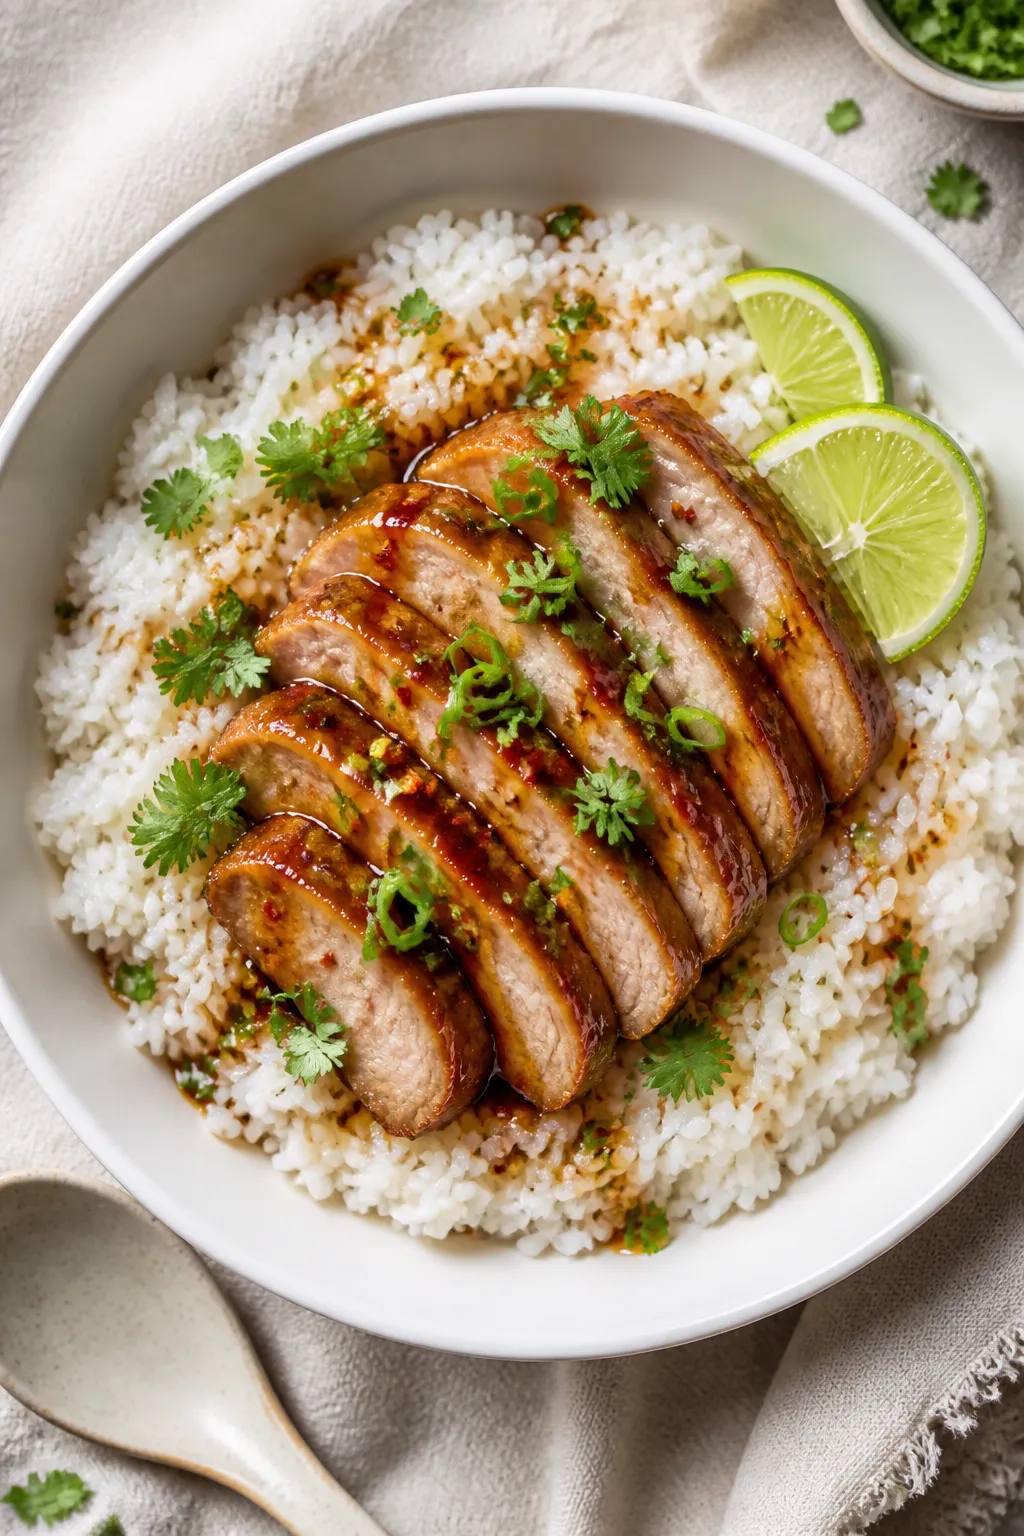
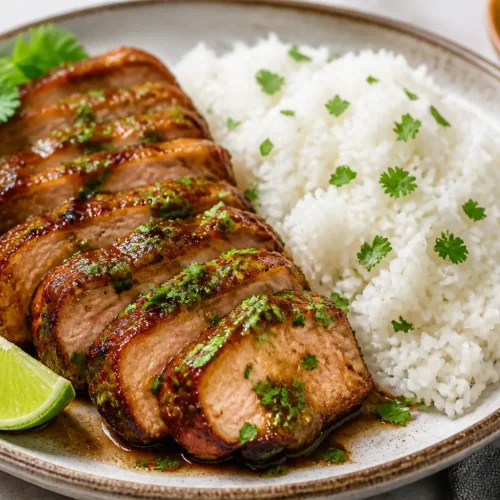
    Final dish, overhead: Tasty top-down shot of Ginger Lime Pork with Coconut Rice in a wide, shallow w
    1. Mix the marinade: In a bowl, combine grated ginger, lime zest, lime juice, soy sauce, honey, garlic, red pepper flakes, and a pinch of black pepper.
    2. Prep the pork: Pat the pork dry. If using tenderloin, trim silver skin and slice into 1-inch medallions.

      If using chops, keep them as is. Add to the marinade and toss to coat. Marinate 15–30 minutes at room temp (or up to 4 hours in the fridge).

    3. Start the coconut rice: Rinse jasmine rice until water runs mostly clear. In a saucepan, combine rice, coconut milk, water, 1/2 teaspoon salt, and sugar if using.

      Bring to a gentle boil, stir once, cover, and simmer on low for 12 minutes. Turn off heat and let steam, covered, for 10 minutes.

    4. Cook the pork: Heat a large skillet over medium-high. Add oil.

      Shake off excess marinade and sear pork in a single layer. Cook 2–3 minutes per side for medallions or thin chops, until nicely browned and just cooked through. Do not crowd the pan; work in batches if needed.

    5. Glaze quickly (optional): Pour the leftover marinade into the empty pan and simmer 1–2 minutes until slightly syrupy. Toss the pork back in to coat.

      If you prefer, skip this step and serve with fresh lime instead.

    6. Fluff and finish the rice: Uncover, fluff with a fork, and adjust salt. If it seems too thick, add a splash of hot water and fluff again.
    7. Serve: Spoon coconut rice into bowls, top with pork, and finish with chopped herbs and lime wedges. Add extra red pepper flakes for more heat.

    How to Store

    Keep leftovers in an airtight container for up to 4 days in the fridge.

    Store rice and pork separately if possible. Reheat gently on the stove with a splash of water or coconut milk to loosen the rice. The pork reheats best over low heat to avoid drying out.

    Benefits of This Recipe

    • Balanced flavors: Bright lime, warm ginger, and creamy coconut hit salty, sweet, and tangy notes.
    • Weeknight-friendly: About 30 minutes of active time.
    • Protein-rich: Lean pork paired with satisfying rice keeps you full.
    • Scalable: Easy to double for meal prep or a small dinner party.
    • Flexible: Works with different cuts and pantry swaps.

    Common Mistakes to Avoid

    • Skipping the rinse on rice: Unrinsed rice can turn gummy.

      Rinsing removes extra starch.

    • Overcrowding the pan: Pork steams instead of sears. Cook in batches for a good crust.
    • Overcooking pork: It dries out fast. Aim for a blush of pink in the center for tender results.
    • Too much marinade in the pan: Excess liquid blocks browning.

      Pat pork lightly before searing.

    • Not seasoning the rice: A small amount of salt (and optional sugar) boosts the coconut flavor.

    Alternatives

    • Protein swaps: Use chicken thighs, shrimp (cook 1–2 minutes per side), or firm tofu (press first).
    • Grain options: Serve over brown rice (extend cook time), quinoa, or cauliflower rice for lower carbs.
    • Sauce tweaks: Add fish sauce for depth, or a drizzle of sesame oil for nuttiness.
    • Vegetable add-ins: Stir-fry snap peas, bell peppers, or bok choy in the same pan after cooking the pork.
    • Dairy-free richness: Stick with full-fat coconut milk for a creamier rice without dairy.

    FAQ

    Can I make this ahead?

    Yes. Marinate the pork up to 24 hours ahead and cook when ready. The rice can be made the day before; reheat with a splash of water or coconut milk.

    What cut of pork works best?

    Pork tenderloin is tender and quick-cooking.

    Thin boneless chops also work well. For more flavor and some marbling, try thinly sliced pork shoulder, but cook quickly to avoid toughness.

    Is light coconut milk okay?

    Yes, but reduce the added water by a couple of tablespoons. Full-fat gives the creamiest texture, while light coconut milk keeps it lighter.

    How spicy is it?

    Mild to medium.

    Adjust the red pepper flakes to your taste, or add sliced fresh chiles at the end for extra heat.

    Can I grill the pork?

    Absolutely. Grill over medium-high heat for 2–3 minutes per side, brushing with marinade during the last minute. Rest briefly before slicing.

    How do I know the pork is done?

    Look for a light golden crust and an internal temperature around 145°F (63°C) with a short rest.

    It should be juicy with a slight blush in the center.

    In Conclusion

    Ginger Lime Pork with Coconut Rice brings bright, fresh flavor and cozy comfort to any night of the week. It’s simple to pull off, adaptable to what you have, and reliably delicious. Keep limes, ginger, and coconut milk on hand, and you’ll always be just a few steps away from a satisfying dinner that tastes like you planned ahead.

    Ginger Lime Pork With Coconut Rice – Bright, Zesty, and Comforting

    Prep Time 15 minutes
    Cook Time 25 minutes
    Total Time 40 minutes
    Servings 4 servings

    Ingredients
      

    • Pork: 1 to 1.25 lb pork tenderloin (or 4 thin-cut boneless pork chops)
    • Ginger: 2 tablespoons fresh ginger, finely grated
    • Limes: 2 limes (zest and juice)
    • Garlic: 2 cloves, minced
    • Soy sauce: 2 tablespoons (or tamari)
    • Honey or brown sugar: 1 tablespoon
    • Red pepper flakes: 1/2 teaspoon (optional)
    • Neutral oil: 1 to 2 tablespoons (canola, avocado, or grapeseed)
    • Salt and black pepper
    • Jasmine rice: 1 cup (uncooked)
    • Coconut milk: 1 can (13.5–14 oz, full-fat or light)
    • Water: 1/2 cup (adjust if using light coconut milk)
    • Sugar: 1 teaspoon (optional, balances the coconut)
    • Fresh herbs: Cilantro, green onions, or mint for garnish
    • Lime wedges for serving

    Instructions
     

    • Mix the marinade: In a bowl, combine grated ginger, lime zest, lime juice, soy sauce, honey, garlic, red pepper flakes, and a pinch of black pepper.
    • Prep the pork: Pat the pork dry. If using tenderloin, trim silver skin and slice into 1-inch medallions. If using chops, keep them as is. Add to the marinade and toss to coat. Marinate 15–30 minutes at room temp (or up to 4 hours in the fridge).
    • Start the coconut rice: Rinse jasmine rice until water runs mostly clear. In a saucepan, combine rice, coconut milk, water, 1/2 teaspoon salt, and sugar if using. Bring to a gentle boil, stir once, cover, and simmer on low for 12 minutes. Turn off heat and let steam, covered, for 10 minutes.
    • Cook the pork: Heat a large skillet over medium-high. Add oil. Shake off excess marinade and sear pork in a single layer. Cook 2–3 minutes per side for medallions or thin chops, until nicely browned and just cooked through. Do not crowd the pan; work in batches if needed.
    • Glaze quickly (optional): Pour the leftover marinade into the empty pan and simmer 1–2 minutes until slightly syrupy. Toss the pork back in to coat. If you prefer, skip this step and serve with fresh lime instead.
    • Fluff and finish the rice: Uncover, fluff with a fork, and adjust salt. If it seems too thick, add a splash of hot water and fluff again.
    • Serve: Spoon coconut rice into bowls, top with pork, and finish with chopped herbs and lime wedges. Add extra red pepper flakes for more heat.
  • Baked Portobello Mushrooms – Simple, Savory, and Satisfying

    Baked Portobello Mushrooms – Simple, Savory, and Satisfying

    Portobello mushrooms are the kind of weeknight hero that feel special without any fuss. They bake up tender and juicy, with a deep, meaty flavor that checks all the comfort-food boxes. You can serve them as a main with a side salad, slice them over pasta, or tuck them into a sandwich.

    The best part? They’re quick to prep and hard to mess up. If you love bold, savory food with minimal effort, this recipe is for you.

    What Makes This Recipe So Good

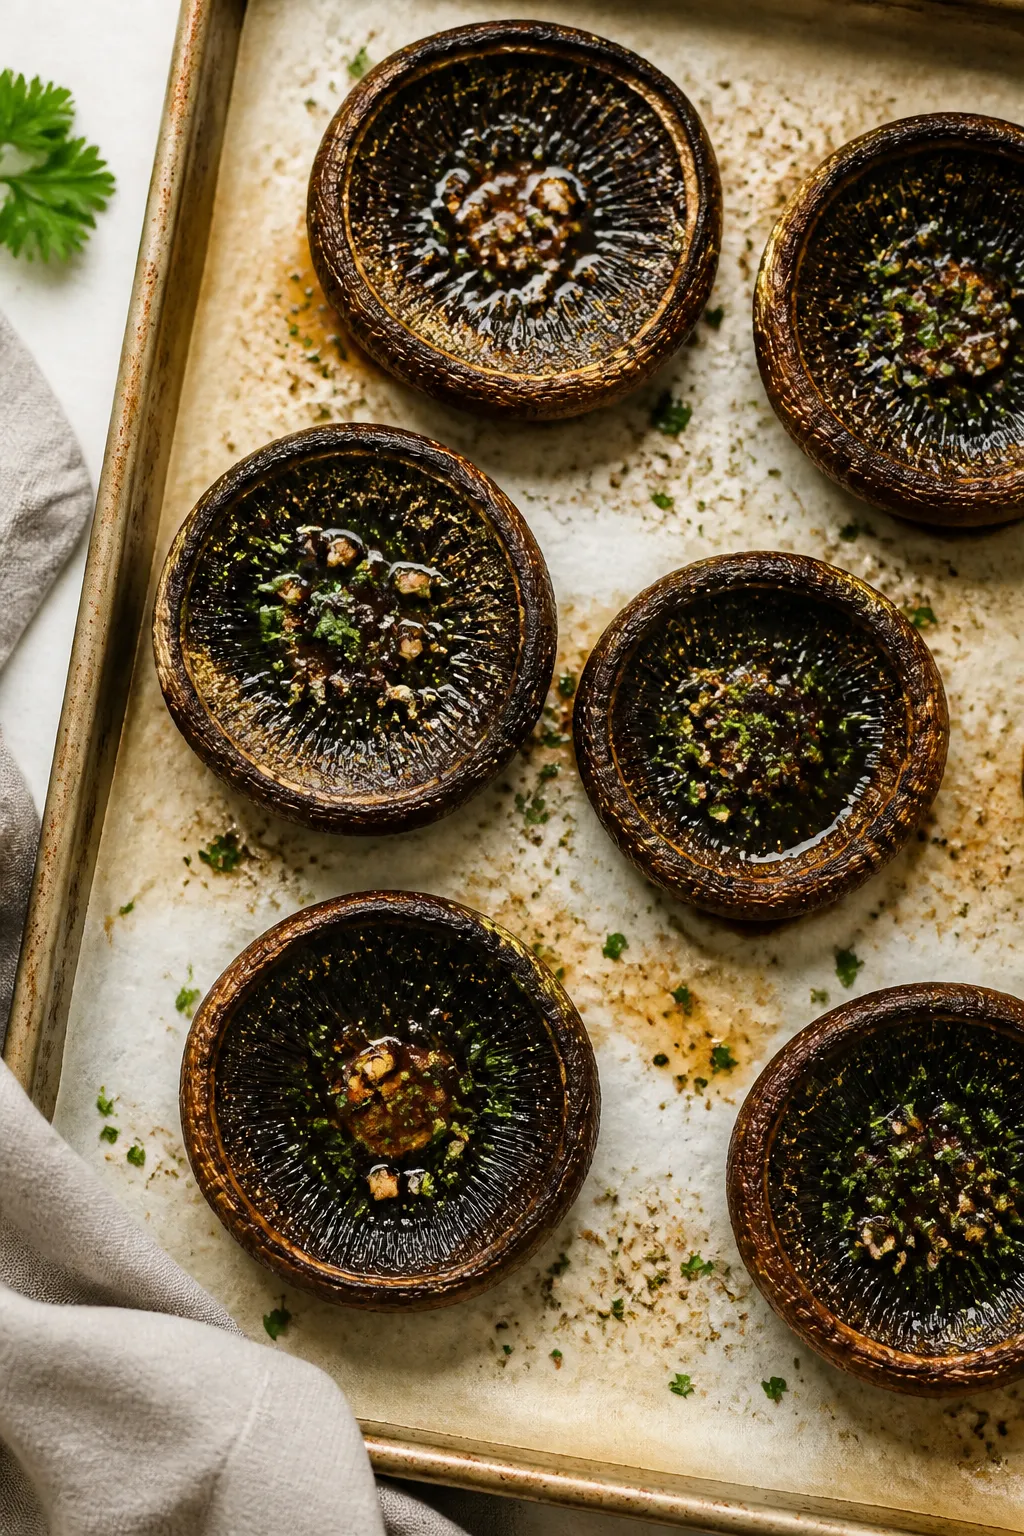
    Overhead shot of freshly baked portobello mushroom caps on a parchment-lined sheet pan, gill-side up
    • Big flavor, little work: A simple mix of olive oil, garlic, and herbs brings out the mushroom’s natural richness.
    • Versatile: Serve them as steaks, chop them for grain bowls, or use them as a burger substitute.
    • Fast and reliable: Ready in about 25 minutes with a handful of pantry ingredients.
    • Healthy and filling: Naturally vegetarian, with options to make it vegan, gluten-free, or dairy-free.
    • Great texture: Meaty and tender with lightly crisped edges when baked correctly.

    What You’ll Need

    • 4 large portobello mushroom caps (stems removed, gills scraped if desired)
    • 3 tablespoons olive oil
    • 3 cloves garlic, minced
    • 1 tablespoon balsamic vinegar
    • 1 teaspoon soy sauce or tamari (optional, for umami)
    • 1 teaspoon dried Italian seasoning (or a mix of thyme and oregano)
    • 1/2 teaspoon smoked paprika (optional, for depth)
    • Salt and black pepper, to taste
    • Fresh parsley or basil, chopped, for serving
    • Grated Parmesan or vegan Parmesan (optional, for topping)

    Step-by-Step Instructions

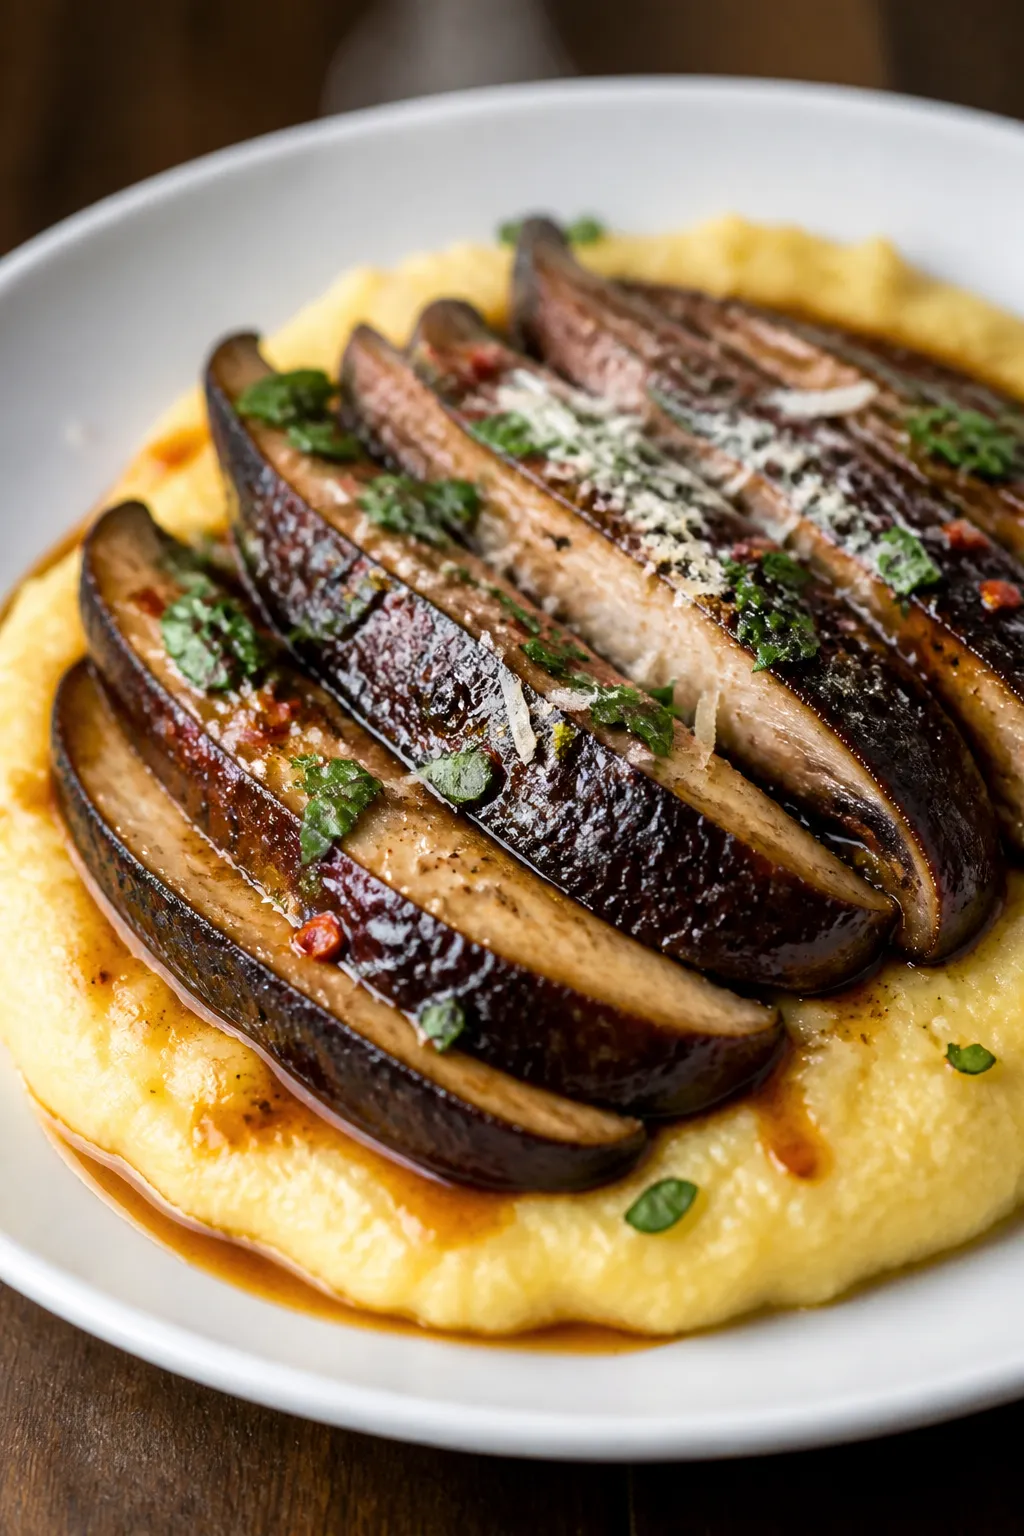
    Close-up, shallow depth-of-field plated presentation: sliced baked portobello “steaks” fanned ov
    1. Prep the mushrooms: Gently clean the caps with a damp paper towel.

      Remove stems. Scrape out the dark gills with a spoon if you want a milder flavor and less moisture.

    2. Heat the oven: Preheat to 400°F (200°C). Line a baking sheet with parchment for easy cleanup.
    3. Make the marinade: In a small bowl, whisk olive oil, garlic, balsamic, soy or tamari, Italian seasoning, smoked paprika, salt, and pepper.
    4. Season both sides: Place mushrooms gill-side up on the sheet.

      Brush generously with the marinade, making sure to coat the edges. Flip and brush the tops, then flip back so they’re gill-side up.

    5. Bake: Roast for 15–20 minutes, until tender and juicy. The edges should look slightly crisp, and the centers should give when pressed.
    6. Finish and serve: Spoon any pan juices over the caps.

      Top with fresh herbs and Parmesan if using. Serve whole, sliced, or chopped.

    Keeping It Fresh

    • Storage: Keep leftovers in an airtight container in the fridge for up to 3 days.
    • Reheating: Warm in a 350°F (175°C) oven for 8–10 minutes or in a skillet over medium heat. Avoid the microwave if you can—it can make them rubbery.
    • Freezing: Not ideal.

      The texture can turn watery after thawing.

    Benefits of This Recipe

    • Nutrient-dense: Portobellos are a good source of B vitamins, potassium, and antioxidants.
    • Lower-calorie option: Satisfying “meaty” bite without heavy ingredients.
    • Budget-friendly: A small list of affordable ingredients turns into a restaurant-worthy side or main.
    • Meal-prep friendly: Bake a batch and use them all week in bowls, wraps, or salads.

    Common Mistakes to Avoid

    • Skipping the wipe-down: Don’t soak mushrooms in water; they’ll get soggy. Wipe with a damp towel instead.
    • Overcrowding the pan: Give them space to roast. Crowded mushrooms steam and lose that nice texture.
    • Under-seasoning: Mushrooms love bold flavors.

      Use enough salt, acid, and herbs to make them pop.

    • Overbaking: They should be tender but not collapsed. Start checking at 15 minutes.

    Variations You Can Try

    • Cheesy garlic: Add a layer of shredded mozzarella or Parmesan in the last 5 minutes.
    • Herb butter: Swap olive oil for melted butter and finish with lemon zest.
    • Spicy kick: Add red pepper flakes or a drizzle of chili oil before serving.
    • Pesto finish: Spread a spoonful of pesto over the hot mushrooms for a bright, herby twist.
    • Stuffed style: Fill with sautéed spinach, sun-dried tomatoes, and feta; bake until warmed through.
    • Burger swap: Keep the caps whole, pat dry after baking, and stack on a toasted bun with your favorite toppings.

    FAQ

    Do I have to remove the gills?

    Removing the gills is optional. They’re edible, but they can release extra moisture and darken sauces.

    If you want a cleaner look and slightly less earthy flavor, scrape them out.

    Can I grill instead of bake?

    Yes. Grill over medium heat for about 4–5 minutes per side, brushing with marinade as they cook. Watch for flare-ups and don’t overcook.

    How do I keep them from getting soggy?

    Wipe, don’t wash.

    Don’t overcrowd the pan, and bake at a high enough temperature (400°F) to drive off excess moisture. Rest them a minute, then spoon off extra juices if needed.

    What can I serve with baked portobellos?

    They pair well with quinoa, mashed potatoes, polenta, garlicky greens, or a crisp salad. They’re also great sliced over risotto or pasta.

    Are portobello mushrooms healthy?

    Generally yes.

    They’re low in calories, offer fiber, and contain vitamins and minerals like niacin and potassium. As always, balance your meal with veggies, protein, and whole grains.

    In Conclusion

    Baked portobello mushrooms are simple, bold, and endlessly useful. With a quick marinade and a hot oven, you get a savory main or side that works any night of the week.

    Keep the ingredients on hand, switch up the toppings, and you’ll have a reliable favorite you can make without thinking.

    Baked Portobello Mushrooms – Simple, Savory, and Satisfying

    Prep Time 10 minutes
    Cook Time 20 minutes
    Total Time 30 minutes
    Servings 4 servings

    Ingredients
      

    • 4 large portobello mushroom caps (stems removed, gills scraped if desired)
    • 3 tablespoons olive oil
    • 3 cloves garlic, minced
    • 1 tablespoon balsamic vinegar
    • 1 teaspoon soy sauce or tamari (optional, for umami)
    • 1 teaspoon dried Italian seasoning (or a mix of thyme and oregano)
    • 1/2 teaspoon smoked paprika (optional, for depth)
    • Salt and black pepper, to taste
    • Fresh parsley or basil, chopped, for serving
    • Grated Parmesan or vegan Parmesan (optional, for topping)

    Instructions
     

    • Prep the mushrooms: Gently clean the caps with a damp paper towel. Remove stems. Scrape out the dark gills with a spoon if you want a milder flavor and less moisture.
    • Heat the oven: Preheat to 400°F (200°C). Line a baking sheet with parchment for easy cleanup.
    • Make the marinade: In a small bowl, whisk olive oil, garlic, balsamic, soy or tamari, Italian seasoning, smoked paprika, salt, and pepper.
    • Season both sides: Place mushrooms gill-side up on the sheet. Brush generously with the marinade, making sure to coat the edges. Flip and brush the tops, then flip back so they’re gill-side up.
    • Bake: Roast for 15–20 minutes, until tender and juicy. The edges should look slightly crisp, and the centers should give when pressed.
    • Finish and serve: Spoon any pan juices over the caps. Top with fresh herbs and Parmesan if using. Serve whole, sliced, or chopped.
  • Stuffed Portabella Mushrooms – A Savory, Satisfying Favorite

    Stuffed Portabella Mushrooms – A Savory, Satisfying Favorite

    These stuffed portabella mushrooms hit that perfect spot between hearty and wholesome. They’re meaty, full of flavor, and easy enough for a weeknight. Serve them as a main dish with a simple salad, or make them a standout side for steak or chicken.

    The filling is cozy and cheesy, the caps stay juicy, and the whole thing feels special without a lot of fuss.

    What Makes This Recipe So Good

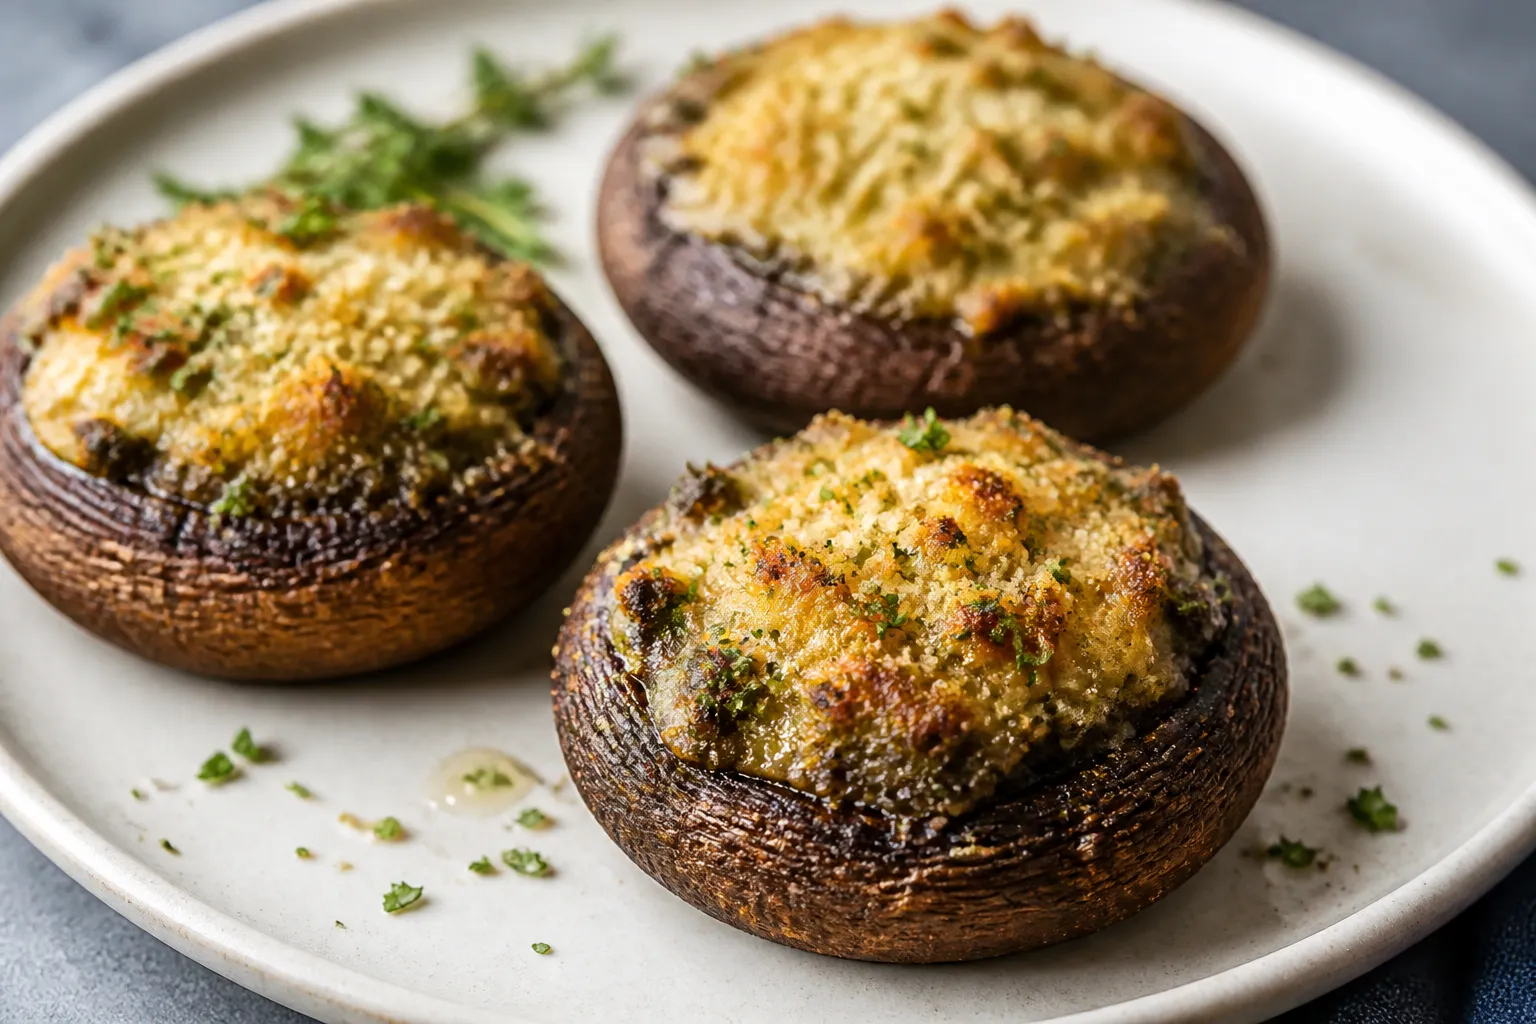
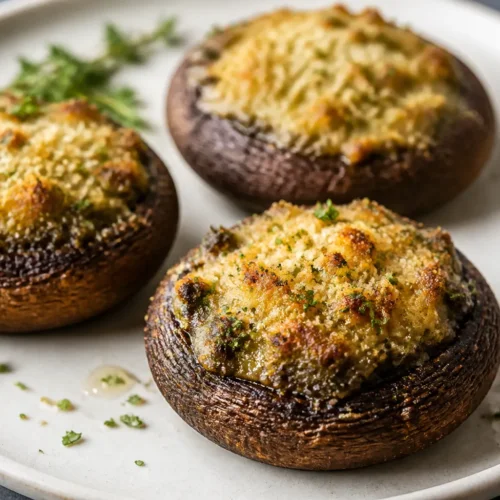
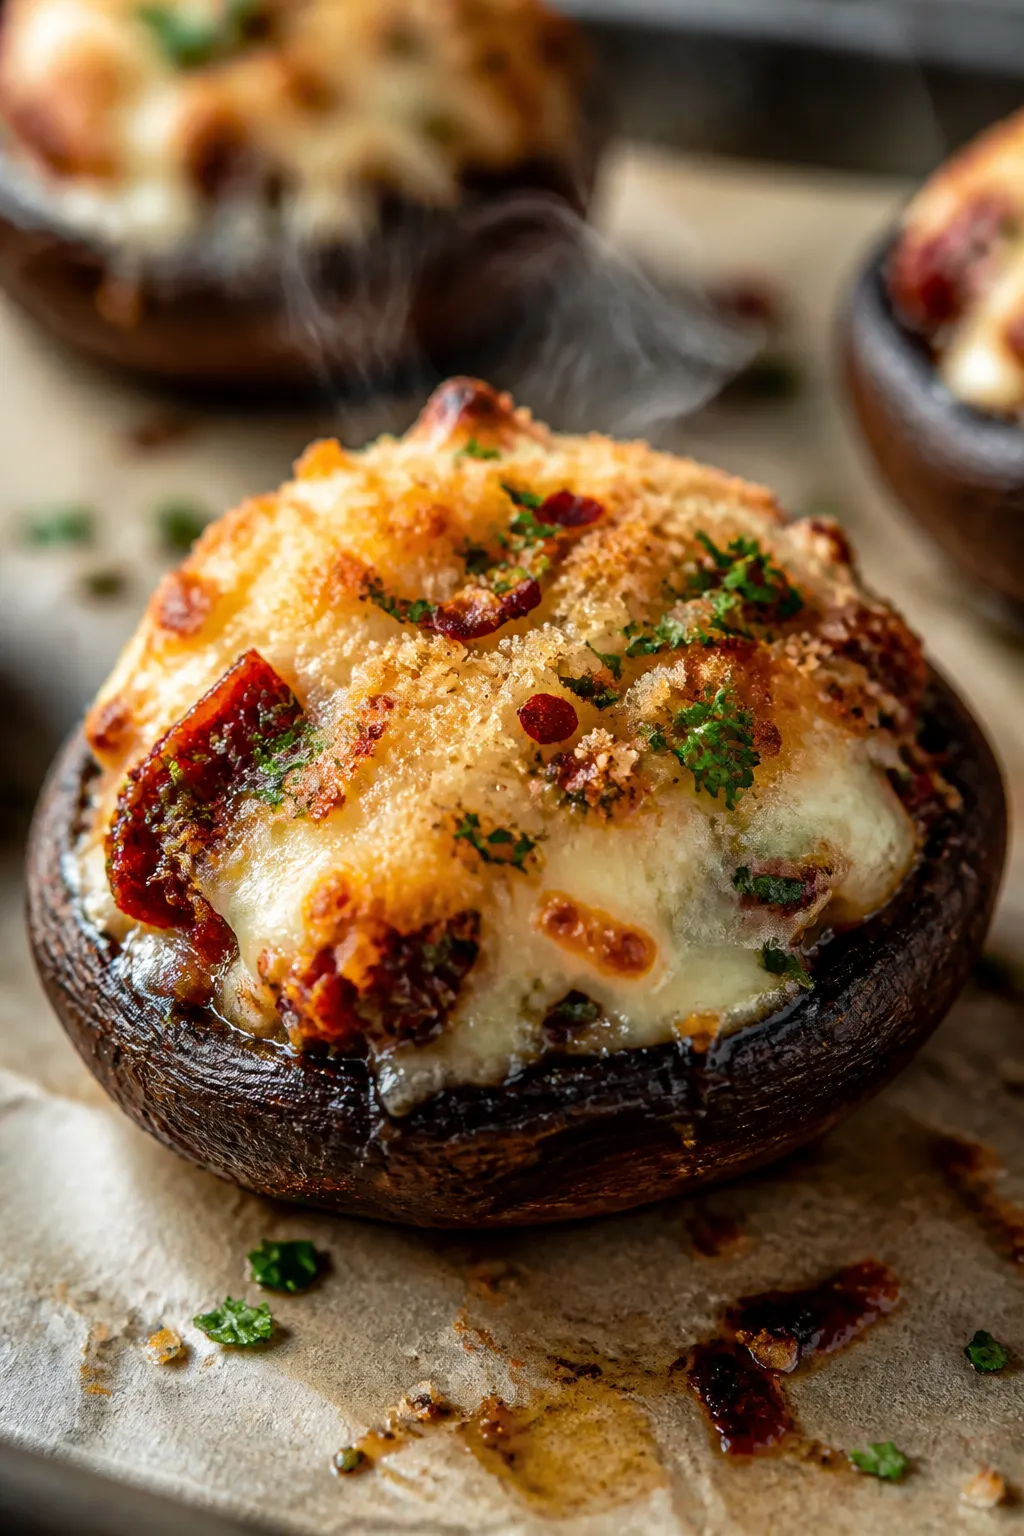
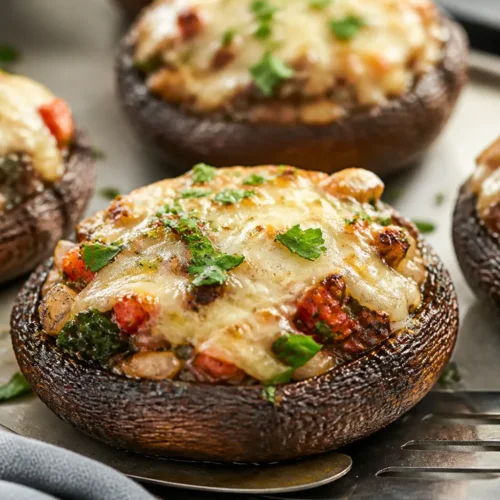
    Close-up detail shot of a just-baked stuffed portabella mushroom cap on a parchment-lined sheet pan,
    • Big flavor, simple steps: Garlic, herbs, and a touch of balsamic bring out the mushroom’s natural savoriness.
    • Flexible filling: Use spinach, sausage, breadcrumbs, or quinoa—whatever you like or have on hand.
    • Great texture: Toasted breadcrumbs and melted cheese give a crisp top and a creamy middle.
    • Meal-prep friendly: Assemble ahead and bake when you’re ready.
    • Naturally crowd-pleasing: Works for vegetarians with easy swaps for gluten-free or low-carb diets.

    Shopping List

    • 4 large portabella mushroom caps, stems and gills removed
    • 2 tablespoons olive oil, plus more for brushing
    • 1 small yellow onion, finely chopped
    • 3 cloves garlic, minced
    • 3 cups fresh spinach, chopped (or 1 cup thawed frozen spinach, squeezed dry)
    • 1/2 cup sun-dried tomatoes, chopped (oil-packed, drained)
    • 1/2 cup breadcrumbs (panko or regular)
    • 1/3 cup grated Parmesan
    • 3/4 cup shredded mozzarella (or provolone)
    • 2 tablespoons fresh parsley, chopped (or 1 teaspoon dried Italian seasoning)
    • 1 tablespoon balsamic vinegar
    • 1/2 teaspoon crushed red pepper flakes (optional)
    • Salt and black pepper
    • Lemon wedges, for serving (optional)
    • Optional add-ins: cooked crumbled Italian sausage, cooked quinoa, or toasted pine nuts

    Step-by-Step Instructions

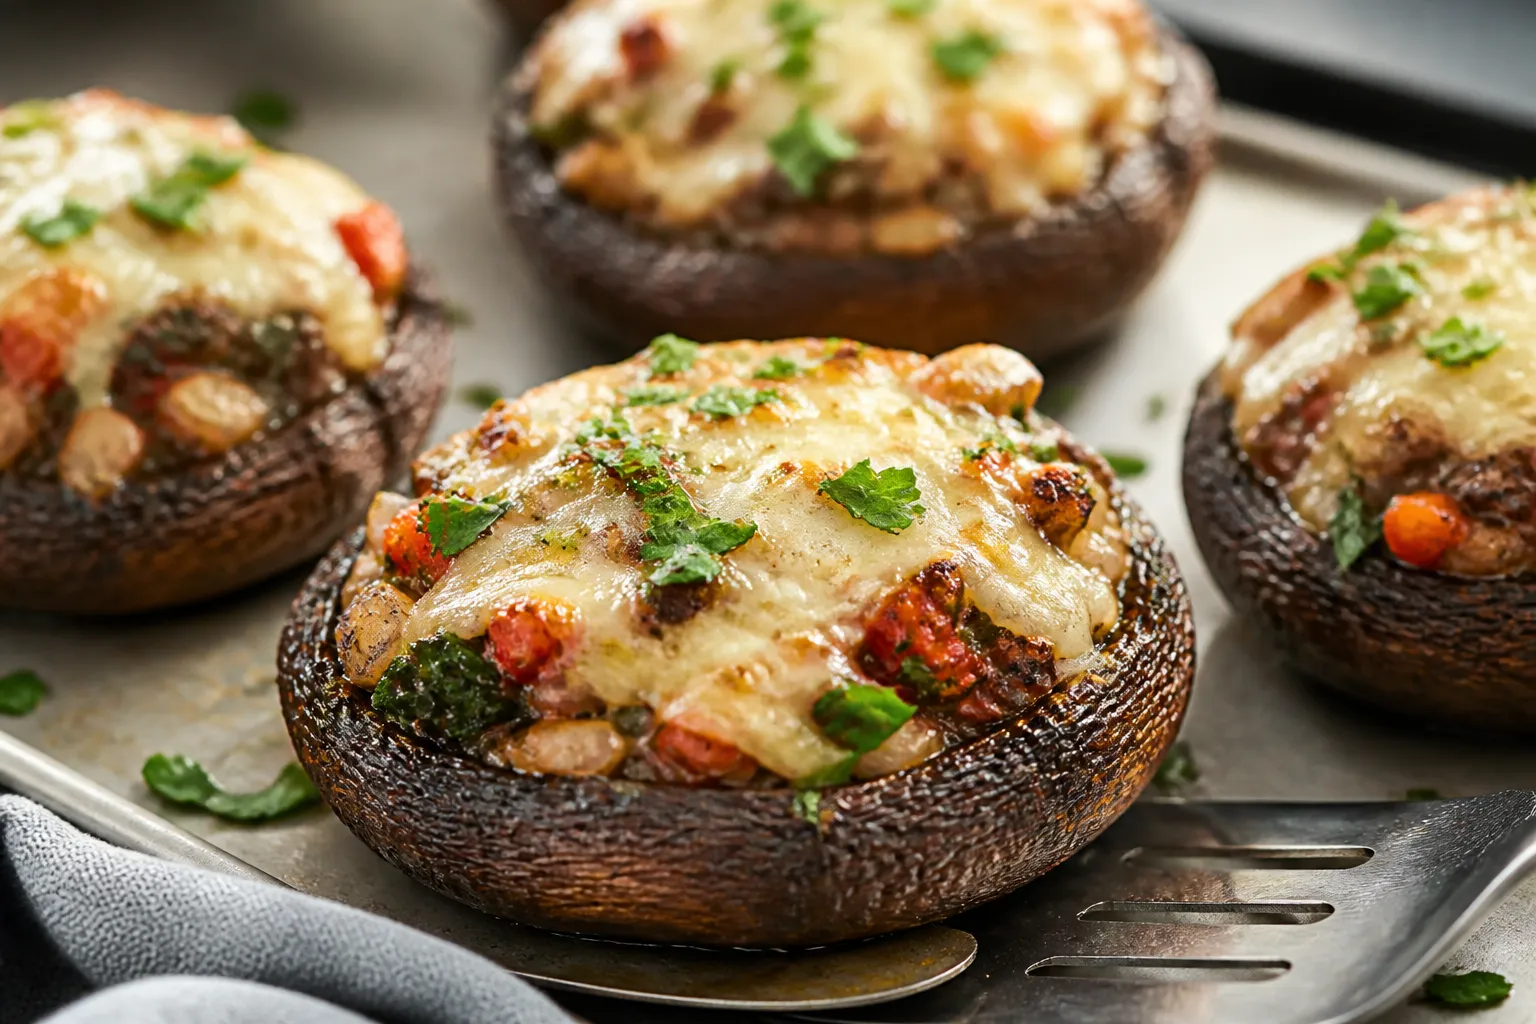
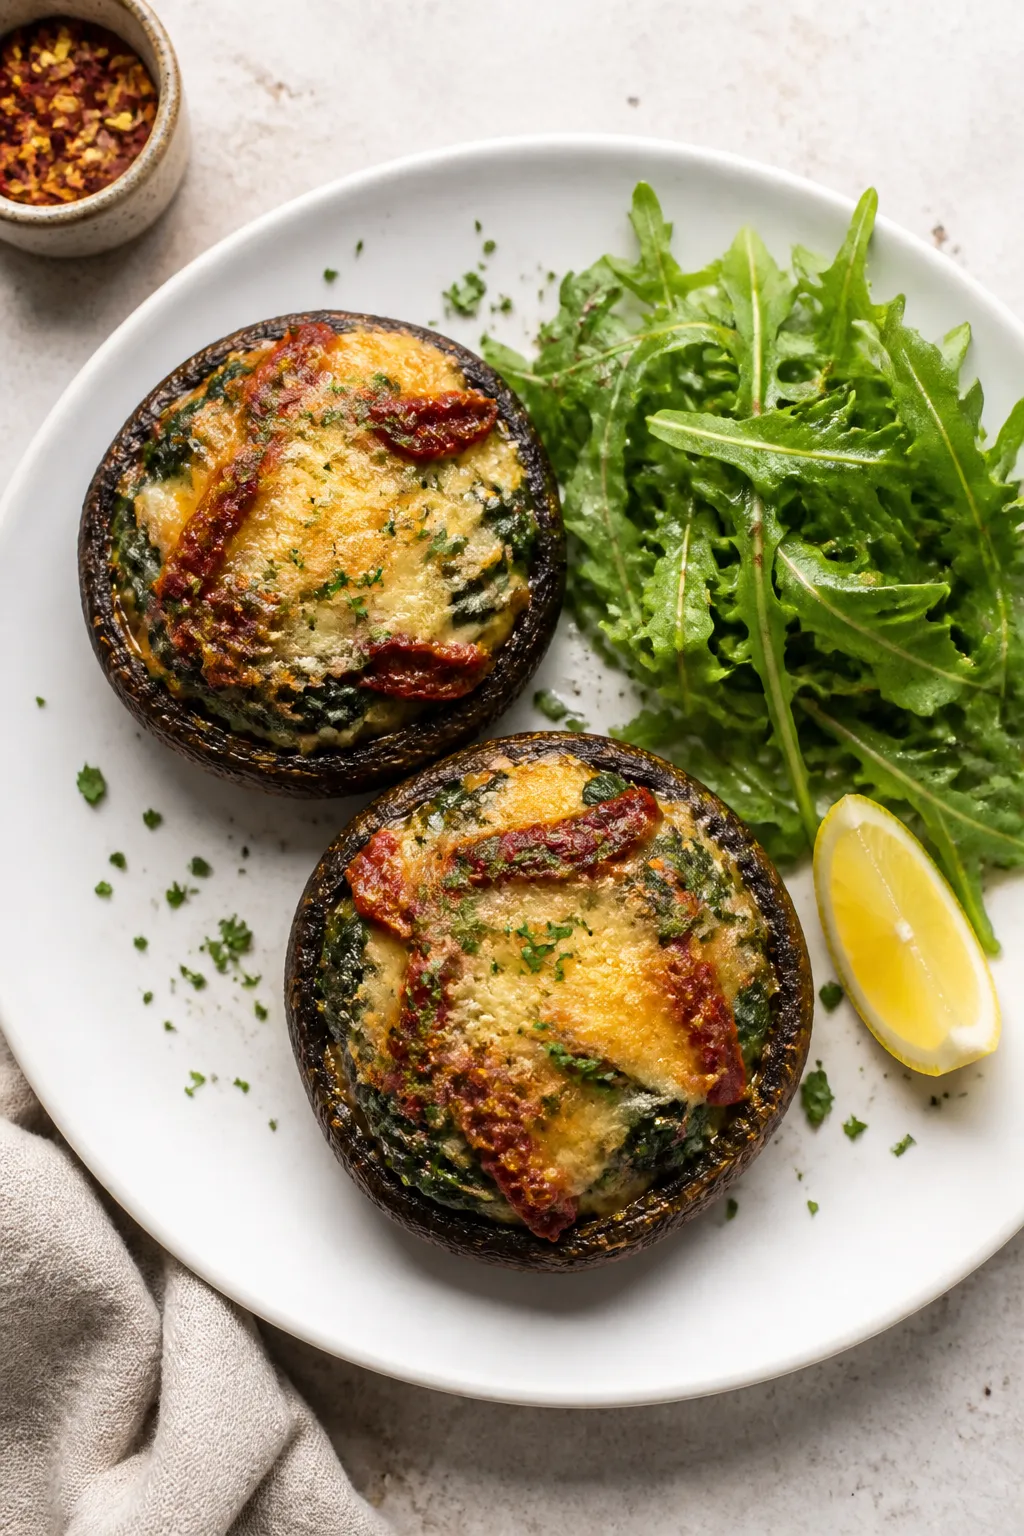
    Overhead final presentation of two stuffed portabella mushrooms plated as a main dish on a matte whi
    1. Prep the mushrooms: Heat the oven to 400°F (200°C). Line a sheet pan with parchment. Gently twist off stems and scrape out gills with a spoon.

      Brush both sides with olive oil and season with salt and pepper.

    2. Pre-bake the caps: Place mushrooms gill side down and bake for 10 minutes. Flip to gill side up and let any moisture drain off. This step helps avoid soggy bottoms.
    3. Cook the aromatics: In a skillet over medium heat, add 2 tablespoons olive oil.

      Sauté onion with a pinch of salt until soft, 4–5 minutes. Add garlic and cook 30 seconds until fragrant.

    4. Add the veggies: Stir in spinach and cook until wilted. Mix in sun-dried tomatoes and turn off the heat.
    5. Build the filling: Stir in breadcrumbs, Parmesan, half the mozzarella, parsley, balsamic, red pepper flakes, and a few grinds of black pepper.

      Taste and adjust salt. Fold in any optional add-ins now.

    6. Stuff the caps: Spoon the filling evenly into the mushrooms, mounding slightly. Top with the remaining mozzarella.
    7. Bake to finish: Return to the oven and bake 12–15 minutes, until cheese is melted and golden at the edges.

      For extra color, broil 1–2 minutes, watching closely.

    8. Serve: Let rest 3 minutes. Finish with a squeeze of lemon and a sprinkle of parsley. Serve warm.

    How to Store

    • Fridge: Keep leftovers in an airtight container for up to 3 days.
    • Reheat: Warm in a 350°F (175°C) oven for 10–12 minutes, or in a covered skillet over low heat until hot.

      Avoid microwaving too long or they’ll weep moisture.

    • Make-ahead: Assemble up to 24 hours in advance. Cover and refrigerate. Bake just before serving.
    • Freezing: Not ideal.

      The texture turns watery once thawed.

    Why This is Good for You

    • Nutrient-dense mushrooms: Portabellas offer B vitamins, minerals, and a meaty texture with few calories.
    • Protein and calcium: Cheese and optional sausage add protein; Parmesan provides calcium.
    • Fiber and antioxidants: Spinach and sun-dried tomatoes bring fiber, vitamins A and C, and lycopene.
    • Smart fats: Olive oil adds heart-healthy monounsaturated fats.

    What Not to Do

    • Don’t skip pre-baking the caps. It’s the key to avoiding soggy mushrooms.
    • Don’t over-salt early. Parmesan and sun-dried tomatoes are salty. Season, then taste.
    • Don’t overload with wet ingredients. Squeeze thawed spinach dry and drain oil-packed tomatoes.
    • Don’t walk away from the broiler. Cheese goes from golden to burnt fast.

    Alternatives

    • Low-carb: Swap breadcrumbs for almond flour or crushed pork rinds.
    • Gluten-free: Use gluten-free breadcrumbs or cooked quinoa.
    • Dairy-free: Use plant-based mozzarella and skip Parmesan, or add nutritional yeast.
    • Protein boost: Stir in cooked crumbled sausage, shredded chicken, or white beans.
    • Different herbs: Try basil, thyme, or rosemary instead of parsley.
    • Different cheeses: Goat cheese, feta, or smoked provolone all work well.

    FAQ

    Do I need to remove the gills?

    Removing the gills helps keep the filling from turning muddy and reduces moisture. It also gives you more room for stuffing.

    A spoon works great for scraping them out.

    Can I grill the mushrooms instead of baking?

    Yes. Grill the caps over medium heat for 4–5 minutes per side to pre-cook, then add the filling and finish on indirect heat with the lid closed until the cheese melts.

    How do I keep them from getting watery?

    Pre-bake the caps, drain excess liquid, and squeeze any moisture from spinach. Avoid overfilling with wet ingredients and let them rest a couple minutes before serving.

    What can I serve with stuffed portabellas?

    They pair well with a simple arugula salad, roasted potatoes, garlic green beans, or a bowl of tomato soup.

    For a heartier meal, add grilled chicken or a grain pilaf.

    Can I make mini versions?

    Absolutely. Use large cremini (baby bella) mushrooms. Skip the pre-bake, stuff lightly, and bake 10–12 minutes until tender and bubbly.

    Wrapping Up

    Stuffed portabella mushrooms deliver big comfort with minimal effort.

    They’re adaptable, satisfying, and perfect for using what’s in your fridge. Once you try this base recipe, you can riff endlessly and never get bored. Keep it simple, keep it savory, and enjoy every bite.

    Stuffed Portabella Mushrooms – A Savory, Satisfying Favorite

    Prep Time 15 minutes
    Cook Time 25 minutes
    Total Time 40 minutes
    Servings 4 servings

    Ingredients
      

    • 4 large portabella mushroom caps, stems and gills removed
    • 2 tablespoons olive oil, plus more for brushing
    • 1 small yellow onion, finely chopped
    • 3 cloves garlic, minced
    • 3 cups fresh spinach, chopped (or 1 cup thawed frozen spinach, squeezed dry)
    • 1/2 cup sun-dried tomatoes, chopped (oil-packed, drained)
    • 1/2 cup breadcrumbs (panko or regular)
    • 1/3 cup grated Parmesan
    • 3/4 cup shredded mozzarella (or provolone)
    • 2 tablespoons fresh parsley, chopped (or 1 teaspoon dried Italian seasoning)
    • 1 tablespoon balsamic vinegar
    • 1/2 teaspoon crushed red pepper flakes (optional)
    • Salt and black pepper
    • Lemon wedges, for serving (optional)
    • Optional add-ins: cooked crumbled Italian sausage, cooked quinoa, or toasted pine nuts

    Instructions
     

    • Prep the mushrooms: Heat the oven to 400°F (200°C). Line a sheet pan with parchment. Gently twist off stems and scrape out gills with a spoon. Brush both sides with olive oil and season with salt and pepper.
    • Pre-bake the caps: Place mushrooms gill side down and bake for 10 minutes. Flip to gill side up and let any moisture drain off. This step helps avoid soggy bottoms.
    • Cook the aromatics: In a skillet over medium heat, add 2 tablespoons olive oil. Sauté onion with a pinch of salt until soft, 4–5 minutes. Add garlic and cook 30 seconds until fragrant.
    • Add the veggies: Stir in spinach and cook until wilted. Mix in sun-dried tomatoes and turn off the heat.
    • Build the filling: Stir in breadcrumbs, Parmesan, half the mozzarella, parsley, balsamic, red pepper flakes, and a few grinds of black pepper. Taste and adjust salt. Fold in any optional add-ins now.
    • Stuff the caps: Spoon the filling evenly into the mushrooms, mounding slightly. Top with the remaining mozzarella.
    • Bake to finish: Return to the oven and bake 12–15 minutes, until cheese is melted and golden at the edges. For extra color, broil 1–2 minutes, watching closely.
    • Serve: Let rest 3 minutes. Finish with a squeeze of lemon and a sprinkle of parsley. Serve warm.
  • Blueberry Cream Cheese Muffin Cake (Bakery Style) – Soft, Tall, and Packed With Berries

    Blueberry Cream Cheese Muffin Cake (Bakery Style) – Soft, Tall, and Packed With Berries

    This is the kind of cake that makes a morning feel special. Think bakery-style blueberry muffins, but baked as one big, tender cake with a creamy ribbon of sweetened cream cheese running through the middle. It’s soft, tall, and lightly crisp on top, with juicy bursts of blueberries in every bite.

    No mixers needed and no fussy steps. Just real ingredients and a result that feels like it came from your favorite café.

    Why This Recipe Works

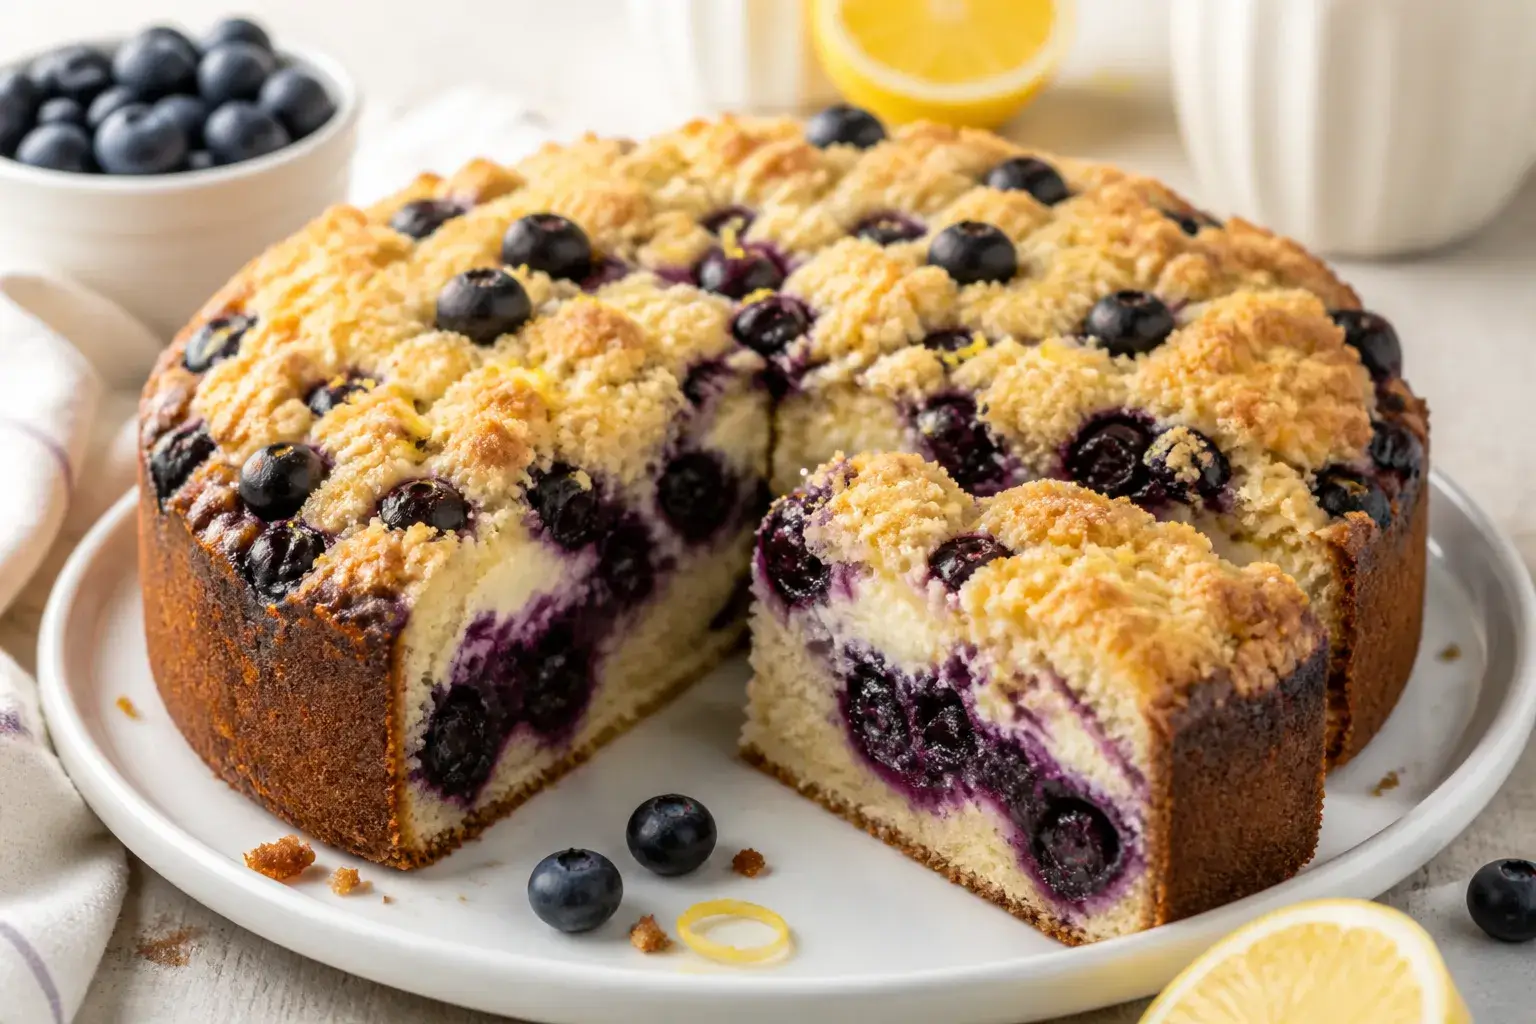
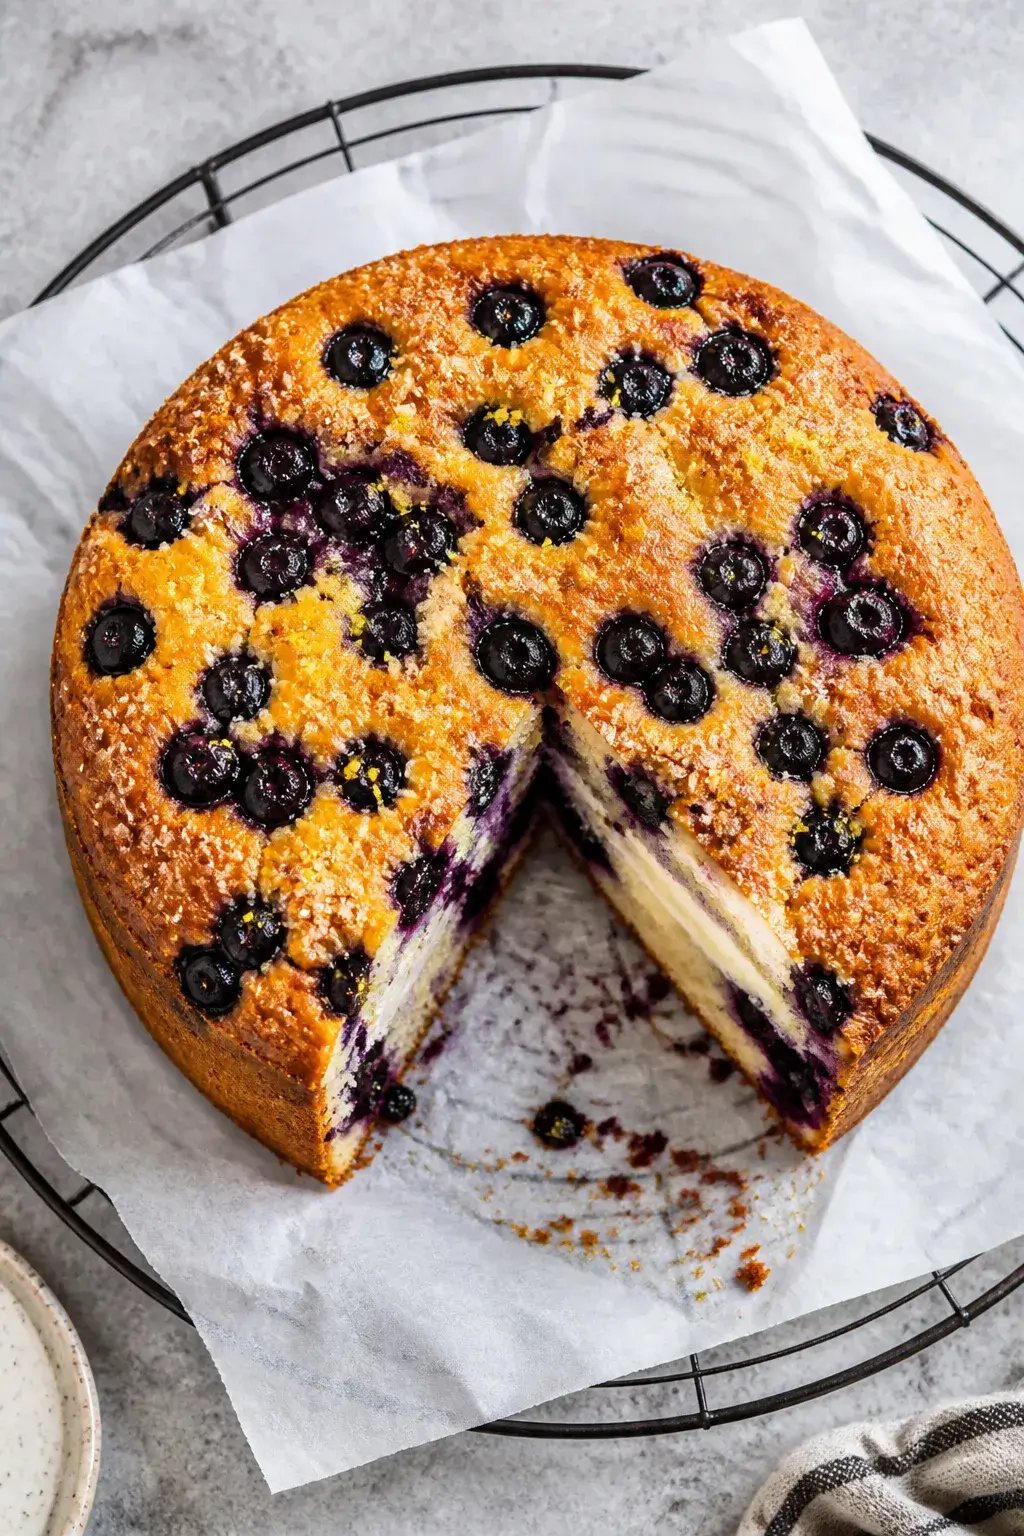
    Overhead shot of the baked Blueberry Cream Cheese Muffin Cake just out of a 9-inch springform pan, t
    • Room-temp dairy makes the batter smooth, so the cake rises high and bakes evenly.
    • Cream cheese layer adds moisture and a cheesecake-like tang that balances the sweetness.
    • Buttermilk (or milk + lemon) keeps the crumb tender and gives the batter lift.
    • Oil + butter combo brings both flavor and long-lasting moisture.
    • Light touch with the flour prevents toughness and keeps the crumb delicate.

    What You’ll Need

    • For the muffin cake batter:
      • 2 cups (250 g) all-purpose flour
      • 1 cup (200 g) granulated sugar
      • 2 tsp baking powder
      • 1/2 tsp baking soda
      • 1/2 tsp fine salt
      • 1/2 cup (120 ml) buttermilk (or milk + 1 tsp lemon juice, rested 5 minutes)
      • 1/2 cup (120 ml) neutral oil (canola or vegetable)
      • 1/4 cup (57 g) unsalted butter, melted and cooled
      • 2 large eggs, room temperature
      • 2 tsp vanilla extract
      • 1 1/2 cups (about 225 g) fresh or frozen blueberries
      • 1 tbsp flour (for tossing the berries)
    • For the cream cheese ribbon:
      • 8 oz (226 g) cream cheese, softened
      • 1/3 cup (67 g) granulated sugar
      • 1 large egg yolk
      • 1 tsp vanilla extract
      • Pinch of salt
    • For the topping (optional but bakery-style):
      • 2 tbsp coarse sugar (turbinado or demerara)
      • 1/2 tsp lemon zest

    How to Make It

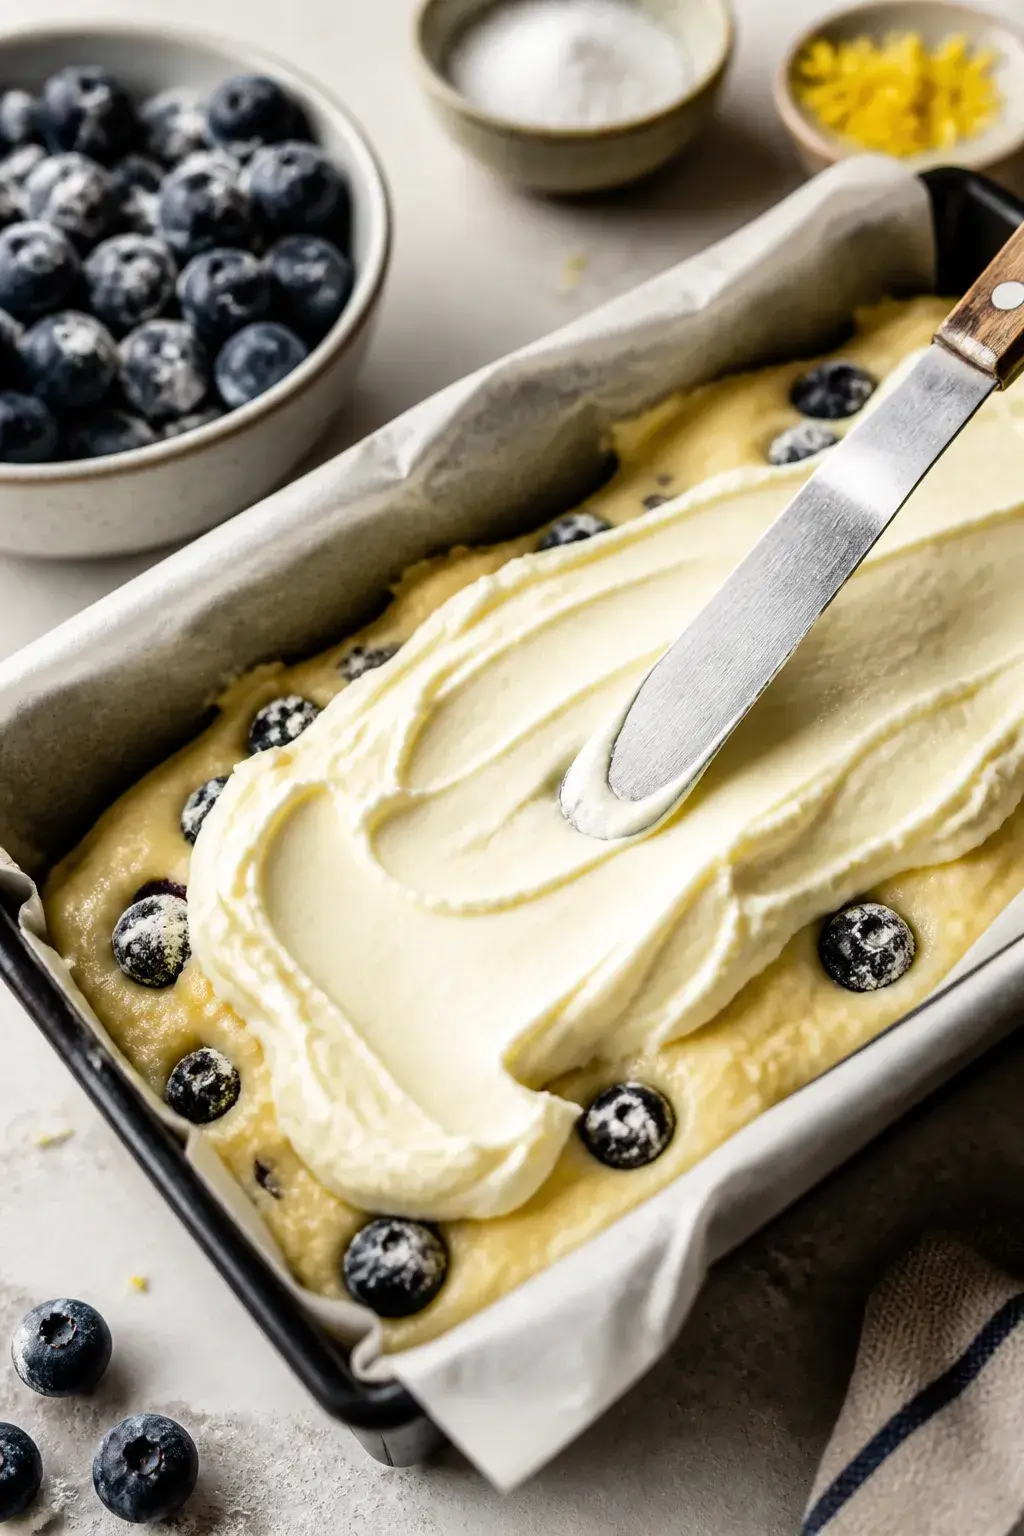
    Close-up 45-degree process shot of the layering stage: half the pale, thick muffin batter smoothed i
    1. Prep the pan. Heat oven to 350°F (175°C). Grease and line a 9-inch round cake pan or springform with parchment on the bottom.

      For a taller look, use a 9×5-inch loaf pan and extend bake time.

    2. Mix the dry ingredients. In a large bowl, whisk flour, sugar, baking powder, baking soda, and salt until evenly combined.
    3. Whisk the wet ingredients. In a separate bowl, whisk buttermilk, oil, melted butter, eggs, and vanilla until smooth.
    4. Combine gently. Pour the wet into the dry and fold with a spatula just until no flour streaks remain. Don’t overmix.
    5. Toss the berries. In a small bowl, toss blueberries with 1 tbsp flour. Fold 1 cup of the berries into the batter.

      Reserve the rest for the top.

    6. Make the cream cheese layer. Beat cream cheese, sugar, egg yolk, vanilla, and a pinch of salt until silky and smooth.
    7. Layer the cake. Spread half the batter into the pan. Dollop the cream cheese mixture over it and gently spread to the edges. Top with the remaining batter, smoothing lightly.
    8. Add berries and topping. Scatter the reserved blueberries over the top.

      Sprinkle with coarse sugar and lemon zest.

    9. Bake. Bake 45–55 minutes (round pan) or 60–70 minutes (loaf), until the top is golden and a tester inserted near the center comes out with moist crumbs, not wet batter. The cream cheese may cling slightly—that’s okay.
    10. Cool. Let cool in the pan 15 minutes, then lift or invert onto a rack, peel parchment, and cool completely before slicing.

    Keeping It Fresh

    • Room temp: Store covered for up to 2 days.
    • Refrigerate: Because of the cream cheese, it stays best in the fridge up to 5 days. Bring slices to room temp before serving for the best texture.
    • Freeze: Wrap slices well and freeze up to 2 months.

      Thaw overnight in the fridge or warm briefly in a low oven.

    Why This is Good for You

    • Blueberries bring antioxidants and fiber, adding natural sweetness and color.
    • Protein and calcium from cream cheese and eggs make this more satisfying than a standard cake.
    • Reasonable sugar for a bakery-style treat, with options to reduce slightly or use coarse sugar just on top for crunch.

    Pitfalls to Watch Out For

    • Overmixing the batter leads to a tough crumb. Fold gently and stop when combined.
    • Cold cream cheese creates lumps. Soften it fully for a smooth ribbon.
    • Underbaking the center is common with rich batters.

      Check multiple spots with a tester.

    • Wet bottoms with frozen berries. Don’t thaw; use them straight from the freezer and add 5–10 minutes to bake time.

    Variations You Can Try

    • Lemon poppy: Add 1 tbsp poppy seeds and 1 tbsp lemon zest to the batter.
    • Almond twist: Swap vanilla for 1 tsp almond extract and sprinkle sliced almonds on top.
    • Streusel top: Mix 3 tbsp cold butter, 1/3 cup flour, 1/3 cup brown sugar, and a pinch of cinnamon. Crumble over the batter before baking.
    • Whole-wheat boost: Replace 1/2 cup all-purpose flour with white whole wheat for a heartier crumb.
    • Mixed berries: Use a blend of blueberries and raspberries for a tangier bite.

    FAQ

    Can I make this gluten-free?

    Yes. Use a 1:1 gluten-free baking flour with xanthan gum.

    Let the batter rest 10 minutes before baking to hydrate, then bake as directed, adding a few minutes if needed.

    What if I don’t have buttermilk?

    Stir 1 teaspoon lemon juice or white vinegar into 1/2 cup milk and let it sit for 5 minutes. It won’t be as rich as real buttermilk, but it works well.

    Can I bake this as muffins?

    Yes. Line a 12-cup muffin tin.

    Fill cups halfway with batter, add a spoonful of cream cheese mixture, then top with more batter. Bake at 375°F (190°C) for 18–22 minutes.

    How do I know it’s done if there’s cream cheese inside?

    Insert a tester slightly off-center. You want moist crumbs from the cake portion.

    Some creamy residue is normal, but there shouldn’t be liquid batter.

    Can I cut the sugar?

    You can reduce the batter sugar to 3/4 cup without hurting texture. Keep the cream cheese layer as is so it stays silky.

    In Conclusion

    This Blueberry Cream Cheese Muffin Cake brings bakery flair to your kitchen without complicated steps. It’s tender, tall, and studded with berries, with a creamy swirl that keeps every slice moist.

    Bake it for a weekend brunch, share it with friends, or stash a few slices in the freezer for a sweet pick-me-up anytime.

    Blueberry Cream Cheese Muffin Cake (Bakery Style) – Soft, Tall, and Packed With Berries

    Prep Time 15 minutes
    Cook Time 30 minutes
    Total Time 45 minutes
    Servings 12 servings

    Ingredients
      

    • For the muffin cake batter: 2 cups (250 g) all-purpose flour
    • 1 cup (200 g) granulated sugar
    • 2 tsp baking powder
    • 1/2 tsp baking soda
    • 1/2 tsp fine salt
    • 1/2 cup (120 ml) buttermilk (or milk + 1 tsp lemon juice, rested 5 minutes)
    • 1/2 cup (120 ml) neutral oil (canola or vegetable)
    • 1/4 cup (57 g) unsalted butter, melted and cooled
    • 2 large eggs, room temperature
    • 2 tsp vanilla extract
    • 1 1/2 cups (about 225 g) fresh or frozen blueberries
    • 1 tbsp flour (for tossing the berries)
    • For the cream cheese ribbon: 8 oz (226 g) cream cheese, softened
    • 1/3 cup (67 g) granulated sugar
    • 1 large egg yolk
    • 1 tsp vanilla extract
    • Pinch of salt
    • For the topping (optional but bakery-style): 2 tbsp coarse sugar (turbinado or demerara)
    • 1/2 tsp lemon zest

    Instructions
     

    • Prep the pan. Heat oven to 350°F (175°C). Grease and line a 9-inch round cake pan or springform with parchment on the bottom. For a taller look, use a 9×5-inch loaf pan and extend bake time.
    • Mix the dry ingredients. In a large bowl, whisk flour, sugar, baking powder, baking soda, and salt until evenly combined.
    • Whisk the wet ingredients. In a separate bowl, whisk buttermilk, oil, melted butter, eggs, and vanilla until smooth.
    • Combine gently. Pour the wet into the dry and fold with a spatula just until no flour streaks remain. Don’t overmix.
    • Toss the berries. In a small bowl, toss blueberries with 1 tbsp flour. Fold 1 cup of the berries into the batter. Reserve the rest for the top.
    • Make the cream cheese layer. Beat cream cheese, sugar, egg yolk, vanilla, and a pinch of salt until silky and smooth.
    • Layer the cake. Spread half the batter into the pan. Dollop the cream cheese mixture over it and gently spread to the edges. Top with the remaining batter, smoothing lightly.
    • Add berries and topping. Scatter the reserved blueberries over the top. Sprinkle with coarse sugar and lemon zest.
    • Bake. Bake 45–55 minutes (round pan) or 60–70 minutes (loaf), until the top is golden and a tester inserted near the center comes out with moist crumbs, not wet batter. The cream cheese may cling slightly—that’s okay.
    • Cool. Let cool in the pan 15 minutes, then lift or invert onto a rack, peel parchment, and cool completely before slicing.
  • Fudgy Keto Brownies – Easy One Bowl Recipe!

    Fudgy Keto Brownies – Easy One Bowl Recipe!

    If you’re craving a rich, chocolatey treat without the sugar crash, these fudgy keto brownies are the answer. They’re made in one bowl, bake up in about 20 minutes, and deliver that dense, gooey center you want in a brownie. No complicated steps, no hard-to-find ingredients.

    Just simple, reliable goodness that happens to be low carb. Keep this recipe on standby for weeknights, parties, or whenever the chocolate urge hits.

    What Makes This Recipe So Good

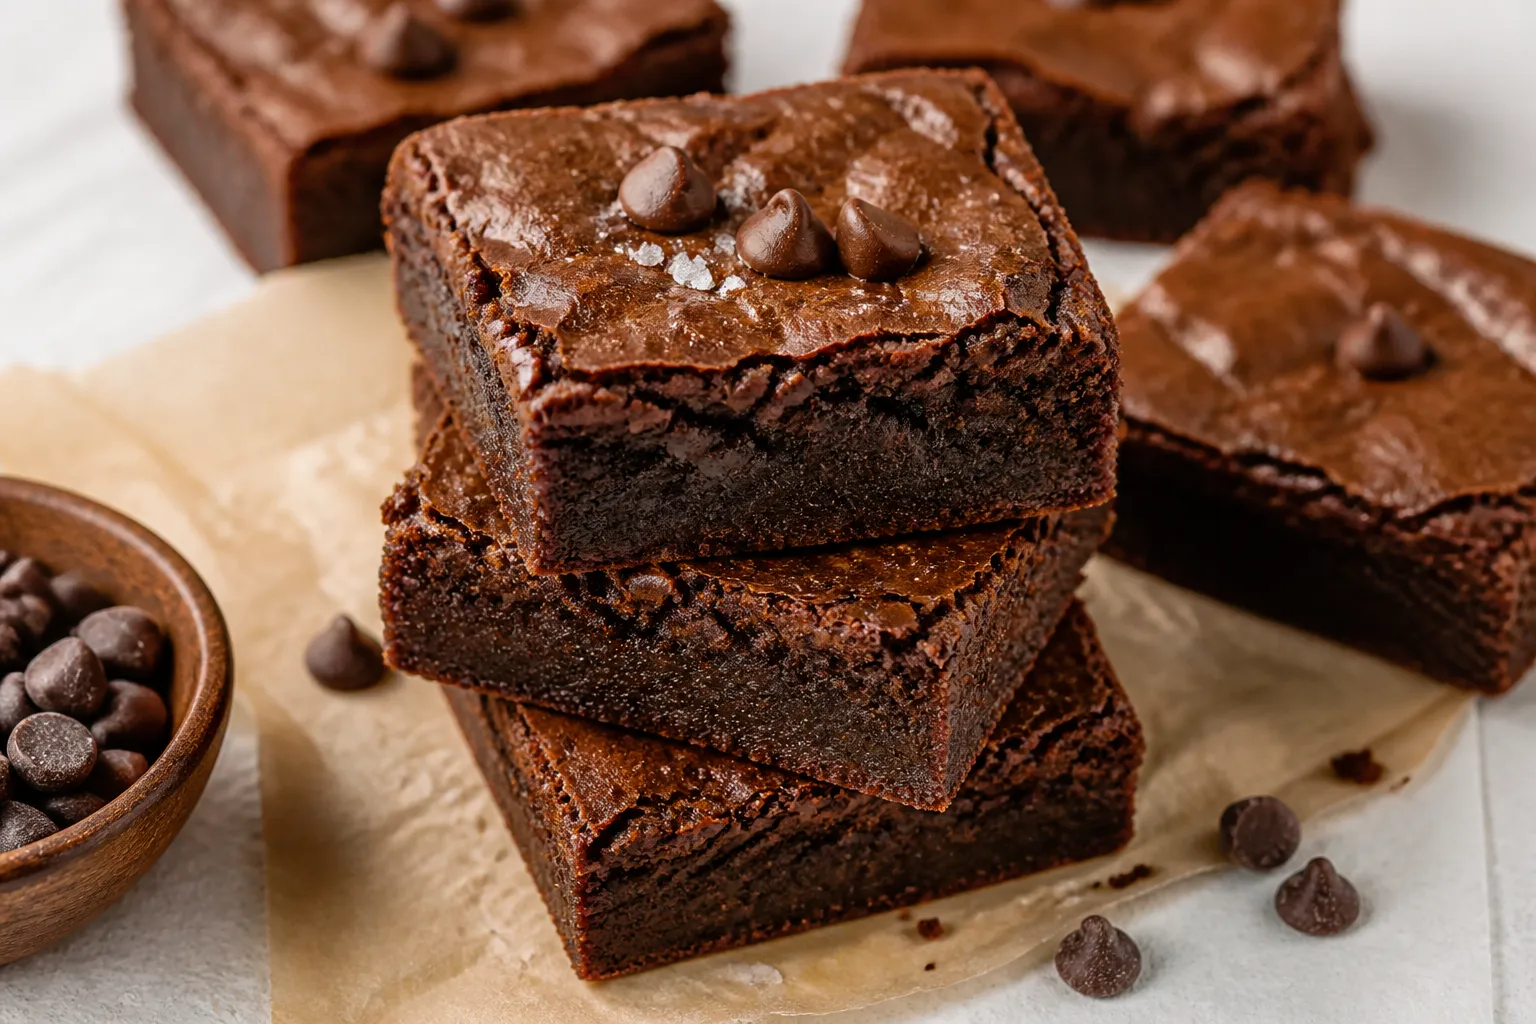
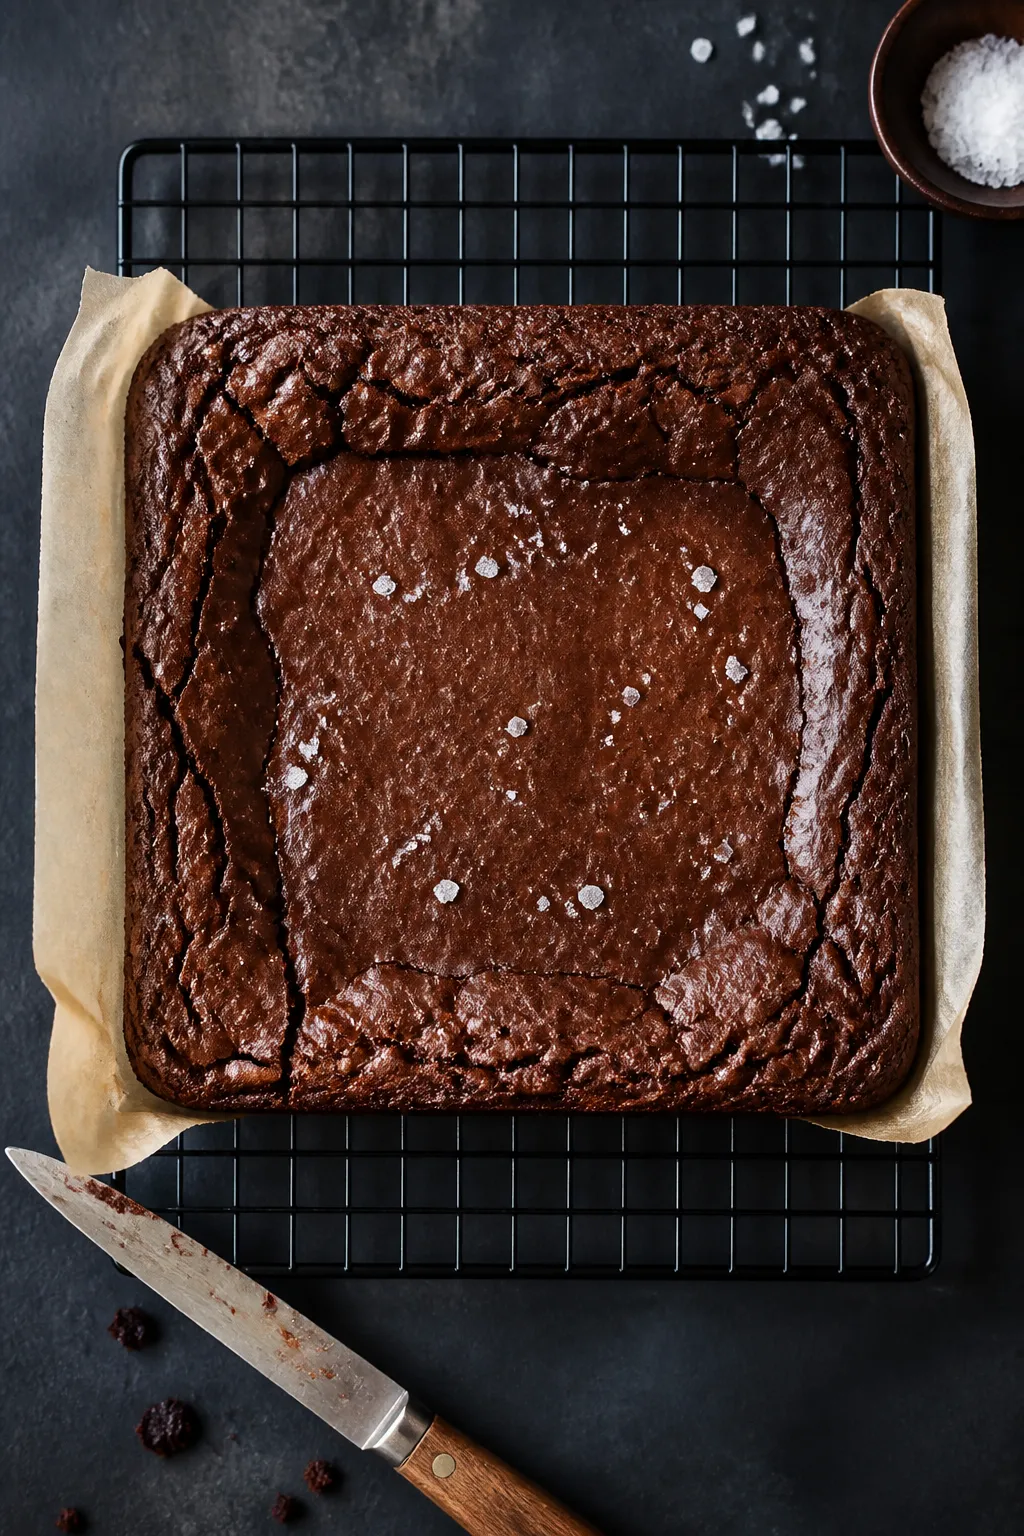
    Overhead shot of a freshly baked 8x8 pan of fudgy keto brownies on a cooling rack, parchment overhan
    • One bowl, minimal mess: Everything mixes in a single bowl for easy cleanup.
    • Super fudgy texture: Almond flour and cocoa give a dense, rich crumb with zero dryness.
    • Truly low carb: Uses keto-friendly sweetener and almond flour.
    • Quick to bake: From bowl to oven in minutes, done in around 20 minutes.
    • Customizable: Add nuts, chips, espresso, or a swirl of nut butter.

    Shopping List

    • Unsalted butter (or coconut oil)
    • Granulated erythritol or a keto-friendly sweetener blend
    • Large eggs
    • Vanilla extract
    • Almond flour (super-fine)
    • Unsweetened cocoa powder (Dutch-processed or natural)
    • Sea salt
    • Baking powder
    • Optional mix-ins: sugar-free chocolate chips, chopped walnuts or pecans
    • Optional flavor boosts: espresso powder, cinnamon

    How to Make It

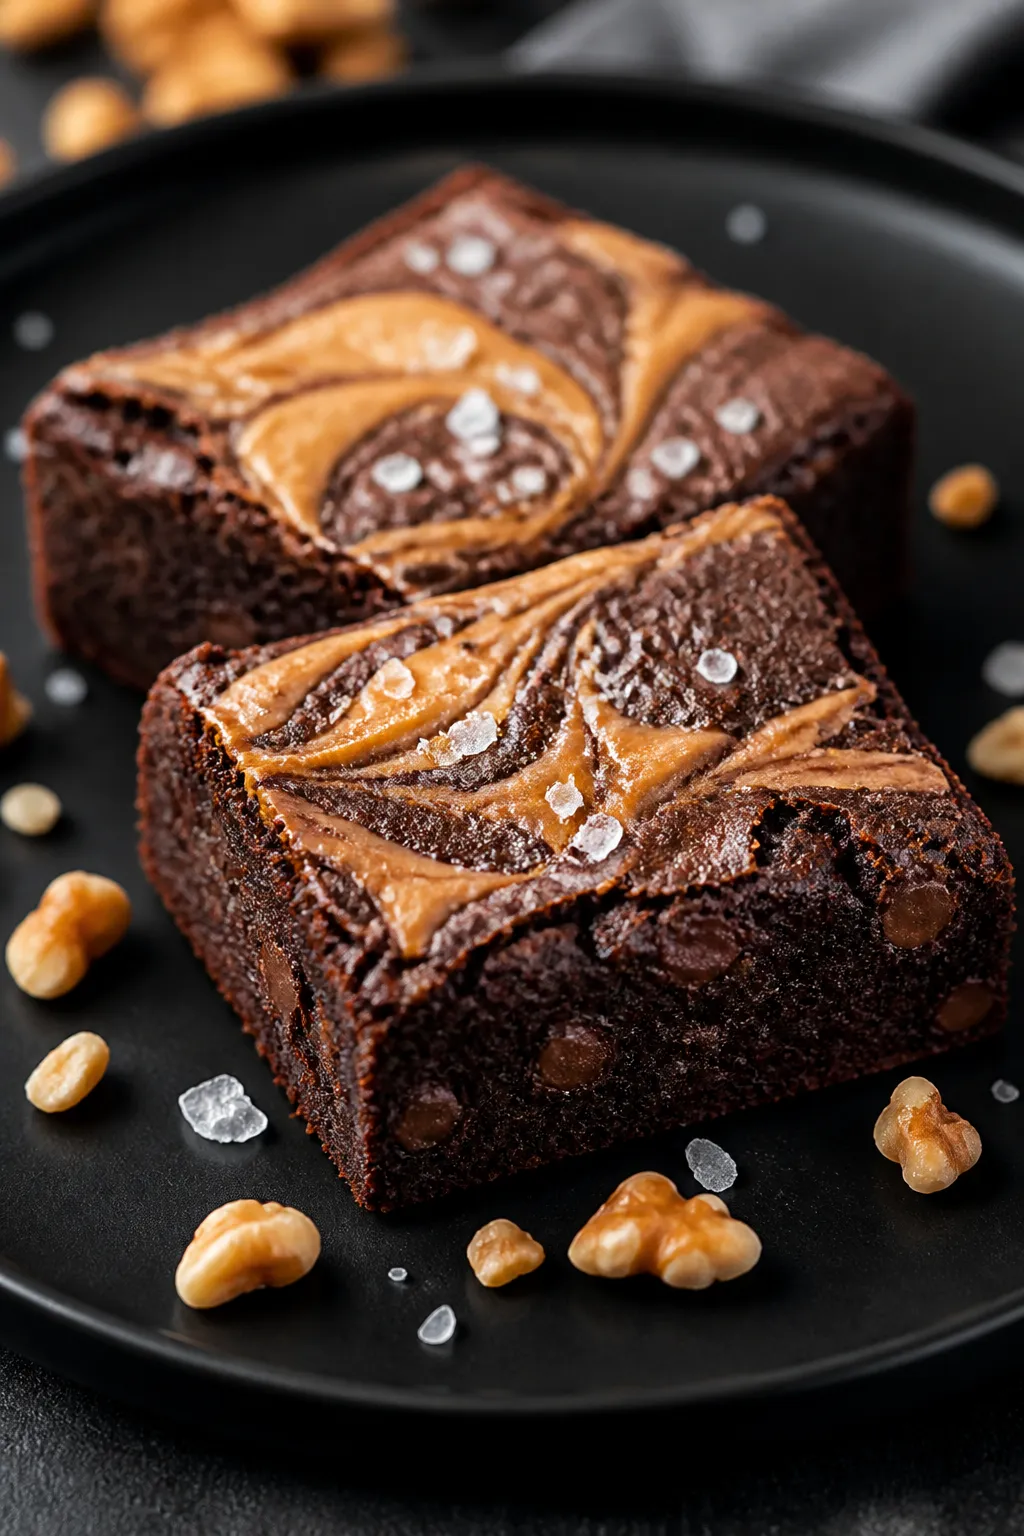
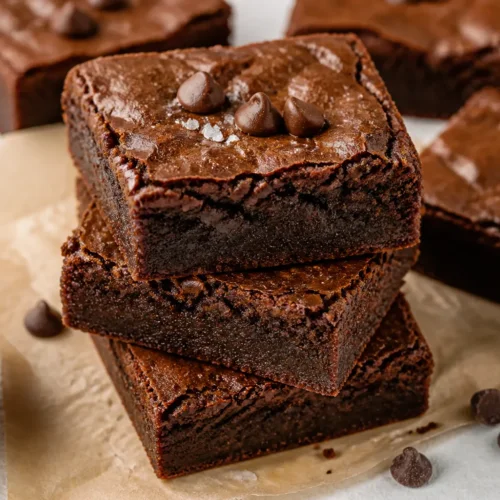
    Close-up detail of sliced keto brownies plated for serving: two thick, dense squares with a gooey in
    1. Prep the pan: Heat oven to 350°F (175°C). Line an 8×8-inch pan with parchment, leaving overhang for easy lifting.
    2. Melt butter: In a medium bowl, microwave butter until melted and warm, not sizzling.

      Let cool 1–2 minutes.

    3. Sweeten: Whisk in the erythritol until mostly dissolved. A few grains are fine.
    4. Add eggs and vanilla: Whisk in eggs one at a time, then add vanilla. Mix until glossy and smooth.
    5. Dry ingredients: Add almond flour, cocoa, salt, and baking powder.

      Stir with a spatula until just combined and thick.

    6. Optional mix-ins: Fold in sugar-free chocolate chips or nuts for extra texture.
    7. Bake: Spread batter evenly in the pan. Bake 18–22 minutes, until the center is just set and a toothpick comes out with a few moist crumbs.
    8. Cool completely: Let brownies cool in the pan at least 30–45 minutes. Lift out and slice with a sharp knife, wiping between cuts.

    Storage Instructions

    • Room temperature: Store in an airtight container for up to 2 days.
    • Refrigerator: Keeps well for 5–6 days.

      The texture gets even fudgier.

    • Freezer: Wrap slices individually and freeze up to 2 months. Thaw at room temperature or warm briefly in the microwave.

    Benefits of This Recipe

    • Low in net carbs: Great for keto, low-carb, and sugar-conscious diets.
    • Gluten-free: Almond flour makes these naturally gluten-free.
    • Satisfying: Healthy fats help keep you fuller longer.
    • Simple ingredients: No specialty tools or complicated steps.

    Pitfalls to Watch Out For

    • Overbaking: Pull them when slightly underdone. They continue to set as they cool.
    • Using coarse almond meal: This can make the brownies gritty.

      Go for super-fine almond flour.

    • Sweetener swap issues: Allulose makes brownies softer; pure erythritol can crystallize. A blend often works best.
    • Skipping the cool-down: Slicing too early leads to crumbling. Patience pays off.

    Recipe Variations

    • Mocha Brownies: Add 1 teaspoon espresso powder to boost chocolate flavor.
    • Nutty Crunch: Fold in 1/2 cup chopped walnuts or pecans.
    • Double Chocolate: Stir in 1/3–1/2 cup sugar-free chocolate chips.
    • Salted Caramel Vibe: Sprinkle flaky sea salt on top right after baking.
    • Peanut Butter Swirl: Dollop 3–4 tablespoons natural peanut butter on top of the batter and swirl with a knife.
    • Dairy-Free: Use coconut oil instead of butter and dairy-free chips.

    FAQ

    Can I use coconut flour instead of almond flour?

    Coconut flour behaves very differently and is much more absorbent.

    It won’t be a 1:1 swap. If you must use coconut flour, you’ll need far less and more eggs, which changes the texture. For best results, stick to almond flour.

    Which sweetener works best?

    A blend of erythritol and monk fruit or stevia usually gives the most balanced sweetness and texture.

    Allulose makes brownies very soft and can brown quickly. Pure erythritol can re-crystallize as they cool. If unsure, use a blend designed for baking.

    How do I know when they’re done?

    Look for set edges and a slightly soft center.

    A toothpick should come out with moist crumbs, not wet batter. Start checking at 18 minutes and go from there.

    Can I make these egg-free?

    Eggs provide structure and that fudgy chew. Flax or chia eggs won’t deliver the same result.

    If you try it, expect a softer, more fragile brownie.

    What pan size should I use?

    An 8×8-inch pan is ideal for thicker, fudgier brownies. A 9×9-inch pan will give thinner brownies and may bake a couple minutes faster.

    Final Thoughts

    These one-bowl keto brownies prove you don’t need sugar or complicated steps to get a deep, chocolatey fix. Keep the ingredients on hand, watch the bake time, and let them cool for the perfect slice.

    Once you try them, they’ll become your go-to low-carb dessert for any occasion.

    Fudgy Keto Brownies – Easy One Bowl Recipe!

    Prep Time 10 minutes
    Cook Time 20 minutes
    Total Time 30 minutes
    Servings 16 servings

    Ingredients
      

    • Unsalted butter (or coconut oil)
    • Granulated erythritol or a keto-friendly sweetener blend
    • Large eggs
    • Vanilla extract
    • Almond flour (super-fine)
    • Unsweetened cocoa powder (Dutch-processed or natural)
    • Sea salt
    • Baking powder
    • Optional mix-ins: sugar-free chocolate chips, chopped walnuts or pecans
    • Optional flavor boosts: espresso powder, cinnamon

    Instructions
     

    • Prep the pan: Heat oven to 350°F (175°C). Line an 8×8-inch pan with parchment, leaving overhang for easy lifting.
    • Melt butter: In a medium bowl, microwave butter until melted and warm, not sizzling. Let cool 1–2 minutes.
    • Sweeten: Whisk in the erythritol until mostly dissolved. A few grains are fine.
    • Add eggs and vanilla: Whisk in eggs one at a time, then add vanilla. Mix until glossy and smooth.
    • Dry ingredients: Add almond flour, cocoa, salt, and baking powder. Stir with a spatula until just combined and thick.
    • Optional mix-ins: Fold in sugar-free chocolate chips or nuts for extra texture.
    • Bake: Spread batter evenly in the pan. Bake 18–22 minutes, until the center is just set and a toothpick comes out with a few moist crumbs.
    • Cool completely: Let brownies cool in the pan at least 30–45 minutes. Lift out and slice with a sharp knife, wiping between cuts.
  • Strawberry Cheesecake Dump Cake – Easy & Creamy

    Strawberry Cheesecake Dump Cake – Easy & Creamy

    Think of this as the easiest cheesecake-meets-cobbler you’ll ever make. You get a creamy cheesecake layer, juicy strawberries, and a buttery, golden cake top—all from a few pantry staples. No mixer, no fancy steps, just stir, dump, and bake.

    It’s a crowd-pleaser for potlucks, birthdays, or cozy weekends. If you can open a can and a box, you can make this dessert.

    Why This Recipe Works

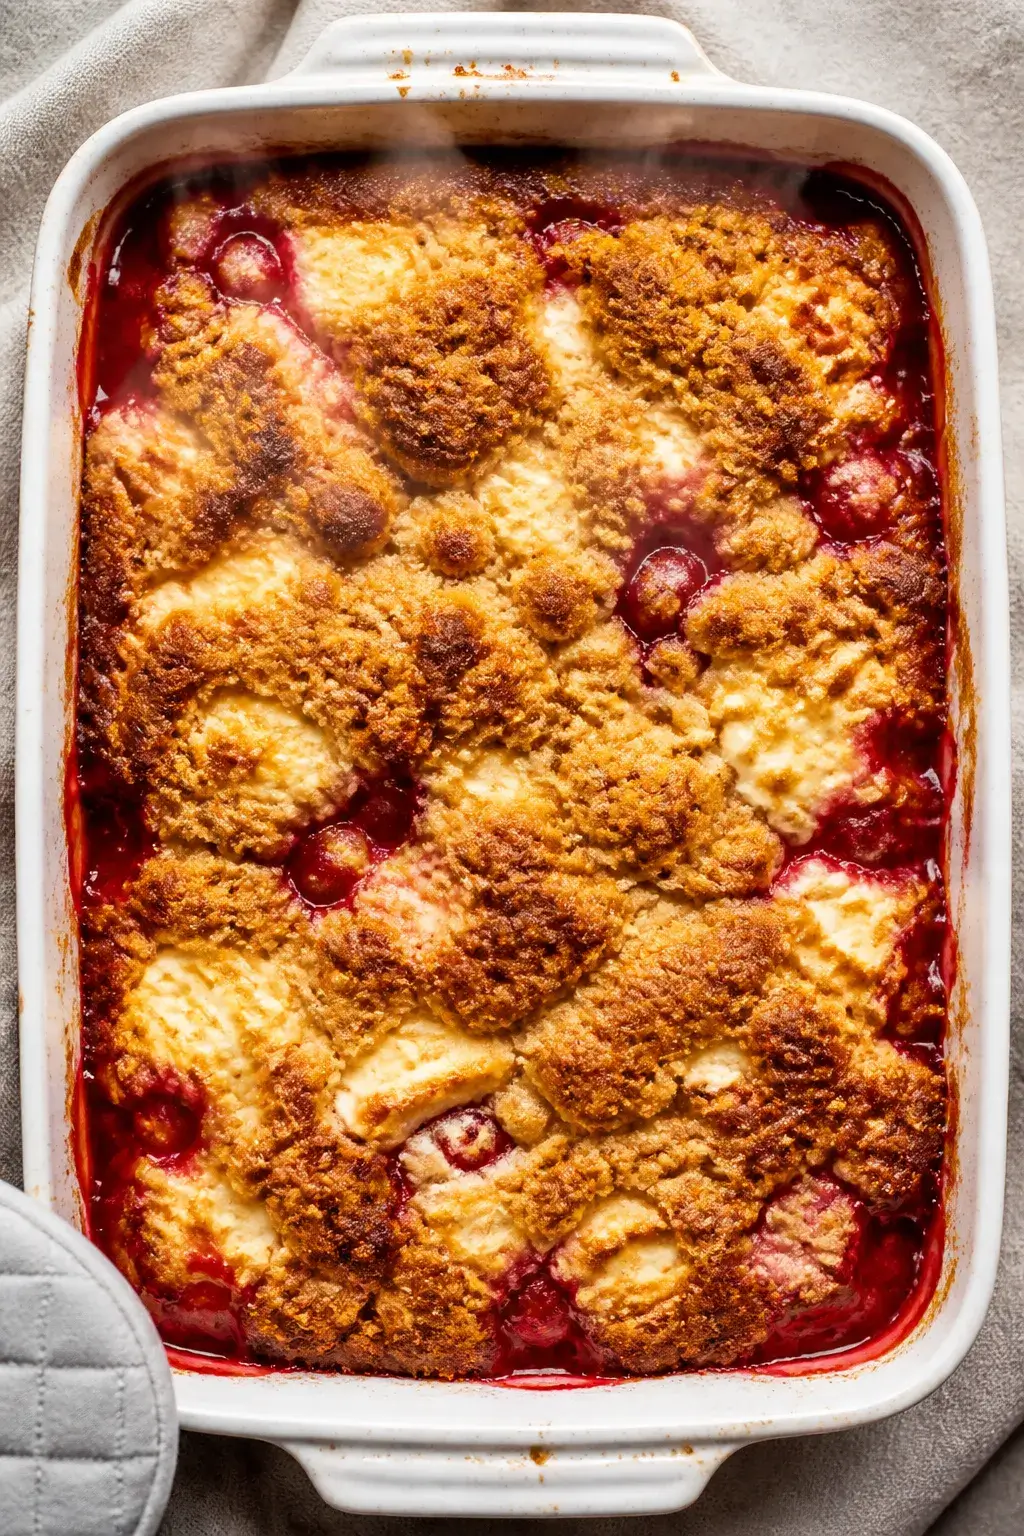
    Overhead cooking process shot: 9x13-inch baking dish just out of the oven showing the Strawberry Che
    • Layered texture: Creamy cheesecake filling, jammy fruit, and a crisp-buttery topping give every bite contrast.
    • Minimal prep: Uses canned pie filling and a boxed cake mix for speed without sacrificing flavor.
    • Foolproof moisture: The cream cheese and butter keep the cake tender and rich—no dry bites.
    • Customizable: Swap fruit flavors, cake mix types, or add-ins to suit your taste.

    Ingredients

    • 2 cans (21 oz each) strawberry pie filling
    • 8 oz cream cheese, softened
    • 1/3 cup granulated sugar
    • 1 teaspoon vanilla extract
    • 1 box (15.25 oz) yellow cake mix
    • 1/2 cup (1 stick) unsalted butter, melted
    • 1/4 teaspoon fine salt (optional, boosts flavor)
    • 1/2 cup chopped fresh strawberries (optional, for extra freshness)
    • Whipped cream or vanilla ice cream, for serving (optional)

    How to Make It

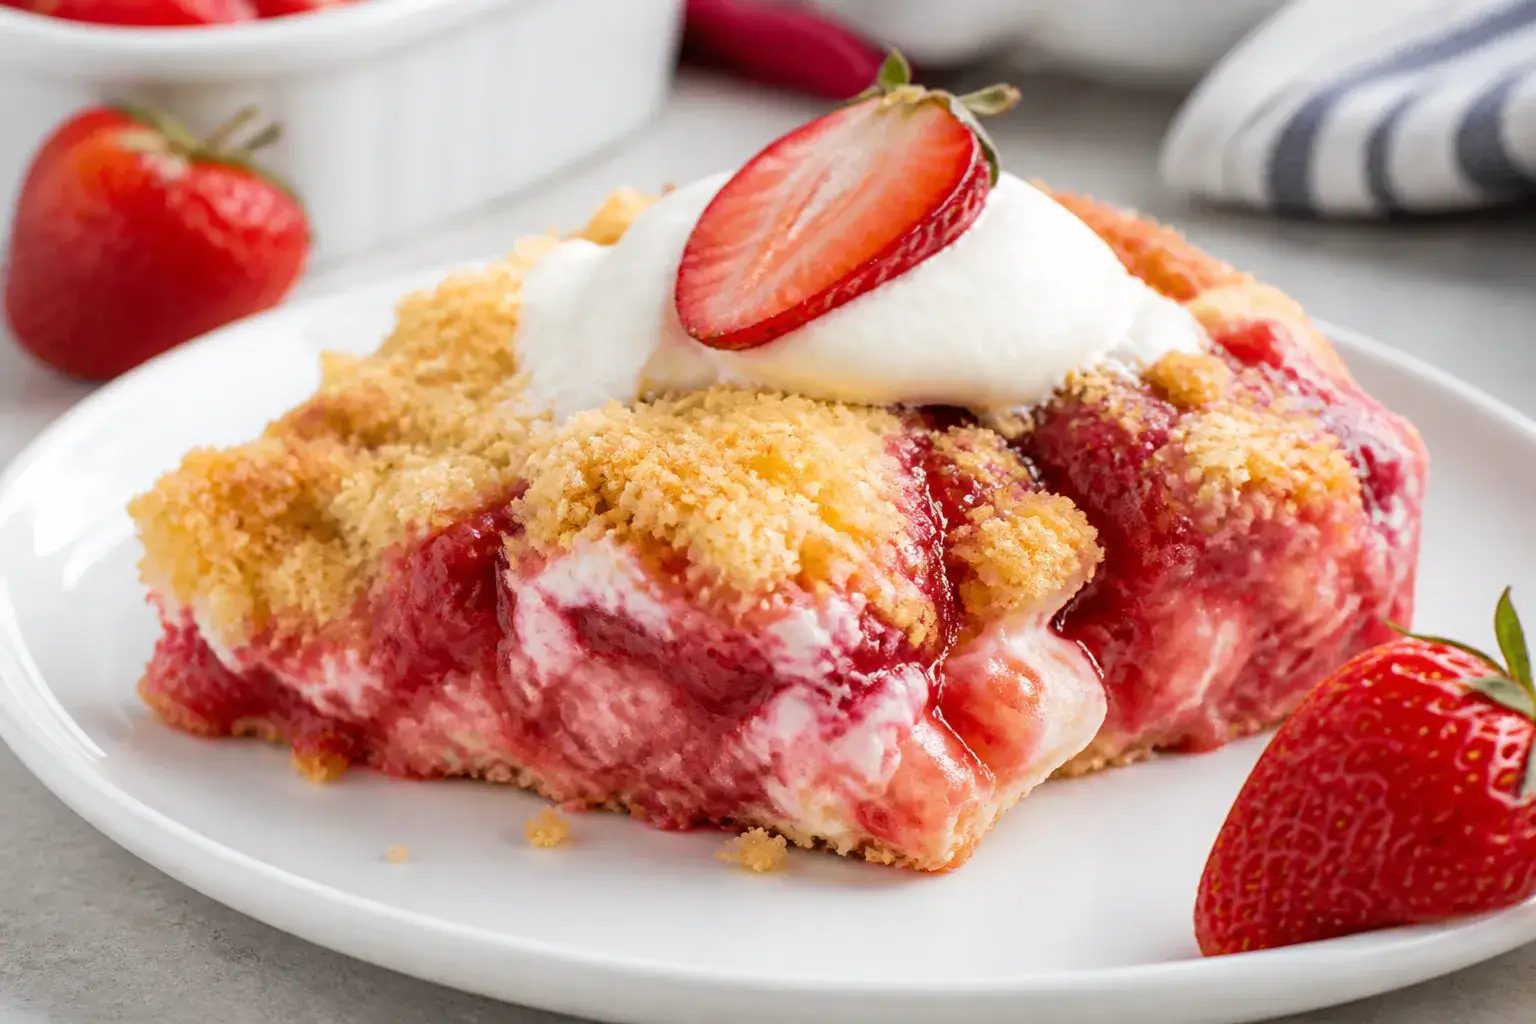
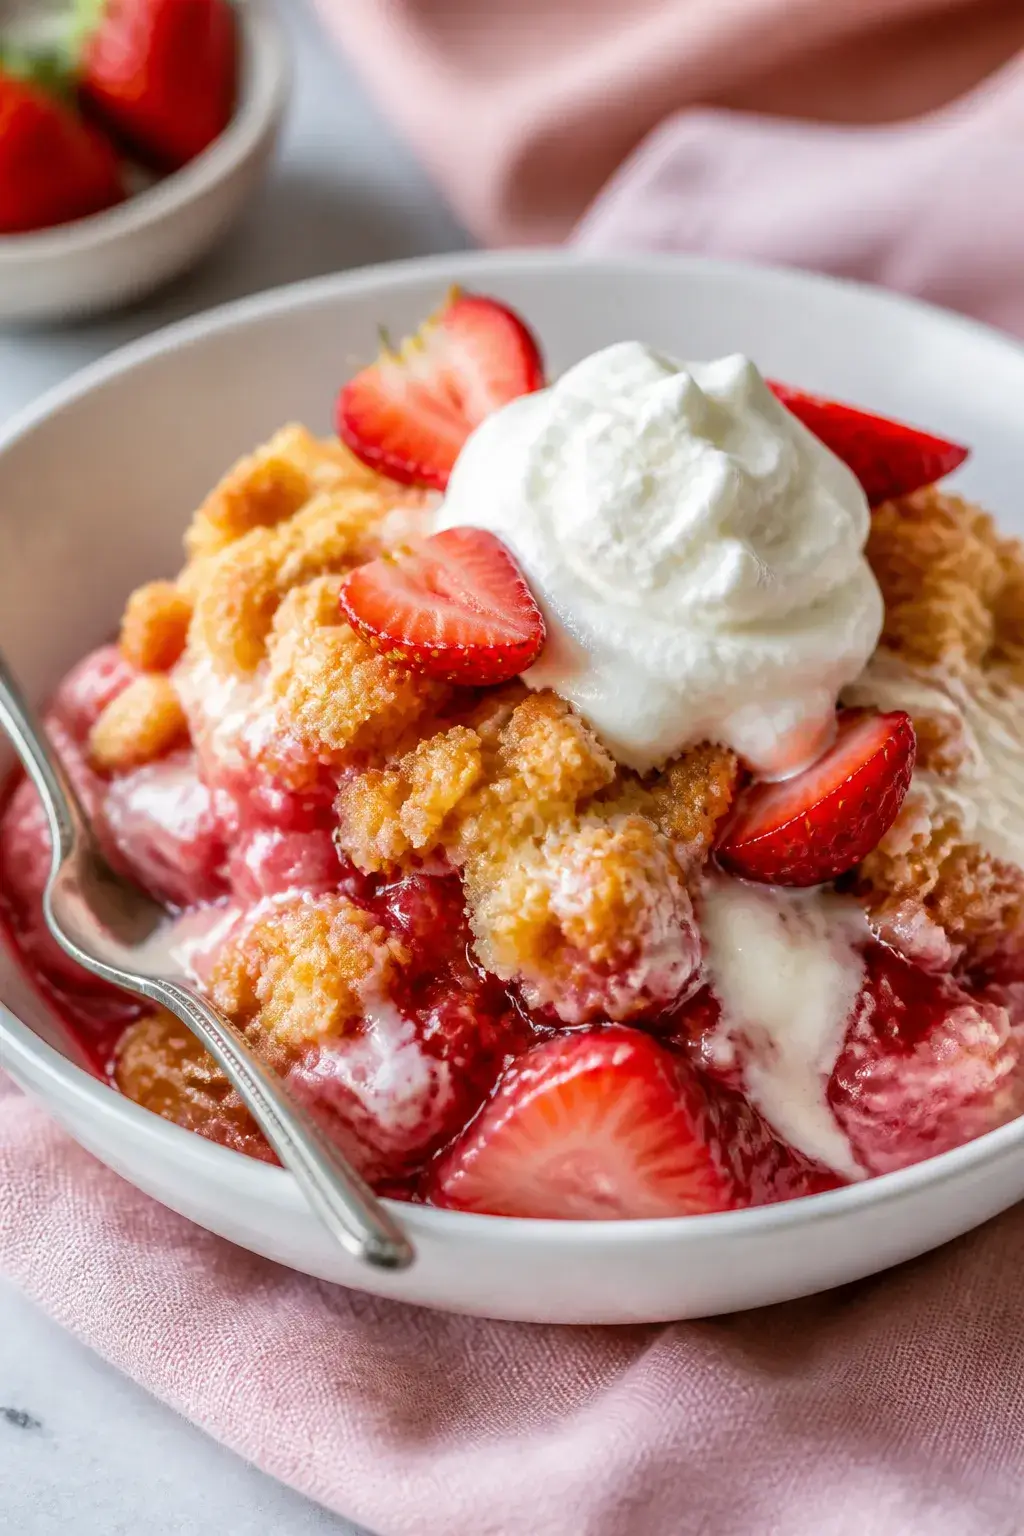
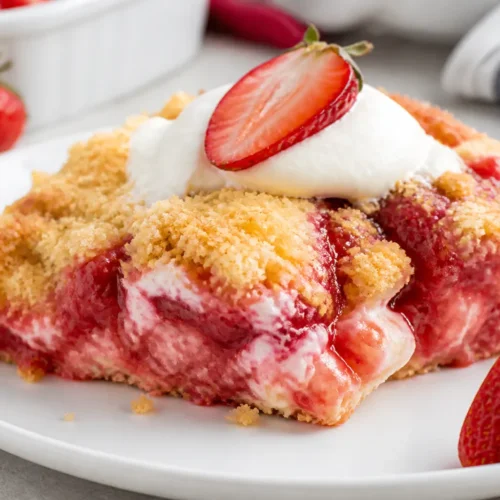
    Final plated close-up: a generous scoop of Strawberry Cheesecake Dump Cake in a shallow white bowl,
    1. Preheat and prep: Heat oven to 350°F (175°C). Lightly grease a 9×13-inch baking dish.
    2. Spread the fruit: Pour strawberry pie filling into the dish and spread evenly.

      Scatter fresh strawberries on top if using.

    3. Make cheesecake dollops: In a bowl, mix softened cream cheese, sugar, vanilla, and salt until smooth. Spoon small dollops over the fruit. No need to cover every inch.
    4. Add cake mix: Sprinkle the dry cake mix evenly over the entire surface.

      Do not mix it in.

    5. Finish with butter: Drizzle melted butter evenly over the cake mix, trying to moisten as much as possible. It’s okay if a few dry spots remain; they’ll hydrate as it bakes.
    6. Bake: Place the dish on the center rack and bake 40–50 minutes, until the top is golden and the edges are bubbling.
    7. Rest: Let cool at least 15–20 minutes. This helps the cheesecake layer set and the juices thicken.
    8. Serve: Scoop into bowls and top with whipped cream or ice cream if you like.

    How to Store

    • Refrigerate: Cover and chill for up to 4 days.

      The cheesecake layer requires refrigeration.

    • Reheat: Warm individual portions in the microwave for 20–30 seconds, or the whole dish at 300°F (150°C) for 10–15 minutes.
    • Freeze: Not ideal, as the cream cheese can turn grainy. If needed, freeze for up to 1 month and thaw overnight in the fridge.

    Why This is Good for You

    • Portion control: It’s rich and satisfying, so a small serving goes a long way.
    • Real dairy: Cream cheese adds calcium and protein, which help keep you full.
    • Strawberries: Provide vitamin C and antioxidants, even in pie filling form. Fresh berries boost this even more.

    What Not to Do

    • Don’t stir the layers together. The magic is in the layers—mixing turns it mushy.
    • Don’t skip the butter. It hydrates the cake mix and creates that crisp topping.
    • Don’t overbake. If the top is deeply brown and the edges are dry, it’s gone too far.

      Look for golden brown and bubbling edges.

    • Don’t use cold cream cheese. It won’t blend smoothly and can leave lumps.

    Recipe Variations

    • Lemon twist: Add 1 tablespoon lemon zest to the cream cheese and use white cake mix.
    • Graham crunch: Sprinkle 1 cup crushed graham crackers over the fruit before the cake mix for cheesecake vibes.
    • Almond bakery style: Swap vanilla for 1/2 teaspoon almond extract and scatter sliced almonds on top during the last 10 minutes.
    • Chocolate-strawberry: Use chocolate cake mix and drizzle with warm hot fudge to serve.
    • Lighter touch: Use Neufchâtel (1/3 less fat) cream cheese and reduce sugar to 1/4 cup.

    FAQ

    Can I use fresh strawberries instead of pie filling?

    Yes, but you’ll need moisture and sweetness. Toss 5–6 cups sliced strawberries with 3/4 cup sugar and 2 tablespoons cornstarch, then let sit 10 minutes before assembling.

    What cake mix works best?

    Yellow or white cake mix is classic. Strawberry cake mix amplifies berry flavor, and chocolate is great for a richer dessert.

    Why is my topping powdery?

    Dry patches mean not enough butter coverage.

    Drizzle an extra 2–3 tablespoons melted butter over dry spots next time, or lightly spritz with cooking spray before baking.

    Can I make it ahead?

    Assemble right before baking for best texture. You can bake it a day ahead, chill, and reheat to serve warm.

    Is this gluten-free friendly?

    Use a gluten-free vanilla cake mix and confirm your pie filling and cream cheese are gluten-free. Bake times are similar.

    How do I get cleaner slices?

    Chill the baked cake completely, then slice and rewarm portions.

    Cooling firms up the cheesecake layer for neat cuts.

    Wrapping Up

    This Strawberry Cheesecake Dump Cake delivers big flavor with almost no effort. It’s creamy, fruity, and buttery with a crisp top that keeps you coming back for one more bite. Keep the ingredients on hand and you’ll always have a fast dessert ready for guests—or a sweet night in.

    Strawberry Cheesecake Dump Cake – Easy & Creamy

    Prep Time 10 minutes
    Cook Time 45 minutes
    Total Time 55 minutes
    Servings 12 servings

    Ingredients
      

    • 2 cans (21 oz each) strawberry pie filling
    • 8 oz cream cheese, softened
    • 1/3 cup granulated sugar
    • 1 teaspoon vanilla extract
    • 1 box (15.25 oz) yellow cake mix
    • 1/2 cup (1 stick) unsalted butter, melted
    • 1/4 teaspoon fine salt (optional, boosts flavor)
    • 1/2 cup chopped fresh strawberries (optional, for extra freshness)
    • Whipped cream or vanilla ice cream, for serving (optional)

    Instructions
     

    • Preheat and prep: Heat oven to 350°F (175°C). Lightly grease a 9×13-inch baking dish.
    • Spread the fruit: Pour strawberry pie filling into the dish and spread evenly. Scatter fresh strawberries on top if using.
    • Make cheesecake dollops: In a bowl, mix softened cream cheese, sugar, vanilla, and salt until smooth. Spoon small dollops over the fruit. No need to cover every inch.
    • Add cake mix: Sprinkle the dry cake mix evenly over the entire surface. Do not mix it in.
    • Finish with butter: Drizzle melted butter evenly over the cake mix, trying to moisten as much as possible. It’s okay if a few dry spots remain; they’ll hydrate as it bakes.
    • Bake: Place the dish on the center rack and bake 40–50 minutes, until the top is golden and the edges are bubbling.
    • Rest: Let cool at least 15–20 minutes. This helps the cheesecake layer set and the juices thicken.
    • Serve: Scoop into bowls and top with whipped cream or ice cream if you like.
  • Orange Creamsicle Cake – Bright, Citrusy, and Comforting

    Orange Creamsicle Cake – Bright, Citrusy, and Comforting

    Think of a childhood creamsicle—sweet vanilla and sunny orange—turned into a soft, fluffy cake. This orange creamsicle cake is light, moist, and full of bright citrus flavor without being too sweet. It’s simple enough for a weeknight treat, yet pretty enough for birthdays and showers.

    The best part? You don’t need fancy tools or rare ingredients—just a few pantry staples and fresh oranges.

    Why This Recipe Works

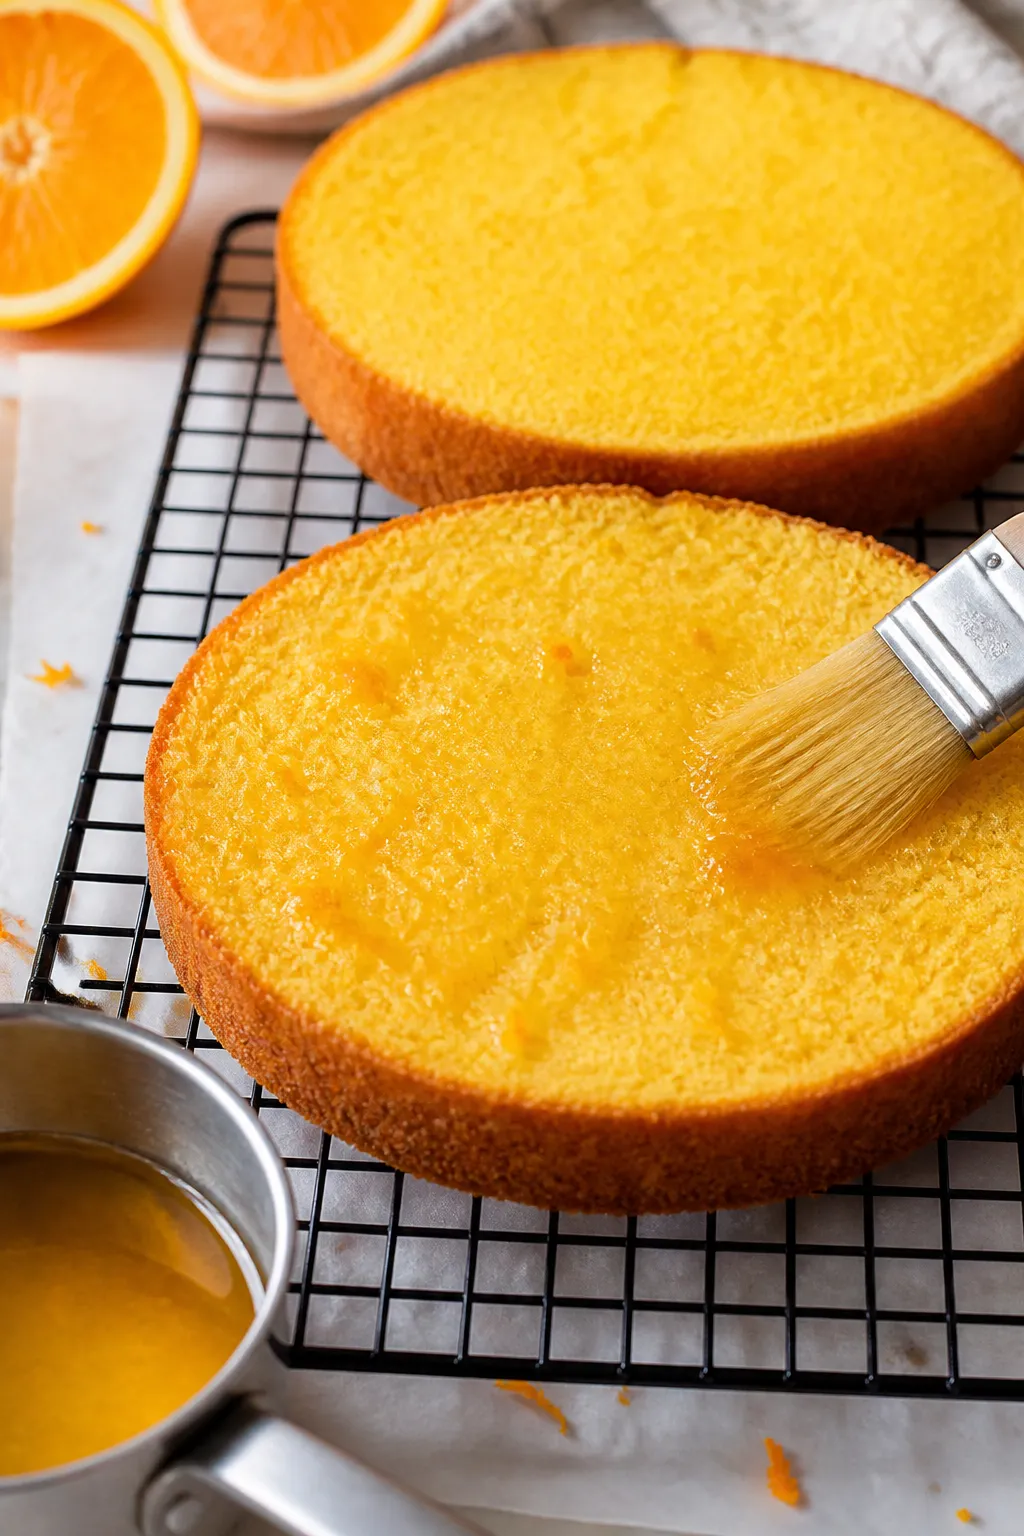
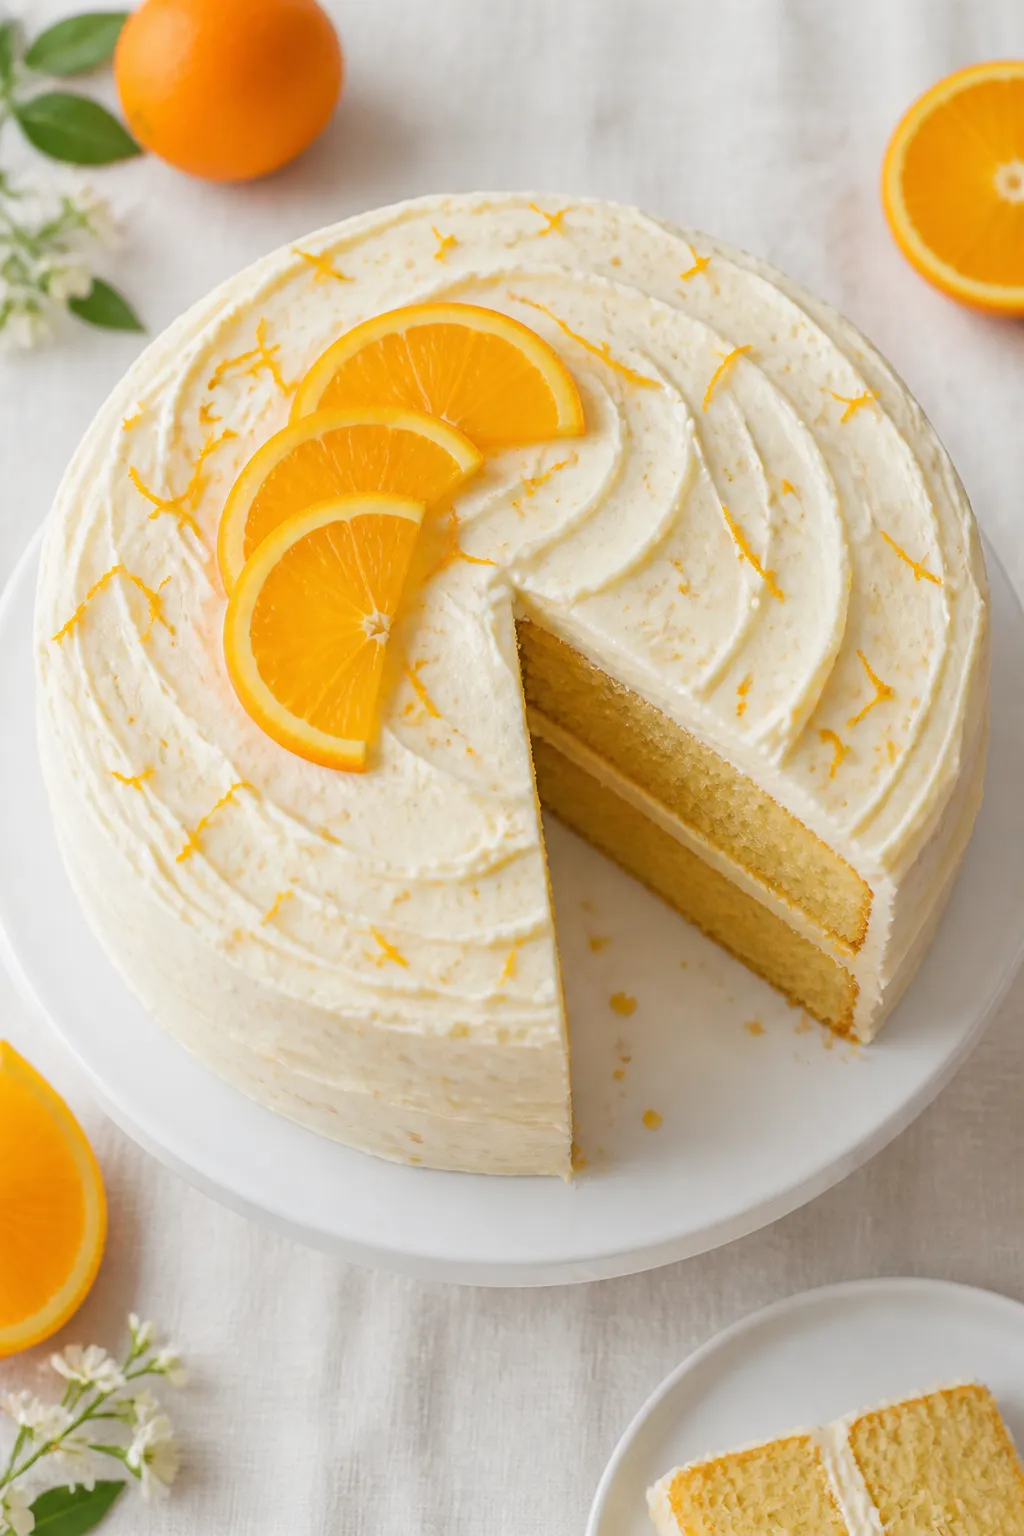
    Cooking process: Close-up of freshly baked orange creamsicle cake layers just out of the pans, being

    This cake layers fresh orange zest, juice, and a touch of vanilla to mimic that classic creamsicle taste. Using both butter and oil gives the crumb a perfect balance: rich flavor with long-lasting moisture.

    A quick soak of orange syrup ensures every bite stays tender. The whipped cream cheese frosting brings tang and creaminess, so the cake tastes bright, not heavy.

    What You’ll Need

    • All-purpose flour: The base for a tender crumb.
    • Granulated sugar: Sweetens and helps with structure.
    • Baking powder and baking soda: For lift and lightness.
    • Salt: Balances sweetness and boosts flavor.
    • Unsalted butter (room temp): Rich flavor and structure.
    • Neutral oil (canola or vegetable): Adds moisture.
    • Eggs (room temp): Bind and add richness.
    • Whole milk or buttermilk: Keeps the cake soft.
    • Fresh oranges: Zest and juice for bold citrus.
    • Vanilla extract: Essential for the creamsicle vibe.
    • Orange extract (optional): For extra citrus punch.
    • Powdered sugar: For the frosting.
    • Cream cheese (softened): Tangy, creamy frosting base.
    • Heavy cream: Whips the frosting light and fluffy.
    • Butter (for frosting): Smooth texture and stability.

    Instructions

    Final dish, tasty top view: Overhead shot of a two-layer Orange Creamsicle Cake fully frosted with w
    1. Prep: Heat oven to 350°F (175°C). Grease and line two 8-inch round cake pans with parchment.
    2. Mix dry: In a bowl, whisk 2 1/2 cups flour, 1 1/2 tsp baking powder, 1/2 tsp baking soda, and 1/2 tsp salt.
    3. Citrus base: In a large bowl, combine 1 cup sugar with the zest of 2 oranges.

      Rub with fingers to release oils.

    4. Cream: Add 1/2 cup softened butter to the sugar-zest mixture. Beat until light and fluffy, 2–3 minutes.
    5. Wet ingredients: Beat in 1/4 cup neutral oil, then 3 eggs, one at a time. Stir in 1 tsp vanilla and 1–2 tsp orange extract (optional).
    6. Liquid: Combine 3/4 cup milk with 1/3 cup fresh orange juice.
    7. Combine: Add dry ingredients to the butter mixture in two parts, alternating with the milk-orange mix.

      Mix just until smooth.

    8. Bake: Divide batter between pans. Bake 23–28 minutes, until a toothpick comes out clean. Cool 10 minutes, then turn out onto racks to cool fully.
    9. Orange syrup (optional but great): Simmer 1/4 cup orange juice with 2 tbsp sugar until slightly thick, 3–4 minutes.

      Brush over cooled cake layers.

    10. Frosting: Beat 8 oz softened cream cheese and 6 tbsp softened butter until smooth. Add 2 1/2–3 cups powdered sugar, 1 tsp vanilla, and a pinch of salt. Beat until creamy.

      Slowly stream in 1/3 cup cold heavy cream and whip until fluffy. Fold in 1 tsp orange zest for extra citrus.

    11. Assemble: Place first layer on a stand. Spread frosting, add second layer, and frost top and sides.

      Swirl for a soft, rustic finish. Garnish with extra zest or thin orange slices.

    How to Store

    Refrigerate: Cover and refrigerate for up to 4 days. The flavors deepen after day one.

    Let slices sit at room temp for 15–20 minutes before serving.

    Freeze: Wrap unfrosted layers tightly and freeze up to 2 months. Thaw in the fridge overnight. Frost before serving.

    Leftover frosted slices can be frozen individually for quick treats.

    Why This is Good for You

    Fresh orange zest and juice bring vitamin C and natural antioxidants. The cake uses a mix of fat sources for better texture, so a small slice is satisfying without needing a big serving. The cream cheese frosting offers protein and calcium compared to pure buttercream.

    It’s a feel-good dessert that leans bright and balanced rather than heavy.

    Common Mistakes to Avoid

    • Overmixing the batter: This makes the cake tough. Mix just until combined.
    • Skipping room-temp ingredients: Cold eggs and butter cause curdling and uneven texture.
    • Using bottled juice only: You’ll miss the fresh zest oils that create real creamsicle flavor.
    • Overbaking: Check early. A dry cake can’t be fully rescued, even with syrup.
    • Too much extract: Orange extract is strong.

      Start small and taste as you go.

    Alternatives

    • Sheet cake: Bake in a 9×13-inch pan for 28–34 minutes; easier to transport and frost.
    • Cupcakes: Bake 16–20 minutes; great for parties.
    • Dairy-free: Use plant milk and dairy-free butter/cream cheese. Whip coconut cream for a lighter topping.
    • Lighter frosting: Swap frosting for lightly sweetened whipped cream with vanilla and a little zest.
    • Gluten-free: Use a 1:1 gluten-free flour blend with xanthan gum; let batter rest 10 minutes before baking.

    FAQ

    Can I use blood oranges or mandarins?

    Yes. Blood oranges add a rosy hue and a berry note.

    Mandarins are sweeter and milder; balance with a touch of lemon juice if needed.

    What if I don’t have cream cheese?

    Use buttercream and add a tablespoon of sour cream or Greek yogurt for tang. Keep frosting slightly loose for that creamy finish.

    How do I make the flavor stronger?

    Add extra zest, a few drops of orange oil, or reduce the orange syrup longer. Keep extract modest to avoid a candy-like taste.

    Can I make it the day before?

    Absolutely.

    Bake, cool, and frost the cake, then chill overnight. The texture sets nicely, and the citrus flavor blooms by day two.

    How do I prevent frosting from sliding?

    Cool layers fully and do a quick crumb coat. Chill for 15 minutes, then finish frosting.

    Keep the cake cool until serving.

    Wrapping Up

    This orange creamsicle cake is sunny, soft, and nostalgic in all the best ways. It’s easy to bake, easy to love, and just different enough to feel special. Keep it classic with cream cheese frosting or try a lighter whipped topping—either way, it’s a bright spot on any table.

    Orange Creamsicle Cake – Bright, Citrusy, and Comforting

    Prep Time 20 minutes
    Cook Time 30 minutes
    Total Time 50 minutes
    Servings 12 servings

    Ingredients
      

    • All-purpose flour: The base for a tender crumb.
    • Granulated sugar: Sweetens and helps with structure.
    • Baking powder and baking soda: For lift and lightness.
    • Salt: Balances sweetness and boosts flavor.
    • Unsalted butter (room temp): Rich flavor and structure.
    • Neutral oil (canola or vegetable): Adds moisture.
    • Eggs (room temp): Bind and add richness.
    • Whole milk or buttermilk: Keeps the cake soft.
    • Fresh oranges: Zest and juice for bold citrus.
    • Vanilla extract: Essential for the creamsicle vibe.
    • Orange extract (optional): For extra citrus punch.
    • Powdered sugar: For the frosting.
    • Cream cheese (softened): Tangy, creamy frosting base.
    • Heavy cream: Whips the frosting light and fluffy.
    • Butter (for frosting): Smooth texture and stability.

    Instructions
     

    • Prep: Heat oven to 350°F (175°C). Grease and line two 8-inch round cake pans with parchment.
    • Mix dry: In a bowl, whisk 2 1/2 cups flour, 1 1/2 tsp baking powder, 1/2 tsp baking soda, and 1/2 tsp salt.
    • Citrus base: In a large bowl, combine 1 cup sugar with the zest of 2 oranges. Rub with fingers to release oils.
    • Cream: Add 1/2 cup softened butter to the sugar-zest mixture. Beat until light and fluffy, 2–3 minutes.
    • Wet ingredients: Beat in 1/4 cup neutral oil, then 3 eggs, one at a time. Stir in 1 tsp vanilla and 1–2 tsp orange extract (optional).
    • Liquid: Combine 3/4 cup milk with 1/3 cup fresh orange juice.
    • Combine: Add dry ingredients to the butter mixture in two parts, alternating with the milk-orange mix. Mix just until smooth.
    • Bake: Divide batter between pans. Bake 23–28 minutes, until a toothpick comes out clean. Cool 10 minutes, then turn out onto racks to cool fully.
    • Orange syrup (optional but great): Simmer 1/4 cup orange juice with 2 tbsp sugar until slightly thick, 3–4 minutes. Brush over cooled cake layers.
    • Frosting: Beat 8 oz softened cream cheese and 6 tbsp softened butter until smooth. Add 2 1/2–3 cups powdered sugar, 1 tsp vanilla, and a pinch of salt. Beat until creamy. Slowly stream in 1/3 cup cold heavy cream and whip until fluffy. Fold in 1 tsp orange zest for extra citrus.
    • Assemble: Place first layer on a stand. Spread frosting, add second layer, and frost top and sides. Swirl for a soft, rustic finish. Garnish with extra zest or thin orange slices.
  • Easy Sopapilla Cheesecake – A Simple, Crowd-Pleasing Dessert

    Easy Sopapilla Cheesecake – A Simple, Crowd-Pleasing Dessert

    If you love the taste of warm cinnamon sugar and creamy cheesecake, this dessert will be your new favorite. Easy sopapilla cheesecake starts with buttery crescent dough, a sweet cream cheese layer, and a golden, cinnamon-sugar top that crackles when you bite in. It’s quick to prep, bakes up beautifully, and feeds a crowd without fuss.

    Bring it to a potluck or serve it after taco night—either way, plates come back clean. Best of all, you don’t need any special skills to make it taste amazing.

    What Makes This Recipe So Good

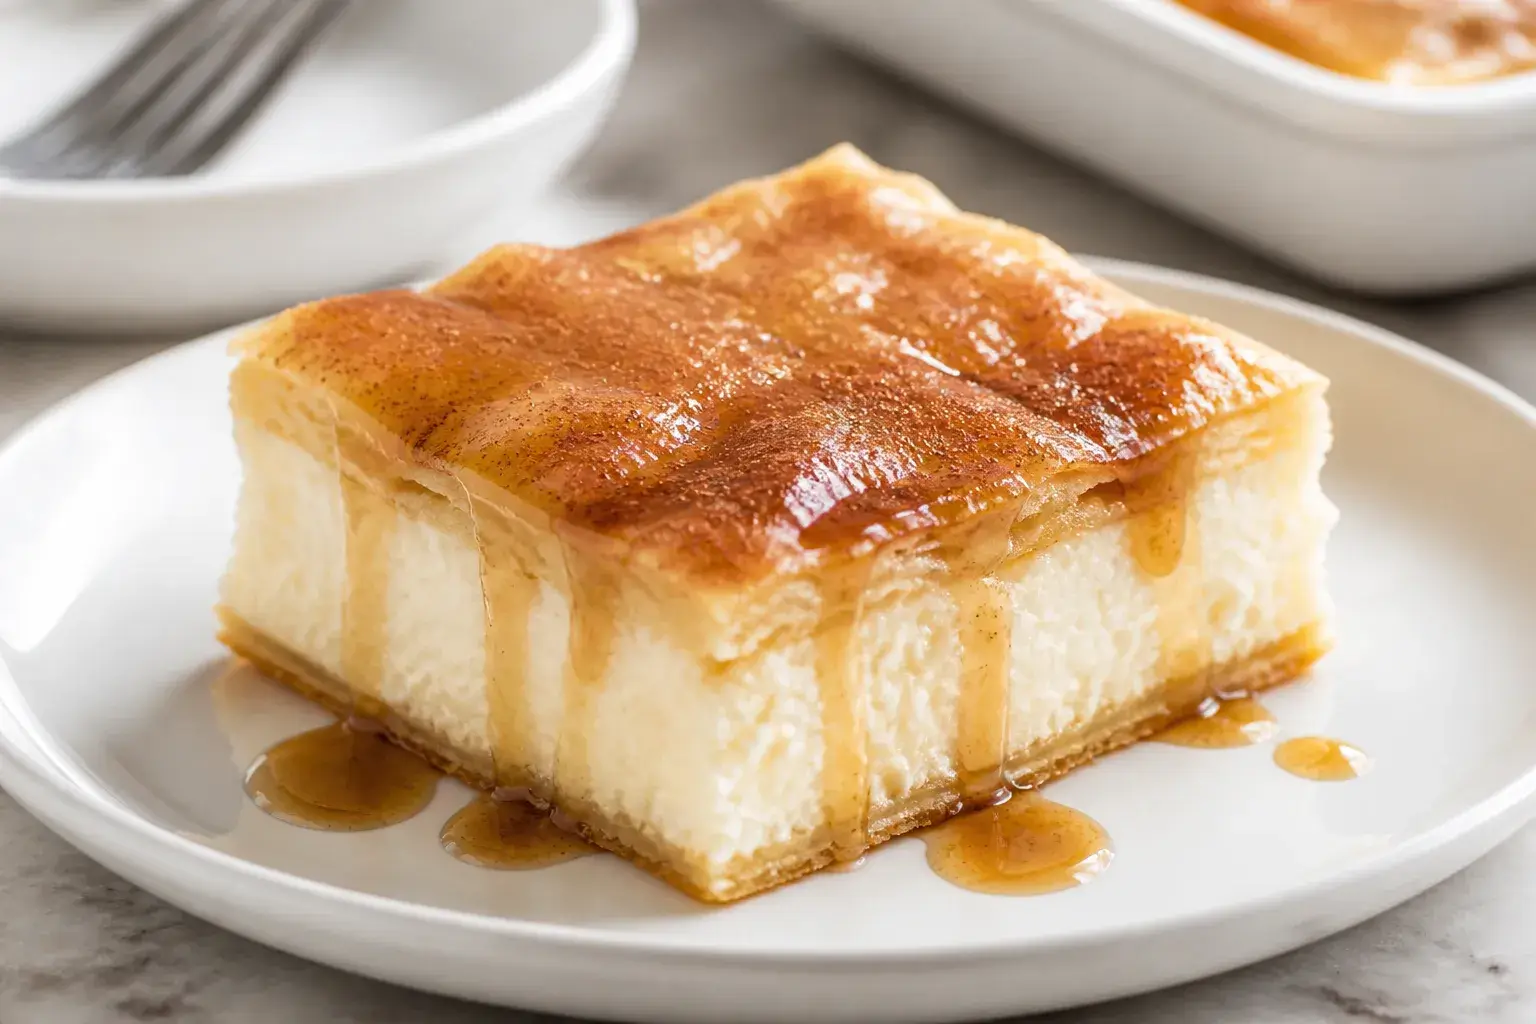
    Close-up detail shot: A just-baked pan of sopapilla cheesecake in a 9x13 glass baking dish, top crus
    • Quick and simple: Uses store-bought crescent roll dough for a no-stress crust and topping.
    • Creamy and crunchy: Silky cheesecake filling contrasts with a buttery, crisp cinnamon-sugar top.
    • Reliable for gatherings: Bakes in a 9×13 pan and slices neatly for sharing.
    • Customizable: Easy to flavor with citrus zest, vanilla, or a drizzle of honey.
    • Make-ahead friendly: Tastes great chilled or at room temperature the next day.

    Ingredients

    • 2 cans refrigerated crescent roll dough (8 ounces each)
    • 16 ounces cream cheese, softened
    • 3/4 cup granulated sugar, divided
    • 1/4 cup light brown sugar
    • 1 large egg
    • 1 1/2 teaspoons vanilla extract
    • 1/2 teaspoon ground cinnamon (plus more for dusting)
    • 1/4 teaspoon fine salt
    • 4 tablespoons unsalted butter, melted
    • Optional: 2–3 tablespoons honey for drizzling
    • Optional add-ins: 1 teaspoon orange or lemon zest; 1/4 teaspoon almond extract

    Step-by-Step Instructions

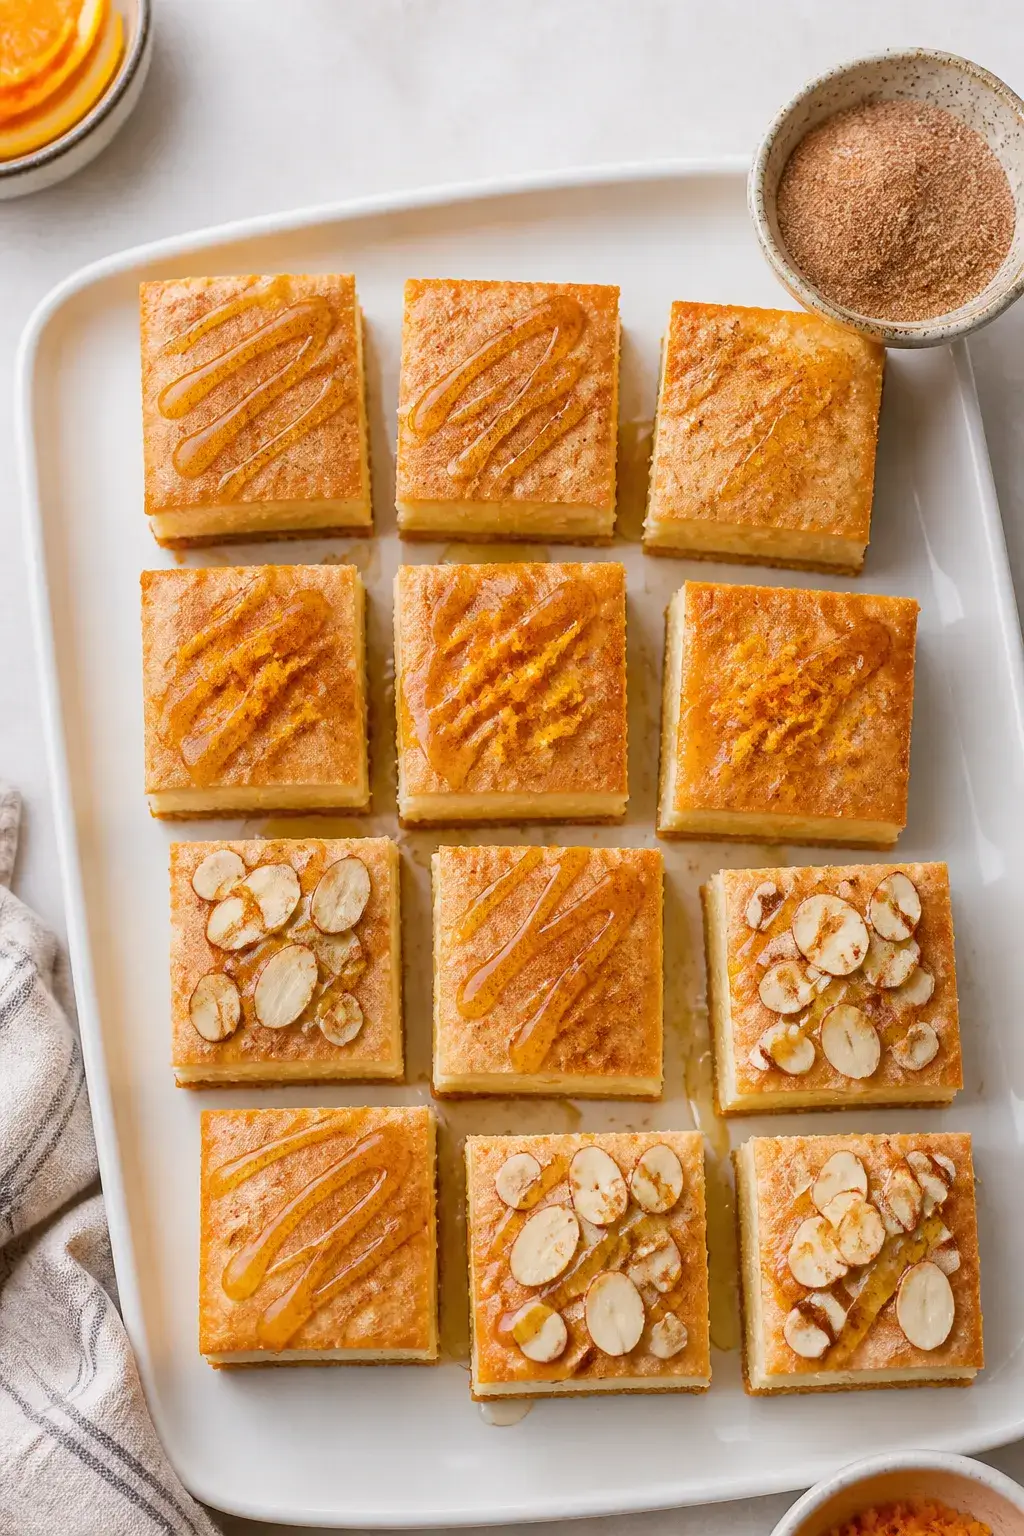
    Tasty top-view final presentation: Overhead shot of neatly cut sopapilla cheesecake squares arranged
    1. Prep the pan: Heat oven to 350°F (175°C). Lightly grease a 9×13-inch baking dish.
    2. Lay the base: Unroll one can of crescent dough.

      Press the seams together and fit it into the bottom of the dish. Keep the second can chilled for the top.

    3. Make the filling: In a bowl, beat cream cheese, 1/2 cup granulated sugar, brown sugar, egg, vanilla, cinnamon, and salt until smooth and fluffy, about 1–2 minutes. Scrape the bowl once for a silky texture.
    4. Spread evenly: Pour the filling over the dough base and smooth it into an even layer.
    5. Add the top crust: Unroll the second can of dough.

      Press seams to seal, then gently place it over the filling. It doesn’t have to be perfect—just cover as evenly as possible.

    6. Butter and sugar: Brush the melted butter over the top crust. Mix remaining 1/4 cup granulated sugar with a pinch of cinnamon and sprinkle generously over the buttered surface.
    7. Bake: Bake 28–35 minutes, until the top is golden and slightly puffed.

      The center should look set, not jiggly.

    8. Cool and set: Let cool at least 30 minutes. For clean slices, chill another 1–2 hours. Drizzle with honey right before serving if you like.
    9. Serve: Cut into squares.

      Enjoy warm, room temp, or chilled.

    How to Store

    • Refrigerate: Cover and chill for up to 4 days. The texture stays creamy and the topping keeps a light crunch.
    • Freeze: Wrap tightly and freeze up to 2 months. Thaw overnight in the fridge before serving.
    • Reheat: Warm slices in a 300°F oven for 8–10 minutes if you prefer them slightly toasty.

      Avoid the microwave to keep the top from getting soggy.

    Why This is Good for You

    • Portion control: It’s baked in a tray, so you can serve small squares for a lighter treat.
    • Satisfies cravings: A little goes a long way thanks to the rich, creamy filling and bold cinnamon flavor.
    • Simple ingredients: You know what’s going in—no mystery flavors or preservatives beyond the dough.

    Common Mistakes to Avoid

    • Using cold cream cheese: It won’t blend smoothly and can leave lumps. Soften it first.
    • Skipping the egg: The egg helps the filling set cleanly. Don’t omit unless adapting for an egg-free version.
    • Not sealing seams: Press crescent seams together so the filling doesn’t leak to the top layer.
    • Overbaking: If the center cracks or looks dry, it’s overdone.

      Pull it when golden and just set.

    • Slicing too soon: Let it cool so the layers firm up and cut neatly.

    Recipe Variations

    • Citrus Twist: Add lemon or orange zest to the filling and a touch of zest to the cinnamon sugar.
    • Honey-Almond: Add 1/4 teaspoon almond extract to the filling and finish with a honey drizzle and sliced almonds.
    • Apple Pie Sopapilla: Spread a thin layer of apple pie filling over the cream cheese before adding the top crust.
    • Chocolate Swirl: Drizzle 1/4 cup melted dark chocolate over the filling and swirl lightly before topping with dough.
    • Spiced Churro: Increase cinnamon to 1 teaspoon and add a pinch of nutmeg and cardamom to the sugar topping.

    FAQ

    Can I use reduced-fat cream cheese?

    Yes, but the filling will be slightly less rich and may set a bit softer. Full-fat gives the best texture.

    What if I only have puff pastry?

    You can substitute it, but the texture changes. Bake the bottom sheet 8–10 minutes first, then add the filling and top sheet and continue baking until deeply golden.

    Do I have to use the egg?

    You can skip it if needed.

    The filling will be softer; chill well before slicing so it holds together.

    How do I prevent a soggy bottom?

    Make sure the base layer fully covers the pan, avoid overmixing the filling (which can add excess air and moisture), and bake until the top is golden and the center is set.
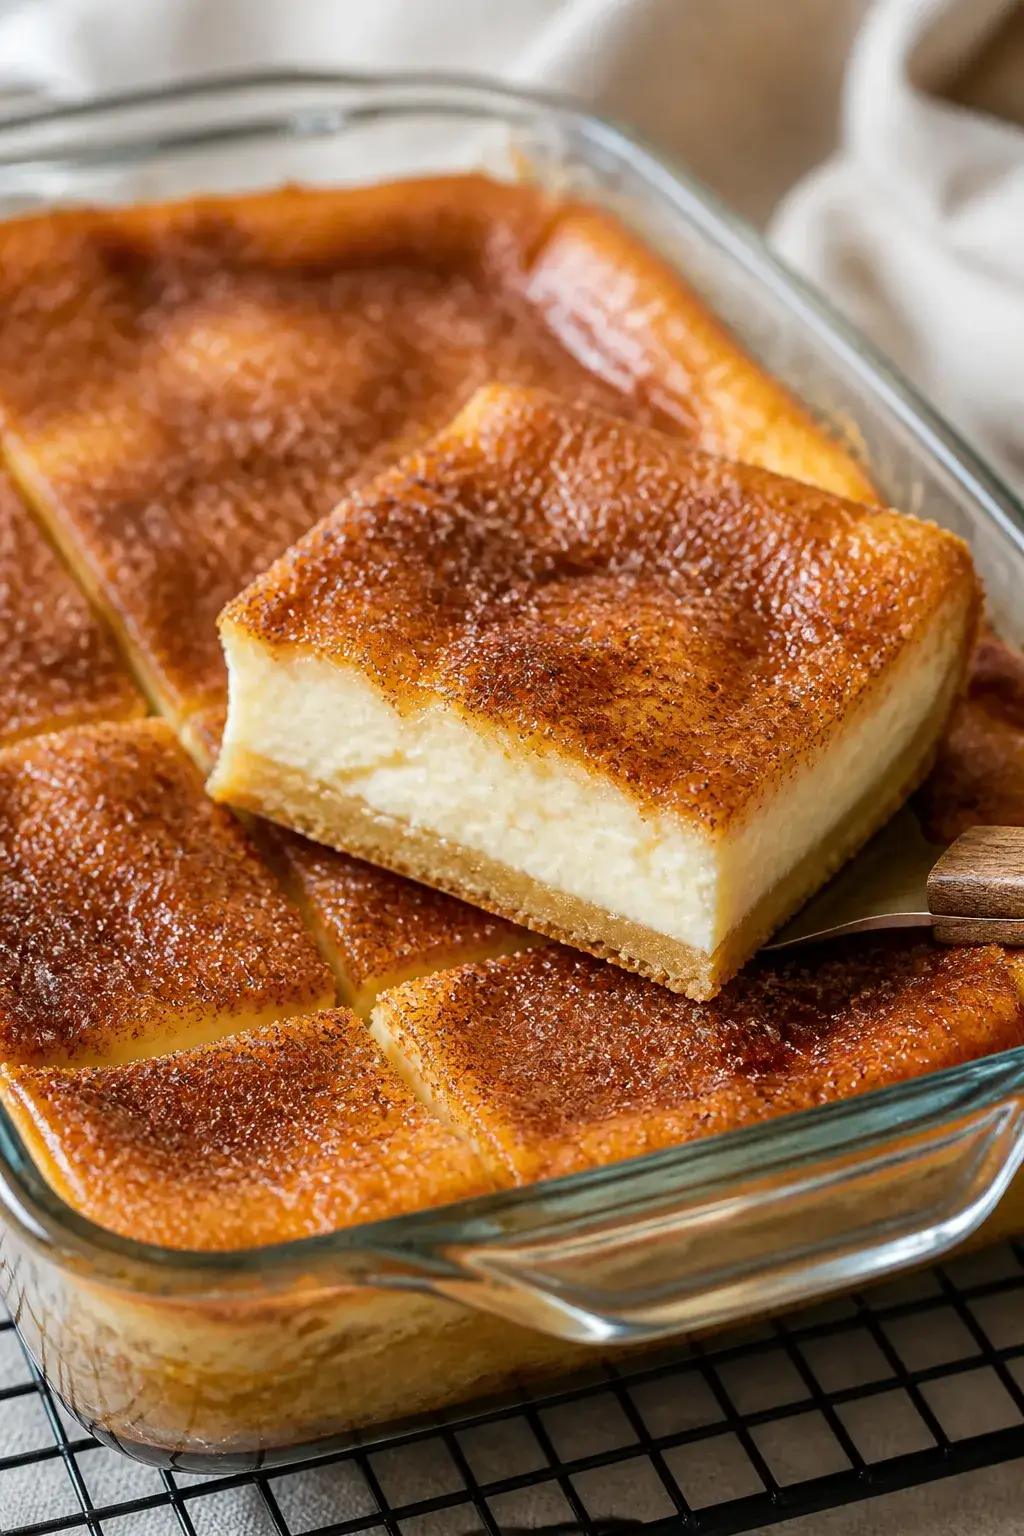
    Can I make it a day ahead?

    Absolutely. Chill overnight, then slice before serving. Add any honey drizzle just before bringing it to the table.

    Wrapping Up

    Easy sopapilla cheesecake is the kind of dessert that always disappears fast.

    It’s buttery, creamy, and warmly spiced, yet simple enough for a weeknight. Keep the ingredients on hand, and you can whisk it together whenever a craving hits or company drops by. One pan, minimal effort, and sweet, cozy flavor in every bite.

    Easy Sopapilla Cheesecake – A Simple, Crowd-Pleasing Dessert

    Prep Time 15 minutes
    Cook Time 30 minutes
    Total Time 45 minutes
    Servings 12 servings

    Ingredients
      

    • 2 cans refrigerated crescent roll dough (8 ounces each)
    • 16 ounces cream cheese, softened
    • 3/4 cup granulated sugar, divided
    • 1/4 cup light brown sugar
    • 1 large egg
    • 1 1/2 teaspoons vanilla extract
    • 1/2 teaspoon ground cinnamon (plus more for dusting)
    • 1/4 teaspoon fine salt
    • 4 tablespoons unsalted butter, melted
    • Optional: 2–3 tablespoons honey for drizzling
    • Optional add-ins: 1 teaspoon orange or lemon zest; 1/4 teaspoon almond extract

    Instructions
     

    • Prep the pan: Heat oven to 350°F (175°C). Lightly grease a 9×13-inch baking dish.
    • Lay the base: Unroll one can of crescent dough. Press the seams together and fit it into the bottom of the dish. Keep the second can chilled for the top.
    • Make the filling: In a bowl, beat cream cheese, 1/2 cup granulated sugar, brown sugar, egg, vanilla, cinnamon, and salt until smooth and fluffy, about 1–2 minutes. Scrape the bowl once for a silky texture.
    • Spread evenly: Pour the filling over the dough base and smooth it into an even layer.
    • Add the top crust: Unroll the second can of dough. Press seams to seal, then gently place it over the filling. It doesn’t have to be perfect—just cover as evenly as possible.
    • Butter and sugar: Brush the melted butter over the top crust. Mix remaining 1/4 cup granulated sugar with a pinch of cinnamon and sprinkle generously over the buttered surface.
    • Bake: Bake 28–35 minutes, until the top is golden and slightly puffed. The center should look set, not jiggly.
    • Cool and set: Let cool at least 30 minutes. For clean slices, chill another 1–2 hours. Drizzle with honey right before serving if you like.
    • Serve: Cut into squares. Enjoy warm, room temp, or chilled.