Author: Elise Bauer

  • Garlic Parmesan Cheeseburger Bombs That Disappear in Minutes 🍔🔥 – Crispy, Cheesy, Crowd-Pleasing Bites

    Garlic Parmesan Cheeseburger Bombs That Disappear in Minutes 🍔🔥 – Crispy, Cheesy, Crowd-Pleasing Bites

    These little cheeseburger bombs are everything you love about a juicy burger, wrapped in warm, buttery dough and finished with a garlicky Parmesan glaze. They’re quick to assemble, bake up golden, and vanish the second they hit the table. Think weeknight-friendly meets game-day gold.

    Serve them with your favorite dipping sauces and watch them go fast. Fair warning: you may want to double the batch.

    Why This Recipe Works
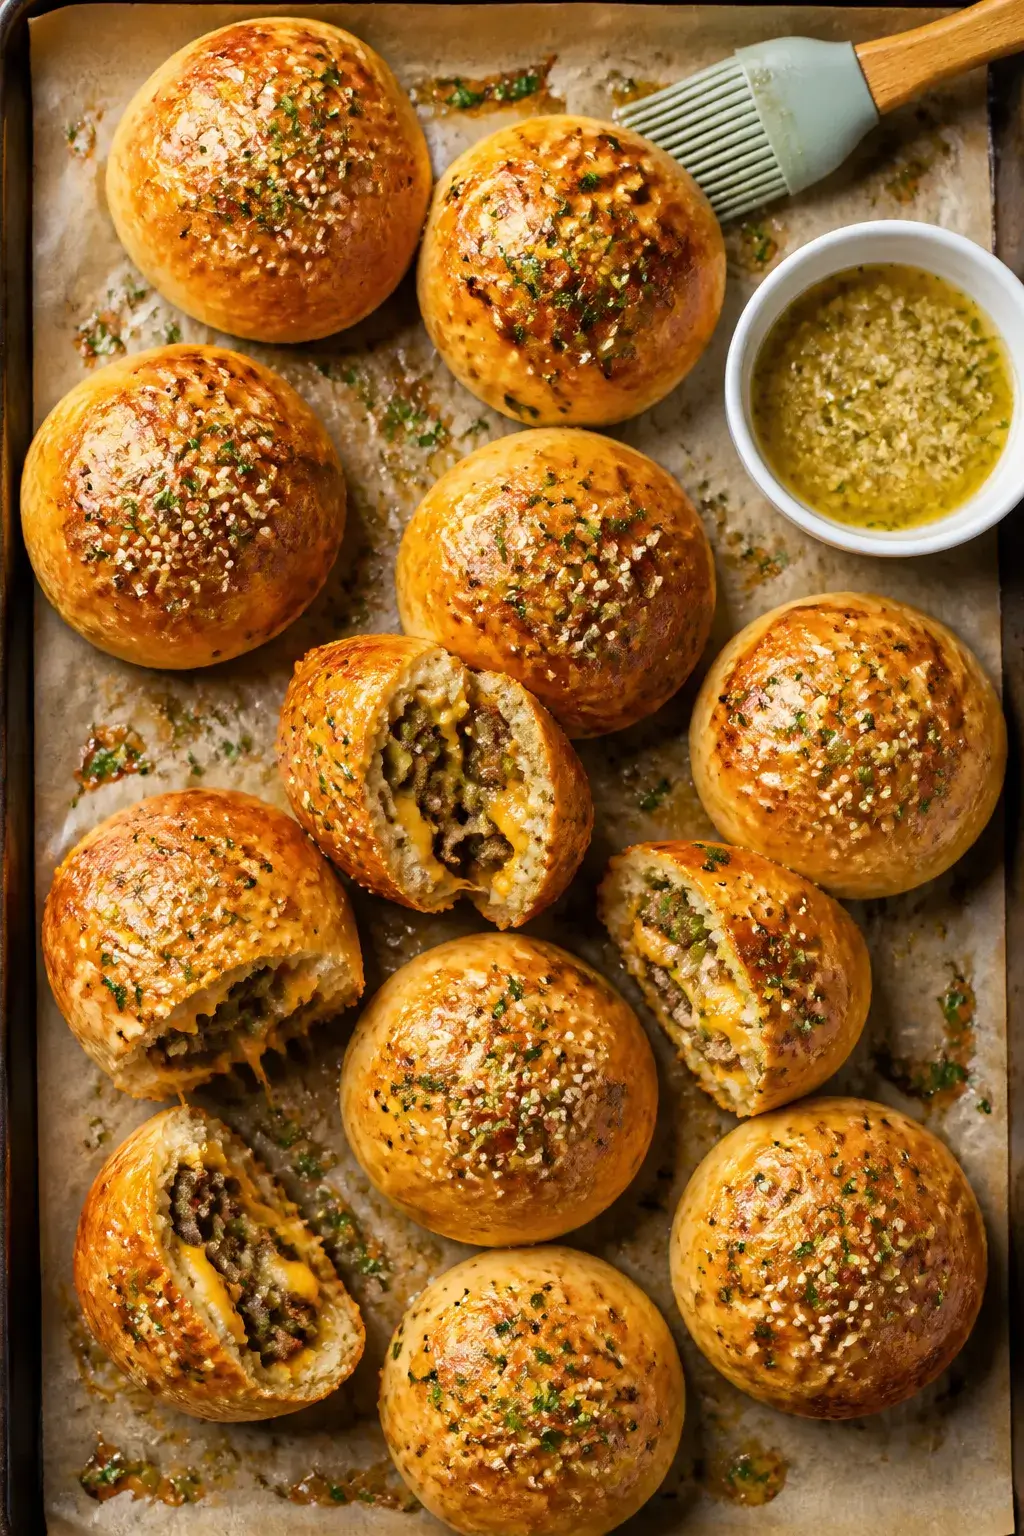
    Overhead shot of freshly baked Garlic Parmesan Cheeseburger Bombs on a parchment-lined, preheated sh
    • Sealed-in juiciness: Browning the beef first and tucking it into dough keeps all the flavor inside each bite.
    • Big flavor, small package: Onion, pickles, and melty cheese mimic a full burger experience in snack form.
    • Garlic-Parmesan finish: A quick butter brush adds savory richness and a crispy, glossy top.
    • Super flexible: Use store-bought dough for speed, or swap in your favorite fillings and sauces.

    Ingredients

    • 1 lb (450 g) ground beef (80/20 for best flavor)
    • 1/2 small onion, finely chopped
    • 2 cloves garlic, minced
    • 1 tsp Worcestershire sauce
    • 1 tsp kosher salt (plus more to taste)
    • 1/2 tsp black pepper
    • 1/2 tsp smoked paprika (optional)
    • 1 cup shredded cheddar or Colby Jack (or 12 small cheese cubes)
    • 1/4 cup finely chopped dill pickles (optional but recommended)
    • 1 can (16 oz) refrigerated biscuit dough or pizza dough (12 pieces)
    • 2 tbsp melted butter
    • 1 tbsp olive oil
    • 2 tbsp grated Parmesan cheese
    • 1 tsp garlic powder
    • 1 tbsp chopped fresh parsley (or 1 tsp dried)
    • Sesame seeds (optional, for topping)
    • Dipping sauces: ketchup, burger sauce, ranch, or garlic aioli

    Instructions
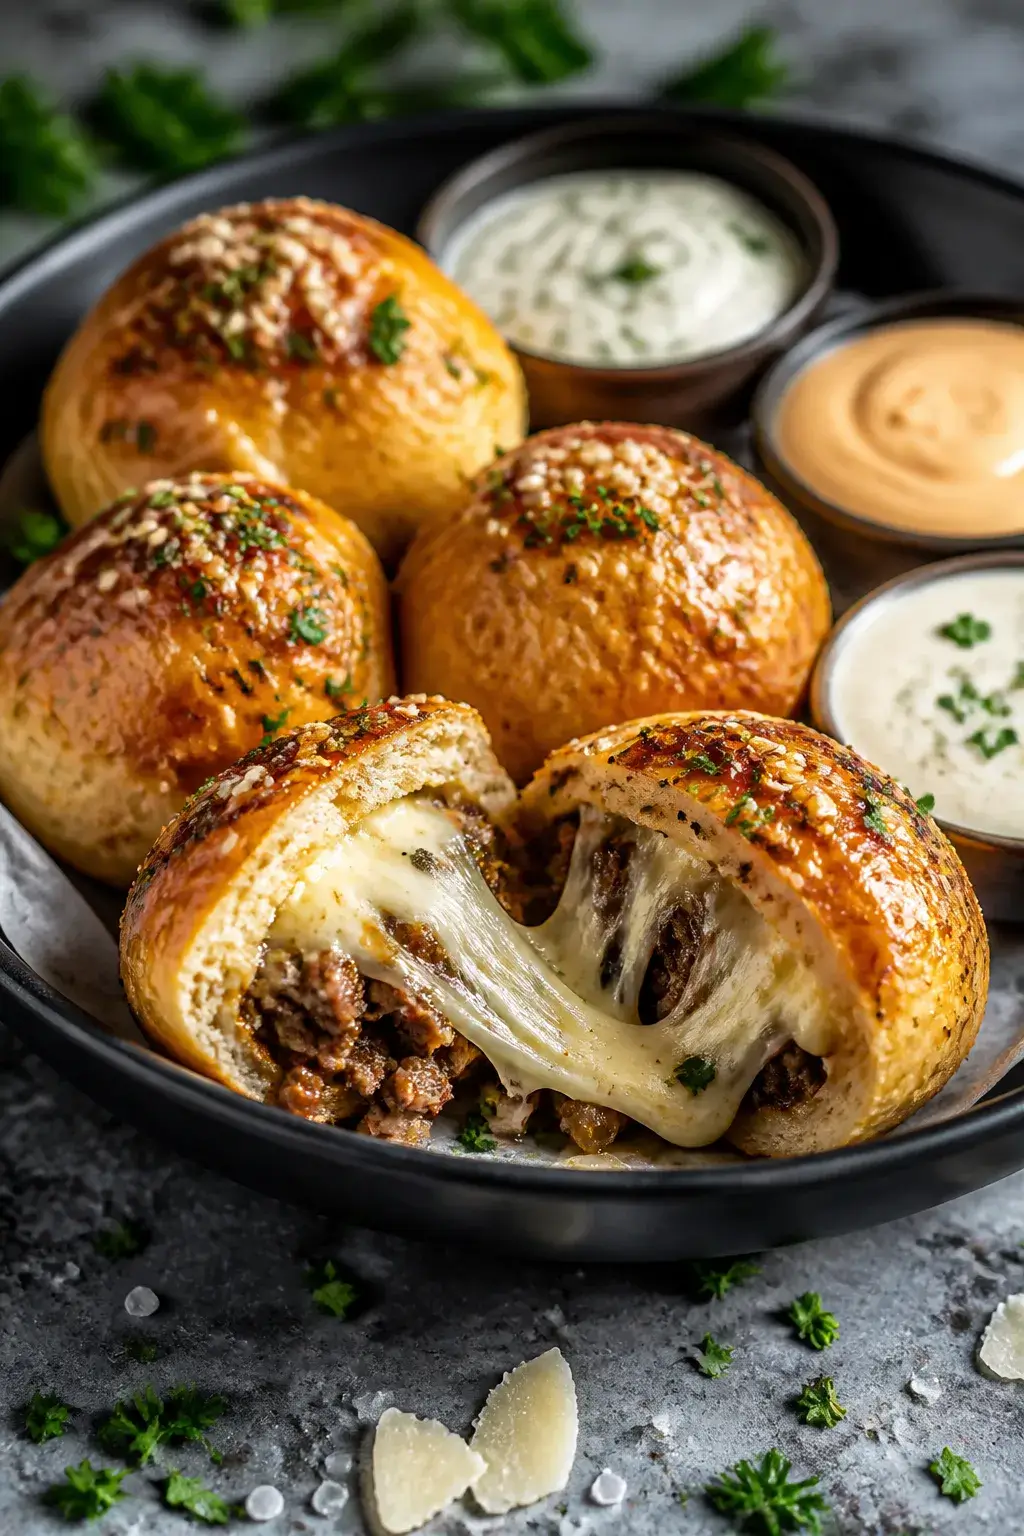
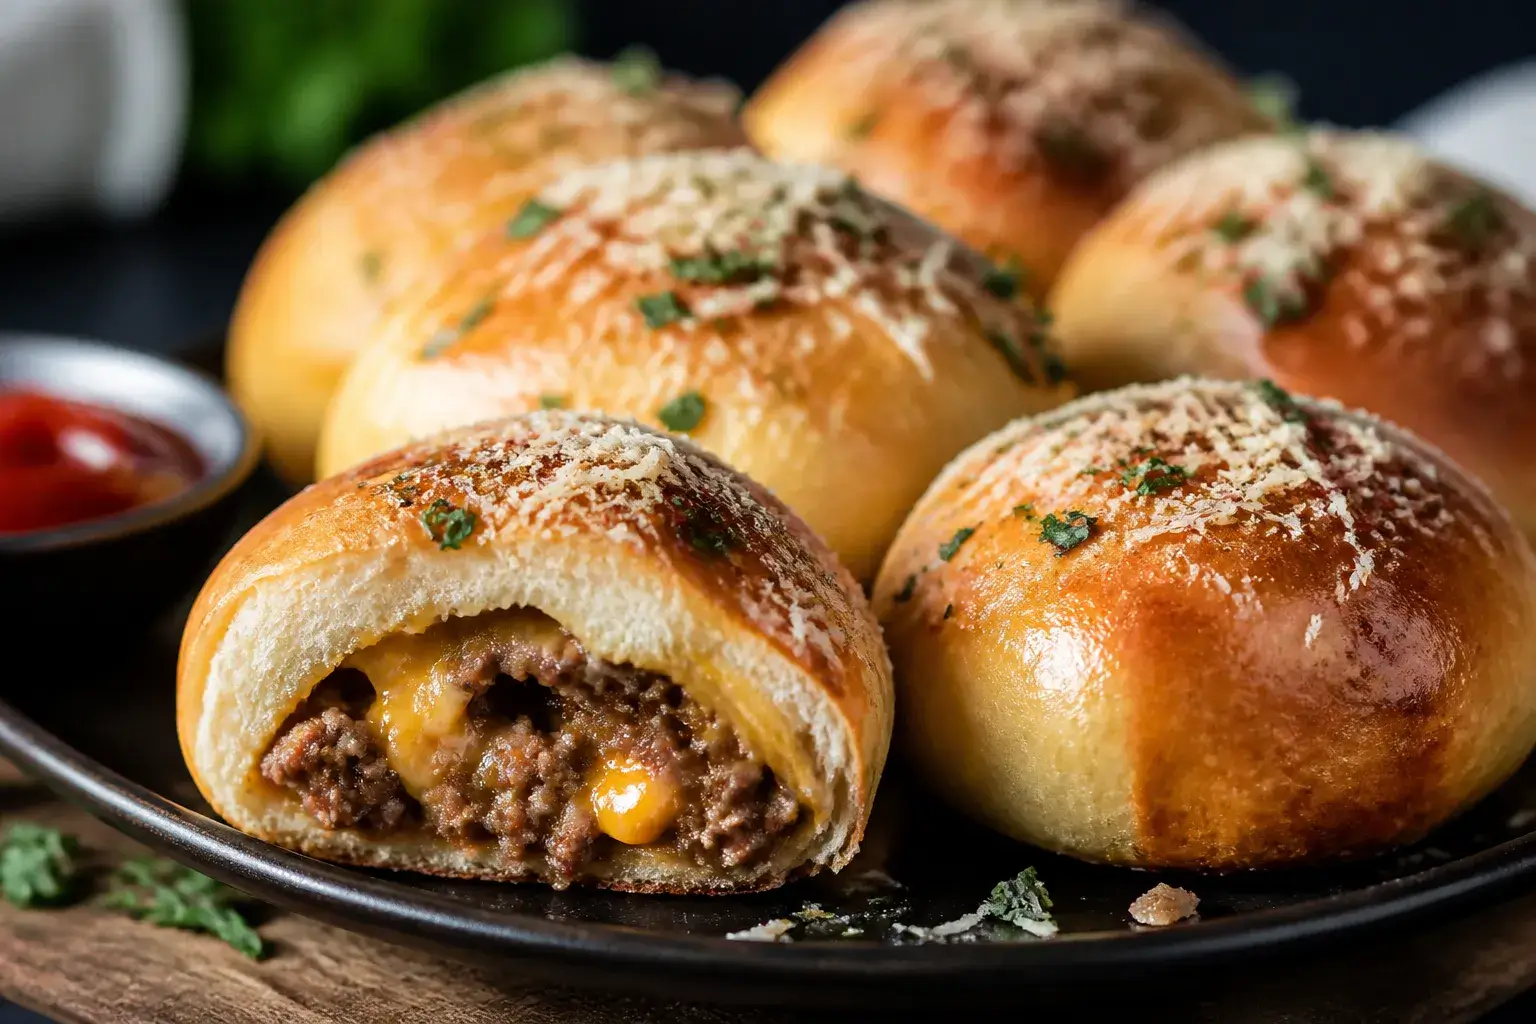
    Close-up plated presentation of Garlic Parmesan Cheeseburger Bombs arranged in a shallow matte-black
    1. Preheat the oven: Set to 400°F (200°C). Line a baking sheet with parchment paper.
    2. Cook the beef: Heat olive oil in a skillet over medium-high.

      Add onion and cook 2 minutes. Stir in garlic for 30 seconds. Add ground beef, salt, pepper, smoked paprika, and Worcestershire.

      Cook, breaking up, until browned and no pink remains, 5–7 minutes. Drain excess fat.

    3. Add mix-ins: Off heat, stir in pickles and half of the cheese. Let the filling cool for 3–4 minutes so it’s easier to handle.
    4. Prep the dough: Separate biscuit dough into 12 pieces.

      If using pizza dough, divide into 12 equal balls and flatten into 3–4 inch rounds.

    5. Fill and seal: Place about 1–2 tablespoons of beef mixture in the center of each round. Top with a pinch of the remaining cheese (or a cheese cube). Pull dough edges up and pinch to seal tightly.

      Place seam-side down on the baking sheet.

    6. Make the garlic-Parmesan butter: Stir together melted butter, Parmesan, and garlic powder. Brush the tops of the bombs. Sprinkle with sesame seeds if using.
    7. Bake: Bake 12–15 minutes, until puffed and deep golden.

      Brush lightly with any remaining butter mixture and finish with parsley.

    8. Serve hot: Let rest 3 minutes, then plate with dipping sauces. Enjoy while melty and warm.

    Keeping It Fresh

    • Make-ahead: Cook the beef filling up to 2 days early and store covered in the fridge. Assemble and bake fresh.
    • Store: Refrigerate baked bombs in an airtight container for 3–4 days.
    • Reheat: Air fryer at 350°F (175°C) for 4–6 minutes or oven at 350°F (175°C) for 8–10 minutes.

      Avoid microwaving if you want a crisp exterior.

    • Freeze: Freeze baked bombs on a sheet tray, then transfer to a freezer bag for up to 2 months. Reheat from frozen at 350°F (175°C) for 12–15 minutes.

    Why This is Good for You

    • Portion control: Built-in single servings make it easier to pace yourself.
    • Protein-rich: Ground beef and cheese provide satisfying protein that helps keep you full.
    • Customizable: Swap in lean ground turkey, lighter cheeses, or whole-wheat dough to meet your goals.
    • Balanced bites: Pair with a crunchy salad or veggie sticks for a complete, satisfying meal.

    Pitfalls to Watch Out For

    • Leaky seams: If the dough isn’t sealed well, cheese can escape. Pinch and twist the seam, then place seam-side down.
    • Soggy bottoms: Drain beef well and avoid overfilling.

      A parchment-lined, preheated sheet pan helps crisping.

    • Undercooked centers: Bake until deep golden and puffed. If using thicker pizza dough, add 2–3 minutes.
    • Dry filling: Don’t overcook the beef. A touch of Worcestershire and onion keeps it juicy.

    Recipe Variations

    • Bacon Ranch: Add crisp bacon crumbles and a drizzle of ranch inside.
    • Spicy Jalapeño: Mix in chopped pickled jalapeños and pepper jack cheese.
    • Mushroom Swiss: Sauté mushrooms in butter and swap cheddar for Swiss.
    • BBQ Cheddar: Stir in 2 tablespoons of your favorite BBQ sauce and use sharp cheddar.
    • Turkey Provolone: Use lean ground turkey with Italian seasoning and provolone.
    • Whole-Wheat Upgrade: Use whole-wheat pizza dough and brush with olive oil instead of butter.

    FAQ

    Can I make these in an air fryer?

    Yes.

    Air fry at 350°F (175°C) for 8–10 minutes, working in batches. Check at 7 minutes and add time as needed until golden and cooked through.

    What dough works best?

    Refrigerated biscuit dough is quick and fluffy, while pizza dough gives a chewier bite. Both work well.

    Just keep the rounds about 3–4 inches wide.

    How do I keep the cheese extra melty?

    Use small cubes of cheese in the center rather than shreds, and let the filling cool slightly before sealing to prevent early melting.

    Can I make them gluten-free?

    Yes. Use a gluten-free pizza dough and confirm your Worcestershire and other ingredients are certified gluten-free.

    What sauces pair well?

    Ketchup, burger sauce, spicy mayo, ranch, honey mustard, BBQ sauce, or garlic aioli are all great picks.

    How do I scale this for a party?

    Double or triple all ingredients and bake on multiple trays. Rotate the trays halfway through for even browning.

    Can I add veggies?

    Absolutely.

    Finely chopped sautéed peppers or mushrooms work well. Make sure to cook off moisture so the dough stays crisp.

    Final Thoughts

    Garlic Parmesan Cheeseburger Bombs are the kind of low-effort, high-reward snack everyone asks for again. They’re crisp on the outside, cheesy inside, and loaded with classic burger flavor.

    Keep a can of dough and some ground beef on hand, and you’ve got a winning appetizer any night of the week. Just be ready—these really do disappear in minutes.

    Garlic Parmesan Cheeseburger Bombs That Disappear in Minutes 🍔🔥 – Crispy, Cheesy, Crowd-Pleasing Bites

    Prep Time 15 minutes
    Cook Time 20 minutes
    Total Time 35 minutes
    Servings 8 servings

    Ingredients
      

    • 1 lb (450 g) ground beef (80/20 for best flavor)
    • 1/2 small onion, finely chopped
    • 2 cloves garlic, minced
    • 1 tsp Worcestershire sauce
    • 1 tsp kosher salt (plus more to taste)
    • 1/2 tsp black pepper
    • 1/2 tsp smoked paprika (optional)
    • 1 cup shredded cheddar or Colby Jack (or 12 small cheese cubes)
    • 1/4 cup finely chopped dill pickles (optional but recommended)
    • 1 can (16 oz) refrigerated biscuit dough or pizza dough (12 pieces)
    • 2 tbsp melted butter
    • 1 tbsp olive oil
    • 2 tbsp grated Parmesan cheese
    • 1 tsp garlic powder
    • 1 tbsp chopped fresh parsley (or 1 tsp dried)
    • Sesame seeds (optional, for topping)
    • Dipping sauces: ketchup, burger sauce, ranch, or garlic aioli

    Instructions
     

    • Preheat the oven: Set to 400°F (200°C). Line a baking sheet with parchment paper.
    • Cook the beef: Heat olive oil in a skillet over medium-high. Add onion and cook 2 minutes. Stir in garlic for 30 seconds. Add ground beef, salt, pepper, smoked paprika, and Worcestershire. Cook, breaking up, until browned and no pink remains, 5–7 minutes. Drain excess fat.
    • Add mix-ins: Off heat, stir in pickles and half of the cheese. Let the filling cool for 3–4 minutes so it’s easier to handle.
    • Prep the dough: Separate biscuit dough into 12 pieces. If using pizza dough, divide into 12 equal balls and flatten into 3–4 inch rounds.
    • Fill and seal: Place about 1–2 tablespoons of beef mixture in the center of each round. Top with a pinch of the remaining cheese (or a cheese cube). Pull dough edges up and pinch to seal tightly. Place seam-side down on the baking sheet.
    • Make the garlic-Parmesan butter: Stir together melted butter, Parmesan, and garlic powder. Brush the tops of the bombs. Sprinkle with sesame seeds if using.
    • Bake: Bake 12–15 minutes, until puffed and deep golden. Brush lightly with any remaining butter mixture and finish with parsley.
    • Serve hot: Let rest 3 minutes, then plate with dipping sauces. Enjoy while melty and warm.
  • Hot Crab Dip With Cream Cheese – A Cozy, Crowd-Pleasing Appetizer

    Hot Crab Dip With Cream Cheese – A Cozy, Crowd-Pleasing Appetizer

    If you’re looking for a warm, creamy appetizer that always disappears fast, this hot crab dip with cream cheese is your answer. It’s rich, savory, and full of real crab flavor, with just enough tang and spice to keep each bite interesting. Serve it with toasted baguette slices, sturdy crackers, or crisp veggies, and watch it go.

    It’s simple enough for a weeknight treat and special enough for holidays or game day. Best of all, it comes together quickly with pantry staples.

    What Makes This Special

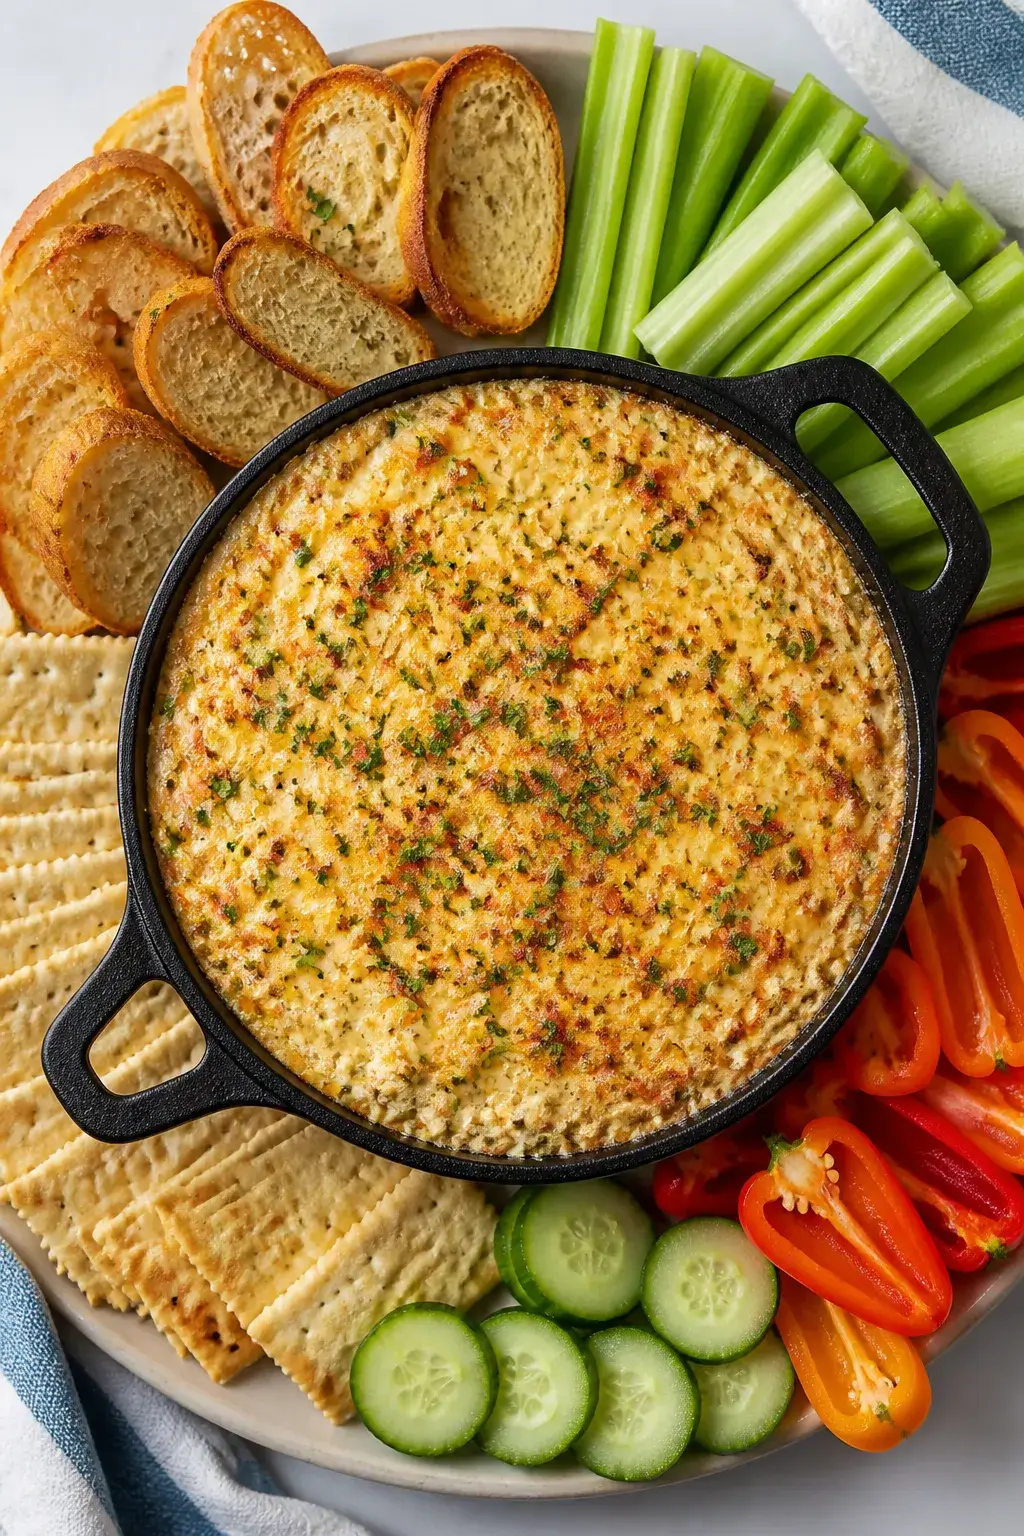
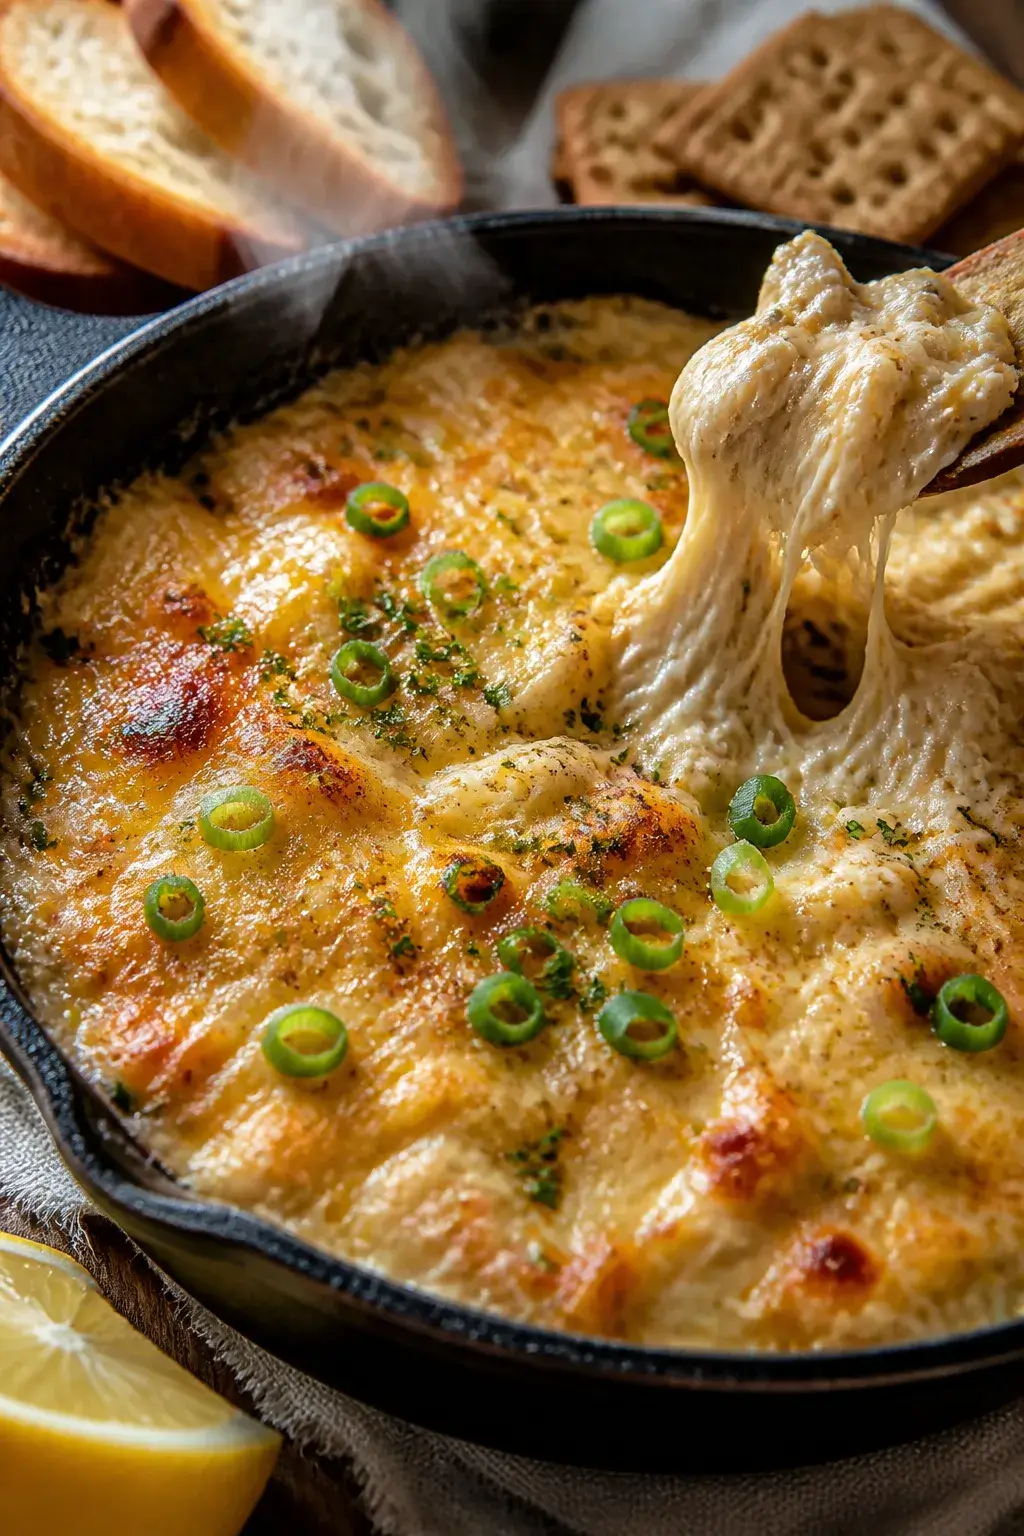
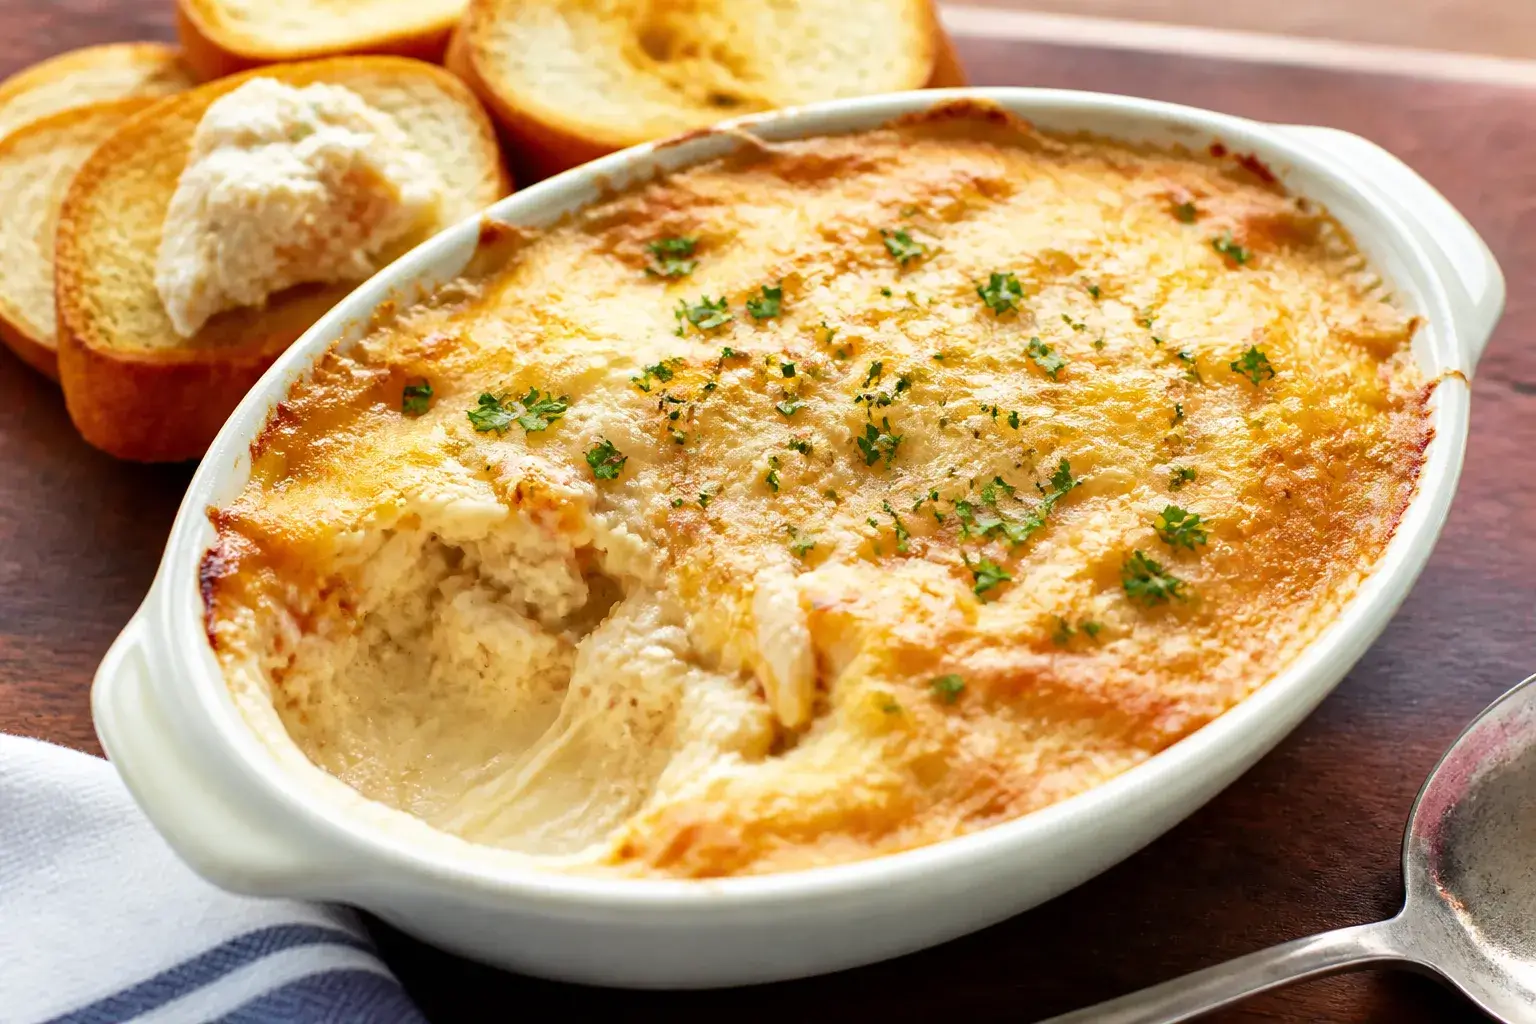
    Overhead shot of hot crab dip just out of the oven in a small cast-iron skillet: bubbling edges, lig

    This dip balances creaminess with brightness. The cream cheese and mayo give it body, while lemon and hot sauce wake it up.

    Using Old Bay and fresh green onion brings that classic coastal vibe. You’ll also get a slightly bubbly, golden top from baking, which makes it feel restaurant-quality at home. It’s a flexible base, too—easy to tweak for spice, texture, or even budget.

    Ingredients

    • 8 oz cream cheese, softened
    • 1/2 cup mayonnaise (or half mayo, half sour cream for extra tang)
    • 1 cup shredded cheese (sharp cheddar, Monterey Jack, or a blend)
    • 1 lb lump crab meat, picked over for shells (fresh or high-quality canned)
    • 2 green onions, finely sliced
    • 1 garlic clove, minced
    • 1–2 tsp Old Bay seasoning, to taste
    • 1–2 tsp Worcestershire sauce
    • 1–2 tsp hot sauce (optional, to taste)
    • 1 tbsp fresh lemon juice and a little zest (optional)
    • 1/4 cup grated Parmesan (for topping)
    • Salt and black pepper, to taste
    • Chopped parsley, for garnish (optional)
    • Sturdy dippers: toasted baguette, crackers, pita chips, or veggies

    How to Make It

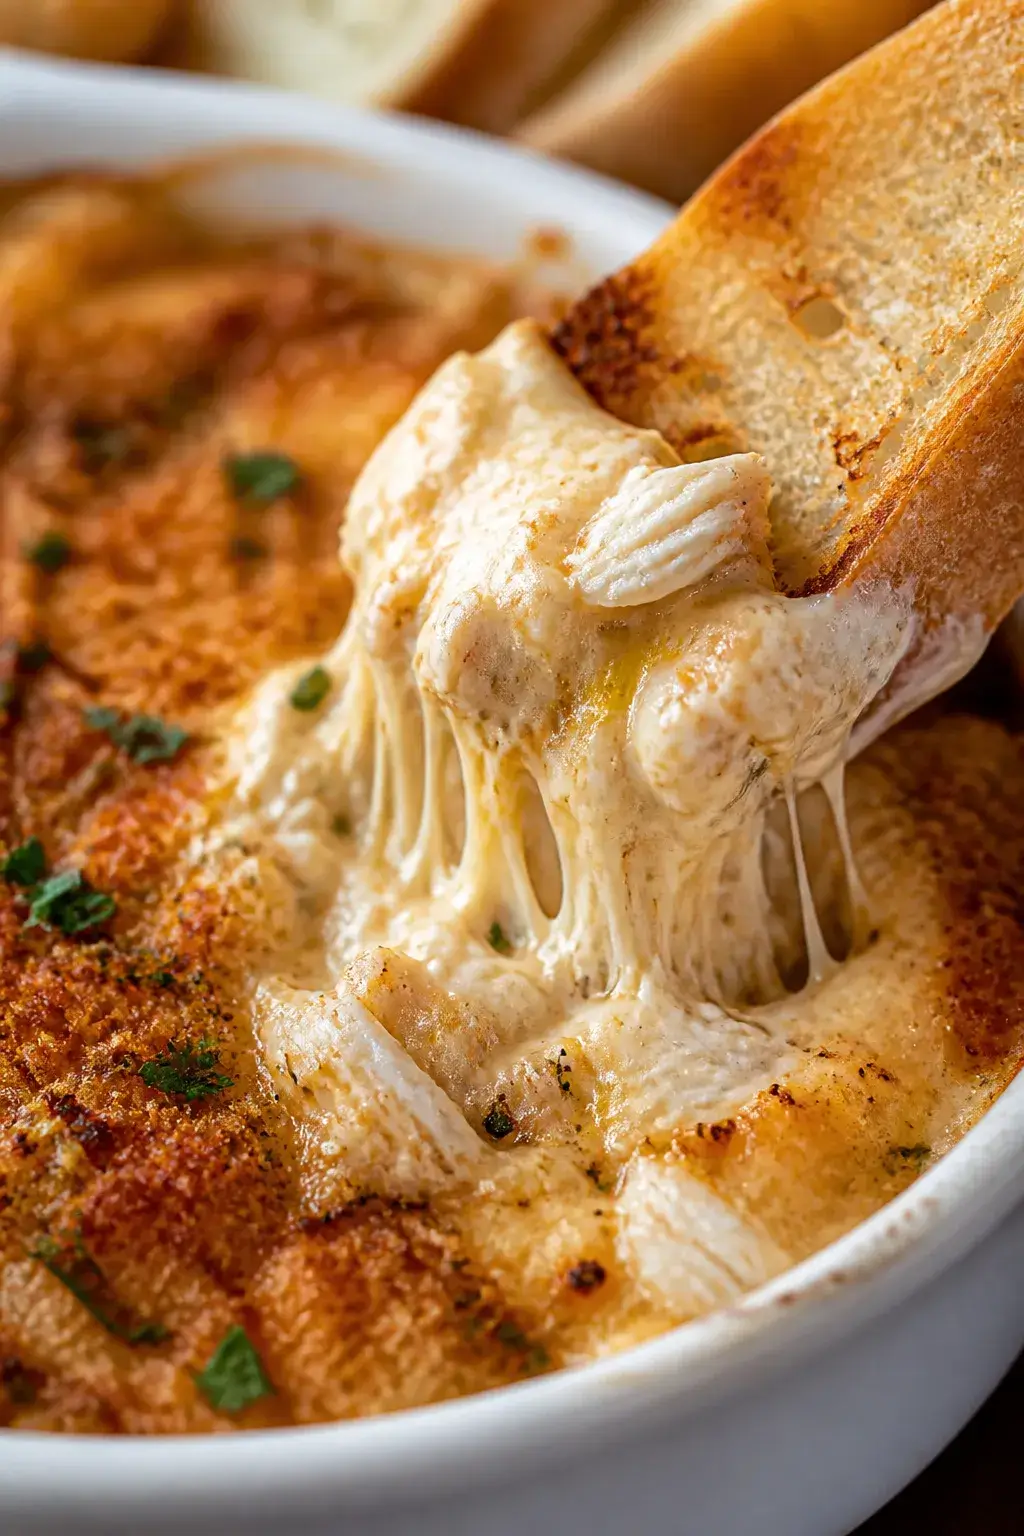
    Extreme close-up, three-quarter angle of a toasted baguette slice scooping into the baked crab dip i
    1. Preheat the oven to 375°F (190°C).

      Lightly grease a small baking dish or ovenproof skillet.

    2. Soften the cream cheese so it mixes easily. Microwave it in short bursts if needed, just until spreadable.
    3. Make the base: In a bowl, mix cream cheese, mayonnaise, shredded cheese, garlic, Old Bay, Worcestershire, hot sauce, lemon juice, and zest. Add a small pinch of salt and pepper.
    4. Fold in the crab and green onion gently.

      Don’t overmix—keep some bigger crab pieces for texture.

    5. Taste and adjust seasoning. Add more Old Bay, lemon, or hot sauce as you like.
    6. Transfer to the baking dish, smoothing the top. Sprinkle Parmesan over the surface for a golden crust.
    7. Bake 18–22 minutes, until hot and bubbling around the edges and lightly browned on top.
    8. Rest 5 minutes so it sets slightly.

      Garnish with parsley. Serve warm with your favorite dippers.

    Storage Instructions

    • Refrigerate leftovers in an airtight container for up to 3 days.
    • Reheat in a 325°F (165°C) oven until warmed through, 10–15 minutes. You can also microwave in short bursts, stirring between intervals.
    • Make ahead: Assemble up to 24 hours in advance, cover, and refrigerate.

      Bake just before serving. Add 3–5 minutes to the bake time if cold.

    • Freezing is not ideal due to dairy separation, but it can work in a pinch. Thaw overnight and reheat gently.

    Health Benefits

    • Protein-rich: Crab provides lean protein to help keep you full.
    • Minerals: Crab is a source of selenium, zinc, and copper, which support immune function and metabolism.
    • Omega-3s: You’ll get some heart-friendly fats from the crab.
    • Portion control: Enjoy it as part of a balanced spread with veggies and whole-grain dippers to lighten things up.

    Common Mistakes to Avoid

    • Overmixing the crab: It turns the texture mushy.

      Fold gently to keep nice chunks.

    • Using watery crab: Drain canned crab well and blot if needed. Excess liquid can make the dip runny.
    • Underseasoning: Cream cheese dulls flavors. Taste and adjust salt, Old Bay, and lemon.
    • Overbaking: It can split and feel greasy.

      Pull it when it’s bubbling and lightly golden.

    • Weak dippers: Thin crackers can break. Choose sturdy options like baguette slices or pita chips.

    Alternatives

    • Lighter version: Use Neufchâtel (1/3 less fat cream cheese) and swap half the mayo for Greek yogurt.
    • Cheese swap: Try Gruyère, Fontina, or pepper jack for a different flavor profile.
    • Extra texture: Fold in 1/2 cup finely diced red bell pepper or water chestnuts.
    • Spice it up: Add minced jalapeño, a pinch of cayenne, or smoked paprika.
    • No Old Bay: Use a mix of paprika, celery salt, garlic powder, and a pinch of cayenne.
    • Seafood mix: Combine crab with chopped cooked shrimp for a surf blend.

    FAQ

    Can I use imitation crab?

    Yes, but expect a slightly sweeter taste and a softer texture. Real lump crab gives the best flavor, yet imitation crab can work for budget-friendly batches.

    What can I serve with this dip?

    Toasted baguette, bagel chips, pita chips, thick crackers, celery sticks, cucumber rounds, and sweet mini peppers are all great.

    Aim for something sturdy and crisp.

    How do I keep it warm for a party?

    Bake it first, then transfer to a small slow cooker on the warm setting. Stir occasionally and keep the lid slightly ajar to prevent condensation.

    Can I make it on the stovetop?

    Yes. Warm the base over low heat, stir in cheese until melted, then gently fold in crab.

    Transfer to a broiler-safe dish, top with Parmesan, and broil briefly to brown.

    Is this gluten-free?

    The dip itself typically is, but check labels on Worcestershire and seasonings. Serve with gluten-free crackers or veggies to keep it gluten-free.

    In Conclusion

    Hot crab dip with cream cheese is simple comfort food with a touch of coastal flair. It’s easy to customize, quick to assemble, and always a hit.

    Keep the seasoning bright, bake until just bubbly, and serve with sturdy dippers. You’ll have a warm, crowd-pleasing appetizer ready in no time.

    Hot Crab Dip With Cream Cheese – A Cozy, Crowd-Pleasing Appetizer

    Prep Time 15 minutes
    Cook Time 25 minutes
    Total Time 40 minutes
    Servings 8 servings

    Ingredients
      

    • 8 oz cream cheese, softened
    • 1/2 cup mayonnaise (or half mayo, half sour cream for extra tang)
    • 1 cup shredded cheese (sharp cheddar, Monterey Jack, or a blend)
    • 1 lb lump crab meat, picked over for shells (fresh or high-quality canned)
    • 2 green onions, finely sliced
    • 1 garlic clove, minced
    • 1–2 tsp Old Bay seasoning, to taste
    • 1–2 tsp Worcestershire sauce
    • 1–2 tsp hot sauce (optional, to taste)
    • 1 tbsp fresh lemon juice and a little zest (optional)
    • 1/4 cup grated Parmesan (for topping)
    • Salt and black pepper, to taste
    • Chopped parsley, for garnish (optional)
    • Sturdy dippers: toasted baguette, crackers, pita chips, or veggies

    Instructions
     

    • Preheat the oven to 375°F (190°C). Lightly grease a small baking dish or ovenproof skillet.
    • Soften the cream cheese so it mixes easily. Microwave it in short bursts if needed, just until spreadable.
    • Make the base: In a bowl, mix cream cheese, mayonnaise, shredded cheese, garlic, Old Bay, Worcestershire, hot sauce, lemon juice, and zest. Add a small pinch of salt and pepper.
    • Fold in the crab and green onion gently. Don’t overmix—keep some bigger crab pieces for texture.
    • Taste and adjust seasoning. Add more Old Bay, lemon, or hot sauce as you like.
    • Transfer to the baking dish, smoothing the top. Sprinkle Parmesan over the surface for a golden crust.
    • Bake 18–22 minutes, until hot and bubbling around the edges and lightly browned on top.
    • Rest 5 minutes so it sets slightly. Garnish with parsley. Serve warm with your favorite dippers.
  • Easy Quinoa Taco Bowl You’ll Crave Weekly – Fast, Fresh, and Flavor-Packed

    Easy Quinoa Taco Bowl You’ll Crave Weekly – Fast, Fresh, and Flavor-Packed

    This quinoa taco bowl hits all the right notes: bold flavor, quick prep, and loads of color. It’s the kind of weeknight meal you can pull together without stress and still feel excited to eat. The base is fluffy quinoa, topped with spiced beans, crisp veggies, and a zesty lime yogurt drizzle.

    Everything is simple, fresh, and customizable. Once you make it, you’ll want it on repeat.

    What Makes This Recipe So Good

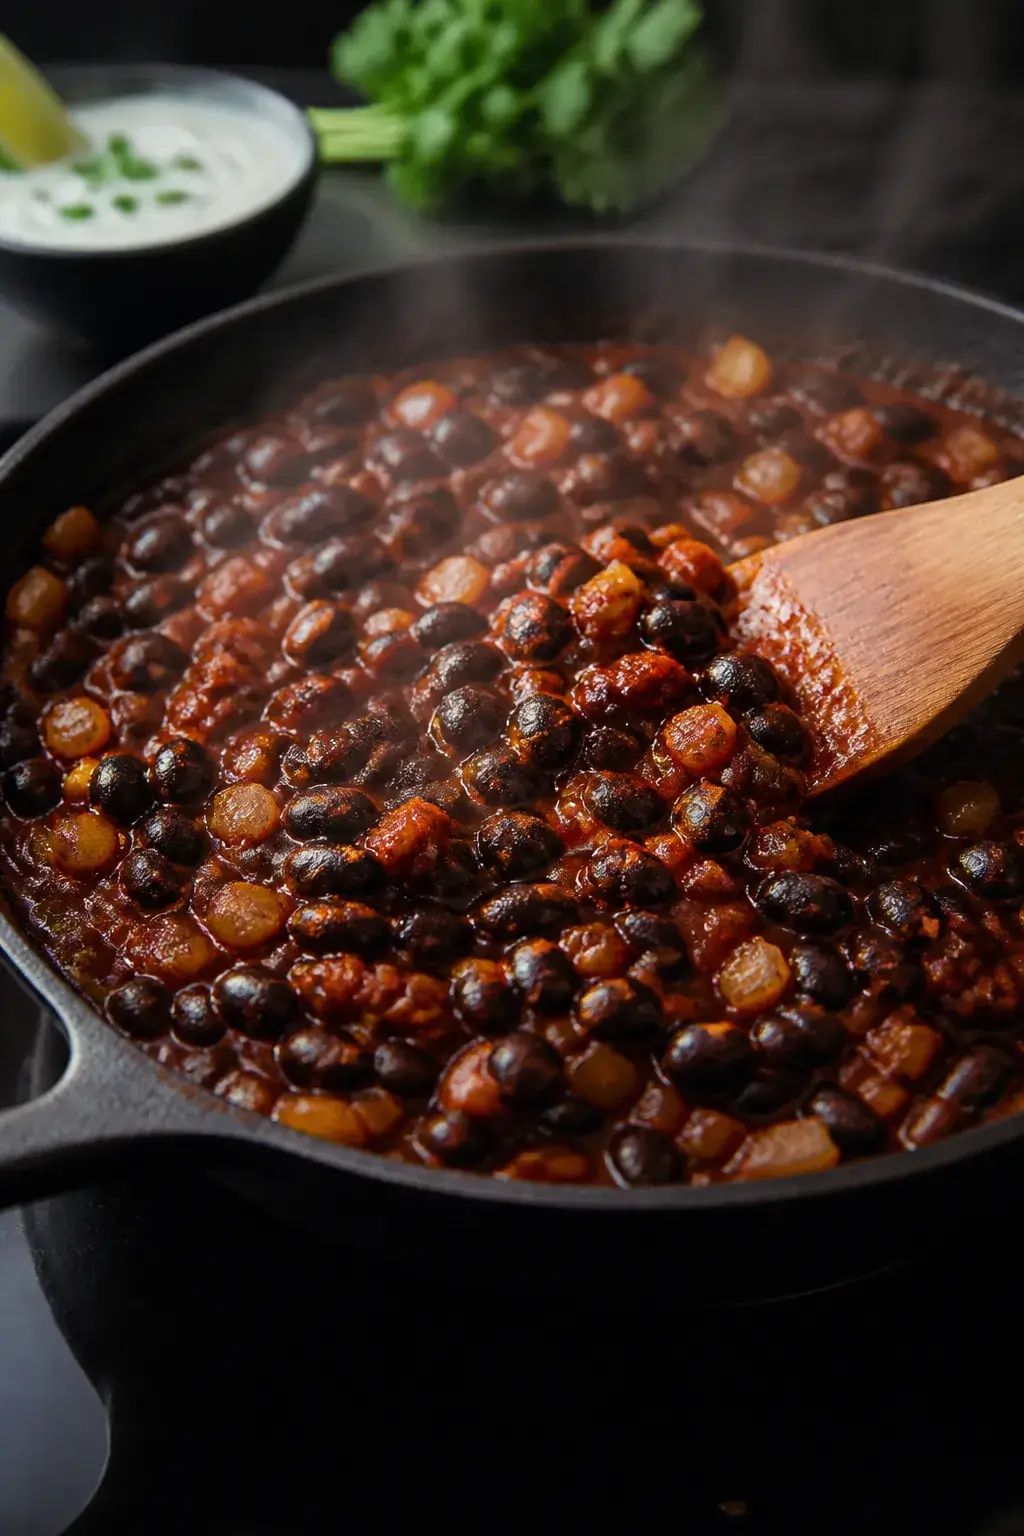
    Cooking process close-up: A skillet of saucy taco black beans simmering with diced yellow onions and
    • Fast and flexible: Ready in about 30 minutes and easy to adapt to what’s in your fridge.
    • Nutrient-dense: Protein-rich quinoa and beans, plus fiber-packed veggies keep you full and energized.
    • Big flavor, minimal effort: A simple taco seasoning brings warmth and depth without a long ingredient list.
    • Great for meal prep: Components store well so you can build bowls all week.
    • Budget-friendly: Pantry staples meet fresh toppings for a satisfying, affordable meal.

    Ingredients

    • For the quinoa base:
      • 1 cup uncooked quinoa, rinsed
      • 2 cups low-sodium vegetable broth or water
      • 1/2 teaspoon salt (skip if broth is salty)
    • For the taco beans:
      • 1 tablespoon olive oil
      • 1 small yellow onion, diced
      • 2 cloves garlic, minced
      • 1 can (15 oz) black beans, drained and rinsed
      • 1 tablespoon tomato paste (or 1/4 cup salsa)
      • 1–1 1/2 tablespoons taco seasoning (store-bought or homemade)
      • 1/3 cup water
      • Salt and pepper, to taste
    • Toppings (mix and match):
      • 1 cup cherry tomatoes, halved
      • 1 cup corn kernels (thawed if frozen)
      • 1 avocado, diced
      • 1/4 small red onion, thinly sliced
      • Fresh cilantro, chopped
      • Lime wedges
      • Shredded lettuce or cabbage
      • Pickled jalapeños (optional)
      • Shredded cheddar or cotija (optional)
    • Zesty lime yogurt drizzle:
      • 1/2 cup plain Greek yogurt (or dairy-free yogurt)
      • 1 tablespoon lime juice
      • 1/2 teaspoon honey or agave
      • Pinch of salt and chili powder

    How to Make It

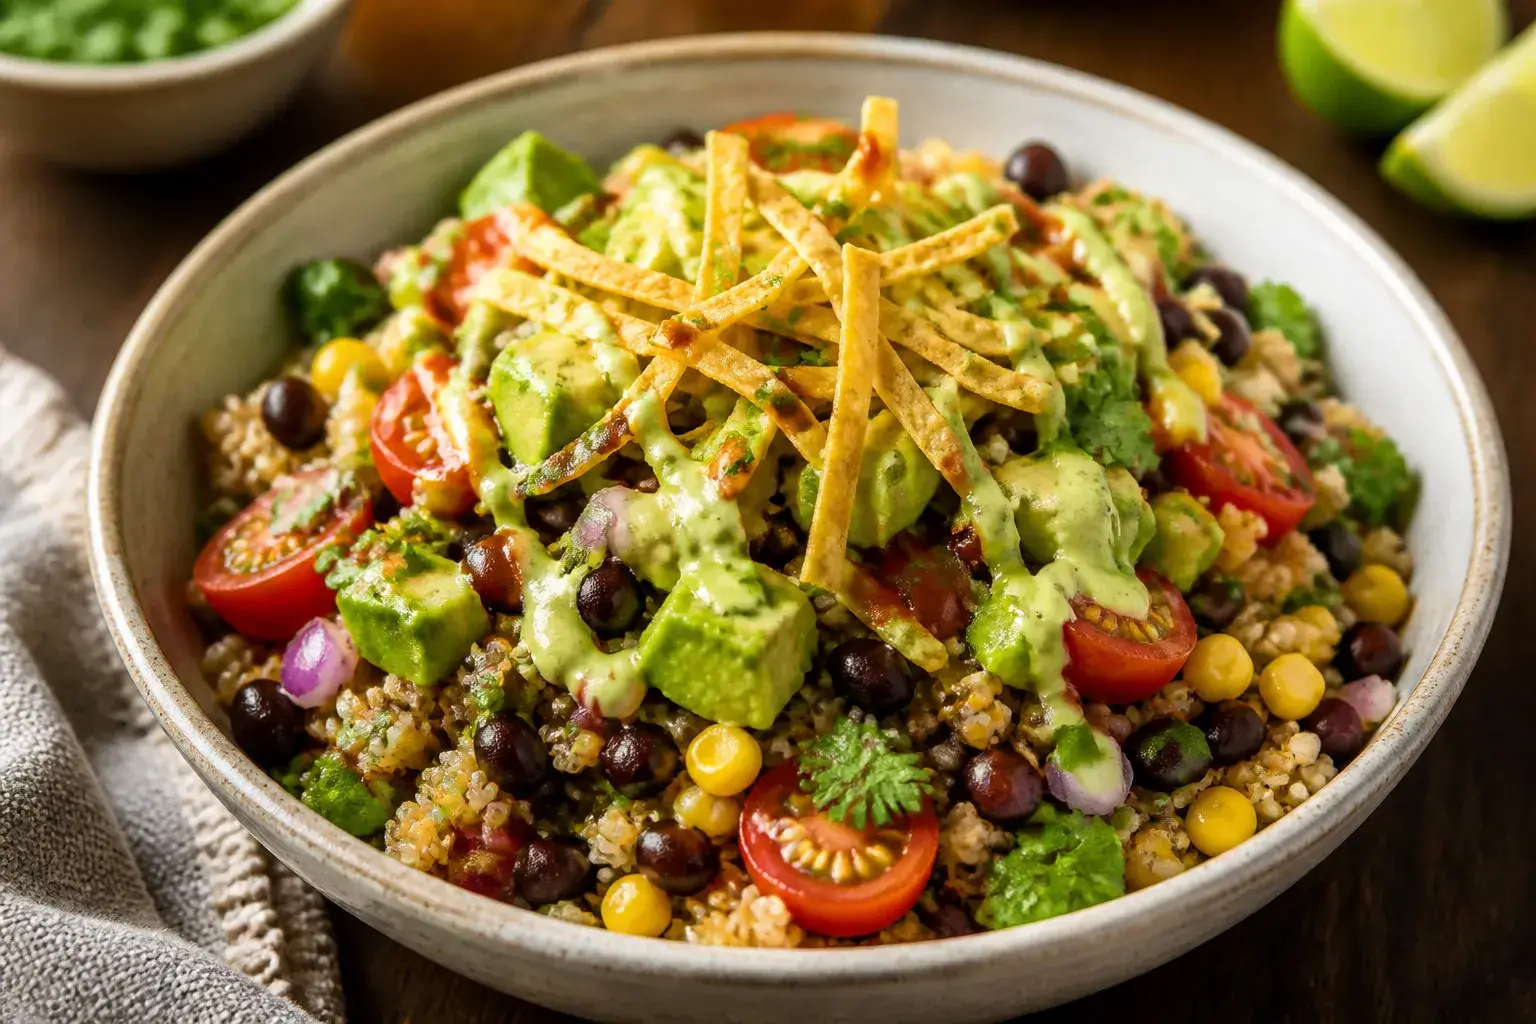
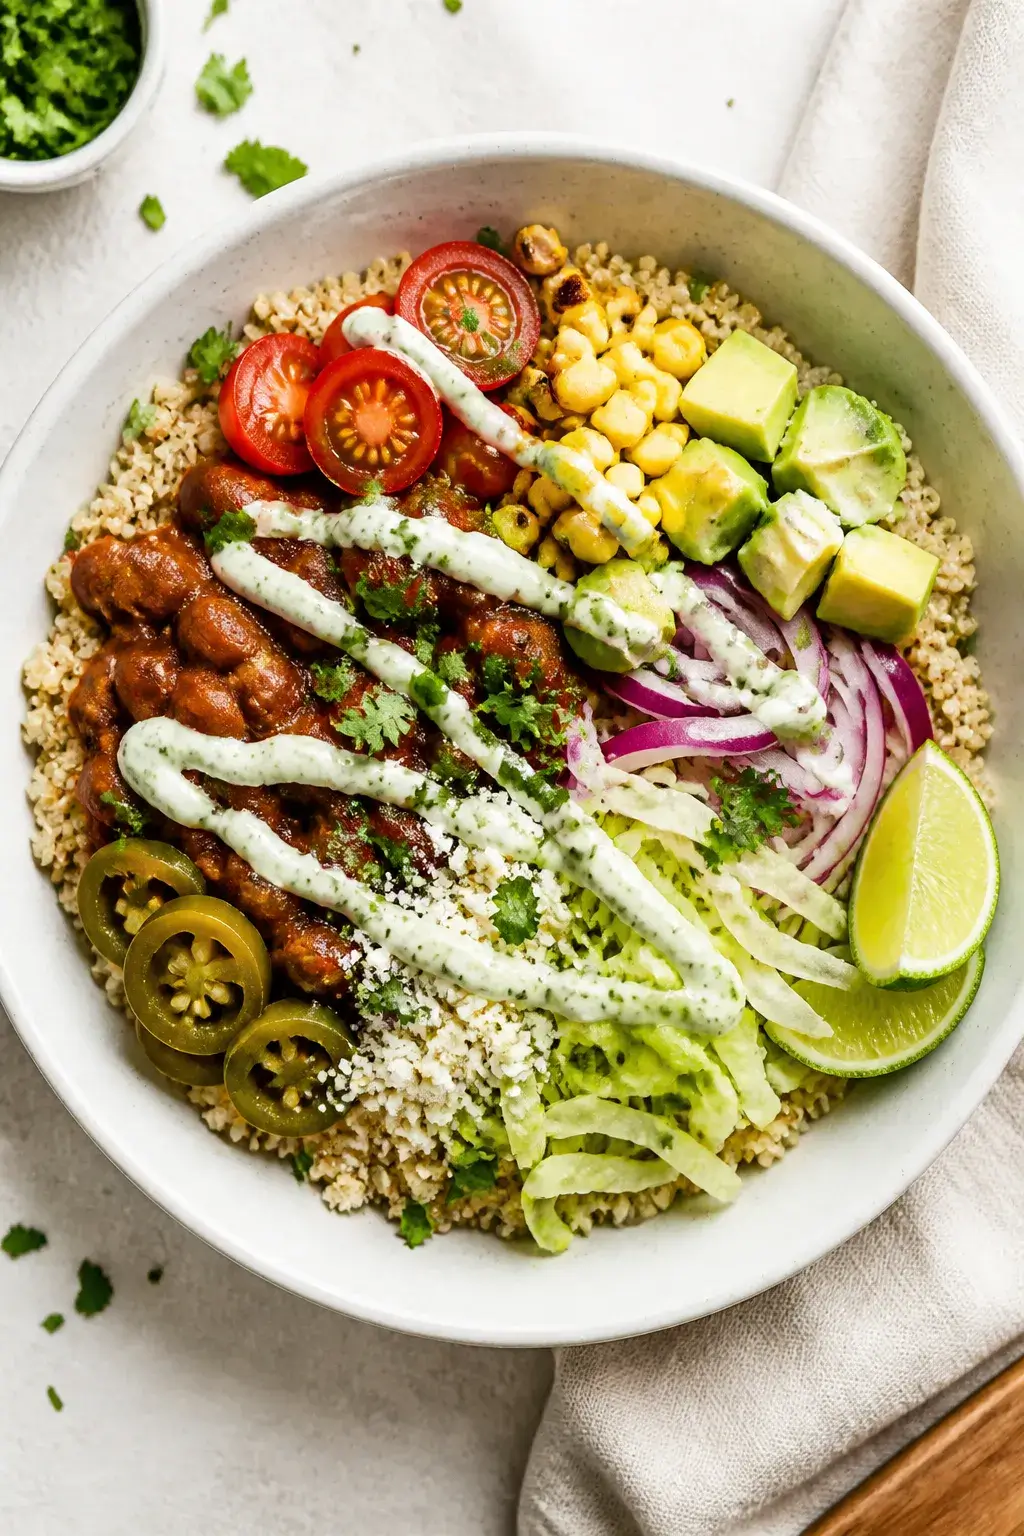
    Final plated overhead: Vibrant quinoa taco bowl assembled in a wide, white ceramic bowl on a light l
    1. Cook the quinoa: Add rinsed quinoa, broth, and salt to a pot. Bring to a boil, reduce to low, cover, and simmer 15 minutes.

      Remove from heat and let sit, covered, 5 minutes. Fluff with a fork.

    2. Sauté aromatics: Warm olive oil in a skillet over medium heat. Add onion and cook 3–4 minutes until softened.

      Stir in garlic for 30 seconds.

    3. Season the beans: Add black beans, tomato paste, taco seasoning, and water. Stir and simmer 3–4 minutes until saucy. Taste and adjust salt, pepper, or seasoning.
    4. Mix the drizzle: In a small bowl, whisk yogurt, lime juice, honey, salt, and chili powder until smooth.

      Thin with a splash of water if needed.

    5. Prep toppings: Halve tomatoes, dice avocado, slice red onion, and chop cilantro. Warm corn briefly in the skillet or microwave.
    6. Assemble: Divide quinoa into bowls. Top with taco beans, tomatoes, corn, avocado, onion, lettuce, and cheese if using.

      Spoon over the lime yogurt drizzle and finish with cilantro and a squeeze of lime.

    Keeping It Fresh

    • Store components separately: Quinoa and beans in airtight containers up to 4 days; toppings in separate containers to keep crisp.
    • Avoid soggy bowls: Add avocado and drizzle right before serving.
    • Reheat smart: Warm quinoa and beans together in the microwave with a splash of water, then add fresh toppings.
    • Freezer-friendly: Freeze cooked quinoa and beans up to 2 months. Thaw in the fridge overnight.

    Benefits of This Recipe

    • Balanced macros: Protein from quinoa and beans, complex carbs for steady energy, and healthy fats from avocado.
    • High in fiber: Supports digestion and keeps you satisfied.
    • Customizable for diets: Easy to make vegetarian, vegan, dairy-free, or gluten-free.
    • Great for families: Everyone builds their own bowl with favorite toppings.

    Pitfalls to Watch Out For

    • Skipping the quinoa rinse: Unrinsed quinoa can taste bitter. Rinse well in a fine-mesh strainer.
    • Over-salting: Taste as you go, especially if using salted broth or seasoned beans.
    • Soggy textures: Don’t overcook the beans; you want them saucy, not mushy.
    • Flat flavor: If it tastes bland, add a squeeze of lime, a pinch more salt, or a sprinkle of taco seasoning.

    Recipe Variations

    • Chipotle chicken bowl: Add shredded rotisserie chicken tossed with chipotle in adobo and lime.
    • Roasted veggie medley: Roast bell peppers, zucchini, and sweet potato with cumin and chili powder.
    • Cilantro-lime quinoa: Stir chopped cilantro and lime zest into the cooked quinoa.
    • Street corn style: Mix corn with a little mayo or yogurt, lime, chili powder, and cotija.
    • Spicy swap: Use pinto or refried beans with extra jalapeño and hot sauce.
    • Salsa verde twist: Replace the yogurt drizzle with salsa verde and a dollop of sour cream.

    FAQ

    Can I make this vegan?

    Yes.

    Use dairy-free yogurt for the drizzle or swap it for guacamole or cashew crema. Skip the cheese or use a plant-based version.

    What if I don’t have quinoa?

    Brown rice, cauliflower rice, or farro all work. Adjust cook times and seasoning as needed.

    How do I make my own taco seasoning?

    Combine 2 teaspoons chili powder, 1 teaspoon cumin, 1/2 teaspoon smoked paprika, 1/2 teaspoon oregano, 1/4 teaspoon garlic powder, 1/4 teaspoon onion powder, and 1/4 teaspoon salt.

    Add cayenne for heat.

    Is this good for meal prep?

    Absolutely. Cook quinoa and beans, portion into containers, and pack toppings separately. Add avocado and drizzle just before eating.

    How can I add more protein?

    Top with grilled chicken, sautéed shrimp, turkey taco meat, or a fried egg.

    You can also add extra beans or a sprinkle of pumpkin seeds.

    Wrapping Up

    This Easy Quinoa Taco Bowl is quick, customizable, and full of fresh flavor. It’s perfect for busy nights, meal prep Sundays, or anytime you want a satisfying bowl without fuss. Keep the staples on hand, swap in your favorite toppings, and make it your own.

    Chances are, it’ll become a weekly habit.

    Easy Quinoa Taco Bowl You’ll Crave Weekly – Fast, Fresh, and Flavor-Packed

    Prep Time 10 minutes
    Cook Time 20 minutes
    Total Time 30 minutes
    Servings 4 servings

    Ingredients
      

    • For the quinoa base: 1 cup uncooked quinoa, rinsed
    • 2 cups low-sodium vegetable broth or water
    • 1/2 teaspoon salt (skip if broth is salty)
    • For the taco beans: 1 tablespoon olive oil
    • 1 small yellow onion, diced
    • 2 cloves garlic, minced
    • 1 can (15 oz) black beans, drained and rinsed
    • 1 tablespoon tomato paste (or 1/4 cup salsa)
    • 1–1 1/2 tablespoons taco seasoning (store-bought or homemade)
    • 1/3 cup water
    • Salt and pepper, to taste
    • Toppings (mix and match): 1 cup cherry tomatoes, halved
    • 1 cup corn kernels (thawed if frozen)
    • 1 avocado, diced
    • 1/4 small red onion, thinly sliced
    • Fresh cilantro, chopped
    • Lime wedges
    • Shredded lettuce or cabbage
    • Pickled jalapeños (optional)
    • Shredded cheddar or cotija (optional)
    • Zesty lime yogurt drizzle: 1/2 cup plain Greek yogurt (or dairy-free yogurt)
    • 1 tablespoon lime juice
    • 1/2 teaspoon honey or agave
    • Pinch of salt and chili powder

    Instructions
     

    • Cook the quinoa: Add rinsed quinoa, broth, and salt to a pot. Bring to a boil, reduce to low, cover, and simmer 15 minutes. Remove from heat and let sit, covered, 5 minutes. Fluff with a fork.
    • Sauté aromatics: Warm olive oil in a skillet over medium heat. Add onion and cook 3–4 minutes until softened. Stir in garlic for 30 seconds.
    • Season the beans: Add black beans, tomato paste, taco seasoning, and water. Stir and simmer 3–4 minutes until saucy. Taste and adjust salt, pepper, or seasoning.
    • Mix the drizzle: In a small bowl, whisk yogurt, lime juice, honey, salt, and chili powder until smooth. Thin with a splash of water if needed.
    • Prep toppings: Halve tomatoes, dice avocado, slice red onion, and chop cilantro. Warm corn briefly in the skillet or microwave.
    • Assemble: Divide quinoa into bowls. Top with taco beans, tomatoes, corn, avocado, onion, lettuce, and cheese if using. Spoon over the lime yogurt drizzle and finish with cilantro and a squeeze of lime.
  • Hot Crab Dip Recipe With Cream Cheese – Warm, Creamy, Crowd-Pleasing Appetizer

    Hot Crab Dip Recipe With Cream Cheese – Warm, Creamy, Crowd-Pleasing Appetizer

    This hot crab dip is the kind of appetizer that disappears fast. It’s creamy, cheesy, and full of tender crab, with a hint of lemon and Old Bay to keep it bright and savory. You can mix it up in minutes, then bake until bubbly and golden.

    Serve it with toasted baguette slices, sturdy crackers, or celery sticks, and watch it become the star of your table.

    What Makes This Special

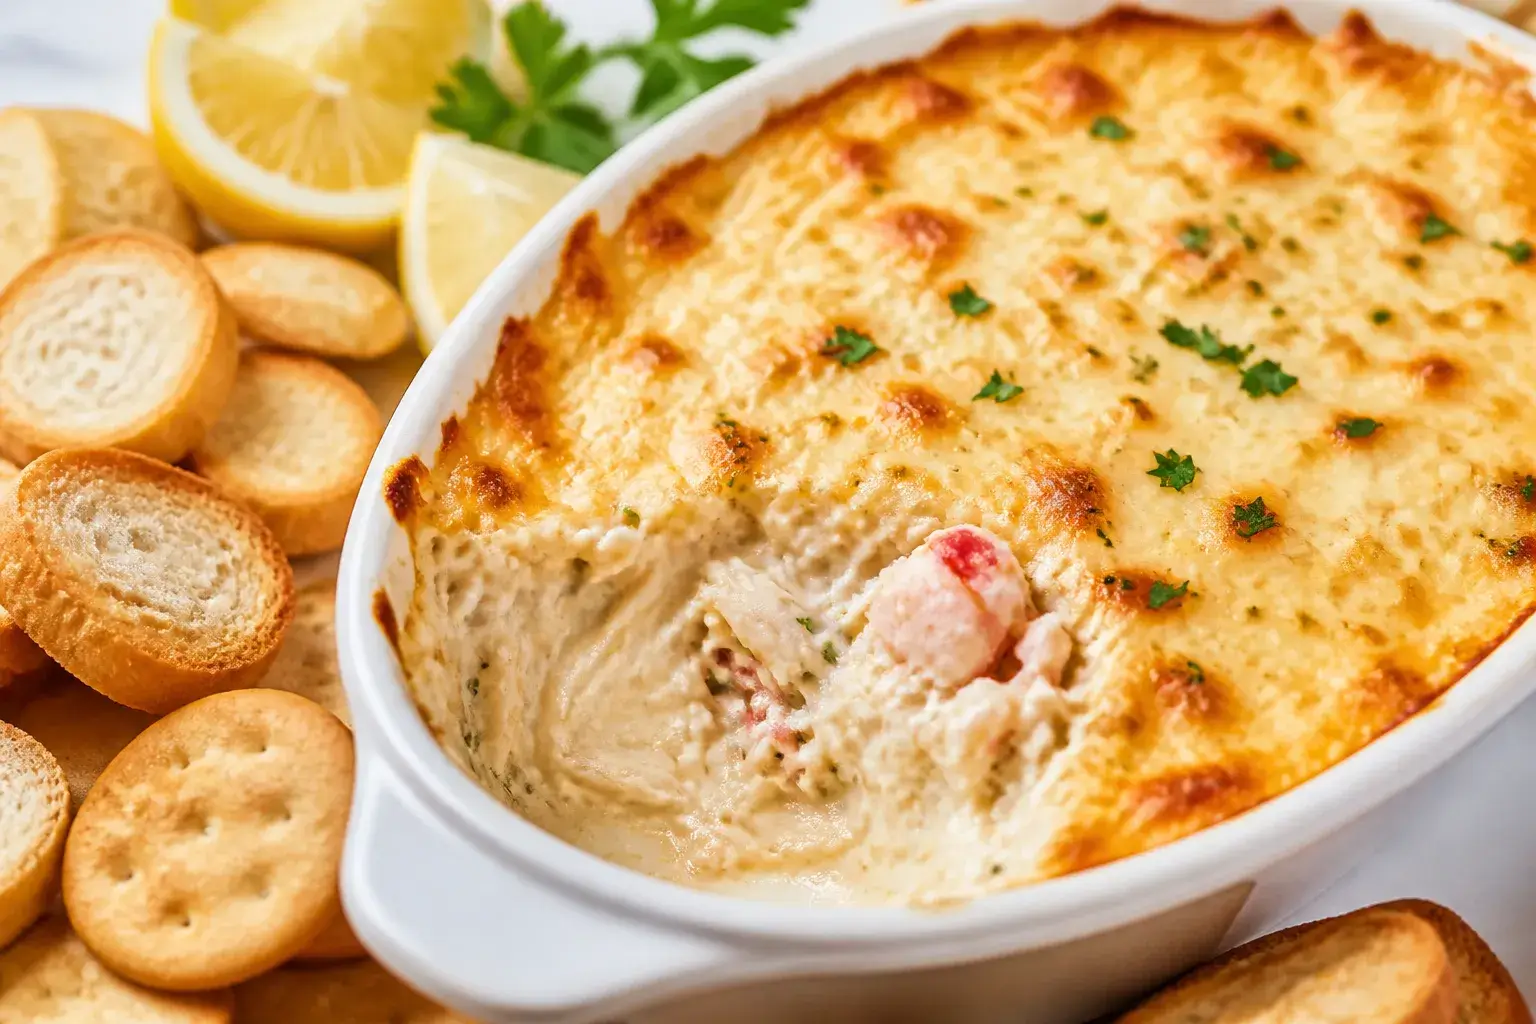
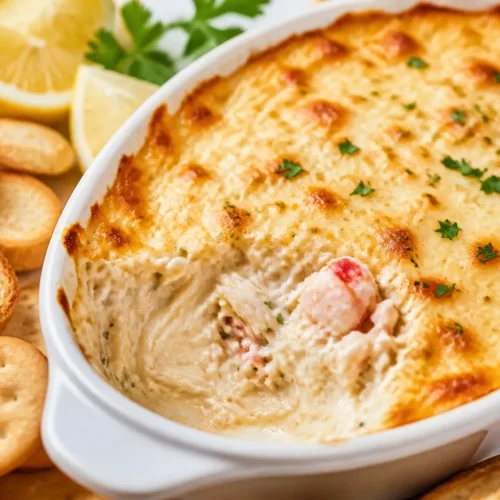
    Cooking process close-up: Hot crab dip just out of the oven in a small, oven-safe cast-iron skillet,

    This version leans into cream cheese for a rich, velvety base that holds up well to baking. A splash of lemon and Worcestershire balances the richness without overpowering the crab. Old Bay adds that classic seafood warmth, while a little cheddar and Parmesan bring gooey pull and a salty finish.

    It’s simple, reliable, and always tastes like more effort than it is.

    What You’ll Need

    • 8 oz cream cheese, softened
    • 1/2 cup sour cream (or plain Greek yogurt)
    • 1/4 cup mayonnaise
    • 8–12 oz lump crab meat (fresh, canned, or pasteurized), picked over for shells
    • 1 cup shredded cheddar (divided)
    • 1/4 cup grated Parmesan
    • 1 tablespoon lemon juice (plus more to taste)
    • 1 teaspoon Old Bay seasoning (adjust to preference)
    • 1 teaspoon Worcestershire sauce
    • 1 small garlic clove, finely minced (or 1/4 teaspoon garlic powder)
    • 2 green onions, thinly sliced (plus extra for garnish)
    • 1–2 tablespoons chopped parsley (optional)
    • Pinch of cayenne or hot sauce (optional, for heat)
    • Salt and black pepper, to taste
    • Olive oil or butter, for greasing the baking dish

    Instructions

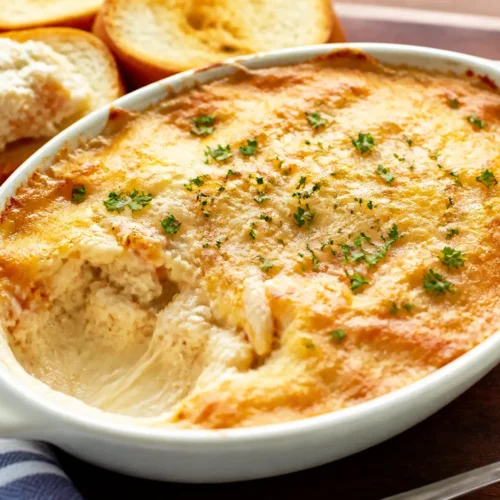
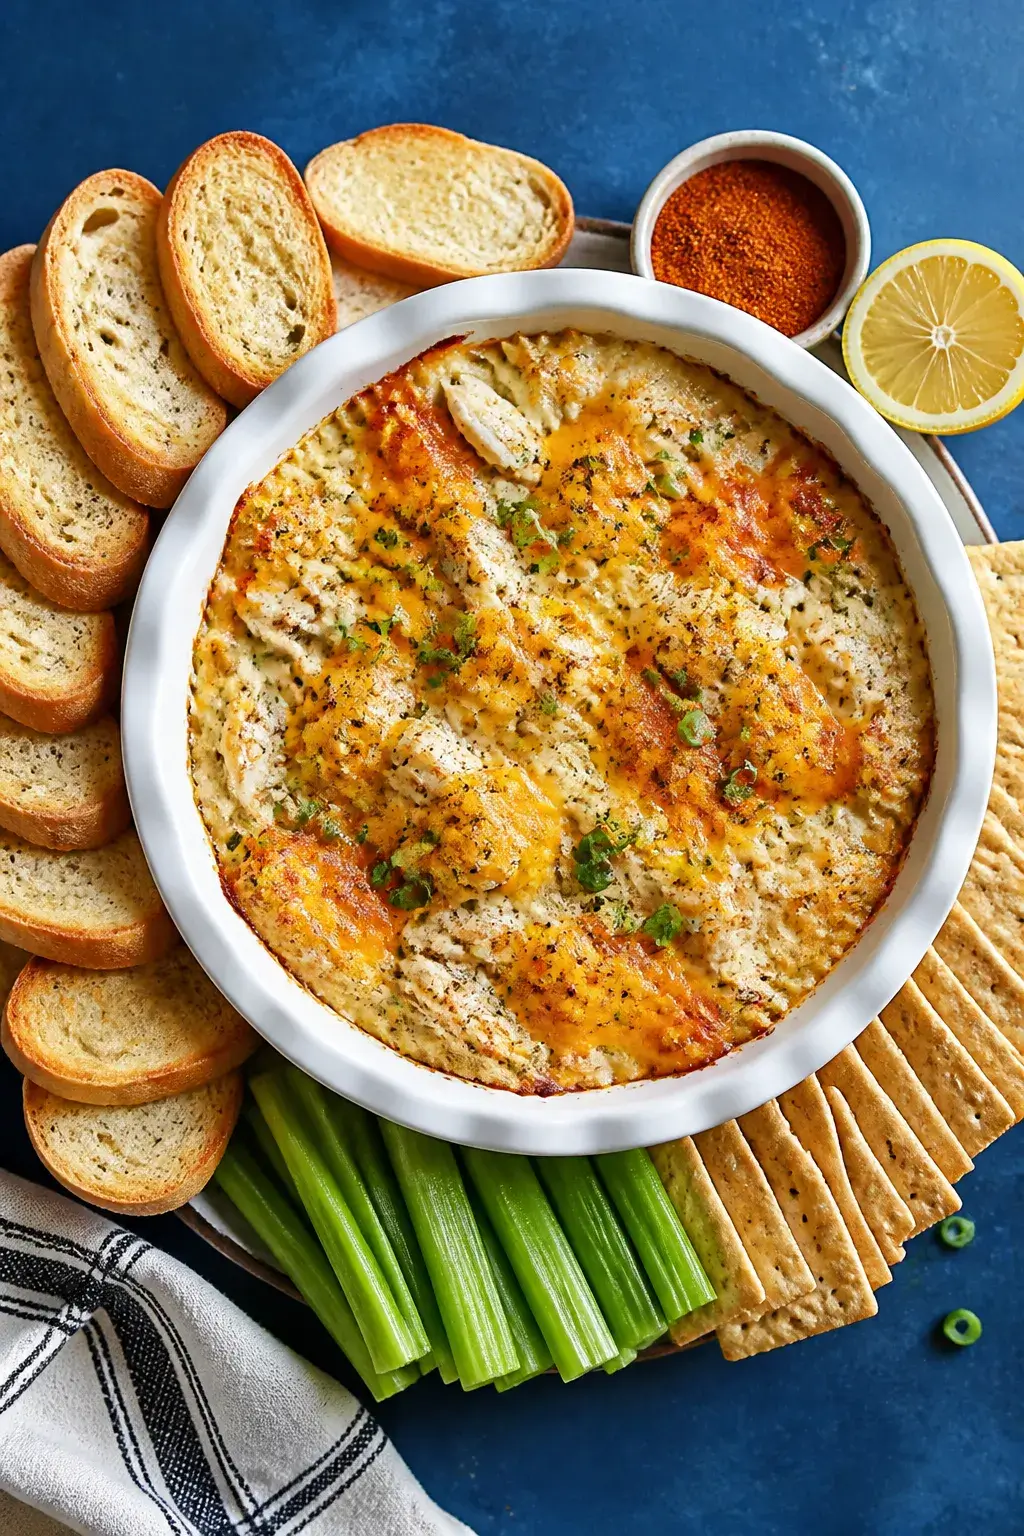
    Final presentation overhead: Tasty top-down shot of hot crab dip transferred to a low, white ceramic
    1. Preheat the oven to 375°F (190°C). Lightly grease a small baking dish or oven-safe skillet.
    2. Mix the creamy base: In a bowl, beat the softened cream cheese until smooth. Stir in sour cream and mayonnaise until fully combined and silky.
    3. Season it up: Add lemon juice, Old Bay, Worcestershire, garlic, half the green onions, parsley, and cayenne or hot sauce if using.

      Mix well. Taste and adjust with a little more lemon, salt, and pepper.

    4. Add the cheese: Fold in 3/4 cup cheddar and all the Parmesan.
    5. Fold in the crab: Gently mix in the crab meat, keeping lumps intact. Don’t over-stir.
    6. Top and bake: Spread into the baking dish.

      Sprinkle the remaining cheddar on top. Bake 18–22 minutes, until hot and bubbly with light golden spots.

    7. Finish and serve: Let it sit 5 minutes. Garnish with remaining green onions and a squeeze of lemon.

      Serve warm with toasted baguette, crackers, or veggies.

    How to Store

    Cool completely, then cover and refrigerate for up to 3 days. Reheat in a 350°F (175°C) oven until warmed through, about 10–15 minutes. If it seems thick, stir in a spoonful of sour cream after reheating.

    You can also assemble it a day ahead, cover, and bake just before serving.

    Why This is Good for You

    • Protein-rich: Crab provides lean protein to keep you satisfied.
    • Minerals: Crab is a good source of selenium and zinc.
    • Portion-flexible: Pair with veggie dippers to lighten things up while keeping the flavor front and center.

    What Not to Do

    • Don’t use imitation crab if you want real crab flavor. It will taste sweeter and less briny.
    • Don’t skip tasting the mixture before baking. Adjust lemon, salt, and Old Bay now.
    • Don’t overbake. Too long in the oven can make it oily or dry.

      Pull it when it’s just bubbly.

    • Don’t shred the crab. Fold gently to keep those tender chunks intact.

    Variations You Can Try

    • Spicy Jalapeño: Stir in 1–2 minced jalapeños and a dash of hot sauce.
    • Artichoke Twist: Add 1/2 cup chopped marinated artichokes for tang and texture.
    • Smoky Bacon: Fold in 1/3 cup crispy crumbled bacon and a pinch of smoked paprika.
    • Herby Lemon: Use extra parsley plus dill or chives, and bump the lemon to 1.5 tablespoons.
    • Extra-Cheesy: Swap half the cheddar for Monterey Jack or Gruyère for more melt and depth.
    • Cold-Serve Option: Skip baking and serve chilled; loosen with a bit more sour cream and lemon.

    FAQ

    Can I use canned crab?

    Yes. Look for lump or claw meat packed in the refrigerated section if possible. Drain well and pick out any shells.

    Fresh or pasteurized lump will have the best texture, but canned works in a pinch.

    Can I make this ahead?

    Absolutely. Mix everything, spread in the dish, cover, and refrigerate up to 24 hours. Bake just before serving, adding a few extra minutes if it’s going in cold.

    What should I serve with it?

    Toasted baguette slices, sturdy crackers, bagel chips, pretzel crisps, endive leaves, celery sticks, and carrot coins are all great.

    Offer a mix so guests can choose lighter or crunchier options.

    How do I keep it warm for a party?

    After baking, transfer to a small slow cooker on the Warm setting, or keep it in a covered oven-safe dish at 200°F (95°C). Stir occasionally so the top doesn’t dry out.

    Can I freeze hot crab dip?

    It’s not ideal. Cream cheese can turn grainy after freezing.

    If you must, freeze unbaked dip tightly wrapped for up to 1 month, thaw overnight, stir, then bake. Fresh is best.

    Wrapping Up

    This hot crab dip with cream cheese is creamy, comforting, and party-ready with minimal effort. Keep the base, season boldly, and let the crab shine.

    Bake until bubbly, garnish with something fresh, and serve it warm—simple as that. Once you make it, you’ll keep it in your back pocket for every get-together.

    Hot Crab Dip Recipe With Cream Cheese – Warm, Creamy, Crowd-Pleasing Appetizer

    Prep Time 10 minutes
    Cook Time 20 minutes
    Total Time 30 minutes
    Servings 8 servings

    Ingredients
      

    • 8 oz cream cheese, softened
    • 1/2 cup sour cream (or plain Greek yogurt)
    • 1/4 cup mayonnaise
    • 8–12 oz lump crab meat (fresh, canned, or pasteurized), picked over for shells
    • 1 cup shredded cheddar (divided)
    • 1/4 cup grated Parmesan
    • 1 tablespoon lemon juice (plus more to taste)
    • 1 teaspoon Old Bay seasoning (adjust to preference)
    • 1 teaspoon Worcestershire sauce
    • 1 small garlic clove, finely minced (or 1/4 teaspoon garlic powder)
    • 2 green onions, thinly sliced (plus extra for garnish)
    • 1–2 tablespoons chopped parsley (optional)
    • Pinch of cayenne or hot sauce (optional, for heat)
    • Salt and black pepper, to taste
    • Olive oil or butter, for greasing the baking dish

    Instructions
     

    • Preheat the oven to 375°F (190°C). Lightly grease a small baking dish or oven-safe skillet.
    • Mix the creamy base: In a bowl, beat the softened cream cheese until smooth. Stir in sour cream and mayonnaise until fully combined and silky.
    • Season it up: Add lemon juice, Old Bay, Worcestershire, garlic, half the green onions, parsley, and cayenne or hot sauce if using. Mix well. Taste and adjust with a little more lemon, salt, and pepper.
    • Add the cheese: Fold in 3/4 cup cheddar and all the Parmesan.
    • Fold in the crab: Gently mix in the crab meat, keeping lumps intact. Don’t over-stir.
    • Top and bake: Spread into the baking dish. Sprinkle the remaining cheddar on top. Bake 18–22 minutes, until hot and bubbly with light golden spots.
    • Finish and serve: Let it sit 5 minutes. Garnish with remaining green onions and a squeeze of lemon. Serve warm with toasted baguette, crackers, or veggies.
  • Garlic Parmesan Focaccia Bread Recipe – Easy Homemade Side Dish

    Garlic Parmesan Focaccia Bread Recipe – Easy Homemade Side Dish

    This garlic parmesan focaccia is the kind of bread that makes any meal feel special with almost no fuss. The dough is simple, the rise is forgiving, and the flavor is big: savory garlic, nutty Parmesan, and plenty of olive oil. It bakes up golden on top with light, airy pockets inside and a crisp bottom.

    Serve it with pasta, soup, salad, or as the base for a quick sandwich. If you’re new to baking bread, this is a fantastic place to start.

    Why This Recipe Works

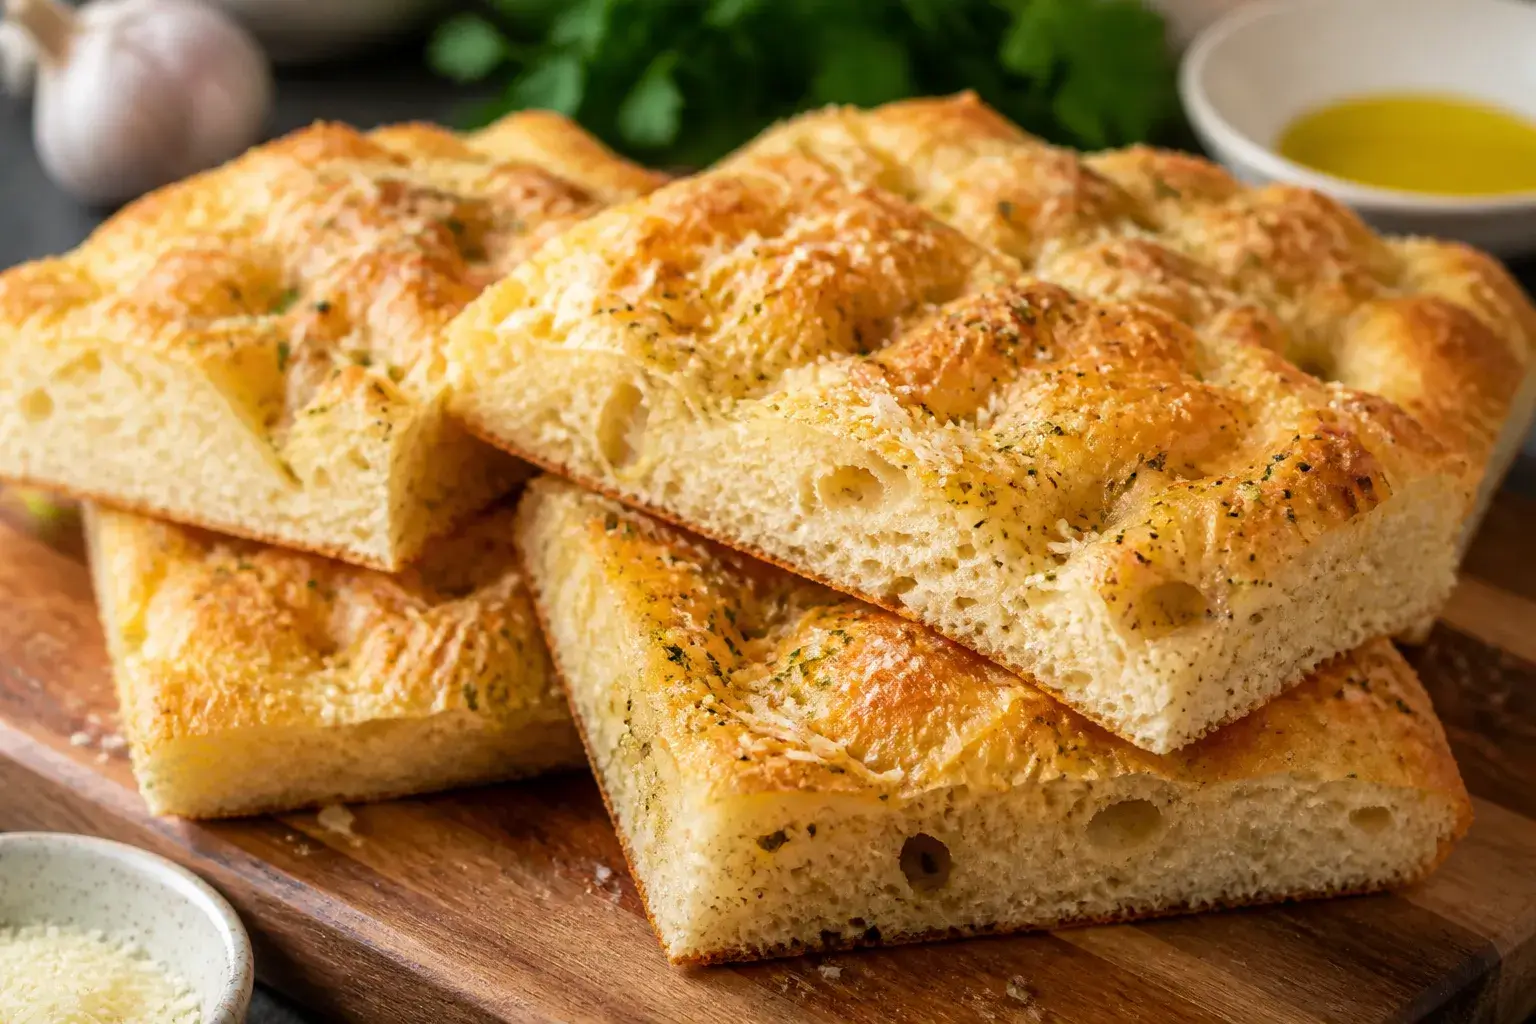
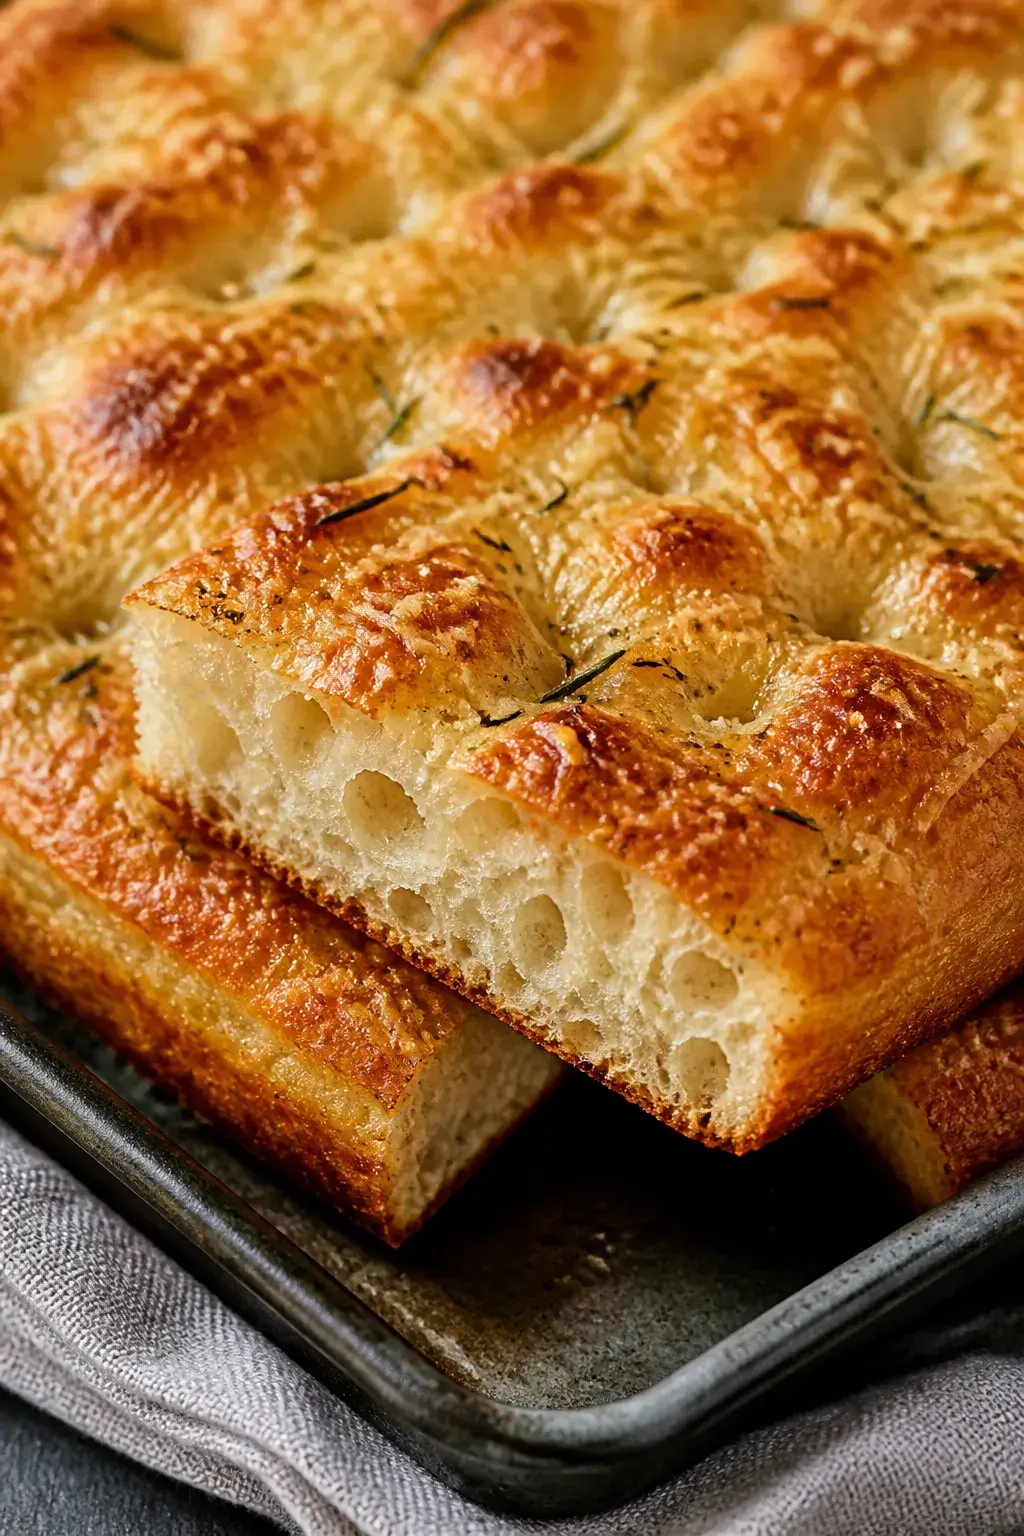
    Close-up detail of freshly baked garlic parmesan focaccia just out of the oven, golden blistered top
    • High-hydration dough creates those signature airy holes and a tender crumb without complicated techniques.
    • Olive oil in the dough and pan ensures a crisp, flavorful crust and a rich bite.
    • Garlic two ways (infused oil and minced) layers flavor without burning in the oven.
    • Parmesan on top melts, browns, and adds savory depth that pairs with almost anything.
    • One-pan method means minimal shaping and easy cleanup.

    Shopping List

    • All-purpose flour (3 1/2 cups)
    • Warm water, about 105–110°F (1 1/2 cups)
    • Active dry yeast (2 1/4 teaspoons, one packet)
    • Granulated sugar or honey (1 teaspoon)
    • Kosher salt (2 teaspoons, divided)
    • Extra-virgin olive oil (1/3 cup, plus more for the pan and drizzling)
    • Fresh garlic (3–4 cloves, minced)
    • Grated Parmesan cheese (1/2 cup, plus more for serving if you like)
    • Fresh rosemary or thyme (optional, 1–2 teaspoons chopped)
    • Flaky sea salt (optional, for finishing)

    Step-by-Step Instructions

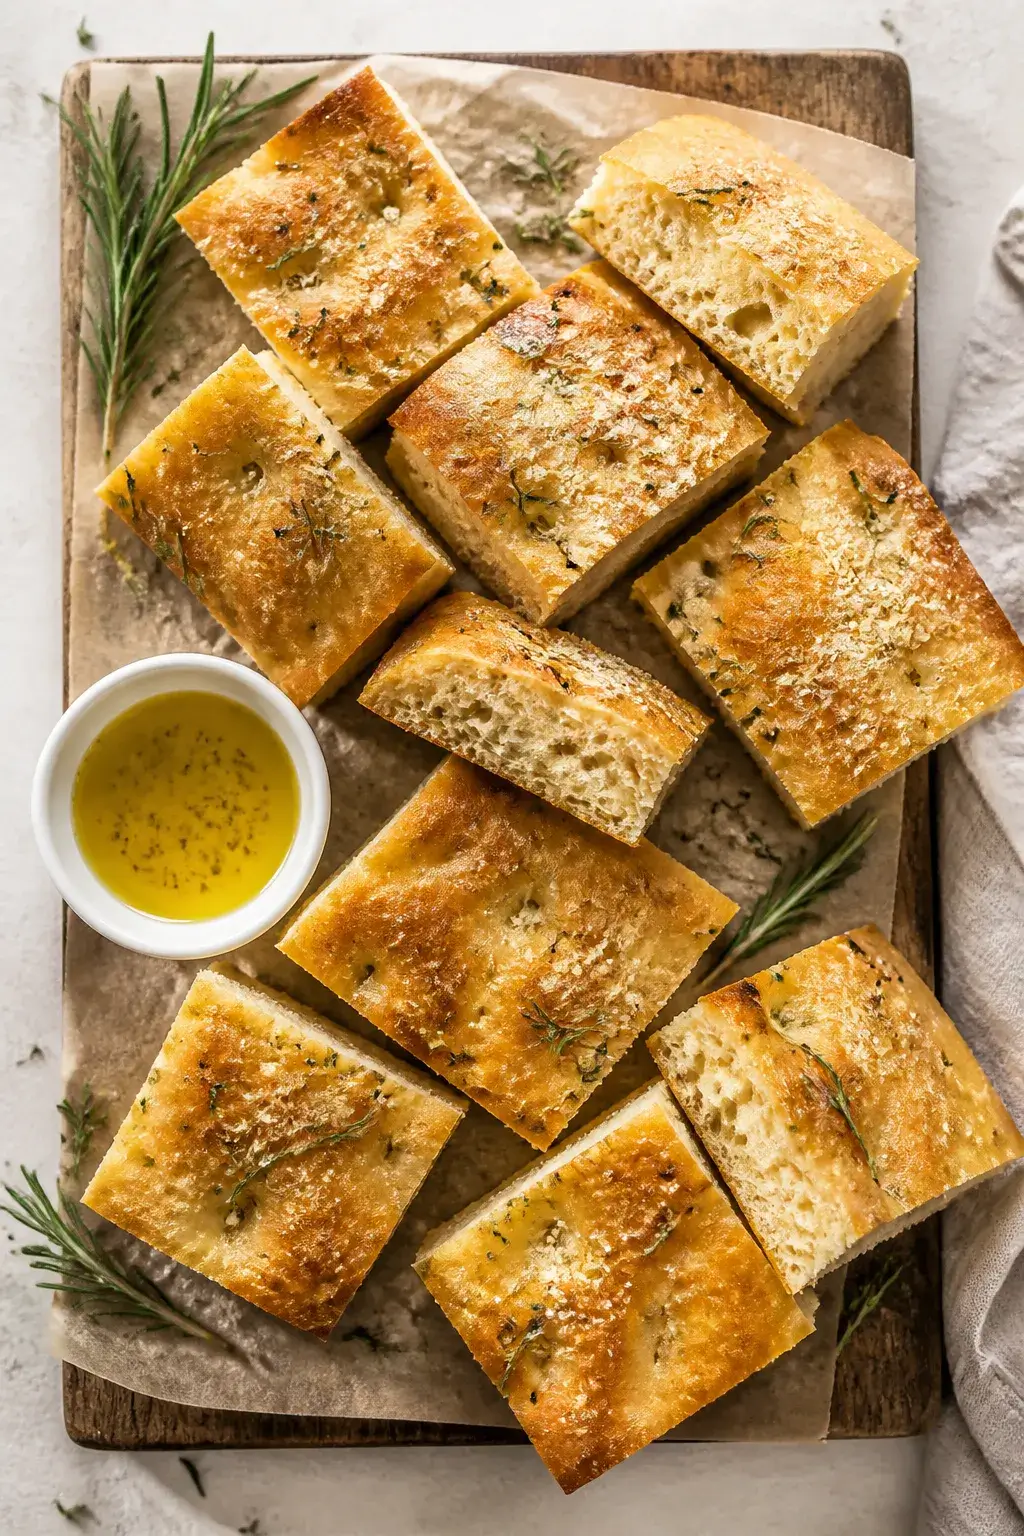
    Overhead final presentation shot of sliced focaccia squares arranged on a rustic wooden board, brush
    1. Proof the yeast: In a large bowl, mix warm water, sugar or honey, and yeast. Let it sit 5–10 minutes until foamy.

      If it doesn’t foam, start over with fresh yeast.

    2. Make the dough: Stir in 2 cups of flour and 1 1/2 teaspoons kosher salt. Add 2 tablespoons olive oil. Mix, then add the remaining flour gradually until a sticky dough forms.

      It should be soft and slightly tacky, not dry.

    3. First rise: Drizzle 1 tablespoon olive oil over the dough and turn it to coat. Cover the bowl and let rise in a warm spot for 45–60 minutes, until doubled.
    4. Prepare the pan: Generously oil a 9×13-inch baking pan or a large sheet pan (about 2 tablespoons oil). The oil helps the crust crisp and prevents sticking.
    5. Transfer and stretch: Tip the dough into the pan.

      With oiled hands, gently stretch and press it toward the edges. If it springs back, rest 5–10 minutes and stretch again.

    6. Garlic oil: In a small bowl, mix 2 tablespoons olive oil with the minced garlic and chopped herbs (if using). Set aside to let flavors mingle.
    7. Dimple the dough: After the dough relaxes in the pan for 15–20 minutes, use your fingertips to press deep dimples all over.

      This helps even baking and holds the oil.

    8. Top it: Spoon or brush the garlic oil over the surface, making sure some gets into the dimples. Sprinkle evenly with Parmesan and the remaining 1/2 teaspoon kosher salt. Add flaky sea salt if you like.
    9. Second rise: Let the topped dough rest 20–30 minutes while you preheat the oven to 425°F (220°C).
    10. Bake: Bake 20–25 minutes until the top is golden and the edges are crisp.

      If using a sheet pan, start checking at 18 minutes.

    11. Finish: Brush the hot focaccia with a little more olive oil for shine and flavor. Let it cool 10 minutes, then cut into squares or strips. Add extra Parmesan at the table if you want.

    How to Store

    • Room temperature: Keep leftovers in an airtight container or wrapped in foil for up to 2 days.

      Recrisp in a 350°F oven for 8–10 minutes.

    • Freezer: Cool completely, wrap tightly, and freeze up to 2 months. Reheat from frozen at 350°F for 12–15 minutes.
    • Avoid the fridge: Refrigeration dries bread out faster and dulls the texture.

    Why This is Good for You

    • Olive oil provides heart-friendly fats and helps you feel satisfied with a smaller piece.
    • Garlic brings antioxidants and bold flavor, so you can use less salt overall.
    • Homemade means you control ingredients—no unnecessary preservatives or excess sugar.

    What Not to Do

    • Don’t rush the rise. Underproofed dough bakes dense and tough.
    • Don’t skimp on oil in the pan. You’ll lose that signature crisp bottom and risk sticking.
    • Don’t use cold water. Yeast needs warmth to activate; aim for bath-warm, not hot.
    • Don’t overload with cheese. Too much can weigh down the dough and burn on top.

    Alternatives

    • Cheese swap: Try Pecorino Romano or Asiago for a sharper bite.
    • Herb twist: Add oregano, basil, or chives. For heat, sprinkle red pepper flakes.
    • Garlic butter: Replace some olive oil with melted butter for a richer flavor.
    • Whole wheat: Substitute up to 1 cup whole wheat flour for a nuttier taste; add 1–2 tablespoons extra water if needed.
    • Pan choice: Bake in a cast-iron skillet for an extra-crisp edge and rustic look.

    Can I make the dough ahead?

    Yes.

    After the first rise, cover and refrigerate up to 24 hours. Bring to room temperature, transfer to the pan, and continue with dimpling, topping, and the second rise.

    What if I only have instant yeast?

    You can skip the proofing step. Mix instant yeast directly with the flour and salt, then add warm water and oil.

    Rising times will be similar.

    How do I prevent the garlic from burning?

    Coat it in oil and press some into the dimples. Keep the pieces small but not paper-thin, and avoid scattering dry garlic on top without oil.

    Why is my focaccia dense?

    Common causes are not enough hydration, short rise times, or too much flour. The dough should be soft and slightly sticky before the first rise.

    Can I add toppings like olives or tomatoes?

    Absolutely.

    Press halved cherry tomatoes, sliced olives, or thin onion into the dough after dimpling. Pat them dry first and reduce added salt if your toppings are salty.

    In Conclusion

    This garlic parmesan focaccia delivers bakery-quality results with simple steps and pantry staples. The dough is easy, the texture is light, and the flavor is bold enough to stand on its own.

    Serve it warm with dinner, use it for sandwiches, or enjoy a square as a snack. Once you make it at home, it’ll be your go-to side dish all year long.

    Garlic Parmesan Focaccia Bread Recipe – Easy Homemade Side Dish

    Prep Time 15 minutes
    Cook Time 20 minutes
    Total Time 35 minutes
    Servings 8 servings

    Ingredients
      

    • All-purpose flour (3 1/2 cups)
    • Warm water, about 105–110°F (1 1/2 cups)
    • Active dry yeast (2 1/4 teaspoons, one packet)
    • Granulated sugar or honey (1 teaspoon)
    • Kosher salt (2 teaspoons, divided)
    • Extra-virgin olive oil (1/3 cup, plus more for the pan and drizzling)
    • Fresh garlic (3–4 cloves, minced)
    • Grated Parmesan cheese (1/2 cup, plus more for serving if you like)
    • Fresh rosemary or thyme (optional, 1–2 teaspoons chopped)
    • Flaky sea salt (optional, for finishing)

    Instructions
     

    • Proof the yeast: In a large bowl, mix warm water, sugar or honey, and yeast. Let it sit 5–10 minutes until foamy. If it doesn’t foam, start over with fresh yeast.
    • Make the dough: Stir in 2 cups of flour and 1 1/2 teaspoons kosher salt. Add 2 tablespoons olive oil. Mix, then add the remaining flour gradually until a sticky dough forms. It should be soft and slightly tacky, not dry.
    • First rise: Drizzle 1 tablespoon olive oil over the dough and turn it to coat. Cover the bowl and let rise in a warm spot for 45–60 minutes, until doubled.
    • Prepare the pan: Generously oil a 9×13-inch baking pan or a large sheet pan (about 2 tablespoons oil). The oil helps the crust crisp and prevents sticking.
    • Transfer and stretch: Tip the dough into the pan. With oiled hands, gently stretch and press it toward the edges. If it springs back, rest 5–10 minutes and stretch again.
    • Garlic oil: In a small bowl, mix 2 tablespoons olive oil with the minced garlic and chopped herbs (if using). Set aside to let flavors mingle.
    • Dimple the dough: After the dough relaxes in the pan for 15–20 minutes, use your fingertips to press deep dimples all over. This helps even baking and holds the oil.
    • Top it: Spoon or brush the garlic oil over the surface, making sure some gets into the dimples. Sprinkle evenly with Parmesan and the remaining 1/2 teaspoon kosher salt. Add flaky sea salt if you like.
    • Second rise: Let the topped dough rest 20–30 minutes while you preheat the oven to 425°F (220°C).
    • Bake: Bake 20–25 minutes until the top is golden and the edges are crisp. If using a sheet pan, start checking at 18 minutes.
    • Finish: Brush the hot focaccia with a little more olive oil for shine and flavor. Let it cool 10 minutes, then cut into squares or strips. Add extra Parmesan at the table if you want.
  • Orange Creamsicle Cake – Bright, Citrusy, and Comforting

    Orange Creamsicle Cake – Bright, Citrusy, and Comforting

    Think of a childhood creamsicle—sweet vanilla and sunny orange—turned into a soft, fluffy cake. This orange creamsicle cake is light, moist, and full of bright citrus flavor without being too sweet. It’s simple enough for a weeknight treat, yet pretty enough for birthdays and showers.

    The best part? You don’t need fancy tools or rare ingredients—just a few pantry staples and fresh oranges.

    Why This Recipe Works

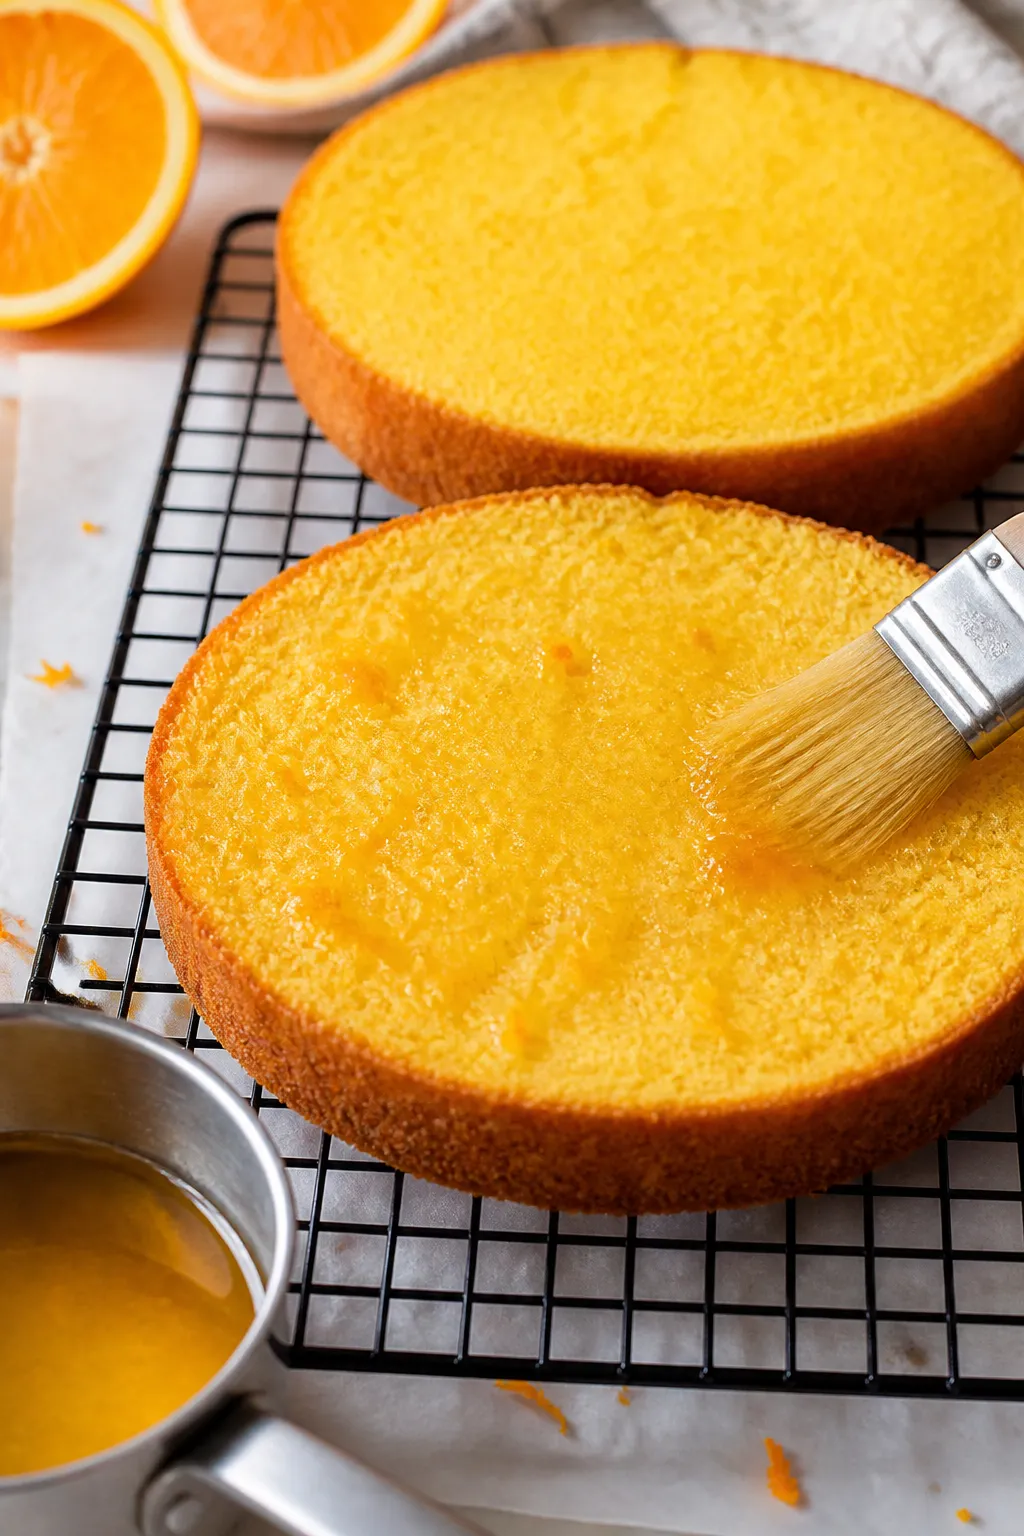
    Cooking process: Close-up of freshly baked orange creamsicle cake layers just out of the pans, being

    This cake layers fresh orange zest, juice, and a touch of vanilla to mimic that classic creamsicle taste. Using both butter and oil gives the crumb a perfect balance: rich flavor with long-lasting moisture.

    A quick soak of orange syrup ensures every bite stays tender. The whipped cream cheese frosting brings tang and creaminess, so the cake tastes bright, not heavy.

    What You’ll Need

    • All-purpose flour: The base for a tender crumb.
    • Granulated sugar: Sweetens and helps with structure.
    • Baking powder and baking soda: For lift and lightness.
    • Salt: Balances sweetness and boosts flavor.
    • Unsalted butter (room temp): Rich flavor and structure.
    • Neutral oil (canola or vegetable): Adds moisture.
    • Eggs (room temp): Bind and add richness.
    • Whole milk or buttermilk: Keeps the cake soft.
    • Fresh oranges: Zest and juice for bold citrus.
    • Vanilla extract: Essential for the creamsicle vibe.
    • Orange extract (optional): For extra citrus punch.
    • Powdered sugar: For the frosting.
    • Cream cheese (softened): Tangy, creamy frosting base.
    • Heavy cream: Whips the frosting light and fluffy.
    • Butter (for frosting): Smooth texture and stability.

    Instructions

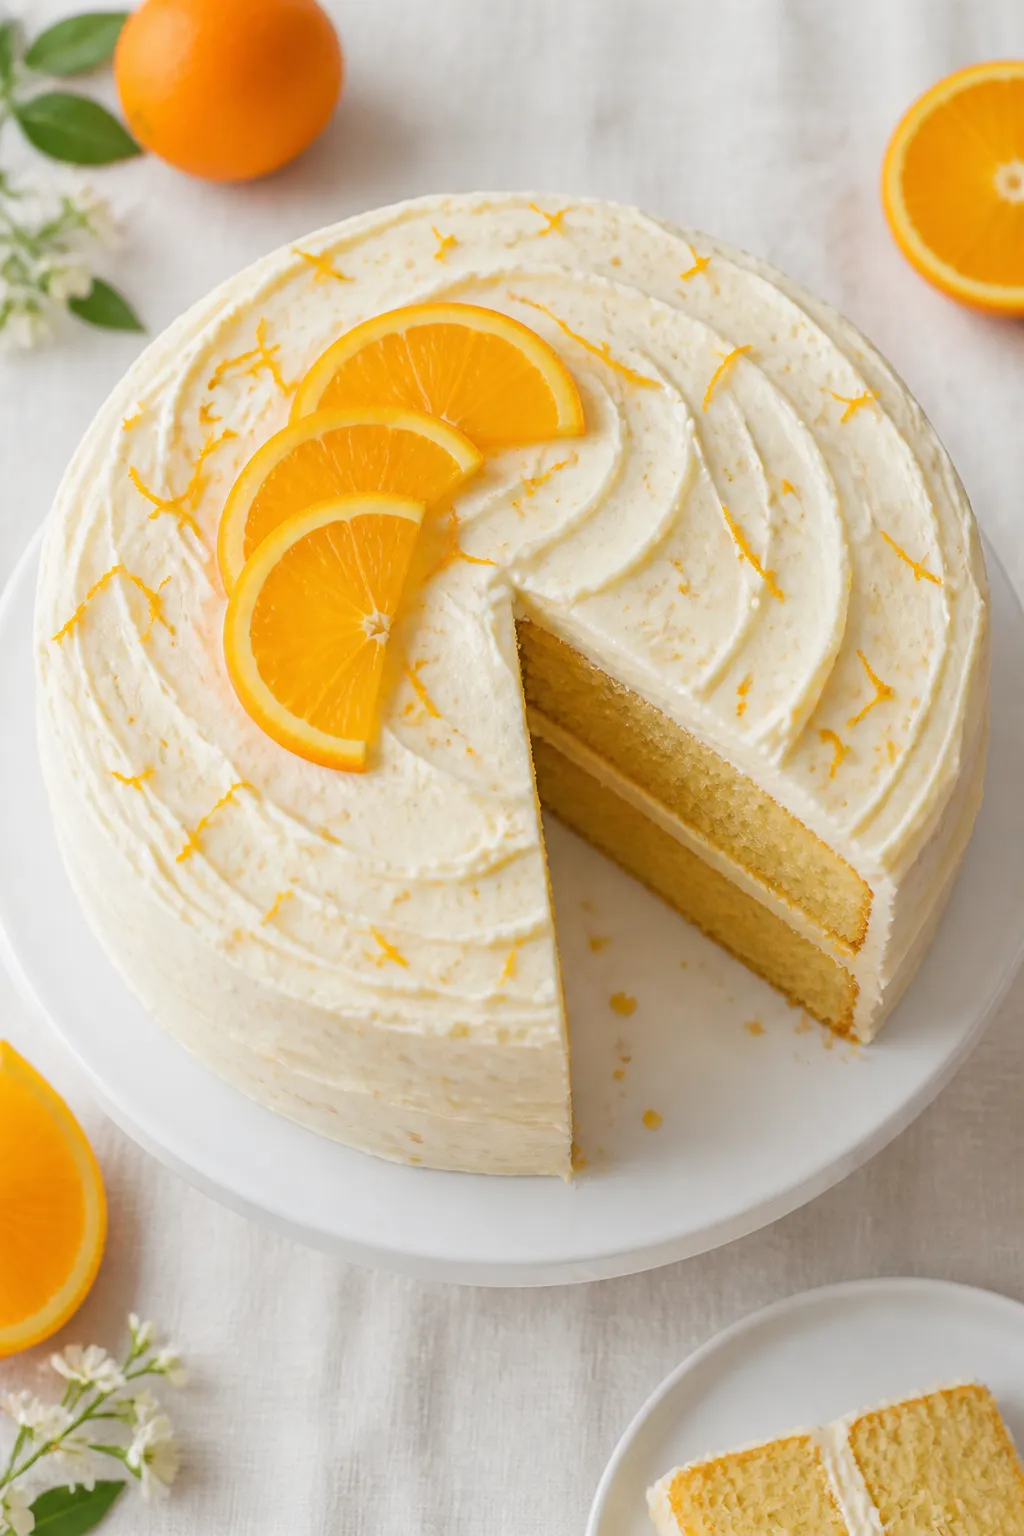
    Final dish, tasty top view: Overhead shot of a two-layer Orange Creamsicle Cake fully frosted with w
    1. Prep: Heat oven to 350°F (175°C). Grease and line two 8-inch round cake pans with parchment.
    2. Mix dry: In a bowl, whisk 2 1/2 cups flour, 1 1/2 tsp baking powder, 1/2 tsp baking soda, and 1/2 tsp salt.
    3. Citrus base: In a large bowl, combine 1 cup sugar with the zest of 2 oranges.

      Rub with fingers to release oils.

    4. Cream: Add 1/2 cup softened butter to the sugar-zest mixture. Beat until light and fluffy, 2–3 minutes.
    5. Wet ingredients: Beat in 1/4 cup neutral oil, then 3 eggs, one at a time. Stir in 1 tsp vanilla and 1–2 tsp orange extract (optional).
    6. Liquid: Combine 3/4 cup milk with 1/3 cup fresh orange juice.
    7. Combine: Add dry ingredients to the butter mixture in two parts, alternating with the milk-orange mix.

      Mix just until smooth.

    8. Bake: Divide batter between pans. Bake 23–28 minutes, until a toothpick comes out clean. Cool 10 minutes, then turn out onto racks to cool fully.
    9. Orange syrup (optional but great): Simmer 1/4 cup orange juice with 2 tbsp sugar until slightly thick, 3–4 minutes.

      Brush over cooled cake layers.

    10. Frosting: Beat 8 oz softened cream cheese and 6 tbsp softened butter until smooth. Add 2 1/2–3 cups powdered sugar, 1 tsp vanilla, and a pinch of salt. Beat until creamy.

      Slowly stream in 1/3 cup cold heavy cream and whip until fluffy. Fold in 1 tsp orange zest for extra citrus.

    11. Assemble: Place first layer on a stand. Spread frosting, add second layer, and frost top and sides.

      Swirl for a soft, rustic finish. Garnish with extra zest or thin orange slices.

    How to Store

    Refrigerate: Cover and refrigerate for up to 4 days. The flavors deepen after day one.

    Let slices sit at room temp for 15–20 minutes before serving.

    Freeze: Wrap unfrosted layers tightly and freeze up to 2 months. Thaw in the fridge overnight. Frost before serving.

    Leftover frosted slices can be frozen individually for quick treats.

    Why This is Good for You

    Fresh orange zest and juice bring vitamin C and natural antioxidants. The cake uses a mix of fat sources for better texture, so a small slice is satisfying without needing a big serving. The cream cheese frosting offers protein and calcium compared to pure buttercream.

    It’s a feel-good dessert that leans bright and balanced rather than heavy.

    Common Mistakes to Avoid

    • Overmixing the batter: This makes the cake tough. Mix just until combined.
    • Skipping room-temp ingredients: Cold eggs and butter cause curdling and uneven texture.
    • Using bottled juice only: You’ll miss the fresh zest oils that create real creamsicle flavor.
    • Overbaking: Check early. A dry cake can’t be fully rescued, even with syrup.
    • Too much extract: Orange extract is strong.

      Start small and taste as you go.

    Alternatives

    • Sheet cake: Bake in a 9×13-inch pan for 28–34 minutes; easier to transport and frost.
    • Cupcakes: Bake 16–20 minutes; great for parties.
    • Dairy-free: Use plant milk and dairy-free butter/cream cheese. Whip coconut cream for a lighter topping.
    • Lighter frosting: Swap frosting for lightly sweetened whipped cream with vanilla and a little zest.
    • Gluten-free: Use a 1:1 gluten-free flour blend with xanthan gum; let batter rest 10 minutes before baking.

    FAQ

    Can I use blood oranges or mandarins?

    Yes. Blood oranges add a rosy hue and a berry note.

    Mandarins are sweeter and milder; balance with a touch of lemon juice if needed.

    What if I don’t have cream cheese?

    Use buttercream and add a tablespoon of sour cream or Greek yogurt for tang. Keep frosting slightly loose for that creamy finish.

    How do I make the flavor stronger?

    Add extra zest, a few drops of orange oil, or reduce the orange syrup longer. Keep extract modest to avoid a candy-like taste.

    Can I make it the day before?

    Absolutely.

    Bake, cool, and frost the cake, then chill overnight. The texture sets nicely, and the citrus flavor blooms by day two.

    How do I prevent frosting from sliding?

    Cool layers fully and do a quick crumb coat. Chill for 15 minutes, then finish frosting.

    Keep the cake cool until serving.

    Wrapping Up

    This orange creamsicle cake is sunny, soft, and nostalgic in all the best ways. It’s easy to bake, easy to love, and just different enough to feel special. Keep it classic with cream cheese frosting or try a lighter whipped topping—either way, it’s a bright spot on any table.

    Orange Creamsicle Cake – Bright, Citrusy, and Comforting

    Prep Time 20 minutes
    Cook Time 30 minutes
    Total Time 50 minutes
    Servings 12 servings

    Ingredients
      

    • All-purpose flour: The base for a tender crumb.
    • Granulated sugar: Sweetens and helps with structure.
    • Baking powder and baking soda: For lift and lightness.
    • Salt: Balances sweetness and boosts flavor.
    • Unsalted butter (room temp): Rich flavor and structure.
    • Neutral oil (canola or vegetable): Adds moisture.
    • Eggs (room temp): Bind and add richness.
    • Whole milk or buttermilk: Keeps the cake soft.
    • Fresh oranges: Zest and juice for bold citrus.
    • Vanilla extract: Essential for the creamsicle vibe.
    • Orange extract (optional): For extra citrus punch.
    • Powdered sugar: For the frosting.
    • Cream cheese (softened): Tangy, creamy frosting base.
    • Heavy cream: Whips the frosting light and fluffy.
    • Butter (for frosting): Smooth texture and stability.

    Instructions
     

    • Prep: Heat oven to 350°F (175°C). Grease and line two 8-inch round cake pans with parchment.
    • Mix dry: In a bowl, whisk 2 1/2 cups flour, 1 1/2 tsp baking powder, 1/2 tsp baking soda, and 1/2 tsp salt.
    • Citrus base: In a large bowl, combine 1 cup sugar with the zest of 2 oranges. Rub with fingers to release oils.
    • Cream: Add 1/2 cup softened butter to the sugar-zest mixture. Beat until light and fluffy, 2–3 minutes.
    • Wet ingredients: Beat in 1/4 cup neutral oil, then 3 eggs, one at a time. Stir in 1 tsp vanilla and 1–2 tsp orange extract (optional).
    • Liquid: Combine 3/4 cup milk with 1/3 cup fresh orange juice.
    • Combine: Add dry ingredients to the butter mixture in two parts, alternating with the milk-orange mix. Mix just until smooth.
    • Bake: Divide batter between pans. Bake 23–28 minutes, until a toothpick comes out clean. Cool 10 minutes, then turn out onto racks to cool fully.
    • Orange syrup (optional but great): Simmer 1/4 cup orange juice with 2 tbsp sugar until slightly thick, 3–4 minutes. Brush over cooled cake layers.
    • Frosting: Beat 8 oz softened cream cheese and 6 tbsp softened butter until smooth. Add 2 1/2–3 cups powdered sugar, 1 tsp vanilla, and a pinch of salt. Beat until creamy. Slowly stream in 1/3 cup cold heavy cream and whip until fluffy. Fold in 1 tsp orange zest for extra citrus.
    • Assemble: Place first layer on a stand. Spread frosting, add second layer, and frost top and sides. Swirl for a soft, rustic finish. Garnish with extra zest or thin orange slices.
  • Fudgy Keto Brownies – Easy One Bowl Recipe!

    Fudgy Keto Brownies – Easy One Bowl Recipe!

    If you’re craving a rich, chocolatey treat without the sugar crash, these fudgy keto brownies are the answer. They’re made in one bowl, bake up in about 20 minutes, and deliver that dense, gooey center you want in a brownie. No complicated steps, no hard-to-find ingredients.

    Just simple, reliable goodness that happens to be low carb. Keep this recipe on standby for weeknights, parties, or whenever the chocolate urge hits.

    What Makes This Recipe So Good

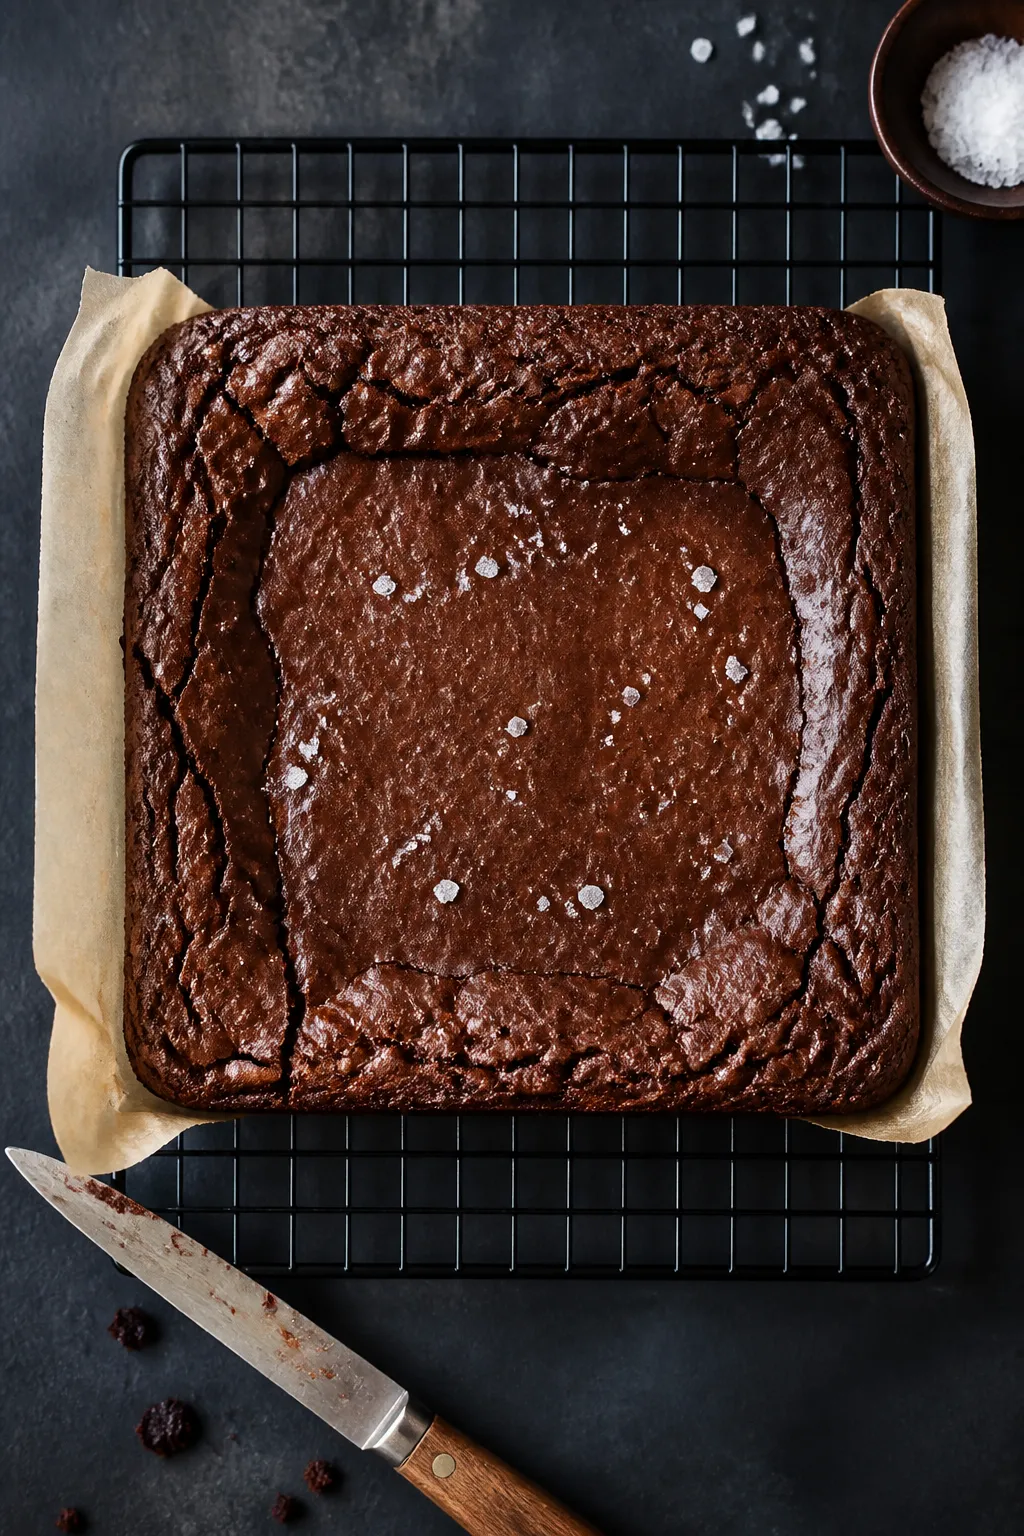
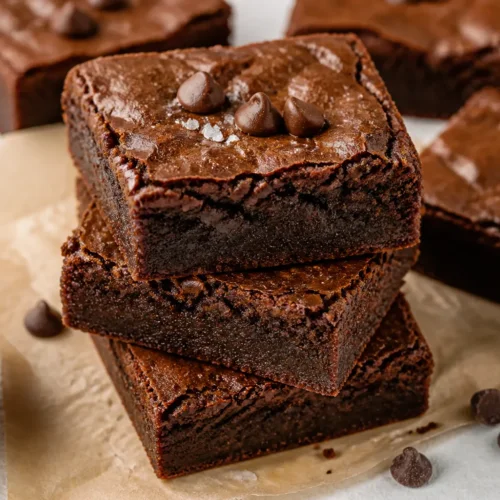
    Overhead shot of a freshly baked 8x8 pan of fudgy keto brownies on a cooling rack, parchment overhan
    • One bowl, minimal mess: Everything mixes in a single bowl for easy cleanup.
    • Super fudgy texture: Almond flour and cocoa give a dense, rich crumb with zero dryness.
    • Truly low carb: Uses keto-friendly sweetener and almond flour.
    • Quick to bake: From bowl to oven in minutes, done in around 20 minutes.
    • Customizable: Add nuts, chips, espresso, or a swirl of nut butter.

    Shopping List

    • Unsalted butter (or coconut oil)
    • Granulated erythritol or a keto-friendly sweetener blend
    • Large eggs
    • Vanilla extract
    • Almond flour (super-fine)
    • Unsweetened cocoa powder (Dutch-processed or natural)
    • Sea salt
    • Baking powder
    • Optional mix-ins: sugar-free chocolate chips, chopped walnuts or pecans
    • Optional flavor boosts: espresso powder, cinnamon

    How to Make It

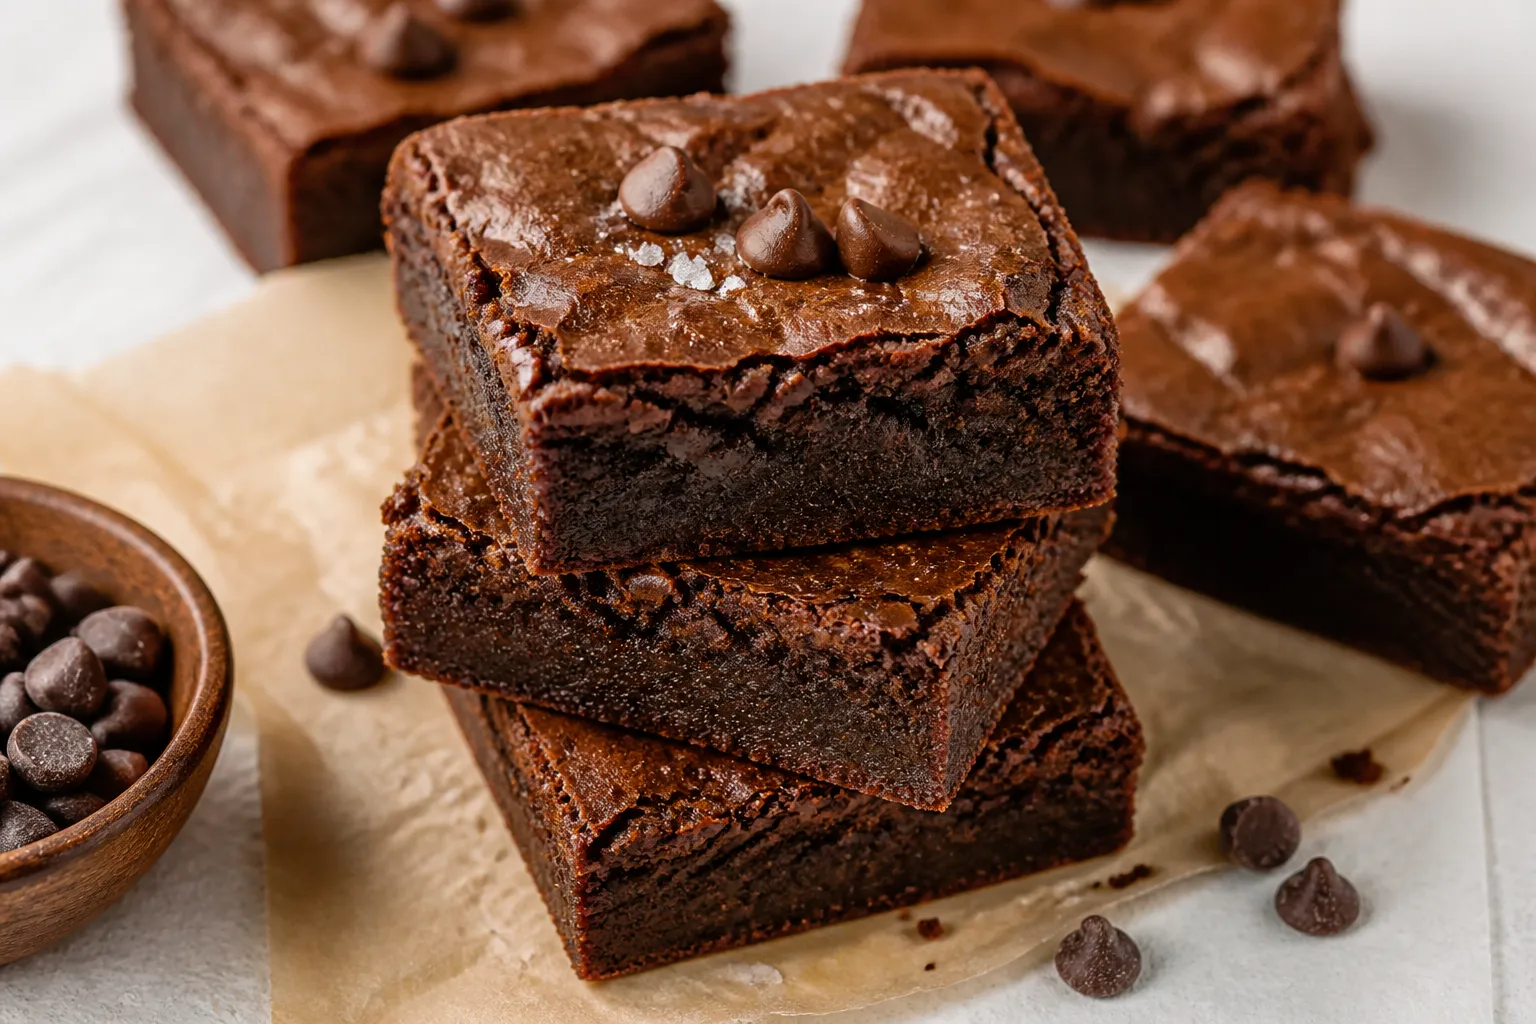
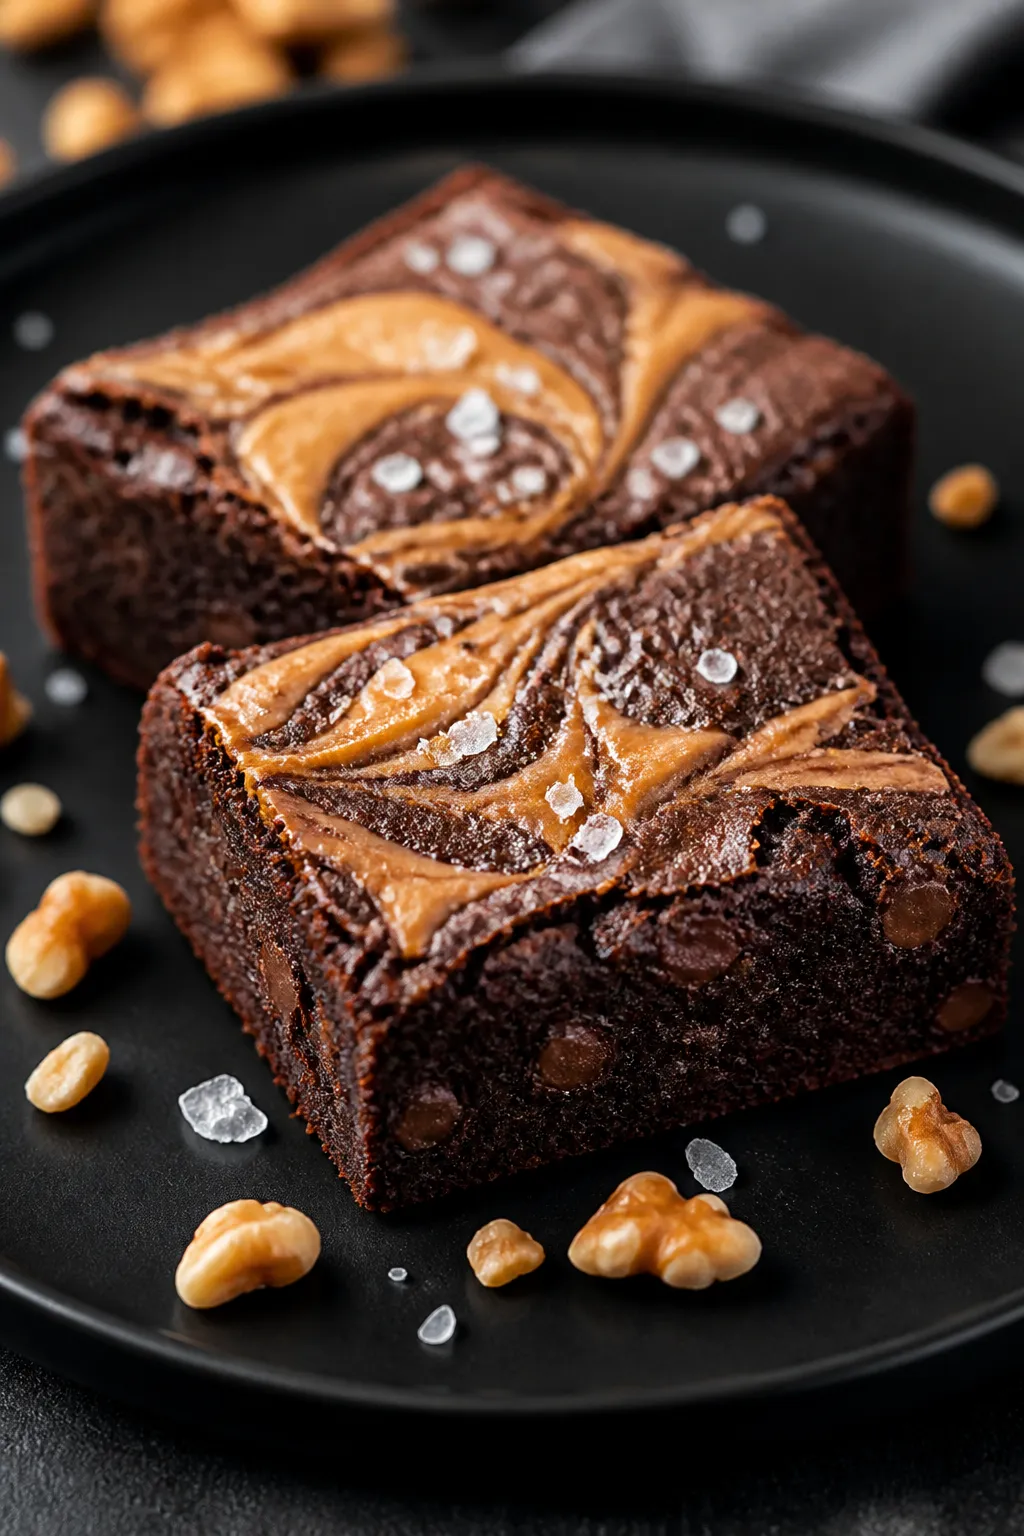
    Close-up detail of sliced keto brownies plated for serving: two thick, dense squares with a gooey in
    1. Prep the pan: Heat oven to 350°F (175°C). Line an 8×8-inch pan with parchment, leaving overhang for easy lifting.
    2. Melt butter: In a medium bowl, microwave butter until melted and warm, not sizzling.

      Let cool 1–2 minutes.

    3. Sweeten: Whisk in the erythritol until mostly dissolved. A few grains are fine.
    4. Add eggs and vanilla: Whisk in eggs one at a time, then add vanilla. Mix until glossy and smooth.
    5. Dry ingredients: Add almond flour, cocoa, salt, and baking powder.

      Stir with a spatula until just combined and thick.

    6. Optional mix-ins: Fold in sugar-free chocolate chips or nuts for extra texture.
    7. Bake: Spread batter evenly in the pan. Bake 18–22 minutes, until the center is just set and a toothpick comes out with a few moist crumbs.
    8. Cool completely: Let brownies cool in the pan at least 30–45 minutes. Lift out and slice with a sharp knife, wiping between cuts.

    Storage Instructions

    • Room temperature: Store in an airtight container for up to 2 days.
    • Refrigerator: Keeps well for 5–6 days.

      The texture gets even fudgier.

    • Freezer: Wrap slices individually and freeze up to 2 months. Thaw at room temperature or warm briefly in the microwave.

    Benefits of This Recipe

    • Low in net carbs: Great for keto, low-carb, and sugar-conscious diets.
    • Gluten-free: Almond flour makes these naturally gluten-free.
    • Satisfying: Healthy fats help keep you fuller longer.
    • Simple ingredients: No specialty tools or complicated steps.

    Pitfalls to Watch Out For

    • Overbaking: Pull them when slightly underdone. They continue to set as they cool.
    • Using coarse almond meal: This can make the brownies gritty.

      Go for super-fine almond flour.

    • Sweetener swap issues: Allulose makes brownies softer; pure erythritol can crystallize. A blend often works best.
    • Skipping the cool-down: Slicing too early leads to crumbling. Patience pays off.

    Recipe Variations

    • Mocha Brownies: Add 1 teaspoon espresso powder to boost chocolate flavor.
    • Nutty Crunch: Fold in 1/2 cup chopped walnuts or pecans.
    • Double Chocolate: Stir in 1/3–1/2 cup sugar-free chocolate chips.
    • Salted Caramel Vibe: Sprinkle flaky sea salt on top right after baking.
    • Peanut Butter Swirl: Dollop 3–4 tablespoons natural peanut butter on top of the batter and swirl with a knife.
    • Dairy-Free: Use coconut oil instead of butter and dairy-free chips.

    FAQ

    Can I use coconut flour instead of almond flour?

    Coconut flour behaves very differently and is much more absorbent.

    It won’t be a 1:1 swap. If you must use coconut flour, you’ll need far less and more eggs, which changes the texture. For best results, stick to almond flour.

    Which sweetener works best?

    A blend of erythritol and monk fruit or stevia usually gives the most balanced sweetness and texture.

    Allulose makes brownies very soft and can brown quickly. Pure erythritol can re-crystallize as they cool. If unsure, use a blend designed for baking.

    How do I know when they’re done?

    Look for set edges and a slightly soft center.

    A toothpick should come out with moist crumbs, not wet batter. Start checking at 18 minutes and go from there.

    Can I make these egg-free?

    Eggs provide structure and that fudgy chew. Flax or chia eggs won’t deliver the same result.

    If you try it, expect a softer, more fragile brownie.

    What pan size should I use?

    An 8×8-inch pan is ideal for thicker, fudgier brownies. A 9×9-inch pan will give thinner brownies and may bake a couple minutes faster.

    Final Thoughts

    These one-bowl keto brownies prove you don’t need sugar or complicated steps to get a deep, chocolatey fix. Keep the ingredients on hand, watch the bake time, and let them cool for the perfect slice.

    Once you try them, they’ll become your go-to low-carb dessert for any occasion.

    Fudgy Keto Brownies – Easy One Bowl Recipe!

    Prep Time 10 minutes
    Cook Time 20 minutes
    Total Time 30 minutes
    Servings 16 servings

    Ingredients
      

    • Unsalted butter (or coconut oil)
    • Granulated erythritol or a keto-friendly sweetener blend
    • Large eggs
    • Vanilla extract
    • Almond flour (super-fine)
    • Unsweetened cocoa powder (Dutch-processed or natural)
    • Sea salt
    • Baking powder
    • Optional mix-ins: sugar-free chocolate chips, chopped walnuts or pecans
    • Optional flavor boosts: espresso powder, cinnamon

    Instructions
     

    • Prep the pan: Heat oven to 350°F (175°C). Line an 8×8-inch pan with parchment, leaving overhang for easy lifting.
    • Melt butter: In a medium bowl, microwave butter until melted and warm, not sizzling. Let cool 1–2 minutes.
    • Sweeten: Whisk in the erythritol until mostly dissolved. A few grains are fine.
    • Add eggs and vanilla: Whisk in eggs one at a time, then add vanilla. Mix until glossy and smooth.
    • Dry ingredients: Add almond flour, cocoa, salt, and baking powder. Stir with a spatula until just combined and thick.
    • Optional mix-ins: Fold in sugar-free chocolate chips or nuts for extra texture.
    • Bake: Spread batter evenly in the pan. Bake 18–22 minutes, until the center is just set and a toothpick comes out with a few moist crumbs.
    • Cool completely: Let brownies cool in the pan at least 30–45 minutes. Lift out and slice with a sharp knife, wiping between cuts.
  • Stuffed Portabella Mushrooms – A Savory, Satisfying Favorite

    Stuffed Portabella Mushrooms – A Savory, Satisfying Favorite

    These stuffed portabella mushrooms hit that perfect spot between hearty and wholesome. They’re meaty, full of flavor, and easy enough for a weeknight. Serve them as a main dish with a simple salad, or make them a standout side for steak or chicken.

    The filling is cozy and cheesy, the caps stay juicy, and the whole thing feels special without a lot of fuss.

    What Makes This Recipe So Good

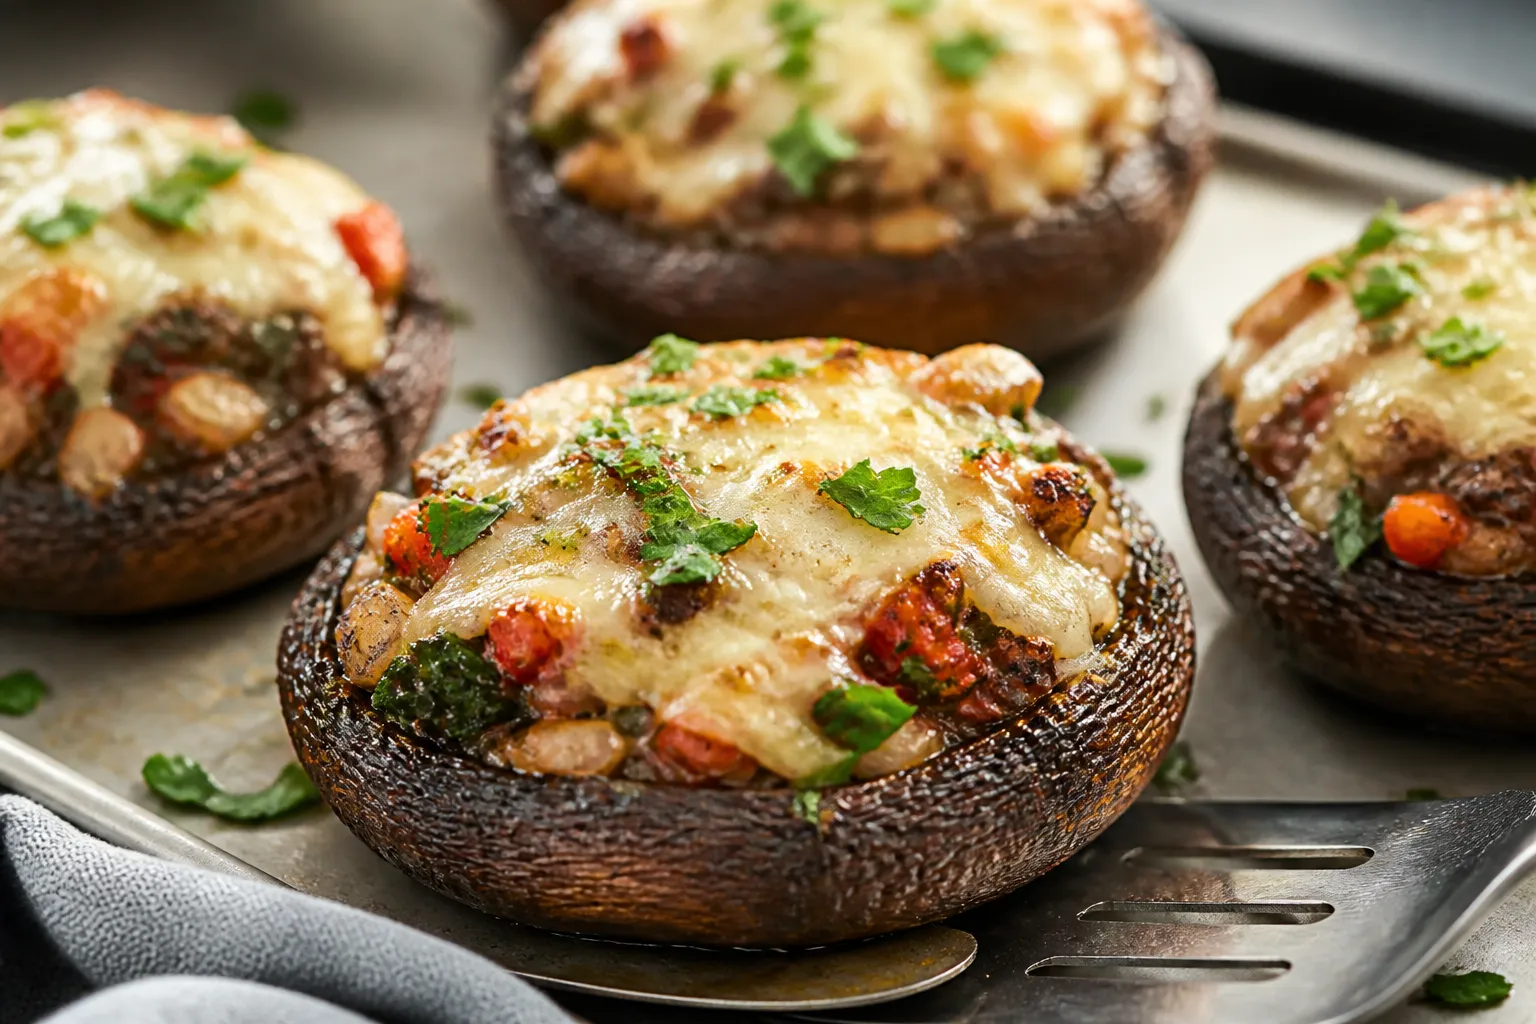
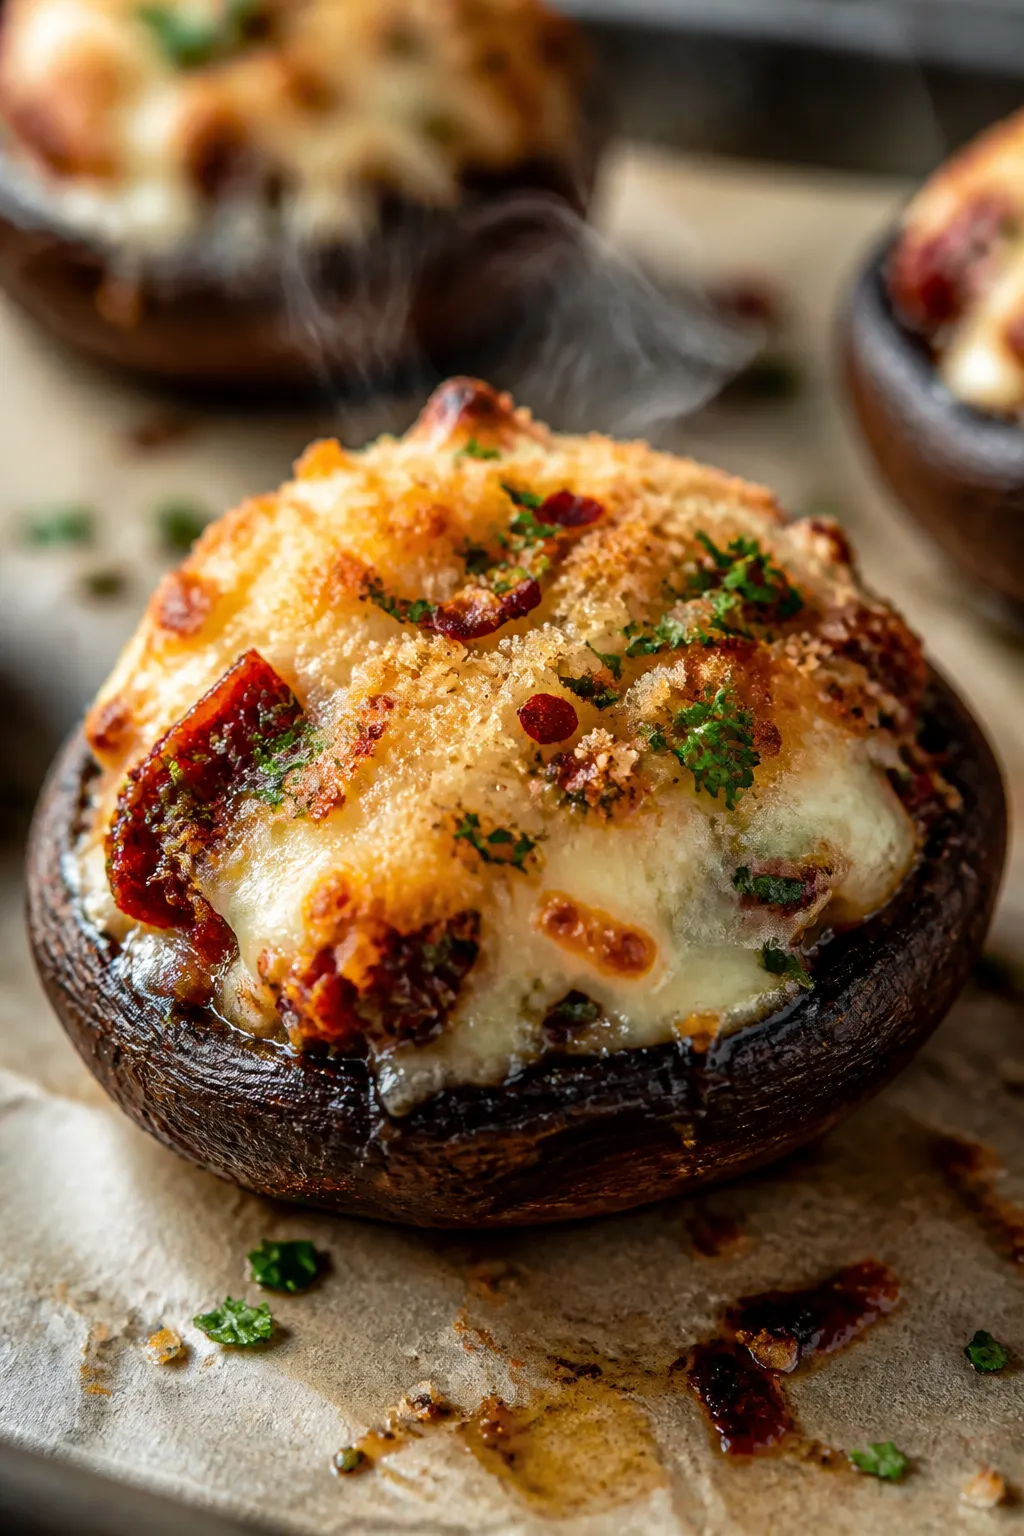
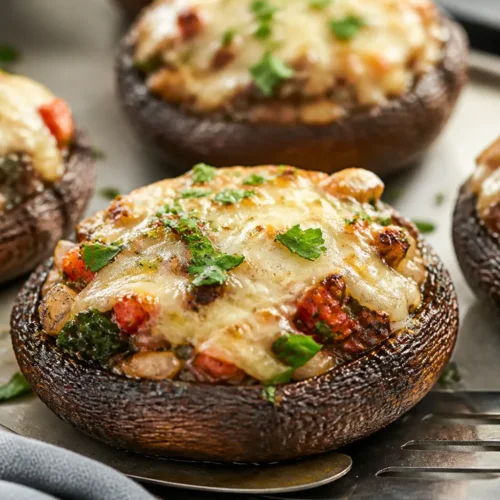
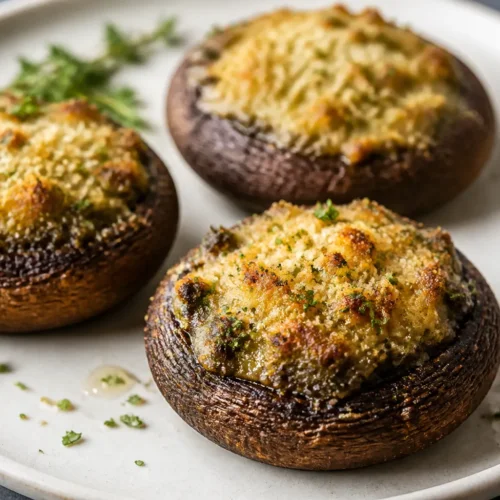
    Close-up detail shot of a just-baked stuffed portabella mushroom cap on a parchment-lined sheet pan,
    • Big flavor, simple steps: Garlic, herbs, and a touch of balsamic bring out the mushroom’s natural savoriness.
    • Flexible filling: Use spinach, sausage, breadcrumbs, or quinoa—whatever you like or have on hand.
    • Great texture: Toasted breadcrumbs and melted cheese give a crisp top and a creamy middle.
    • Meal-prep friendly: Assemble ahead and bake when you’re ready.
    • Naturally crowd-pleasing: Works for vegetarians with easy swaps for gluten-free or low-carb diets.

    Shopping List

    • 4 large portabella mushroom caps, stems and gills removed
    • 2 tablespoons olive oil, plus more for brushing
    • 1 small yellow onion, finely chopped
    • 3 cloves garlic, minced
    • 3 cups fresh spinach, chopped (or 1 cup thawed frozen spinach, squeezed dry)
    • 1/2 cup sun-dried tomatoes, chopped (oil-packed, drained)
    • 1/2 cup breadcrumbs (panko or regular)
    • 1/3 cup grated Parmesan
    • 3/4 cup shredded mozzarella (or provolone)
    • 2 tablespoons fresh parsley, chopped (or 1 teaspoon dried Italian seasoning)
    • 1 tablespoon balsamic vinegar
    • 1/2 teaspoon crushed red pepper flakes (optional)
    • Salt and black pepper
    • Lemon wedges, for serving (optional)
    • Optional add-ins: cooked crumbled Italian sausage, cooked quinoa, or toasted pine nuts

    Step-by-Step Instructions

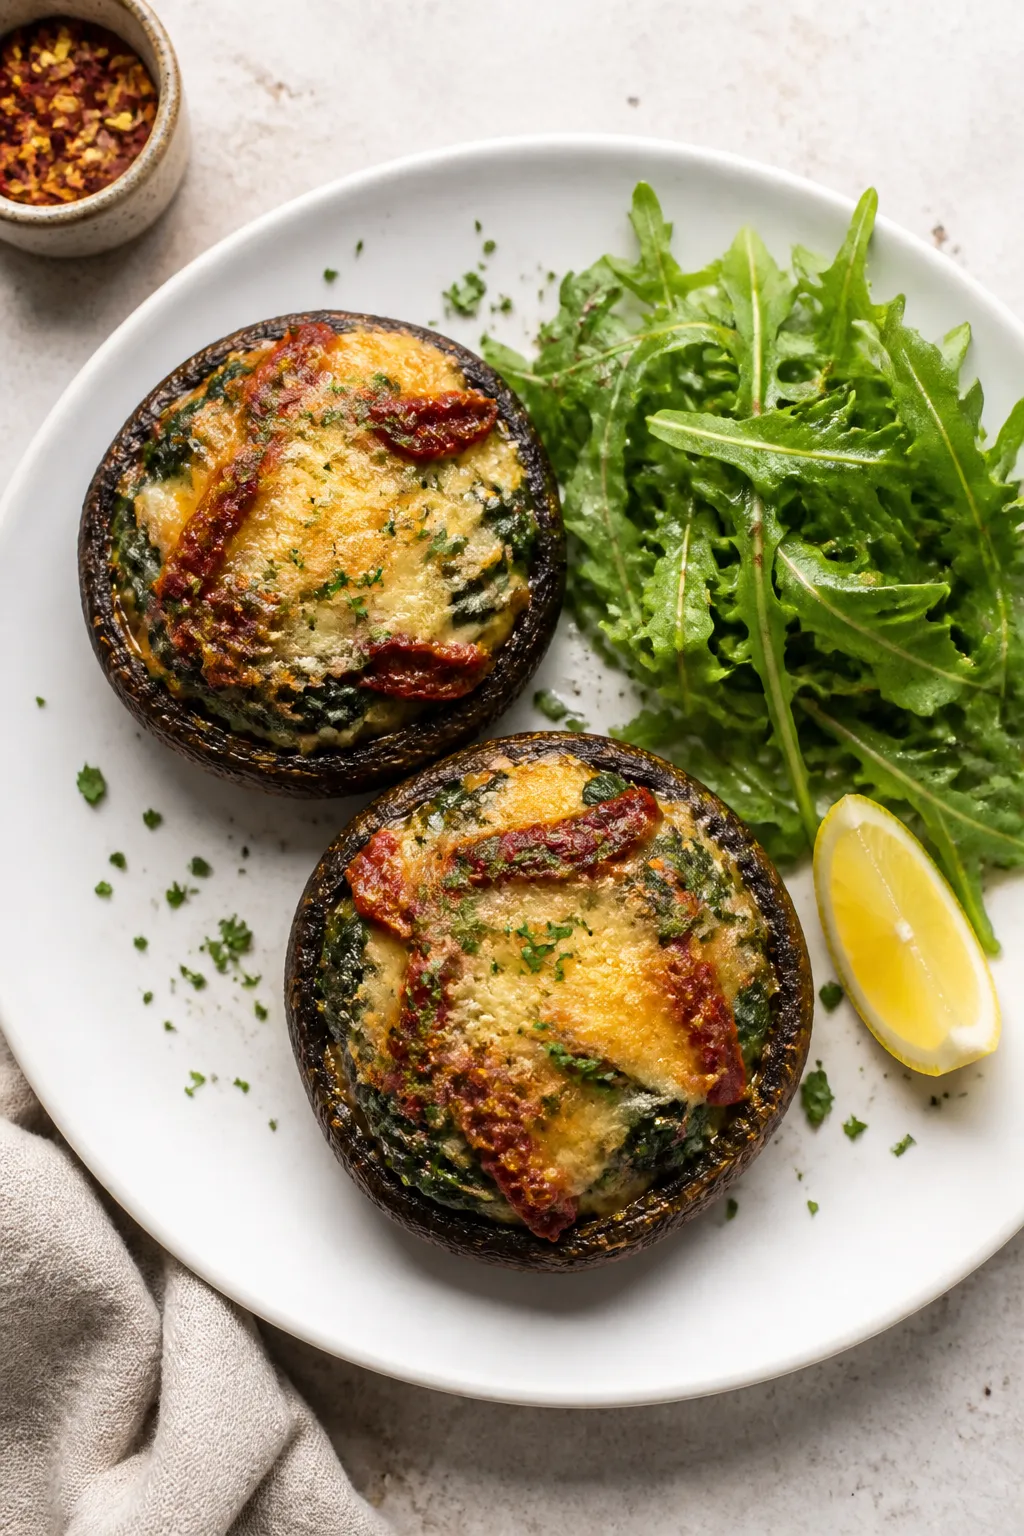
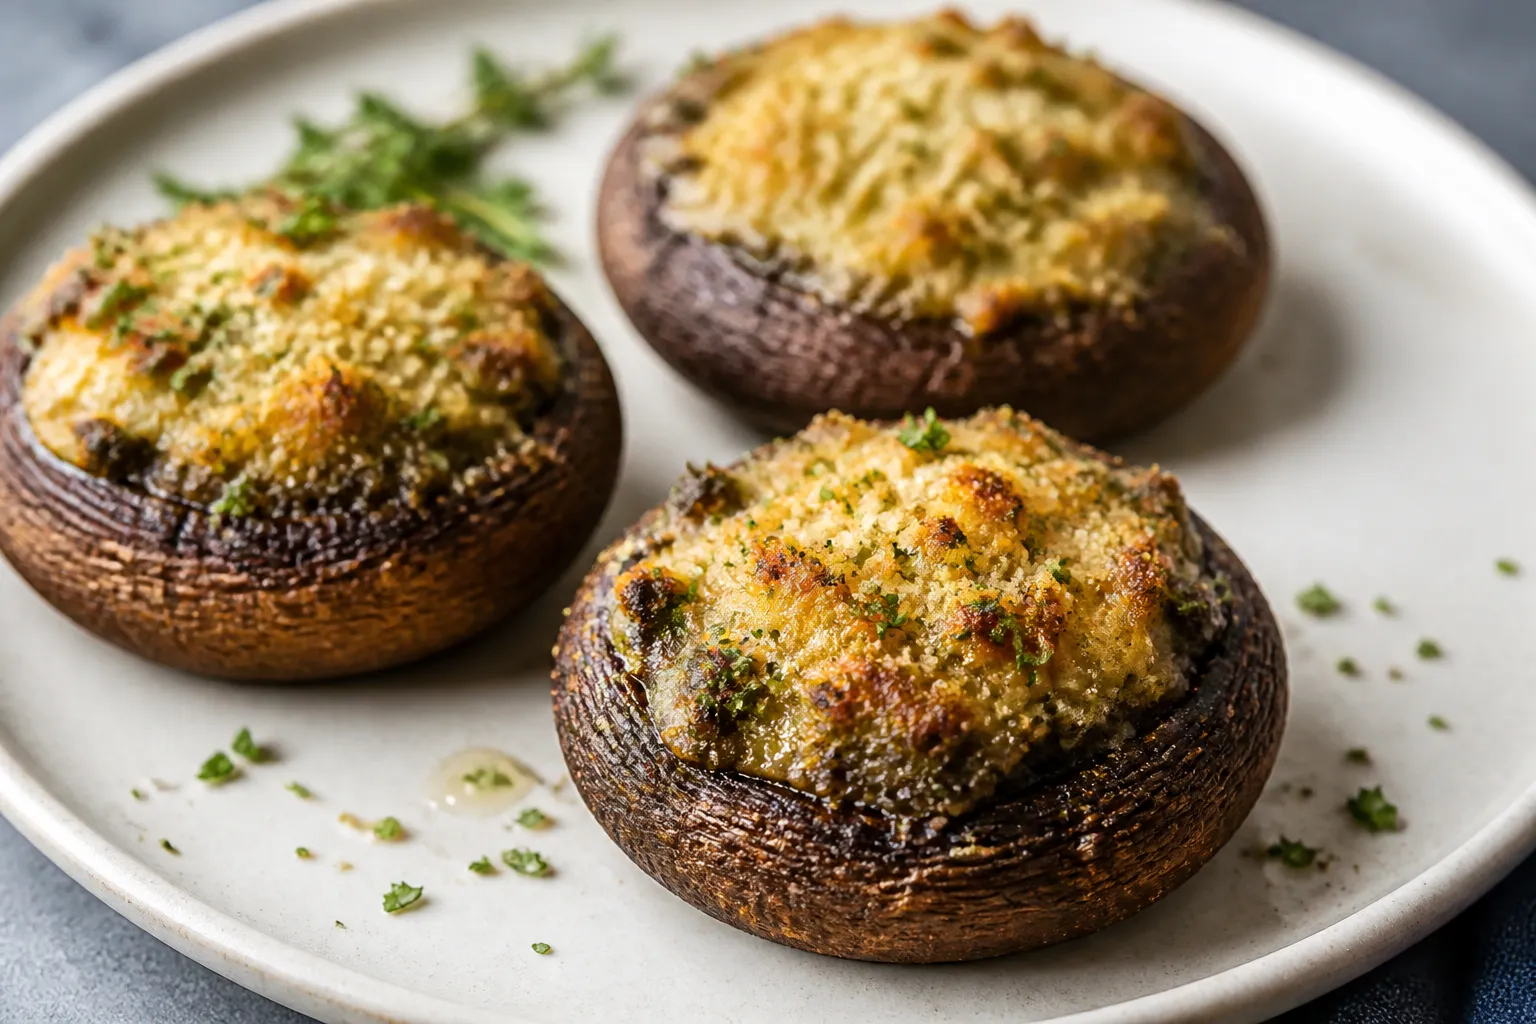
    Overhead final presentation of two stuffed portabella mushrooms plated as a main dish on a matte whi
    1. Prep the mushrooms: Heat the oven to 400°F (200°C). Line a sheet pan with parchment. Gently twist off stems and scrape out gills with a spoon.

      Brush both sides with olive oil and season with salt and pepper.

    2. Pre-bake the caps: Place mushrooms gill side down and bake for 10 minutes. Flip to gill side up and let any moisture drain off. This step helps avoid soggy bottoms.
    3. Cook the aromatics: In a skillet over medium heat, add 2 tablespoons olive oil.

      Sauté onion with a pinch of salt until soft, 4–5 minutes. Add garlic and cook 30 seconds until fragrant.

    4. Add the veggies: Stir in spinach and cook until wilted. Mix in sun-dried tomatoes and turn off the heat.
    5. Build the filling: Stir in breadcrumbs, Parmesan, half the mozzarella, parsley, balsamic, red pepper flakes, and a few grinds of black pepper.

      Taste and adjust salt. Fold in any optional add-ins now.

    6. Stuff the caps: Spoon the filling evenly into the mushrooms, mounding slightly. Top with the remaining mozzarella.
    7. Bake to finish: Return to the oven and bake 12–15 minutes, until cheese is melted and golden at the edges.

      For extra color, broil 1–2 minutes, watching closely.

    8. Serve: Let rest 3 minutes. Finish with a squeeze of lemon and a sprinkle of parsley. Serve warm.
    How to Store

    • Fridge: Keep leftovers in an airtight container for up to 3 days.
    • Reheat: Warm in a 350°F (175°C) oven for 10–12 minutes, or in a covered skillet over low heat until hot.

      Avoid microwaving too long or they’ll weep moisture.

    • Make-ahead: Assemble up to 24 hours in advance. Cover and refrigerate. Bake just before serving.
    • Freezing: Not ideal.

      The texture turns watery once thawed.

    Why This is Good for You

    • Nutrient-dense mushrooms: Portabellas offer B vitamins, minerals, and a meaty texture with few calories.
    • Protein and calcium: Cheese and optional sausage add protein; Parmesan provides calcium.
    • Fiber and antioxidants: Spinach and sun-dried tomatoes bring fiber, vitamins A and C, and lycopene.
    • Smart fats: Olive oil adds heart-healthy monounsaturated fats.

    What Not to Do

    • Don’t skip pre-baking the caps. It’s the key to avoiding soggy mushrooms.
    • Don’t over-salt early. Parmesan and sun-dried tomatoes are salty. Season, then taste.
    • Don’t overload with wet ingredients. Squeeze thawed spinach dry and drain oil-packed tomatoes.
    • Don’t walk away from the broiler. Cheese goes from golden to burnt fast.

    Alternatives

    • Low-carb: Swap breadcrumbs for almond flour or crushed pork rinds.
    • Gluten-free: Use gluten-free breadcrumbs or cooked quinoa.
    • Dairy-free: Use plant-based mozzarella and skip Parmesan, or add nutritional yeast.
    • Protein boost: Stir in cooked crumbled sausage, shredded chicken, or white beans.
    • Different herbs: Try basil, thyme, or rosemary instead of parsley.
    • Different cheeses: Goat cheese, feta, or smoked provolone all work well.

    FAQ

    Do I need to remove the gills?

    Removing the gills helps keep the filling from turning muddy and reduces moisture. It also gives you more room for stuffing.

    A spoon works great for scraping them out.

    Can I grill the mushrooms instead of baking?

    Yes. Grill the caps over medium heat for 4–5 minutes per side to pre-cook, then add the filling and finish on indirect heat with the lid closed until the cheese melts.

    How do I keep them from getting watery?

    Pre-bake the caps, drain excess liquid, and squeeze any moisture from spinach. Avoid overfilling with wet ingredients and let them rest a couple minutes before serving.

    What can I serve with stuffed portabellas?

    They pair well with a simple arugula salad, roasted potatoes, garlic green beans, or a bowl of tomato soup.

    For a heartier meal, add grilled chicken or a grain pilaf.

    Can I make mini versions?

    Absolutely. Use large cremini (baby bella) mushrooms. Skip the pre-bake, stuff lightly, and bake 10–12 minutes until tender and bubbly.

    Wrapping Up

    Stuffed portabella mushrooms deliver big comfort with minimal effort.

    They’re adaptable, satisfying, and perfect for using what’s in your fridge. Once you try this base recipe, you can riff endlessly and never get bored. Keep it simple, keep it savory, and enjoy every bite.

    Stuffed Portabella Mushrooms – A Savory, Satisfying Favorite

    Prep Time 15 minutes
    Cook Time 25 minutes
    Total Time 40 minutes
    Servings 4 servings

    Ingredients
      

    • 4 large portabella mushroom caps, stems and gills removed
    • 2 tablespoons olive oil, plus more for brushing
    • 1 small yellow onion, finely chopped
    • 3 cloves garlic, minced
    • 3 cups fresh spinach, chopped (or 1 cup thawed frozen spinach, squeezed dry)
    • 1/2 cup sun-dried tomatoes, chopped (oil-packed, drained)
    • 1/2 cup breadcrumbs (panko or regular)
    • 1/3 cup grated Parmesan
    • 3/4 cup shredded mozzarella (or provolone)
    • 2 tablespoons fresh parsley, chopped (or 1 teaspoon dried Italian seasoning)
    • 1 tablespoon balsamic vinegar
    • 1/2 teaspoon crushed red pepper flakes (optional)
    • Salt and black pepper
    • Lemon wedges, for serving (optional)
    • Optional add-ins: cooked crumbled Italian sausage, cooked quinoa, or toasted pine nuts

    Instructions
     

    • Prep the mushrooms: Heat the oven to 400°F (200°C). Line a sheet pan with parchment. Gently twist off stems and scrape out gills with a spoon. Brush both sides with olive oil and season with salt and pepper.
    • Pre-bake the caps: Place mushrooms gill side down and bake for 10 minutes. Flip to gill side up and let any moisture drain off. This step helps avoid soggy bottoms.
    • Cook the aromatics: In a skillet over medium heat, add 2 tablespoons olive oil. Sauté onion with a pinch of salt until soft, 4–5 minutes. Add garlic and cook 30 seconds until fragrant.
    • Add the veggies: Stir in spinach and cook until wilted. Mix in sun-dried tomatoes and turn off the heat.
    • Build the filling: Stir in breadcrumbs, Parmesan, half the mozzarella, parsley, balsamic, red pepper flakes, and a few grinds of black pepper. Taste and adjust salt. Fold in any optional add-ins now.
    • Stuff the caps: Spoon the filling evenly into the mushrooms, mounding slightly. Top with the remaining mozzarella.
    • Bake to finish: Return to the oven and bake 12–15 minutes, until cheese is melted and golden at the edges. For extra color, broil 1–2 minutes, watching closely.
    • Serve: Let rest 3 minutes. Finish with a squeeze of lemon and a sprinkle of parsley. Serve warm.
  • Baked Portobello Mushrooms – Simple, Savory, and Satisfying

    Baked Portobello Mushrooms – Simple, Savory, and Satisfying

    Portobello mushrooms are the kind of weeknight hero that feel special without any fuss. They bake up tender and juicy, with a deep, meaty flavor that checks all the comfort-food boxes. You can serve them as a main with a side salad, slice them over pasta, or tuck them into a sandwich.

    The best part? They’re quick to prep and hard to mess up. If you love bold, savory food with minimal effort, this recipe is for you.

    What Makes This Recipe So Good

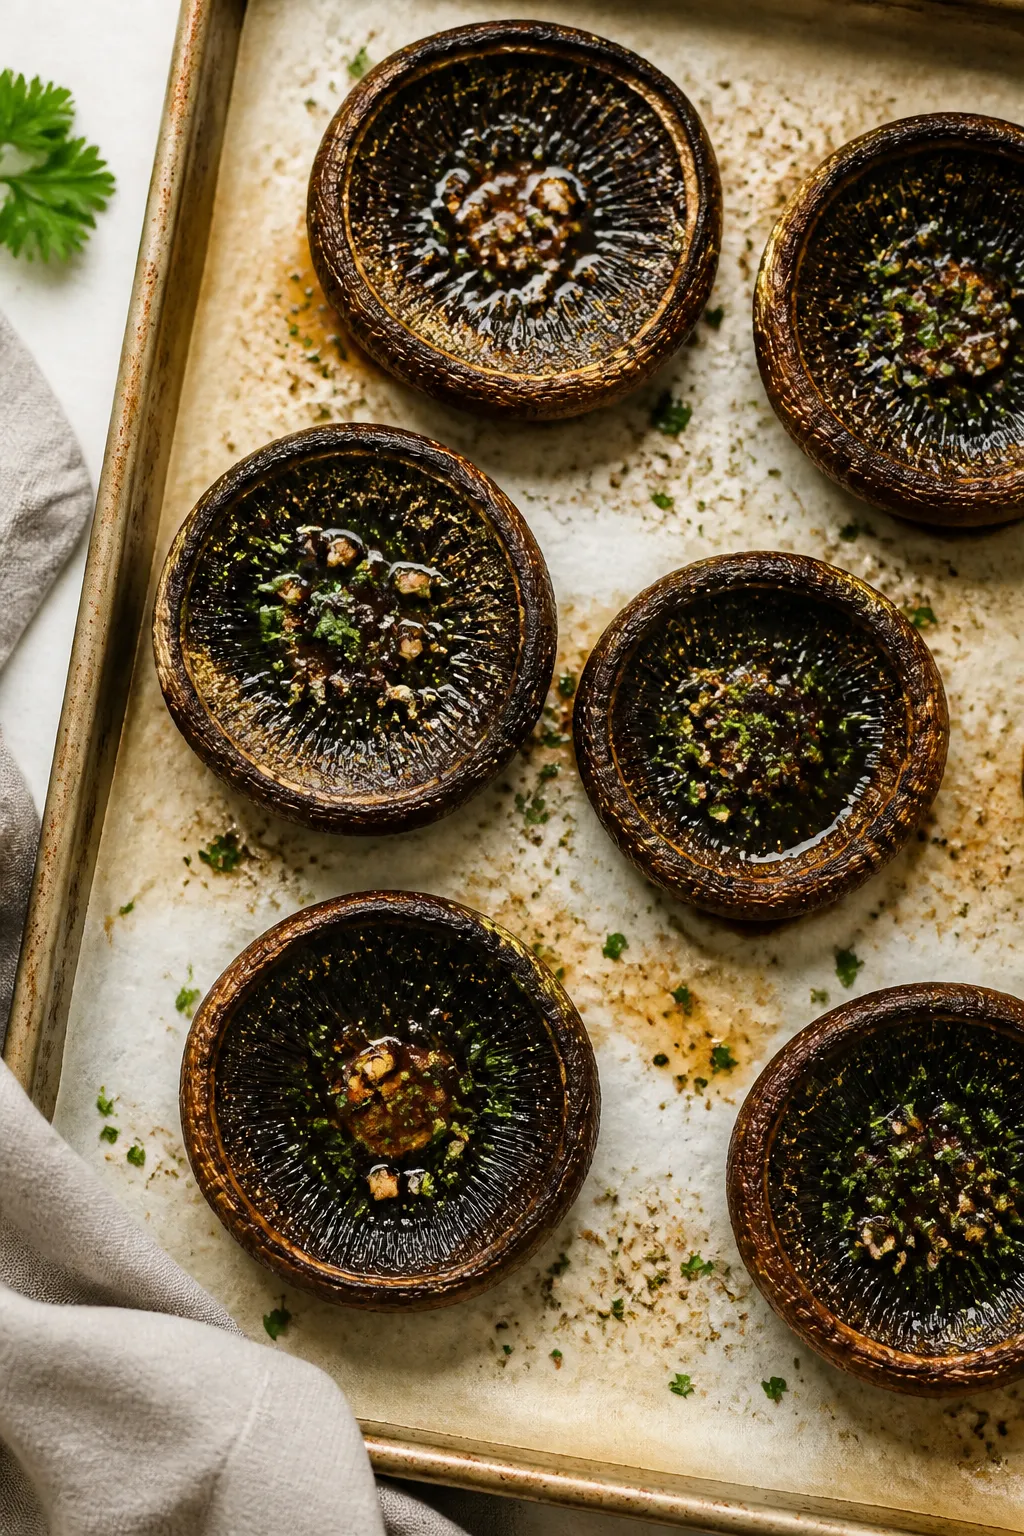
    Overhead shot of freshly baked portobello mushroom caps on a parchment-lined sheet pan, gill-side up
    • Big flavor, little work: A simple mix of olive oil, garlic, and herbs brings out the mushroom’s natural richness.
    • Versatile: Serve them as steaks, chop them for grain bowls, or use them as a burger substitute.
    • Fast and reliable: Ready in about 25 minutes with a handful of pantry ingredients.
    • Healthy and filling: Naturally vegetarian, with options to make it vegan, gluten-free, or dairy-free.
    • Great texture: Meaty and tender with lightly crisped edges when baked correctly.

    What You’ll Need

    • 4 large portobello mushroom caps (stems removed, gills scraped if desired)
    • 3 tablespoons olive oil
    • 3 cloves garlic, minced
    • 1 tablespoon balsamic vinegar
    • 1 teaspoon soy sauce or tamari (optional, for umami)
    • 1 teaspoon dried Italian seasoning (or a mix of thyme and oregano)
    • 1/2 teaspoon smoked paprika (optional, for depth)
    • Salt and black pepper, to taste
    • Fresh parsley or basil, chopped, for serving
    • Grated Parmesan or vegan Parmesan (optional, for topping)

    Step-by-Step Instructions

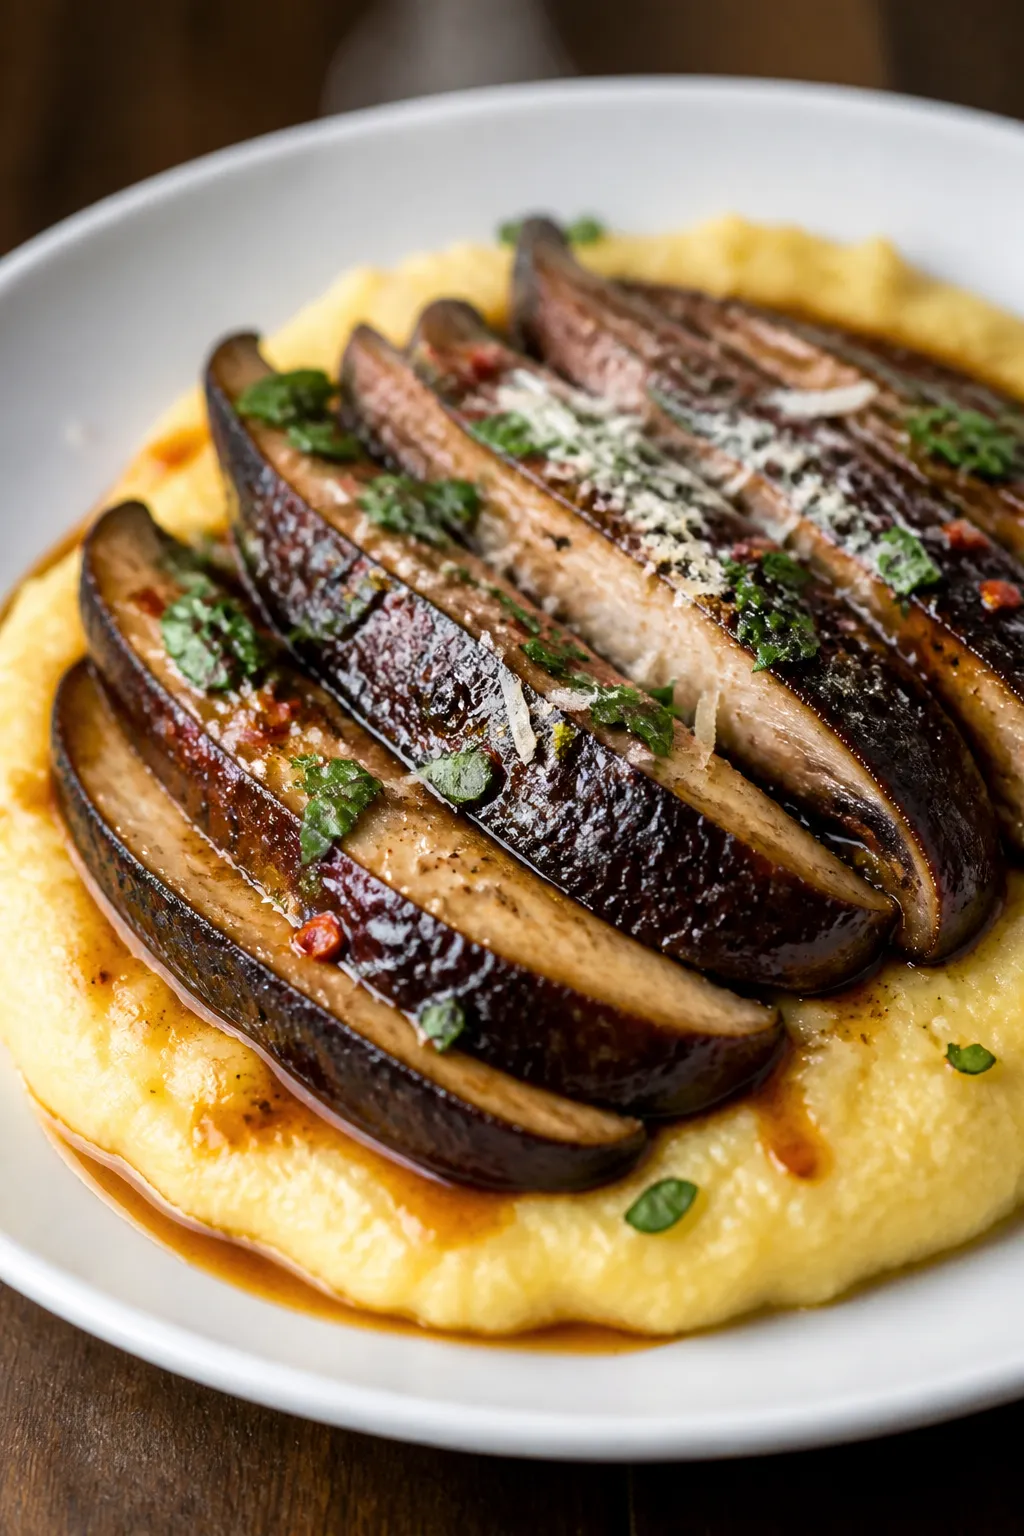
    Close-up, shallow depth-of-field plated presentation: sliced baked portobello “steaks” fanned ov
    1. Prep the mushrooms: Gently clean the caps with a damp paper towel.

      Remove stems. Scrape out the dark gills with a spoon if you want a milder flavor and less moisture.

    2. Heat the oven: Preheat to 400°F (200°C). Line a baking sheet with parchment for easy cleanup.
    3. Make the marinade: In a small bowl, whisk olive oil, garlic, balsamic, soy or tamari, Italian seasoning, smoked paprika, salt, and pepper.
    4. Season both sides: Place mushrooms gill-side up on the sheet.

      Brush generously with the marinade, making sure to coat the edges. Flip and brush the tops, then flip back so they’re gill-side up.

    5. Bake: Roast for 15–20 minutes, until tender and juicy. The edges should look slightly crisp, and the centers should give when pressed.
    6. Finish and serve: Spoon any pan juices over the caps.

      Top with fresh herbs and Parmesan if using. Serve whole, sliced, or chopped.

    Keeping It Fresh

    • Storage: Keep leftovers in an airtight container in the fridge for up to 3 days.
    • Reheating: Warm in a 350°F (175°C) oven for 8–10 minutes or in a skillet over medium heat. Avoid the microwave if you can—it can make them rubbery.
    • Freezing: Not ideal.

      The texture can turn watery after thawing.

    Benefits of This Recipe

    • Nutrient-dense: Portobellos are a good source of B vitamins, potassium, and antioxidants.
    • Lower-calorie option: Satisfying “meaty” bite without heavy ingredients.
    • Budget-friendly: A small list of affordable ingredients turns into a restaurant-worthy side or main.
    • Meal-prep friendly: Bake a batch and use them all week in bowls, wraps, or salads.

    Common Mistakes to Avoid

    • Skipping the wipe-down: Don’t soak mushrooms in water; they’ll get soggy. Wipe with a damp towel instead.
    • Overcrowding the pan: Give them space to roast. Crowded mushrooms steam and lose that nice texture.
    • Under-seasoning: Mushrooms love bold flavors.

      Use enough salt, acid, and herbs to make them pop.

    • Overbaking: They should be tender but not collapsed. Start checking at 15 minutes.

    Variations You Can Try

    • Cheesy garlic: Add a layer of shredded mozzarella or Parmesan in the last 5 minutes.
    • Herb butter: Swap olive oil for melted butter and finish with lemon zest.
    • Spicy kick: Add red pepper flakes or a drizzle of chili oil before serving.
    • Pesto finish: Spread a spoonful of pesto over the hot mushrooms for a bright, herby twist.
    • Stuffed style: Fill with sautéed spinach, sun-dried tomatoes, and feta; bake until warmed through.
    • Burger swap: Keep the caps whole, pat dry after baking, and stack on a toasted bun with your favorite toppings.

    FAQ

    Do I have to remove the gills?

    Removing the gills is optional. They’re edible, but they can release extra moisture and darken sauces.

    If you want a cleaner look and slightly less earthy flavor, scrape them out.

    Can I grill instead of bake?

    Yes. Grill over medium heat for about 4–5 minutes per side, brushing with marinade as they cook. Watch for flare-ups and don’t overcook.

    How do I keep them from getting soggy?

    Wipe, don’t wash.

    Don’t overcrowd the pan, and bake at a high enough temperature (400°F) to drive off excess moisture. Rest them a minute, then spoon off extra juices if needed.

    What can I serve with baked portobellos?

    They pair well with quinoa, mashed potatoes, polenta, garlicky greens, or a crisp salad. They’re also great sliced over risotto or pasta.

    Are portobello mushrooms healthy?

    Generally yes.

    They’re low in calories, offer fiber, and contain vitamins and minerals like niacin and potassium. As always, balance your meal with veggies, protein, and whole grains.

    In Conclusion

    Baked portobello mushrooms are simple, bold, and endlessly useful. With a quick marinade and a hot oven, you get a savory main or side that works any night of the week.

    Keep the ingredients on hand, switch up the toppings, and you’ll have a reliable favorite you can make without thinking.

    Baked Portobello Mushrooms – Simple, Savory, and Satisfying

    Prep Time 10 minutes
    Cook Time 20 minutes
    Total Time 30 minutes
    Servings 4 servings

    Ingredients
      

    • 4 large portobello mushroom caps (stems removed, gills scraped if desired)
    • 3 tablespoons olive oil
    • 3 cloves garlic, minced
    • 1 tablespoon balsamic vinegar
    • 1 teaspoon soy sauce or tamari (optional, for umami)
    • 1 teaspoon dried Italian seasoning (or a mix of thyme and oregano)
    • 1/2 teaspoon smoked paprika (optional, for depth)
    • Salt and black pepper, to taste
    • Fresh parsley or basil, chopped, for serving
    • Grated Parmesan or vegan Parmesan (optional, for topping)

    Instructions
     

    • Prep the mushrooms: Gently clean the caps with a damp paper towel. Remove stems. Scrape out the dark gills with a spoon if you want a milder flavor and less moisture.
    • Heat the oven: Preheat to 400°F (200°C). Line a baking sheet with parchment for easy cleanup.
    • Make the marinade: In a small bowl, whisk olive oil, garlic, balsamic, soy or tamari, Italian seasoning, smoked paprika, salt, and pepper.
    • Season both sides: Place mushrooms gill-side up on the sheet. Brush generously with the marinade, making sure to coat the edges. Flip and brush the tops, then flip back so they’re gill-side up.
    • Bake: Roast for 15–20 minutes, until tender and juicy. The edges should look slightly crisp, and the centers should give when pressed.
    • Finish and serve: Spoon any pan juices over the caps. Top with fresh herbs and Parmesan if using. Serve whole, sliced, or chopped.
  • Ginger Lime Pork With Coconut Rice – Bright, Zesty, and Comforting

    Ginger Lime Pork With Coconut Rice – Bright, Zesty, and Comforting

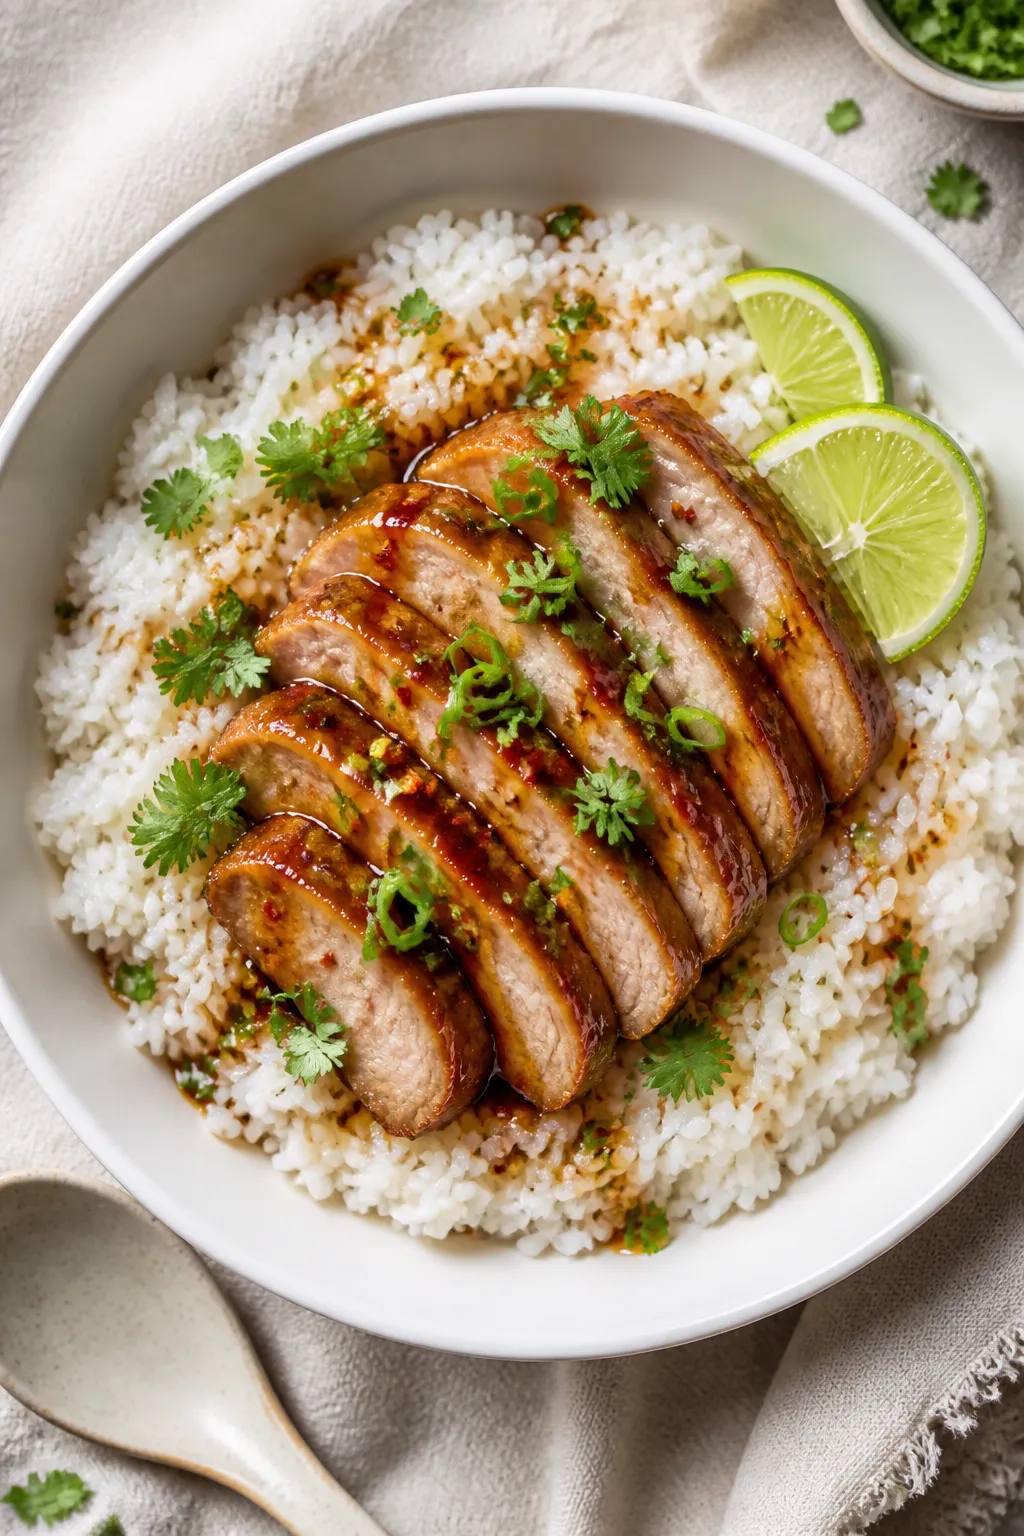
    This is the kind of weeknight dinner that feels special without making a mess of your kitchen. Juicy pork kissed with fresh ginger and lime, served over fluffy coconut rice that tastes creamy yet light. It smells incredible while it cooks, and the flavors are clean and balanced.

    You get tang, warmth, a touch of sweetness, and a little char on the pork that keeps you going back for more. If you need a low-effort, high-reward meal, this one earns a spot in the regular rotation.

    What Makes This Special

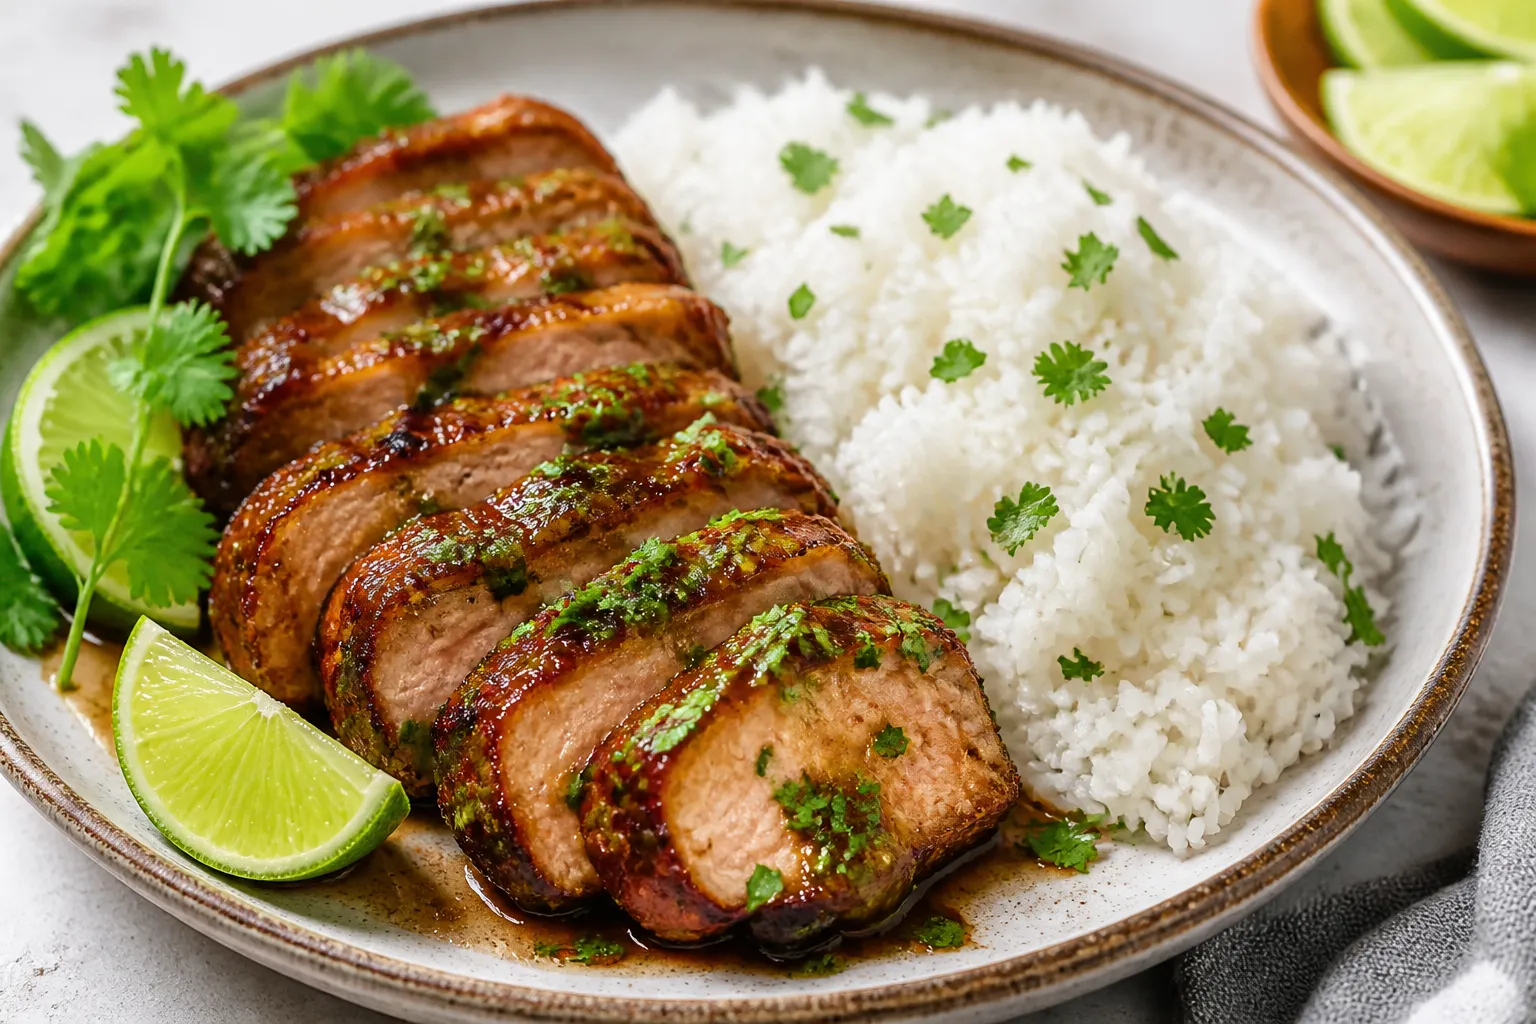
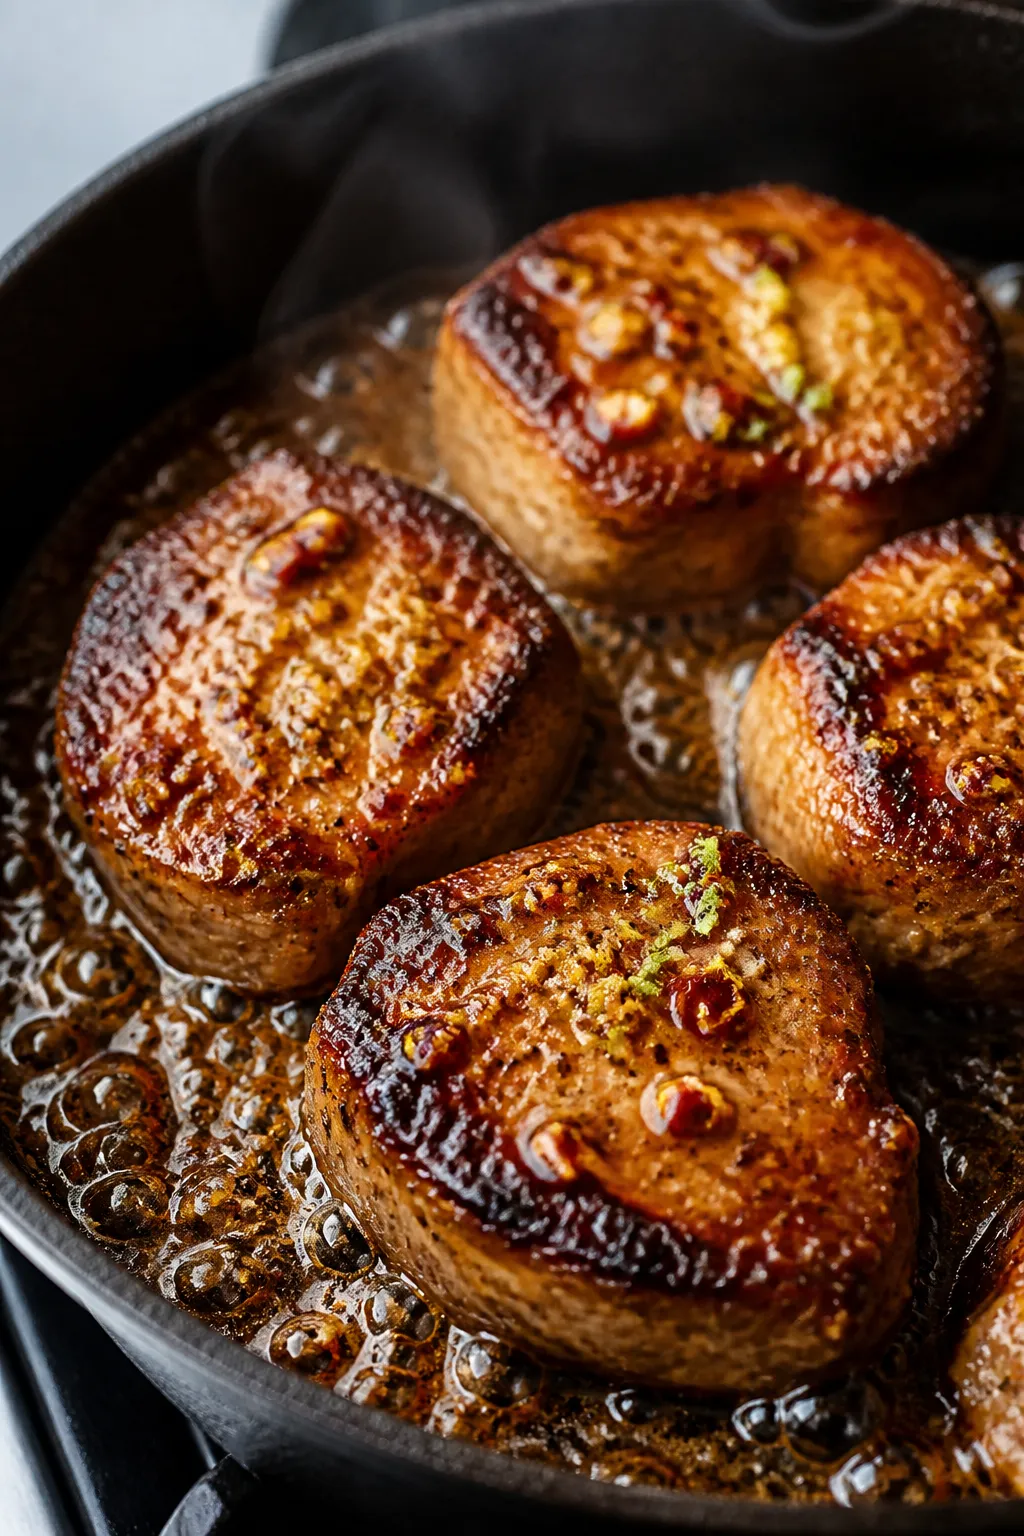
    Cooking process, close-up sear: Close-up of caramelized pork medallions sizzling in a dark cast-iron

    This recipe brings together bright citrus, peppery ginger, and the gentle richness of coconut. The coconut rice is a set-it-and-forget-it base that turns out tender and fragrant.

    The pork cooks quickly, so you get dinner on the table fast. It’s also flexible—lean chops, tenderloin, or thinly sliced shoulder all work well. Everything uses pantry-friendly ingredients you can find easily.

    Shopping List

    • Pork: 1 to 1.25 lb pork tenderloin (or 4 thin-cut boneless pork chops)
    • Ginger: 2 tablespoons fresh ginger, finely grated
    • Limes: 2 limes (zest and juice)
    • Garlic: 2 cloves, minced
    • Soy sauce: 2 tablespoons (or tamari)
    • Honey or brown sugar: 1 tablespoon
    • Red pepper flakes: 1/2 teaspoon (optional)
    • Neutral oil: 1 to 2 tablespoons (canola, avocado, or grapeseed)
    • Salt and black pepper
    • Jasmine rice: 1 cup (uncooked)
    • Coconut milk: 1 can (13.5–14 oz, full-fat or light)
    • Water: 1/2 cup (adjust if using light coconut milk)
    • Sugar: 1 teaspoon (optional, balances the coconut)
    • Fresh herbs: Cilantro, green onions, or mint for garnish
    • Lime wedges for serving

    Instructions

    Final dish, overhead: Tasty top-down shot of Ginger Lime Pork with Coconut Rice in a wide, shallow w
    1. Mix the marinade: In a bowl, combine grated ginger, lime zest, lime juice, soy sauce, honey, garlic, red pepper flakes, and a pinch of black pepper.
    2. Prep the pork: Pat the pork dry. If using tenderloin, trim silver skin and slice into 1-inch medallions.

      If using chops, keep them as is. Add to the marinade and toss to coat. Marinate 15–30 minutes at room temp (or up to 4 hours in the fridge).

    3. Start the coconut rice: Rinse jasmine rice until water runs mostly clear. In a saucepan, combine rice, coconut milk, water, 1/2 teaspoon salt, and sugar if using.

      Bring to a gentle boil, stir once, cover, and simmer on low for 12 minutes. Turn off heat and let steam, covered, for 10 minutes.

    4. Cook the pork: Heat a large skillet over medium-high. Add oil.

      Shake off excess marinade and sear pork in a single layer. Cook 2–3 minutes per side for medallions or thin chops, until nicely browned and just cooked through. Do not crowd the pan; work in batches if needed.

    5. Glaze quickly (optional): Pour the leftover marinade into the empty pan and simmer 1–2 minutes until slightly syrupy. Toss the pork back in to coat.

      If you prefer, skip this step and serve with fresh lime instead.

    6. Fluff and finish the rice: Uncover, fluff with a fork, and adjust salt. If it seems too thick, add a splash of hot water and fluff again.
    7. Serve: Spoon coconut rice into bowls, top with pork, and finish with chopped herbs and lime wedges. Add extra red pepper flakes for more heat.

    How to Store

    Keep leftovers in an airtight container for up to 4 days in the fridge.

    Store rice and pork separately if possible. Reheat gently on the stove with a splash of water or coconut milk to loosen the rice. The pork reheats best over low heat to avoid drying out.

    Benefits of This Recipe

    • Balanced flavors: Bright lime, warm ginger, and creamy coconut hit salty, sweet, and tangy notes.
    • Weeknight-friendly: About 30 minutes of active time.
    • Protein-rich: Lean pork paired with satisfying rice keeps you full.
    • Scalable: Easy to double for meal prep or a small dinner party.
    • Flexible: Works with different cuts and pantry swaps.

    Common Mistakes to Avoid

    • Skipping the rinse on rice: Unrinsed rice can turn gummy.

      Rinsing removes extra starch.

    • Overcrowding the pan: Pork steams instead of sears. Cook in batches for a good crust.
    • Overcooking pork: It dries out fast. Aim for a blush of pink in the center for tender results.
    • Too much marinade in the pan: Excess liquid blocks browning.

      Pat pork lightly before searing.

    • Not seasoning the rice: A small amount of salt (and optional sugar) boosts the coconut flavor.

    Alternatives

    • Protein swaps: Use chicken thighs, shrimp (cook 1–2 minutes per side), or firm tofu (press first).
    • Grain options: Serve over brown rice (extend cook time), quinoa, or cauliflower rice for lower carbs.
    • Sauce tweaks: Add fish sauce for depth, or a drizzle of sesame oil for nuttiness.
    • Vegetable add-ins: Stir-fry snap peas, bell peppers, or bok choy in the same pan after cooking the pork.
    • Dairy-free richness: Stick with full-fat coconut milk for a creamier rice without dairy.

    FAQ

    Can I make this ahead?

    Yes. Marinate the pork up to 24 hours ahead and cook when ready. The rice can be made the day before; reheat with a splash of water or coconut milk.

    What cut of pork works best?

    Pork tenderloin is tender and quick-cooking.

    Thin boneless chops also work well. For more flavor and some marbling, try thinly sliced pork shoulder, but cook quickly to avoid toughness.

    Is light coconut milk okay?

    Yes, but reduce the added water by a couple of tablespoons. Full-fat gives the creamiest texture, while light coconut milk keeps it lighter.

    How spicy is it?

    Mild to medium.

    Adjust the red pepper flakes to your taste, or add sliced fresh chiles at the end for extra heat.

    Can I grill the pork?

    Absolutely. Grill over medium-high heat for 2–3 minutes per side, brushing with marinade during the last minute. Rest briefly before slicing.

    How do I know the pork is done?

    Look for a light golden crust and an internal temperature around 145°F (63°C) with a short rest.

    It should be juicy with a slight blush in the center.

    In Conclusion

    Ginger Lime Pork with Coconut Rice brings bright, fresh flavor and cozy comfort to any night of the week. It’s simple to pull off, adaptable to what you have, and reliably delicious. Keep limes, ginger, and coconut milk on hand, and you’ll always be just a few steps away from a satisfying dinner that tastes like you planned ahead.

    Ginger Lime Pork With Coconut Rice – Bright, Zesty, and Comforting

    Prep Time 15 minutes
    Cook Time 25 minutes
    Total Time 40 minutes
    Servings 4 servings

    Ingredients
      

    • Pork: 1 to 1.25 lb pork tenderloin (or 4 thin-cut boneless pork chops)
    • Ginger: 2 tablespoons fresh ginger, finely grated
    • Limes: 2 limes (zest and juice)
    • Garlic: 2 cloves, minced
    • Soy sauce: 2 tablespoons (or tamari)
    • Honey or brown sugar: 1 tablespoon
    • Red pepper flakes: 1/2 teaspoon (optional)
    • Neutral oil: 1 to 2 tablespoons (canola, avocado, or grapeseed)
    • Salt and black pepper
    • Jasmine rice: 1 cup (uncooked)
    • Coconut milk: 1 can (13.5–14 oz, full-fat or light)
    • Water: 1/2 cup (adjust if using light coconut milk)
    • Sugar: 1 teaspoon (optional, balances the coconut)
    • Fresh herbs: Cilantro, green onions, or mint for garnish
    • Lime wedges for serving

    Instructions
     

    • Mix the marinade: In a bowl, combine grated ginger, lime zest, lime juice, soy sauce, honey, garlic, red pepper flakes, and a pinch of black pepper.
    • Prep the pork: Pat the pork dry. If using tenderloin, trim silver skin and slice into 1-inch medallions. If using chops, keep them as is. Add to the marinade and toss to coat. Marinate 15–30 minutes at room temp (or up to 4 hours in the fridge).
    • Start the coconut rice: Rinse jasmine rice until water runs mostly clear. In a saucepan, combine rice, coconut milk, water, 1/2 teaspoon salt, and sugar if using. Bring to a gentle boil, stir once, cover, and simmer on low for 12 minutes. Turn off heat and let steam, covered, for 10 minutes.
    • Cook the pork: Heat a large skillet over medium-high. Add oil. Shake off excess marinade and sear pork in a single layer. Cook 2–3 minutes per side for medallions or thin chops, until nicely browned and just cooked through. Do not crowd the pan; work in batches if needed.
    • Glaze quickly (optional): Pour the leftover marinade into the empty pan and simmer 1–2 minutes until slightly syrupy. Toss the pork back in to coat. If you prefer, skip this step and serve with fresh lime instead.
    • Fluff and finish the rice: Uncover, fluff with a fork, and adjust salt. If it seems too thick, add a splash of hot water and fluff again.
    • Serve: Spoon coconut rice into bowls, top with pork, and finish with chopped herbs and lime wedges. Add extra red pepper flakes for more heat.