Author: Elise Bauer

  • Cinnamon Roll Focaccia Bread – Soft, Swirled, and Perfectly Cozy

    Cinnamon Roll Focaccia Bread – Soft, Swirled, and Perfectly Cozy

    This cinnamon roll focaccia bread brings the best of two worlds together: the pillowy chew of Italian focaccia and the warm sweetness of a classic cinnamon roll. It’s fun to make, smells incredible, and serves beautifully for brunch, dessert, or a cozy afternoon snack. The dough is simple, the rise is forgiving, and the results are impressive without being fussy.

    If you love cinnamon rolls but want something a little easier and more shareable, this is your recipe.

    What Makes This Special

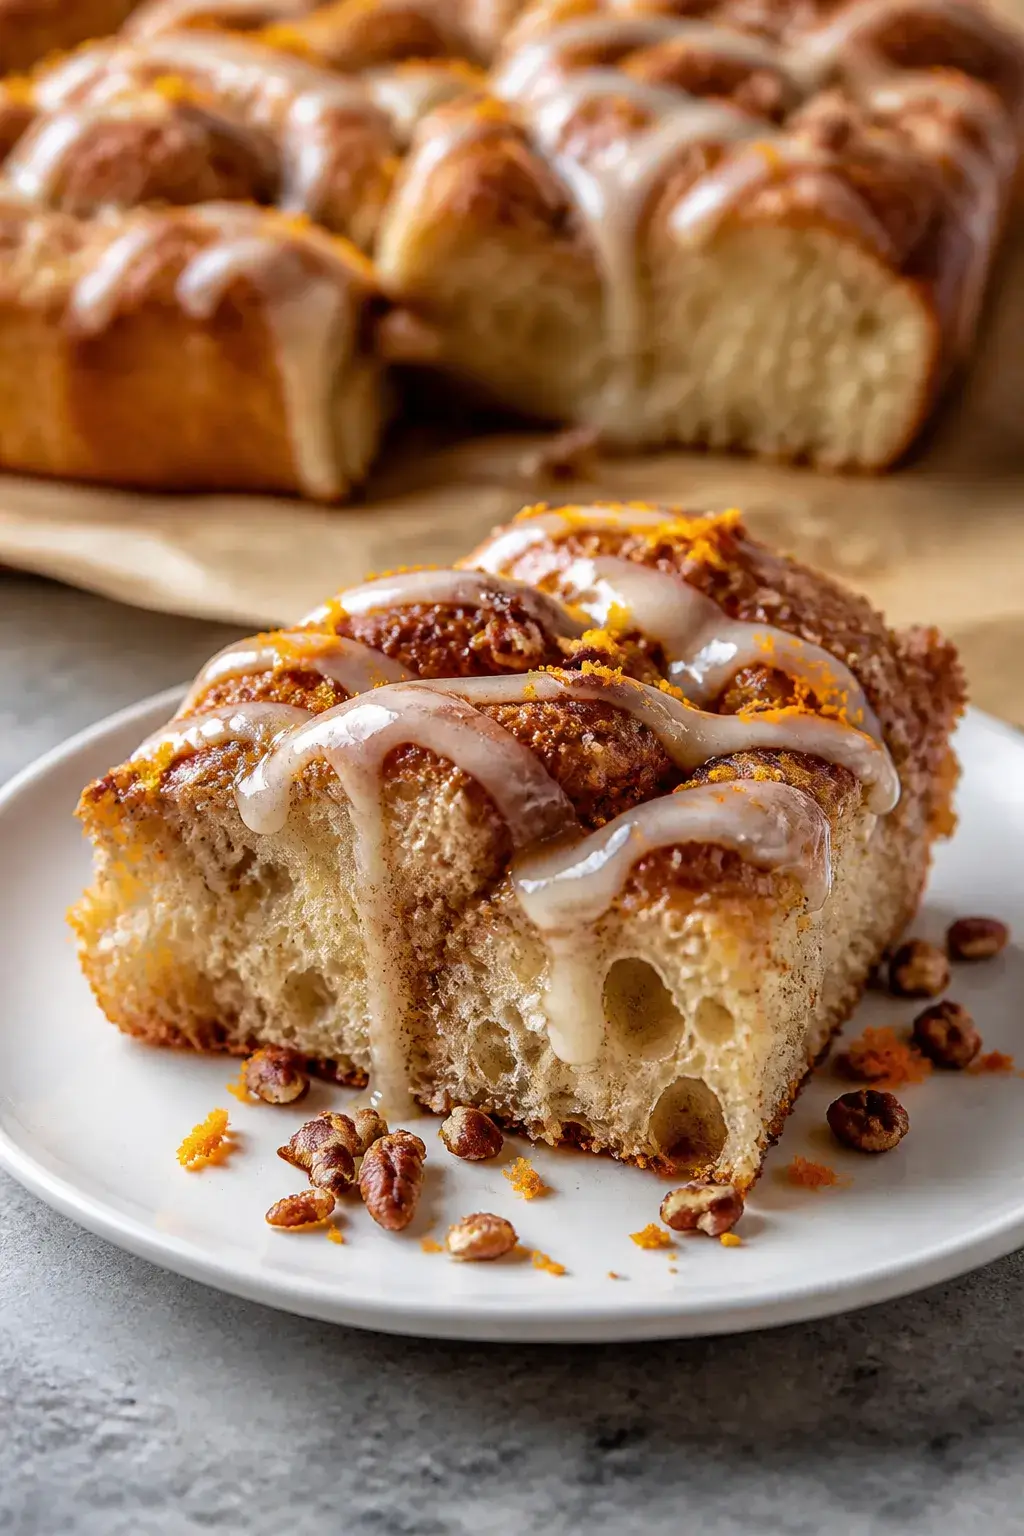
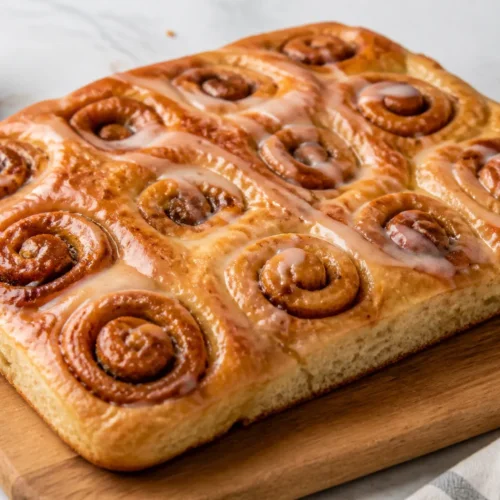
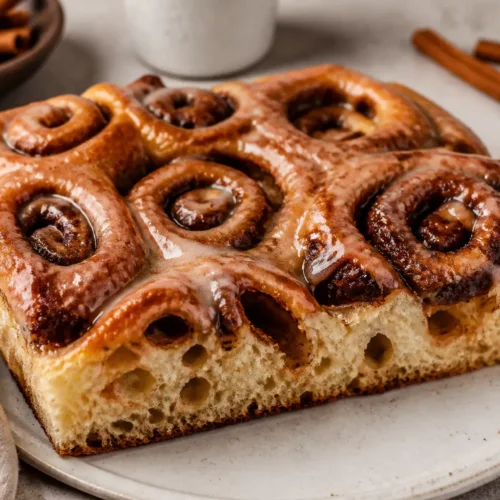
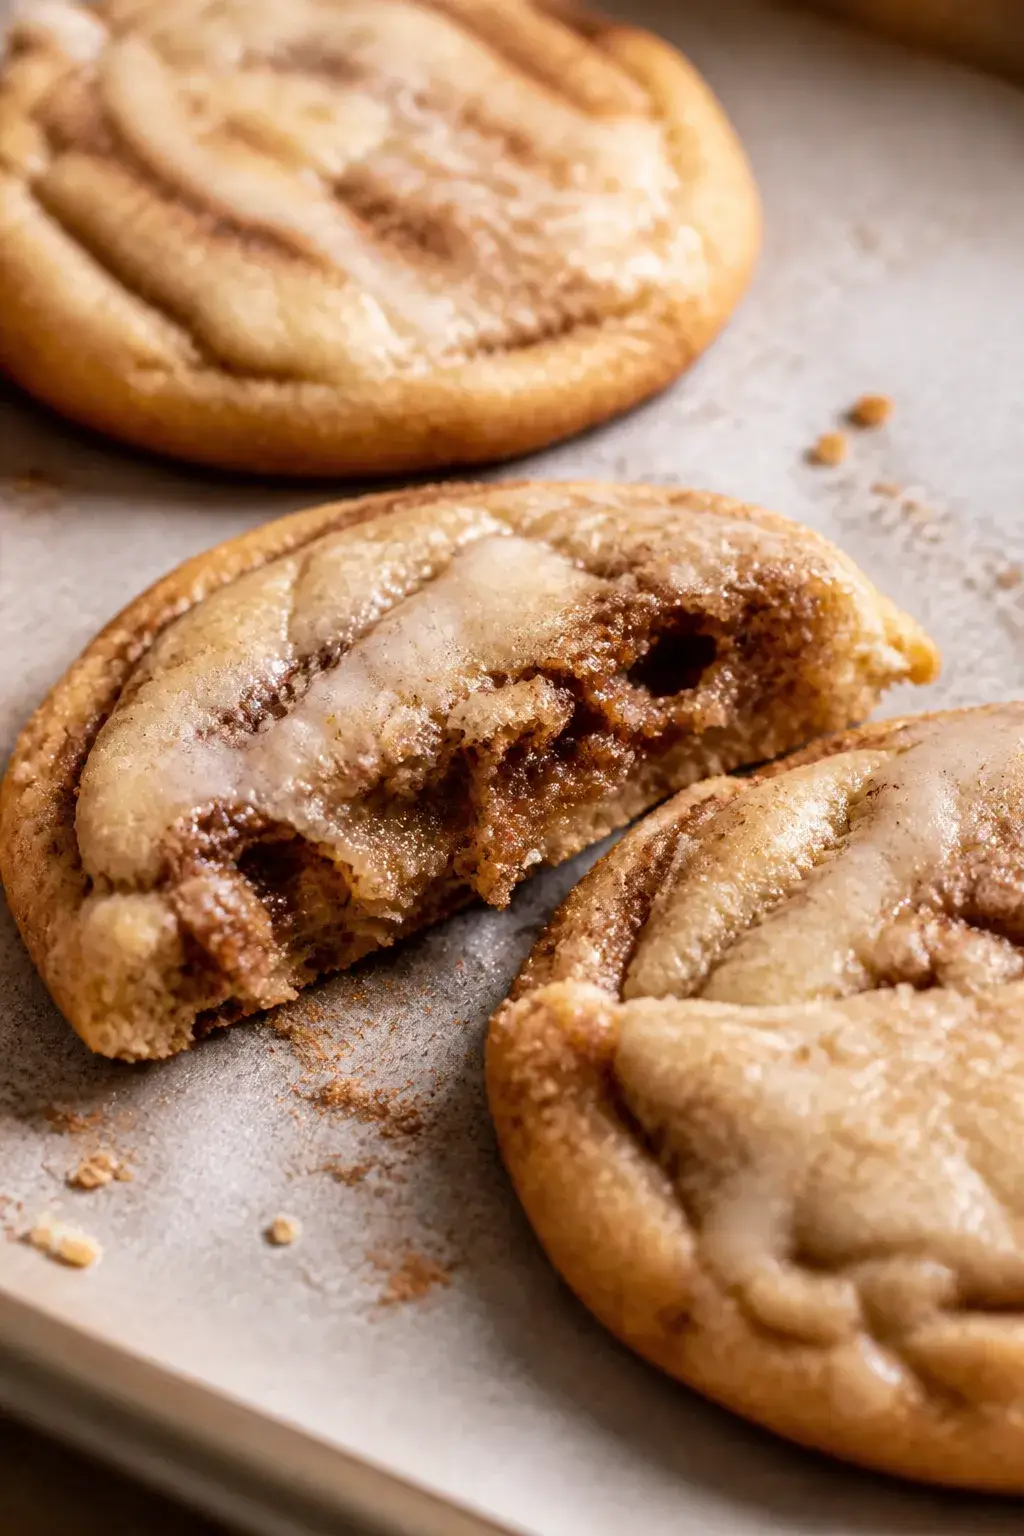
    Close-up process shot: Cinnamon roll focaccia just out of the oven in a large cast-iron skillet, sho
    • Low-effort, high-reward. Focaccia dough is easy to handle and doesn’t require shaping or rolling like traditional cinnamon rolls.
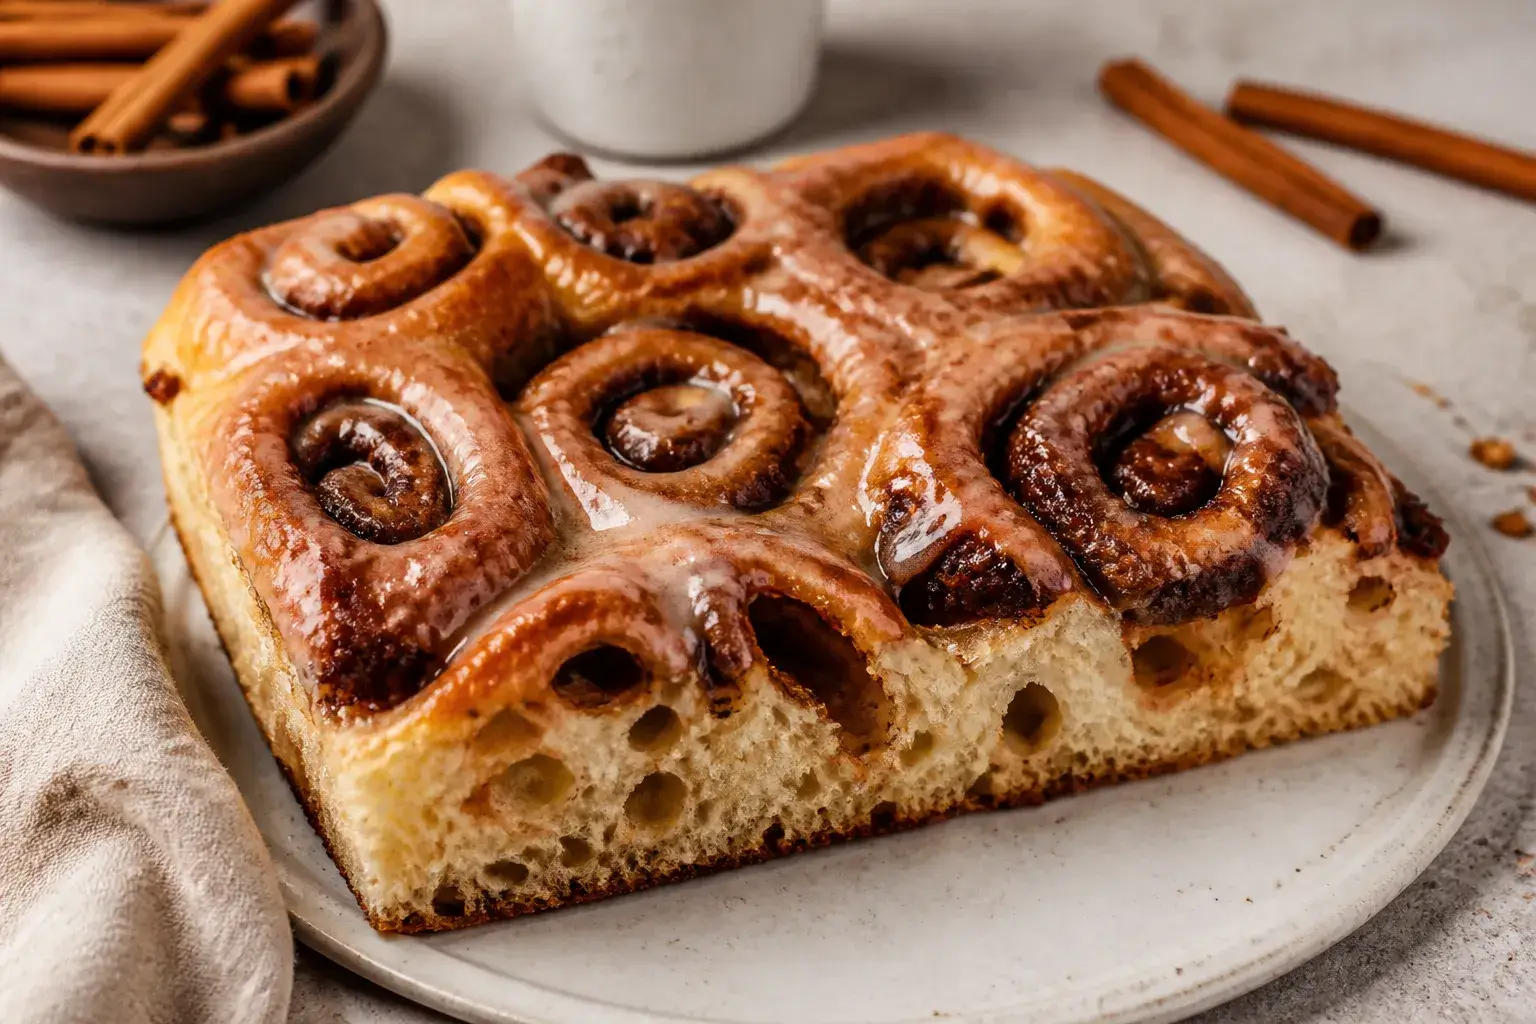
    • Gorgeous swirls. The cinnamon-sugar butter pools into the dimples, creating caramelized pockets and a crackly top.
    • Delightfully shareable. Bake in a sheet pan or skillet and set it on the table for tearing and dipping.
    • Flexible timing. Make the dough the same day or let it cold-proof overnight for deeper flavor.

    Ingredients

    • For the Dough:
      • 3 1/2 cups (440 g) all-purpose flour
      • 1 1/2 cups (360 ml) warm water (about 100°F/38°C)
      • 2 1/4 tsp (1 packet) instant yeast
      • 2 tsp granulated sugar
      • 1 1/2 tsp fine sea salt
      • 1/4 cup (60 ml) extra-virgin olive oil, plus more for the pan and finishing
    • For the Cinnamon Swirl:
      • 6 tbsp (85 g) unsalted butter, melted
      • 1/2 cup (100 g) brown sugar, packed
      • 2 tsp ground cinnamon
      • 1/4 tsp fine salt
      • 1 tsp vanilla extract (optional)
    • For the Glaze (Optional):
      • 1 cup (120 g) powdered sugar
      • 2–3 tbsp milk or cream
      • 1/2 tsp vanilla extract
      • Pinch of salt

    Step-by-Step Instructions

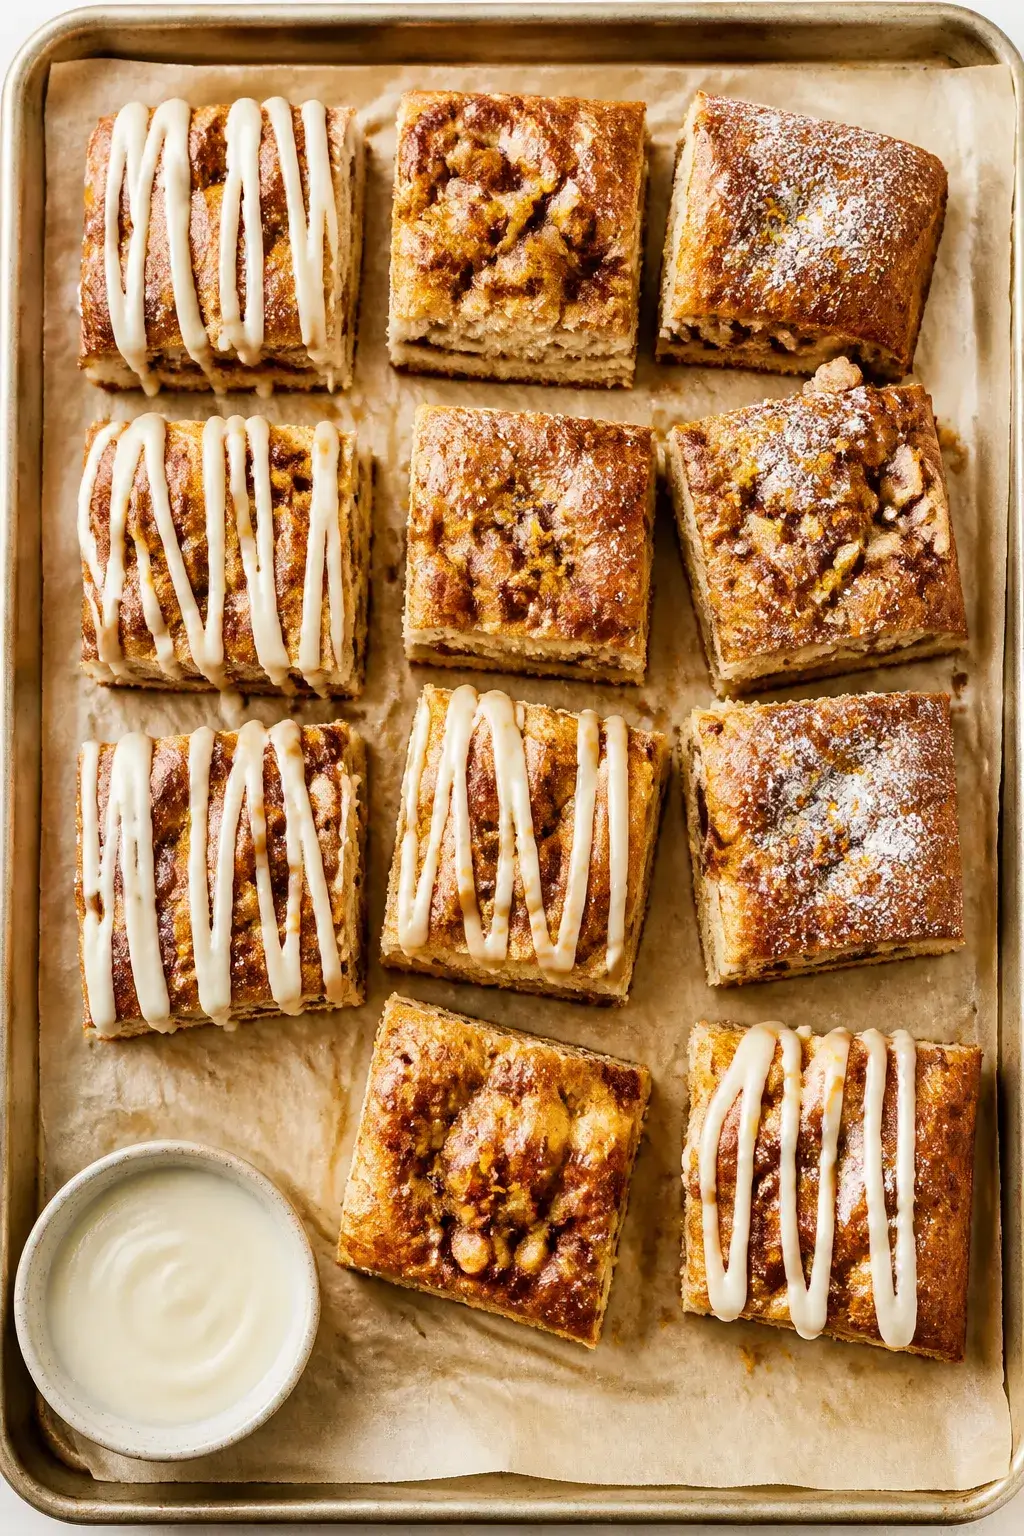
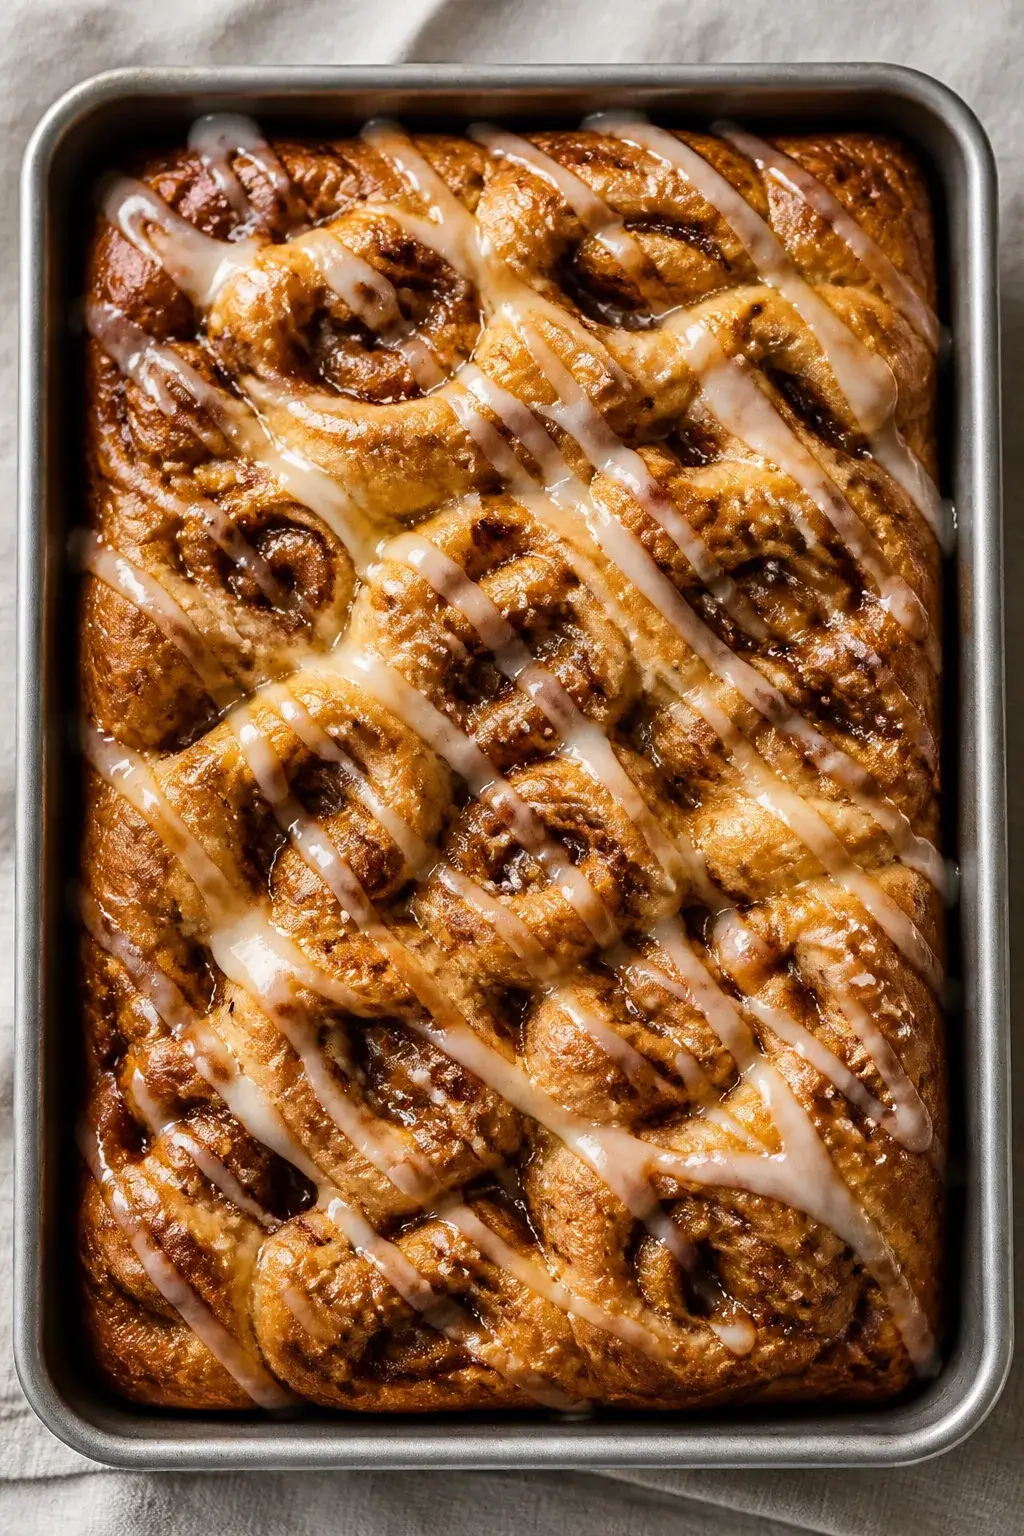
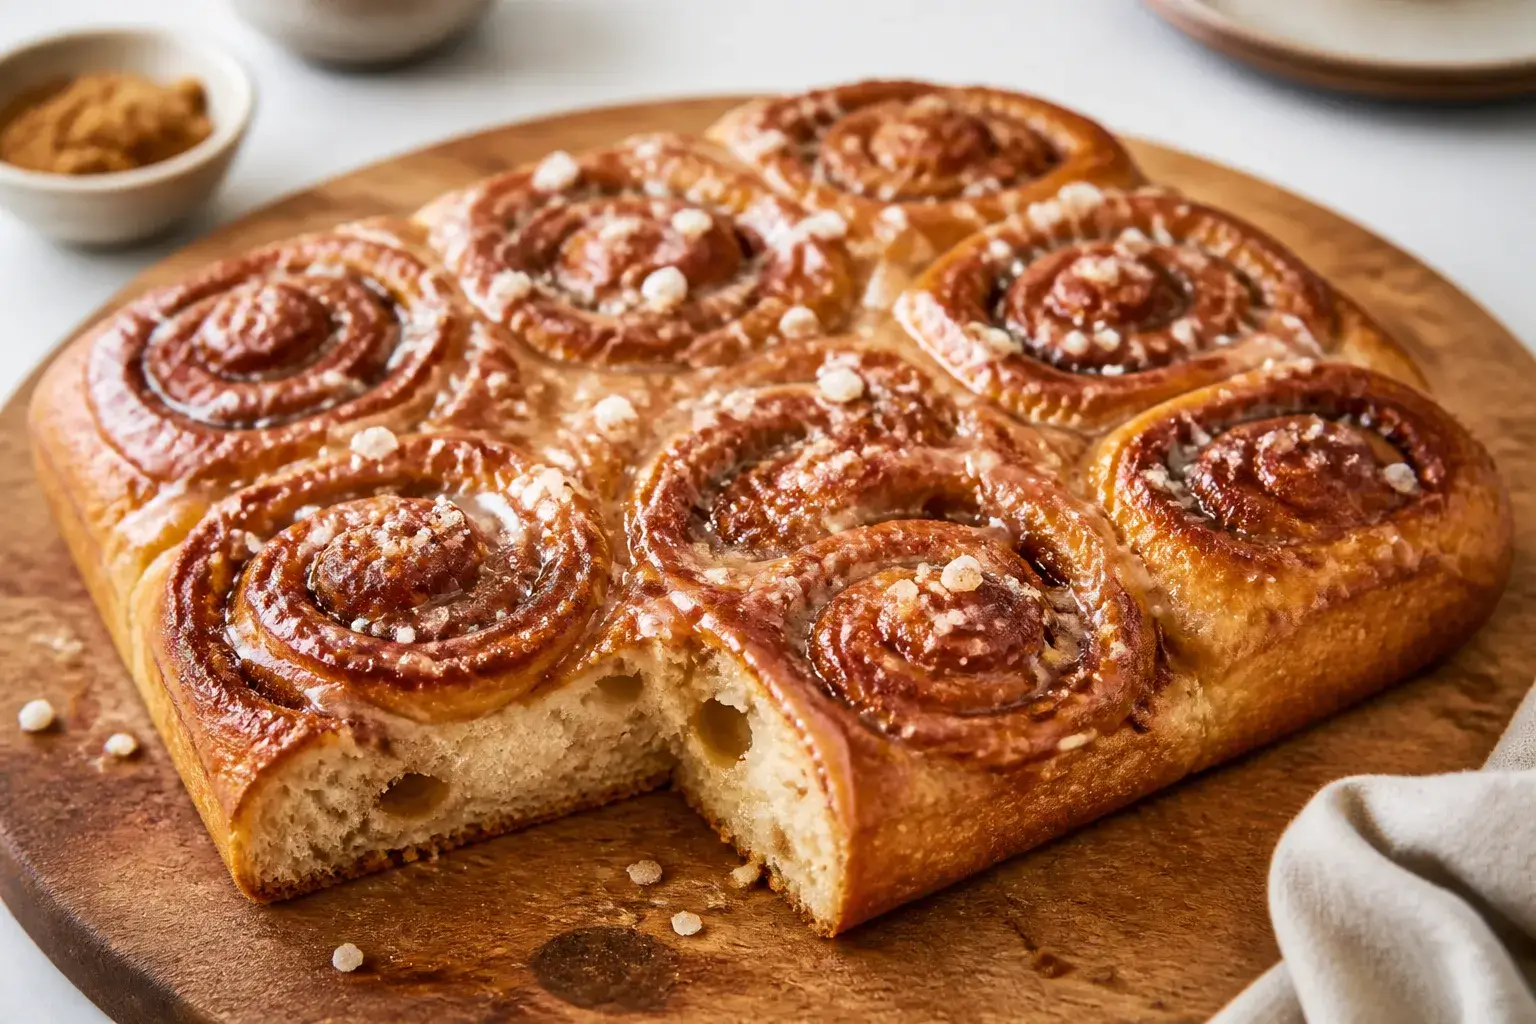
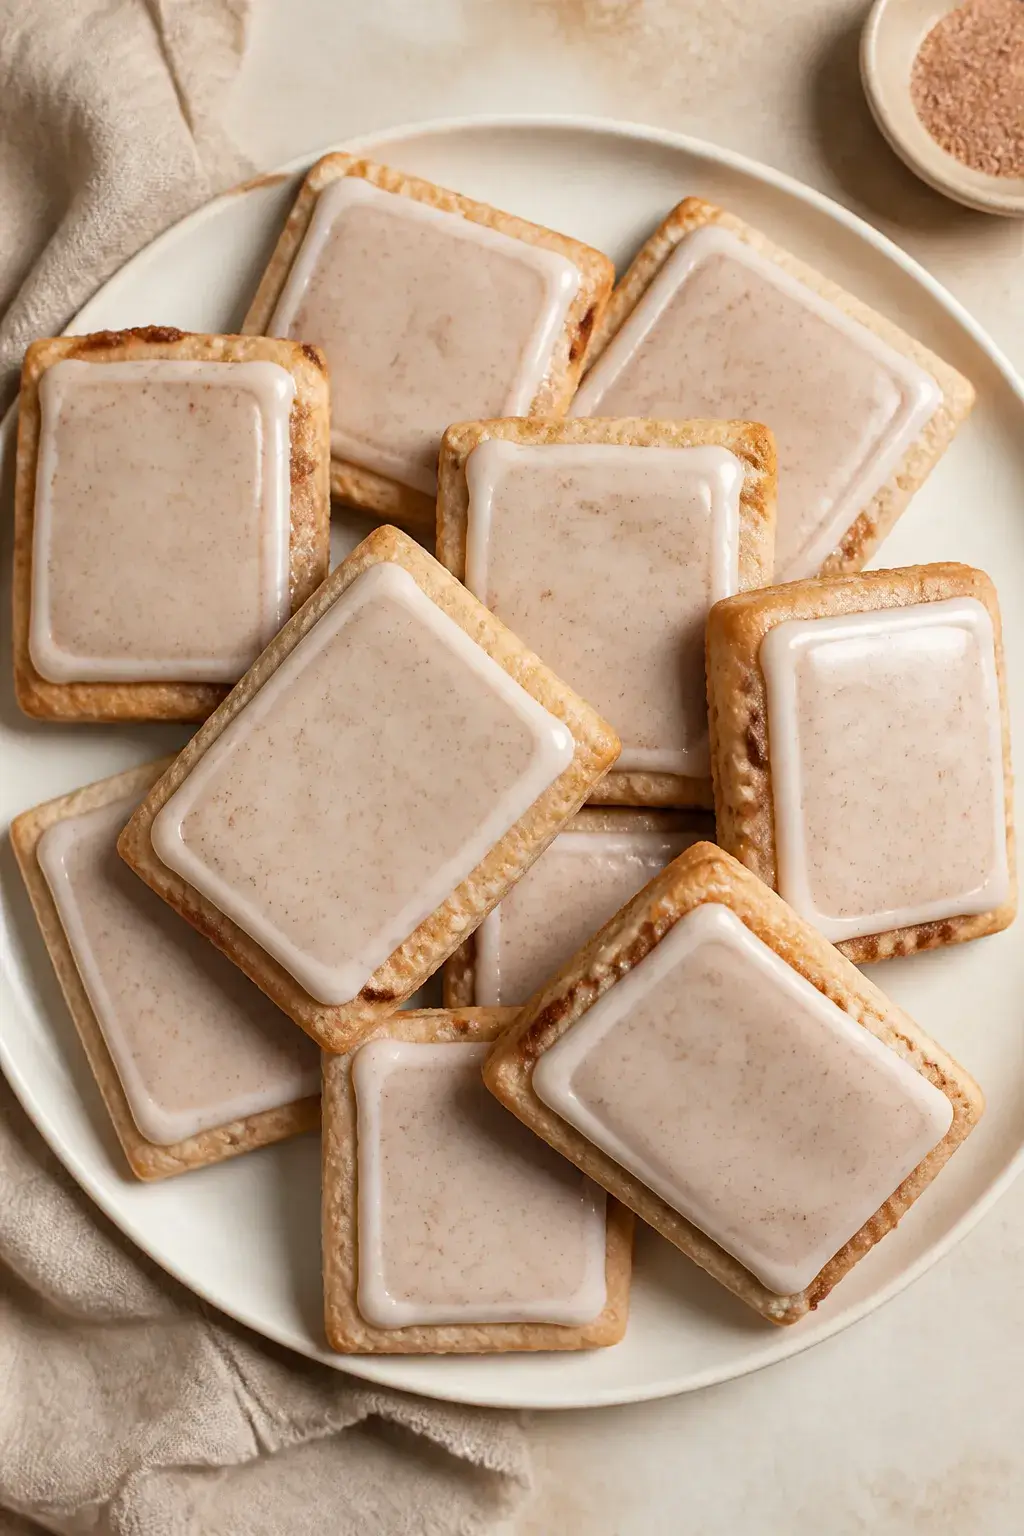
    Overhead final presentation: Sliced squares of cinnamon roll focaccia on a parchment-lined sheet pan
    1. Mix the dough. In a large bowl, whisk warm water, sugar, and yeast. Add flour, salt, and olive oil. Stir with a spatula until no dry spots remain.

      The dough will be sticky—perfect.

    2. First rise. Cover the bowl and let it rise at room temperature until doubled, about 60–90 minutes. For more flavor, refrigerate up to 24 hours after a 30-minute rest, then bring to room temp before shaping.
    3. Prepare the pan. Generously oil a 9×13-inch pan or a large cast-iron skillet. Pour in 2–3 tablespoons olive oil so the bottom is slick.
    4. Transfer and stretch. Scrape the dough into the pan.

      With oiled fingers, gently stretch it toward the edges. If it springs back, rest 10 minutes and try again.

    5. Make the cinnamon mixture. Stir melted butter, brown sugar, cinnamon, salt, and vanilla until smooth and syrupy.
    6. Dimple and swirl. With oiled fingers, press deep dimples all over the dough. Drizzle the cinnamon mixture in ribbons and little pools, encouraging it into the dimples for that signature swirl.
    7. Second rise. Let the dough rise uncovered for 20–30 minutes, until slightly puffy.

      Meanwhile, preheat the oven to 425°F (220°C).

    8. Bake. Bake 18–24 minutes, until the top is deeply golden and the cinnamon sugar is bubbling at the edges. The bottom should be crisp but not dark.
    9. Optional glaze. Whisk powdered sugar, milk, vanilla, and a pinch of salt until smooth. Drizzle over the warm focaccia.
    10. Finish and serve. For bakery shine, brush the crust with a little olive oil right after baking.

      Cool 10 minutes, then cut or tear into squares. Serve warm.

    Storage Instructions

    • Room temperature: Keep in an airtight container for up to 2 days. Rewarm at 300°F (150°C) for 8–10 minutes.
    • Freezer: Wrap pieces tightly and freeze up to 2 months.

      Thaw at room temp, then refresh in the oven until soft.

    • Avoid the fridge: Refrigeration dries out enriched doughs. Freeze instead if storing longer than 2 days.

    Health Benefits

    • Olive oil fats. Using olive oil adds heart-friendly monounsaturated fats compared to butter-only bakes.
    • Portion control. It’s easy to cut into small squares for a lighter treat.
    • Customizable sweetness. You control how much cinnamon sugar and glaze you add.
    • Spice perks. Cinnamon brings warm flavor and may support balanced blood sugar when used as part of an overall healthy diet.

    Pitfalls to Watch Out For

    • Under-proofing. If the dough hasn’t puffed, it will bake dense. Look for visible bubbles and a light, airy feel.
    • Overbaking. The sugar can darken quickly.

      Start checking at 18 minutes and tent with foil if needed.

    • Dry dough. This dough should be sticky. Add a tablespoon of water if it looks stiff or shaggy.
    • Uneven cinnamon pools. Spread the mixture in thin ribbons and small dots so every bite gets flavor without sogginess.

    Variations You Can Try

    • Cream cheese glaze: Beat 2 oz softened cream cheese with the glaze for tangy richness.
    • Maple pecan: Swap half the brown sugar for maple syrup and sprinkle chopped toasted pecans on top.
    • Cardamom twist: Add 1/2 tsp ground cardamom to the cinnamon mix for a fragrant lift.
    • Raisin rum: Soak 1/3 cup raisins in warm rum or apple juice, drain, and scatter before baking.
    • Apple pie: Dot the top with tiny diced apples tossed in cinnamon sugar for a fruity layer.

    FAQ

    Can I use active dry yeast instead of instant?

    Yes. Bloom 2 1/4 teaspoons active dry yeast in the warm water with the sugar for 5–10 minutes until foamy, then proceed.

    Can I make this dairy-free?

    Use a plant-based butter for the cinnamon mixture and a nondairy milk for the glaze.

    The dough itself uses olive oil, so it’s already dairy-free.

    What flour works best?

    All-purpose flour gives a soft, tender crumb. Bread flour will make it chewier. You can do a 50/50 mix if you like more bite.

    How do I know it’s done?

    The top should be a deep golden brown with bubbling cinnamon sugar, and the edges should pull slightly from the pan.

    If you tap the surface, it should sound lightly hollow.

    Can I prepare it the night before?

    Yes. Let the mixed dough rest 30 minutes, then refrigerate covered up to 24 hours. Bring to room temperature, stretch in the pan, and continue with dimpling and baking.

    In Conclusion

    Cinnamon roll focaccia bread is cozy, simple, and a little bit showy.

    It keeps the spirit of a cinnamon roll without the fuss and delivers that irresistible swirl in every bite. Make it for brunch, a bake sale, or an easy weekend treat—and watch it disappear fast.

    Cinnamon Roll Focaccia Bread – Soft, Swirled, and Perfectly Cozy

    Prep Time 20 minutes
    Cook Time 25 minutes
    Total Time 45 minutes
    Servings 12 servings

    Ingredients
      

    • For the Dough: 3 1/2 cups (440 g) all-purpose flour
    • 1 1/2 cups (360 ml) warm water (about 100°F/38°C)
    • 2 1/4 tsp (1 packet) instant yeast
    • 2 tsp granulated sugar
    • 1 1/2 tsp fine sea salt
    • 1/4 cup (60 ml) extra-virgin olive oil, plus more for the pan and finishing
    • For the Cinnamon Swirl: 6 tbsp (85 g) unsalted butter, melted
    • 1/2 cup (100 g) brown sugar, packed
    • 2 tsp ground cinnamon
    • 1/4 tsp fine salt
    • 1 tsp vanilla extract (optional)
    • For the Glaze (Optional): 1 cup (120 g) powdered sugar
    • 2–3 tbsp milk or cream
    • 1/2 tsp vanilla extract
    • Pinch of salt

    Instructions
     

    • Mix the dough. In a large bowl, whisk warm water, sugar, and yeast. Add flour, salt, and olive oil. Stir with a spatula until no dry spots remain. The dough will be sticky—perfect.
    • First rise. Cover the bowl and let it rise at room temperature until doubled, about 60–90 minutes. For more flavor, refrigerate up to 24 hours after a 30-minute rest, then bring to room temp before shaping.
    • Prepare the pan. Generously oil a 9×13-inch pan or a large cast-iron skillet. Pour in 2–3 tablespoons olive oil so the bottom is slick.
    • Transfer and stretch. Scrape the dough into the pan. With oiled fingers, gently stretch it toward the edges. If it springs back, rest 10 minutes and try again.
    • Make the cinnamon mixture. Stir melted butter, brown sugar, cinnamon, salt, and vanilla until smooth and syrupy.
    • Dimple and swirl. With oiled fingers, press deep dimples all over the dough. Drizzle the cinnamon mixture in ribbons and little pools, encouraging it into the dimples for that signature swirl.
    • Second rise. Let the dough rise uncovered for 20–30 minutes, until slightly puffy. Meanwhile, preheat the oven to 425°F (220°C).
    • Bake. Bake 18–24 minutes, until the top is deeply golden and the cinnamon sugar is bubbling at the edges. The bottom should be crisp but not dark.
    • Optional glaze. Whisk powdered sugar, milk, vanilla, and a pinch of salt until smooth. Drizzle over the warm focaccia.
    • Finish and serve. For bakery shine, brush the crust with a little olive oil right after baking. Cool 10 minutes, then cut or tear into squares. Serve warm.
  • Sourdough Cinnamon Roll Focaccia Recipe – A Soft, Swirled, and Cozy Bake

    Sourdough Cinnamon Roll Focaccia Recipe – A Soft, Swirled, and Cozy Bake

    This mash-up keeps the best parts of both worlds: the chewy, olive oil–kissed edges of focaccia and the gooey cinnamon-sugar comfort of a classic roll. It’s playful, homey, and perfect for brunch or an afternoon treat. If you have a lively sourdough starter, you’re halfway there.

    The rest comes down to gentle stretching, patient proofing, and a buttery swirl that turns every bite into a cinnamon hug.

    What Makes This Special

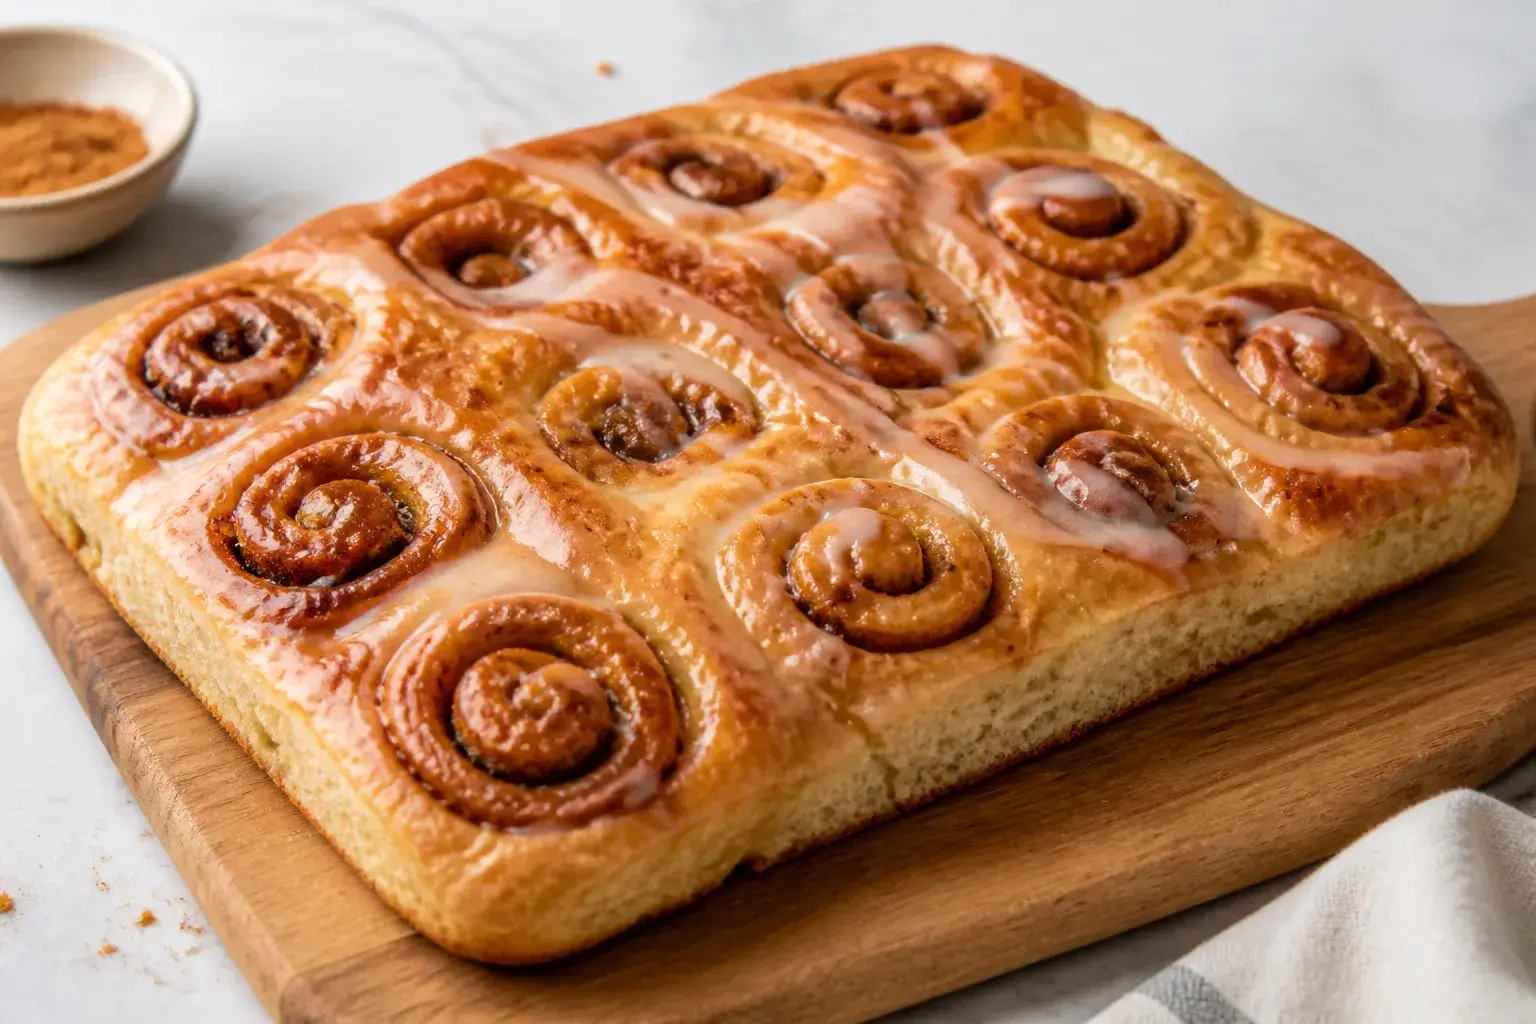
    Overhead shot of freshly baked sourdough cinnamon roll focaccia in a generously oiled 9x13 metal pan
    • Hybrid style: Focaccia texture with cinnamon roll flavor—light, airy crumb with a caramelized top and soft center.
    • Sourdough depth: Natural fermentation adds flavor and keeps the crumb tender without being too sweet.
    • Low effort: Mostly hands-off time; no rolling or slicing needed.
    • Built for sharing: Bakes in one pan and pulls apart like a dream.

    Ingredients

    • For the dough:
      • 450 g bread flour (about 3 3/4 cups)
      • 50 g whole wheat flour (about 1/3 cup), optional for flavor
      • 375 g warm water (about 1 1/2 cups), 90–95°F
      • 120 g active sourdough starter (about 1/2 cup), 100% hydration
      • 10 g fine sea salt (about 1 3/4 tsp)
      • 40 g olive oil (about 3 tbsp), plus more for the pan and drizzle
    • For the cinnamon swirl:
      • 80 g unsalted butter, very soft (about 6 tbsp)
      • 120 g light brown sugar (about 1/2 cup packed)
      • 1 tbsp ground cinnamon
      • 1/8 tsp fine salt
      • 1 tsp vanilla extract
    • For the glaze (optional):
      • 80 g powdered sugar (about 2/3 cup)
      • 1–2 tbsp milk or cream
      • 1/2 tsp vanilla extract
      • Pinch of salt

    Instructions

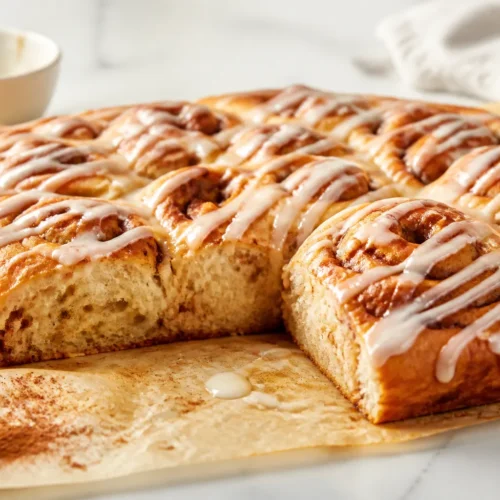
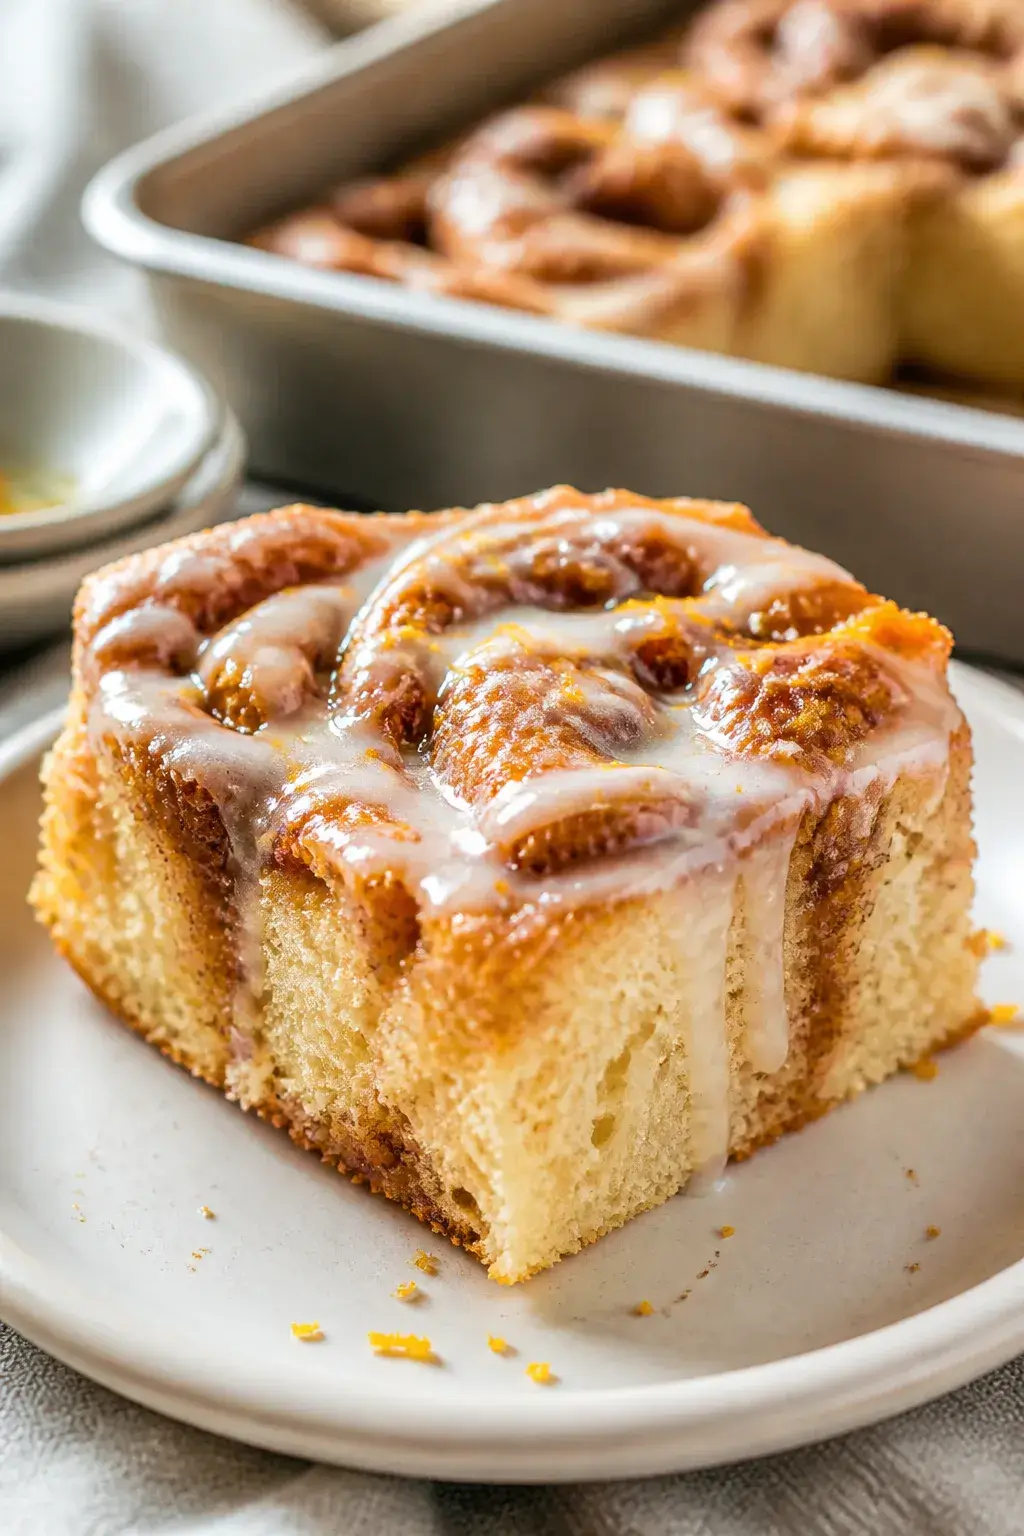
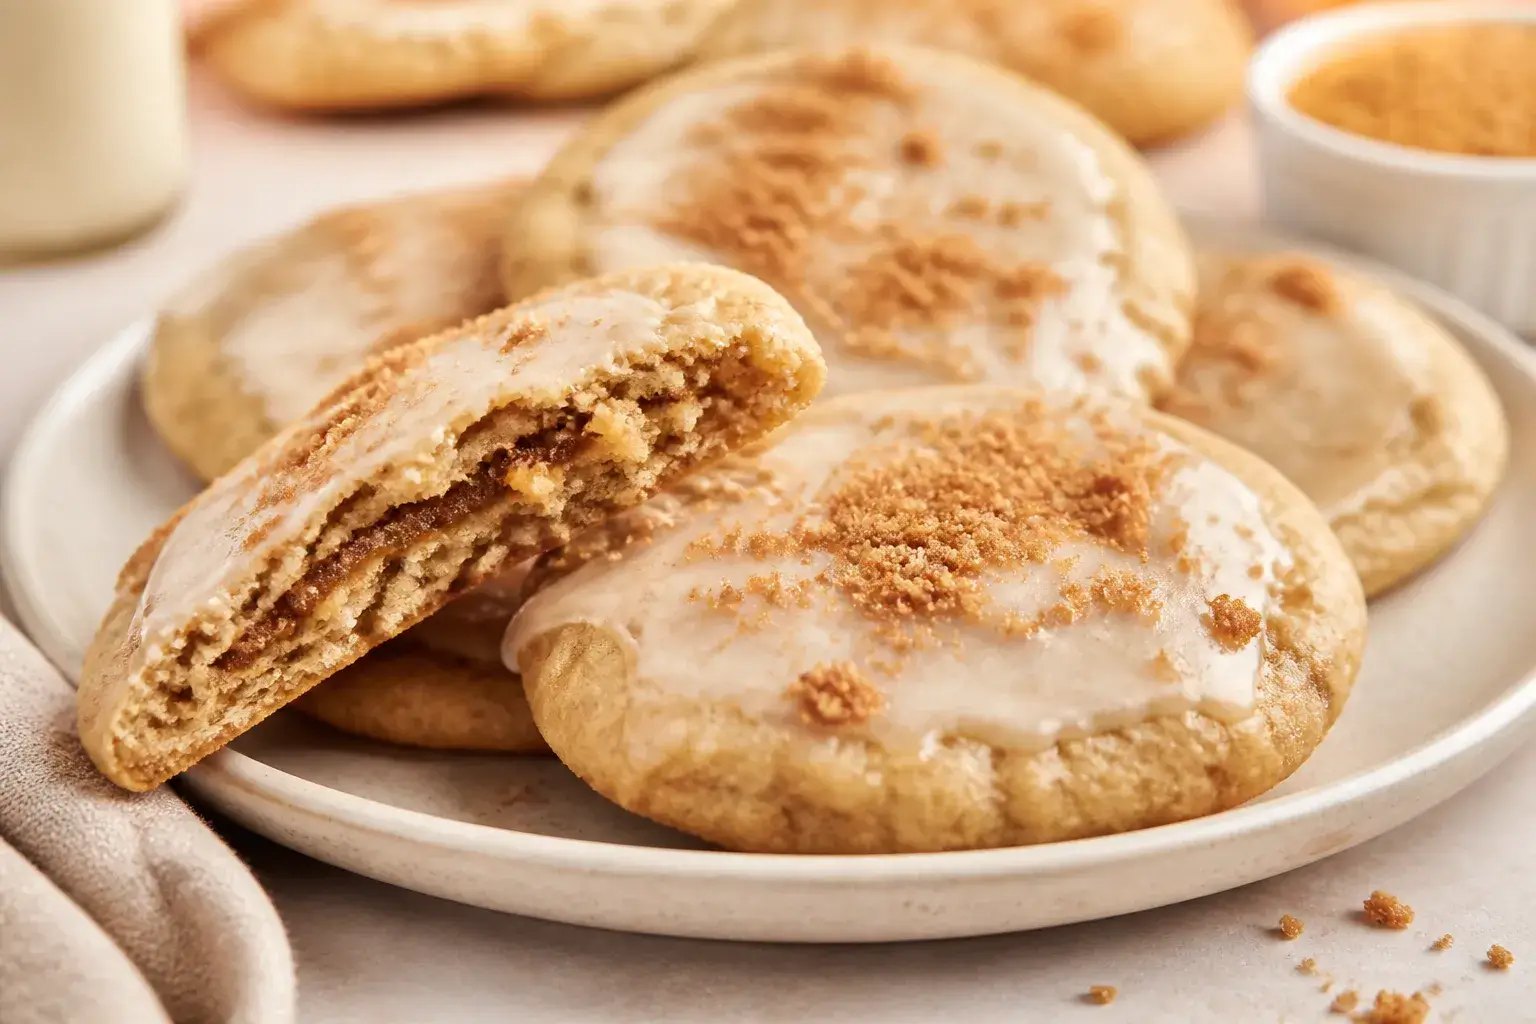
    Close-up detail of a pulled-apart square of sourdough cinnamon roll focaccia on a matte white plate,
    1. Mix the dough: In a large bowl, whisk warm water and starter. Add flours and salt. Stir until no dry bits remain.

      Rest 20 minutes, then drizzle in olive oil and fold until incorporated. The dough will be sticky—this is good.

    2. Strengthen the dough: Over 1 hour, perform 3 sets of stretch-and-folds every 20 minutes. Keep hands slightly wet to prevent sticking.

      The dough should grow smoother and bouncier.

    3. Bulk ferment: Cover and let rise at room temperature until puffy and roughly doubled, 3–5 hours depending on warmth and starter strength. You should see bubbles along the sides.
    4. Pan and cold proof: Generously oil a 9×13-inch pan. Gently transfer dough into the pan.

      Dimple lightly to spread, then rest 20 minutes. Repeat dimpling to fill the pan. Cover and refrigerate 8–12 hours or overnight for flavor and easier handling.

    5. Make the cinnamon mix: Stir butter, brown sugar, cinnamon, salt, and vanilla into a smooth paste.

      If too firm, warm briefly until spreadable.

    6. Final proof: Remove dough from the fridge and let sit 45–60 minutes until slightly puffy. Preheat oven to 425°F (220°C) with a rack in the center.
    7. Add the swirl: Use oiled fingers to create shallow channels and dimples. Dollop the cinnamon paste across the surface.

      Gently spread and swirl with the back of a spoon, leaving a 1/2-inch border. Drizzle a little olive oil around the edges for crispness.

    8. Bake: Bake 20–25 minutes until the top is deep golden with caramelized pockets. If browning too fast, tent loosely with foil for the last 5 minutes.
    9. Glaze and cool: Whisk the glaze to a thick, pourable consistency.

      Cool focaccia 10–15 minutes, then drizzle over the warm surface. Slice or pull apart and serve.

    Storage Instructions

    • Room temperature: Keep covered for up to 2 days. Rewarm at 300°F (150°C) for 8–10 minutes to refresh.
    • Freezer: Wrap slices tightly and freeze up to 1 month.

      Thaw at room temp, then warm in the oven.

    • Avoid the fridge: It dries out the crumb. If you must, reheat before serving.

    Health Benefits

    • Sourdough fermentation can improve digestibility and may reduce the glycemic impact compared to straight-yeast breads.
    • Olive oil adds heart-friendly fats and helps create a tender crumb without heavy enrichments.
    • Whole wheat flour (even a small amount) adds fiber and minerals for a more balanced treat.

    Common Mistakes to Avoid

    • Underactive starter: If your starter isn’t bubbly and doubling, the dough won’t rise well. Feed it 4–8 hours before mixing.
    • Too little oil in the pan: This prevents crisp edges and can make sticking a nightmare.

      Be generous.

    • Overproofing: If the dough is collapsing or very loose, it’s gone too far. Bake when it’s puffy and aerated but still resilient.
    • Overloading the topping: Too much butter-sugar mix can pool and burn. Stick to the amounts listed.

    Recipe Variations

    • Cream cheese glaze: Beat 85 g cream cheese with powdered sugar, a splash of milk, and vanilla for a tangy finish.
    • Maple pecan: Swap half the brown sugar for maple syrup and sprinkle toasted chopped pecans before baking.
    • Cardamom twist: Add 1/2 tsp ground cardamom to the cinnamon mix for a Scandinavian vibe.
    • Raisin or date studded: Press a handful of soaked raisins or chopped dates into the dough before swirling.
    • Orange icing: Add orange zest to the glaze and a teaspoon of juice for brightness.

    FAQ

    Can I make this without overnight proofing?

    Yes.

    Let the dough rise in the pan at room temperature until puffy, 1–2 hours, then proceed. The flavor will be milder and the dough a bit stickier to handle, but it still works.

    Can I use instant yeast instead of sourdough?

    You can. Use 2 tsp instant yeast, increase water to 400 g, and skip the starter.

    Bulk ferment will be faster—about 1–2 hours—so watch the dough, not the clock.

    How do I know it’s fully baked?

    The top should be a deep golden brown with bubbling cinnamon pockets. The internal temperature near the center should read around 200–205°F (93–96°C).

    What if my dough is very wet?

    That’s normal for focaccia. Use wet or oiled hands for folds and shaping, and rely on time and folds to build strength rather than adding extra flour.

    Can I reduce the sugar?

    Yes.

    Drop the brown sugar to 80–90 g for a less-sweet version. The swirl will be lighter but still flavorful.

    In Conclusion

    This sourdough cinnamon roll focaccia brings bakery warmth to a simple, shareable pan. It’s unfussy, aromatic, and satisfyingly soft with crisp, caramelized edges.

    Keep your starter lively, respect the proof, and enjoy a bake that feels special without being complicated. One pan, big flavor, plenty of smiles.

    Sourdough Cinnamon Roll Focaccia Recipe – A Soft, Swirled, and Cozy Bake

    Prep Time 30 minutes
    Cook Time 25 minutes
    Total Time 55 minutes
    Servings 12 servings

    Ingredients
      

    • For the dough:
    • 450 g bread flour (about 3 3/4 cups)
    • 50 g whole wheat flour (about 1/3 cup), optional for flavor
    • 375 g warm water (about 1 1/2 cups), 90–95°F
    • 120 g active sourdough starter (about 1/2 cup), 100% hydration
    • 10 g fine sea salt (about 1 3/4 tsp)
    • 40 g olive oil (about 3 tbsp), plus more for the pan and drizzle
    • For the cinnamon swirl:
    • 80 g unsalted butter, very soft (about 6 tbsp)
    • 120 g light brown sugar (about 1/2 cup packed)
    • 1 tbsp ground cinnamon
    • 1/8 tsp fine salt
    • 1 tsp vanilla extract
    • For the glaze (optional):
    • 80 g powdered sugar (about 2/3 cup)
    • 1–2 tbsp milk or cream
    • 1/2 tsp vanilla extract
    • Pinch of salt

    Instructions
     

    • Mix the dough: In a large bowl, whisk warm water and starter. Add flours and salt. Stir until no dry bits remain. Rest 20 minutes, then drizzle in olive oil and fold until incorporated. The dough will be sticky—this is good.
    • Strengthen the dough: Over 1 hour, perform 3 sets of stretch-and-folds every 20 minutes. Keep hands slightly wet to prevent sticking. The dough should grow smoother and bouncier.
    • Bulk ferment: Cover and let rise at room temperature until puffy and roughly doubled, 3–5 hours depending on warmth and starter strength. You should see bubbles along the sides.
    • Pan and cold proof: Generously oil a 9×13-inch pan. Gently transfer dough into the pan. Dimple lightly to spread, then rest 20 minutes. Repeat dimpling to fill the pan. Cover and refrigerate 8–12 hours or overnight for flavor and easier handling.
    • Make the cinnamon mix: Stir butter, brown sugar, cinnamon, salt, and vanilla into a smooth paste. If too firm, warm briefly until spreadable.
    • Final proof: Remove dough from the fridge and let sit 45–60 minutes until slightly puffy. Preheat oven to 425°F (220°C) with a rack in the center.
    • Add the swirl: Use oiled fingers to create shallow channels and dimples. Dollop the cinnamon paste across the surface. Gently spread and swirl with the back of a spoon, leaving a 1/2-inch border. Drizzle a little olive oil around the edges for crispness.
    • Bake: Bake 20–25 minutes until the top is deep golden with caramelized pockets. If browning too fast, tent loosely with foil for the last 5 minutes.
    • Glaze and cool: Whisk the glaze to a thick, pourable consistency. Cool focaccia 10–15 minutes, then drizzle over the warm surface. Slice or pull apart and serve.
  • Cinnamon Roll Focaccia Sourdough – A Soft, Swirly Twist on a Classic

    Cinnamon Roll Focaccia Sourdough – A Soft, Swirly Twist on a Classic

    Think of this as the cozy mashup you didn’t know you needed: plush sourdough focaccia meets gooey cinnamon roll. It’s simple to assemble, fun to swirl, and perfect for brunch or a sweet afternoon treat. The dough is light and pillowy with a crisp edge, while the cinnamon-brown sugar topping melts into little caramelized pockets.

    You’ll finish with a quick vanilla glaze for that classic cinnamon roll vibe. If you love sourdough baking but want something different, this one’s a winner.

    What Makes This Recipe So Good

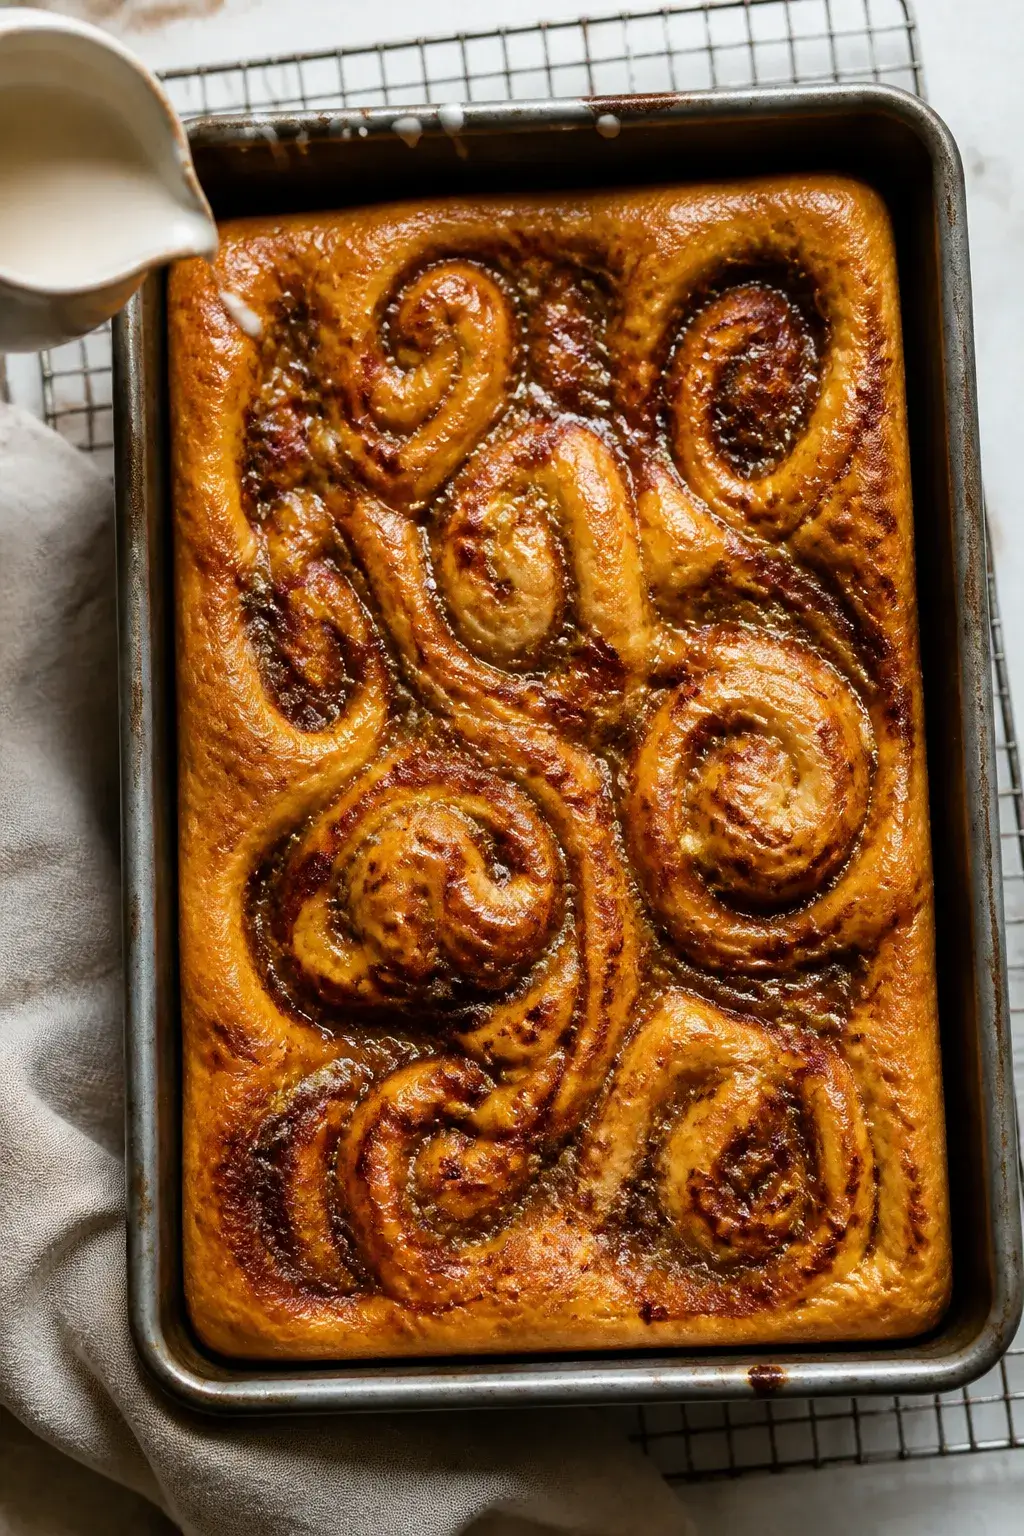
    Overhead shot of cinnamon roll focaccia just out of the oven in a well-oiled 9x13 metal pan: golden
    • Texture heaven: Airy, open-crumb focaccia meets sticky-sweet cinnamon swirl.
    • Make-ahead friendly: The cold ferment builds flavor and makes timing flexible.
    • Low-effort, high payoff: No complicated shaping—just dimples and drizzle.
    • Balanced sweetness: Not cloying, thanks to tangy sourdough and a light glaze.
    • Brunch showstopper: Looks fancy, but it’s easy enough for a lazy weekend.

    Shopping List

    • Active sourdough starter (100% hydration, bubbly and ripe)
    • Bread flour (or all-purpose in a pinch)
    • Water (room temperature)
    • Fine sea salt
    • Olive oil
    • Unsalted butter (melted, for the topping)
    • Brown sugar (light or dark)
    • Cinnamon (ground)
    • Vanilla extract
    • Powdered sugar (for the glaze)
    • Milk or cream (for the glaze)
    • Optional: Pinch of cardamom, orange zest, flaky salt

    How to Make It

    Close-up, three-quarter angle of a sliced square of cinnamon roll focaccia on a matte white plate: p
    1. Mix the dough: In a large bowl, combine 100 g active starter, 375 g water, and 450 g bread flour. Stir to a shaggy mass.

      Rest 20–30 minutes (autolyse).

    2. Add salt and oil: Sprinkle in 10 g fine sea salt and 20 g olive oil. Pinch and fold until incorporated and the dough smooths slightly.
    3. Bulk ferment with folds: Over 2–3 hours at warm room temp, perform 3–4 sets of stretch-and-folds every 30 minutes. Dough should become elastic and puffy by ~50–75% rise.
    4. Cold ferment: Lightly oil the bowl, cover, and refrigerate 8–24 hours for flavor and easier handling.
    5. Pan and proof: Generously oil a 9×13-inch pan (or a well-oiled sheet pan for thinner focaccia).

      Tip in the dough and gently stretch. If it resists, rest 10 minutes and stretch again. Cover and proof until noticeably puffy, 45–90 minutes depending on room temp.

    6. Make the cinnamon topping: Mix 60 g melted butter, 100 g brown sugar, 2–3 tsp cinnamon, a pinch of salt, and 1 tsp vanilla.

      Stir to a thick, spoonable paste.

    7. Dimple and swirl: Heat oven to 425°F (220°C). Oil your fingertips and deeply dimple the dough. Spoon the cinnamon mixture in thin ribbons across the surface, then use a butter knife to gently swirl.

      Avoid pooling too much in one spot.

    8. Bake: Drizzle a little olive oil around the edges for crispness. Bake 18–24 minutes, until golden with caramelized spots and an internal temp around 200°F (93°C). If browning too quickly, tent with foil near the end.
    9. Glaze: Whisk 100 g powdered sugar with 1–2 tbsp milk or cream and 1/2 tsp vanilla until smooth and pourable.

      Cool focaccia 10–15 minutes, then drizzle. Finish with a pinch of flaky salt if you like.

    10. Slice and serve: Cut into squares or long sticks. Best slightly warm.

    How to Store

    • Room temperature: Keep covered for 1–2 days.

      Rewarm at 300°F (150°C) for 8–10 minutes to refresh.

    • Freeze: Wrap pieces well and freeze up to 2 months. Thaw at room temp, then re-crisp in the oven.
    • Avoid the fridge: It dries the crumb faster than you’d think.

    Benefits of This Recipe

    • Less sugar than classic rolls: Sweet, but not heavy.
    • Sourdough tang: Adds depth and balances the topping.
    • No knead drama: Gentle folds do the work; no mixer required.
    • Flexible timeline: Cold ferment fits your schedule and enhances flavor.

    What Not to Do

    • Don’t skip a ripe starter: Weak starter = dense, sluggish dough.
    • Don’t rush the proof: Underproofed dough won’t dimple well and bakes up tight.
    • Don’t flood with topping: Too much butter-sugar creates soggy spots. Aim for thin, even ribbons.
    • Don’t overbake: Cinnamon sugar can burn fast.

      Watch the last minutes closely.

    Variations You Can Try

    • Maple Pecan: Swap half the brown sugar for maple sugar and scatter chopped pecans.
    • Orange Cardamom: Add 1 tsp orange zest and 1/4 tsp cardamom to the topping; glaze with orange juice.
    • Cream Cheese Drizzle: Beat softened cream cheese with powdered sugar and a splash of milk for a tangy topping.
    • Apple Cinnamon: Dot the surface with finely diced apples before swirling the topping.
    • Salted Honey Glaze: Replace vanilla glaze with warm honey and a pinch of flaky salt.

    FAQ

    Can I use instant yeast instead of sourdough?

    Yes. Use 2 tsp instant yeast, increase water slightly if needed, and skip the cold ferment or shorten it to 2–4 hours. Flavor will be milder but still delicious.

    How do I know the dough is ready to bake?

    It should look puffy, hold the dimples, and spring back slowly when poked.

    If it snaps back quickly, give it more time.

    Can I bake this in a cast-iron skillet?

    Absolutely. A well-oiled 12-inch skillet gives great edge crisp. Watch the bake time—it may run a couple minutes shorter.

    What if my topping leaks to the sides?

    That’s fine.

    The edges will caramelize and turn candy-crisp. Just loosen with a thin spatula while warm.

    Is there a dairy-free option?

    Use olive oil or vegan butter in the topping and make a simple water-vanilla-powdered sugar glaze.

    My dough is sticky—did I do something wrong?

    Sticky is normal for focaccia. Oil your hands and pan, and rely on gentle folds plus rest periods instead of adding flour.

    Final Thoughts

    Cinnamon roll focaccia sourdough brings together comfort and ease in one pan.

    It’s simple, flexible, and impressive without being fussy. Keep your starter lively, let the dough get puffy, and swirl with a light hand. You’ll end up with a golden, tender bake that tastes like weekend morning sunshine.

    Cinnamon Roll Focaccia Sourdough – A Soft, Swirly Twist on a Classic

    Prep Time 25 minutes
    Cook Time 25 minutes
    Total Time 50 minutes
    Servings 12 servings

    Ingredients
      

    • Active sourdough starter (100% hydration, bubbly and ripe)
    • Bread flour (or all-purpose in a pinch)
    • Water (room temperature)
    • Fine sea salt
    • Olive oil
    • Unsalted butter (melted, for the topping)
    • Brown sugar (light or dark)
    • Cinnamon (ground)
    • Vanilla extract
    • Powdered sugar (for the glaze)
    • Milk or cream (for the glaze)
    • Optional: Pinch of cardamom, orange zest, flaky salt

    Instructions
     

    • Mix the dough: In a large bowl, combine 100 g active starter, 375 g water, and 450 g bread flour. Stir to a shaggy mass. Rest 20–30 minutes (autolyse).
    • Add salt and oil: Sprinkle in 10 g fine sea salt and 20 g olive oil. Pinch and fold until incorporated and the dough smooths slightly.
    • Bulk ferment with folds: Over 2–3 hours at warm room temp, perform 3–4 sets of stretch-and-folds every 30 minutes. Dough should become elastic and puffy by ~50–75% rise.
    • Cold ferment: Lightly oil the bowl, cover, and refrigerate 8–24 hours for flavor and easier handling.
    • Pan and proof: Generously oil a 9×13-inch pan (or a well-oiled sheet pan for thinner focaccia). Tip in the dough and gently stretch. If it resists, rest 10 minutes and stretch again. Cover and proof until noticeably puffy, 45–90 minutes depending on room temp.
    • Make the cinnamon topping: Mix 60 g melted butter, 100 g brown sugar, 2–3 tsp cinnamon, a pinch of salt, and 1 tsp vanilla. Stir to a thick, spoonable paste.
    • Dimple and swirl: Heat oven to 425°F (220°C). Oil your fingertips and deeply dimple the dough. Spoon the cinnamon mixture in thin ribbons across the surface, then use a butter knife to gently swirl. Avoid pooling too much in one spot.
    • Bake: Drizzle a little olive oil around the edges for crispness. Bake 18–24 minutes, until golden with caramelized spots and an internal temp around 200°F (93°C). If browning too quickly, tent with foil near the end.
    • Glaze: Whisk 100 g powdered sugar with 1–2 tbsp milk or cream and 1/2 tsp vanilla until smooth and pourable. Cool focaccia 10–15 minutes, then drizzle. Finish with a pinch of flaky salt if you like.
    • Slice and serve: Cut into squares or long sticks. Best slightly warm.
  • 17 Easy Movie Night Dinner Ideas Everyone Will Love (Perfect for Family & Weekend Fun!)

    17 Easy Movie Night Dinner Ideas Everyone Will Love (Perfect for Family & Weekend Fun!)

    Hey there, movie night maestros! If you’ve been hunting for dinner ideas that pair perfectly with film marathons, you’re in the right spot. We’ve got 17 delicious, easy-to-mix ideas that everyone—from toddlers to grandparents—will devour. Grab a snack, pick a movie, and let’s get cooking!

    Trust me, these ideas make snacky, cozy evenings feel extra special without extra stress. Seriously, dinner can be the MVP of your movie night lineup. FYI, the best part is they scale from quick weeknights to weekend feasts. Let’s dive in!

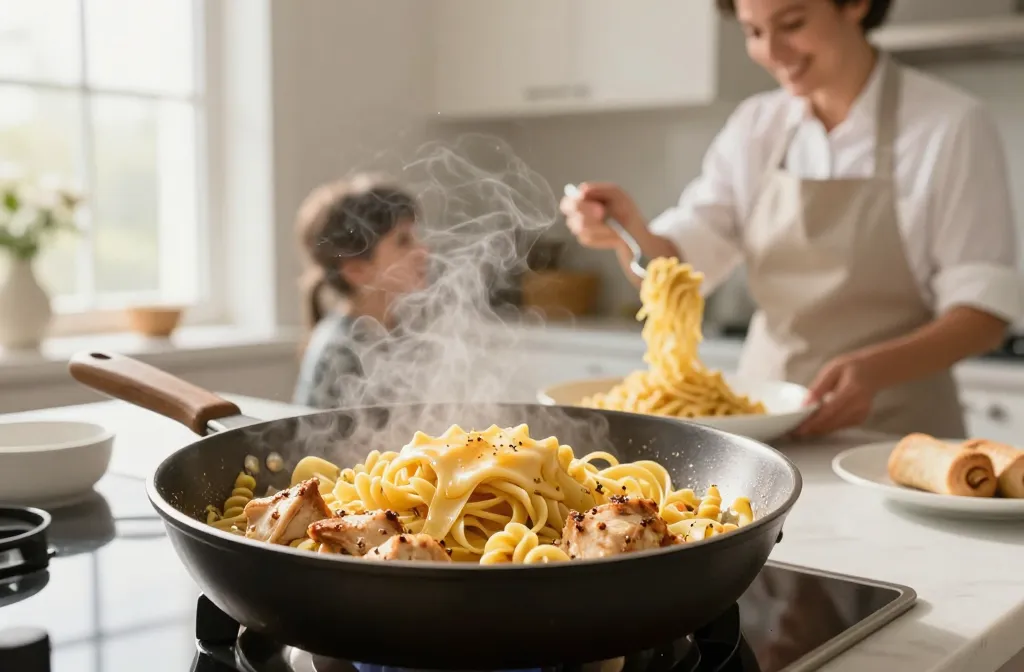
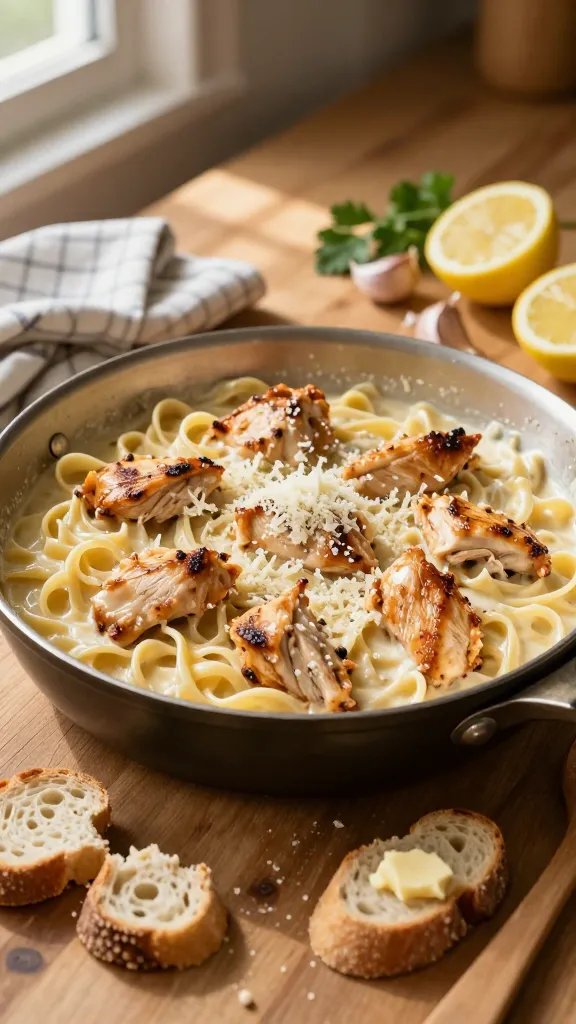
    1. One-Pan Cheesy Garlic Chicken Alfredo Bakes
    Item 1

    This section is all about a comforting, creamy classic that stays fuss-free. The magic? A single pan and a loaf of bread for dunking, perfect for family bonding during the big finale. It’s creamy, cheesy, and incredibly satisfying.

    AI Coloring Page Prompt:

    Write one extremely detailed AI image generation prompt (300–600 words) to create a premium printable black-and-white coloring page focused on the topic of this section: a scene featuring a single large skillet with garlic butter chicken and spirals of fettuccine noodles, topped with melted cheese, arranged in a cozy household kitchen setting. Include 1-3 main characters or objects: a family member chef wearing an apron, a bubbling skillet, and a serving dish with steaming pasta. Keep the composition clean and uncluttered with a large open space. Include simple decorative elements: steam wisps, tiny stars or sparkles, and a few kitchen utensils like a wooden spoon and a spatula. The background should be minimal, with a hint of a kitchen counter and a wall clock. The page title should appear inside the artwork in large outlined bubble letters with white interiors so children can color the letters. Use portrait orientation, US Letter printable, A4 printable. Professional KDP-quality illustration, white background, black-and-white vector line art, thick smooth outlines, large open coloring spaces, no grayscale, no shading, no crosshatching, no logos, no branding, no watermark, no jersey sponsors, no other text besides the title. The title should be “One-Pan Cheesy Garlic Chicken Alfredo Bakes” in large outlined bubble letters. End with: Premium printable coloring book illustration, professional black-and-white vector line art, thick smooth outlines, large open coloring spaces, minimal background, clean balanced composition, one to three main subjects only, white background, no grayscale, no shading, no crosshatching, no logos, no branding, no watermark, KDP-quality artwork.

    Fun Facts

    • One-pan meals cut down cleanup time, letting you get back to the movie faster.
    • Cheese pulls are scientifically satisfying and perfect for photo-worthy bites.

    Why Kids Love It

    Kids adore the gooey cheese, the sizzling sound, and the cozy kitchen vibe that makes them feel like mini chefs.

    Creative Coloring Ideas

    • Color the cheese in a melty yellow tone, the pasta in pale gold, and the skillet in a warm metallic shade.
    • Add colorful aprons and a bright kitchen backdrop to make the scene pop.

    Pro Tip

    Use a light pencil underlines first to map where the cheese drips will go, then follow with bold black lines for a crisp final look.

    2. Super-Simple Sheet Pan Nachos Party
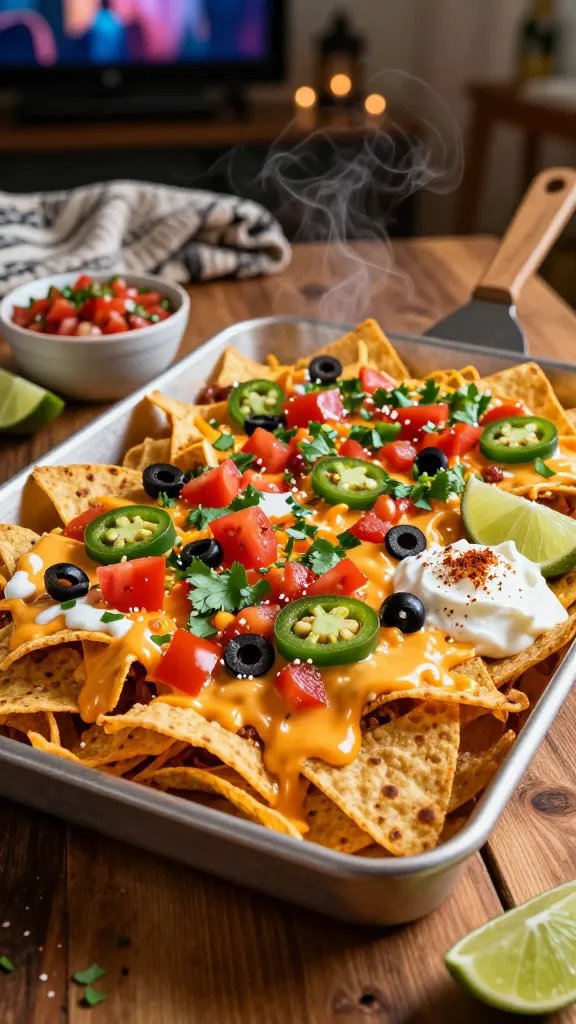
    Item 2

    Craving crowd-pleasing, mess-friendly, snackable goodness? Sheet pan nachos are your best friend—crunchy, melty, and perfect for sharing while the movie starts. It’s a win for both flavor and practicality.

    AI Coloring Page Prompt:

    Write one extremely detailed AI image generation prompt (300–600 words) to create a premium printable black-and-white coloring page focused on the topic of this section: a big sheet pan heaped with nachos loaded with cheese, jalapeños, diced tomatoes, and cilantro. Include 1-3 main characters or objects: two hands reaching toward the pan, a bowl of sour cream on the side, and a sprinkle of cilantro on top. Keep the composition clean and uncluttered with a large open space. Include simple decorative elements: small bursts representing cheese steam, tiny stars, and a few confetti-like dots around the pan. The background minimal with a simple kitchen counter edge. The page title should appear inside the artwork in large outlined bubble letters with white interiors so children can color the letters. Use portrait orientation, US Letter printable, A4 printable. Professional KDP-quality illustration, white background, black-and-white vector line art, thick smooth outlines, large open coloring spaces, no grayscale, no shading, no crosshatching, no logos, no branding, no watermark, no jersey sponsors, no other text besides the title. The title should be “Sheet Pan Nachos Party” in large outlined bubble letters. End with: Premium printable coloring book illustration, professional black-and-white vector line art, thick smooth outlines, large open coloring spaces, minimal background, clean balanced composition, one to three main subjects only, white background, no grayscale, no shading, no crosshatching, no logos, no branding, no watermark, KDP-quality artwork.

    Fun Facts

    • Sheet pan meals minimize cleanup and maximize time with family during a film.
    • Nachos are forgiving—top with whatever you have for extra flavor.

    Why Kids Love It

    Crunchy chips, cheesy goodness, and the easy-to-reach toppings make it a playful, interactive snack.

    Creative Coloring Ideas

    • Color the cheese with marbled yellows and oranges; make toppings bright green and red for a colorful contrast.
    • Accent with dotted or dashed lines to mimic sizzling steam.

    Pro Tip

    Leave larger white spaces for bold crayon work; reserve smaller details for fine-tipped markers.

    3. Family-Favorite Pepperoni Pizza Slab Bake

    Item 3

    A pizza night that feels special but stays effortless. This slab bake serves a crowd and keeps the cheese bubbling under a golden crust while the film plays in the background. It’s a simple, crowd-pleasing centerpiece you’ll make again and again.

    AI Coloring Page Prompt:

    Write one extremely detailed AI image generation prompt (300–600 words) to create a premium printable black-and-white coloring page focused on the topic of this section: a large rectangular pizza slab with pepperoni circles, melted cheese, and a few basil leaves on top. Include 1-3 main characters or objects: a hand placing a slice on a plate, a pizza cutter nearby, and a steaming hot oven in the background. Keep the composition clean and uncluttered with a large open space. Include simple decorative elements: little bite marks, tiny hearts, and wisps of steam rising from the slice. The background should be minimal, hinting at a dining table setting. The page title should appear inside the artwork in large outlined bubble letters with white interiors so children can color the letters. Use portrait orientation, US Letter printable, A4 printable. Professional KDP-quality illustration, white background, black-and-white vector line art, thick smooth outlines, large open coloring spaces, no grayscale, no shading, no crosshatching, no logos, no branding, no watermark, no jersey sponsors, no other text besides the title. The title should be “Family-Favorite Pepperoni Pizza Slab Bake” in large outlined bubble letters. End with: Premium printable coloring book illustration, professional black-and-white vector line art, thick smooth outlines, large open coloring spaces, minimal background, clean balanced composition, one to three main subjects only, white background, no grayscale, no shading, no crosshatching, no logos, no branding, no watermark, KDP-quality artwork.

    Fun Facts

    • Pizza is a universal crowd-pleaser and a quick crowd-saver for movie nights.
    • Slice-by-slice serving keeps everyone engaged during the film.

    Why Kids Love It

    Who can resist a cheesy slice? The bold shapes and simple toppings are perfect for little colorers.

    Creative Coloring Ideas

    • Experiment with crust browns and cheese shades from pale yellow to golden amber.
    • Add colorful toppings in fun arrangements to create a party-on-a-plate vibe.

    Pro Tip

    Work from the edges inward to keep the crust edges neat and the cheese bubbling-looking.

    4. Creamy Tortellini Soup with a Cozy Finish

    Item 4

    Soup night can be a warm hug on a busy weekend. This creamy tortellini soup idea is hearty yet quick, soothing every stomach after a long movie adventure. It’s perfect for dipping warm breadsticks while the credits roll.

    AI Coloring Page Prompt:

    Write one extremely detailed AI image generation prompt (300–600 words) to create a premium printable black-and-white coloring page focused on the topic of this section: a large bowl of tortellini soup with steam rising and a spoon resting inside. Include 1-3 main characters or objects: a family member holding a spoon, a mug of hot cocoa on the side, and a cozy knitted blanket draped over a chair. Keep the composition clean and uncluttered with a large open space. Include decorative elements: small steam curls, a few floating basil leaves, and gentle swirls around the bowl. The background should be minimal, hinting at a table with a placemat. The page title should appear inside the artwork in large outlined bubble letters with white interiors so children can color the letters. Use portrait orientation, US Letter printable, A4 printable. Professional KDP-quality illustration, white background, black-and-white vector line art, thick smooth outlines, large open coloring spaces, no grayscale, no shading, no crosshatching, no logos, no branding, no watermark, no jersey sponsors, no other text besides the title. The title should be “Creamy Tortellini Soup With Cozy Finish” in large outlined bubble letters. End with: Premium printable coloring book illustration, professional black-and-white vector line art, thick smooth outlines, large open coloring spaces, minimal background, clean balanced composition, one to three main subjects only, white background, no grayscale, no shading, no crosshatching, no logos, no branding, no watermark, KDP-quality artwork.

    Fun Facts

    • Warm soups pair beautifully with soft music for a relaxing movie night.
    • Countdown to the first spoonful builds anticipation and smiles.

    Why Kids Love It

    Children enjoy the comforting aroma and the chance to pick out little toppings like herbs and bread dippers.

    Creative Coloring Ideas

    • Color the soup with creamy off-white and pale yellow hues; keep the table setting in soft neutrals.
    • Give the blanket a plush texture with cross-hatching-free shading in subtle tones.

    Pro Tip

    Color the steam in light, wispy lines to give the page a cozy, inviting feel.

    5. Tangy BBQ Chicken Sliders on Mini Buns
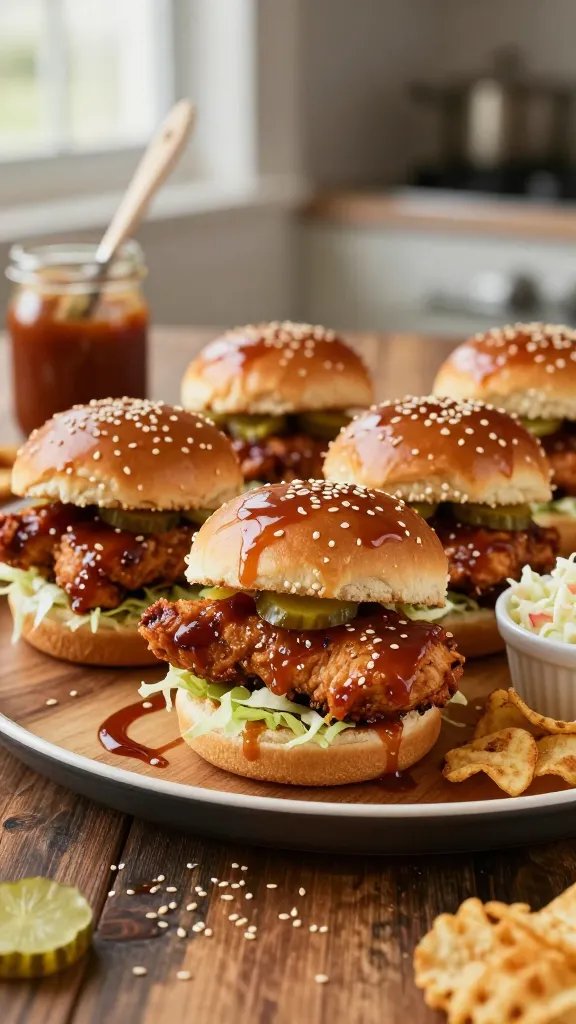
    Item 5

    Wind down with bite-sized joy. BBQ chicken sliders are the perfect handheld dinner that still feels restaurant-worthy. They’re kid-friendly, mess-friendly, and easy to share while the movie crowds cheer during a big chase scene.

    AI Coloring Page Prompt:

    Write one extremely detailed AI image generation prompt (300–600 words) to create a premium printable black-and-white coloring page focused on the topic of this section: several mini chicken sliders stacked with glossy BBQ sauce and sesame seeds on a tray. Include 1-3 main characters or objects: a hand reaching for a slider, a napkin tucked under the tray, and a small plate with pickles. The composition should be clean with a large open space. Decorative elements: tiny droplets of sauce, few sesame seeds scattered, small stars/tiny hearts. Minimal background with a simple table edge. The page title should appear inside the artwork in large outlined bubble letters with white interiors so children can color the letters. Orientation: portrait, US Letter printable, A4 printable. Professional KDP-quality illustration, white background, black-and-white vector line art, thick smooth outlines, large open coloring spaces, no grayscale, no shading, no crosshatching, no logos, no branding, no watermark, no jersey sponsors, no other text besides the title. Title: “Tangy BBQ Chicken Sliders” End with: Premium printable coloring book illustration, professional black-and-white vector line art, thick smooth outlines, large open coloring spaces, minimal background, clean balanced composition, one to three main subjects only, white background, no grayscale, no shading, no crosshatching, no logos, no branding, no watermark, KDP-quality artwork.

    Fun Facts

    • Slider bites are easy to share, perfect for a casual, fun movie vibe.
    • BBQ sauce adds a bold, family-friendly flavor that pairs with many sides.

    Why Kids Love It

    Everything mini is exciting—especially when there’s a little sauce involved!

    Creative Coloring Ideas

    • Color buns in warm browns, chicken in light tans, and sauce in rich amber tones.
    • Add a pop of green from pickles to contrast with the warm tones.

    Pro Tip

    Leave the sesame seeds as tiny circles you can color in with a fine-tipped marker for texture.

    6. Cheesy Quesadilla Wraps with Salsa Dip
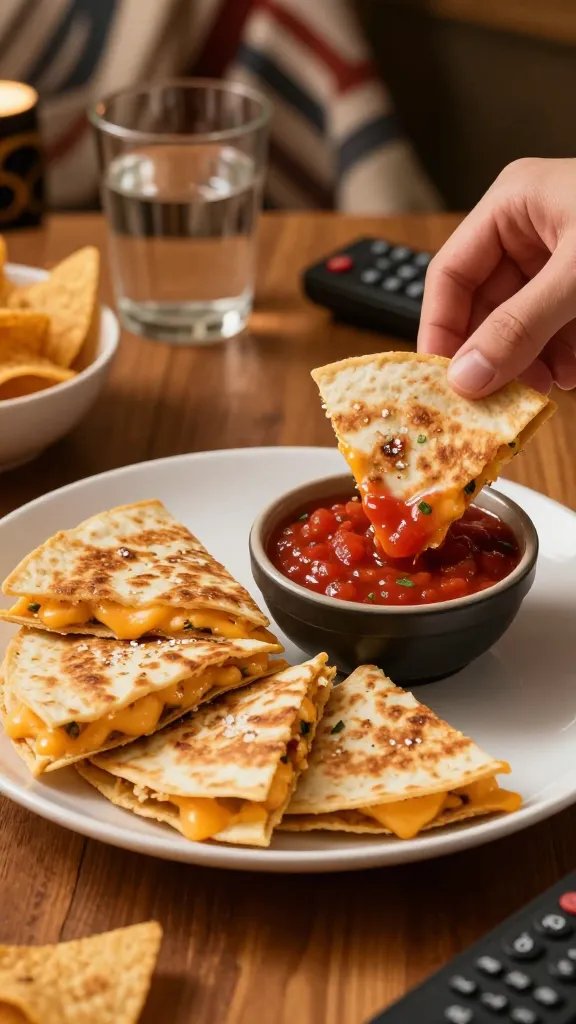
    Item 6

    Quesadillas are the movie night MVP for speed and flavor. Crisp edges, melty cheese, and a bright salsa dip make this idea irresistibly fun for everyone around the TV.

    AI Coloring Page Prompt:

    Write one extremely detailed AI image generation prompt (300–600 words) to create a premium printable black-and-white coloring page focused on the topic of this section: a stack of folded quesadilla wedges on a plate with a small bowl of salsa. Include 1-3 main characters or objects: a hand dipping a wedge into salsa, a mug of agua fresca beside the plate, and a slice of lime. Keep the composition clean with a large open space. Decorative elements: tiny sparkles around the plate, small dots to indicate salt, and a few line-based steam curls. Minimal background suggesting a kitchen counter. The page title should appear inside the artwork in large outlined bubble letters with white interiors so children can color the letters. Orientation: portrait, US Letter printable, A4 printable. Professional KDP-quality illustration, white background, black-and-white vector line art, thick smooth outlines, large open coloring spaces, no grayscale, no shading, no crosshatching, no logos, no branding, no watermark, no jersey sponsors, no other text besides the title. Title: “Cheesy Quesadilla Wraps With Salsa Dip” End with: Premium printable coloring book illustration, professional black-and-white vector line art, thick smooth outlines, large open coloring spaces, minimal background, clean balanced composition, one to three main subjects only, white background, no grayscale, no shading, no crosshatching, no logos, no branding, no watermark, KDP-quality artwork.

    Fun Facts

    • Quesadillas are versatile and can be filled with leftovers for a quick upgrade.
    • Salsa adds a bright pop that complements the gooey cheese perfectly.

    Why Kids Love It

    Folded wedges are easy to grip, fun to dip, and visually appealing for little colorers.

    Creative Coloring Ideas

    • Use a range of yellows for cheese and mix in vibrant red for salsa.
    • Color the plate with glossy shading but avoid too much blending to keep clarity.

    Pro Tip

    Outline the lime wedge with a bold line so its segments stay distinct when colored.

    7. Kid-Approved Mac and Cheese Cupcakes

    Item 7

    Yes, you read that right—mac and cheese in cupcake form. It’s playful, surprising, and incredibly shareable. Perfect for a fun, family-friendly movie night centerpiece that doubles as a conversation starter.

    AI Coloring Page Prompt:

    Write one extremely detailed AI image generation prompt (300–600 words) to create a premium printable black-and-white coloring page focused on the topic of this section: several mac and cheese cupcakes in cupcake liners arranged on a cooling rack. Include 1-3 main characters or objects: a hand reaching for a cupcake, a small jar of grated cheese, and a tiny fork. Keep the composition clean with a large open space. Decorative elements: steam lines curling above the cups, a few sesame seeds sprinkled, and gentle dots representing cheese shreds. Minimal background with a kitchen tray and a wall clock. The page title should appear inside the artwork in large outlined bubble letters with white interiors so children can color the letters. Orientation: portrait, US Letter printable, A4 printable. Professional KDP-quality illustration, white background, black-and-white vector line art, thick smooth outlines, large open coloring spaces, no grayscale, no shading, no crosshatching, no logos, no branding, no watermark, no jersey sponsors, no other text besides the title. The title should be “Mac and Cheese Cupcakes” End with: Premium printable coloring book illustration, professional black-and-white vector line art, thick smooth outlines, large open coloring spaces, minimal background, clean balanced composition, one to three main subjects only, white background, no grayscale, no shading, no crosshatching, no logos, no branding, no watermark, KDP-quality artwork.

    Fun Facts

    • Mini servings prevent overeating while still delivering big flavor.
    • Cheese-flecked crusts are visually appealing and fun to color.

    Why Kids Love It

    Kids adore the cute cupcake shape and the gooey cheese centers.

    Creative Coloring Ideas

    • Experiment with different cheese shades from creamy white to sunny gold.
    • Add colorful toppers using small veggie shapes for a playful twist.

    Pro Tip

    Color the liners in a diagonal stripe pattern to create dynamic contrast.

    8. Fun Veggie-Loaded Pita Pizzas
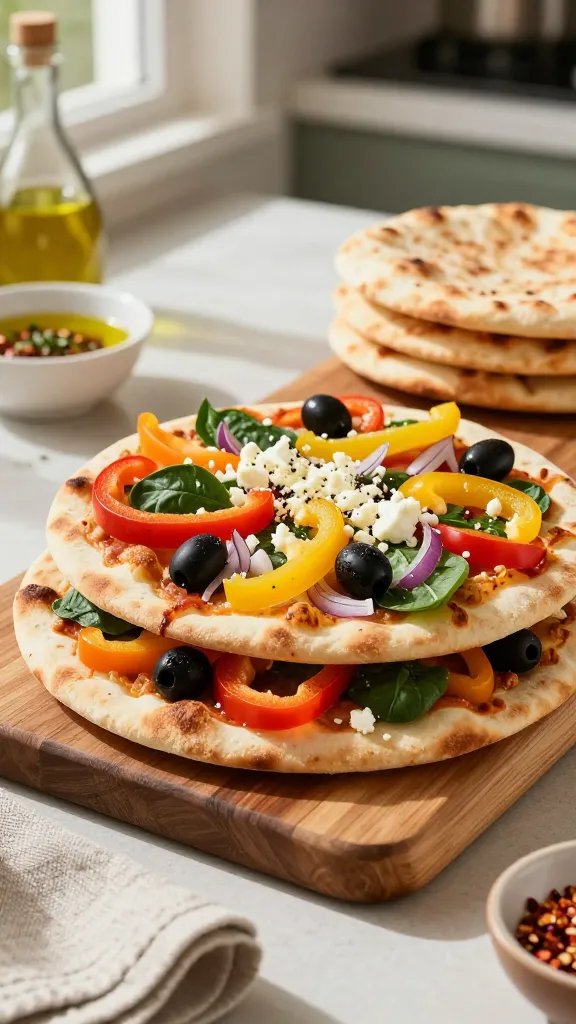
    Item 8

    Yes, veggies can be fun—the pita base makes these quick to assemble, and the toppings add a vibrant, movie-friendly look. A bright, crunchy crust with colorful veggies is the perfect palate cleanser between scenes.

    AI Coloring Page Prompt:

    Write one extremely detailed AI image generation prompt (300–600 words) to create a premium printable black-and-white coloring page focused on the topic of this section: a stack of pita pizzas with assorted toppings like bell peppers, olives, and spinach. Include 1-3 main characters or objects: a hand sprinkling oregano, a small bowl of dipping sauce, and a smiling pepper shaker. Keep the composition clean with a large open space. Decorative elements: tiny leaves, confetti-like dots, and light steam lines. Minimal background suggesting a kitchen counter. The page title should appear inside the artwork in large outlined bubble letters with white interiors so children can color the letters. Orientation: portrait, US Letter printable, A4 printable. Professional KDP-quality illustration, white background, black-and-white vector line art, thick smooth outlines, large open coloring spaces, no grayscale, no shading, no crosshatching, no logos, no branding, no watermark, no jersey sponsors, no other text besides the title. The title should be “Fun Veggie-Loaded Pita Pizzas” End with: Premium printable coloring book illustration, professional black-and-white vector line art, thick smooth outlines, large open coloring spaces, minimal background, clean balanced composition, one to three main subjects only, white background, no grayscale, no shading, no crosshatching, no logos, no branding, no watermark, KDP-quality artwork.

    Fun Facts

    • Vegetables on pizza are a colorful, healthy companion to a movie snack.
    • Flat pita bases bake quickly, keeping dinner on schedule.

    Why Kids Love It

    Kids can customize toppings and colors, turning veggies into playful shapes.

    Creative Coloring Ideas

    • Use bold greens for spinach and purple for olives to create contrast.
    • Color the pita crust a warm tan with a crisp texture.

    Pro Tip

    Outline the pepper slices to keep their shapes crisp when coloring.

    9. Crispy Air-Fryer Chicken Tenders Trio

    Item 9

    Air-fried chicken tenders deliver crunch without the greasy bite. They’re perfect for dipping, sharing, and snacking along with a film—plus, they reheat beautifully for leftovers the next day.

    AI Coloring Page Prompt:

    Write one extremely detailed AI image generation prompt (300–600 words) to create a premium printable black-and-white coloring page focused on the topic of this section: three crispy chicken tenders arranged on a plate with a small bowl of dipping sauce. Include 1-3 main characters or objects: a hand reaching for a tender, a napkin roll nearby, and a tiny bottle of hot sauce. The composition should be clean with a large open space. Decorative elements: small sparkles to indicate crispiness, a few crumbs scattered, and a couple of line-drawn steam curls. Minimal background showing a table edge. The page title should appear inside the artwork in large outlined bubble letters with white interiors so children can color the letters. Portrait orientation, US Letter printable, A4 printable. Professional KDP-quality illustration, white background, black-and-white vector line art, thick smooth outlines, large open coloring spaces, no grayscale, no shading, no crosshatching, no logos, no branding, no watermark, no jersey sponsors, no other text besides the title. Title: “Crispy Air-Fryer Chicken Tenders Trio” End with: Premium printable coloring book illustration, professional black-and-white vector line art, thick smooth outlines, large open coloring spaces, minimal background, clean balanced composition, one to three main subjects only, white background, no grayscale, no shading, no crosshatching, no logos, no branding, no watermark, KDP-quality artwork.

    Fun Facts

    • Air frying yields a satisfying crunch with less oil than deep frying.
    • Dip them in a trio of sauces for variety and color on the page.

    Why Kids Love It

    Kids love the finger-friendly shape and the chance to dip into a tasty sauce.

    Creative Coloring Ideas

    • Color the chicken with light browns and golden edges for a realistic look.
    • Make the dipping sauce bright red or orange to contrast with the plate.

    Pro Tip

    Color the plate edge with a darker shade to create depth and separation from the white background.

    10. Honey-Glazed Salmon with Lemon Wedges
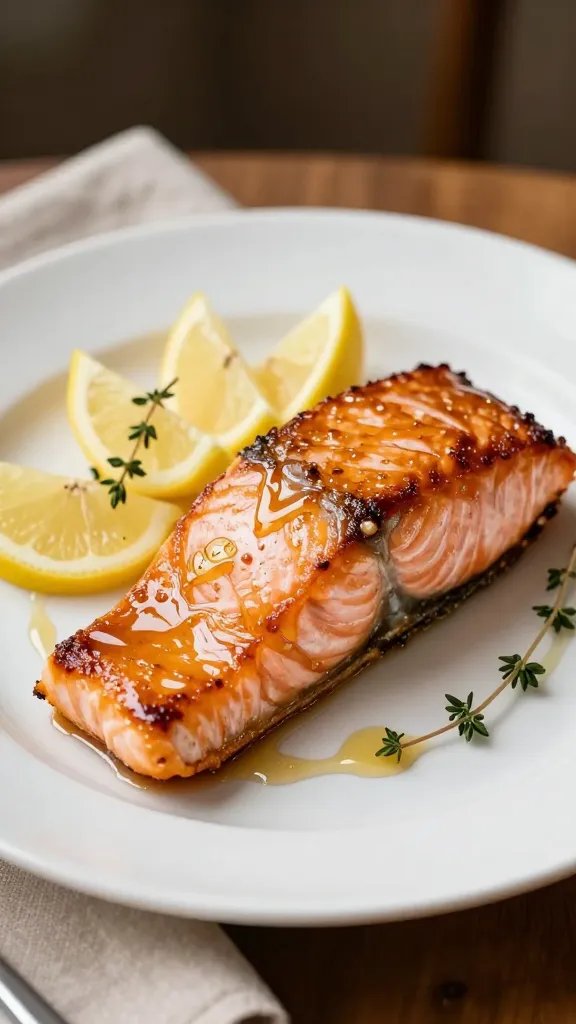
    Item 10

    Elevate your movie-night dining with a shimmering, healthy option. Honey-glazed salmon brings a touch of elegance to casual evenings and pairs surprisingly well with a family comedy or a light-hearted adventure.

    AI Coloring Page Prompt:

    Write one extremely detailed AI image generation prompt (300–600 words) to create a premium printable black-and-white coloring page focused on the topic of this section: a fillet of salmon glazed with honey, placed on a plate with lemon wedges. Include 1-3 main characters or objects: a fork resting on the plate, a glass of water nearby, and a small herb sprig. Keep the composition clean with a large open space. Decorative elements: light steam lines, subtle bubbles in water, and a few stylized leaves. Minimal background with a table surface. The page title should appear inside the artwork in large outlined bubble letters with white interiors so children can color the letters. Orientation: portrait, US Letter printable, A4 printable. Professional KDP-quality illustration, white background, black-and-white vector line art, thick smooth outlines, large open coloring spaces, no grayscale, no shading, no crosshatching, no logos, no branding, no watermark, no jersey sponsors, no other text besides the title. Title: “Honey-Glazed Salmon With Lemon Wedges” End with: Premium printable coloring book illustration, professional black-and-white vector line art, thick smooth outlines, large open coloring spaces, minimal background, clean balanced composition, one to three main subjects only, white background, no grayscale, no shading, no crosshatching, no logos, no branding, no watermark, KDP-quality artwork.

    Fun Facts

    • Salmon cooks quickly, keeping dinner bright and quick for movie nights.
    • Honey glaze creates a glossy finish that’s fun to color.

    Why Kids Love It

    Bright lemon wedges and shiny glaze are visually appealing and easy to color.

    Creative Coloring Ideas

    • Use orange-pink for the salmon and sunny yellow for the lemon wedges.
    • Color the glaze with a reflective shine using thin white spaces between lines.

    Pro Tip

    Leave the lemon rind slightly lighter to stand out against the plate and salmon.

    11. Savory Meatball Sub Sliders
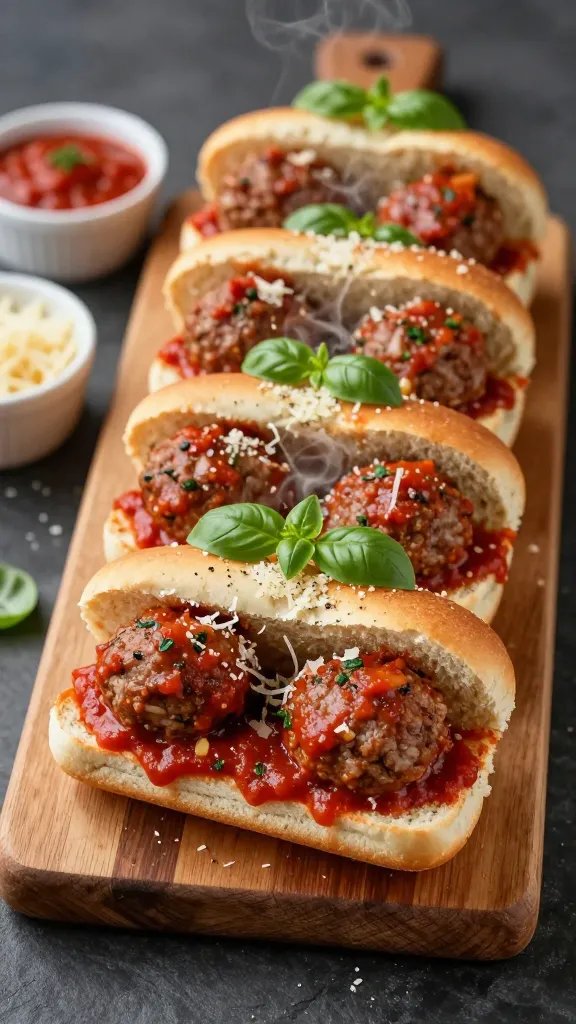
    Item 11

    Meatball subs are cozy, hearty, and perfect for a movie night that needs a big, satisfying bite. They’re easy to assemble, easy to share, and endlessly comforting as the action ramps up on screen.

    AI Coloring Page Prompt:

    Write one extremely detailed AI image generation prompt (300–600 words) to create a premium printable black-and-white coloring page focused on the topic of this section: a row of meatball sliders in a long sandwich roll with marinara sauce peeking through. Include 1-3 main characters or objects: a hand holding a slider, a jar of grated cheese nearby, and a napkin tucked under the tray. The composition should be clean with a large open space. Decorative elements: tiny spirals representing steam, small dotted stars, and a couple of line-based bubbles to indicate sauce. Minimal background hinting at a table. The page title should appear inside the artwork in large outlined bubble letters with white interiors so children can color the letters. Orientation: portrait, US Letter printable, A4 printable. Professional KDP-quality illustration, white background, black-and-white vector line art, thick smooth outlines, large open coloring spaces, no grayscale, no shading, no crosshatching, no logos, no branding, no watermark, no jersey sponsors, no other text besides the title. Title: “Savory Meatball Sub Sliders” End with: Premium printable coloring book illustration, professional black-and-white vector line art, thick smooth outlines, large open coloring spaces, minimal background, clean balanced composition, one to three main subjects only, white background, no grayscale, no shading, no crosshatching, no logos, no branding, no watermark, KDP-quality artwork.

    Fun Facts

    • Sliders are perfect for sampling multiple flavors in one sitting.
    • Red sauce adds vibrant color and a bold taste.

    Why Kids Love It

    They get to stack and bite-sized pieces, which is both fun and forgiving to color.

    Creative Coloring Ideas

    • Color the marinara sauce a deep crimson and the cheese a pale shade for contrast.
    • Make the roll a warm golden brown to mimic a freshly baked crust.

    Pro Tip

    Shade the roll edges with a slightly darker tone to create depth and dimension.

    12. Creamy Spinach Feta Stuffed Bell Peppers
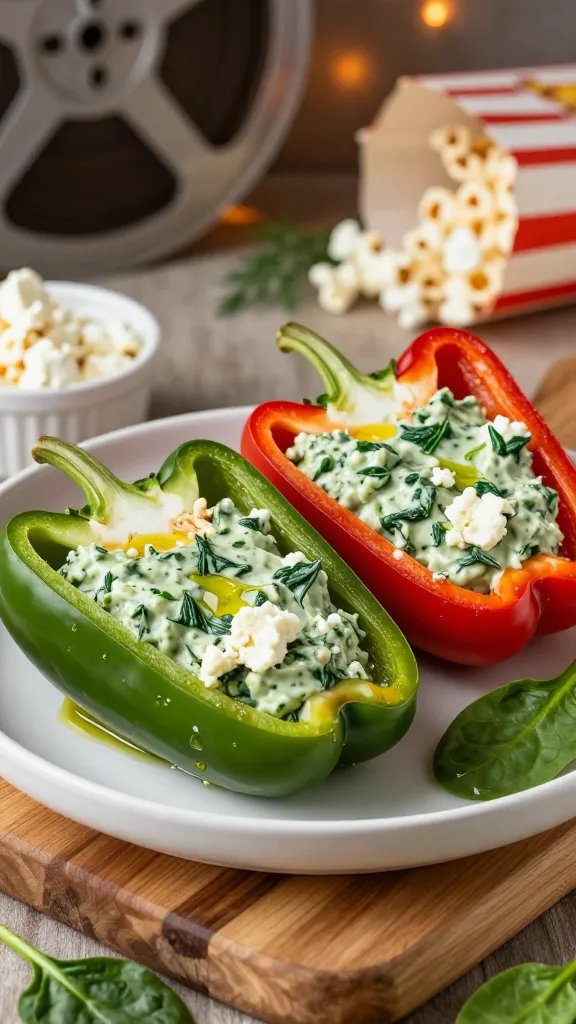
    Item 12

    A dish that looks as vibrant as it tastes. Stuffed peppers bring color, nutrition, and a hearty bite that pairs perfectly with a light-hearted film. It’s fancy enough for weekend family dinners but simple enough for a weekday twist.

    AI Coloring Page Prompt:

    Write one extremely detailed AI image generation prompt (300–600 words) to create a premium printable black-and-white coloring page focused on the topic of this section: two bell peppers filled with a creamy spinach and feta mixture, sliced open to reveal the filling. Include 1-3 main characters or objects: a hand placing a pepper on a plate, a jar of feta crumbles, and a small herb sprig. The composition should be clean with a large open space. Decorative elements: small leaves, sprinkled feta dots, and light steam lines. Minimal background suggesting a kitchen counter and a few utensils. The page title should appear inside the artwork in large outlined bubble letters with white interiors so children can color the letters. Orientation: portrait, US Letter printable, A4 printable. Professional KDP-quality illustration, white background, black-and-white vector line art, thick smooth outlines, large open coloring spaces, no grayscale, no shading, no crosshatching, no logos, no branding, no watermark, no jersey sponsors, no other text besides the title. Title: “Creamy Spinach Feta Stuffed Bell Peppers” End with: Premium printable coloring book illustration, professional black-and-white vector line art, thick smooth outlines, large open coloring spaces, minimal background, clean balanced composition, one to three main subjects only, white background, no grayscale, no shading, no crosshatching, no logos, no branding, no watermark, KDP-quality artwork.

    Fun Facts

    • Peppers add vibrant color that’s fun to color and eat.
    • Spinach is a great nutrient boost that pairs well with creamy feta.

    Why Kids Love It

    The peppers’ bright surfaces invite bold coloring and creative shading.

    Creative Coloring Ideas

    • Use deep greens for spinach and rich reds for peppers to create contrast with white feta.
    • Experiment with shading on the pepper shells to show their curved surfaces.

    Pro Tip

    Highlight the filling with a softer gray-white to emphasize creaminess without losing the black-and-white look.

    13. Zesty Lemon Garlic Shrimp Toppers
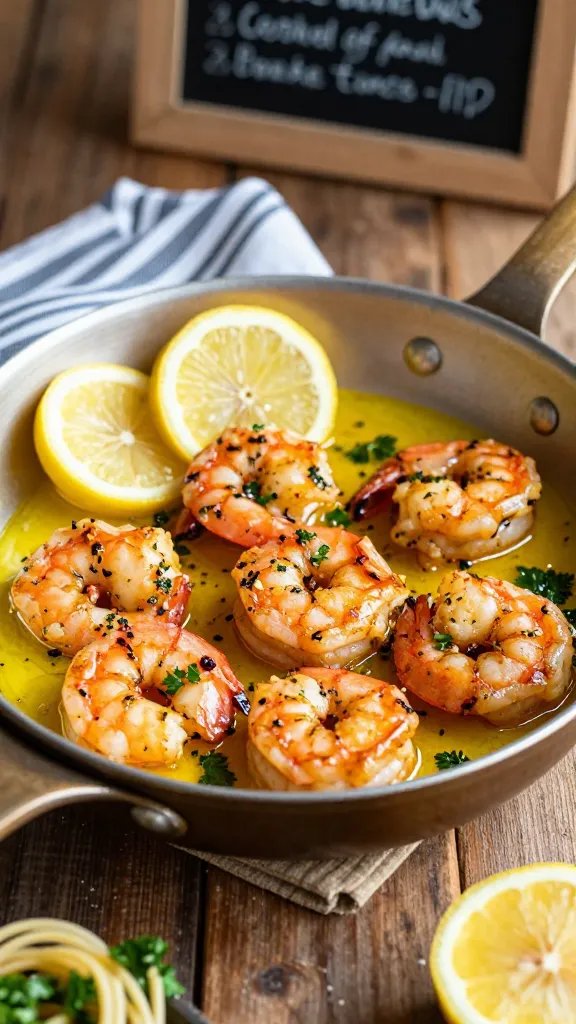
    Item 13

    Seafood fans, this one’s for you. Light, zesty, and super fast, lemon garlic shrimp can be cooked in minutes and tossed over pasta, rice, or greens for a bright, movie-night-friendly plate that feels special without the stress.

    AI Coloring Page Prompt:

    Write one extremely detailed AI image generation prompt (300–600 words) to create a premium printable black-and-white coloring page focused on the topic of this section: a small skillet with shrimp tossed in lemon garlic sauce, with lemon halves on the side. Include 1-3 main characters or objects: a hand stirring with a spoon, a plate with a few shrimp, and a sprig of parsley. The composition should be clean with a large open space. Decorative elements: lemon slices, tiny bubbles in sauce, and light steam lines. Minimal background with a table edge. The page title should appear inside the artwork in large outlined bubble letters with white interiors so children can color the letters. Orientation: portrait, US Letter printable, A4 printable. Professional KDP-quality illustration, white background, black-and-white vector line art, thick smooth outlines, large open coloring spaces, no grayscale, no shading, no crosshatching, no logos, no branding, no watermark, no jersey sponsors, no other text besides the title. Title: “Zesty Lemon Garlic Shrimp Toppers” End with: Premium printable coloring book illustration, professional black-and-white vector line art, thick smooth outlines, large open coloring spaces, minimal background, clean balanced composition, one to three main subjects only, white background, no grayscale, no shading, no crosshatching, no logos, no branding, no watermark, KDP-quality artwork.

    Fun Facts

    • Shrimp cooks quickly, making this a perfect dish for busy movie nights.
    • Lemon brightens the flavor and color palette for coloring pages.

    Why Kids Love It

    The playful shrimp shapes and bright citrus slices are irresistible to color and nibble on a story.

    Creative Coloring Ideas

    • Color the shrimp pink with a glossy glaze, lemon bright yellow, and parsley deep green.
    • Accessorize with a light drizzle of sauce lines to suggest action and flavor.

    Pro Tip

    Keep the shrimp bodies simple and bold to maintain clarity in coloring.

    14. Creamy Pesto Tortellini Toss
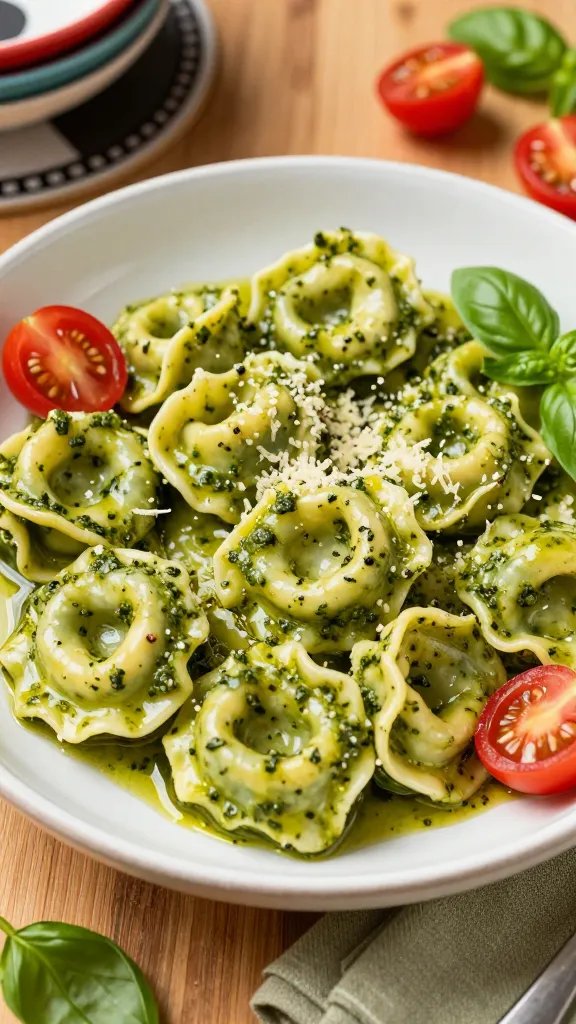
    Item 14

    Herby, fresh, and irresistibly creamy, pesto tortellini toss is a green-gold dream on a plate. It’s quick to whip up and perfect for a weekend movie celebration with a lighter, vibrant bite.

    AI Coloring Page Prompt:

    Write one extremely detailed AI image generation prompt (300–600 words) to create a premium printable black-and-white coloring page focused on the topic of this section: a bowl of tortellini coated in creamy pesto sauce and a few tomato halves for color pop. Include 1-3 main characters or objects: a hand stirring with a spoon, a small parmesan cheese wedge, and a basil leaf. The composition should be clean with a large open space. Decorative elements: tiny leaf sprigs, dotted shading to indicate sauce, and simple steam curls. Minimal background with a counter edge. The page title should appear inside the artwork in large outlined bubble letters with white interiors so children can color the letters. Orientation: portrait, US Letter printable, A4 printable. Professional KDP-quality illustration, white background, black-and-white vector line art, thick smooth outlines, large open coloring spaces, no grayscale, no shading, no crosshatching, no logos, no branding, no watermark, no jersey sponsors, no other text besides the title. Title: “Creamy Pesto Tortellini Toss” End with: Premium printable coloring book illustration, professional black-and-white vector line art, thick smooth outlines, large open coloring spaces, minimal background, clean balanced composition, one to three main subjects only, white background, no grayscale, no shading, no crosshatching, no logos, no branding, no watermark, KDP-quality artwork.

    Fun Facts

    • Pesto adds a bold green color that’s great for coloring pages.
    • Tortellini shapes are fun to color and easy to distinguish.

    Why Kids Love It

    Bright greens and jewel-tone tomatoes make the page lively and engaging to color.

    Creative Coloring Ideas

    • Experiment with different shades of green for the pesto and a dusky red for the tomatoes.
    • Add a light speckling of grated cheese on top for texture.

    Pro Tip

    Leave the basil leaves with a lighter midtone to keep the greens vibrant when coloring.

    15. Classic Meatloaf Cupcakes with Mashed Potatoes

    Item 15

    Yes, we’re bending the traditional to delight the eye and the palate. Meatloaf cupcakes with fluffy mashed potato tops bring whimsy and nostalgia to movie night, pairing beautifully with a comforting mystery or family comedy.

    AI Coloring Page Prompt:

    Write one extremely detailed AI image generation prompt (300–600 words) to create a premium printable black-and-white coloring page focused on the topic of this section: two meatloaf cupcakes on a plate with piped mashed potato “frosting” peaks. Include 1-3 main characters or objects: a hand placing a meatloaf cup on the plate, a small gravy boat, and a fork spear. The composition should be clean with a large open space. Decorative elements: tiny gravy drops, a few dotted herbs, and steam lines above the potatoes. Minimal background showing a table edge. The page title should appear inside the artwork in large outlined bubble letters with white interiors so children can color the letters. Orientation: portrait, US Letter printable, A4 printable. Professional KDP-quality illustration, white background, black-and-white vector line art, thick smooth outlines, large open coloring spaces, no grayscale, no shading, no crosshatching, no logos, no branding, no watermark, no jersey sponsors, no other text besides the title. Title: “Classic Meatloaf Cupcakes With Mashed Potatoes” End with: Premium printable coloring book illustration, professional black-and-white vector line art, thick smooth outlines, large open coloring spaces, minimal background, clean balanced composition, one to three main subjects only, white background, no grayscale, no shading, no crosshatching, no logos, no branding, no watermark, KDP-quality artwork.

    Fun Facts

    • Meatloaf cupcakes are a playful way to serve a classic dish.
    • Mashed potato peaks add texture and fun to color.

    Why Kids Love It

    Kids love the “cupcake” concept and the chance to color frosting-like mashed potatoes.

    Creative Coloring Ideas

    • Shade meatloaf with rich browns and potatoes with pale cream tones.
    • Add a drizzle of gravy with a darker line to create depth.

    Pro Tip

    Color the gravy with a slightly lighter tone around the edges to simulate light reflection.

    16. Sweet Garlic Butter Noodles with Peas
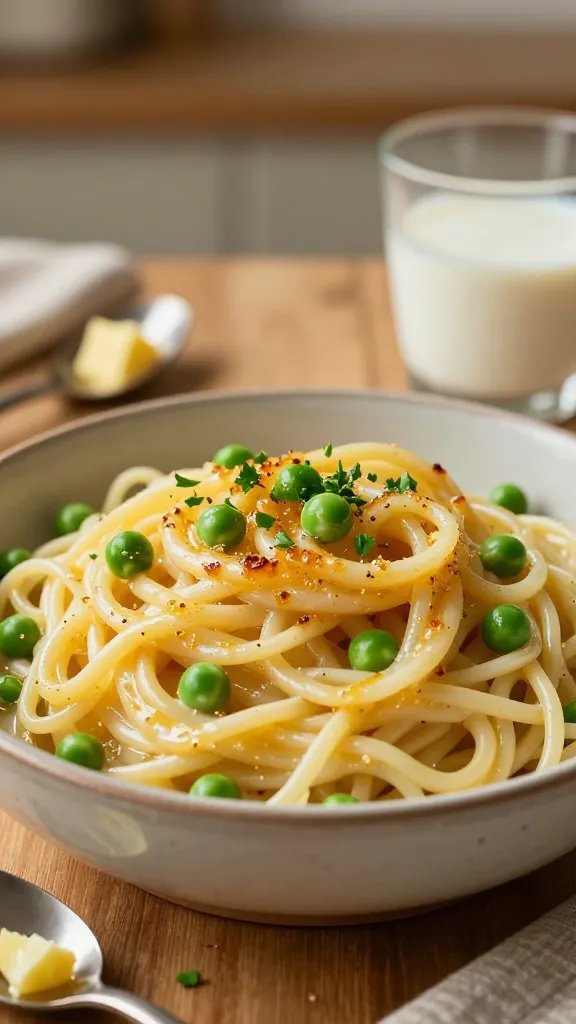
    Item 16

    A simple, comforting dish that feels like a warm hug. Garlic butter noodles with peas bring a comforting, kid-friendly flavor and a bright green pop from the peas to keep things visually appealing on screen time.

    AI Coloring Page Prompt:

    Write one extremely detailed AI image generation prompt (300–600 words) to create a premium printable black-and-white coloring page focused on the topic of this section: a bowl of stretchy garlic butter noodles with scattered peas. Include 1-3 main characters or objects: a hand twirling a noodle, a small shaker of grated cheese, and a little plate with peas. The composition should be clean with a large open space. Decorative elements: steam lines, tiny peas scattered, and a few simple swirl lines around the bowl. Minimal background with a table edge. The page title should appear inside the artwork in large outlined bubble letters with white interiors so children can color the letters. Orientation: portrait, US Letter printable, A4 printable. Professional KDP-quality illustration, white background, black-and-white vector line art, thick smooth outlines, large open coloring spaces, no grayscale, no shading, no crosshatching, no logos, no branding, no watermark, no jersey sponsors, no other text besides the title. Title: “Sweet Garlic Butter Noodles With Peas” End with: Premium printable coloring book illustration, professional black-and-white vector line art, thick smooth outlines, large open coloring spaces, minimal background, clean balanced composition, one to three main subjects only, white background, no grayscale, no shading, no crosshatching, no logos, no branding, no watermark, KDP-quality artwork.

    Fun Facts

    • Butter-based sauces keep noodles silky and kid-friendly.
    • Peas add a pop of color and a tiny nutritional boost.

    Why Kids Love It

    Swirly noodles are satisfying to color, and the little peas are easy to dot color in.

    Creative Coloring Ideas

    • Color noodles in glossy pale yellows and peas in bright greens for contrast.
    • Use light shading to show the sheen of the butter sauce without making it muddy.

    Pro Tip

    Keep the noodle wisp lines bold to mimic motion and energy on the page.

    17. Classic Banana Split Sundae Finale

    Item 17

    End your movie night with a classic dessert that’s playful and irresistibly colorful. A banana split sundae is a celebratory finish—perfect for a family-friendly film and a fantastic color-by-number-esque splash of fun to close out the evening.

    AI Coloring Page Prompt:

    Write one extremely detailed AI image generation prompt (300–600 words) to create a premium printable black-and-white coloring page focused on the topic of this section: a tall banana split sundae glass with scoops of ice cream, whipped cream, a cherry on top, and a drizzle of chocolate sauce. Include 1-3 main characters or objects: a hand holding a strawberry, a spoon resting on the saucer, and a small plate with a wafer. The composition should be clean with a large open space. Decorative elements: sprinkles, tiny stars, and a few line-drawn bubbles to indicate fizz. Minimal background with a simple table edge. The page title should appear inside the artwork in large outlined bubble letters with white interiors so children can color the letters. Orientation: portrait, US Letter printable, A4 printable. Professional KDP-quality illustration, white background, black-and-white vector line art, thick smooth outlines, large open coloring spaces, no grayscale, no shading, no crosshatching, no logos, no branding, no watermark, no jersey sponsors, no other text besides the title. Title: “Classic Banana Split Sundae Finale” End with: Premium printable coloring book illustration, professional black-and-white vector line art, thick smooth outlines, large open coloring spaces, minimal background, clean balanced composition, one to three main subjects only, white background, no grayscale, no shading, no crosshatching, no logos, no branding, no watermark, KDP-quality artwork.

    Fun Facts

    • Banana splits are a timeless finish to any meal—especially during family movie nights.
    • Ice cream colors inspire a playful rainbow of coloring possibilities.

    Why Kids Love It

    Lots of toppings and a towering sundae shape make it a satisfying coloring challenge and a delicious finale to the night.

    Creative Coloring Ideas

    • Color each scoop a different pastel shade for a vivid sundae rainbow.
    • Use swirls of chocolate and whipped cream with bold black outlines to emphasize texture.

    Pro Tip

    Leave the whipped cream area mostly white with thin gray pencil shading to give a fluffy look without overpowering the design.

    Ready to dive into these 17 ideas? The movie-night magic is all about easy, delicious dinners that bring your family together. If you’d like more coloring pages, I’ve got you covered with fresh themes, new flavors, and even more creative prompts to keep your weekend fun rolling. Stay cozy, and happy coloring!

    Conclusion: Thanks for hanging out with me through these delicious, kid-friendly dinner ideas. I hope you found at least a few new favorites to add to your next movie night lineup. If you want more coloring pages and prompts, keep exploring—there’s a whole world of tasty scenes waiting to be colored, just for you.
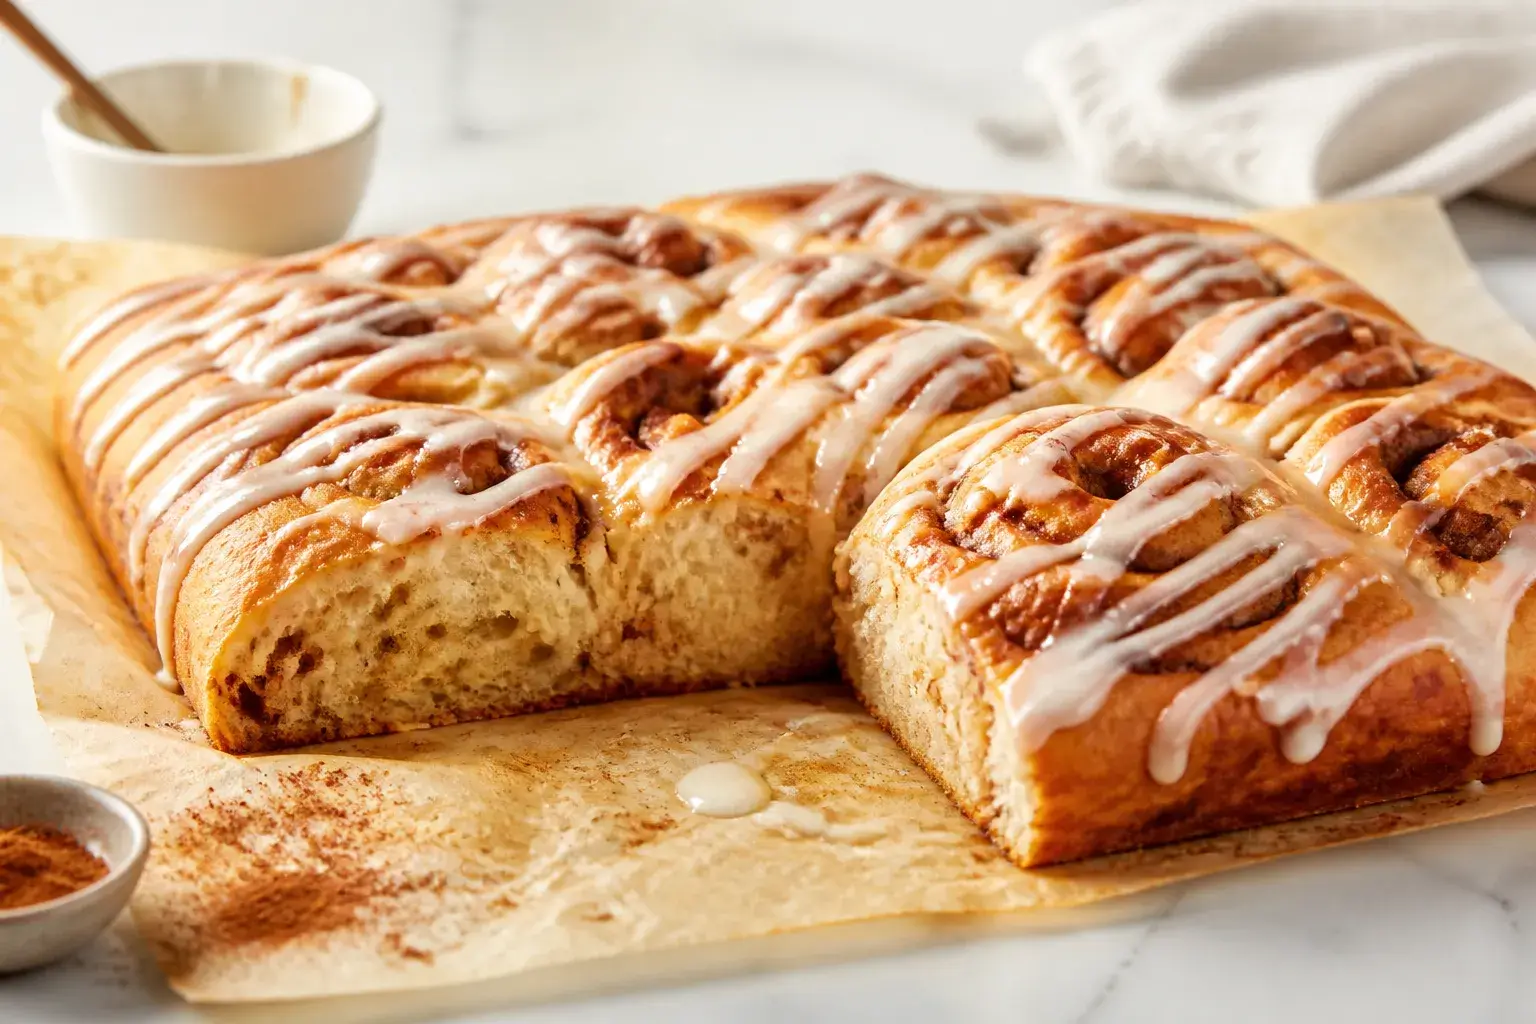
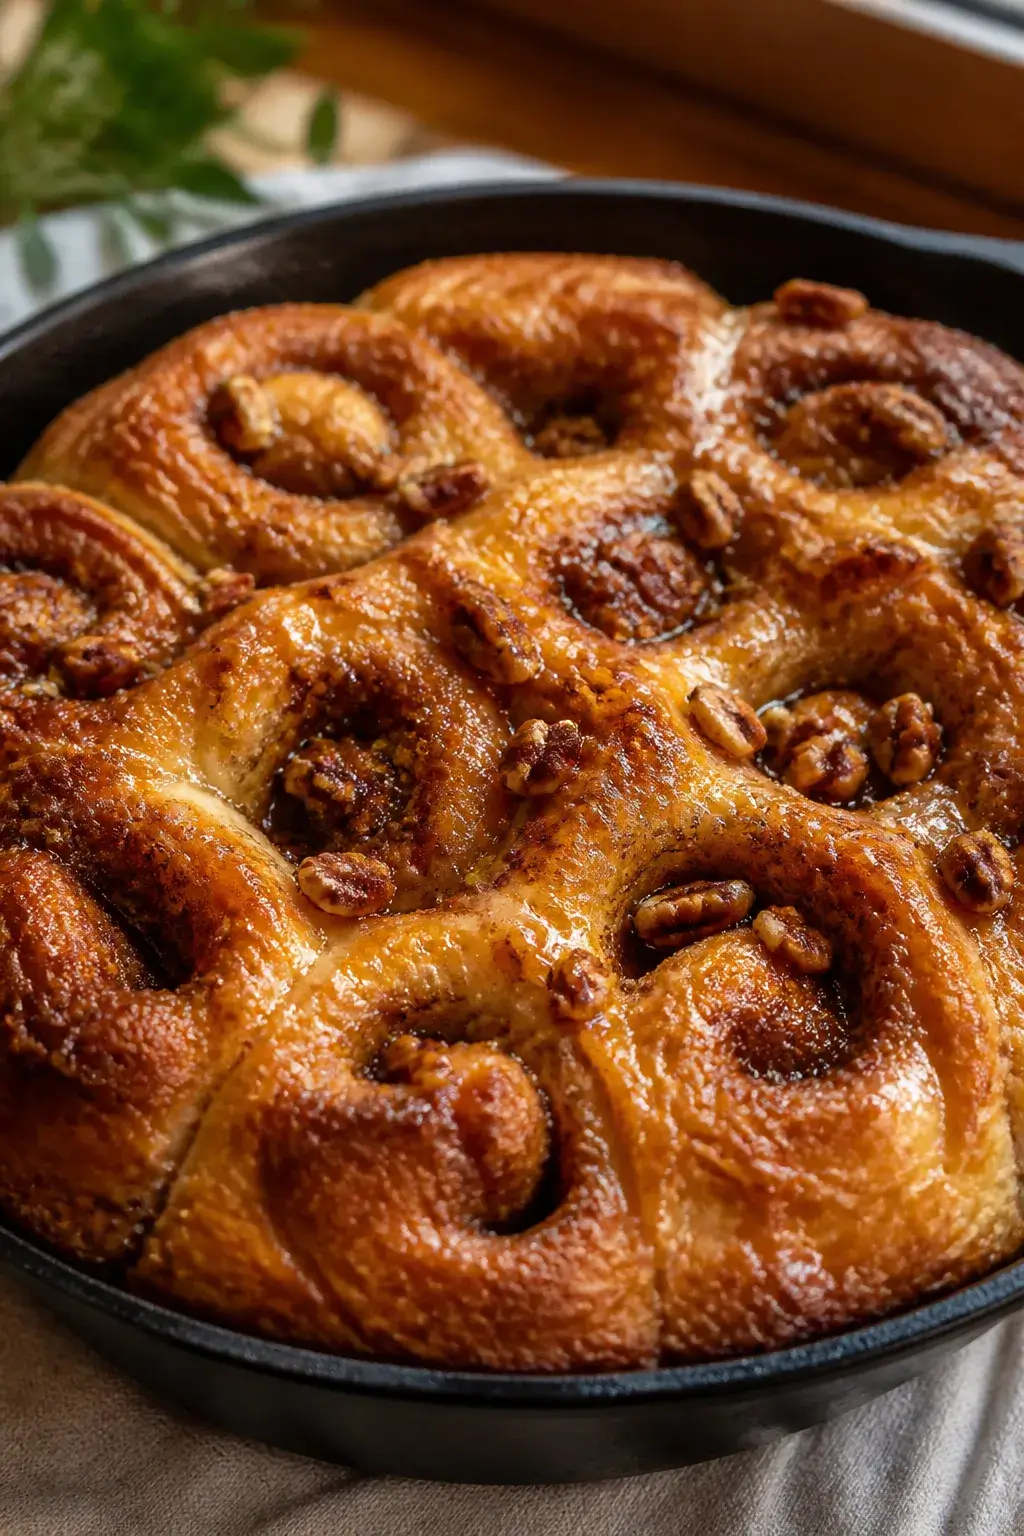
  • Cinnamon Roll Focaccia Sourdough – A Soft, Swirled Sweet Treat

    Cinnamon Roll Focaccia Sourdough – A Soft, Swirled Sweet Treat

    This mash-up brings the pillowy texture of focaccia together with the cozy flavors of a cinnamon roll. It’s soft, airy, and swirled with cinnamon sugar, then finished with a simple glaze. If you love sourdough but want something a little sweeter, this hits the spot.
    It’s perfect for brunch, holidays, or a lazy weekend bake. You’ll get the joy of sourdough with the fun of a shareable, tear-and-enjoy pan bread.

    What Makes This Recipe So Good

    • Light and airy crumb: The focaccia base is soft with those classic, irregular sourdough bubbles.
    • Warm cinnamon flavor: A buttery cinnamon-sugar swirl gives each bite that nostalgic cinnamon roll taste.
    • Easy to shape: No intricate rolling—just dimple and swirl.
    • Make-ahead friendly: The cold proof builds flavor and makes morning baking simple.
    • Not too sweet: It’s balanced—sweet enough for dessert, but still great with coffee or tea.

    Ingredients

    • Dough
      • 450 g bread flour (or strong all-purpose)
      • 50 g whole wheat flour (optional, for flavor)
      • 375 g water, room temperature
      • 100 g active sourdough starter (100% hydration, bubbly and ripe)
      • 10 g fine sea salt
      • 30 g olive oil, plus more for the pan and dimpling
    • Cinnamon Swirl
      • 60 g unsalted butter, melted
      • 120 g light brown sugar
      • 1.5 tbsp ground cinnamon
      • Pinch of salt
    • Simple Glaze
      • 120 g powdered sugar
      • 2–3 tbsp milk (or cream), plus more as needed
      • 1/2 tsp vanilla extract
      • Pinch of salt

    Step-by-Step Instructions

    1. Mix the dough (autolyse): In a large bowl, whisk the flours. Add water and mix until no dry spots remain.

      Cover and rest 30 minutes.

    2. Add starter and salt: Add the sourdough starter, salt, and olive oil. Pinch and fold until combined. The dough will be sticky—that’s good.
    3. Bulk ferment with folds: Over 2–3 hours at room temp (75°F/24°C ideal), perform 3–4 sets of stretch-and-folds every 30 minutes.

      Let the dough rise about 50–75%.

    4. Pan and cold proof: Generously oil a 9×13-inch pan or a large rimmed sheet pan. Gently turn the dough into the pan, coat the top with oil, and stretch it toward the edges without tearing. Cover and refrigerate 8–16 hours.
    5. Make the cinnamon swirl: Stir melted butter, brown sugar, cinnamon, and a pinch of salt until sandy and spreadable.

      Set aside.

    6. Final rise: Remove dough from the fridge and let it warm for 45–60 minutes. Heat oven to 425°F (220°C).
    7. Dimple and swirl: With oiled fingers, press deep dimples all over the dough. Dollop the cinnamon mixture across the surface.

      Use your fingers to swirl it into the dimples, creating ribbons. Avoid pooling too much in one spot to prevent soggy pockets.

    8. Bake: Bake 18–24 minutes until puffed, edges are crisp-golden, and the center registers about 200°F (93°C). Rotate once if needed for even browning.
    9. Cool and glaze: Cool in the pan 10 minutes, then whisk the glaze ingredients to a pourable consistency. Drizzle generously over the warm focaccia.
    10. Serve: Cut into squares or pull apart.

      Best slightly warm.

    How to Store

    • Room temperature: Keep covered for up to 2 days. Rewarm at 300°F (150°C) for 8–10 minutes to refresh.
    • Fridge: Not ideal; it dries out. If needed, wrap well and reheat before serving.
    • Freeze: Wrap pieces tightly and freeze up to 2 months.

      Thaw at room temp, then warm in the oven and add a fresh drizzle of glaze if desired.

    Benefits of This Recipe

    • Lower waste: A great way to use active starter on the day it peaks.
    • Flexible timing: The cold proof lets you bake on your schedule.
    • Shareable: Bakes in one pan, easy for parties and brunch tables.
    • Less fuss than rolls: All the cinnamon-roll flavor without individual shaping.

    Pitfalls to Watch Out For

    • Underproofing: If the dough hasn’t risen enough, the crumb will be tight. Let it puff and feel airy before baking.
    • Too much filling in one spot: This can cause soggy tunnels. Spread the cinnamon mixture evenly.
    • Overbaking: The sugar can darken quickly.

      Check at 18 minutes and tent with foil if browning too fast.

    • Weak starter: If your starter isn’t bubbly and active, the dough may be dense. Feed it and use at peak.

    Recipe Variations

    • Cream cheese glaze: Beat 60 g cream cheese with powdered sugar and milk for a tangy finish.
    • Maple pecan: Add chopped toasted pecans and swap some sugar for maple syrup in the swirl.
    • Apple cinnamon: Scatter finely diced, sautéed apples over the dough before swirling.
    • Cardamom twist: Add 1/2 tsp ground cardamom to the cinnamon mixture for a bakery-style aroma.
    • Raisin or cranberry: Sprinkle a handful of plumped dried fruit over the surface before baking.

    FAQ

    Can I make this without sourdough starter?

    Yes. Replace the starter with 5 g instant yeast and add 50 g more water and 50 g more flour to balance hydration.

    Bulk ferment about 1–2 hours until puffy, then proceed.

    How do I know my starter is ready?

    It should at least double after feeding, look airy with lots of bubbles, and pass a float test. Use it at peak or just after for the best rise and flavor.

    Can I bake in a cast-iron skillet?

    Absolutely. Use a well-oiled 12-inch skillet.

    Bake time may be a couple of minutes shorter due to better heat retention, so keep an eye on color.

    Why is my focaccia dense?

    Common causes are a weak starter, cool dough temperatures, or cutting bulk fermentation short. Give it more time and warmth, and ensure gentle handling.

    Can I reduce the sugar?

    You can. Cut the brown sugar in the swirl to 80–90 g.

    The flavor will be less sweet but still cinnamon-forward.

    In Conclusion

    Cinnamon roll focaccia sourdough brings together the lift and chew of classic focaccia with a buttery cinnamon swirl and an easy glaze. It’s simple to shape, reliable to bake, and a crowd-pleaser at any brunch table. With a little planning and a lively starter, you’ll get a golden, tender crumb that tastes like a cozy weekend morning.

    Bake it once, and it might become your new favorite sweet sourdough.

  • 21 Strawberry Pound Cake Recipes So Delicious You’ll Save Every One

    21 Strawberry Pound Cake Recipes So Delicious You’ll Save Every One

    Ready to fall in love with strawberry pound cake all over again? These 21 inventive twists are impossibly dreamy, crowd-pleasing, and almost impossibly easy to whip up. FYI, you’ll want to save every single one for future dessert emergencies.

    1. Irresistible Strawberry Lemon Pound Cake That Brightens Any Moment

    Item 1

    This cake pairs sun-kissed strawberries with zippy lemon for a bright, bakery-worthy bite you can whip up on a weeknight. It’s light, tangy, and seriously addictive.

    Ingredients:

    • 2 cups all-purpose flour
    • 1 1/2 cups granulated sugar
    • 1 cup unsalted butter, softened
    • 4 large eggs
    • 1/2 cup sour cream
    • 1/4 cup milk
    • 1 tablespoon lemon zest
    • 1 teaspoon vanilla extract
    • 1 1/2 cups diced strawberries
    • 1 teaspoon baking powder
    • 1/2 teaspoon salt

    Instructions:

    1. Preheat oven to 350°F. Grease a loaf pan.
    2. Cream butter and sugar until light and fluffy.
    3. Beat in eggs one at a time, then mix in sour cream, milk, lemon zest, and vanilla.
    4. Whisk together flour, baking powder, and salt; fold into wet ingredients.
    5. Gently fold in strawberries.
    6. Bake 55–60 minutes, or until a toothpick comes out clean.

    Serve warm with a dusting of powdered sugar or a quick glaze. Variations: swap lemon for orange zest, add grated coconut for a tropical vibe.

    2. Strawberry Cardamom Pound Cake That Smells Like Sunrise

    Item 2

    Every bite bursts with floral strawberry and warm spice. It’s a kitchen hug you’ll want on repeat, especially with coffee.

    Ingredients:

    • 2 1/2 cups all-purpose flour
    • 1 1/2 cups sugar
    • 1 cup unsalted butter, softened
    • 4 eggs
    • 1/2 cup yogurt
    • 1/2 cup milk
    • 1 tablespoon cardamom
    • 1 1/2 cups strawberries, diced
    • 2 teaspoons baking powder
    • 1/2 teaspoon salt

    Instructions:

    1. Grease and flour a loaf pan; preheat to 350°F.
    2. Cream butter and sugar until fluffy, then add eggs one by one.
    3. Stir in yogurt, milk, and cardamom.
    4. Combine dry ingredients; fold into batter gently.
    5. Fold in strawberries; bake 60–65 minutes.

    Glaze with a simple strawberry glaze if you’re feeling fancy. Pro tip: chill the cake overnight for deeper flavor.

    3. Dairy-Free Strawberry Pound Cake That Tastes Like Summer

    Item 3

    No dairy? No problem. This cake stays moist with almond milk and a hit of coconut oil. It’s snackable, sliceable, and perfect for picnics.

    Ingredients:

    • 2 cups all-purpose flour
    • 1 1/2 cups sugar
    • 3/4 cup coconut oil, melted
    • 4 eggs
    • 1 cup almond milk
    • 1 teaspoon vanilla extract
    • 1 1/2 cups strawberries, chopped
    • 2 teaspoons baking powder
    • 1/2 teaspoon salt

    Instructions:

    1. Preheat to 350°F; grease a loaf pan.
    2. Beat coconut oil with sugar until creamy, add eggs one by one.
    3. Mix in almond milk and vanilla.
    4. Stir in dry ingredients; fold in strawberries.
    5. Bake 50–60 minutes, until golden and set.

    Serve with a dairy-free strawberry drizzle or coconut whip for extra flair.

    4. Strawberry Vanilla Pound Cake With a Cream Cheese Swirl

    Item 4

    A ribbon of cream cheese runs through this cake like a secret, creamy dream. It’s elegant enough for guests, easy enough for everyday.

    Ingredients:

    • 2 1/2 cups flour
    • 1 1/2 cups sugar
    • 1 cup butter, softened
    • 4 eggs
    • 1/2 cup sour cream
    • 1/2 cup milk
    • 2 teaspoons vanilla extract
    • 1 1/2 cups strawberries, chopped
    • 8 oz cream cheese, softened
    • 1/4 cup powdered sugar

    Instructions:

    1. Prepare pan and oven at 350°F.
    2. Cream butter and sugar; add eggs one at a time.
    3. Beat in sour cream, milk, and vanilla.
    4. Fold in dry ingredients; gently fold in strawberries.
    5. Whip cream cheese with powdered sugar; swirl into batter before baking.
    6. Bake 60 minutes; cool and glaze if desired.

    Slice thick and serve with strawberry compote for extra wow factor.

    5. Double Strawberry Pound Cake With Jam Swirl

    Item 5

    Two strawberry moments in one slice. A jam swirl makes every bite bright and jam-packed with fruit flavor.

    Ingredients:

    • 2 1/2 cups flour
    • 1 1/2 cups sugar
    • 1 cup butter
    • 4 eggs
    • 1/2 cup milk
    • 1 teaspoon vanilla
    • 1 1/2 cups strawberries, diced
    • 1/2 cup strawberry jam
    • 2 teaspoons baking powder
    • 1/2 teaspoon salt

    Instructions:

    1. Follow standard creaming method; fold in berries.
    2. Spoon half batter into pan, drop jam in dollops, cover with remaining batter.
    3. Bake at 350°F for 65–70 minutes.

    Serve with whipped cream and extra jam on the side for dipping dreams.

    6. Brown Butter Strawberry Pound Cake For Nutty Caramel Vibes

    Item 6

    Nutty, toasty, and deeply delicious, brown butter adds VIP status to any dessert lineup. This one screams cozy summer nights.

    Ingredients:

    • 2 1/2 cups flour
    • 1 1/2 cups sugar
    • 1 cup brown butter, cooled
    • 4 eggs
    • 1/2 cup sour cream
    • 1/2 cup milk
    • 2 teaspoons vanilla
    • 1 1/2 cups strawberries, chopped
    • 2 teaspoons baking powder
    • 1/2 teaspoon salt

    Instructions:

    1. Brown butter on the stove until nutty; cool briefly.
    2. Beat with sugar, then add eggs, sour cream, milk, vanilla.
    3. Fold in dry ingredients and strawberries; bake 60–65 minutes.

    Top with a drizzle of browned butter glaze if you’re feeling extra fancy.

    7. Strawberry Almond Pound Cake That Smells Like Bakery Delights

    Item 7

    Almond flavor brightens the strawberry base for a cake that tastes delicately indulgent without being heavy.

    Ingredients:

    • 2 1/2 cups flour
    • 1 1/2 cups sugar
    • 1 cup almond-infused butter, softened
    • 4 eggs
    • 1/2 cup yogurt
    • 1/2 cup milk
    • 1 teaspoon almond extract
    • 1 1/2 cups strawberries
    • 2 teaspoons baking powder
    • 1/2 teaspoon salt

    Instructions:

    1. Prep pan; preheat to 350°F.
    2. Cream almond butter with sugar; add eggs.
    3. Mix in yogurt, milk, and almond extract; fold in dry ingredients.
    4. Gently fold in strawberries; bake 60 minutes.

    Slice with almond whipped cream or a scoop of vanilla ice cream for dreaminess.

    8. Strawberry Pistachio Pound Cake For a Crunchy Surprise

    Item 8

    Pistachio adds color, texture, and a cheeky crunch that makes this cake memorable. Serve with pistachio dust for flair.

    Ingredients:

    • 2 1/2 cups flour
    • 1 1/2 cups sugar
    • 1 cup butter
    • 4 eggs
    • 1/2 cup yogurt
    • 1/2 cup milk
    • 1 teaspoon vanilla
    • 1 1/2 cups strawberries
    • 1/2 cup chopped pistachios
    • 2 teaspoons baking powder
    • 1/2 teaspoon salt

    Instructions:

    1. Blend wet ingredients; stir in dry ingredients.
    2. Fold in strawberries and pistachios; bake 55–65 minutes at 350°F.

    Dust with powdered sugar and more chopped pistachios before serving for wow factor.

    9. Jasmine Strawberry Pound Cake That Feels Fancy Yet Easy

    Item 9

    Fragrant jasmine tea (or extract) adds an elegant twist to bright berries. Perfect with afternoon tea or brunch.

    Ingredients:

    • 2 1/2 cups flour
    • 1 1/2 cups sugar
    • 1 cup butter
    • 4 eggs
    • 1/2 cup jasmine tea-infused milk
    • 1/2 cup yogurt
    • 2 teaspoons vanilla
    • 1 1/2 cups strawberries
    • 2 teaspoons baking powder
    • 1/2 teaspoon salt

    Instructions:

    1. Infuse milk with jasmine tea; cool thoroughly.
    2. Proceed with standard batter method; fold in berries.
    3. Bake 60 minutes at 350°F; let cool before slicing.

    Glaze with a light lemon glaze to brighten the blossoms.

    10. Strawberry Chocolate Pound Cake For A Pretty Toss-Up

    Item 10

    Chocolate and strawberry in one slice is basically dessert destiny. Rich, berry-bright, and totally swoon-worthy.

    Ingredients:

    • 2 1/2 cups flour
    • 1 1/2 cups sugar
    • 1 cup butter
    • 4 eggs
    • 1/2 cup sour cream
    • 1/2 cup milk
    • 2 tablespoons cocoa powder
    • 1 1/2 cups strawberries
    • 2 teaspoons baking powder
    • 1/2 teaspoon salt

    Instructions:

    1. Mix wet ingredients with melted butter; add cocoa to dry ingredients.
    2. Combine and fold in berries; bake 60–65 minutes at 350°F.

    Dust with cocoa powder for a pretty finish; serve with vanilla ice cream.

    11. Strawberry Lavender Pound Cake For Calm Sweetness

    Item 11

    Lavender brings a calm, floral note that pairs beautifully with strawberry brightness. Elegant enough to impress, easy enough to make after work.

    Ingredients:

    • 2 1/2 cups flour
    • 1 1/2 cups sugar
    • 1 cup butter
    • 4 eggs
    • 1/2 cup yogurt
    • 1/2 cup milk
    • 1 tablespoon culinary lavender, finely chopped
    • 1 1/2 cups strawberries
    • 2 teaspoons baking powder
    • 1/2 teaspoon salt

    Instructions:

    1. Infuse milk with lavender (strain before using).
    2. Make batter as usual; fold in berries; bake 60 minutes.

    Glaze lightly with vanilla lavender icing if you’re feeling extra classy.

    12. Strawberry Coconut Pound Cake With Island Vibes

    Item 12

    Desert island flavors meet a cozy pound cake. Coconut oil keeps it moist; shredded coconut adds texture.

    Ingredients:

    • 2 1/2 cups flour
    • 1 1/2 cups sugar
    • 1 cup coconut oil, melted
    • 4 eggs
    • 1/2 cup coconut milk
    • 1/2 cup yogurt
    • 1 1/2 cups strawberries
    • 2 teaspoons baking powder
    • 1/2 teaspoon salt
    • 1/2 cup shredded coconut

    Instructions:

    1. Combine wet ingredients; mix in dry ingredients.
    2. Fold in strawberries and coconut; bake 60 minutes at 350°F.

    Top with coconut glaze and extra coconut for a tropical finish.

    13. Strawberry Mozzarella Pound Cake That Works For Brunch

    Item 13

    Trust me, salty-sweet is a mood. A tiny bit of mozzarella in the batter yields a surprisingly lush texture; garnish with mint.

    Ingredients:

    • 2 1/2 cups flour
    • 1 1/2 cups sugar
    • 1 cup butter
    • 4 eggs
    • 1/2 cup milk
    • 1/2 cup mozzarella, finely grated
    • 1 1/2 cups strawberries
    • 2 teaspoons baking powder
    • 1/2 teaspoon salt

    Instructions:

    1. Combine wet ingredients; whisk in mozzarella to melt softly.
    2. Fold in dry ingredients and strawberries; bake 60 minutes.

    Serve with a balsamic strawberry glaze for a surprising finish.

    14. Strawberry Banana Pound Cake For Breakfast Or Dessert

    Item 14

    Banana and strawberry make a breakfast-friendly duo without skimping on dessert vibes. Toasted pecan crunch is optional but addictive.

    Ingredients:

    • 2 1/2 cups flour
    • 1 1/2 cups sugar
    • 1 cup butter
    • 4 eggs
    • 1/2 cup mashed ripe banana
    • 1/2 cup yogurt
    • 1 cup strawberries
    • 2 teaspoons baking powder
    • 1/2 teaspoon salt
    • 1/2 cup chopped pecans (optional)

    Instructions:

    1. Cream butter and sugar; mix in eggs, banana, yogurt.
    2. Fold in dry ingredients; add pecans and strawberries.
    3. Bake 60 minutes at 350°F.

    Finish with a drizzle of honey or maple glaze for extra breakfast vibes.

    15. Strawberry Cheesecake Pound Cake For A Rich, Creamy Moment

    Item 15

    Cheesecake batter swirled through pound cake? Yes please. Rich, dreamy, and still sliceable for sharing.

    Ingredients:

    • 2 1/2 cups flour
    • 1 1/2 cups sugar
    • 1 cup butter
    • 4 eggs
    • 8 oz cream cheese, softened
    • 1/2 cup sour cream
    • 1/2 cup milk
    • 1 1/2 cups strawberries
    • 2 teaspoons baking powder
    • 1/2 teaspoon salt

    Instructions:

    1. Beat cream cheese with sugar until smooth; blend in eggs, sour cream, milk.
    2. Mix in dry ingredients; fold in strawberries.
    3. Pour half batter, dollop cheesecake filling, top with remaining batter; bake 65–70 minutes at 350°F.

    Cool fully and serve with strawberry compote for extra richness.

    16. Strawberry Pistachio Upside-Down Pound Cake

    Item 16

    Take the classic upside-down cake vibe and swap in a pound cake base with vivid pistachio notes and ruby strawberries on top.

    Ingredients:

    • 2 1/2 cups flour
    • 1 1/2 cups sugar
    • 1 cup butter
    • 4 eggs
    • 1/2 cup milk
    • 1/2 cup yogurt
    • 1 cup strawberries, halved
    • 1/2 cup pistachios, chopped
    • 2 teaspoons vanilla
    • 2 teaspoons baking powder
    • 1/2 teaspoon salt

    Instructions:

    1. Caramelize a quick sugar layer in the pan; arrange strawberries on top.
    2. Prepare batter and fold in pistachios; pour over fruit.
    3. Bake 60 minutes; invert to serve.

    Whip up a quick pistachio glaze to finish for extra drama.

    17. Strawberry Yogurt Pound Cake For Super Moist Texture

    Item 17

    yogurt in the batter keeps things incredibly moist and tangy. A simple, reliable crowd-pleaser.

    Ingredients:

    • 2 1/2 cups flour
    • 1 1/2 cups sugar
    • 1 cup yogurt
    • 1/2 cup oil or melted butter
    • 4 eggs
    • 1/2 cup milk
    • 1 1/2 cups strawberries
    • 2 teaspoons baking powder
    • 1/2 teaspoon salt

    Instructions:

    1. Whisk yogurt, oil, milk, and eggs; add sugar.
    2. Fold in dry ingredients; mix in strawberries gently.
    3. Bake 60–65 minutes at 350°F.

    Glaze with lemon yogurt glaze for a bright finish.

    18. Strawberry Rum Pound Cake For Adult-Only Magic

    Item 18

    Subtle rum shines through the berries, making this one feel festive and a touch cheeky. Serve with whipped cream and extra berries.

    Ingredients:

    • 2 1/2 cups flour
    • 1 1/2 cups sugar
    • 1 cup butter
    • 4 eggs
    • 1/2 cup rum
    • 1/2 cup milk
    • 1 1/2 cups strawberries
    • 2 teaspoons baking powder
    • 1/2 teaspoon salt

    Instructions:

    1. Cream butter and sugar; add eggs one by one.
    2. Stir in rum and milk; fold in dry ingredients.
    3. Fold in strawberries; bake 60 minutes.

    Drizzle with a light rum glaze after cooling for a party-perfect finish.

    19. Strawberry Matcha Pound Cake For Green Tea Fans

    Item 19

    Matcha adds a subtle earthiness that plays beautifully with strawberry sweetness. It’s a conversation starter and a delight.

    Ingredients:

    • 2 1/2 cups flour
    • 1 1/2 cups sugar
    • 1 cup butter
    • 4 eggs
    • 1/2 cup milk
    • 1 tablespoon matcha powder
    • 1 1/2 cups strawberries
    • 2 teaspoons baking powder
    • 1/2 teaspoon salt

    Instructions:

    1. Sift matcha with flour; cream butter with sugar.
    2. Beat in eggs, then milk; fold in dry ingredients.
    3. Gently fold in strawberries; bake 60 minutes at 350°F.

    Dust with a little extra matcha or glaze with strawberry matcha icing for drama.

    20. Strawberry Rosemary Pound Cake For a Savory-Sweet Moment

    Item 20

    Fresh rosemary gives an aromatic twist that’s surprising in the best way. Pair with vanilla cream for cooling contrast.

    Ingredients:

    • 2 1/2 cups flour
    • 1 1/2 cups sugar
    • 1 cup butter
    • 4 eggs
    • 1/2 cup yogurt
    • 1/2 cup milk
    • 1 tablespoon finely chopped rosemary
    • 1 1/2 cups strawberries
    • 2 teaspoons baking powder
    • 1/2 teaspoon salt

    Instructions:

    1. Cream butter and sugar; mix in eggs.
    2. Stir in yogurt, milk, and rosemary; fold in dry ingredients.
    3. Add strawberries; bake 60 minutes at 350°F.

    Serve with honey vanilla cream to tie the herb and fruit notes together.

    21. Strawberry Basil Pound Cake For The Freshest Finish

    Item 21

    Basil adds a garden-fresh brightness that’s downright magical with strawberries. Light lemon yogurt glaze brings it home.

    Ingredients:

    • 2 1/2 cups flour
    • 1 1/2 cups sugar
    • 1 cup butter
    • 4 eggs
    • 1/2 cup yogurt
    • 1/2 cup milk
    • 1/2 cup basil leaves, finely chopped
    • 1 1/2 cups strawberries
    • 2 teaspoons baking powder
    • 1/2 teaspoon salt

    Instructions:

    1. Creme butter and sugar; add eggs one by one.
    2. Mix in yogurt, milk, and chopped basil; fold in dry ingredients.
    3. Fold in strawberries; bake 60 minutes at 350°F.

    Glaze with lemon juice and powdered sugar for a bright finish, and garnish with basil leaves for fragrance.

    There you have it—21 strawberry pound cake recipes that are seriously crave-worthy and easy enough to pull off any day of the week. Which one will you bake first? Seriously, pick one, bake it, and watch the group instantly become your best dessert squad.

    Conclusion: Grab a fork and get your bake on. These cakes are saving-worthy, crowd-pleasing, and totally your vibe. Happy baking!

  • 21 Strawberry Bundt Cake Recipes Too Good Not to Try (A Spicy)

    21 Strawberry Bundt Cake Recipes Too Good Not to Try (A Spicy)

    Ready to bake something that tastes like summer with a kick? These strawberry bundt recipes bring bright fruit, cozy warmth, and a playful jolt of spice. FYI, you’ll want to bake them all in one weekend and pretend you’re a pastry rockstar.

    1. Fiery Strawberry Bundt With Cardamom and a Kiss of Cayenne

    Item 1

    This cake balances sweet strawberries with fragrant cardamom and a teasing hint of heat. It’s a showstopper for date night or a bold brunch addition. Seriously, one slice and you’ll be plotting a sequel.

    Ingredients:

    • 2 cups fresh strawberries, hulled and mashed
    • 2 cups all-purpose flour
    • 1 cup granulated sugar
    • 1/2 cup unsalted butter, softened
    • 3 large eggs
    • 1/2 cup whole milk
    • 1 tsp baking powder
    • 1/2 tsp baking soda
    • 1/2 tsp ground cardamom
    • 1/4 tsp cayenne pepper
    • 1/4 tsp salt
    • 1 tsp vanilla extract

    Instructions:

    1. Preheat oven to 350°F (175°C) and grease a bundt pan well.
    2. Cream butter and sugar until light and fluffy, about 3 minutes.
    3. Beat in eggs one at a time, then mix in vanilla and mashed strawberries.
    4. Whisk together flour, baking powder, baking soda, cardamom, cayenne, and salt; alternate adding dry ingredients and milk.
    5. Pour into pan and bake 45-50 minutes until a toothpick comes out clean.
    6. Cool in pan 15 minutes, then invert onto rack to finish cooling.

    Serve with a light dusting of powdered sugar and a dollop of whipped cream. For extra drama, drizzle a quick berry glaze on top. Seriously delicious with espresso.

    2. Strawberry Basil Bundt With Sweet Heat Glaze

    Item 2

    The basil in this cake adds a fresh, herbal twist that somehow works with strawberries and a gentle heat. It’s perfect for spring gatherings or a Sunday chill session.

    Ingredients:

    • 2 cups sliced strawberries
    • 2 1/2 cups all-purpose flour
    • 1 cup packed fresh basil leaves, finely chopped
    • 1 cup sugar
    • 3/4 cup olive oil
    • 3 large eggs
    • 1/2 cup buttermilk
    • 1 tsp baking powder
    • 1/2 tsp baking soda
    • 1/4 tsp salt
    • 1 tsp lemon zest
    • For glaze: 1 cup powdered sugar, 2-3 tbsp lemon juice

    Instructions:

    1. Grease and flour bundt pan; preheat to 350°F (175°C).
    2. Whisk flour, baking powder, baking soda, and salt in a bowl.
    3. Beat sugar and oil until creamy, then add eggs one by one.
    4. Alternate adding dry mix, buttermilk, and strawberries with basil until batter comes together.
    5. Bake 45-50 minutes until tester comes out clean.
    6. Cool 15 minutes, then unmold and glaze while warm for best glaze absorption.

    Glaze the cake with a basil-tinged lemon glaze and garnish with extra basil leaves for a vibrant finish. FYI, this pairs beautifully with sparkling rosé.

    3. Spiced Strawberry Orange Bundt That Smells Like Sunshine

    Item 3

    Citrusy brightness meets warm spices in a bundt that feels like a hug from the kitchen. It’s excellent for breakfast, brunch, or a post-dinner dessert.

    Ingredients:

    • 2 cups fresh strawberries, chopped
    • 2 1/4 cups all-purpose flour
    • 1 cup orange juice
    • 1/2 cup orange zest
    • 1 cup sugar
    • 1/2 cup unsalted butter, melted
    • 3 large eggs
    • 1 tsp cinnamon
    • 1/2 tsp nutmeg
    • 1 tsp baking powder
    • 1/2 tsp salt

    Instructions:

    1. Preheat to 350°F (175°C) and prep bundt pan.
    2. Whisk dry ingredients: flour, baking powder, cinnamon, nutmeg, and salt.
    3. Mix sugar with melted butter, beat in eggs, then fold in orange juice and zest.
    4. Combine wet and dry mixtures, then gently stir in strawberries.
    5. Bake 45-50 minutes; cool before glazing with an orange glaze if desired.

    Serve with a scoop of vanilla ice cream for a dessert that tastes like sunny mornings. Trust me, it’s worth waking up early for this one.

    4. Pomegranate-Strawberry Spark Bundt With a Kick

    Item 4

    A bold fruity tang meets a hint of spice and tart pomegranate seeds for a textural surprise. Great for celebrations or when you want wow factor without extra effort.

    Ingredients:

    • 2 cups strawberries, quartered
    • 1 3/4 cups all-purpose flour
    • 1 cup granulated sugar
    • 1/2 cup pomegranate juice
    • 1/2 cup vegetable oil
    • 3 large eggs
    • 1 tsp baking powder
    • 1/2 tsp baking soda
    • 1/4 tsp salt
    • 1/2 tsp ground ginger
    • 1/2 cup pomegranate arils (optional)

    Instructions:

    1. Prepare pan and preheat to 350°F (175°C).
    2. Whisk dry ingredients together.
    3. Beat eggs with sugar until pale, then whisk in oil and pomegranate juice.
    4. Combine wet and dry ingredients, fold in strawberries and optional arils.
    5. Bake 40-45 minutes; cool and dust with powdered sugar or drizzle with glaze.

    For a festive finish, glaze with a simple white chocolate-pomegranate drizzle. Seriously pretty and delicious.

    5. Raspberry-Strawberry Chipotle Bundt for Smoky Sweetness

    Item 5

    Okay, not every day you see smoky heat in a dessert, but this chipotle offers a memorable twist that pairs beautifully with berries. Perfect party cake or a bold solo dessert.

    Ingredients:

    • 2 cups mashed strawberries
    • 2 cups all-purpose flour
    • 1 cup granulated sugar
    • 1/2 cup cocoa powder (for a subtle chocolate note)
    • 1/2 cup vegetable oil
    • 3 large eggs
    • 1/2 cup buttermilk
    • 1 tsp baking powder
    • 1/2 tsp baking soda
    • 1/4 tsp salt
    • 1/4 tsp chipotle powder
    • Optional glaze: powdered sugar + lime juice

    Instructions:

    1. Preheat to 350°F (175°C) and grease bundt pan.
    2. Whisk dry ingredients, including chipotle powder.
    3. Beat sugar with oil, add eggs one at a time, then mix in mashed strawberries and buttermilk.
    4. Combine with dry mix until just blended; pour into pan.
    5. Bake 40-45 minutes; cool and glaze lightly with lime glaze if desired.

    FYI, the glaze makes this sing. Add a pinch more chipotle if you want courage in every bite.

    6. Strawberry Coconut Bundt With Warm Ginger Surprise

    Item 6

    Think tropical meets cozy spice. The coconut milk keeps it moist while ginger adds a friendly bite that lingers pleasantly.

    Ingredients:

    • 2 cups sliced strawberries
    • 2 cups all-purpose flour
    • 3/4 cup shredded coconut
    • 1 cup sugar
    • 1/2 cup coconut milk
    • 1/2 cup unsalted butter, melted
    • 3 large eggs
    • 1 tsp baking powder
    • 1/2 tsp ginger powder
    • 1/4 tsp salt

    Instructions:

    1. Prepare pan and preheat to 350°F (175°C).
    2. Whisk dry ingredients: flour, baking powder, coconut, ginger, and salt.
    3. Beat sugar with butter, add eggs, then stir in coconut milk.
    4. Fold in strawberries and dry ingredients until just combined.
    5. Bake 45-50 minutes; cool and optionally dust with coconut flakes.

    Serve with a drizzle of simple lime-cuivre glaze for a zingy finish that brightens every slice.

    7. Chocolate-Strawberry Spice Bundt With a Velvet Finish

    Item 7

    Chocolate and strawberry team up with a spicy edge for a luxe, velvety slice. Perfect for chocolate lovers who want a fruity surprise.

    Ingredients:

    • 2 cups chopped strawberries
    • 2 cups all-purpose flour
    • 3/4 cup cocoa powder
    • 1 1/2 cups sugar
    • 1/2 cup vegetable oil
    • 3 large eggs
    • 1/2 cup sour cream
    • 1 tsp baking powder
    • 1/2 tsp baking soda
    • 1/4 tsp salt
    • 1/2 tsp cinnamon

    Instructions:

    1. Preheat to 350°F (175°C) and prepare pan.
    2. Whisk dry ingredients including cocoa, cinnamon, and salt.
    3. Beat sugar and oil, add eggs one by one, mix in sour cream and strawberries.
    4. Combine with dry ingredients until just incorporated; bake 45-50 minutes.
    5. Cool and dust with powdered sugar or serve with melted chocolate drizzle.

    FYI, this is decadence with a fruity twist. Seriously, melt some chocolate and go wild.

    8. Lemon Strawberry Bundt With Cinnamon Sugar Swirl

    Item 8

    A bright lemon note cuts the sweetness, while a cinnamon swirl adds cozy depth. It’s sunshine in a cake, minus the beach sand.

    Ingredients:

    • 2 cups strawberries, diced
    • 2 1/2 cups all-purpose flour
    • 1 cup sugar
    • 1/2 cup lemon juice
    • 1/2 cup lemon zest
    • 3/4 cup butter, melted
    • 3 eggs
    • 1 tsp baking powder
    • 1/2 tsp baking soda
    • 1/4 tsp salt
    • For cinnamon sugar swirl: 1/4 cup sugar + 1 tsp cinnamon

    Instructions:

    1. Grease bundt pan; preheat to 350°F (175°C).
    2. Mix dry ingredients; whisk lemon zest and juice into melted butter.
    3. Beat eggs with sugar, then add butter mixture.
    4. Alternate adding dry mix with strawberries until batter forms.
    5. Layer batter with cinnamon sugar swirl and bake 40-45 minutes.

    Serve with a lemon glaze or simply a dusting of lemon zest for extra zing.

    9. Ginger-Lime Strawberry Bundt With a Sugar Crunch

    Item 9

    Ginger and lime bring zing, while a sugary crust creates a delightful crackly texture on top. It’s party cake energy in a cozy slice.

    Ingredients:

    • 2 cups fresh strawberries, halved
    • 2 1/2 cups flour
    • 1 cup sugar
    • 1/2 cup neutral oil
    • 3 large eggs
    • 1/2 cup maple syrup
    • 1/4 cup lime juice
    • 1 tbsp grated ginger
    • 1 tsp baking powder
    • 1/2 tsp salt

    Instructions:

    1. Preheat to 350°F (175°C) and prep pan.
    2. Whisk dry ingredients; whisk wet ingredients in another bowl.
    3. Combine wet and dry, fold in strawberries gently.
    4. Bake 40-45 minutes; let cool and sprinkle with a lime-sugar crunch topping if desired.

    FYI, the maple glaze glaze elevates every bite. Seriously good with a cup of tea.

    10. Vanilla Strawberry Bundt With Rosy Pepper Tizz

    Item 10

    Vanilla is a loyal base, and a pinch of black pepper brings out the berry brightness in a surprising way. Elegant enough for guests, simple enough for a weekday treat.

    Ingredients:

    • 2 cups sliced strawberries
    • 2 1/2 cups flour
    • 1 cup sugar
    • 3/4 cup butter, melted
    • 3 eggs
    • 2 tsp vanilla extract
    • 1/2 tsp black pepper
    • 1/2 tsp baking powder
    • 1/4 tsp salt

    Instructions:

    1. Grease bundt pan; preheat to 350°F (175°C).
    2. Whisk dry ingredients; cream butter with sugar and vanilla.
    3. Beat in eggs, then fold in dry mix with strawberries and pepper.
    4. Bake 40-45 minutes; cool and glaze with a vanilla-cream cheese drizzle.

    Glaze is optional, but it ties everything together nicely. Trust me, the pepper comes through in the best way.

    11. Crunchy Nut Strawberry Bundt With Cinnamon Spice

    Item 11

    Toasted nuts add texture, while cinnamon warmth keeps it comforting. It’s like autumn in a strawberry coat.

    Ingredients:

    • 2 cups strawberries, chopped
    • 2 cups flour
    • 3/4 cup chopped walnuts
    • 1 cup sugar
    • 1/2 cup sour cream
    • 1/2 cup vegetable oil
    • 3 eggs
    • 1 tsp baking powder
    • 1/2 tsp cinnamon
    • 1/4 tsp salt

    Instructions:

    1. Toast nuts lightly and set aside; preheat to 350°F (175°C).
    2. Mix dry ingredients with cinnamon and salt.
    3. Beat sugar with oil, add eggs, then sour cream and strawberries.
    4. Combine with dry ingredients, fold in nuts; bake 45-50 minutes.

    Serve with a dollop of yogurt or whipped cream for balance.

    12. Apricot-Strawberry Bundt With Middle-Eastern Spice

    Item 12

    Apricot and warm spices give it a glow-up that’s exotic without shouting. It’s a conversation starter on the dessert table.

    Ingredients:

    • 2 cups strawberries, diced
    • 1 3/4 cups flour
    • 1 cup apricot jam (swirled in batter)
    • 3/4 cup sugar
    • 1/2 cup yogurt
    • 1/2 cup olive oil
    • 3 eggs
    • 1 tsp cardamom
    • 1/2 tsp allspice
    • 1/4 tsp salt

    Instructions:

    1. Preheat to 350°F (175°C) and prepare pan.
    2. Whisk dry ingredients with spices.
    3. Beat sugar, oil, yogurt, and eggs; fold in flour mixture with jam.
    4. Pour into pan and bake 40-45 minutes; cool and serve with extra apricot glaze if you like.

    FYI, apricot jam gives a glossy ribbon through the center for pretty presentation.

    13. Pistachio-Studded Strawberry Bundt With Warm Spice

    Item 13

    Pistachios add a savory bite that surprisingly plays well with strawberry sweetness and spice. A fancy touch without the fuss.

    Ingredients:

    • 2 cups strawberries, halved
    • 2 cups flour
    • 3/4 cup pistachios, chopped
    • 1 cup sugar
    • 1/2 cup butter, melted
    • 3 eggs
    • 1/2 cup sour cream
    • 1 tsp baking powder
    • 1/2 tsp vanilla
    • 1/4 tsp salt

    Instructions:

    1. Grease bundt pan; preheat to 350°F (175°C).
    2. Mix dry ingredients with pistachios.
    3. Beat sugar with butter, add eggs, then sour cream and vanilla.
    4. Fold in strawberries and dry mix; bake 40-45 minutes.

    Top with a light lemon glaze to brighten the nuts and berries together.

    14. Cream Cheese Swirl Strawberry Bundt With Peppery Spark

    Item 14

    A creamy center swirls through the cake, and a dash of black pepper wakes up the fruit. Comfort meets bold in every bite.

    Ingredients:

    • 2 cups strawberries, chunked
    • 2 1/2 cups flour
    • 1 cup sugar
    • 1/2 cup cream cheese, softened
    • 1/2 cup butter, softened
    • 3 eggs
    • 1 tsp vanilla
    • 1/2 tsp pepper
    • 1 tsp baking powder
    • 1/4 tsp salt

    Instructions:

    1. Prepare pan and heat to 350°F (175°C).
    2. Beat cream cheese with sugar until fluffy; set aside.
    3. Make batter with butter, sugar, eggs, vanilla, and dry ingredients.
    4. Layer batter, strawberry chunks, and cream cheese swirl in pan. Bake 45-50 minutes.

    Serve with a light strawberry glaze to finish. Seriously indulgent.

    15. Lime-Honey Strawberry Bundt With Ginger Snap Crumble

    Item 15

    Bright lime, honey sweetness, and a crunchy crumble top create a texture party. Super tasty for a weekend bake-and-share.

    Ingredients:

    • 2 cups chopped strawberries
    • 2 1/2 cups flour
    • 3/4 cup honey
    • 1/2 cup lime juice
    • 1/2 cup butter, melted
    • 3 eggs
    • 1 tsp baking powder
    • 1/2 tsp grated ginger
    • 1/4 tsp salt
    • For crumble: 1/2 cup flour + 1/4 cup brown sugar + 1/4 cup butter

    Instructions:

    1. Preheat to 350°F (175°C) and grease pan.
    2. Mix dry ingredients; whisk wet ingredients with honey and lime juice.
    3. Combine and fold in strawberries; top with crumble and bake 45-50 minutes.

    Let it cool and slice with a citrusy yogurt dip for dipping delight.

    16. Maple-Balsamic Strawberry Bundt For Gourmet Night

    Item 16

    Maple and balsamic add a chic density that makes this feel restaurant-ish at home. The strawberries stay juicy and bright.

    Ingredients:

    • 2 cups strawberries
    • 2 1/2 cups flour
    • 3/4 cup maple syrup
    • 1/2 cup balsamic glaze
    • 1/2 cup olive oil
    • 3 eggs
    • 1 tsp baking powder
    • 1/2 tsp salt

    Instructions:

    1. Preheat to 350°F (175°C); coat bundt pan.
    2. Whisk dry ingredients; whisk wet ingredients with maple syrup and balsamic glaze.
    3. Combine, fold in strawberries, and bake 40-45 minutes.

    Drizzle extra balsamic glaze on top before serving for a glossy finish. Trust me, it’s dreamy with vanilla ice cream.

    17. Espresso-Strawberry Bundt With Coffee Crunch

    Item 17

    Cool coffee notes pair beautifully with berry brightness and a crisp sugar crunch. Morning (or night) cake heaven.

    Ingredients:

    • 2 cups strawberries
    • 2 1/2 cups flour
    • 3/4 cup sugar
    • 1/2 cup espresso or strong coffee
    • 1/2 cup butter, melted
    • 3 eggs
    • 1 tsp baking powder
    • 1/2 tsp salt
    • For crunch: 1/2 cup sugar + 1/4 cup butter

    Instructions:

    1. Preheat to 350°F (175°C) and grease bundt pan.
    2. Make batter with coffee, melted butter, and eggs; fold in strawberries.
    3. Bake 40-45 minutes; top with crunch mixture and bake 5 additional minutes if needed to crisp.

    Serve with whipped cream and a shot of espresso on the side for serious coffee vibes.

    18. Ginger Mango Strawberry Bundt With Warm Spice

    Item 18

    Okay, mango is optional, but it adds a tropical flavor that plays surprisingly well with ginger and strawberries. A sunny dessert with a vacation mood.

    Ingredients:

    • 2 cups strawberries
    • 1 cup diced mango (optional)
    • 2 1/2 cups flour
    • 3/4 cup sugar
    • 1/2 cup oil
    • 3 eggs
    • 1/2 cup yogurt
    • 1 tbsp grated ginger
    • 1 tsp baking powder
    • 1/2 tsp salt

    Instructions:

    1. Preheat to 350°F (175°C) and prepare pan.
    2. Beat sugar with oil, add eggs, yogurt, and ginger.
    3. Fold in dry ingredients with strawberries (and mango if using).
    4. Bake 40-45 minutes; cool and optionally glaze with lime glaze.

    Garnish with lime zest for a bright finish. You’ll be smiling with every slice.

    19. Pearl-Sugar Strawberry Bundt With Cinnamon Crust

    Item 19

    A crunchy crust and tender crumb make this one feel like a bakery masterpiece without leaving your kitchen. Pearl sugar adds a little sparkle, too.

    Ingredients:

    • 2 cups strawberries
    • 2 1/2 cups flour
    • 3/4 cup sugar
    • 1/2 cup melted butter
    • 3 eggs
    • 1/2 cup milk
    • 1 tsp baking powder
    • 1/2 tsp cinnamon
    • 1/4 tsp salt
    • 1/4 cup pearl sugar for topping

    Instructions:

    1. Grease bundt pan and preheat to 350°F (175°C).
    2. Stir dry ingredients; whisk wet ingredients including melted butter and milk.
    3. Combine, fold in strawberries, pour into pan, sprinkle pearl sugar on top.
    4. Bake 40-45 minutes; cool and slice.

    Ideal with vanilla yogurt or a light cream cheese frosting drizzle.

    20. Blackberry-Strawberry Bundt With Midnight Spice

    Item 20

    Blackberries join the party for a deeper berry note and a dramatic look. Midnight spice keeps it intriguing without stealing the spotlight from fruit.

    Ingredients:

    • 2 cups strawberries
    • 1 cup blackberries
    • 2 1/2 cups flour
    • 3/4 cup sugar
    • 1/2 cup neutral oil
    • 3 eggs
    • 1/2 cup yogurt
    • 1 tsp vanilla
    • 1/2 tsp cardamom
    • 1/4 tsp salt

    Instructions:

    1. Preheat to 350°F (175°C) and grease bundt pan.
    2. Whisk dry ingredients with cardamom and salt.
    3. Beat sugar with oil, add eggs, yogurt, and vanilla.
    4. Fold in berries and dry ingredients; bake 40-45 minutes.

    Top with a light pink glaze or dusting of powdered sugar for a classy finish.

    21. Browned Butter Strawberry Bundt With Smoky Sugar Dust

    Item 21

    Browned butter brings nutty depth, while a smoky sugar dust adds a playful finish. This is the careful, grown-up dessert that still feels like a treat.

    Ingredients:

    • 2 cups strawberries, halved
    • 2 1/2 cups flour
    • 3/4 cup brown sugar
    • 1/2 cup browned butter (cooled slightly)
    • 3 eggs
    • 1/2 cup milk
    • 1 tsp baking powder
    • 1/2 tsp salt
    • 1/4 tsp smoked paprika (optional, for dusting)

    Instructions:

    1. Preheat to 350°F (175°C) and prepare pan.
    2. Whisk dry ingredients; beat brown sugar with browned butter, then mix in eggs and milk.
    3. Fold in strawberries and dry ingredients until just combined.
    4. Bake 40-45 minutes; cool and dust with smoked paprika-sugar mix if using.

    Serve with a dollop of whipped mascarpone for a luxe bite. Seriously, this one is a keeper.

    There you have it—21 strawberry bundt recipes that balance spice, brightness, and fun. Which one will you bake first? IMO, grab a mug of coffee and start with whichever vibe you’re feeling: fiery and bold, herbal and fresh, or cozy and comforting. Seriously, you can’t go wrong with these fruity-spice bundles.

    Now go conquer your oven, friends. The kitchen is your stage and these bundts are your applause.

  • Brown Sugar Cinnamon Pop Tart Cookies You Need to Try ASAP – Soft, Buttery, and Nostalgic

    Brown Sugar Cinnamon Pop Tart Cookies You Need to Try ASAP – Soft, Buttery, and Nostalgic

    These cookies taste like your favorite toaster pastry in chewy, bakery-style form. Think warm cinnamon, caramel-y brown sugar, and a creamy glaze that sets with a gentle crackle. They’re simple enough for a weeknight and special enough for a party platter.

    If you grew up loving Pop-Tarts, this is a fun, grown-up twist. And if you didn’t, you’ll still love the cozy flavors and soft, thick bite.

    What Makes This Special

    Close-up detail shot of freshly baked Brown Sugar Cinnamon Pop Tart Cookies on a parchment-lined bak

    These cookies take the best parts of a Brown Sugar Cinnamon Pop-Tart—sweet filling, toasty cinnamon, and vanilla icing—and pack them into a soft, thick cookie. The dough is rich with brown sugar for a deep, caramel flavor and soft texture.

    A quick cinnamon-sugar swirl runs through the center, giving each bite that Pop-Tart signature. The glaze goes on last for a glossy, nostalgic finish. They’re easy to make, but they taste like a bakery treat.

    Ingredients

    • For the cookies:
    • 2 1/4 cups all-purpose flour
    • 1 teaspoon baking soda
    • 1/2 teaspoon baking powder
    • 3/4 teaspoon fine salt
    • 1 tablespoon ground cinnamon
    • 3/4 cup unsalted butter, softened
    • 1 cup packed light brown sugar
    • 1/3 cup granulated sugar
    • 1 large egg
    • 1 large egg yolk
    • 2 teaspoons vanilla extract
    • For the brown sugar cinnamon filling:
    • 1/3 cup packed light brown sugar
    • 1 tablespoon all-purpose flour
    • 1 teaspoon ground cinnamon
    • 1 tablespoon melted butter
    • For the glaze:
    • 1 cup powdered sugar
    • 1 teaspoon ground cinnamon
    • 1 teaspoon vanilla extract
    • 2–3 tablespoons milk (as needed)
    • Pinch of salt

    Instructions

    Overhead final presentation of glazed Brown Sugar Cinnamon Pop Tart Cookies arranged in a relaxed cl
    1. Preheat your oven to 350°F (175°C).

      Line two baking sheets with parchment paper.

    2. In a bowl, whisk together flour, baking soda, baking powder, salt, and cinnamon. Set aside.
    3. In a large bowl, beat softened butter, brown sugar, and granulated sugar until fluffy, about 2 minutes.
    4. Add the egg, egg yolk, and vanilla. Mix until smooth and creamy.
    5. Stir in the dry ingredients just until combined.

      Do not overmix.

    6. Make the filling: In a small bowl, combine brown sugar, flour, cinnamon, and melted butter until sandy and clumpy.
    7. Scoop cookie dough into 2-tablespoon balls. Flatten each slightly in your palm, add about 1 teaspoon of filling to the center, then fold the edges up and seal. Roll gently back into a ball.
    8. Arrange on the baking sheets, spacing 2 inches apart.

      Chill the trays in the fridge for 10 minutes for thicker cookies.

    9. Bake for 9–11 minutes, until edges are set and centers look slightly underdone. They’ll continue to set as they cool.
    10. Cool on the sheet for 5 minutes, then transfer to a rack.
    11. Make the glaze: Whisk powdered sugar, cinnamon, vanilla, salt, and 2 tablespoons milk. Add more milk as needed for a thick, slightly pourable glaze.
    12. Spoon glaze over cooled cookies.

      Let it set for 15–20 minutes before serving.

    How to Store

    Keep cookies in an airtight container at room temperature for up to 4 days. For longer storage, refrigerate for up to a week, then bring to room temp before serving. You can also freeze unglazed cookies for up to 2 months; thaw, then glaze.

    If stacking glazed cookies, place parchment between layers to prevent sticking.

    Health Benefits

    • Portion control: These are rich, so one cookie goes a long way, helping you enjoy a treat without overdoing it.
    • Balanced ingredients: Butter and egg provide some protein and fat for satiety, which can help prevent sugar spikes when paired with a meal.
    • Spices matter: Cinnamon brings warm flavor and pairs well with lower-sugar coffee or tea, helping you keep the overall sweetness in check.

    Pitfalls to Watch Out For

    • Overbaking: Pull them when the centers look slightly soft. Overbaked cookies turn dry instead of chewy.
    • Skipping the chill: A short chill helps prevent spreading and keeps the filling centered.
    • Runny glaze: If it drips right off, add more powdered sugar. It should be thick enough to cling but still smooth.
    • Loose seal: If the dough isn’t sealed around the filling, it can leak.

      Pinch seams well.

    Recipe Variations

    • Toaster-crumb topping: Add a sprinkle of cinnamon-sugar on the wet glaze for a Pop-Tart look and extra crunch.
    • Brown butter upgrade: Brown the butter, cool until solid but soft, then proceed. Expect deeper, nutty flavor.
    • Maple twist: Swap 1 teaspoon vanilla in the glaze for maple extract, and add 1 tablespoon maple syrup to the dough (reduce granulated sugar by 1 tablespoon).
    • Whole wheat blend: Use 1 cup white whole wheat flour plus 1 1/4 cups all-purpose for a heartier cookie.
    • Stuffed with Pop-Tart bits: Fold 1/2 cup chopped Brown Sugar Cinnamon Pop-Tart pieces into the dough for texture.

    FAQ

    Can I make the dough ahead?

    Yes. Chill the dough up to 48 hours.

    Let it sit 15–20 minutes at room temperature before scooping if it’s too firm to handle.

    Do I have to fill the cookies?

    No, but the filling adds that signature Pop-Tart vibe. If you skip it, roll dough balls in cinnamon-sugar before baking for extra flavor.

    Why did my cookies spread too much?

    Warm dough usually spreads more. Chill the shaped dough briefly, and make sure your butter isn’t melted.

    Also check that your baking soda is fresh.

    Can I make them gluten-free?

    Use a good 1:1 gluten-free baking flour with xanthan gum. Texture will be slightly more delicate, so don’t overbake.

    How do I get perfectly round cookies?

    As soon as they come out of the oven, use a wide circular cutter or a mug to “scoot” them into shape while still hot.

    In Conclusion

    These Brown Sugar Cinnamon Pop Tart Cookies are soft, cozy, and full of nostalgic flavor. They’re easy to make, big on cinnamon, and topped with a simple glaze that ties everything together.

    Bake a batch for a weekend treat or a sweet gift—just be ready for them to disappear fast.

    Brown Sugar Cinnamon Pop Tart Cookies You Need to Try ASAP – Soft, Buttery, and Nostalgic

    Prep Time 15 minutes
    Cook Time 10 minutes
    Total Time 25 minutes
    Servings 12 servings

    Ingredients
      

    • For the cookies:
    • 2 1/4 cups all-purpose flour
    • 1 teaspoon baking soda
    • 1/2 teaspoon baking powder
    • 3/4 teaspoon fine salt
    • 1 tablespoon ground cinnamon
    • 3/4 cup unsalted butter, softened
    • 1 cup packed light brown sugar
    • 1/3 cup granulated sugar
    • 1 large egg
    • 1 large egg yolk
    • 2 teaspoons vanilla extract
    • For the brown sugar cinnamon filling:
    • 1/3 cup packed light brown sugar
    • 1 tablespoon all-purpose flour
    • 1 teaspoon ground cinnamon
    • 1 tablespoon melted butter
    • For the glaze:
    • 1 cup powdered sugar
    • 1 teaspoon ground cinnamon
    • 1 teaspoon vanilla extract
    • 2–3 tablespoons milk (as needed)
    • Pinch of salt

    Instructions
     

    • Preheat your oven to 350°F (175°C). Line two baking sheets with parchment paper.
    • In a bowl, whisk together flour, baking soda, baking powder, salt, and cinnamon. Set aside.
    • In a large bowl, beat softened butter, brown sugar, and granulated sugar until fluffy, about 2 minutes.
    • Add the egg, egg yolk, and vanilla. Mix until smooth and creamy.
    • Stir in the dry ingredients just until combined. Do not overmix.
    • Make the filling: In a small bowl, combine brown sugar, flour, cinnamon, and melted butter until sandy and clumpy.
    • Scoop cookie dough into 2-tablespoon balls. Flatten each slightly in your palm, add about 1 teaspoon of filling to the center, then fold the edges up and seal. Roll gently back into a ball.
    • Arrange on the baking sheets, spacing 2 inches apart. Chill the trays in the fridge for 10 minutes for thicker cookies.
    • Bake for 9–11 minutes, until edges are set and centers look slightly underdone. They’ll continue to set as they cool.
    • Cool on the sheet for 5 minutes, then transfer to a rack.
    • Make the glaze: Whisk powdered sugar, cinnamon, vanilla, salt, and 2 tablespoons milk. Add more milk as needed for a thick, slightly pourable glaze.
    • Spoon glaze over cooled cookies. Let it set for 15–20 minutes before serving.
  • Copycat Brown Sugar Pop Tart Cookies Better Than Crumbl – Soft, Cinnamon-Swirl Treats

    Copycat Brown Sugar Pop Tart Cookies Better Than Crumbl – Soft, Cinnamon-Swirl Treats

    These cookies hit all the nostalgic notes of a brown sugar Pop-Tart, but with a bakery-style twist: thick, soft centers, crisp edges, and a buttery cinnamon-brown sugar swirl. They’re simple to make, no special equipment needed, and the icing sets into that classic toaster pastry finish. If you love Crumbl’s version, this copycat brings the same vibe with cleaner ingredients and bigger flavor.

    Make a batch for a weekend treat, a bake sale, or just because you want something cozy.

    Why This Recipe Works

    Close-up detail shot of a freshly baked Brown Sugar Pop Tart Cookie on a parchment-lined baking shee
    • Brown sugar + cinnamon swirl: A quick, sandy filling melts into the dough and creates ribbons of caramel flavor.
    • Chilled dough: Keeps the cookies thick and prevents spreading, giving you that bakery-style height.
    • Cornstarch in the dough: Adds softness without making the cookies cakey.
    • Browned butter option: Boosts toasty, pastry-like flavor if you want to level up.
    • Simple icing: Sets with a slight crust, just like a Pop-Tart, but stays soft underneath.

    Ingredients

    • For the cookies:
      • 2 3/4 cups all-purpose flour
      • 1 tablespoon cornstarch
      • 1 teaspoon baking powder
      • 1/2 teaspoon baking soda
      • 3/4 teaspoon fine salt
      • 3/4 cup unsalted butter, softened (or browned and cooled to solid-soft)
      • 1 cup packed light brown sugar
      • 1/2 cup granulated sugar
      • 2 large eggs, room temperature
      • 2 teaspoons pure vanilla extract
    • For the cinnamon filling:
      • 1/3 cup packed light brown sugar
      • 2 tablespoons granulated sugar
      • 1 tablespoon ground cinnamon
      • 2 tablespoons melted unsalted butter
      • Pinch of salt
    • For the icing:
      • 1 1/4 cups powdered sugar, sifted
      • 1 1/2 tablespoons milk (plus more as needed)
      • 1 teaspoon pure vanilla extract
      • 1/2 teaspoon ground cinnamon
      • Pinch of salt

    Step-by-Step Instructions

    Overhead final presentation of fully cooled and glazed Brown Sugar Pop Tart Cookies arranged on a ma
    1. Prep the pans: Line two baking sheets with parchment. Set oven to 350°F (175°C), but you’ll chill the dough before baking.
    2. Make the filling: In a small bowl, mix brown sugar, granulated sugar, cinnamon, melted butter, and a pinch of salt until sandy. Set aside.
    3. Whisk dry ingredients: In a medium bowl, whisk flour, cornstarch, baking powder, baking soda, and salt.
    4. Cream the butter and sugars: Beat softened butter with brown and granulated sugar until light and fluffy, 2–3 minutes.
    5. Add eggs and vanilla: Mix in eggs one at a time, then vanilla.

      Scrape the bowl.

    6. Combine: Add dry ingredients to wet on low speed until just combined. Do not overmix.
    7. Swirl the filling: Sprinkle the cinnamon filling over the dough. Fold gently 2–3 times with a spatula to create ribbons. Do not fully blend; you want streaks.
    8. Portion and chill: Scoop 1/4-cup mounds (about 12 large cookies).

      Roll into balls, then gently press the tops to flatten slightly. Chill 30–45 minutes.

    9. Bake: Arrange 6 cookies per sheet. Bake 10–12 minutes until edges are set and centers look slightly underdone.

      They’ll finish on the pan.

    10. Cool: Let cookies rest on the sheet 10 minutes, then transfer to a rack. Cool completely before icing.
    11. Make the icing: Stir powdered sugar, milk, vanilla, cinnamon, and salt until smooth and thick but pourable. Adjust with a few drops of milk if needed.
    12. Glaze: Spoon icing over the cooled cookies, leaving a small border to mimic Pop-Tart frosting.

      Let set 20–30 minutes.

    Keeping It Fresh

    • Room temp: Store in an airtight container for 3–4 days with a piece of bread or a sugar cube to maintain softness.
    • Freeze unglazed: Freeze baked, un-iced cookies up to 2 months. Thaw, then ice.
    • Freeze dough: Freeze portioned dough balls up to 2 months. Bake from frozen, adding 1–2 minutes.

    Why This is Good for You

    • Made at home: You control the ingredients—no artificial flavors or preservatives.
    • Balanced sweetness: Brown sugar and cinnamon deliver big flavor, so you don’t need a super-sweet dough.
    • Mindful portions: These are rich.

      One cookie satisfies a craving without a long list of additives.

    Pitfalls to Watch Out For

    • Overmixing: Makes cookies tough. Stop when the flour vanishes.
    • Skipping the chill: Leads to spreading and thinner cookies.
    • Overbaking: Pull them when centers look slightly soft. They firm up as they cool.
    • Runny icing: Add extra powdered sugar 1 tablespoon at a time if it won’t hold a soft ribbon.

    Variations You Can Try

    • Browned butter: Brown the butter, cool to a soft-solid, and proceed.

      Extra toasty notes.

    • Maple twist: Swap 1 teaspoon vanilla in the icing for 1 teaspoon pure maple extract.
    • Filled center: Press a thumb into each dough ball, add 1/2 teaspoon cinnamon filling, pinch closed, then bake.
    • Gluten-free: Use a 1:1 gluten-free baking blend with xanthan gum. Chill a bit longer.
    • Mini size: Scoop 2 tablespoons dough, bake 8–9 minutes for bite-size treats.

    FAQ

    Can I make these without a mixer?

    Yes. Use a sturdy spatula or whisk.

    Cream butter and sugars by hand until fluffy, then proceed as written.

    Do I have to chill the dough?

    Chilling is strongly recommended. It keeps the cookies thick and helps the cinnamon swirl stay defined.

    What if I only have dark brown sugar?

    Use it. The flavor will be deeper and a bit more molasses-forward, which is delicious here.

    How do I know when they’re done?

    Edges should look set and lightly golden; centers should look slightly underbaked.

    They’ll firm up as they cool on the pan.

    Can I reduce the sugar?

    You can reduce the granulated sugar in the dough by 2–3 tablespoons without affecting texture. Keep the brown sugar for moisture and flavor.

    How long does the icing take to set?

    About 20–30 minutes at room temperature. For faster setting, place the cookies in the fridge for 10 minutes.

    In Conclusion

    These Copycat Brown Sugar Pop Tart Cookies Better Than Crumbl bring warm cinnamon flavor, soft centers, and that iconic glazed top—all from your own kitchen.

    With a quick swirl, a short chill, and a simple icing, you’ll have bakery-level cookies that taste like your childhood favorite, only better. Bake a batch once, and they’ll become your go-to cozy cookie.

    Copycat Brown Sugar Pop Tart Cookies Better Than Crumbl – Soft, Cinnamon-Swirl Treats

    Prep Time 15 minutes
    Cook Time 13 minutes
    Total Time 28 minutes
    Servings 12 servings

    Ingredients
      

    • For the cookies:
    • 2 3/4 cups all-purpose flour
    • 1 tablespoon cornstarch
    • 1 teaspoon baking powder
    • 1/2 teaspoon baking soda
    • 3/4 teaspoon fine salt
    • 3/4 cup unsalted butter, softened (or browned and cooled to solid-soft)
    • 1 cup packed light brown sugar
    • 1/2 cup granulated sugar
    • 2 large eggs, room temperature
    • 2 teaspoons pure vanilla extract
    • For the cinnamon filling:
    • 1/3 cup packed light brown sugar
    • 2 tablespoons granulated sugar
    • 1 tablespoon ground cinnamon
    • 2 tablespoons melted unsalted butter
    • Pinch of salt
    • For the icing:
    • 1 1/4 cups powdered sugar, sifted
    • 1 1/2 tablespoons milk (plus more as needed)
    • 1 teaspoon pure vanilla extract
    • 1/2 teaspoon ground cinnamon
    • Pinch of salt

    Instructions
     

    • Prep the pans: Line two baking sheets with parchment. Set oven to 350°F (175°C), but you’ll chill the dough before baking.
    • Make the filling: In a small bowl, mix brown sugar, granulated sugar, cinnamon, melted butter, and a pinch of salt until sandy. Set aside.
    • Whisk dry ingredients: In a medium bowl, whisk flour, cornstarch, baking powder, baking soda, and salt.
    • Cream the butter and sugars: Beat softened butter with brown and granulated sugar until light and fluffy, 2–3 minutes.
    • Add eggs and vanilla: Mix in eggs one at a time, then vanilla. Scrape the bowl.
    • Combine: Add dry ingredients to wet on low speed until just combined. Do not overmix.
    • Swirl the filling: Sprinkle the cinnamon filling over the dough. Fold gently 2–3 times with a spatula to create ribbons. Do not fully blend; you want streaks.
    • Portion and chill: Scoop 1/4-cup mounds (about 12 large cookies). Roll into balls, then gently press the tops to flatten slightly. Chill 30–45 minutes.
    • Bake: Arrange 6 cookies per sheet. Bake 10–12 minutes until edges are set and centers look slightly underdone. They’ll finish on the pan.
    • Cool: Let cookies rest on the sheet 10 minutes, then transfer to a rack. Cool completely before icing.
    • Make the icing: Stir powdered sugar, milk, vanilla, cinnamon, and salt until smooth and thick but pourable. Adjust with a few drops of milk if needed.
    • Glaze: Spoon icing over the cooled cookies, leaving a small border to mimic Pop-Tart frosting. Let set 20–30 minutes.
  • Brown Sugar Pop Tart Cookies Everyone Is Obsessed With Right Now – Soft, Gooey, and Perfectly Nostalgic

    Brown Sugar Pop Tart Cookies Everyone Is Obsessed With Right Now – Soft, Gooey, and Perfectly Nostalgic

    These Brown Sugar Pop Tart Cookies taste like your favorite toaster pastry grew up and got a bakery makeover. They’re buttery, cinnamon-packed, and finished with that signature brown sugar icing. The texture lands somewhere between a soft sugar cookie and a gooey cinnamon roll center.

    They’re easy enough for a weeknight treat and impressive enough for a weekend dessert board. If you love cozy flavors and a little nostalgia, this is your cookie.

    What Makes This Special

    Overhead shot of freshly baked Brown Sugar Pop Tart Cookies cooling on a wire rack, thick and soft w

    There’s a generous swirl of cinnamon-brown sugar running through the dough, so every bite has that classic Pop-Tart vibe. A simple, glossy brown sugar icing sets up just like the real thing.

    The cookies bake up thick, soft, and slightly chewy around the edges. Best of all, the dough is straightforward, and the icing comes together in minutes.

    What You’ll Need

    • For the cookies:
      • 2 3/4 cups all-purpose flour
      • 1 teaspoon baking soda
      • 1/2 teaspoon baking powder
      • 1/2 teaspoon fine salt
      • 1 cup (2 sticks) unsalted butter, softened
      • 1 cup packed light brown sugar
      • 1/2 cup granulated sugar
      • 1 large egg + 1 large egg yolk
      • 2 teaspoons vanilla extract
      • 1 teaspoon ground cinnamon
    • For the brown sugar cinnamon filling:
      • 1/2 cup packed light brown sugar
      • 1 teaspoon ground cinnamon
      • 2 tablespoons melted butter
      • Pinch of salt
    • For the icing:
      • 1 cup powdered sugar
      • 2 tablespoons brown sugar, very finely packed
      • 1–2 tablespoons milk (as needed)
      • 1/2 teaspoon vanilla extract
      • Pinch of cinnamon (optional)

    Step-by-Step Instructions

    Close-up final presentation of iced Brown Sugar Pop Tart Cookies on a matte cream plate, glossy brow
    1. Prep the pans: Preheat oven to 350°F (175°C). Line two baking sheets with parchment paper.
    2. Whisk dry ingredients: In a bowl, whisk flour, baking soda, baking powder, salt, and cinnamon.

      Set aside.

    3. Cream the butter and sugars: In a large bowl, beat softened butter with brown sugar and granulated sugar until light and fluffy, 2–3 minutes.
    4. Add eggs and vanilla: Beat in the egg, egg yolk, and vanilla until smooth.
    5. Combine: Add dry ingredients to the wet and mix on low just until the dough comes together. Do not overmix.
    6. Make the filling: Stir brown sugar, cinnamon, melted butter, and a pinch of salt until it looks like damp sand.
    7. Shape the cookies: Scoop dough into 2-tablespoon balls. Flatten each slightly, add 1 teaspoon of filling to the center, and fold the edges over to seal.

      Place seam-side down on the baking sheet, spacing 2 inches apart.

    8. Bake: Bake 10–12 minutes, until edges are set and centers look slightly underdone. They’ll finish setting as they cool.
    9. Cool: Let cookies rest on the sheet for 5 minutes, then transfer to a rack to cool completely.
    10. Make the icing: Whisk powdered sugar, brown sugar, vanilla, and 1 tablespoon milk. Add more milk, a few drops at a time, until thick but spoonable.

      Stir in a pinch of cinnamon if you like.

    11. Glaze: Spoon icing over cooled cookies, letting it slowly spread. Allow 20–30 minutes for the icing to set.

    Keeping It Fresh

    Store cookies in an airtight container at room temperature for 3–4 days. If stacking, place parchment between layers to protect the icing.

    For longer storage, freeze un-iced cookies up to 2 months; thaw and ice before serving. You can also chill formed dough balls (without icing) for up to 24 hours to bake fresh later.

    Benefits of This Recipe

    • Nostalgic flavor: Tastes like a Pop-Tart, but softer and fresher.
    • Easy glaze: No special equipment, sets quickly.
    • Make-ahead friendly: Dough chills well and freezes beautifully.
    • Crowd-pleaser: Familiar flavor profile that appeals to kids and adults.

    Pitfalls to Watch Out For

    • Overbaking: Pull them when centers look slightly soft for that gooey middle.
    • Leaky filling: Seal the dough around the filling to prevent sugar seepage.
    • Runny icing: Add milk a few drops at a time. It should be thick, not drippy.
    • Warm cookies + icing: Let cookies cool completely or the icing will melt and slide.

    Recipe Variations

    • Maple twist: Swap half the vanilla in the icing for maple extract and add a splash more milk.
    • Brown butter base: Brown the butter, cool to solid, then cream for deeper, nutty flavor.
    • Whole wheat note: Replace 1/2 cup of all-purpose flour with white whole wheat for a heartier bite.
    • Extra crunch: Add 1/2 cup finely chopped pecans to the dough.
    • Pop-Tart look: Sprinkle a pinch of cinnamon sugar over the wet icing.

    FAQ

    Can I use dark brown sugar?

    Yes, but expect a deeper molasses flavor and slightly darker color.

    It’s delicious if you like a richer cookie.

    Do I have to stuff the cookies?

    No. You can skip the filling and instead roll dough balls in cinnamon sugar before baking. The icing will still shine.

    How do I know they’re done?

    Edges should be set and lightly golden, while the centers look soft and a bit puffy.

    If they brown all over, they’re overdone.

    Can I make these gluten-free?

    Use a 1:1 gluten-free baking flour with xanthan gum. The texture will be a touch more delicate but still tasty.

    What if my icing gets grainy?

    Whisk longer to dissolve the brown sugar, or warm the mixture for 5–10 seconds in the microwave and whisk again. Add a few drops of milk if needed.

    Can I chill the dough?

    Yes.

    Chill for 30–60 minutes for thicker cookies. If the dough gets too firm, let it sit at room temp for 10 minutes before shaping.

    Wrapping Up

    These Brown Sugar Pop Tart Cookies deliver everything you love about the classic pastry in a soft, homemade bite. They’re simple, cozy, and wildly addictive.

    Make a batch for your next movie night, lunchbox treat, or weekend bake, and watch them disappear fast.

    Brown Sugar Pop Tart Cookies Everyone Is Obsessed With Right Now – Soft, Gooey, and Perfectly Nostalgic

    Prep Time 15 minutes
    Cook Time 12 minutes
    Total Time 27 minutes
    Servings 24 servings

    Ingredients
      

    • For the cookies:
    • 2 3/4 cups all-purpose flour
    • 1 teaspoon baking soda
    • 1/2 teaspoon baking powder
    • 1/2 teaspoon fine salt
    • 1 cup (2 sticks) unsalted butter, softened
    • 1 cup packed light brown sugar
    • 1/2 cup granulated sugar
    • 1 large egg + 1 large egg yolk
    • 2 teaspoons vanilla extract
    • 1 teaspoon ground cinnamon
    • For the brown sugar cinnamon filling:
    • 1/2 cup packed light brown sugar
    • 1 teaspoon ground cinnamon
    • 2 tablespoons melted butter
    • Pinch of salt
    • For the icing:
    • 1 cup powdered sugar
    • 2 tablespoons brown sugar, very finely packed
    • 1–2 tablespoons milk (as needed)
    • 1/2 teaspoon vanilla extract
    • Pinch of cinnamon (optional)

    Instructions
     

    • Prep the pans: Preheat oven to 350°F (175°C). Line two baking sheets with parchment paper.
    • Whisk dry ingredients: In a bowl, whisk flour, baking soda, baking powder, salt, and cinnamon. Set aside.
    • Cream the butter and sugars: In a large bowl, beat softened butter with brown sugar and granulated sugar until light and fluffy, 2–3 minutes.
    • Add eggs and vanilla: Beat in the egg, egg yolk, and vanilla until smooth.
    • Combine: Add dry ingredients to the wet and mix on low just until the dough comes together. Do not overmix.
    • Make the filling: Stir brown sugar, cinnamon, melted butter, and a pinch of salt until it looks like damp sand.
    • Shape the cookies: Scoop dough into 2-tablespoon balls. Flatten each slightly, add 1 teaspoon of filling to the center, and fold the edges over to seal. Place seam-side down on the baking sheet, spacing 2 inches apart.
    • Bake: Bake 10–12 minutes, until edges are set and centers look slightly underdone. They’ll finish setting as they cool.
    • Cool: Let cookies rest on the sheet for 5 minutes, then transfer to a rack to cool completely.
    • Make the icing: Whisk powdered sugar, brown sugar, vanilla, and 1 tablespoon milk. Add more milk, a few drops at a time, until thick but spoonable. Stir in a pinch of cinnamon if you like.
    • Glaze: Spoon icing over cooled cookies, letting it slowly spread. Allow 20–30 minutes for the icing to set.