Author: Elise Bauer

  • Strawberry Lemonade Cupcakes – Bright, Fresh, and Fun

    Strawberry Lemonade Cupcakes – Bright, Fresh, and Fun

    These Strawberry Lemonade Cupcakes taste like a sunny afternoon in dessert form. You get a soft lemon cupcake, a swirl of strawberry frosting, and that sweet-tart balance that never gets old. They’re simple enough for a weekday bake but special enough for a birthday or shower.

    If you love bright flavors and pretty colors, this is your new go-to treat.

    What Makes This Recipe So Good

    Close-up detail, process shot: Lemon cupcake batter being portioned into a lined muffin pan, each we
    • Fresh, real flavor: Lemon zest and juice in the batter, real strawberries in the frosting.
    • Moist and tender crumb: A touch of sour cream keeps the cupcakes soft for days.
    • Balanced sweetness: Tart lemon meets sweet berries, so nothing tastes cloying.
    • Make-ahead friendly: Bake the cupcakes a day ahead and frost before serving.
    • Crowd-pleasing look: Pink frosting and lemony cupcakes always feel festive.

    Shopping List

    • For the cupcakes:
      • 1 1/2 cups all-purpose flour
      • 1 teaspoon baking powder
      • 1/2 teaspoon baking soda
      • 1/4 teaspoon fine salt
      • 3/4 cup granulated sugar
      • 1/2 cup unsalted butter, softened
      • 2 large eggs, room temperature
      • 1/2 cup sour cream (or plain Greek yogurt)
      • 1/3 cup whole milk
      • 1 tablespoon finely grated lemon zest
      • 3 tablespoons fresh lemon juice
      • 1 teaspoon vanilla extract
    • For the strawberry frosting:
      • 1 cup unsalted butter, softened
      • 3–3 1/2 cups powdered sugar, sifted
      • 1/3 cup strawberry puree or thick strawberry reduction (see note below)
      • 1 teaspoon vanilla extract
      • Pinch of salt
      • Optional: 1–2 teaspoons lemon juice for extra tang
    • Garnish: Fresh strawberries and thin lemon slices (optional)

    Note: To make a thick strawberry puree, blend 1 cup chopped strawberries, then simmer over medium heat until reduced by half and syrupy. Cool completely.

    Step-by-Step Instructions

    Final dish, tasty top view: Overhead shot of Strawberry Lemonade Cupcakes fully baked and frosted, s
    1. Prep: Heat oven to 350°F (175°C). Line a 12-cup muffin pan with paper liners.
    2. Whisk dry ingredients: In a bowl, whisk flour, baking powder, baking soda, and salt.
    3. Cream butter and sugar: In a large bowl, beat butter and sugar until light and fluffy, 2–3 minutes.
    4. Add eggs and flavors: Beat in eggs one at a time.

      Mix in lemon zest, lemon juice, and vanilla.

    5. Combine with dairy: Mix sour cream and milk in a small cup. Add dry ingredients to the butter mixture in two parts, alternating with the sour cream mixture. Mix just until smooth.

      Do not overmix.

    6. Fill and bake: Divide batter evenly among liners (about 2/3 full). Bake 16–19 minutes, until tops spring back and a toothpick comes out clean.
    7. Cool: Let cupcakes cool in the pan 5 minutes, then transfer to a rack to cool completely.
    8. Make the frosting: Beat butter until creamy. Add 2 cups powdered sugar, vanilla, and salt; mix until smooth.

      Beat in the cooled strawberry reduction, then add more powdered sugar, 1/2 cup at a time, until fluffy and pipeable. Add a splash of lemon juice if you want extra brightness.

    9. Frost: Pipe or spread frosting onto cooled cupcakes. Garnish with a strawberry slice or tiny lemon wedge if you like.

    How to Store

    • Room temperature: Keep frosted cupcakes in an airtight container for up to 1 day.
    • Refrigerator: Store up to 4 days.

      Let sit at room temperature 20–30 minutes before serving.

    • Freezer: Freeze unfrosted cupcakes up to 2 months. Thaw overnight in the fridge, then frost.
    • Frosting: Strawberry frosting keeps in the fridge 1 week. Rewhip before using.

    Why This is Good for You

    • Real fruit: Strawberries bring vitamin C and antioxidants.
    • Fresh lemon: Lemon juice and zest add bright flavor without extra heaviness.
    • Reasonable portion: Cupcakes offer built-in serving sizes, helping you enjoy dessert mindfully.

    What Not to Do

    • Don’t overmix the batter: It leads to tough cupcakes.
    • Don’t add warm puree to frosting: It will melt and turn runny.
    • Don’t skip the zest: Zest carries the lemon oils and most of the flavor.
    • Don’t overbake: Dry cupcakes lose that plush, lemonade-like feel.

    Variations You Can Try

    • Filled cupcakes: Core the center and spoon in strawberry jam or lemon curd.
    • Lemon-lime twist: Swap half the lemon juice for lime juice and add lime zest.
    • Gluten-free: Use a 1:1 gluten-free baking blend and add an extra tablespoon of milk if needed.
    • Strawberry lemonade swirl: Tint half the frosting pale yellow with a drop of gel color.

      Swirl with pink in the piping bag.

    • Mascarpone frosting: Beat 4 ounces mascarpone into the butter for a richer, slightly tangy finish.

    FAQ

    Can I use frozen strawberries?

    Yes. Thaw them fully and drain excess liquid before blending and reducing. This keeps the frosting thick and stable.

    What if I don’t have sour cream?

    Use plain Greek yogurt or buttermilk.

    If using buttermilk, replace both the sour cream and milk with 2/3 cup buttermilk.

    How do I get brighter pink frosting naturally?

    Use a more concentrated strawberry reduction. You can also add a teaspoon of freeze-dried strawberry powder for color and flavor.

    Why did my frosting turn runny?

    The puree was likely too warm or too thin. Reduce it further and cool completely.

    Add more powdered sugar to thicken if needed.

    Can I make mini cupcakes?

    Yes. Bake 10–12 minutes, or until a toothpick comes out clean. This recipe makes about 30–36 minis.

    Wrapping Up

    These Strawberry Lemonade Cupcakes bring bright citrus and sweet berry flavor in every bite.

    They’re easy to bake, pretty to serve, and always a hit. Keep the frosting thick, don’t overbake, and you’ll have a bakery-level treat at home. Happy baking!

    Strawberry Lemonade Cupcakes – Bright, Fresh, and Fun

    Prep Time 20 minutes
    Cook Time 18 minutes
    Total Time 38 minutes
    Servings 12 servings

    Ingredients
      

    • For the cupcakes:
    • 1 1/2 cups all-purpose flour
    • 1 teaspoon baking powder
    • 1/2 teaspoon baking soda
    • 1/4 teaspoon fine salt
    • 3/4 cup granulated sugar
    • 1/2 cup unsalted butter, softened
    • 2 large eggs, room temperature
    • 1/2 cup sour cream (or plain Greek yogurt)
    • 1/3 cup whole milk
    • 1 tablespoon finely grated lemon zest
    • 3 tablespoons fresh lemon juice
    • 1 teaspoon vanilla extract
    • For the strawberry frosting:
    • 1 cup unsalted butter, softened
    • 3–3 1/2 cups powdered sugar, sifted
    • 1/3 cup strawberry puree or thick strawberry reduction (see note below)
    • 1 teaspoon vanilla extract
    • Pinch of salt
    • Optional: 1–2 teaspoons lemon juice for extra tang
    • Garnish: Fresh strawberries and thin lemon slices (optional)

    Instructions
     

    • Prep: Heat oven to 350°F (175°C). Line a 12-cup muffin pan with paper liners.
    • Whisk dry ingredients: In a bowl, whisk flour, baking powder, baking soda, and salt.
    • Cream butter and sugar: In a large bowl, beat butter and sugar until light and fluffy, 2–3 minutes.
    • Add eggs and flavors: Beat in eggs one at a time. Mix in lemon zest, lemon juice, and vanilla.
    • Combine with dairy: Mix sour cream and milk in a small cup. Add dry ingredients to the butter mixture in two parts, alternating with the sour cream mixture. Mix just until smooth. Do not overmix.
    • Fill and bake: Divide batter evenly among liners (about 2/3 full). Bake 16–19 minutes, until tops spring back and a toothpick comes out clean.
    • Cool: Let cupcakes cool in the pan 5 minutes, then transfer to a rack to cool completely.
    • Make the frosting: Beat butter until creamy. Add 2 cups powdered sugar, vanilla, and salt; mix until smooth. Beat in the cooled strawberry reduction, then add more powdered sugar, 1/2 cup at a time, until fluffy and pipeable. Add a splash of lemon juice if you want extra brightness.
    • Frost: Pipe or spread frosting onto cooled cupcakes. Garnish with a strawberry slice or tiny lemon wedge if you like.
  • Best Stable Whipped Cream Frosting Recipe (Perfect for Cakes & Cupcakes) – Light, Fluffy, and Holds Its Shape

    Best Stable Whipped Cream Frosting Recipe (Perfect for Cakes & Cupcakes) – Light, Fluffy, and Holds Its Shape

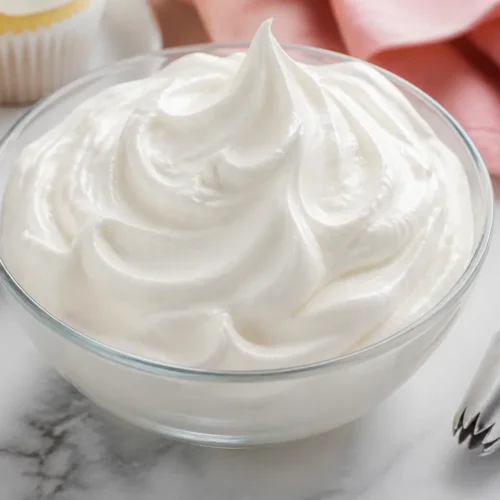
    Whipped cream frosting is dreamy, but it often wilts on warm days or slides off cakes. This version stays fluffy and stable, even when piped into tall swirls. It’s lightly sweet, vanilla-forward, and pairs beautifully with sponge cakes, cupcakes, cheesecakes, and fruit.

    If you’ve ever fought with runny whipped cream, this recipe will be a relief. It’s easy, quick, and uses simple ingredients you probably have on hand.

    What Makes This Special

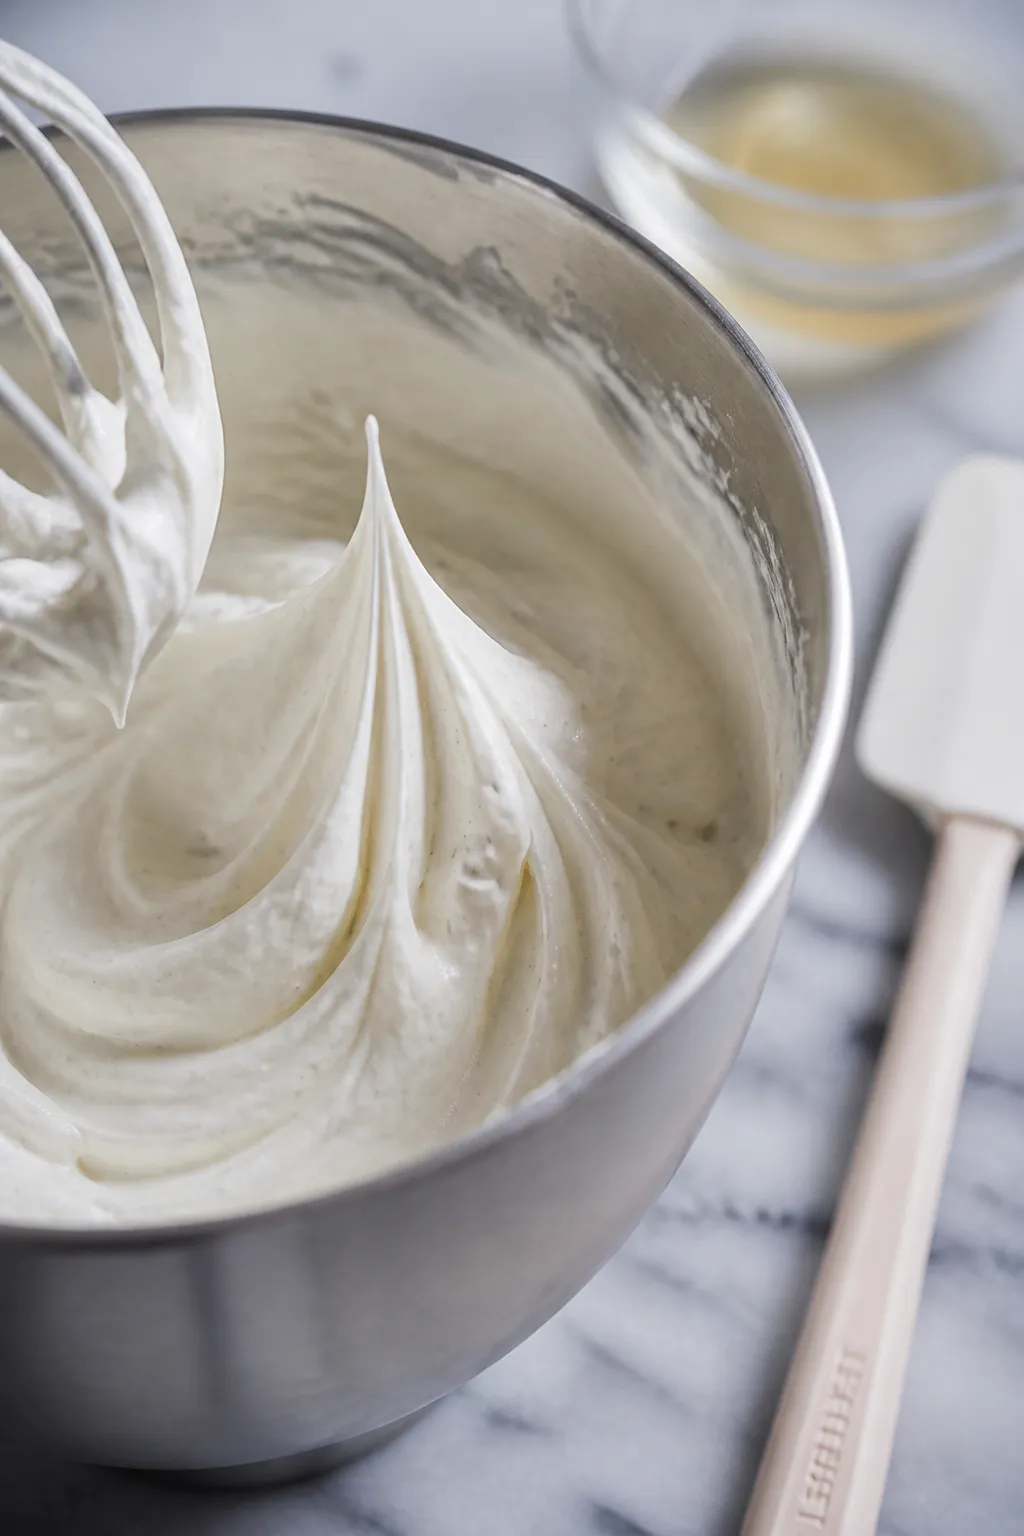
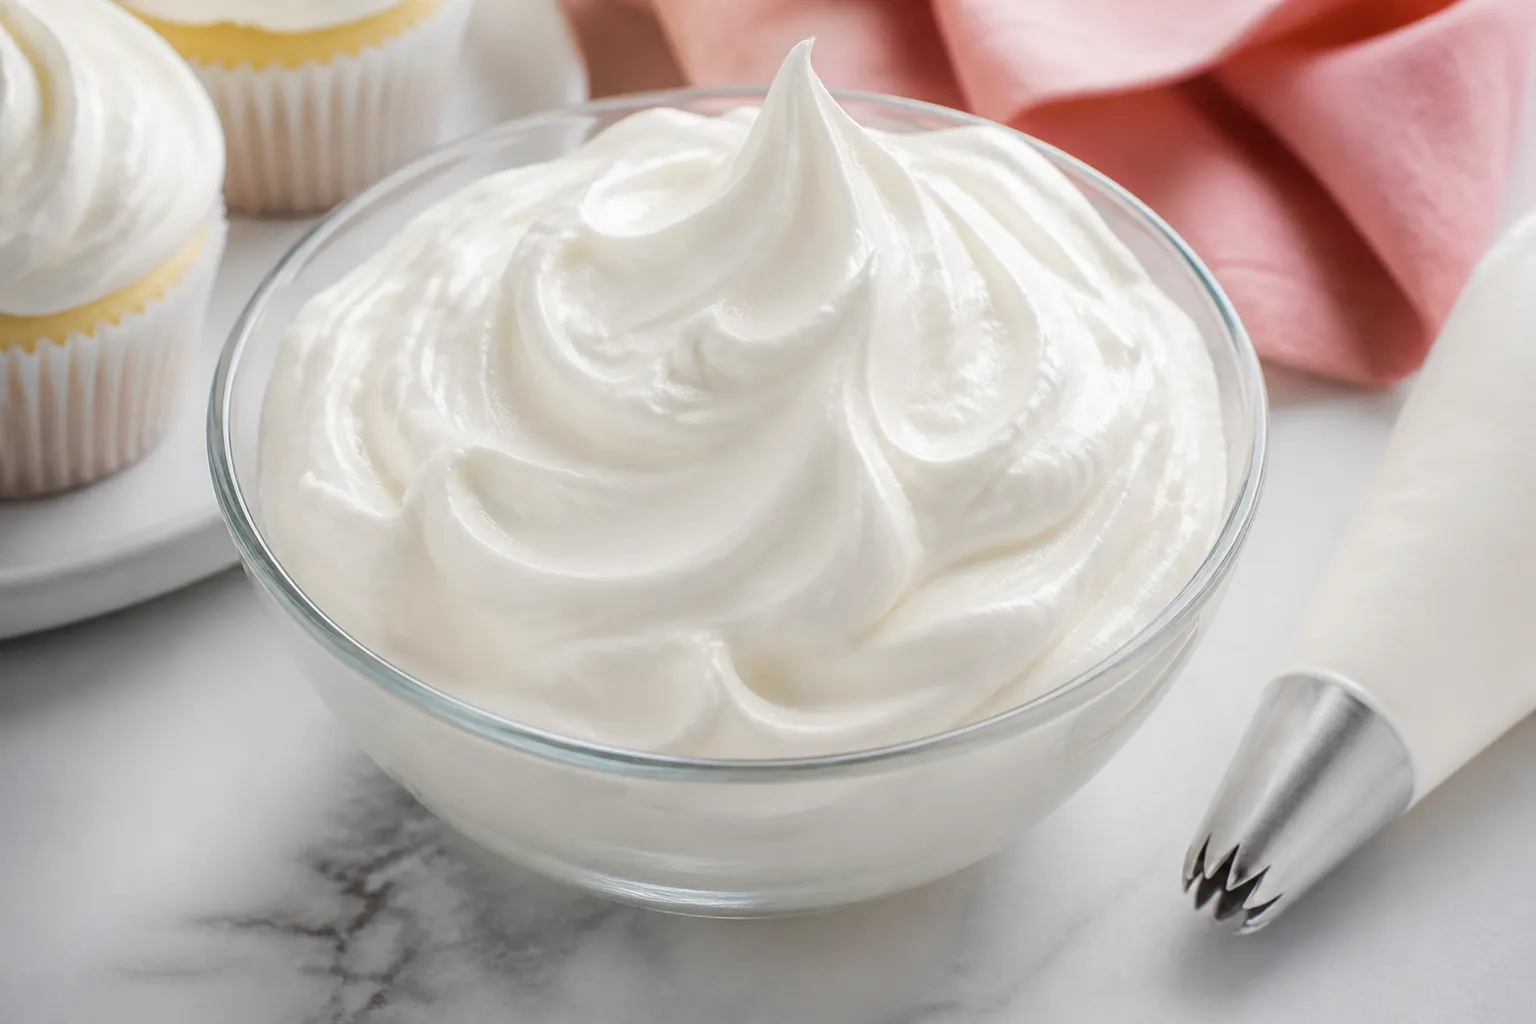
    Close-up detail/process shot: A chilled stainless-steel mixer bowl with whipped cream frosting just
    • Truly Stable: A touch of gelatin helps the frosting hold shape for hours, even at room temperature.
    • Light and Not Greasy: Unlike buttercream, this stays airy and silky, with clean vanilla flavor.
    • Perfect for Piping: Holds crisp edges for rosettes, shells, and tall swirls.
    • Not Too Sweet: Balanced sweetness that won’t overpower your cake.
    • Make-Ahead Friendly: Keeps well in the fridge without weeping or separating.

    What You’ll Need

    • 2 cups (480 ml) cold heavy whipping cream (36–40% milk fat)
    • 1/2 cup (60 g) powdered sugar (also called confectioners’ sugar)
    • 2 teaspoons pure vanilla extract (or 1 teaspoon vanilla paste)
    • 1 tablespoon cold water
    • 1 teaspoon unflavored powdered gelatin
    • Pinch of fine salt (optional, enhances flavor)
    • Equipment: Stand mixer or hand mixer, mixing bowl, small microwave-safe bowl, whisk, spatula

    Instructions

    Final presentation/top view: Overhead shot of a dozen vanilla cupcakes crowned with tall, sharply pi
    1. Chill your tools. Place the mixing bowl and beaters in the fridge or freezer for 10–15 minutes. Cold equipment helps the cream whip faster and fluffier.
    2. Bloom the gelatin. In a small bowl, sprinkle gelatin over the cold water.

      Let it sit for 5 minutes until spongy.

    3. Melt the gelatin. Microwave the bloomed gelatin for 5–10 seconds, just until melted and clear. Let it cool for 3–4 minutes. It should be liquid but not hot.
    4. Start the whip. Add cold heavy cream, powdered sugar, vanilla, and salt to the chilled bowl.

      Beat on medium speed until it’s thickened slightly and trails begin to form, about soft peaks.

    5. Stabilize. With the mixer on low, slowly stream in the cooled, melted gelatin. Once added, increase to medium-high and whip to firm peaks. The frosting should be smooth, billowy, and stable.

      Don’t overbeat.

    6. Use or store. Frost cakes or cupcakes right away, or transfer to a piping bag. If it firms up too much in the fridge, give it a brief whisk to refresh.

    Keeping It Fresh

    • Refrigerate: Store frosted cakes and leftover frosting in the fridge for up to 3 days.
    • Cover Well: Keep cakes in a cake carrier or lightly tented to prevent drying and odor absorption.
    • Serving: For best texture, serve chilled or let sit at room temp for 10–15 minutes. Avoid hot environments.
    • Freezing: Not ideal.

      The texture can become grainy after thawing.

    Health Benefits

    • Lower Sugar Than Buttercream: Uses less sugar overall, which can be easier on the palate and your day’s sugar load.
    • Simple Ingredients: No artificial stabilizers beyond a small amount of gelatin.
    • Portion-Friendly: Because it’s light and flavorful, a little goes a long way.

    Pitfalls to Watch Out For

    • Overbeating: Whip just to firm peaks. Overwhipped cream looks grainy and can turn to butter.
    • Hot Gelatin: If the gelatin is too warm, it can create strings. Let it cool slightly before adding.
    • Warm Equipment: Room-temp bowls slow whipping and reduce stability.

      Keep everything cold.

    • Humidity and Heat: Even stabilized cream softens in heat. Keep desserts chilled until serving.

    Alternatives

    • Cream Cheese Stabilized: Beat 4 oz (113 g) softened cream cheese with sugar and vanilla, then fold in softly whipped cream. Tangy and very stable.
    • Mascarpone Whip: Swap cream cheese for 4 oz mascarpone for a richer but still delicate frosting.
    • Pudding Mix Method: Add 1–2 tablespoons instant vanilla pudding mix to the cream and sugar before whipping for quick stability.
    • Powdered Milk/Cornstarch: Add 1 tablespoon powdered milk or 1 teaspoon cornstarch to help hold shape, though results are softer than gelatin.
    • Gelatin-Free (Vegetarian): Use agar-agar: dissolve 1/2 teaspoon agar powder in 2 tablespoons water, simmer 1 minute, cool to lukewarm, then stream into softly whipped cream and finish whipping.

    FAQ

    Can I make this without gelatin?

    Yes.

    Try the cream cheese or mascarpone versions, or use instant pudding mix. For a vegetarian option, agar works well when properly dissolved and cooled.

    Why is my whipped cream grainy?

    It’s likely overwhipped. Add a splash of cold cream (1–2 tablespoons) and gently whisk by hand to smooth it out.

    Will this hold up for outdoor parties?

    It’s more stable than plain whipped cream, but heat is still tricky.

    Keep it chilled and out of direct sun. Aim to serve within 30–45 minutes at room temp.

    Can I color or flavor it?

    Absolutely. Use gel food coloring for vivid hues.

    For flavor, add almond, lemon, or peppermint extract (start with 1/4 teaspoon) or fold in citrus zest or cocoa powder.

    Can I use granulated sugar instead of powdered?

    Powdered sugar dissolves more easily and helps stabilize. If using granulated, superfine works best, but whip a bit longer to fully dissolve.

    How much does this recipe frost?

    It comfortably frosts 12–16 cupcakes with tall swirls, or a 2-layer 8-inch cake with a light to moderate coat.

    In Conclusion

    This stable whipped cream frosting is light, lush, and dependable. With a quick gelatin boost and cold tools, you’ll get beautiful swirls that last.

    Keep it simple, keep it cold, and enjoy a not-too-sweet finish that makes any cake or cupcake shine.

    Best Stable Whipped Cream Frosting Recipe (Perfect for Cakes & Cupcakes) – Light, Fluffy, and Holds Its Shape

    Prep Time 15 minutes
    Total Time 15 minutes
    Servings 12 servings

    Ingredients
      

    • 2 cups (480 ml) cold heavy whipping cream (36–40% milk fat)
    • 1/2 cup (60 g) powdered sugar (also called confectioners’ sugar)
    • 2 teaspoons pure vanilla extract (or 1 teaspoon vanilla paste)
    • 1 tablespoon cold water
    • 1 teaspoon unflavored powdered gelatin
    • Pinch of fine salt (optional, enhances flavor)
    • Equipment: Stand mixer or hand mixer, mixing bowl, small microwave-safe bowl, whisk, spatula

    Instructions
     

    • Chill your tools. Place the mixing bowl and beaters in the fridge or freezer for 10–15 minutes. Cold equipment helps the cream whip faster and fluffier.
    • Bloom the gelatin. In a small bowl, sprinkle gelatin over the cold water. Let it sit for 5 minutes until spongy.
    • Melt the gelatin. Microwave the bloomed gelatin for 5–10 seconds, just until melted and clear. Let it cool for 3–4 minutes. It should be liquid but not hot.
    • Start the whip. Add cold heavy cream, powdered sugar, vanilla, and salt to the chilled bowl. Beat on medium speed until it’s thickened slightly and trails begin to form, about soft peaks.
    • Stabilize. With the mixer on low, slowly stream in the cooled, melted gelatin. Once added, increase to medium-high and whip to firm peaks. The frosting should be smooth, billowy, and stable. Don’t overbeat.
    • Use or store. Frost cakes or cupcakes right away, or transfer to a piping bag. If it firms up too much in the fridge, give it a brief whisk to refresh.
  • Key Lime Cupcakes From Box Cake – Bright, Tangy, and Easy

    Key Lime Cupcakes From Box Cake – Bright, Tangy, and Easy

    If you love the punchy taste of key lime pie but want something quick and fun, these key lime cupcakes from a box are the answer. They’re tender, citrusy, and topped with a creamy lime frosting that tastes like sunshine. No special equipment, no fussy steps—just a smart upgrade to a simple mix.

    You’ll get bakery-worthy results with a handful of tweaks you probably already have in your kitchen. Perfect for parties, potlucks, or a weekday treat that feels special.

    Why This Recipe Works

    Close-up detail shot of freshly baked key lime cupcakes being frosted: a swirl of creamy key lime bu

    We lean on a white or vanilla cake mix, then add lime juice and zest for real flavor—not just extract. A touch of sour cream or Greek yogurt keeps the cupcakes moist and tender.

    Swapping water for milk and using oil instead of butter keeps the crumb soft and light. The frosting is balanced with both lime juice and zest, so it’s tangy without being harsh. The result is a bright, fresh cupcake that tastes homemade with half the effort.

    What You’ll Need

    • 1 box white or vanilla cake mix (15.25 ounces)
    • 3 large eggs
    • 1/2 cup neutral oil (canola or vegetable)
    • 3/4 cup whole milk (or 2% in a pinch)
    • 1/3 cup key lime juice (fresh if possible; bottled works)
    • 1 tablespoon key lime zest (from about 6–8 key limes, or 1–2 regular limes)
    • 1/3 cup sour cream or plain Greek yogurt
    • 1 teaspoon vanilla extract

    For the frosting:

    • 1 cup (2 sticks) unsalted butter, softened
    • 3 1/2–4 cups powdered sugar
    • 2–3 tablespoons key lime juice
    • 1 teaspoon key lime zest
    • Pinch of salt
    • 1–2 tablespoons heavy cream or milk, as needed

    Optional garnishes: extra zest, lime slices, graham cracker crumbs

    Instructions

    Overhead final presentation of key lime cupcakes on a matte white platter: a neat arrangement of fro
    1. Prep the pan: Heat oven to 350°F (175°C).

      Line a 12-cup muffin tin with liners. For mini cupcakes, use 24 liners and reduce bake time.

    2. Mix the wet ingredients: In a large bowl, whisk eggs, oil, milk, lime juice, vanilla, and sour cream until smooth.
    3. Add the dry: Sprinkle in the cake mix and lime zest. Stir with a spatula until just combined.

      Do not overmix.

    4. Fill and bake: Divide batter among liners, filling each about 2/3 full. Bake 16–20 minutes, or until the tops spring back and a toothpick comes out clean.
    5. Cool completely: Let cupcakes rest in the pan 5 minutes, then transfer to a rack. Cool fully before frosting.
    6. Make the frosting: Beat softened butter on medium-high until fluffy, about 2 minutes.

      Add 3 1/2 cups powdered sugar, lime juice, zest, and salt. Beat until smooth. Adjust with more sugar for thickness or a splash of cream for softness.

    7. Frost and garnish: Pipe or spread frosting on cooled cupcakes.

      Top with zest, tiny lime wedges, or a sprinkle of graham crumbs for a “pie” vibe.

    Storage Instructions

    • Room temperature: Frosted cupcakes keep 1–2 days in an airtight container in a cool spot.
    • Refrigerator: Store up to 5 days. Bring to room temp 20–30 minutes before serving for best texture.
    • Freezer: Freeze unfrosted cupcakes up to 2 months. Thaw at room temp, then frost.

    Why This is Good for You

    Key limes add vitamin C and a bright, refreshing lift that can curb cravings for heavier desserts.

    Using oil and yogurt helps keep the crumb moist, so one cupcake goes a long way satisfaction-wise. The citrus aroma can even make the cupcakes taste sweeter, letting you enjoy a smaller portion without feeling deprived. It’s a cheerful, feel-good treat made lighter in spirit, if not strictly “light.”

    What Not to Do

    • Don’t overmix the batter. It makes cupcakes dense and tough.
    • Don’t skip the zest. It delivers the strongest lime flavor.
    • Don’t frost warm cupcakes. The frosting will melt and slide.
    • Don’t use only bottled juice without tasting. Some are bitter; adjust with a pinch of sugar if needed.
    • Don’t overbake. Dry cupcakes lose that soft, tender crumb.

    Recipe Variations

    • Graham Crust Bottoms: Press 1–2 teaspoons graham cracker crumbs mixed with a little melted butter into each liner before adding batter.
    • Coconut Twist: Fold in 1/2 cup shredded coconut and swap milk for canned coconut milk.
    • Cream Cheese Frosting: Replace half the butter with cream cheese for extra tang.
    • Lime-Curd Center: Core baked cupcakes and fill with store-bought lime curd, then frost.
    • Glaze Instead of Frosting: Whisk powdered sugar with lime juice to a pourable glaze and drizzle over warm cupcakes.

    FAQ

    Can I use regular limes instead of key limes?

    Yes.

    Regular Persian limes work well. The flavor is slightly less floral, so add a touch more zest to boost it.

    Why add sour cream or yogurt to a box mix?

    It adds moisture, a tender crumb, and mild tang that pairs perfectly with citrus. It also makes boxed mixes taste more homemade.

    How do I prevent my frosting from being too runny?

    Start with 2 tablespoons of lime juice and add more powdered sugar as needed.

    If it’s still loose, chill the frosting 10–15 minutes, then re-whip.

    Can I make these as a cake instead?

    Absolutely. Pour into a greased 9×13-inch pan and bake 25–30 minutes, or until a toothpick tests clean. Frost once cooled.

    Do I need green food coloring?

    No.

    The zest gives a natural hint of green. If you want a pastel look, add one tiny drop of gel color and mix well.

    How do I get stronger lime flavor?

    Use both zest and juice, and don’t skip the zest in the frosting. You can also add 1/4 teaspoon lime extract, but taste as you go.

    In Conclusion

    These key lime cupcakes from box cake are bright, moist, and fast to make—proof that a simple mix can turn out something special.

    With real lime zest, a soft crumb, and a tangy frosting, they feel like sunshine in cupcake form. Keep this recipe in your back pocket for easy wins, from weeknights to celebrations. One bowl, big flavor, happy crowd.

    Key Lime Cupcakes From Box Cake – Bright, Tangy, and Easy

    Prep Time 15 minutes
    Cook Time 20 minutes
    Total Time 35 minutes
    Servings 12 servings

    Ingredients
      

    • 1 box white or vanilla cake mix (15.25 ounces)
    • 3 large eggs
    • 1/2 cup neutral oil (canola or vegetable)
    • 3/4 cup whole milk (or 2% in a pinch)
    • 1/3 cup key lime juice (fresh if possible; bottled works)
    • 1 tablespoon key lime zest (from about 6–8 key limes, or 1–2 regular limes)
    • 1/3 cup sour cream or plain Greek yogurt
    • 1 teaspoon vanilla extract
    • 1 cup (2 sticks) unsalted butter, softened
    • 3 1/2–4 cups powdered sugar
    • 2–3 tablespoons key lime juice
    • 1 teaspoon key lime zest
    • Pinch of salt
    • 1–2 tablespoons heavy cream or milk, as needed

    Instructions
     

    • Prep the pan: Heat oven to 350°F (175°C). Line a 12-cup muffin tin with liners. For mini cupcakes, use 24 liners and reduce bake time.
    • Mix the wet ingredients: In a large bowl, whisk eggs, oil, milk, lime juice, vanilla, and sour cream until smooth.
    • Add the dry: Sprinkle in the cake mix and lime zest. Stir with a spatula until just combined. Do not overmix.
    • Fill and bake: Divide batter among liners, filling each about 2/3 full. Bake 16–20 minutes, or until the tops spring back and a toothpick comes out clean.
    • Cool completely: Let cupcakes rest in the pan 5 minutes, then transfer to a rack. Cool fully before frosting.
    • Make the frosting: Beat softened butter on medium-high until fluffy, about 2 minutes. Add 3 1/2 cups powdered sugar, lime juice, zest, and salt. Beat until smooth. Adjust with more sugar for thickness or a splash of cream for softness.
    • Frost and garnish: Pipe or spread frosting on cooled cupcakes. Top with zest, tiny lime wedges, or a sprinkle of graham crumbs for a “pie” vibe.
  • Easy Coconut Cream Pie Dip Recipe – Rich, Creamy & Ready in 10 Minutes

    Easy Coconut Cream Pie Dip Recipe – Rich, Creamy & Ready in 10 Minutes

    Craving coconut cream pie but don’t want to bake? This Coconut Cream Pie Dip gives you all the flavor and texture—sweet, rich, and silky—in minutes. It’s perfect for last-minute get-togethers, after-dinner treats, or a quick dessert that feels special.

    Serve it with vanilla wafers, graham crackers, or fresh fruit, and watch it disappear. No oven, no fuss, just a creamy dip that tastes like your favorite pie.

    Why This Recipe Works

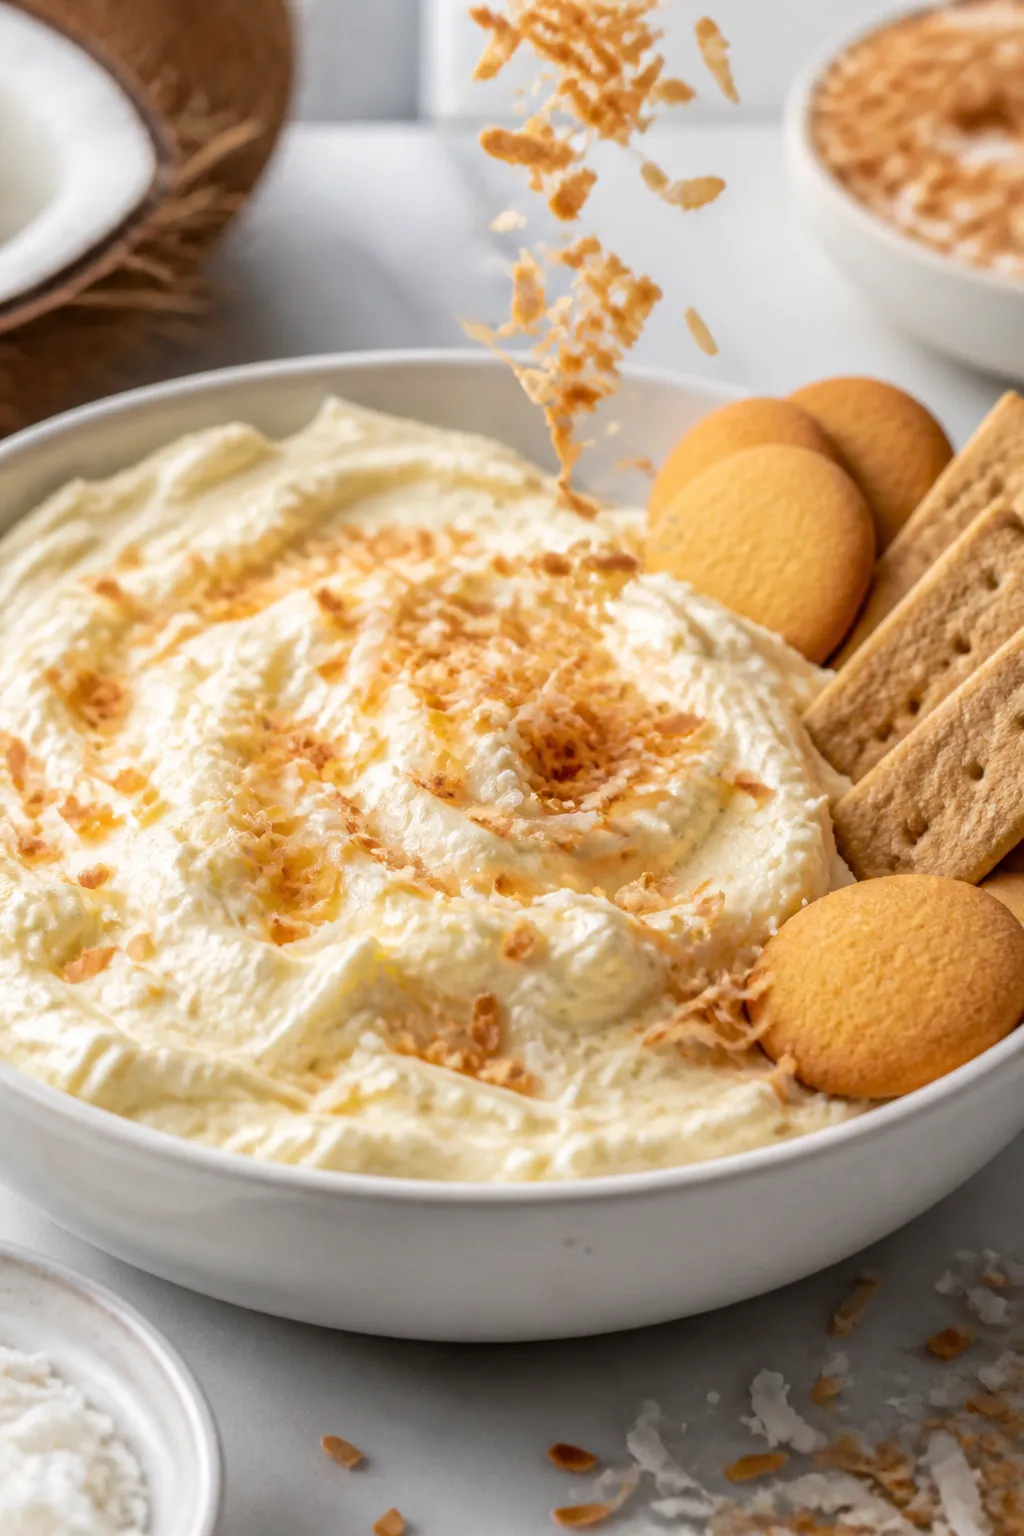
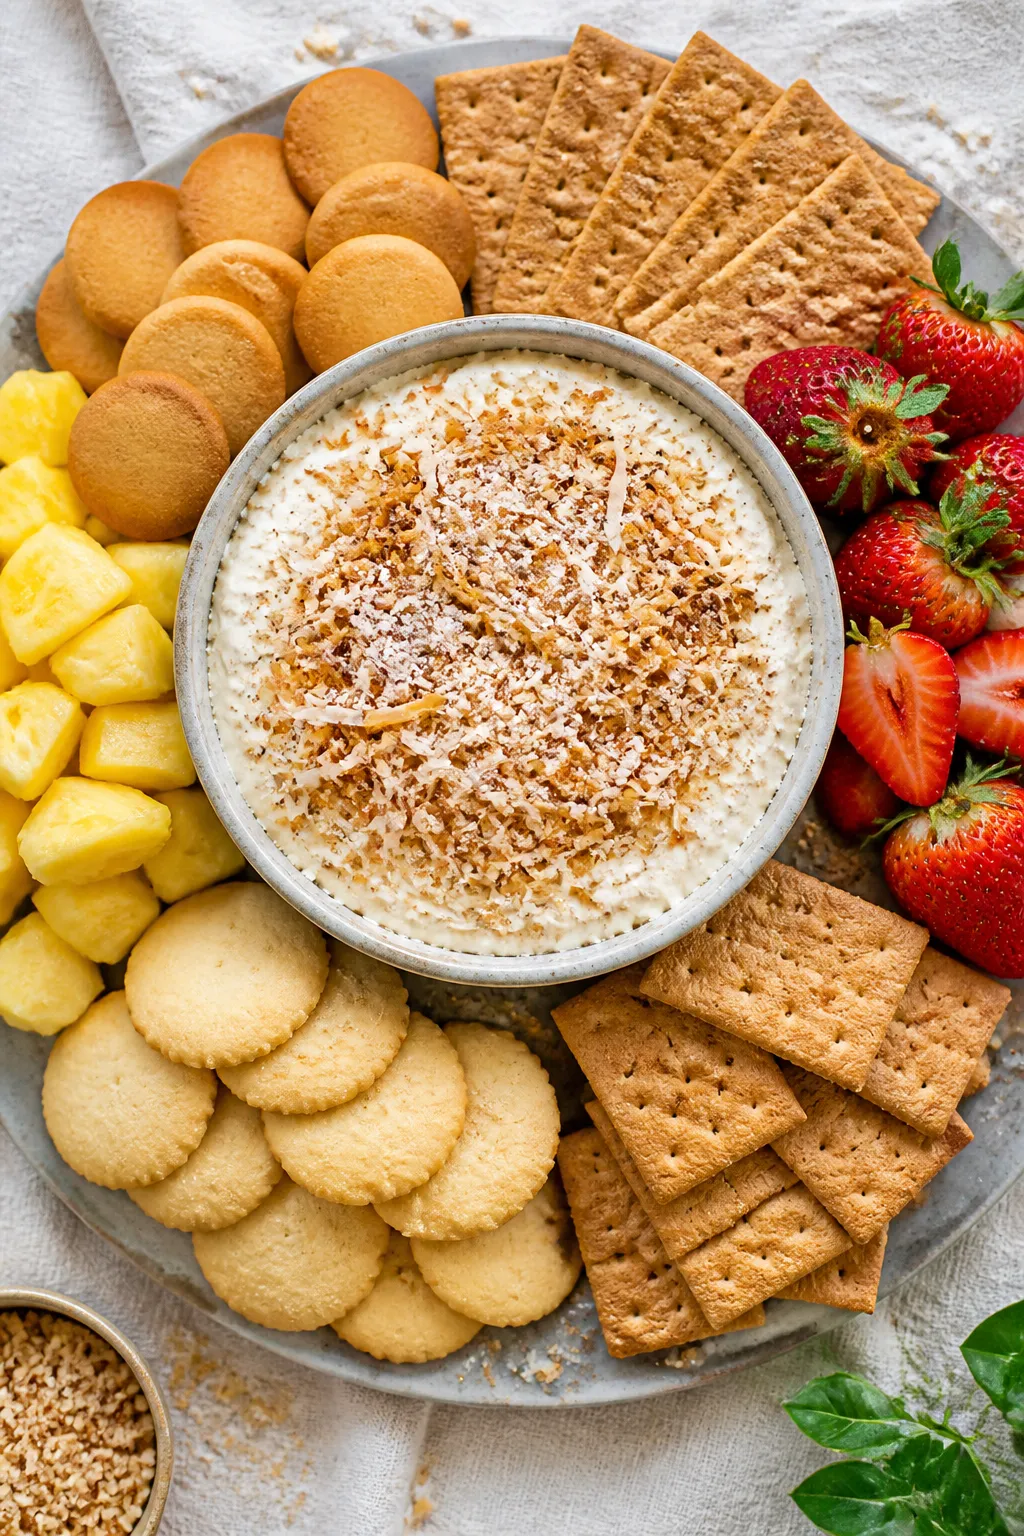
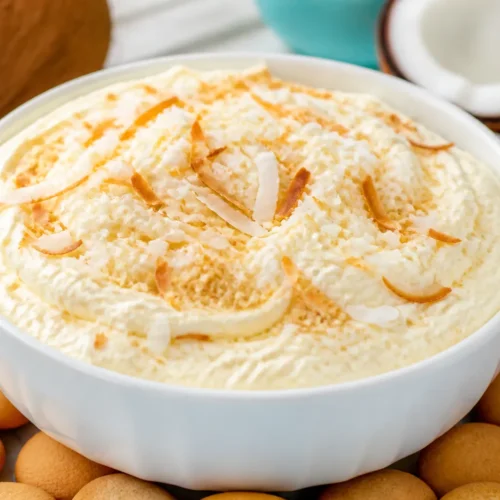
    Close-up detail shot of the finished Coconut Cream Pie Dip being garnished: the creamy, silky dip sw
    • No-bake convenience: Everything comes together in one bowl with simple pantry staples.
    • Perfect texture: Instant pudding and cream cheese make it thick and luxurious, while whipped topping keeps it light.
    • Big coconut flavor: Coconut milk and toasted coconut give it that true pie vibe.
    • Make-ahead friendly: The flavor gets even better after chilling.
    • Versatile: Serve with cookies, fruit, or spoon into mini cups for easy party bites.

    Ingredients

    • 1 (8 oz) block cream cheese, softened
    • 1 cup coconut milk (canned, well-shaken) or whole milk for a milder flavor
    • 1 (3.4 oz) box instant vanilla pudding mix or instant coconut cream pudding
    • 1/2 cup sweetened shredded coconut, plus more for topping
    • 1/3 cup powdered sugar (adjust to taste)
    • 1 teaspoon vanilla extract
    • 1/2 teaspoon coconut extract (optional but boosts flavor)
    • 1 (8 oz) tub whipped topping (like Cool Whip), thawed, or 2 cups lightly sweetened whipped cream
    • Pinch of salt to balance sweetness
    • Dippers: vanilla wafers, graham crackers, shortbread, strawberries, pineapple chunks, or apple slices

    Instructions

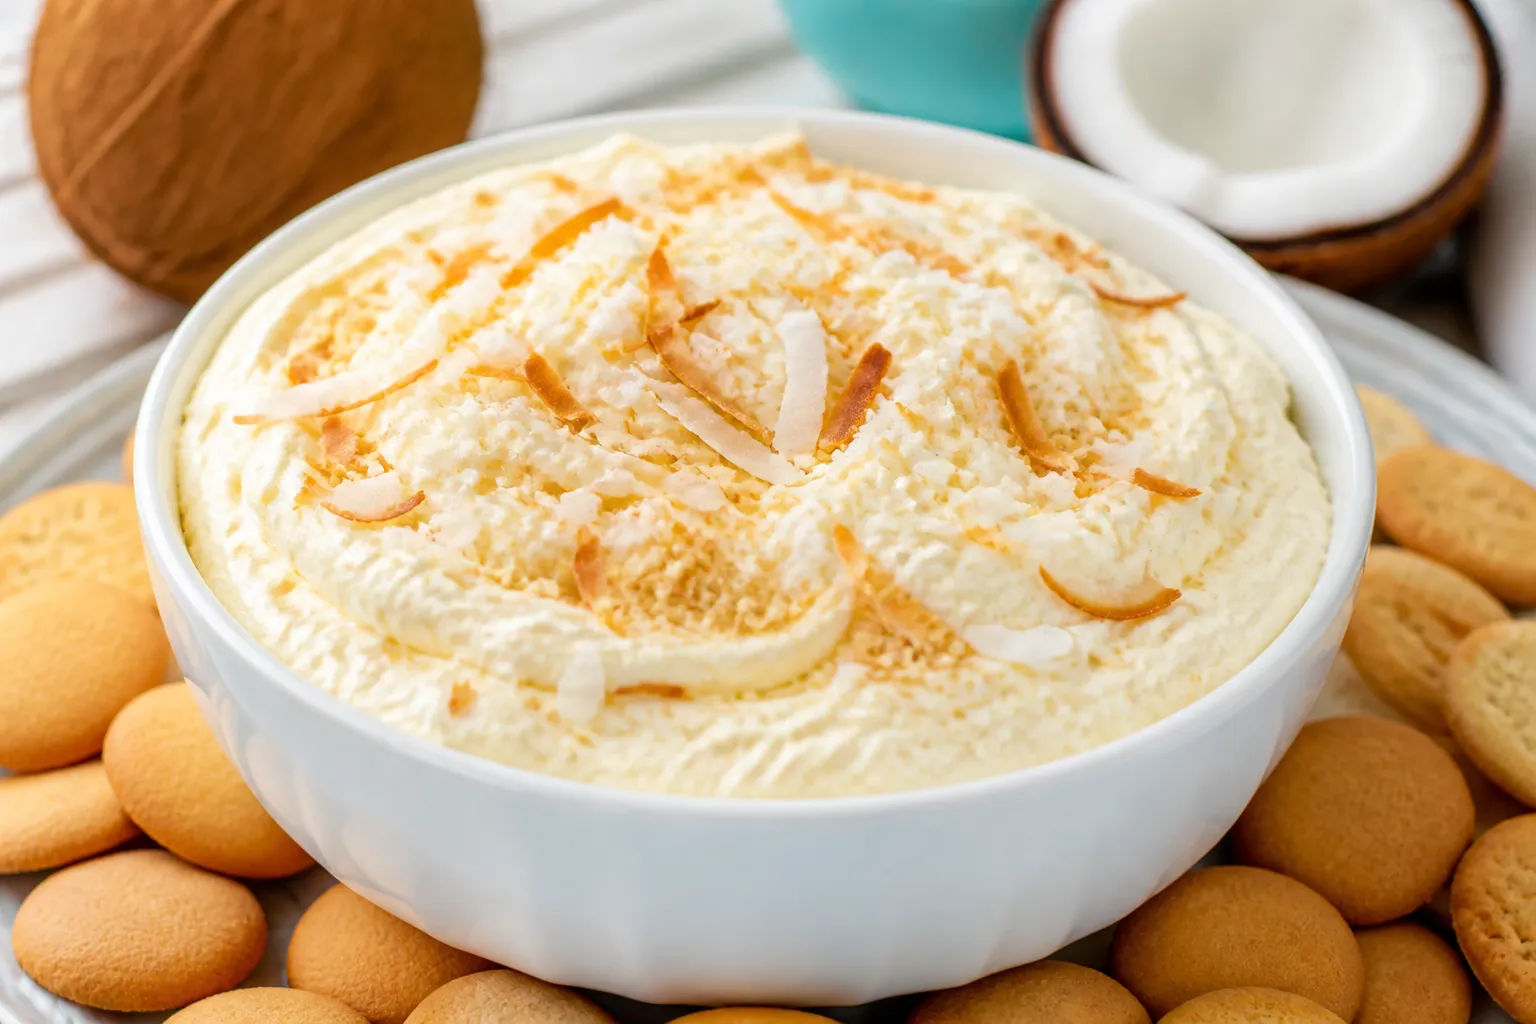
    Overhead final presentation of a party-ready spread: a generous bowl of Coconut Cream Pie Dip center
    1. Toast the coconut: In a dry skillet over medium heat, cook 1/2 cup shredded coconut, stirring often, until golden and fragrant, 3–5 minutes. Let cool.
    2. Beat the base: In a mixing bowl, beat softened cream cheese with powdered sugar and a pinch of salt until super smooth and fluffy.
    3. Mix the pudding: In a separate bowl, whisk instant pudding with coconut milk until thick, about 1–2 minutes.
    4. Combine: Beat the pudding mixture into the cream cheese until no lumps remain.

      Add vanilla and coconut extract.

    5. Fold in: Gently fold in whipped topping and most of the toasted coconut, saving some for garnish. Taste and adjust sweetness.
    6. Garnish and serve: Spoon into a serving bowl, sprinkle with remaining toasted coconut, and serve right away or chill for 30–60 minutes for a thicker set.

    How to Store

    • Refrigerate: Cover tightly and store up to 3 days. Stir before serving.
    • Make-ahead: Prepare up to 24 hours in advance for the best texture and flavor.
    • Freezing: Not recommended; the texture may separate once thawed.

    Why This is Good for You

    • Portion control: It’s rich, so a small serving satisfies a sweet tooth without a full slice of pie.
    • Customizable: You can lighten it by using light cream cheese and whipped topping, or swap in Greek yogurt for part of the cream cheese.
    • Coconut perks: Coconut provides flavor and some healthy fats.

      Enjoy in moderation as part of a balanced treat.

    Common Mistakes to Avoid

    • Using warm cream cheese: Too soft or melty cream cheese can make the dip runny. Aim for room temperature, not warm.
    • Overmixing whipped topping: Fold gently to keep the dip airy. Vigorous stirring can deflate it.
    • Skipping the salt: A tiny pinch sharpens flavors and cuts the sweetness.
    • Not toasting the coconut: Raw coconut is fine, but toasting adds depth and a pie-like aroma.
    • Adding too much liquid: Stick to the 1 cup of coconut milk; more can thin the dip.

    Alternatives

    • Dairy-free: Use dairy-free cream cheese, coconut whipped topping, and confirm your pudding mix is dairy-free.

      Swap coconut milk for the liquid.

    • Lower sugar: Reduce powdered sugar or use a sugar-free pudding mix and light whipped topping.
    • No pudding mix: Whisk 1/3 cup instant vanilla powder or 2 tablespoons cornstarch with 1/2 cup cold milk, simmer gently until thick, cool, then proceed. Flavor won’t be as intense but still tasty.
    • Flavor twists: Add lime zest for a coconut-lime dip, rum extract for a pina colada vibe, or fold in crushed pineapple (well-drained).
    • Crunch factor: Top with crushed graham crackers or toasted macadamias right before serving.

    FAQ

    Can I use regular milk instead of coconut milk?

    Yes. Whole milk works well and gives a milder coconut flavor.

    If you still want strong coconut notes, keep the coconut extract and toasted coconut.

    How do I keep the dip from being too sweet?

    Start with 2 tablespoons powdered sugar and taste as you go. The pudding and whipped topping already add sweetness, so you may need less than you think.

    Can I make this ahead for a party?

    Absolutely. Make it up to a day in advance, cover, and chill.

    Add the toasted coconut and any crunchy toppings just before serving.

    What should I serve with coconut cream pie dip?

    Vanilla wafers, graham crackers, shortbread, pretzels for a salty contrast, and fruit like strawberries, pineapple, or apple slices all pair nicely.

    Why is my dip lumpy?

    Lumps usually mean the cream cheese wasn’t smooth enough. Beat the cream cheese until fluffy before adding the pudding mixture, and make sure the pudding is whisked well.

    Final Thoughts

    This Coconut Cream Pie Dip delivers classic dessert flavor without turning on the oven. It’s quick, creamy, and easy to customize, whether you like it extra coconutty or lightly sweet.

    Keep the ingredients on hand and you’ve got a reliable, crowd-pleasing treat ready in minutes. Serve, scoop, and enjoy.

    Easy Coconut Cream Pie Dip Recipe – Rich, Creamy & Ready in 10 Minutes

    Prep Time 10 minutes
    Total Time 10 minutes
    Servings 8 servings

    Ingredients
      

    • 1 (8 oz) block cream cheese, softened
    • 1 cup coconut milk (canned, well-shaken) or whole milk for a milder flavor
    • 1 (3.4 oz) box instant vanilla pudding mix or instant coconut cream pudding
    • 1/2 cup sweetened shredded coconut, plus more for topping
    • 1/3 cup powdered sugar (adjust to taste)
    • 1 teaspoon vanilla extract
    • 1/2 teaspoon coconut extract (optional but boosts flavor)
    • 1 (8 oz) tub whipped topping (like Cool Whip), thawed, or 2 cups lightly sweetened whipped cream
    • Pinch of salt to balance sweetness
    • Dippers: vanilla wafers, graham crackers, shortbread, strawberries, pineapple chunks, or apple slices

    Instructions
     

    • Toast the coconut: In a dry skillet over medium heat, cook 1/2 cup shredded coconut, stirring often, until golden and fragrant, 3–5 minutes. Let cool.
    • Beat the base: In a mixing bowl, beat softened cream cheese with powdered sugar and a pinch of salt until super smooth and fluffy.
    • Mix the pudding: In a separate bowl, whisk instant pudding with coconut milk until thick, about 1–2 minutes.
    • Combine: Beat the pudding mixture into the cream cheese until no lumps remain. Add vanilla and coconut extract.
    • Fold in: Gently fold in whipped topping and most of the toasted coconut, saving some for garnish. Taste and adjust sweetness.
    • Garnish and serve: Spoon into a serving bowl, sprinkle with remaining toasted coconut, and serve right away or chill for 30–60 minutes for a thicker set.
  • Easy Apple Crumb Muffins with Cinnamon Streusel Topping – Cozy, Bakery-Style Treat

    Easy Apple Crumb Muffins with Cinnamon Streusel Topping – Cozy, Bakery-Style Treat

    These apple crumb muffins taste like something you’d grab from a small-town bakery on a crisp fall morning. They’re soft and tender inside, with juicy bits of apple in every bite. On top, there’s a buttery cinnamon streusel that bakes into a golden, crumbly layer.

    They’re simple to make, great for breakfast or snacks, and perfect for using up a couple of apples you have on hand.

    What Makes This Recipe So Good

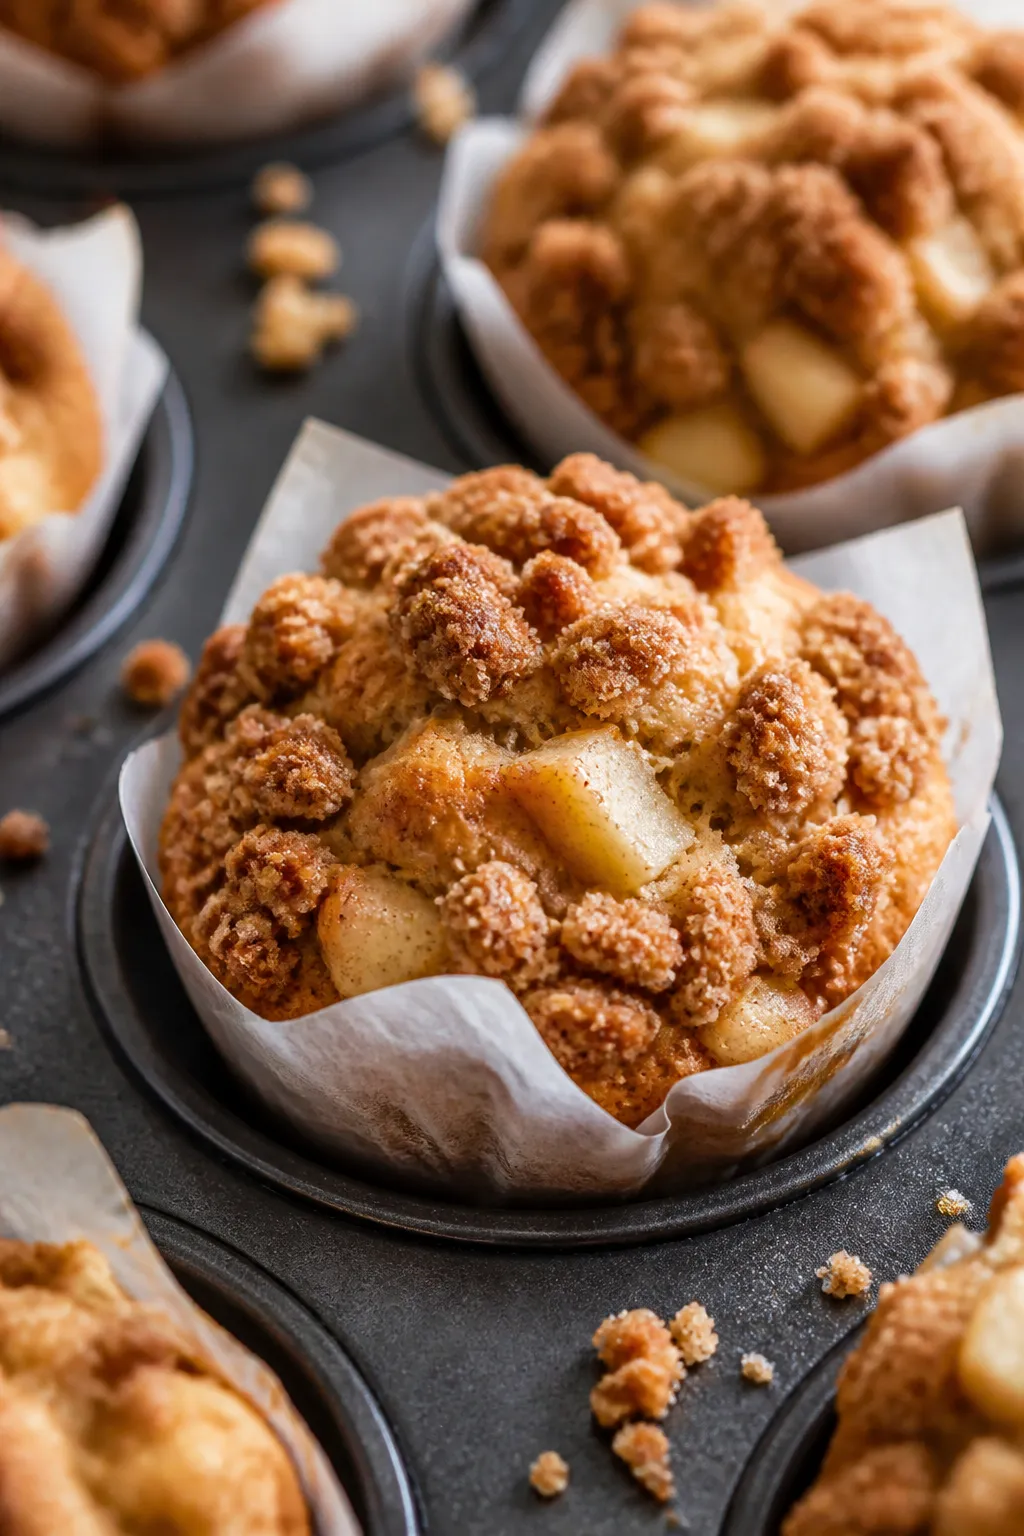
    Close-up detail shot of freshly baked apple crumb muffins just out of the tin, focus on the golden,
    • Big apple flavor: Fresh apples and warm cinnamon make these muffins taste like apple pie in muffin form.
    • Bakery-style crumb top: The cinnamon streusel adds a crunchy, buttery finish that’s hard to resist.
    • Quick and simple: Basic pantry ingredients and no mixer required.
    • Moist and tender: Oil and milk keep the crumb soft for days.
    • Make-ahead friendly: Freeze beautifully and reheat well.

    Shopping List

    • Apples: 2 medium, peeled and diced (about 1.5 cups). Granny Smith, Honeycrisp, or Fuji work well.
    • All-purpose flour: For both batter and streusel.
    • Granulated sugar and light brown sugar
    • Ground cinnamon and a pinch of nutmeg (optional)
    • Baking powder and baking soda
    • Salt
    • Eggs: 2 large
    • Milk: Whole or 2% preferred
    • Neutral oil: Canola or vegetable
    • Vanilla extract
    • Unsalted butter: For the streusel

    How to Make It

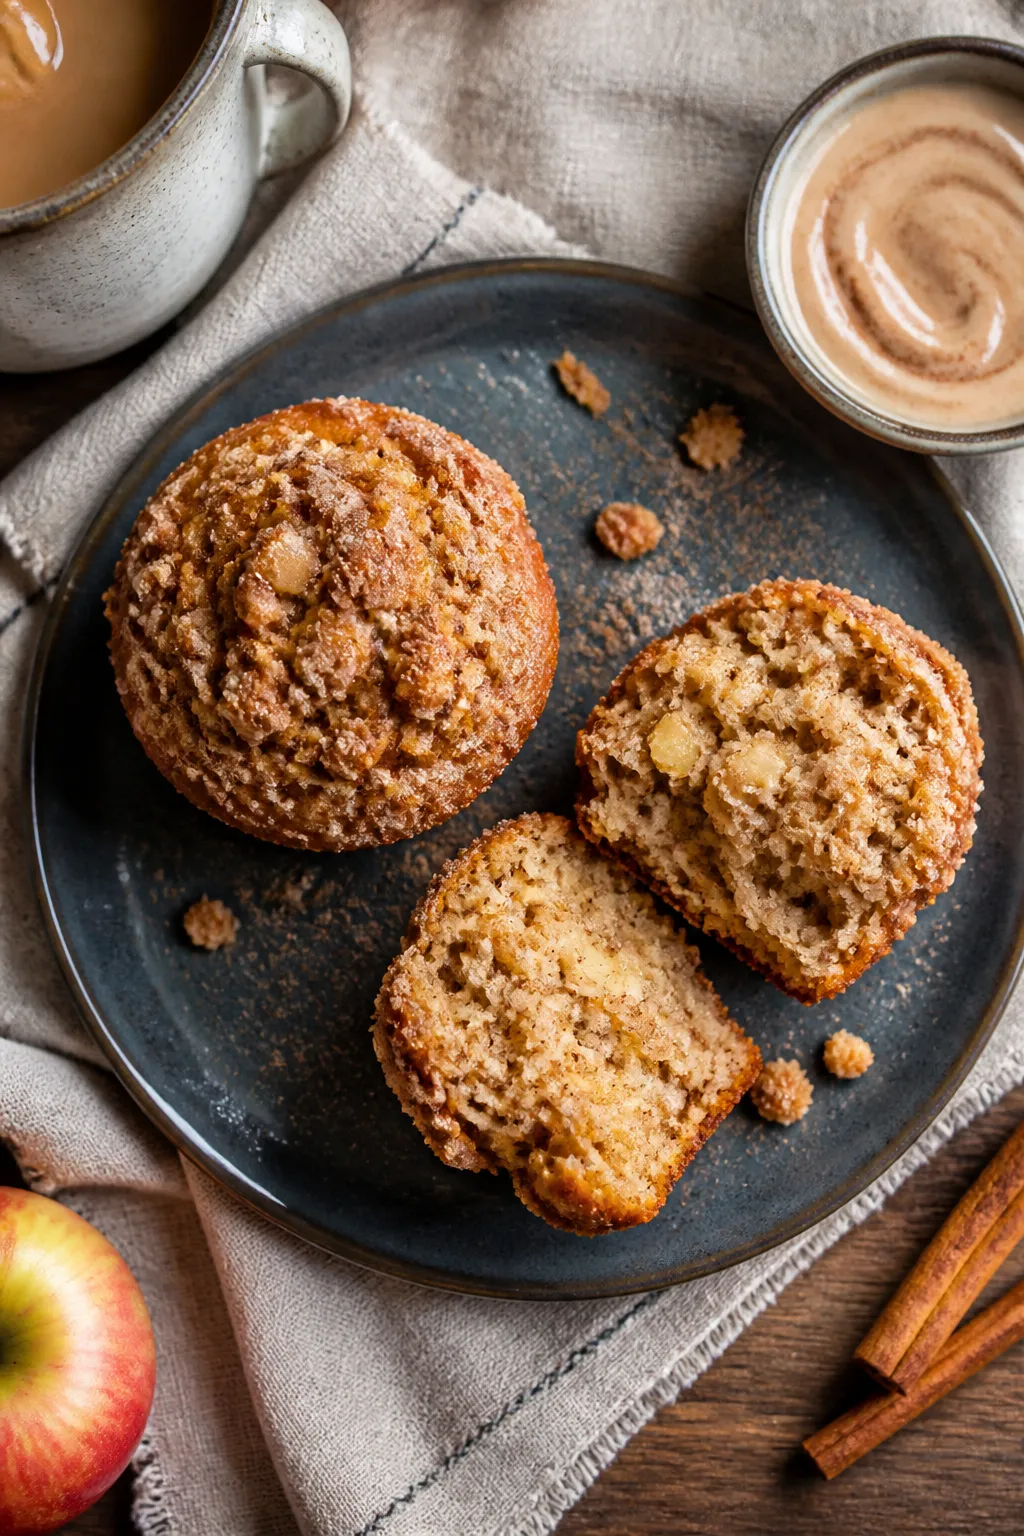
    Overhead final presentation of a cozy bakery-style breakfast scene: a slate-gray plate with one whol
    1. Prep the pan and oven: Heat oven to 375°F (190°C). Line a 12-cup muffin tin with paper liners or grease well.
    2. Make the streusel: In a bowl, mix 3/4 cup flour, 1/3 cup brown sugar, 1 teaspoon cinnamon, and a pinch of salt.

      Stir in 6 tablespoons melted butter until clumpy. Chill while you make the batter.

    3. Whisk dry ingredients: In a large bowl, whisk 2 cups flour, 2 teaspoons baking powder, 1/2 teaspoon baking soda, 1/2 teaspoon salt, 1 teaspoon cinnamon, and a pinch of nutmeg.
    4. Mix wet ingredients: In a separate bowl, whisk 2 large eggs, 3/4 cup granulated sugar, 1/2 cup neutral oil, 3/4 cup milk, and 2 teaspoons vanilla.
    5. Combine: Pour wet ingredients into dry. Stir gently until just combined.

      A few small lumps are fine. Fold in the diced apples.

    6. Fill the cups: Divide batter evenly among the muffin cups, almost to the top for taller muffins.
    7. Add streusel: Break the chilled streusel into chunky crumbs and mound on top of each muffin. Press lightly so it adheres.
    8. Bake: Bake 18–22 minutes, until the tops are golden and a toothpick comes out clean or with a few moist crumbs.
    9. Cool: Let muffins rest in the pan 5 minutes, then transfer to a rack.

      For extra shine, brush warm tops with a little melted butter and dust with cinnamon sugar (optional).

    Storage Instructions

    • Room temperature: Store in an airtight container for up to 3 days. Add a paper towel to absorb moisture and keep the streusel crisp.
    • Refrigerator: Up to 5 days, though the crumb softens slightly.
    • Freezer: Wrap individually and freeze up to 2 months. Thaw at room temperature or warm in a 300°F (150°C) oven for 8–10 minutes.

    Benefits of This Recipe

    • Kid-approved: Sweet, cinnamon-kissed flavor with a crunchy top.
    • Flexible: Works with many apple varieties and pantry swaps.
    • Balanced texture: Moist crumb, juicy fruit, crisp streusel.
    • Everyday ingredients: No specialty items needed, and no mixer required.

    Common Mistakes to Avoid

    • Overmixing the batter: Stir just until combined to prevent dense muffins.
    • Skipping the chill for streusel: Cold, clumpy crumbs bake up crunchier.
    • Cutting apples too large: Aim for small, even dice so they cook through.
    • Underfilling the cups: Fill close to the top for a nice dome and good crumb-to-muffin ratio.
    • Overbaking: Start checking at 18 minutes to keep muffins moist.

    Recipe Variations

    • Apple-cinnamon glaze: Mix powdered sugar with a splash of milk and cinnamon; drizzle over cooled muffins.
    • Nutty streusel: Add 1/2 cup chopped pecans or walnuts to the crumb topping.
    • Brown butter boost: Use browned butter in the streusel for deeper flavor.
    • Whole wheat twist: Swap 1 cup all-purpose flour for white whole wheat.

      Add 1–2 tablespoons extra milk if needed.

    • Dairy-free: Use plant milk and dairy-free butter for the streusel.
    • Spice it up: Add a pinch of cardamom or allspice to the batter.

    FAQ

    Which apples are best for these muffins?

    Choose firm apples that hold shape, like Granny Smith, Honeycrisp, Fuji, or Pink Lady. A mix of tart and sweet is great for balance.

    Can I use applesauce instead of some oil?

    Yes. Replace up to half the oil with unsweetened applesauce.

    The muffins will be slightly less tender but still moist.

    Do I have to peel the apples?

    No, but peeled apples give a softer bite and a more classic texture. If leaving skins on, dice very small.

    How do I get taller muffin tops?

    Fill cups almost to the rim and start with a fully preheated oven. You can also bake at 400°F (205°C) for the first 5 minutes, then reduce to 350°F (175°C) to finish.

    Can I make these as mini muffins?

    Yes.

    Bake in a mini muffin tin for 10–12 minutes, watching closely. Use smaller streusel crumbs.

    Why did my streusel melt into the muffins?

    The butter was likely too warm or the topping too fine. Keep the streusel chilled and crumbly, and press it gently onto the batter before baking.

    Wrapping Up

    These Easy Apple Crumb Muffins with Cinnamon Streusel Topping bring cozy, fresh-from-the-oven comfort with minimal effort.

    The batter comes together fast, the crumb is irresistible, and they make any morning feel special. Keep a batch on hand for quick breakfasts, lunchbox treats, or a sweet afternoon pick-me-up. Enjoy them warm with coffee or a glass of cold milk.

    Easy Apple Crumb Muffins with Cinnamon Streusel Topping – Cozy, Bakery-Style Treat

    Prep Time 15 minutes
    Cook Time 20 minutes
    Total Time 35 minutes
    Servings 12 servings

    Ingredients
      

    • Apples: 2 medium, peeled and diced (about 1.5 cups). Granny Smith, Honeycrisp, or Fuji work well.
    • All-purpose flour: For both batter and streusel.
    • Granulated sugar and light brown sugar
    • Ground cinnamon and a pinch of nutmeg (optional)
    • Baking powder and baking soda
    • Salt
    • Eggs: 2 large
    • Milk: Whole or 2% preferred
    • Neutral oil: Canola or vegetable
    • Vanilla extract
    • Unsalted butter: For the streusel

    Instructions
     

    • Prep the pan and oven: Heat oven to 375°F (190°C). Line a 12-cup muffin tin with paper liners or grease well.
    • Make the streusel: In a bowl, mix 3/4 cup flour, 1/3 cup brown sugar, 1 teaspoon cinnamon, and a pinch of salt. Stir in 6 tablespoons melted butter until clumpy. Chill while you make the batter.
    • Whisk dry ingredients: In a large bowl, whisk 2 cups flour, 2 teaspoons baking powder, 1/2 teaspoon baking soda, 1/2 teaspoon salt, 1 teaspoon cinnamon, and a pinch of nutmeg.
    • Mix wet ingredients: In a separate bowl, whisk 2 large eggs, 3/4 cup granulated sugar, 1/2 cup neutral oil, 3/4 cup milk, and 2 teaspoons vanilla.
    • Combine: Pour wet ingredients into dry. Stir gently until just combined. A few small lumps are fine. Fold in the diced apples.
    • Fill the cups: Divide batter evenly among the muffin cups, almost to the top for taller muffins.
    • Add streusel: Break the chilled streusel into chunky crumbs and mound on top of each muffin. Press lightly so it adheres.
    • Bake: Bake 18–22 minutes, until the tops are golden and a toothpick comes out clean or with a few moist crumbs.
    • Cool: Let muffins rest in the pan 5 minutes, then transfer to a rack. For extra shine, brush warm tops with a little melted butter and dust with cinnamon sugar (optional).
  • One Bowl Pumpkin Muffins Ready in 30 Minutes – Quick, Cozy, and Delicious

    One Bowl Pumpkin Muffins Ready in 30 Minutes – Quick, Cozy, and Delicious

    These pumpkin muffins check all the boxes: quick, simple, and packed with warm fall flavor. Everything mixes in one bowl, so cleanup is easy and the batter comes together in minutes. They bake up soft and tender with just the right amount of spice.

    Whether you’re baking for a busy weekday or a lazy weekend morning, these muffins fit the moment. Add chocolate chips, nuts, or keep them classic—either way, they’re a win.

    What Makes This Recipe So Good

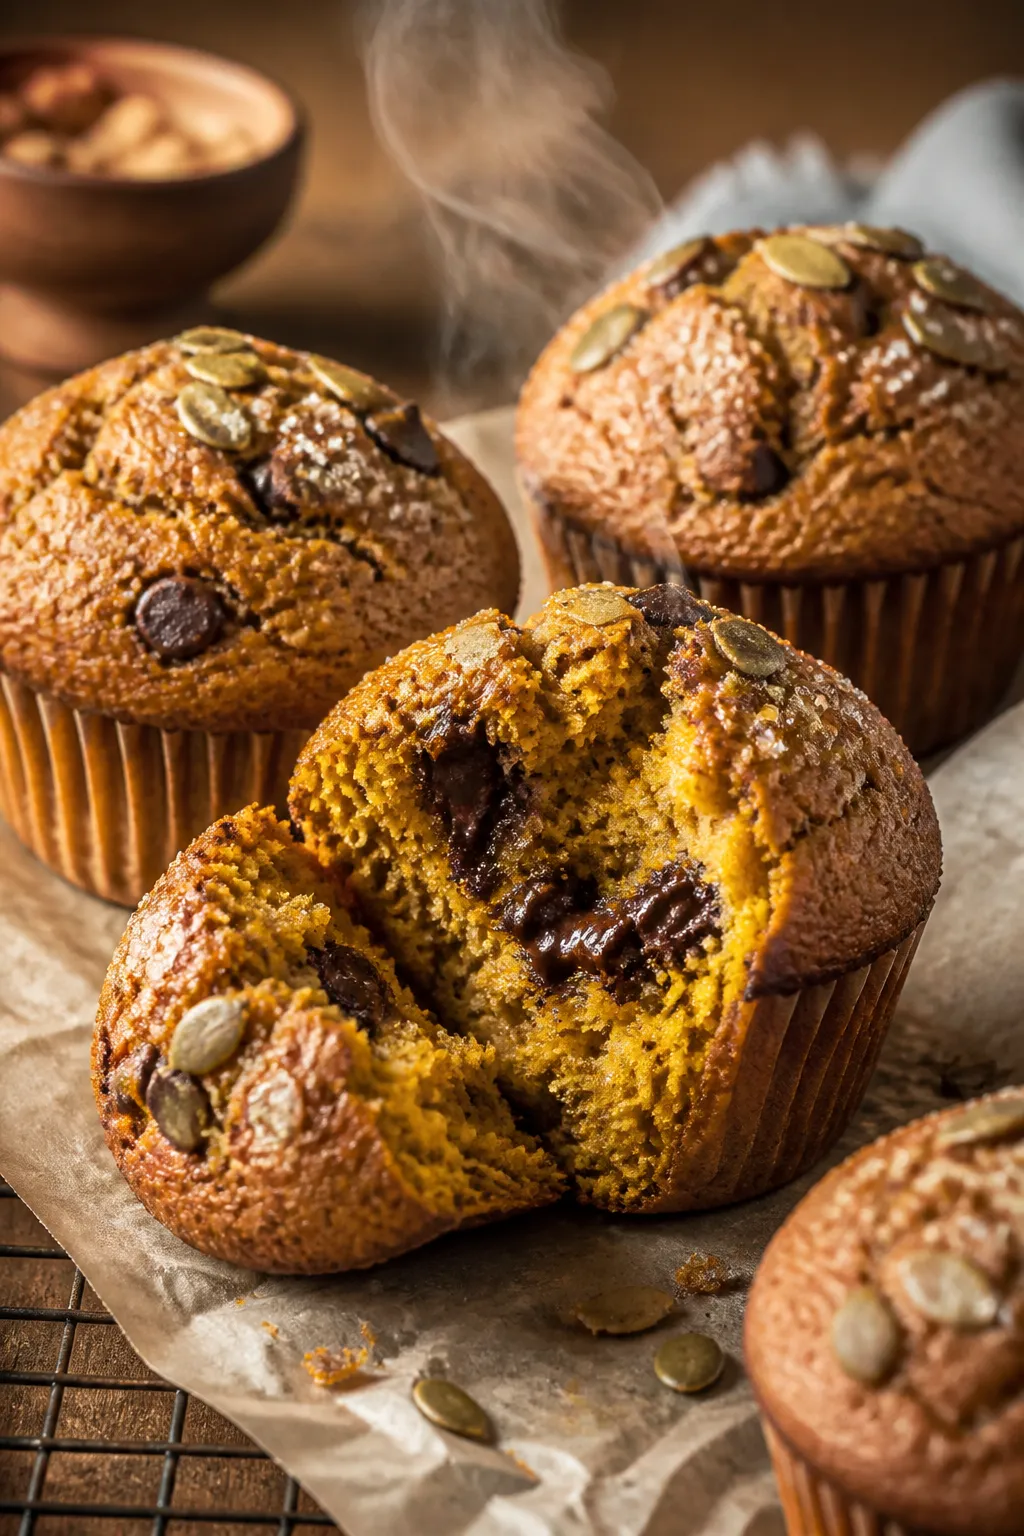
    Close-up detail shot of freshly baked pumpkin muffins just out of the tin, domed tops with crackly c
    • One-bowl simplicity: Less mess, fewer dishes, and faster cleanup.
    • Fast bake time: From pantry to plate in about 30 minutes.
    • Moist and tender: Pumpkin puree keeps the crumb soft without being heavy.
    • Easy to customize: Stir in chocolate chips, pecans, or dried cranberries.
    • Balanced spice: Warm but not overpowering, perfect for breakfast or a snack.

    Ingredients

    • 1 cup canned pumpkin puree (not pumpkin pie filling)
    • 2 large eggs, room temperature
    • 1/2 cup neutral oil (vegetable, canola, or light olive)
    • 1/2 cup brown sugar, packed
    • 1/4 cup granulated sugar
    • 1 teaspoon vanilla extract
    • 1 1/2 cups all-purpose flour
    • 1 teaspoon baking soda
    • 1 teaspoon baking powder
    • 1 1/2 teaspoons ground cinnamon
    • 1/2 teaspoon ground nutmeg
    • 1/4 teaspoon ground ginger
    • 1/4 teaspoon ground cloves (optional, for extra warmth)
    • 1/2 teaspoon fine salt
    • Optional mix-ins: 1/2–3/4 cup chocolate chips, chopped nuts, or dried cranberries
    • Optional topping: coarse sugar or pumpkin seeds

    Instructions

    Overhead final presentation of pumpkin muffins arranged on a matte white platter, alternating plain
    1. Preheat and prep: Heat the oven to 375°F (190°C). Line a 12-cup muffin tin with liners or lightly grease.
    2. Whisk wet ingredients: In a large bowl, whisk pumpkin, eggs, oil, brown sugar, granulated sugar, and vanilla until smooth.
    3. Add dry ingredients: Sprinkle flour, baking soda, baking powder, spices, and salt over the wet mixture.

      Stir gently with a spatula until just combined. Do not overmix.

    4. Fold in extras: If using chocolate chips, nuts, or cranberries, fold them in now.
    5. Portion the batter: Divide evenly among muffin cups, filling each about 3/4 full. Top with coarse sugar or pumpkin seeds if you like.
    6. Bake: Bake 16–20 minutes, or until the tops spring back and a toothpick comes out clean or with a few moist crumbs.
    7. Cool: Let muffins rest in the pan 5 minutes, then transfer to a rack. Enjoy warm or at room temperature.

    Keeping It Fresh

    • Room temperature: Store in an airtight container for 2–3 days.

      Add a paper towel to absorb moisture.

    • Refrigerator: Keeps well up to 5 days. Warm briefly in the microwave to refresh.
    • Freezer: Wrap individually and freeze up to 3 months. Thaw at room temp or microwave 20–30 seconds.

    Benefits of This Recipe

    • Time-friendly: Ready in 30 minutes, start to finish.
    • Pantry-friendly: Uses common staples and canned pumpkin.
    • Kid-approved: Not too sweet, not too spicy—easy to love.
    • Make-ahead friendly: Freezes well for quick breakfasts and snacks.
    • Flexible: Works with different oils, sugars, and add-ins.

    What Not to Do

    • Don’t use pumpkin pie filling: It’s pre-sweetened and spiced, which throws off the recipe.
    • Don’t overmix: Overworking the batter makes tough, dense muffins.
    • Don’t overbake: Dry muffins happen fast.

      Start checking at 16 minutes.

    • Don’t skip the salt: It sharpens the spices and balances sweetness.

    Alternatives

    • Oil swap: Use melted coconut oil or browned butter for richer flavor.
    • Flour options: Sub up to 1/2 cup whole wheat flour for extra fiber. For gluten-free, use a 1:1 gluten-free flour blend.
    • Sugar tweaks: Replace granulated sugar with more brown sugar or coconut sugar for deeper flavor.
    • Dairy boost: Stir in 2 tablespoons of sour cream or Greek yogurt for extra tenderness.
    • Spice shortcuts: Use 2–2 1/2 teaspoons pumpkin pie spice instead of the individual spices.

    Can I make these muffins dairy-free?

    Yes. The base recipe is already dairy-free if you don’t add chocolate chips containing milk.

    Use dairy-free chips if needed.

    How do I get taller muffin tops?

    Fill cups 3/4 full and bake at 375°F. A hotter oven helps the batter rise quickly for a rounded top.

    Can I use fresh pumpkin puree?

    Absolutely. Make sure it’s well-drained and thick.

    If it’s watery, blot it or simmer briefly to reduce moisture.

    How do I know when they’re done?

    Look for a domed top that springs back when lightly pressed. A toothpick should come out clean or with a few moist crumbs.

    Can I double the recipe?

    Yes. Bake in two muffin tins or in batches.

    Avoid crowding the oven, which can affect browning and rise.

    In Conclusion

    These one-bowl pumpkin muffins are quick, cozy, and foolproof. They deliver soft texture, warm spice, and just enough sweetness—no special tools or tricky steps required. Keep the base recipe handy, then mix and match add-ins to fit your mood.

    With 30 minutes and a single bowl, fresh muffins are always within reach.

    One Bowl Pumpkin Muffins Ready in 30 Minutes – Quick, Cozy, and Delicious

    Prep Time 10 minutes
    Cook Time 20 minutes
    Total Time 30 minutes
    Servings 12 servings

    Ingredients
      

    • 1 cup canned pumpkin puree (not pumpkin pie filling)
    • 2 large eggs, room temperature
    • 1/2 cup neutral oil (vegetable, canola, or light olive)
    • 1/2 cup brown sugar, packed
    • 1/4 cup granulated sugar
    • 1 teaspoon vanilla extract
    • 1 1/2 cups all-purpose flour
    • 1 teaspoon baking soda
    • 1 teaspoon baking powder
    • 1 1/2 teaspoons ground cinnamon
    • 1/2 teaspoon ground nutmeg
    • 1/4 teaspoon ground ginger
    • 1/4 teaspoon ground cloves (optional, for extra warmth)
    • 1/2 teaspoon fine salt
    • Optional mix-ins: 1/2–3/4 cup chocolate chips, chopped nuts, or dried cranberries
    • Optional topping: coarse sugar or pumpkin seeds

    Instructions
     

    • Preheat and prep: Heat the oven to 375°F (190°C). Line a 12-cup muffin tin with liners or lightly grease.
    • Whisk wet ingredients: In a large bowl, whisk pumpkin, eggs, oil, brown sugar, granulated sugar, and vanilla until smooth.
    • Add dry ingredients: Sprinkle flour, baking soda, baking powder, spices, and salt over the wet mixture. Stir gently with a spatula until just combined. Do not overmix.
    • Fold in extras: If using chocolate chips, nuts, or cranberries, fold them in now.
    • Portion the batter: Divide evenly among muffin cups, filling each about 3/4 full. Top with coarse sugar or pumpkin seeds if you like.
    • Bake: Bake 16–20 minutes, or until the tops spring back and a toothpick comes out clean or with a few moist crumbs.
    • Cool: Let muffins rest in the pan 5 minutes, then transfer to a rack. Enjoy warm or at room temperature.
  • Easy Focaccia Bread Recipe – Soft, Golden, and Foolproof

    Easy Focaccia Bread Recipe – Soft, Golden, and Foolproof

    Focaccia is one of those breads that looks fancy but is wonderfully simple to make at home. It’s soft inside, crisp at the edges, and full of olive oil flavor. With a few pantry staples and a little patience, you can pull a golden, dimpled loaf from your oven that tastes like it came from a bakery.

    This version keeps things straightforward without sacrificing texture or taste. Perfect for sandwiches, snacking, or soaking up sauce.

    Why This Recipe Works

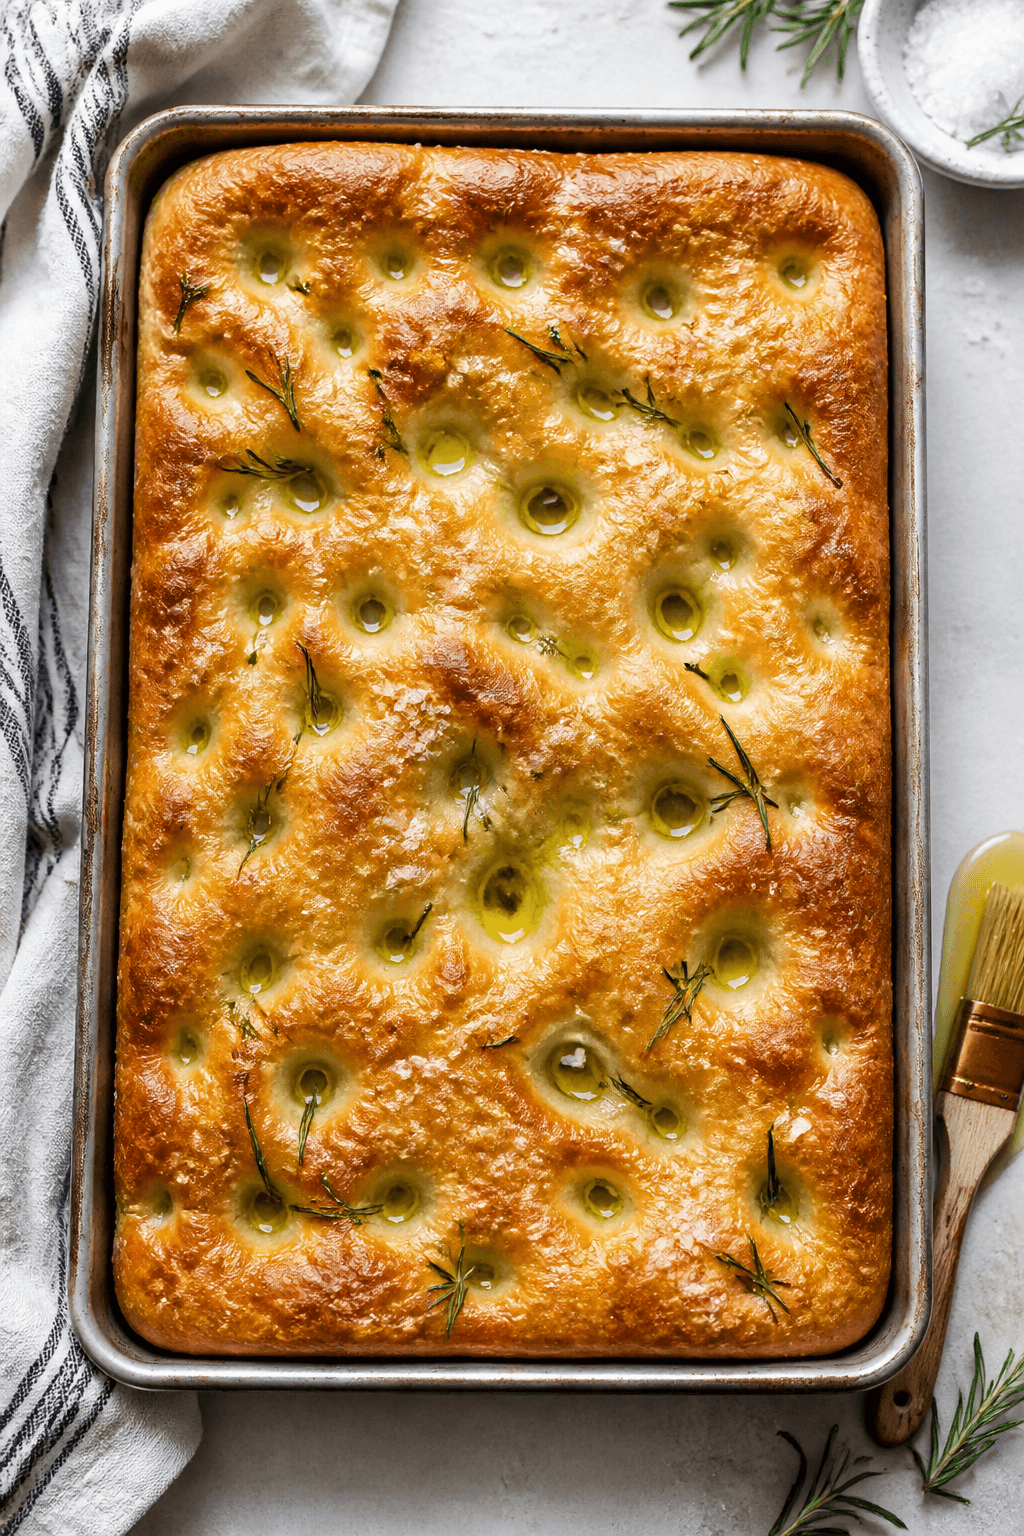
    Overhead shot of freshly baked focaccia in a 9x13-inch pan just out of the oven, golden surface with
    • High-hydration dough keeps the crumb moist and airy, giving you those classic focaccia bubbles.
    • Olive oil in the dough and pan creates a crisp, flavorful crust and prevents sticking.
    • Two rises develop flavor and structure without complicated shaping.
    • Coarse salt and dimpling help trap little pools of oil for extra flavor in every bite.

    Ingredients

    • 4 cups (500 g) bread flour or all-purpose flour
    • 1 1/2 cups (360 ml) warm water, about 100–110°F (38–43°C)
    • 2 1/4 tsp (1 packet) active dry yeast or instant yeast
    • 2 tsp fine sea salt
    • 2 tbsp granulated sugar or honey
    • 1/4 cup (60 ml) extra-virgin olive oil, plus more for the pan and topping
    • 2–3 tbsp olive oil for topping
    • 1–2 tsp flaky or coarse sea salt, for finishing
    • Optional toppings: fresh rosemary, thin red onion slices, cherry tomatoes, olives, garlic

    Step-by-Step Instructions

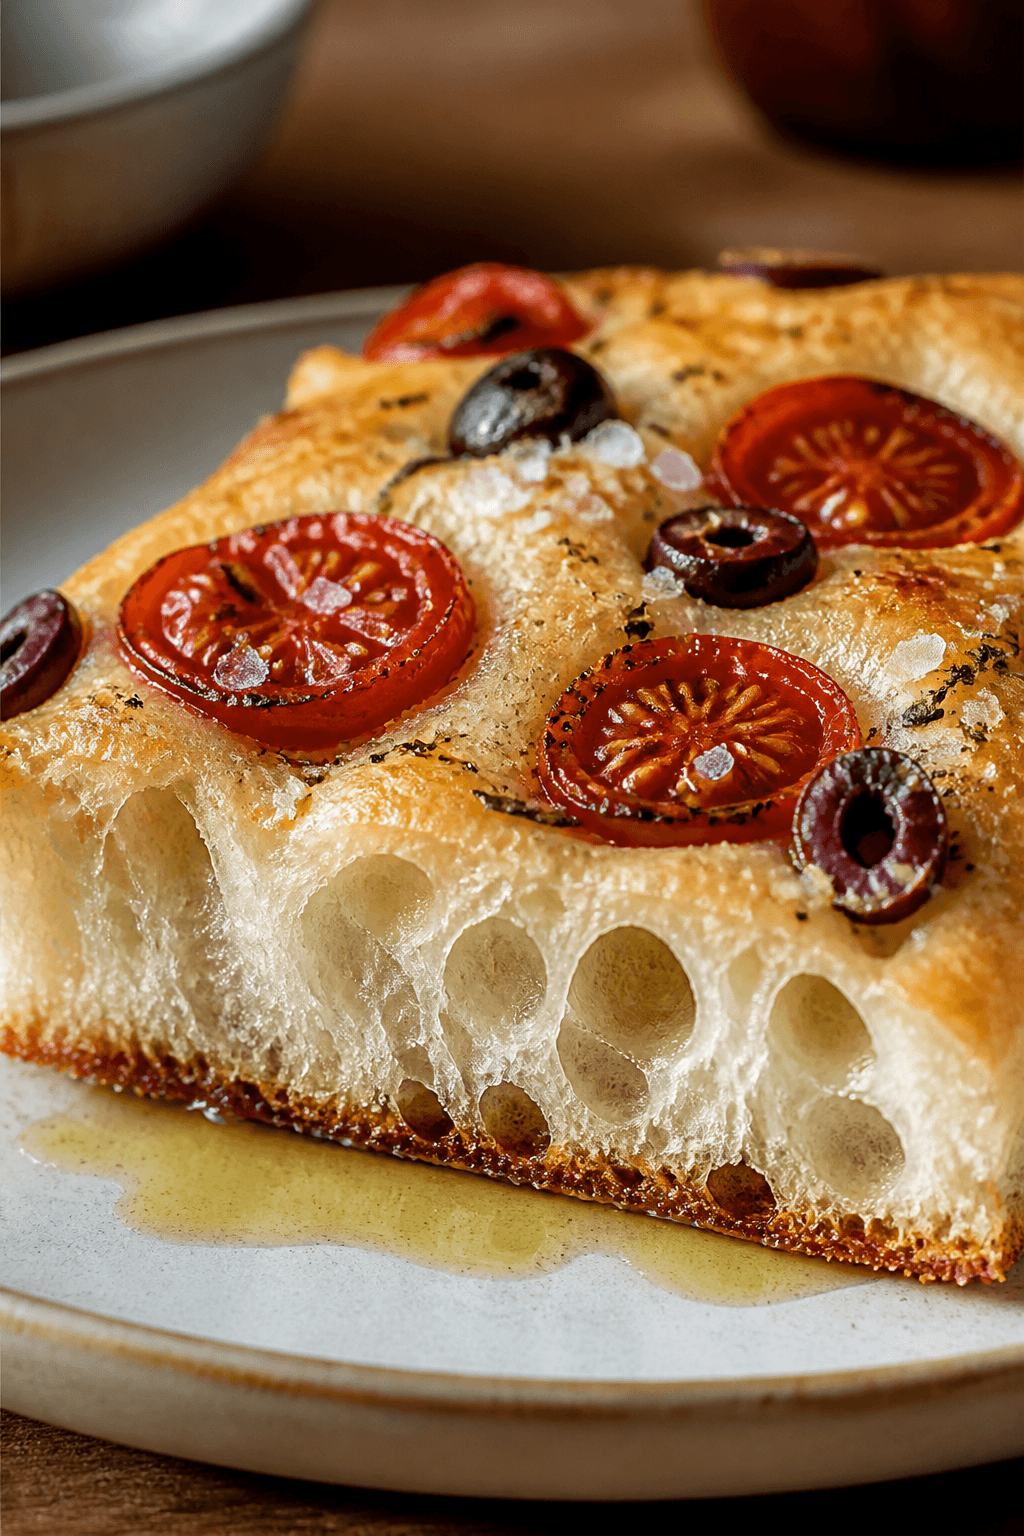
    Close-up detail of a sliced square of focaccia on a simple ceramic plate, showing the moist, high-hy
    1. Activate the yeast (if using active dry): In a large bowl, stir warm water with sugar or honey. Sprinkle the yeast over the top, wait 5–10 minutes until foamy.If using instant yeast, skip the proof and add it directly to the flour.
    2. Make the dough: Add flour, fine salt, and 1/4 cup olive oil to the bowl. Mix with a spoon until a shaggy dough forms. The dough will be sticky—that’s good.
    3. Knead briefly: Turn the dough onto a lightly oiled surface and knead 2–3 minutes, or perform 2–3 sets of stretch-and-folds in the bowl.Aim for a smooth, elastic dough. Don’t overwork it.
    4. First rise: Place dough in a lightly oiled bowl, turn to coat, cover, and let rise in a warm spot until doubled, about 60–90 minutes.
    5. Prep the pan: Generously oil a 9×13-inch pan or large sheet pan (about 2–3 tbsp). This oil helps the crust crisp and prevents sticking.
    6. Pan the dough: Transfer the dough to the pan.Gently stretch it toward the edges. If it resists, let it rest 10 minutes, then stretch again until it mostly fills the pan.
    7. Second rise: Cover and let the dough puff until slightly jiggly and airy, 30–45 minutes.
    8. Dimple and top: Drizzle 2–3 tbsp olive oil over the surface. With oiled fingers, press deep dimples all over.Sprinkle flaky salt and add toppings like rosemary, tomatoes, or olives.
    9. Bake: Preheat oven to 425°F (220°C). Bake 20–25 minutes, until golden with crisp edges. Rotate the pan once for even color.
    10. Finish and cool: Brush or drizzle a little more olive oil on top.Cool in the pan 10 minutes, then transfer to a rack. Slice warm or at room temp.

    Storage Instructions

    • Room temperature: Wrap loosely in parchment or store in a paper bag inside a plastic bag for up to 2 days. Re-crisp in a 375°F (190°C) oven for 5–8 minutes.
    • Freezer: Wrap tightly in plastic, then foil, for up to 2 months.Thaw at room temp, then refresh in the oven.
    • Avoid the fridge: Refrigeration dries bread out faster. Freeze instead.

    Why This is Good for You

    • Olive oil provides heart-friendly fats and great flavor without butter.
    • Homemade means control: You manage the salt, toppings, and oil, keeping it cleaner than many store-bought versions.
    • Complex carbs offer steady energy, and pairing with protein or veggies makes a balanced snack or meal.

    Common Mistakes to Avoid

    • Water too hot: Anything above 120°F (49°C) can kill yeast. Aim for warm, not hot.
    • Under-oiling the pan: Leads to sticking and a pale crust.Be generous.
    • Skipping the second rise: You’ll miss the airy texture and signature bubbles.
    • Overloading toppings: Too much moisture (like wet tomatoes) can make the top soggy. Pat juicy toppings dry.
    • Cutting too soon: Let it rest 10 minutes so the crumb sets and stays fluffy.

    Recipe Variations

    • Garlic-Rosemary: Add 2–3 minced garlic cloves and a handful of chopped fresh rosemary before baking.
    • Tomato-Basil: Press halved cherry tomatoes into the dough and finish with torn basil after baking.
    • Olive and Onion: Scatter sliced Kalamata olives and thin red onion for a savory bite.
    • Cheesy Focaccia: Sprinkle 1/2 cup grated Parmesan or shredded mozzarella in the last 5 minutes of baking.
    • Whole-Wheat Twist: Swap 1 cup of the white flour for whole-wheat flour. Add 1–2 tbsp extra water if needed.

    FAQ

    Can I make the dough ahead?

    Yes.

    After mixing, let it rise 30 minutes at room temp, then refrigerate up to 24 hours. Bring to room temp, spread in the pan, let it puff, then bake.

    Do I need bread flour?

    No. All-purpose flour works well.

    Bread flour gives a chewier texture and a bit more structure, but both are great.

    How do I get bigger air pockets?

    Use a wetter dough, don’t over-knead, and give it a full second rise. Gentle handling preserves the bubbles.

    Why is my focaccia dense?

    Common causes are old yeast, cool rising conditions, or cutting the rises short. Check yeast freshness and allow enough time to double.

    Can I bake on a sheet pan instead of a 9×13?

    Absolutely.

    Use a rimmed sheet pan, oil it well, and stretch the dough to your desired thickness. Thinner dough bakes a bit faster.

    Final Thoughts

    This easy focaccia delivers bakery-quality results with minimal fuss. With a few simple steps, you’ll get a golden, olive oil–kissed loaf that fits any meal.

    Keep the base recipe handy, switch up the toppings, and make it your go-to for weeknights or gatherings. Once you try it, you’ll wonder why you ever bought it.

    Easy Focaccia Bread Recipe – Soft, Golden, and Foolproof

    Prep Time 20 minutes
    Cook Time 25 minutes
    Total Time 45 minutes
    Servings: 12 servings

    Ingredients
      

    • 4 cups (500 g) bread flour or all-purpose flour
    • 1 1/2 cups (360 ml) warm water, about 100–110°F (38–43°C)
    • 2 1/4 tsp (1 packet) active dry yeast or instant yeast
    • 2 tsp fine sea salt
    • 2 tbsp granulated sugar or honey
    • 1/4 cup (60 ml) extra-virgin olive oil, plus more for the pan and topping
    • 2–3 tbsp olive oil for topping
    • 1–2 tsp flaky or coarse sea salt, for finishing
    • Optional toppings: fresh rosemary, thin red onion slices, cherry tomatoes, olives, garlic

    Method
     

    1. Activate the yeast (if using active dry): In a large bowl, stir warm water with sugar or honey. Sprinkle the yeast over the top, wait 5–10 minutes until foamy. If using instant yeast, skip the proof and add it directly to the flour.
    2. Make the dough: Add flour, fine salt, and 1/4 cup olive oil to the bowl. Mix with a spoon until a shaggy dough forms. The dough will be sticky—that’s good.
    3. Knead briefly: Turn the dough onto a lightly oiled surface and knead 2–3 minutes, or perform 2–3 sets of stretch-and-folds in the bowl. Aim for a smooth, elastic dough. Don’t overwork it.
    4. First rise: Place dough in a lightly oiled bowl, turn to coat, cover, and let rise in a warm spot until doubled, about 60–90 minutes.
    5. Prep the pan: Generously oil a 9×13-inch pan or large sheet pan (about 2–3 tbsp). This oil helps the crust crisp and prevents sticking.
    6. Pan the dough: Transfer the dough to the pan. Gently stretch it toward the edges. If it resists, let it rest 10 minutes, then stretch again until it mostly fills the pan.
    7. Second rise: Cover and let the dough puff until slightly jiggly and airy, 30–45 minutes.
    8. Dimple and top: Drizzle 2–3 tbsp olive oil over the surface. With oiled fingers, press deep dimples all over. Sprinkle flaky salt and add toppings like rosemary, tomatoes, or olives.
    9. Bake: Preheat oven to 425°F (220°C). Bake 20–25 minutes, until golden with crisp edges. Rotate the pan once for even color.
    10. Finish and cool: Brush or drizzle a little more olive oil on top. Cool in the pan 10 minutes, then transfer to a rack. Slice warm or at room temp.
  • What Is a Security Audit? Types, Process & Checklist 2026

    security audits

    In assessing the need for a client to implement https://getusainvest.com/panel-for-managing-servers-web-hosting-advantages-and-application.html encryption policies for their organization, the Auditor should conduct an analysis of the client’s risk and data value. The auditor should ask certain questions to better understand the network and its vulnerabilities. The role of an ISO has become one of following the dynamics of the security environment and keeping the risk posture balanced for the organization. In certain regulated industries, information security audits may be mandated by law.

    If you skip this, the audit becomes a scavenger hunt—and you’ll feel that pain most in cloud and identity, where misconfigurations and “invisible drift” are common (see future of cloud security and the reality of evolving threats like AI-powered attacks). The frequency of security audits depends on multiple factors including regulatory requirements, organizational risk tolerance, system complexity, and business criticality. Network security audits examine router and switch configurations, wireless network security, VPN implementations, and network access control systems.

    Modern Best Security Audit Software to Ensure Compliance & Mitigate Risk platforms automate many audit processes, reducing the time and resources required while improving accuracy and consistency of results. Security audits can be conducted internally by the organization’s security team or externally by independent third-party auditors, depending on regulatory requirements and organizational needs. Enterprise security teams face mounting pressure to demonstrate continuous compliance while managing increasingly complex IT environments. During the audit, take care to provide appropriate documentation and perform due diligence throughout the process. Gartner advises companies to agree on how the assessment will be performed and tracked, and how the results will be gathered and addressed prior to the audit. They found that companies focus audits on compliance activities and not to assess the risk to their organization.

    More Content We Think You’ll Love!

    security audits

    Shadow IT, unofficial technology used without organizational approval, requires special attention as it often represents undocumented risk. This represents a shift away from implementing checklist-based security measures. It covers everything from network configurations to employee practices. Discover https://vevobahis581.com/conditions-created-for-customers-on-the-glambook-platform.html vulnerabilities and safeguard IT assets today for a secure tomorrow. Many firms offer follow-up assessments to verify that critical findings have been properly addressed. The biggest time investment for your team is gathering documentation upfront.

    • Log review and analysis help establish whether appropriate monitoring exists across the environment.
    • Security audits is a broad term, and it includes evaluating the hardware, software, policies or procedures applied for compliance with industry best practices and regulatory requirements.
    • Vulnerabilities in an organization’s IT systems are often not attributed to technical weaknesses, but rather related to individual behavior of employees within the organization.
    • Objectives should align with broader organizational goals and risk frameworks such as NIST CSF, ISO/IEC 27005, or COBIT.
    • They bridge the gap between high-level security policies and detailed implementation requirements, making audit processes more efficient and thorough.
    • Cyber security audits share this objective—they identify vulnerabilities before they lead to breaches, making them perfectly complementary to the standard’s goals.

    Security audits give you a complete, holistic view of your cloud infrastructure. We can break down the different types of security audits into various key https://carsdirecttoday.com/10-best-python-automation-courses-online-complete-comparison-guide.html components. These Types of security audits are essential for conducting detailed evaluations of your infrastructures, policies, and controls. One of the most common disasters is the partial execution of these transactions, where tokens are debated. In Blockchain, transactions consist of messages exchanged between contracts across multiple ledgers. Outsiders come and go daily, and they should be tracked to check for unauthorized access rights.

    Cloud Security Audit Checklist

    Recommendations followed, giving the company a prioritized action plan to fix issues and boost its defenses. This process thoroughly checked the company’s setup, from its firewalls to its policies, using a mix of automated tools and hands-on expert analysis. This document serves as a roadmap for security improvements and provides documentation for compliance purposes. Verifying access control implementation is a fundamental part of security audits. During this phase, auditors may observe controls being executed in real time to confirm proper implementation.

    Five Types of Security Audits Every Organization Should Know

    security audits

    Through regular review and evaluation of security measures, information security remains a visible priority across all organizational levels. Technical audits focus on evaluating the technical aspects of security, including system configurations, network architecture, access controls, encryption implementations, and vulnerability management. The reporting phase encompasses the creation of a detailed audit report that documents all findings, identified vulnerabilities, risk assessments, and actionable recommendations. It also strengthens defenses through regular risk assessments and policy updates. The selected choice should conduct a systematic review of system configurations, security logs, and access control policies. The IT security audit process starts by identifying the assets and systems that need to be audited, including servers, databases, applications, and endpoints.

  • Customer data privacy: A CX guide for 2026

    customer data protection

    Their responsibilities often include managing data access rights, overseeing data classification, and supporting data lifecycle management. They conduct audits, educate staff, and escalate issues as needed, ensuring that privacy and security are embedded into organizational processes. A Data Protection Officer (DPO) is a mandated role under regulations like GDPR for organizations that engage in large-scale processing of personal data or process sensitive information. Organizations must validate their compliance annually and ensure continuous monitoring to defend against increasingly sophisticated payment-related cyber risks. The law has become a de facto standard for privacy regulation in the United States, spurring similar legislation in other states and raising the bar for consumer data rights https://101amazingcoffee.com/terms-and-conditions/ nationwide.

    • Three popular data protection policies are encryption policies, password policies, and email policies.
    • Organizations must validate their compliance annually and ensure continuous monitoring to defend against increasingly sophisticated payment-related cyber risks.
    • Internal or third-party audits validate compliance with policies, standards, and legal requirements—verifying that controls work as intended.
    • This allows you to transfer your data between service providers, promoting competition and consumer choice.
    • A study by Ponemon Institute published in the HIPAA journal revealed that 31% of consumers said they discontinued their relationship with an entity after it suffered a data breach.
    • California law requires businesses to provide a clear “Do Not Sell or Share My Personal Information” link on their websites.

    Ultimately, embedding lawfulness, fairness, and transparency builds a culture of ethical data management and helps avoid legal disputes. Without transparency, individuals cannot make informed decisions about how their data is handled, and organizations risk backlash or complaints if perceived as misleading. Maintaining these principles is critical for regulatory compliance and fostering trust with customers. Fairness means treating data subjects fairly, ensuring that their information is not used in ways that would deceive or harm them.

    Customer data can https://www.gurlitt.info/the-essential-laws-of-explained-9/ destroy trust and lead to years of costly legal, regulatory, and reputational consequences. Hackers have become lethally efficient in deceiving companies through social engineering and other attacks, and no business wants to go through the stress of reaching out to customers to disclose a data breach. NinjaOne’s automated patching, secure access controls, and cloud backups can help organizations stay compliant and safeguard sensitive information. While some customer data needs to be stored in perpetuity, that’s not the case for all data. Collecting unnecessary customer data not only means wasted energy and resources, but also makes your data rich and enticing for hackers. It can be tempting to collect as much data as possible “just in case,” but doing so can quickly lead to problems.

    customer data protection

    The Secure Workspacefor the AI Era

    customer data protection

    The guide that covers compliance, remediation and why accessible PDFs are also more visible to AI search Get the phase-by-phase structure, role assignments and governance policies your team needs to stay compliant after the deadline He also has experience working in business development, digital marketing and business operations.

    Step 3: Apply encryption and multi-factor authentication

    The FTC has brought numerous enforcement actions against companies for failing to implement reasonable security measures, treating inadequate data security as an unfair business practice that harms consumers. However, businesses may offer financial incentives for data https://exomedx.com/privacy-policy?noamp=mobile collection if the incentive is reasonably related to the value of the data and you provide opt-in consent. California law requires businesses to provide a clear “Do Not Sell or Share My Personal Information” link on their websites. Understanding these rights empowers you to take control of your digital privacy.

    customer data protection

    best practices for protecting customer data

    • While having a standard customer data protection policy is essential, several factors may still get in the way and put this critical information at risk.
    • Implementing strategies such as multi-factor authentication (MFA) as a standard security measure can reduce risks and support customer data protection policy.
    • Businesses must balance data privacy and personalization to give consumers excellent experiences while keeping their information safe—meaning data security is paramount.
    • Encryption is a security measure that obscures data so only authorized users can read it.
    • Regularly engaging in redaction can limit the exposure or misuse of sensitive data.

    PoLP is a security practice where users have access to the minimum amount of data needed to do their job. You can avoid silos by keeping all types of consumer data in a single place, such as a cloud storage system with trusted security measures. Encrypting all consumer data from the moment you receive it can help you reduce the risk of exposure. Gathering only the consumer data that is essential to your business operations is a great way to help protect customer information.

    • Customer data protection refers to the tools, policies, and practices used to secure personally identifiable information (PII) from unauthorized access, breaches, and misuse.
    • Governance structures support accountability by defining clear roles and responsibilities, setting up oversight mechanisms, and ensuring regular training and audits.
    • These capabilities enable consistent enforcement of access controls, streamline compliance audits, and simplify the management of users across hybrid and cloud environments.
    • These solutions automate the detection of sensitive or personal data, often using pattern recognition and machine learning to classify information at scale.
    • Having the right digital partners is not a one-size-fits-all approach.
    • Collecting unnecessary customer data not only means wasted energy and resources, but also makes your data rich and enticing for hackers.

    What Is Customer Data Protection?

    As the saying goes, “A chain is only as strong as its weakest link.” This also applies to your organization’s cybersecurity. Additionally, keeping your software up to date can help reduce the risk of vulnerabilities, as software updates usually address these issues. Hackers may expose systems to malware by attaching it to a phishing email or linking to it on a malicious website designed to impersonate a trustworthy website. Malware is malicious software designed to gain unauthorized access or damage a computer system.