Category: Breakfast

  • Gooey Chocolate Earthquake Cake – A Fudgy, Crowd-Pleasing Dessert

    Gooey Chocolate Earthquake Cake – A Fudgy, Crowd-Pleasing Dessert

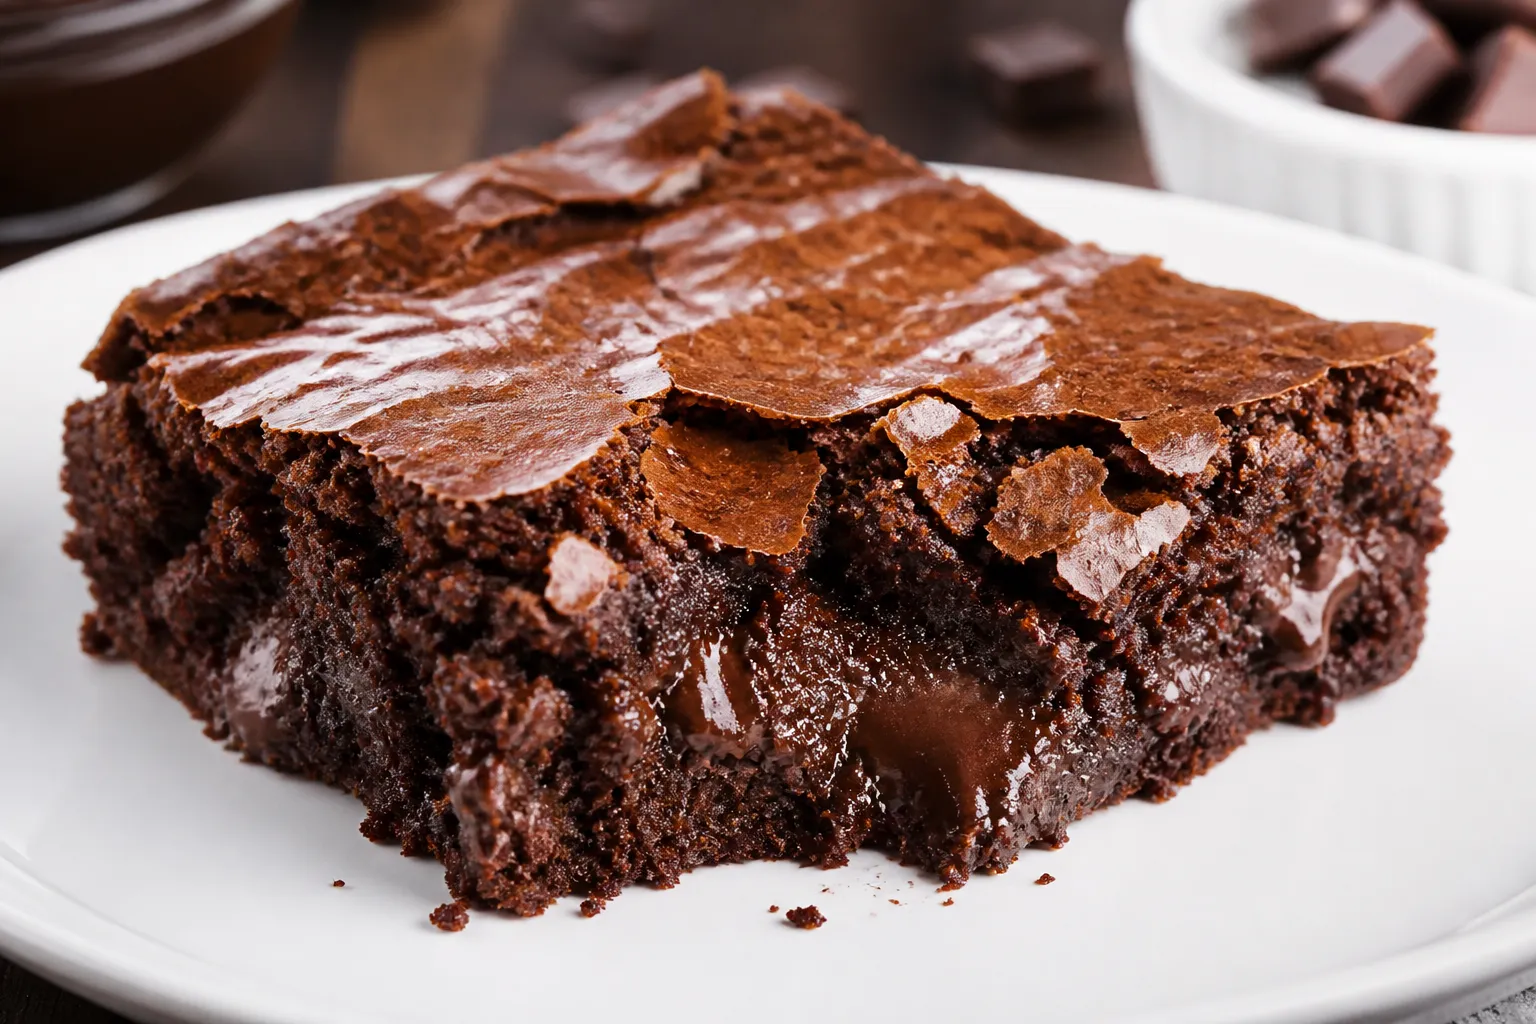
    This cake looks a little wild, but that’s the fun of it. A tender chocolate base, rich cream cheese swirls, and melty chocolate pockets make every bite a surprise. It’s the kind of dessert that doesn’t ask for perfection—just a big spoon and a sweet tooth.

    If you love brownies and cheesecake, this mash-up sits right in the middle. Easy to make, hard to resist, and even better the next day.

    What Makes This Special
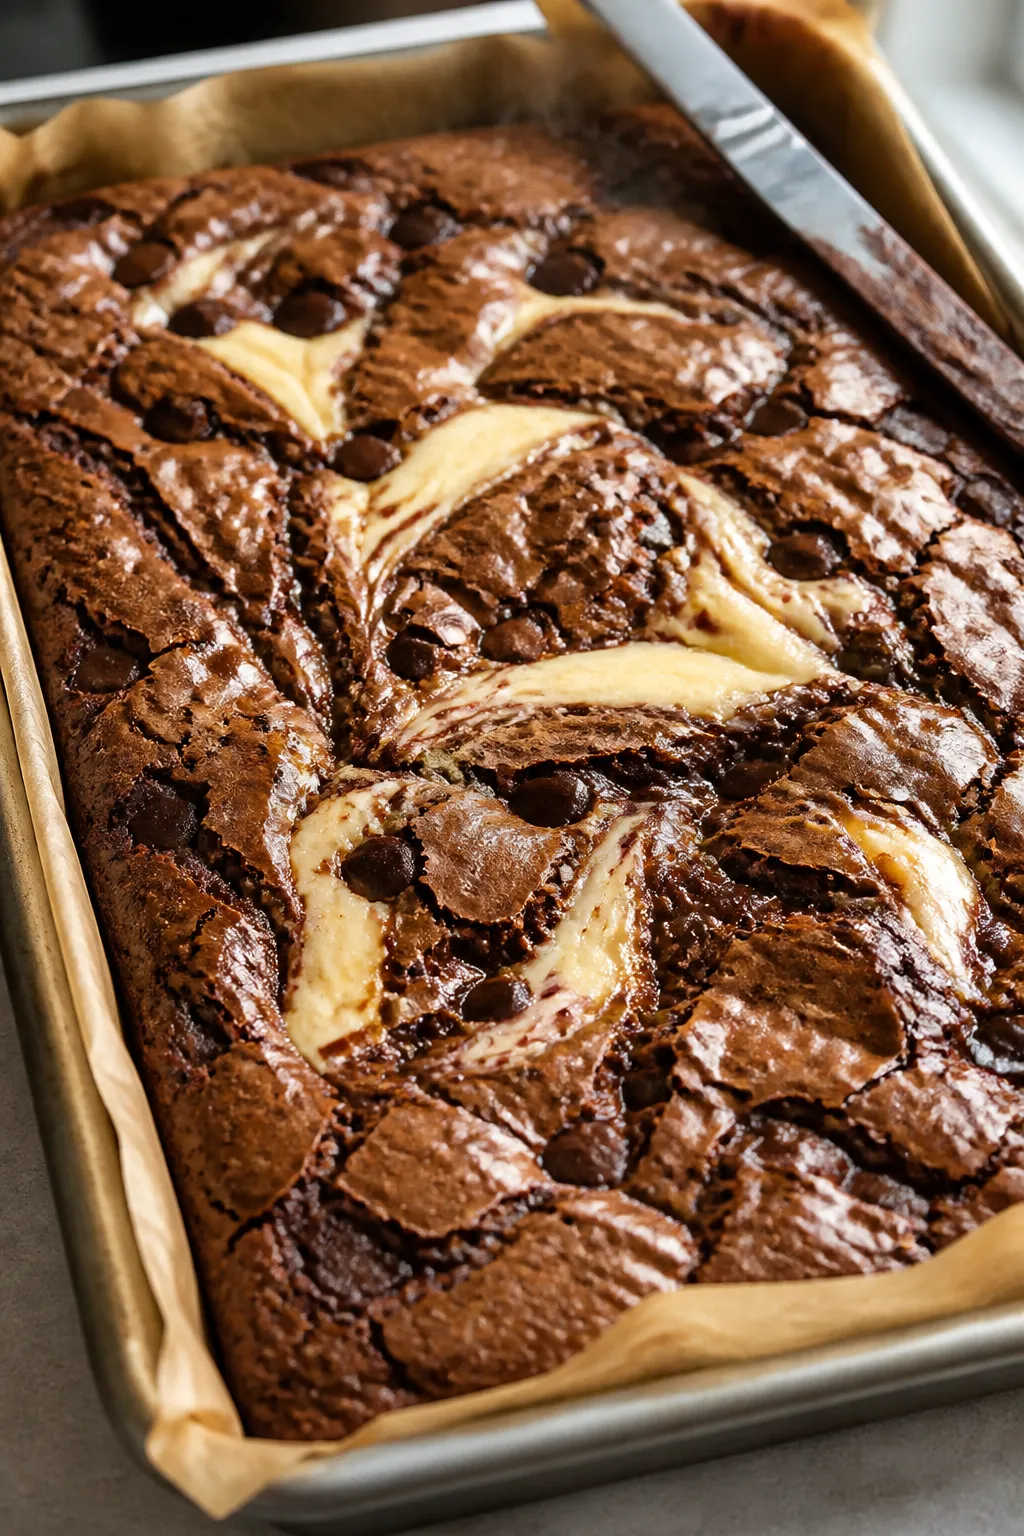
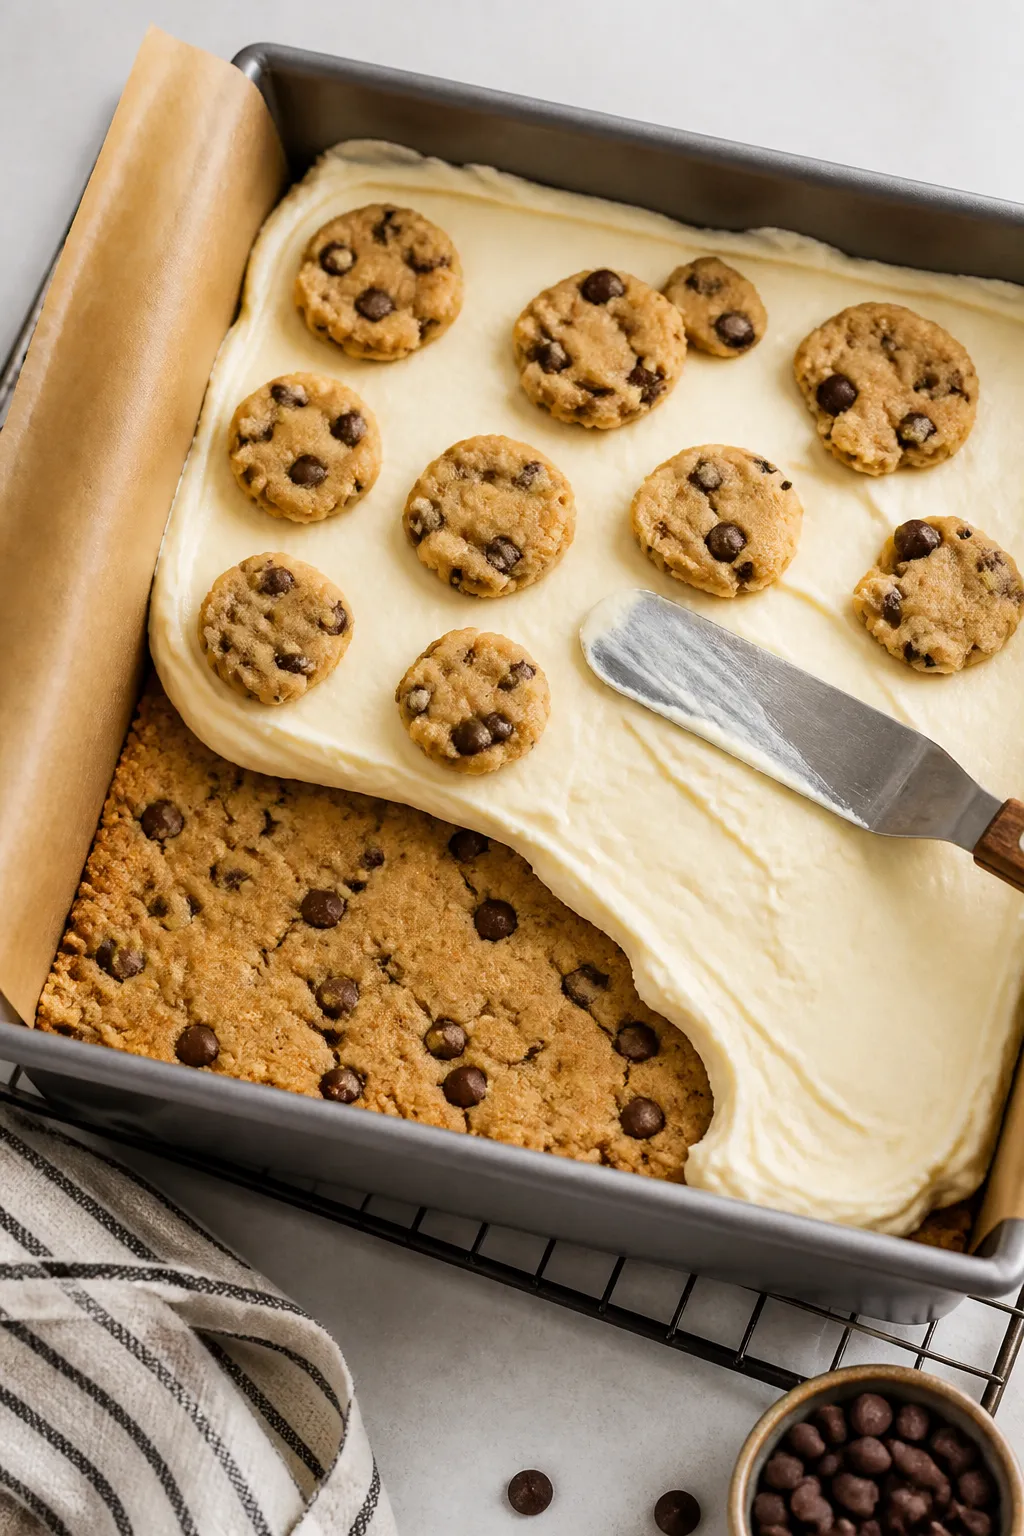
    Close-up detail, cooking process: A 9x13 pan of freshly baked Gooey Chocolate Earthquake Cake just o

    This cake earns its “earthquake” name from the dramatic cracks and swirls that appear as it bakes. The cream cheese mixture sinks into the chocolate batter, creating ribbons of tangy sweetness and gooey texture.

    It uses pantry-friendly shortcuts, but tastes like a bakery treat. No frosting needed—the top sets into a crackly, craggy finish that’s picture-perfect on its own.

    Shopping List

    • Chocolate cake mix (15.25 oz box), plus ingredients listed on the box (usually eggs, oil, and water)
    • Cream cheese (8 oz), softened
    • Unsalted butter (1/2 cup or 1 stick), melted and slightly cooled
    • Powdered sugar (2 cups)
    • Vanilla extract (1 teaspoon)
    • Semi-sweet chocolate chips (1 cup)
    • Sweetened shredded coconut (1 cup, optional but classic)
    • Chopped pecans (3/4 cup, optional)
    • Pinch of salt
    • Nonstick spray or butter for the pan

    Step-by-Step Instructions
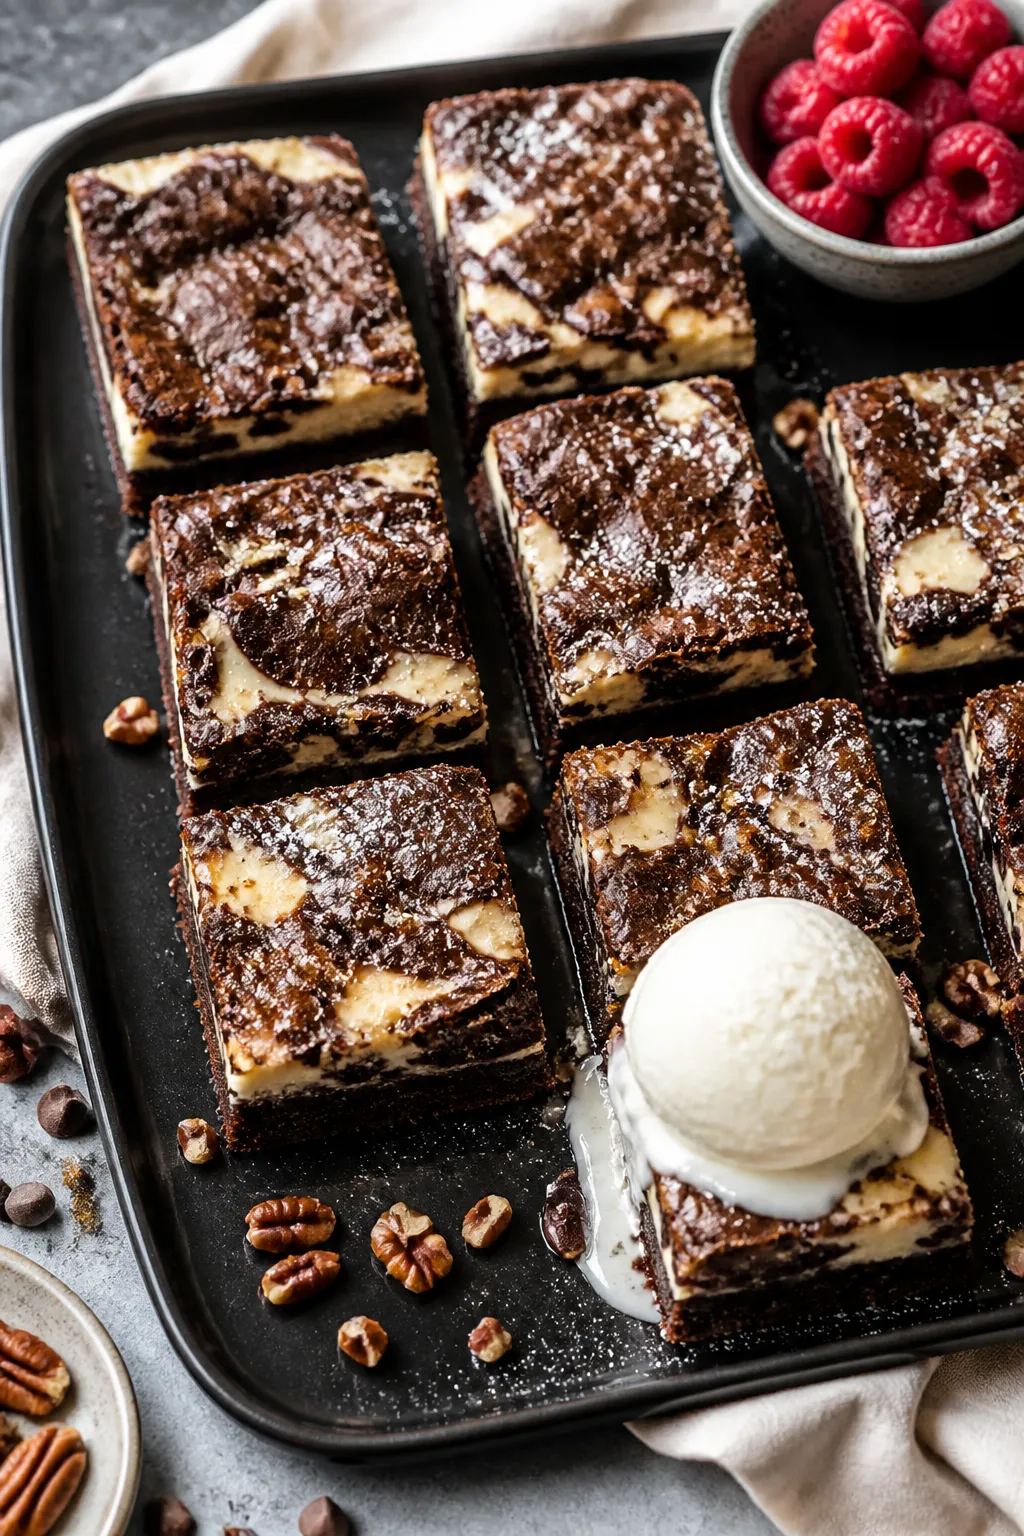
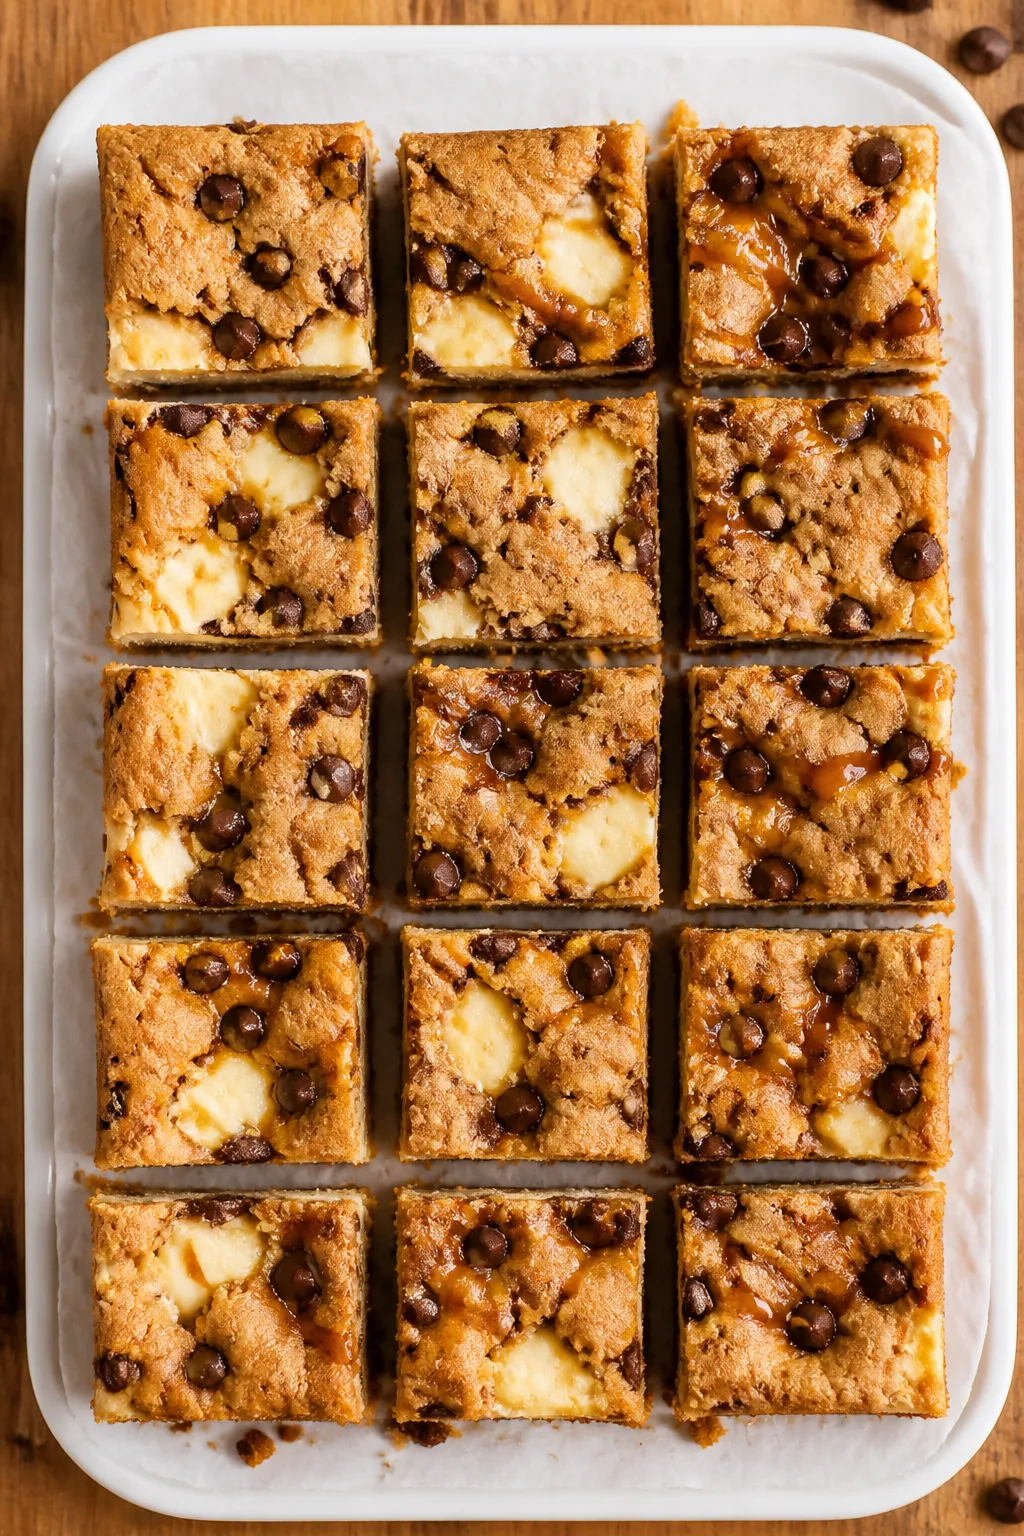
    Final dish, tasty top view: Overhead shot of neatly sliced squares of Gooey Chocolate Earthquake Cak
    1. Preheat and prep: Heat oven to 350°F (175°C). Grease a 9×13-inch baking pan and line with parchment for easy lifting.
    2. Layer the add-ins: If using coconut and pecans, scatter them evenly over the bottom of the pan. This creates a toasty, candy-bar-like base.
    3. Mix the cake batter: Prepare the chocolate cake mix according to the box directions.

      Pour the batter over the coconut and pecans, smoothing the top.

    4. Make the cream cheese mixture: In a bowl, beat softened cream cheese until smooth. Add melted butter, powdered sugar, vanilla, and a pinch of salt. Beat until thick and glossy.
    5. Marble the top: Dollop spoonfuls of the cream cheese mixture over the cake batter.

      Use a butter knife to swirl lightly. Don’t overmix—the dramatic streaks are the goal.

    6. Add chocolate chips: Sprinkle over the top. They’ll sink in slightly and melt into pockets of fudgy goodness.
    7. Bake: Bake 35–40 minutes, until the edges are set and the center still has a slight jiggle. Do not overbake. The middle should be gooey.
    8. Cool and serve: Let the cake cool at least 20–30 minutes to set.

      Slice warm for extra gooeyness, or cool completely for cleaner cuts.

    Keeping It Fresh

    Let the cake cool, then cover the pan or transfer slices to an airtight container. Refrigerate for up to 5 days because of the cream cheese. For serving, warm a slice in the microwave for 10–15 seconds to bring back the melt. You can also freeze tightly wrapped pieces for up to 2 months; thaw overnight in the fridge.

    Health Benefits

    This is an indulgent dessert, but there are a few small wins. Pecans add healthy fats, fiber, and minerals. Dark or semi-sweet chocolate provides antioxidants.

    You can trim sugar slightly by using reduced-sugar chocolate chips and a cake mix with less sugar. For portion control, cut smaller pieces and pair with fresh berries for balance.

    Common Mistakes to Avoid

    • Overbaking: If the center is fully firm, you’ll lose the signature gooey texture.
    • Cold cream cheese: It won’t blend smoothly. Soften it to room temperature for streak-free swirls.
    • Over-swirling: Too much mixing blends the layers and dulls the “earthquake” look.
    • Skipping the salt: A pinch sharpens flavors and balances sweetness.
    • Cutting too soon: Give it time to set, or the pieces may fall apart.

    Variations You Can Try

    • Peanut butter twist: Warm 1/3 cup peanut butter and drizzle over the batter before swirling.
    • Oreo crush: Swap coconut and pecans for 1 cup crushed chocolate sandwich cookies.
    • Mint-chocolate: Add 1/2 teaspoon peppermint extract to the cream cheese mixture and use mint chips.
    • Salted caramel: Swirl 1/4 cup thick caramel sauce into the top and finish with flaky sea salt.
    • Gluten-free: Use a certified gluten-free chocolate cake mix and check all labels.
    • Extra-dark: Use dark chocolate cake mix and 70% cocoa chips for a less sweet, richer bite.

    FAQ

    Can I make this ahead of time?

    Yes.

    Bake the cake, cool it, and refrigerate. It tastes great the next day as the layers settle. Rewarm slices briefly for maximum gooeyness.

    Do I have to add coconut and nuts?

    No.

    They’re traditional but optional. You can leave them out or swap with crushed cookies, toffee bits, or more chocolate chips.

    How will I know it’s done?

    The edges should look set and slightly pulled from the pan, while the center should wobble a little. A toothpick won’t come out clean—and that’s okay.

    Can I use homemade chocolate cake batter?

    Absolutely.

    Use your favorite one-bowl chocolate cake recipe. Aim for a standard 9×13 yield so the layers bake correctly.

    What should I serve it with?

    Vanilla ice cream, lightly sweetened whipped cream, or fresh raspberries. A dusting of powdered sugar is a simple finishing touch.

    In Conclusion

    Gooey Chocolate Earthquake Cake is messy in the best way—crackly on top, soft in the middle, and full of pockets of chocolate.

    It’s simple enough for a weeknight and impressive enough for a party. Keep the swirls bold, don’t overbake, and enjoy that warm, fudgy slice with a scoop of something cold.
    Gooey Chocolate Earthquake Cake – A Fudgy, Crowd-Pleasing Dessert

    Prep Time 15 minutes
    Cook Time 45 minutes
    Total Time 1 hour
    Servings 12 servings

    Ingredients
      

    • Chocolate cake mix (15.25 oz box), plus ingredients listed on the box (usually eggs, oil, and water)
    • Cream cheese (8 oz), softened
    • Unsalted butter (1/2 cup or 1 stick), melted and slightly cooled
    • Powdered sugar (2 cups)
    • Vanilla extract (1 teaspoon)
    • Semi-sweet chocolate chips (1 cup)
    • Sweetened shredded coconut (1 cup, optional but classic)
    • Chopped pecans (3/4 cup, optional)
    • Pinch of salt
    • Nonstick spray or butter for the pan

    Instructions
     

    • Preheat and prep: Heat oven to 350°F (175°C). Grease a 9×13-inch baking pan and line with parchment for easy lifting.
    • Layer the add-ins: If using coconut and pecans, scatter them evenly over the bottom of the pan. This creates a toasty, candy-bar-like base.
    • Mix the cake batter: Prepare the chocolate cake mix according to the box directions. Pour the batter over the coconut and pecans, smoothing the top.
    • Make the cream cheese mixture: In a bowl, beat softened cream cheese until smooth. Add melted butter, powdered sugar, vanilla, and a pinch of salt. Beat until thick and glossy.
    • Marble the top: Dollop spoonfuls of the cream cheese mixture over the cake batter. Use a butter knife to swirl lightly. Don’t overmix—the dramatic streaks are the goal.
    • Add chocolate chips: Sprinkle over the top. They’ll sink in slightly and melt into pockets of fudgy goodness.
    • Bake: Bake 35–40 minutes, until the edges are set and the center still has a slight jiggle. Do not overbake. The middle should be gooey.
    • Cool and serve: Let the cake cool at least 20–30 minutes to set. Slice warm for extra gooeyness, or cool completely for cleaner cuts.
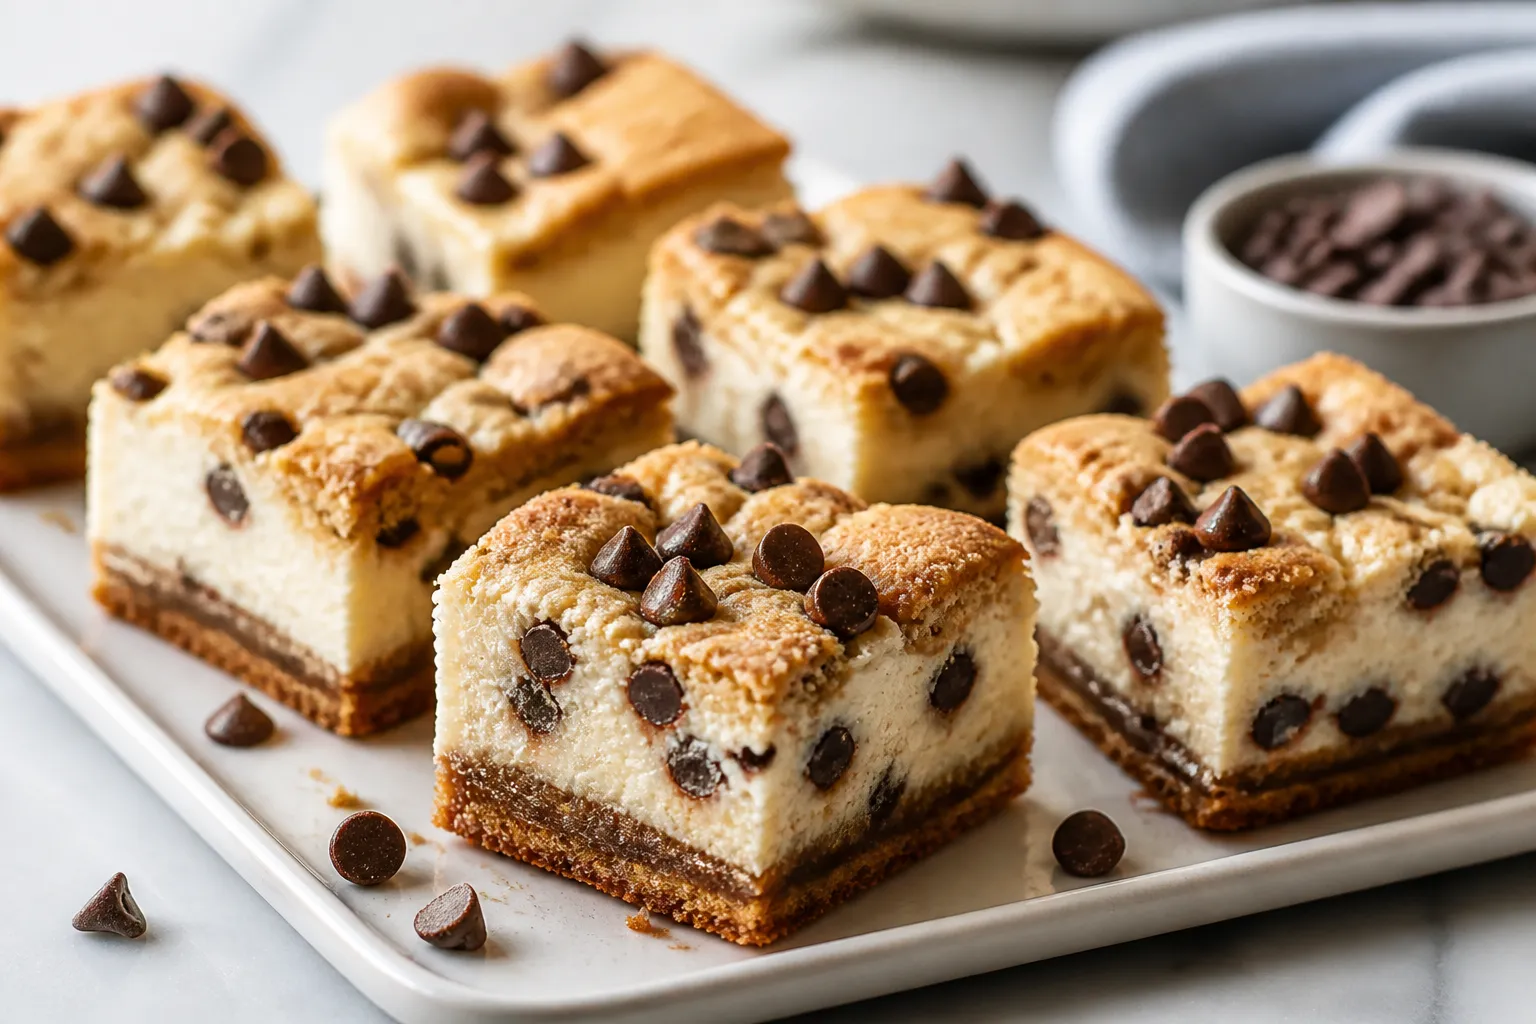
  • Chocolate Chip Cookie Cheesecake Bars – Creamy, Gooey, and Crowd-Pleasing

    Chocolate Chip Cookie Cheesecake Bars – Creamy, Gooey, and Crowd-Pleasing

    These bars bring together two classics: rich cheesecake and gooey chocolate chip cookies. They’re simple to make, easy to slice, and perfect for sharing. The crust and topping are made from the same cookie dough, so you get buttery edges with a creamy center.

    Whether you’re baking for a party or just because, this recipe hits that sweet spot between nostalgic and impressive.

    What Makes This Special

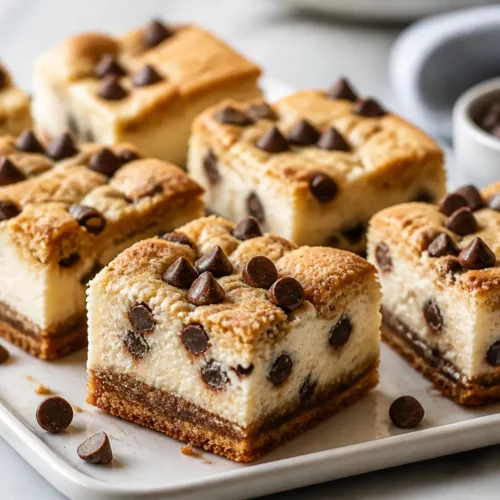
    Cooking process close-up: Overhead shot of an 8x8 pan lined with parchment showing assembly of choco

    Chocolate chip cookie cheesecake bars are the best of both worlds. You get the comfort of a warm cookie and the cool, silky texture of cheesecake in one bite. They’re also make-ahead friendly, which means less stress before serving.

    And unlike a full cheesecake, there’s no fuss with water baths or cracked tops—just simple, reliable results.

    What You’ll Need

    • For the Cookie Dough:
      • 1/2 cup (1 stick) unsalted butter, softened
      • 1/2 cup granulated sugar
      • 1/2 cup packed light brown sugar
      • 1 large egg
      • 1 teaspoon vanilla extract
      • 1 1/4 cups all-purpose flour
      • 1/2 teaspoon baking soda
      • 1/4 teaspoon fine salt
      • 1 cup semisweet chocolate chips
    • For the Cheesecake Filling:
      • 16 ounces cream cheese, softened
      • 1/3 cup granulated sugar
      • 1/4 cup sour cream (or plain Greek yogurt)
      • 1 large egg
      • 1 teaspoon vanilla extract
      • Pinch of salt
    • Equipment:
      • 8×8-inch baking pan
      • Parchment paper
      • Electric mixer or sturdy whisk
      • Spatula

    Step-by-Step Instructions

    Final dish top view: Tasty overhead shot of neatly sliced chocolate chip cookie cheesecake bars arra
    1. Prep the pan and oven. Heat the oven to 350°F (175°C). Line an 8×8 pan with parchment, leaving overhang for easy lifting.
    2. Make the cookie dough.

      Beat butter, granulated sugar, and brown sugar until creamy. Mix in the egg and vanilla. Add flour, baking soda, and salt.

      Stir until just combined, then fold in chocolate chips.

    3. Form the crust. Press about 2/3 of the dough evenly into the lined pan. Reserve the rest for topping.
    4. Make the cheesecake layer.

      Beat cream cheese until smooth. Add sugar, sour cream, egg, vanilla, and a pinch of salt. Mix until creamy with no lumps.

    5. Assemble.

      Pour the cheesecake batter over the crust and smooth the top. Crumble or flatten small pieces of the remaining cookie dough and scatter them evenly over the cheesecake layer.

    6. Bake. Bake for 28–34 minutes, until the cookie topping is golden and the center looks set but slightly jiggly.
    7. Cool and chill.

      Let the pan cool to room temperature. Refrigerate for at least 3 hours (overnight is best) before slicing.

    8. Slice and serve. Lift out with the parchment, slice into bars, and enjoy chilled or slightly cool.

    How to Store

    Keep the bars covered in the fridge for up to 5 days.

    For longer storage, freeze tightly wrapped bars for up to 2 months. Thaw in the refrigerator overnight for the best texture. Avoid leaving them at room temperature for more than 2 hours.

    Benefits of This Recipe

    • No water bath: Cheesecake flavor without the classic fuss.
    • Foolproof assembly: One dough works as both crust and topping.
    • Great for sharing: Clean slices that travel well.
    • Customizable: Easy to switch up chips, add-ins, or flavors.

    What Not to Do

    • Don’t skip the chill time.

      Slicing too soon leads to messy bars and a runny center.

    • Don’t overbake. The center should have a slight wobble; it sets as it cools.
    • Don’t overmix the cheesecake. Too much air can cause cracks and a spongy texture.
    • Don’t press all the dough into the crust.

      You need some for the topping.

    Alternatives

    • Flavor swaps: Use dark chocolate chips, white chocolate chips, or a mix. Add a handful of chopped toasted pecans or walnuts to the dough.
    • Brown butter twist: Brown the butter for the cookie dough and let it cool before mixing for a deeper, nutty flavor.
    • Gluten-free: Use a cup-for-cup gluten-free flour blend formulated for baking.
    • Lighter option: Use Neufchâtel (1/3 less fat) cream cheese and Greek yogurt, understanding the texture will be slightly softer.
    • Pan size: Double the recipe for a 9×13-inch pan and add a few extra minutes to the bake time.

    FAQ

    Can I use store-bought cookie dough?

    Yes. Use about 16–18 ounces of prepared chocolate chip cookie dough.

    Press two-thirds in the pan and crumble the rest on top. Keep the cheesecake layer the same.

    Why is my cheesecake layer lumpy?

    Your cream cheese was likely too cold. For a smooth filling, make sure it’s softened to room temperature and beat it well before adding other ingredients.

    How do I know when it’s done?

    The topping should be golden, and the center should jiggle slightly when you nudge the pan.

    If it’s sloshing, bake a few minutes longer.

    Can I add caramel or peanut butter?

    Absolutely. Drizzle 2–3 tablespoons of caramel or warmed peanut butter over the cheesecake layer before adding the cookie topping, then bake as directed.

    What’s the best way to get clean slices?

    Chill fully, then use a sharp knife. Wipe the blade between cuts and cut straight down rather than sawing.

    In Conclusion

    Chocolate chip cookie cheesecake bars are a guaranteed hit with minimal effort.

    They’re creamy, chocolatey, and easy to prep ahead. Keep this recipe in your back pocket for birthdays, potlucks, or a weekend treat—you’ll make it once and it’ll become a go-to favorite.

    Chocolate Chip Cookie Cheesecake Bars – Creamy, Gooey, and Crowd-Pleasing

    Prep Time 20 minutes
    Cook Time 35 minutes
    Total Time 55 minutes
    Servings 16 servings

    Ingredients
      

    • For the Cookie Dough: 1/2 cup (1 stick) unsalted butter, softened
    • 1/2 cup granulated sugar
    • 1/2 cup packed light brown sugar
    • 1 large egg
    • 1 teaspoon vanilla extract
    • 1 1/4 cups all-purpose flour
    • 1/2 teaspoon baking soda
    • 1/4 teaspoon fine salt
    • 1 cup semisweet chocolate chips
    • For the Cheesecake Filling: 16 ounces cream cheese, softened
    • 1/3 cup granulated sugar
    • 1/4 cup sour cream (or plain Greek yogurt)
    • 1 large egg
    • 1 teaspoon vanilla extract
    • Pinch of salt
    • Equipment: 8×8-inch baking pan
    • Parchment paper
    • Electric mixer or sturdy whisk
    • Spatula

    Instructions
     

    • Prep the pan and oven. Heat the oven to 350°F (175°C). Line an 8×8 pan with parchment, leaving overhang for easy lifting.
    • Make the cookie dough. Beat butter, granulated sugar, and brown sugar until creamy. Mix in the egg and vanilla. Add flour, baking soda, and salt. Stir until just combined, then fold in chocolate chips.
    • Form the crust. Press about 2/3 of the dough evenly into the lined pan. Reserve the rest for topping.
    • Make the cheesecake layer. Beat cream cheese until smooth. Add sugar, sour cream, egg, vanilla, and a pinch of salt. Mix until creamy with no lumps.
    • Assemble. Pour the cheesecake batter over the crust and smooth the top. Crumble or flatten small pieces of the remaining cookie dough and scatter them evenly over the cheesecake layer.
    • Bake. Bake for 28–34 minutes, until the cookie topping is golden and the center looks set but slightly jiggly.
    • Cool and chill. Let the pan cool to room temperature. Refrigerate for at least 3 hours (overnight is best) before slicing.
    • Slice and serve. Lift out with the parchment, slice into bars, and enjoy chilled or slightly cool.
  • High Protein Pumpkin Whipped Cottage Cheese Breakfast Bowl | Easy Fall Recipe – Cozy, Creamy, and Satisfying

    High Protein Pumpkin Whipped Cottage Cheese Breakfast Bowl | Easy Fall Recipe – Cozy, Creamy, and Satisfying

    This high-protein pumpkin whipped cottage cheese breakfast bowl is the fall breakfast you’ll actually look forward to. It’s creamy, lightly sweet, and tastes like pumpkin pie meets cheesecake—without the sugar crash. You only need a few simple ingredients and a blender or food processor.

    It comes together in minutes and keeps you full for hours. Make it as a weekday breakfast, a post-workout snack, or even a healthy dessert.

    What Makes This Special

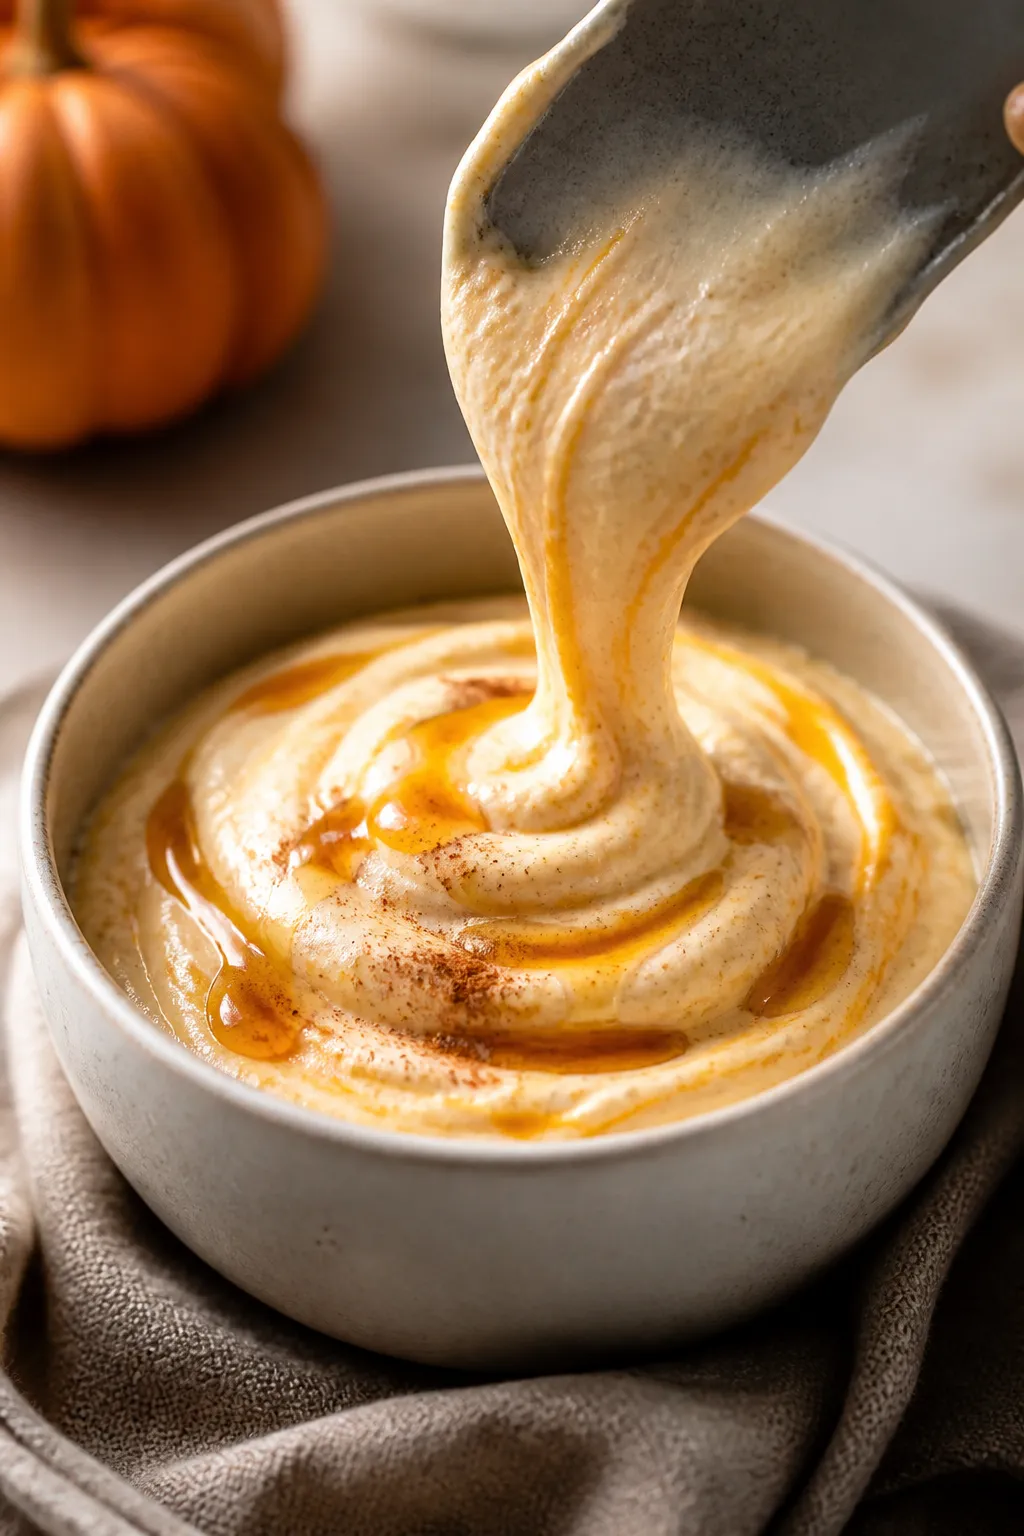
    Cooking process close-up: Silky pumpkin whipped cottage cheese streaming off a blender spatula into
    • Protein-packed and filling: Cottage cheese blends into a silky base with about 20–30g of protein, depending on your brand and add-ins.
    • Real pumpkin flavor: Made with pure pumpkin purée and warm spices for that classic autumn taste.
    • Balanced and customizable: Sweeten to your liking, choose your milk, and top it however you want.
    • Quick and convenient: Ready in under 10 minutes with minimal cleanup.
    • Dessert vibes, breakfast nutrients: Creamy texture without heavy cream or tons of sugar.

    Ingredients

    • 1 cup cottage cheese (2% or 4% for the creamiest texture; use lactose-free if needed)
    • 1/3 cup pumpkin purée (not pumpkin pie filling)
    • 1–2 tablespoons maple syrup or honey (adjust to taste; or use a zero-calorie sweetener)
    • 1 teaspoon vanilla extract
    • 1/2–1 teaspoon pumpkin pie spice (or 1/2 tsp cinnamon + pinch nutmeg + pinch ginger + tiny pinch clove)
    • Pinch of salt (enhances flavor)
    • 2–3 tablespoons milk (dairy or non-dairy) to loosen, as needed
    • Optional protein boost: 1 scoop vanilla or unflavored protein powder
    • Optional toppings: sliced banana, chopped pecans or walnuts, granola, chia seeds, hemp hearts, cacao nibs, a drizzle of almond butter, or extra cinnamon

    Step-by-Step Instructions

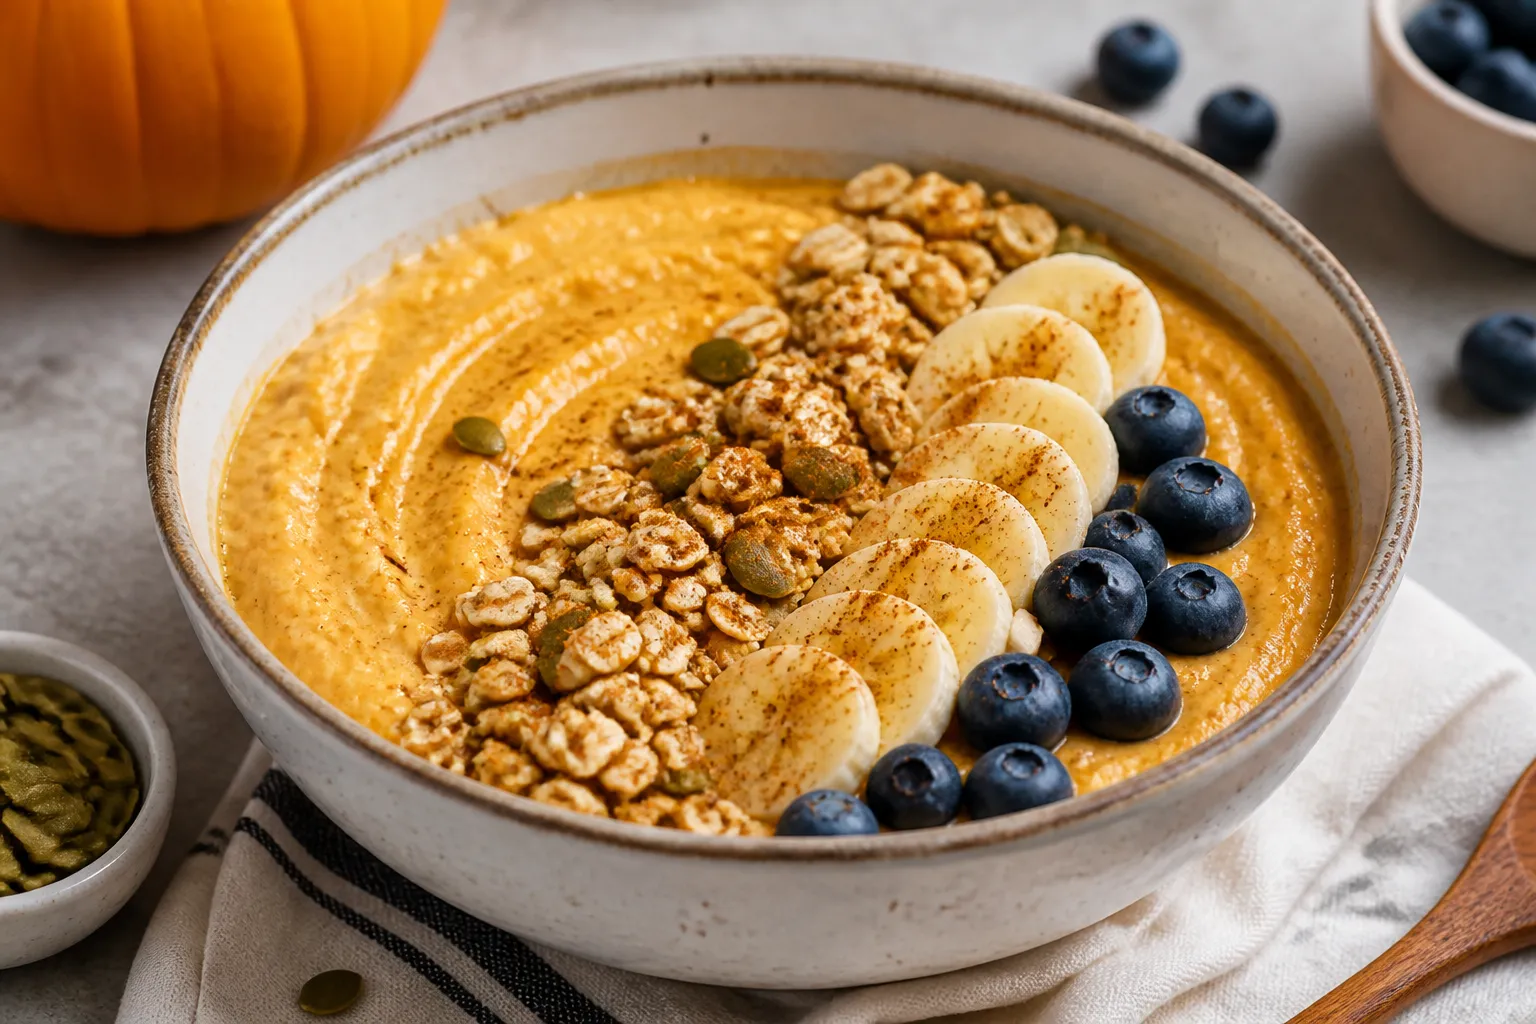
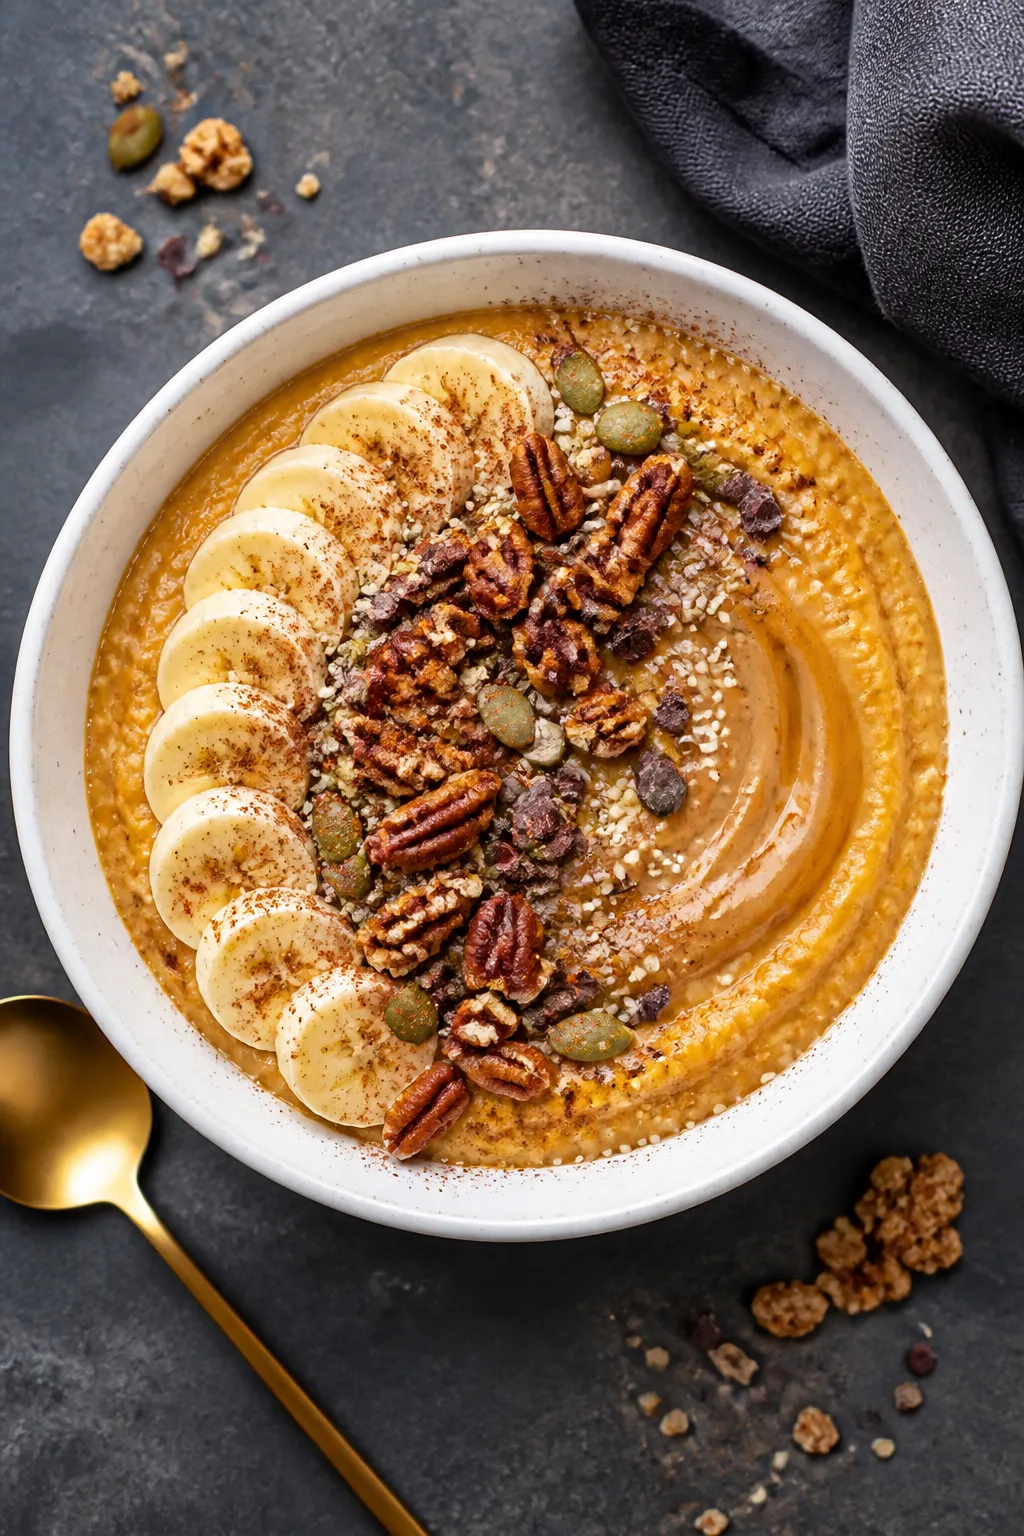
    Final plated overhead: Tasty top-view of a High Protein Pumpkin Whipped Cottage Cheese Breakfast Bow
    1. Blend the base: Add cottage cheese, pumpkin purée, maple syrup, vanilla, pumpkin spice, and a pinch of salt to a blender or food processor.
    2. Adjust texture: Blend until completely smooth and airy, 30–60 seconds. If it’s too thick, add milk 1 tablespoon at a time until it’s creamy and spoonable.
    3. Boost protein (optional): Add protein powder and blend again.

      If the mixture thickens, splash in a bit more milk.

    4. Taste and tweak: Add more spice or sweetener if you like. A tiny extra pinch of salt can make the flavors pop.
    5. Assemble the bowl: Spoon into a bowl and add your favorite toppings. For crunch, go with granola or nuts.
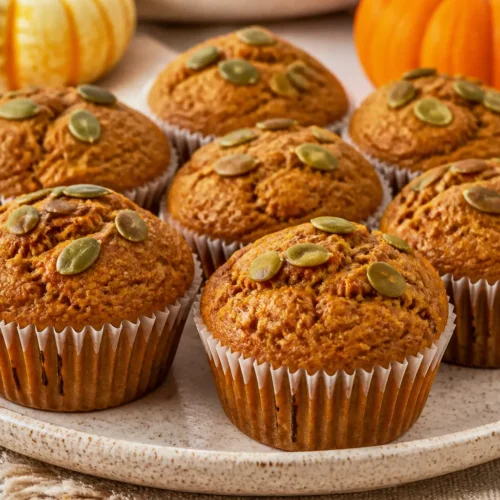
      For extra creaminess, a swirl of nut butter is great.

    6. Serve: Enjoy immediately while it’s cool and fluffy.

    Keeping It Fresh

    • Storage: Refrigerate in an airtight container for up to 2 days. Give it a quick stir before serving.
    • Meal prep: Make the whipped base ahead and add toppings right before eating so they stay crunchy.
    • Freezing: Not recommended. The texture can separate after thawing.

    Why This is Good for You

    • High-quality protein: Supports satiety, muscle repair, and steady energy.
    • Vitamin-packed pumpkin: Rich in vitamin A and fiber for eye health and digestion.
    • Balanced macros: Carbs from pumpkin and toppings, protein from cottage cheese, and healthy fats from nuts or seeds keep blood sugar steadier.
    • Lower sugar option: You control the sweetness, so it can fit a wide range of goals.

    Pitfalls to Watch Out For

    • Using pumpkin pie filling: It’s pre-sweetened and spiced, which can make the bowl too sweet and throw off the flavor.
    • Under-blending: If you don’t blend long enough, the texture stays curdy.

      Blend until silky smooth.

    • Too much protein powder: Can make it chalky. Start with half a scoop and adjust.
    • Over-thinning: Add milk slowly so it doesn’t turn soupy.
    • Skipping the salt: A small pinch rounds out the sweetness and spice.

    Alternatives

    • Greek yogurt swap: Use thick Greek yogurt instead of cottage cheese. It’s tangier and slightly less creamy, but still delicious.
    • Dairy-free: Use a dairy-free cottage cheese or thick coconut yogurt and a plant-based protein powder.
    • Sweetener-free: Blend in a ripe banana or a few soaked dates for natural sweetness.
    • Spice switch: Try chai spice or extra cinnamon if you don’t have pumpkin pie spice.
    • Crunch ideas: Toasted pecans, pumpkin seeds, or a small handful of high-fiber granola.

    FAQ

    Can I make this without a blender?

    Yes.

    Use an immersion blender or whip the cottage cheese with a hand mixer until smooth. If you only have a whisk, choose small-curd cottage cheese and whisk vigorously; it won’t be as silky, but it will still taste great.

    What fat percentage of cottage cheese works best?

    2% or 4% gives the creamiest, cheesecake-like texture. Fat-free blends up fine but tastes less rich.

    Add a teaspoon of nut butter or a splash of cream if using fat-free.

    How much protein is in one bowl?

    It varies by brand and add-ins, but expect roughly 20–30 grams from the cottage cheese alone. Adding a half to full scoop of protein powder can raise it to 30–40 grams.

    Can I serve it warm?

    You can, but heat gently. Warm on low in a saucepan, stirring, just until slightly warmed through.

    Avoid boiling, which can make the dairy separate.

    What toppings pair best?

    Chopped pecans or walnuts, pumpkin seeds, a drizzle of almond or peanut butter, granola, sliced banana, or a sprinkle of cacao nibs. Extra cinnamon or a dusting of pumpkin spice ties it all together.

    In Conclusion

    This high protein pumpkin whipped cottage cheese bowl is a cozy, quick, and seriously satisfying fall recipe. It blends creamy texture with warm spice, smart nutrition, and easy customization.

    Keep it simple for busy mornings or dress it up with crunchy toppings and a protein boost. Either way, you get a breakfast that tastes like dessert and fuels your day.

    High Protein Pumpkin Whipped Cottage Cheese Breakfast Bowl | Easy Fall Recipe – Cozy, Creamy, and Satisfying

    Prep Time 5 minutes
    Total Time 5 minutes
    Servings 1 servings

    Ingredients
      

    • 1 cup cottage cheese (2% or 4% for the creamiest texture; use lactose-free if needed)
    • 1/3 cup pumpkin purée (not pumpkin pie filling)
    • 1–2 tablespoons maple syrup or honey (adjust to taste; or use a zero-calorie sweetener)
    • 1 teaspoon vanilla extract
    • 1/2–1 teaspoon pumpkin pie spice (or 1/2 tsp cinnamon + pinch nutmeg + pinch ginger + tiny pinch clove)
    • Pinch of salt (enhances flavor)
    • 2–3 tablespoons milk (dairy or non-dairy) to loosen, as needed
    • Optional protein boost: 1 scoop vanilla or unflavored protein powder
    • Optional toppings: sliced banana, chopped pecans or walnuts, granola, chia seeds, hemp hearts, cacao nibs, a drizzle of almond butter, or extra cinnamon

    Instructions
     

    • Blend the base: Add cottage cheese, pumpkin purée, maple syrup, vanilla, pumpkin spice, and a pinch of salt to a blender or food processor.
    • Adjust texture: Blend until completely smooth and airy, 30–60 seconds. If it’s too thick, add milk 1 tablespoon at a time until it’s creamy and spoonable.
    • Boost protein (optional): Add protein powder and blend again. If the mixture thickens, splash in a bit more milk.
    • Taste and tweak: Add more spice or sweetener if you like. A tiny extra pinch of salt can make the flavors pop.
    • Assemble the bowl: Spoon into a bowl and add your favorite toppings. For crunch, go with granola or nuts. For extra creaminess, a swirl of nut butter is great.
    • Serve: Enjoy immediately while it’s cool and fluffy.
  • Easy Orange Creamsicle Cake Recipe – Bright, Fresh, and Simple

    Easy Orange Creamsicle Cake Recipe – Bright, Fresh, and Simple

    This cake tastes like a childhood creamsicle in dessert form—bright orange, creamy vanilla, and a soft, fluffy crumb. It’s simple enough for a weekday treat and special enough for birthdays or potlucks. You’ll use a box cake mix for speed, then layer on real citrus flavor with gelatin and a whipped topping.

    The result is light, refreshing, and not overly sweet. If you love citrus desserts that feel nostalgic but not fussy, this one hits the mark.

    What Makes This Special

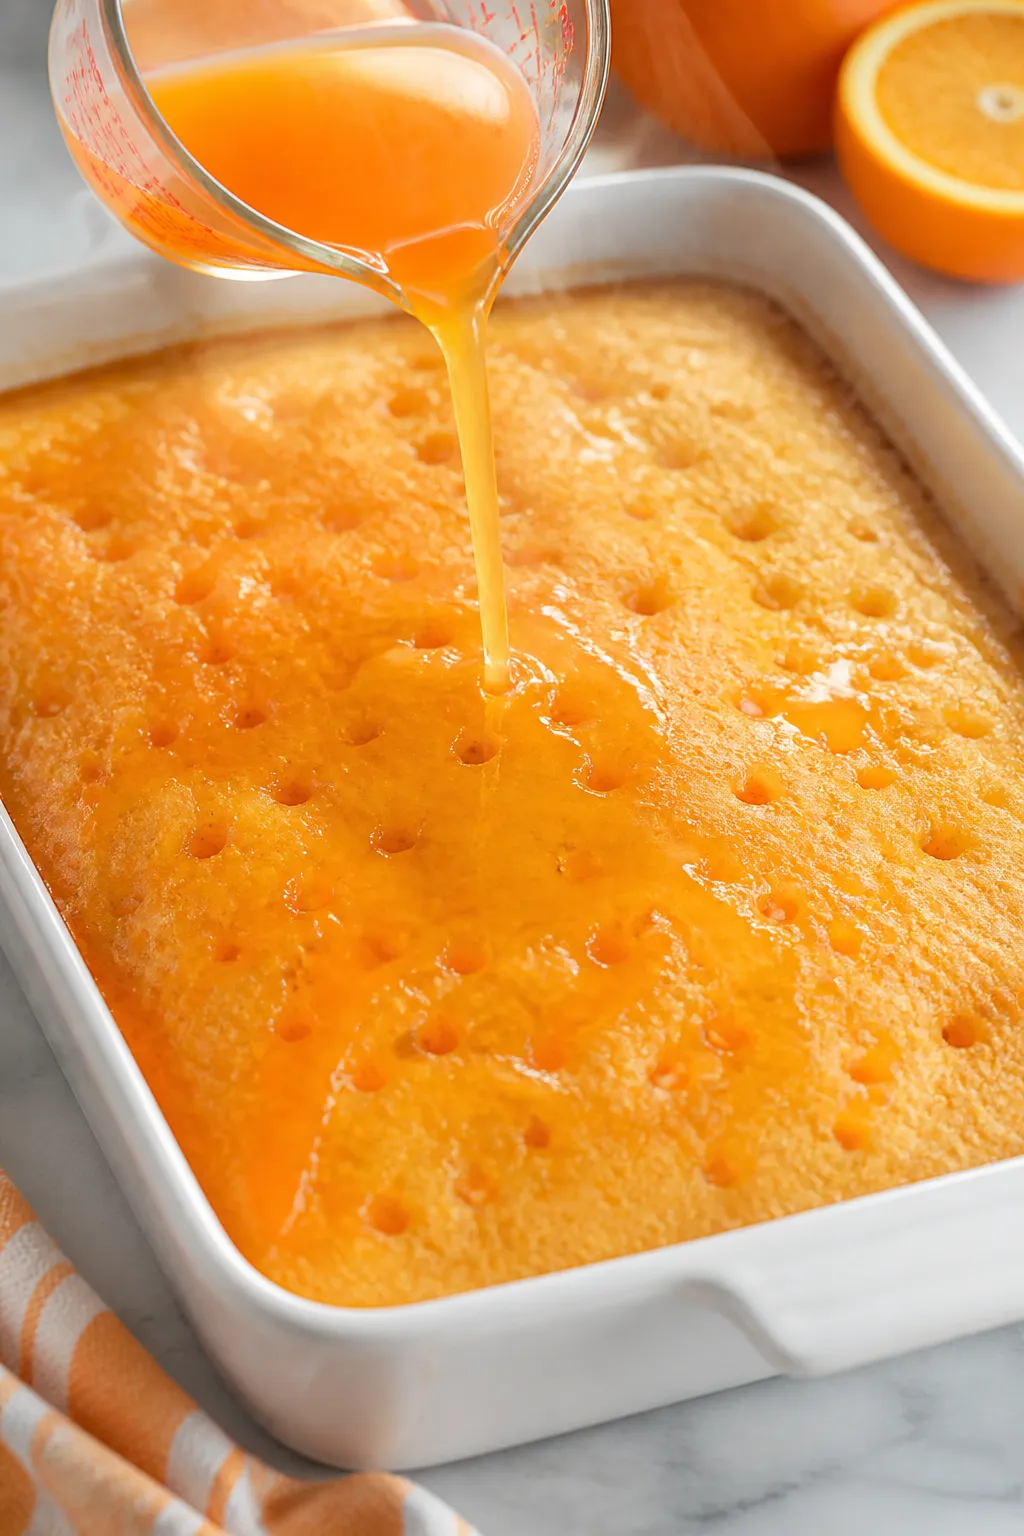
    Cooking process close-up: Warm orange gelatin being slowly poured from a small glass measuring cup i
    • Easy but impressive: Starts with a boxed mix, but tastes bakery-fresh thanks to orange juice, zest, and a creamy topping.
    • Real creamsicle vibe: Orange gelatin soaks into the cake, and a vanilla-infused whipped topping gives that classic flavor combo.
    • Light texture: Cool, airy, and not heavy—perfect after a big meal or on a warm day.
    • Make-ahead friendly: It actually tastes better after chilling, so it’s great for planning ahead.

    What You’ll Need

    • Cake:
      • 1 box white or vanilla cake mix (15.25 oz)
      • 3 large eggs (or per box directions)
      • 1/2 cup vegetable oil (or per box directions)
      • 1 cup orange juice (replace the water in the box directions)
      • 1 tablespoon orange zest (about 1 large orange)
      • 1 teaspoon vanilla extract
    • Orange soak:
      • 1 box orange gelatin (3 oz)
      • 1 cup boiling water
      • 1/2 cup cold orange juice (or cold water)
    • Creamsicle topping:
      • 1 cup cold heavy whipping cream
      • 4 oz cream cheese, softened
      • 1/2 cup powdered sugar
      • 1 teaspoon vanilla extract
      • 1 teaspoon orange zest (optional, for extra flavor)
    • Garnish (optional): Fresh orange slices or extra zest

    How to Make It

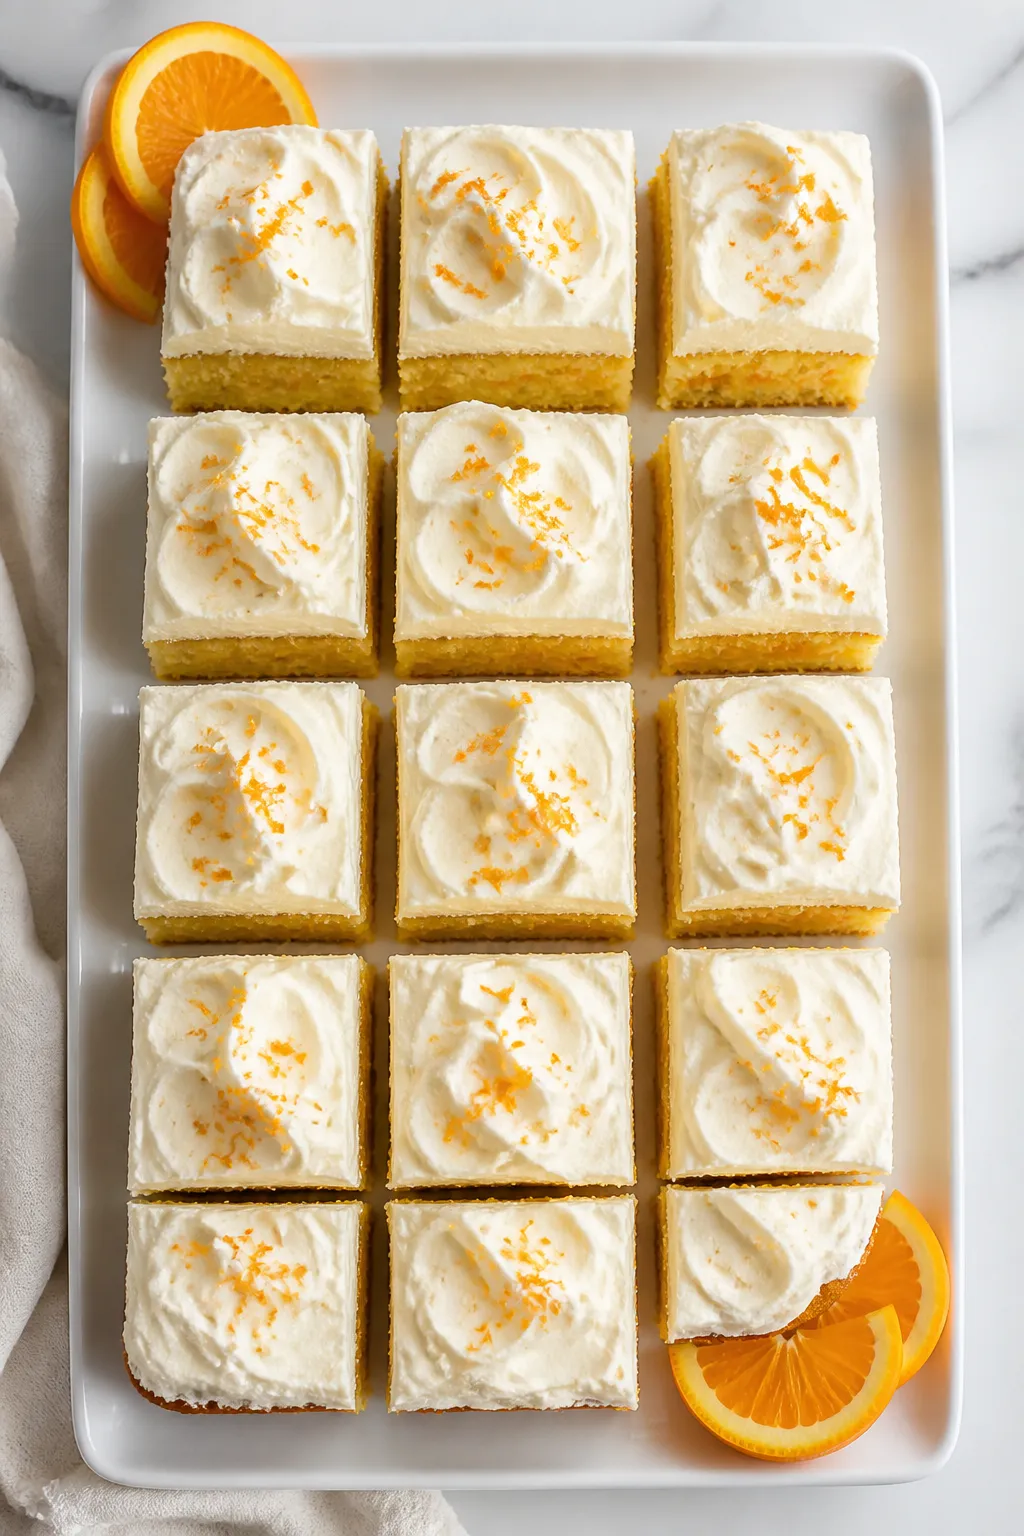
    Final dish overhead: Chilled Orange Creamsicle Cake sliced into neat squares and arranged on a matte
    1. Prep the pan and oven: Preheat to 350°F (175°C). Grease a 9×13-inch baking pan and line with parchment if you want easy removal.
    2. Mix the cake: In a bowl, combine cake mix, eggs, oil, orange juice, orange zest, and vanilla.

      Beat until smooth and slightly fluffy, about 2 minutes.

    3. Bake: Pour into the pan and bake 23–28 minutes, or until a toothpick comes out clean and the top springs back.
    4. Cool slightly: Let the cake cool 10–15 minutes. Poke holes all over the surface with a fork or the handle of a wooden spoon.
    5. Make the orange soak: Dissolve the orange gelatin in 1 cup boiling water. Stir in 1/2 cup cold orange juice.

      Mix well.

    6. Soak the cake: Slowly pour the warm gelatin mixture over the cake, letting it seep into the holes. Chill uncovered for 30 minutes, then cover and chill at least 2 hours.
    7. Make the topping: Beat the cream cheese, powdered sugar, vanilla, and orange zest until smooth. In a separate bowl, whip the cream to soft peaks.

      Fold whipped cream into the cream cheese mixture until fluffy.

    8. Frost and finish: Spread the creamsicle topping over the chilled cake. Add zest or orange slices if using. Chill 30–60 minutes before slicing.
    9. Serve: Cut into squares.

      Keep the cake cold for the best texture and flavor.

    Storage Instructions

    • Refrigerate: Cover and store in the fridge for up to 4 days.
    • Freeze: Freeze slices without garnish, tightly wrapped, for up to 2 months. Thaw in the fridge overnight.
    • Make ahead: You can bake and soak the cake a day in advance. Add the topping the day you plan to serve.

    Why This is Good for You

    • Portion-friendly sweetness: Light, chilled cakes help satisfy a sweet tooth without feeling heavy.
    • Citrus lift: Orange zest and juice provide bright flavor, a bit of vitamin C, and less need for extra frosting.
    • Balanced topping: The cream cheese adds protein and helps stabilize the whipped cream, so you use less sugar overall.

    Pitfalls to Watch Out For

    • Overbaking: A dry cake won’t absorb the orange soak well.

      Start checking a few minutes early.

    • Rushing the chill: If the cake isn’t cool enough before topping, the frosting can melt or slide.
    • Watery gelatin: Measure liquids carefully and fully dissolve the gelatin to avoid pockets of liquid.
    • Overmixing whipped cream: Stop at soft-to-medium peaks, or the topping can turn grainy.

    Alternatives

    • Lighter topping: Swap the cream cheese for 1 cup Greek yogurt plus 2 tablespoons powdered sugar for a tangy, lighter finish.
    • Dairy-free: Use dairy-free cream cheese and coconut whipped cream. Check the cake mix for dairy content.
    • From-scratch base: Use your favorite vanilla sheet cake; replace some liquid with orange juice and add zest.
    • Different citrus: Try lemon gelatin with lemon zest for a lemon creamsicle twist.
    • Bundt style: Bake in a greased Bundt pan and drizzle the gelatin over the warm cake; top with a thin glaze instead of whipped topping.

    FAQ

    Can I use yellow cake mix instead of white or vanilla?

    Yes. Yellow cake works well and adds a slightly richer flavor.

    Just keep the orange juice and zest for that bright note.

    Do I have to use gelatin?

    No. You can skip it and brush the warm cake with 1/2 cup orange syrup (equal parts sugar and orange juice simmered) for a lighter soak.

    Can I make cupcakes with this recipe?

    Absolutely. Bake the batter in lined muffin tins for 16–18 minutes.

    Poke each cupcake with a skewer, spoon a little gelatin over, chill, then top with the whipped frosting.

    How do I get stronger orange flavor?

    Add an extra teaspoon of zest, or a few drops of pure orange extract. You can also replace all the cold water in the gelatin with orange juice.

    What if my topping is too loose?

    Chill it for 10–15 minutes, then gently re-whip. If needed, add 1–2 tablespoons more powdered sugar to stabilize.

    Can I use store-bought whipped topping?

    Yes.

    Fold 8 oz thawed whipped topping into the softened cream cheese and powdered sugar mixture for a quick shortcut.

    Final Thoughts

    This Easy Orange Creamsicle Cake gives you maximum flavor with minimal effort. It’s bright, nostalgic, and crowd-pleasing, and it holds up beautifully in the fridge. Keep this recipe on hand for birthdays, cookouts, or any time you want a dessert that tastes like sunshine—no fuss required.

    Easy Orange Creamsicle Cake Recipe – Bright, Fresh, and Simple

    Prep Time 15 minutes
    Cook Time 30 minutes
    Total Time 45 minutes
    Servings 12 servings

    Ingredients
      

    • Cake: 1 box white or vanilla cake mix (15.25 oz)
    • 3 large eggs (or per box directions)
    • 1/2 cup vegetable oil (or per box directions)
    • 1 cup orange juice (replace the water in the box directions)
    • 1 tablespoon orange zest (about 1 large orange)
    • 1 teaspoon vanilla extract
    • Orange soak: 1 box orange gelatin (3 oz)
    • 1 cup boiling water
    • 1/2 cup cold orange juice (or cold water)
    • Creamsicle topping: 1 cup cold heavy whipping cream
    • 4 oz cream cheese, softened
    • 1/2 cup powdered sugar
    • 1 teaspoon vanilla extract
    • 1 teaspoon orange zest (optional, for extra flavor)
    • Garnish (optional): Fresh orange slices or extra zest

    Instructions
     

    • Prep the pan and oven: Preheat to 350°F (175°C). Grease a 9×13-inch baking pan and line with parchment if you want easy removal.
    • Mix the cake: In a bowl, combine cake mix, eggs, oil, orange juice, orange zest, and vanilla. Beat until smooth and slightly fluffy, about 2 minutes.
    • Bake: Pour into the pan and bake 23–28 minutes, or until a toothpick comes out clean and the top springs back.
    • Cool slightly: Let the cake cool 10–15 minutes. Poke holes all over the surface with a fork or the handle of a wooden spoon.
    • Make the orange soak: Dissolve the orange gelatin in 1 cup boiling water. Stir in 1/2 cup cold orange juice. Mix well.
    • Soak the cake: Slowly pour the warm gelatin mixture over the cake, letting it seep into the holes. Chill uncovered for 30 minutes, then cover and chill at least 2 hours.
    • Make the topping: Beat the cream cheese, powdered sugar, vanilla, and orange zest until smooth. In a separate bowl, whip the cream to soft peaks. Fold whipped cream into the cream cheese mixture until fluffy.
    • Frost and finish: Spread the creamsicle topping over the chilled cake. Add zest or orange slices if using. Chill 30–60 minutes before slicing.
    • Serve: Cut into squares. Keep the cake cold for the best texture and flavor.
  • Copycat Hostess Ding Dong Cake Recipe That Tastes Better Than the Original – Rich, Creamy, and Easy

    Copycat Hostess Ding Dong Cake Recipe That Tastes Better Than the Original – Rich, Creamy, and Easy

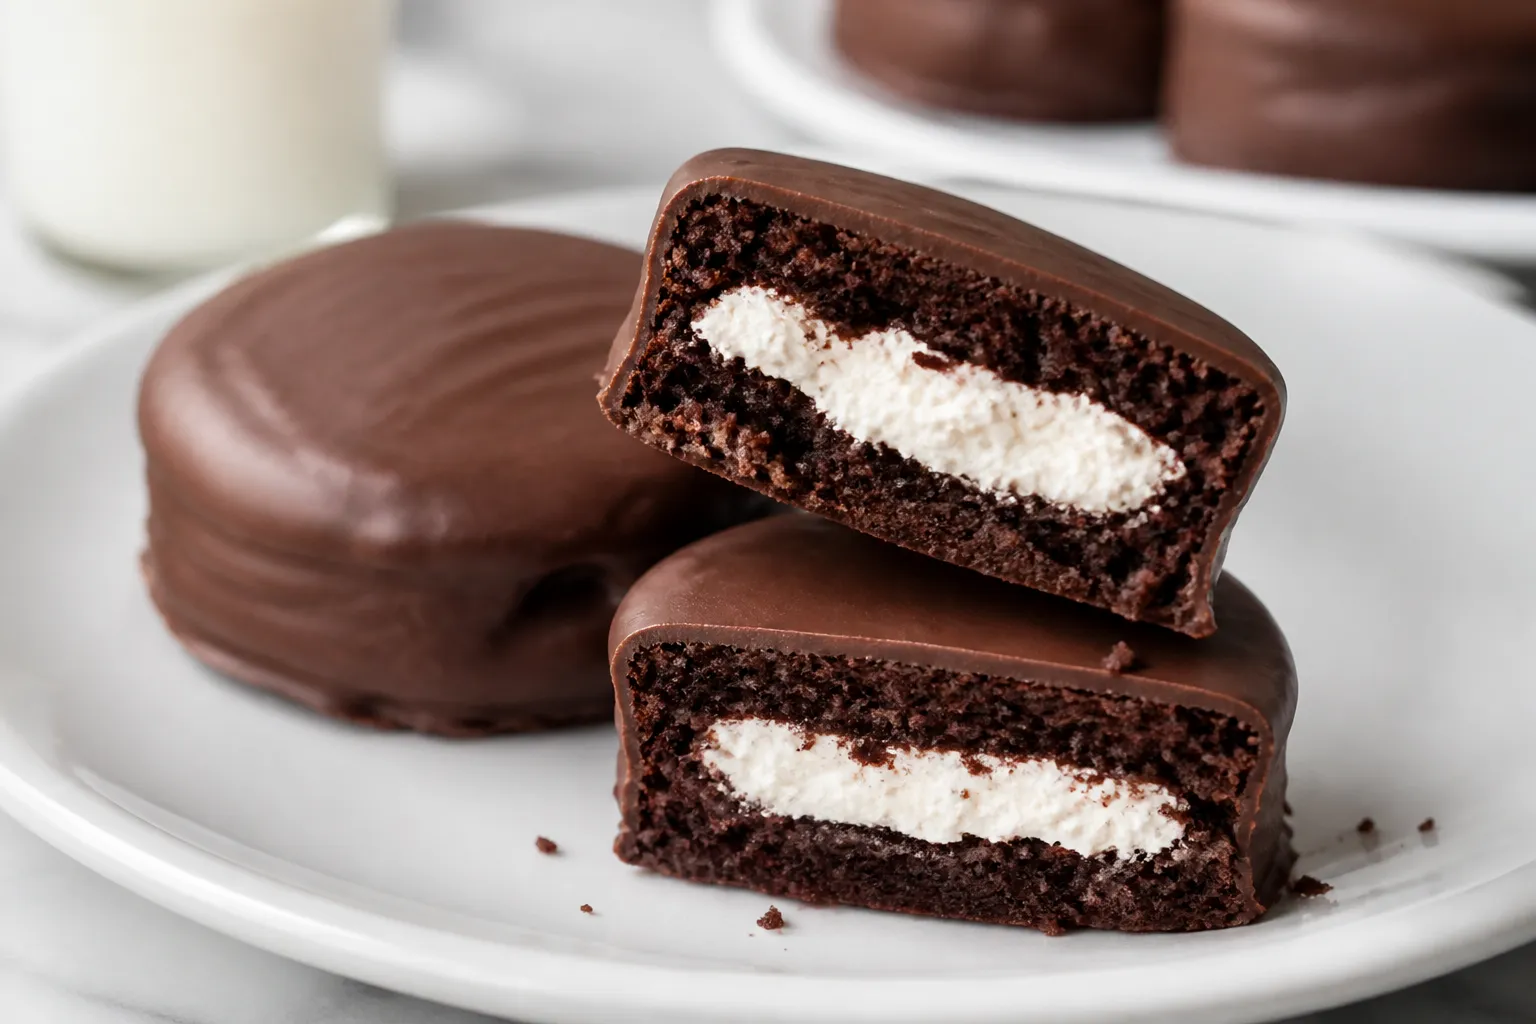
    If you grew up unwrapping those little chocolate cakes with the creamy centers, this recipe will hit all the right nostalgic notes—only better. Think tender chocolate layers, a fluffy vanilla cream filling, and a smooth, glossy chocolate ganache on top. It’s bakery-level good without being fussy.

    You don’t need special tools, just a couple of bowls and a whisk. And yes, it tastes like the classic snack cake—only richer, fresher, and way more satisfying.

    What Makes This Special

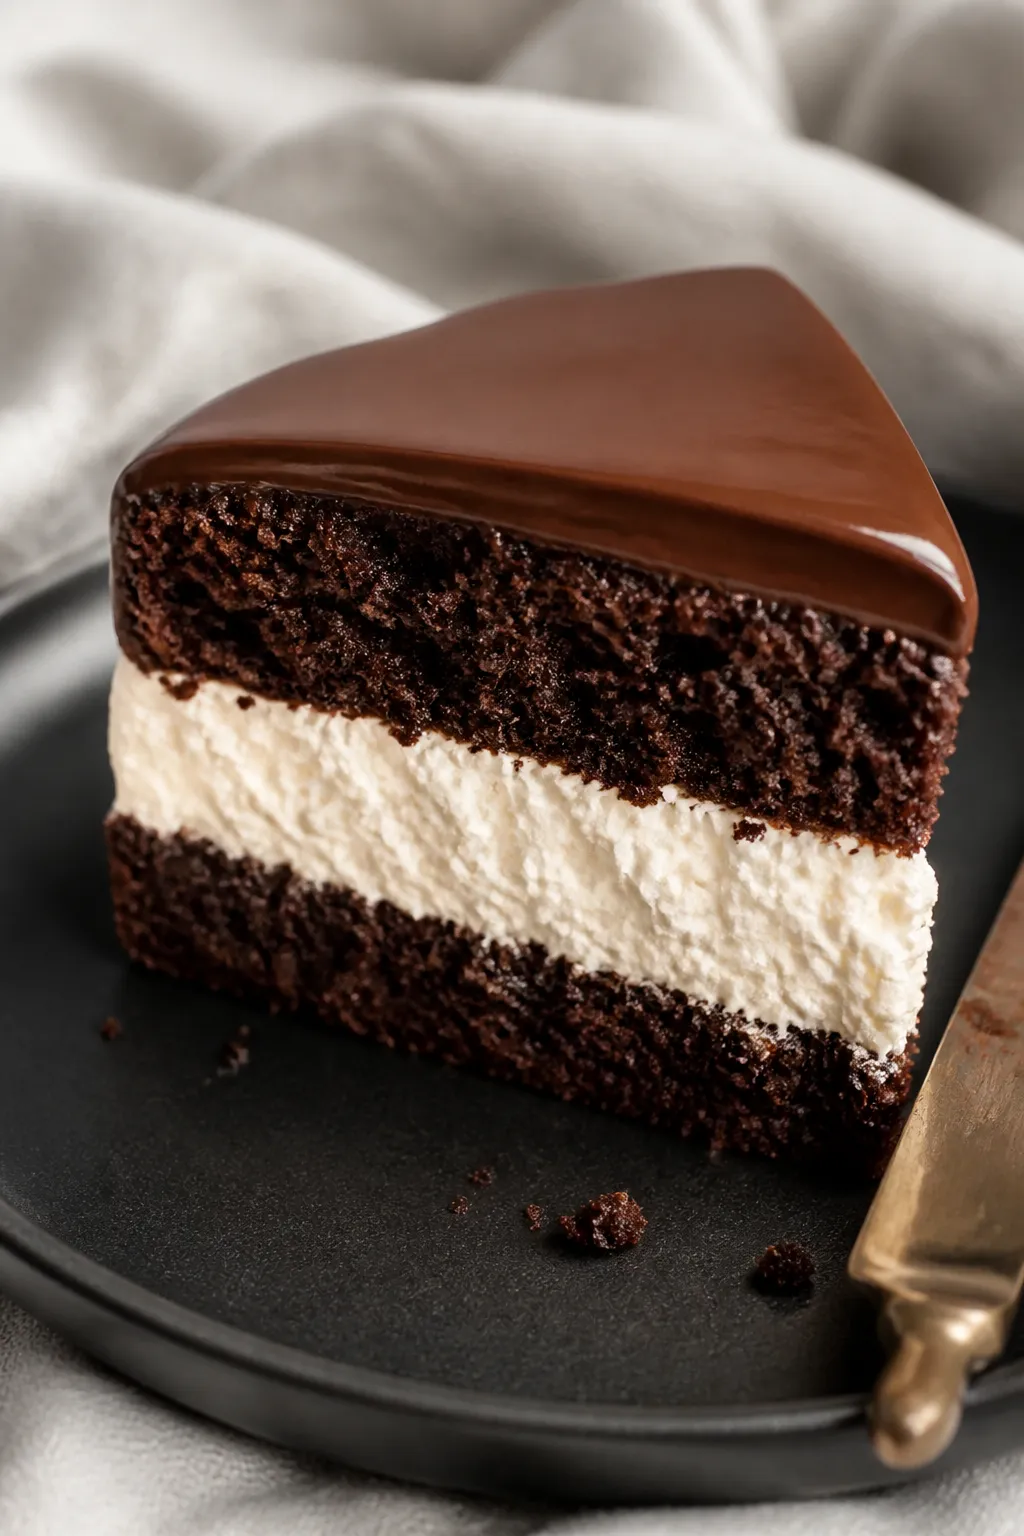
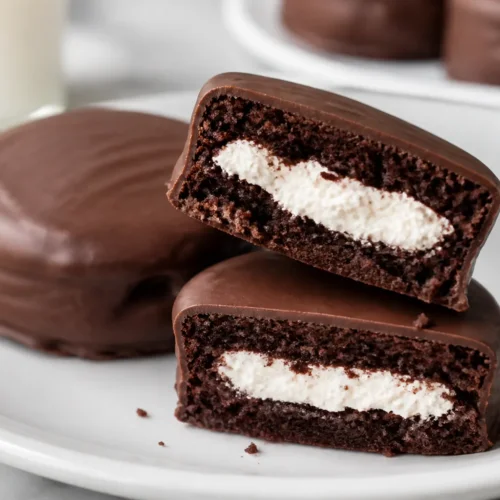
    Close-up detail: A precise side-cut slice of Copycat Hostess Ding Dong Cake showing three distinct l
    • Better texture: Soft, moist chocolate cake that stays tender for days.
    • Real cream filling: Light and cloud-like without being overly sweet.
    • Shiny ganache: A smooth, glossy shell that sets beautifully and slices clean.
    • Make-ahead friendly: The flavors improve as it chills.

    What You’ll Need

    • For the Chocolate Cake:
      • 1¾ cups all-purpose flour
      • 1¾ cups granulated sugar
      • ¾ cup unsweetened cocoa powder (preferably Dutch-process)
      • 1½ tsp baking powder
      • 1½ tsp baking soda
      • 1 tsp fine salt
      • 2 large eggs, room temperature
      • 1 cup whole milk, room temperature
      • ½ cup neutral oil (canola or vegetable)
      • 2 tsp pure vanilla extract
      • 1 cup hot brewed coffee (or hot water)
    • For the Cream Filling:
      • 1 cup cold heavy whipping cream
      • 4 oz cream cheese, softened
      • ¼ cup unsalted butter, softened
      • ¾ cup powdered sugar
      • 1 tsp pure vanilla extract
      • Pinch of salt
    • For the Ganache:
      • 1½ cups semisweet chocolate chips or chopped chocolate
      • 1 cup heavy cream
      • 1 tbsp unsalted butter (for extra shine), optional
      • Pinch of salt

    Step-by-Step Instructions

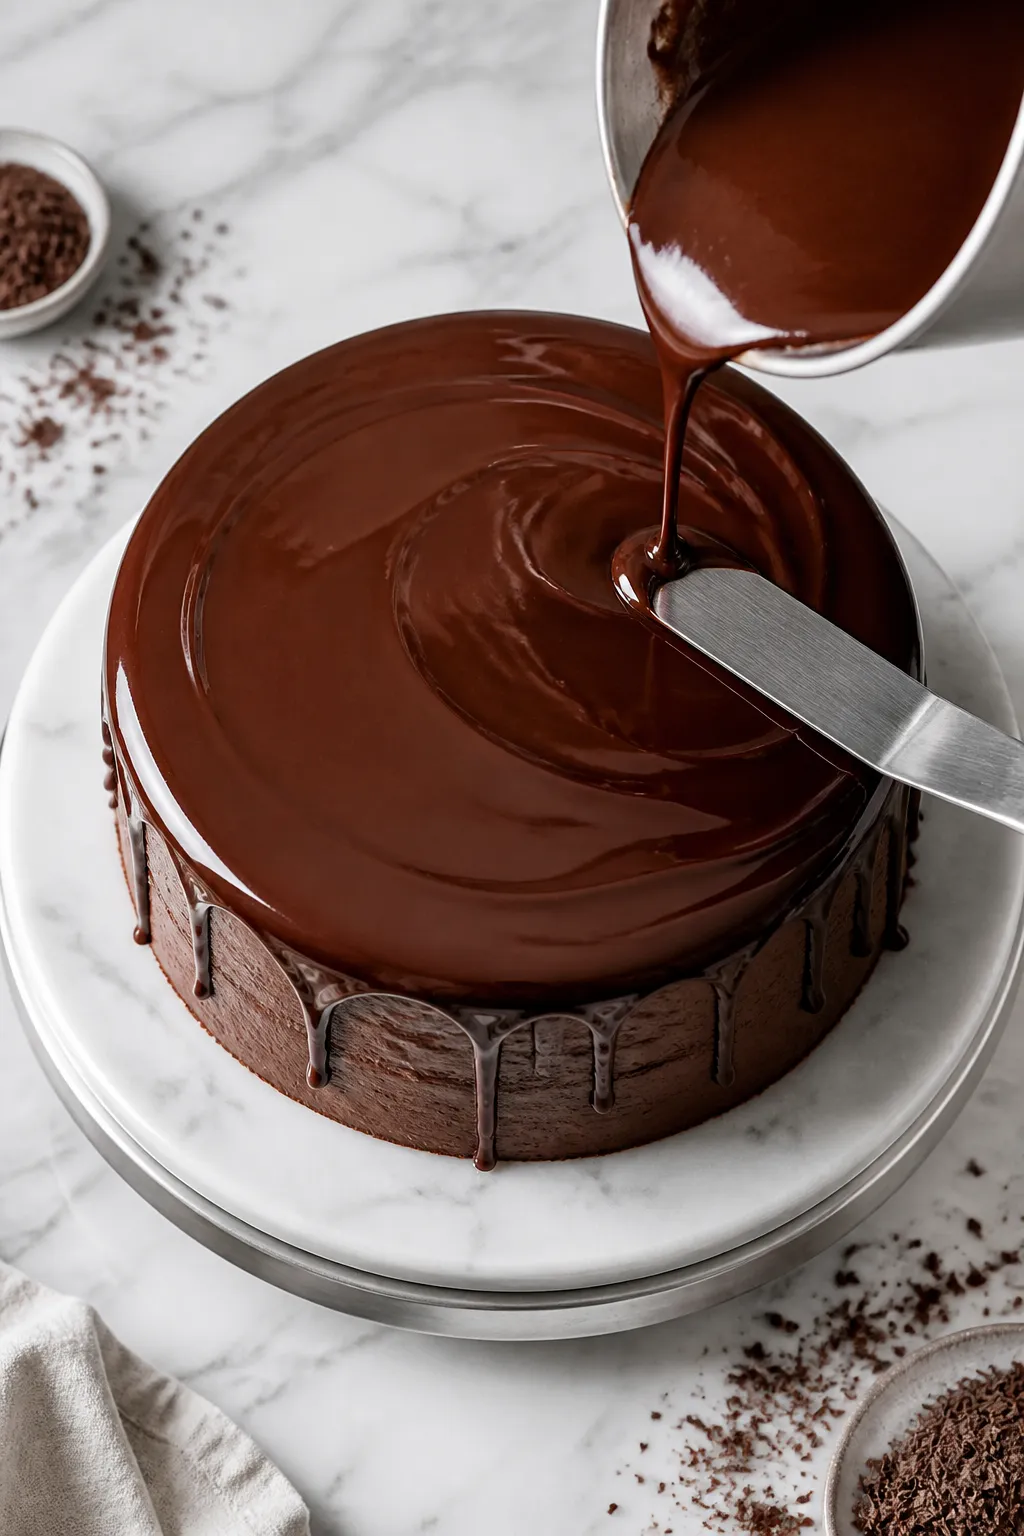
    Tasty top view, process moment: Overhead shot of the assembled, chilled cake as warm ganache is bein
    1. Prep the pans: Heat oven to 350°F (175°C). Grease and line two 9-inch round cake pans with parchment.
    2. Mix dry ingredients: In a large bowl, whisk flour, sugar, cocoa, baking powder, baking soda, and salt until evenly combined.
    3. Mix wet ingredients: In a second bowl, whisk eggs, milk, oil, and vanilla until smooth.
    4. Combine and add coffee: Add wet to dry and whisk just until smooth.

      Stir in hot coffee. The batter will be thin—this is right.

    5. Bake: Divide batter between pans and bake 28–32 minutes, or until a toothpick comes out with a few moist crumbs. Cool 10 minutes, then turn out onto racks.

      Cool completely.

    6. Make the cream filling: Beat cream cheese and butter until smooth. Add powdered sugar, vanilla, and salt; beat until fluffy. In a separate bowl, whip the cold cream to stiff peaks.

      Fold the whipped cream into the cream-cheese mixture until light and uniform. Chill 15 minutes to firm up.

    7. Assemble layers: Level cake tops if needed. Place one layer on a plate.

      Spread the cream filling evenly, leaving a ½-inch border so it doesn’t squish out. Top with the second layer and press gently.

    8. Chill before glazing: Refrigerate the stacked cake 20–30 minutes to set the filling.
    9. Make ganache: Heat cream until steaming (not boiling). Pour over chocolate, add butter and salt, and let sit 2 minutes.

      Stir from the center outward until glossy and smooth. Cool 5–8 minutes until slightly thickened.

    10. Glaze the cake: Pour ganache over the chilled cake, letting it drip down the sides. Smooth the top with an offset spatula.

      Chill 30–45 minutes until the ganache sets.

    11. Slice and serve: For clean slices, use a warm knife (dip in hot water, wipe, slice).

    Keeping It Fresh

    • Refrigerate: Store covered in the fridge for up to 4 days. The filling is dairy-based, so keep it chilled.
    • Freeze: Freeze slices wrapped tightly for up to 2 months. Thaw in the fridge overnight.
    • Make ahead: Bake cake layers a day ahead; wrap well and refrigerate.

      Fill and glaze the next day.

    Benefits of This Recipe

    • Familiar flavor, upgraded: All the nostalgia with richer chocolate and fresher cream.
    • Simple method: No complicated techniques—just basic baking steps.
    • Customizable sweetness: Adjust sugar in the filling or use darker chocolate for a less-sweet finish.
    • Reliable results: Moist cake that doesn’t dry out and a ganache that sets smoothly.

    Pitfalls to Watch Out For

    • Rushing the chill: If the cake isn’t chilled before ganache, the filling may ooze out.
    • Overmixing: Mix the batter just until smooth to avoid a tough crumb.
    • Too-hot cream for ganache: Boiling cream can split the chocolate. Warm until steaming only.
    • Warm kitchen: If it’s hot, keep the cake chilled longer so the filling stays firm.

    Recipe Variations

    • Mini Ding Dong cupcakes: Bake batter in lined muffin tins (16–18 minutes). Core, fill with cream, and dip tops in ganache.
    • Chocolate-on-chocolate filling: Fold 2 tablespoons cocoa into the cream filling for extra chocolate punch.
    • Peppermint twist: Add ¼ teaspoon peppermint extract to the ganache and sprinkle with crushed peppermint.
    • Gluten-free: Use a quality 1:1 gluten-free flour blend and ensure other ingredients are GF-certified.
    • Dairy-free: Use dairy-free milk, plant butter, and coconut cream for ganache; swap in a dairy-free whipped topping.

    FAQ

    Can I skip the coffee in the cake?

    Yes.

    Replace it with hot water. Coffee deepens the chocolate flavor without tasting like coffee, but water works fine.

    My ganache is too thin. What should I do?

    Let it cool a few more minutes to thicken, or stir in a small handful of extra chocolate.

    It should flow slowly, not run like syrup.

    How do I keep the filling from squeezing out?

    Leave a border when spreading the cream, then chill the stacked cake before adding ganache. Leveling the layers also helps.

    Can I use boxed cake mix?

    You can. Prepare two 9-inch rounds from a chocolate mix, then follow the filling and ganache steps for a faster version.

    Do I need Dutch-process cocoa?

    It’s preferred for a smoother, deeper chocolate flavor, but natural cocoa works.

    Just keep the recipe as written for leavening balance.

    Final Thoughts

    This copycat Ding Dong cake brings the best parts of the original—soft cake, creamy center, glossy chocolate—without the waxy coatings or artificial aftertaste. It’s simple enough for a weekend bake but polished enough for a birthday. Chill it well, slice with a warm knife, and enjoy a nostalgic favorite made truly from scratch.

    Copycat Hostess Ding Dong Cake Recipe That Tastes Better Than the Original – Rich, Creamy, and Easy

    Prep Time 20 minutes
    Cook Time 30 minutes
    Total Time 50 minutes
    Servings 12 servings

    Ingredients
      

    • For the Chocolate Cake: 1¾ cups all-purpose flour
    • 1¾ cups granulated sugar
    • ¾ cup unsweetened cocoa powder (preferably Dutch-process)
    • 1½ tsp baking powder
    • 1½ tsp baking soda
    • 1 tsp fine salt
    • 2 large eggs, room temperature
    • 1 cup whole milk, room temperature
    • ½ cup neutral oil (canola or vegetable)
    • 2 tsp pure vanilla extract
    • 1 cup hot brewed coffee (or hot water)
    • For the Cream Filling: 1 cup cold heavy whipping cream
    • 4 oz cream cheese, softened
    • ¼ cup unsalted butter, softened
    • ¾ cup powdered sugar
    • 1 tsp pure vanilla extract
    • Pinch of salt
    • For the Ganache: 1½ cups semisweet chocolate chips or chopped chocolate
    • 1 cup heavy cream
    • 1 tbsp unsalted butter (for extra shine), optional
    • Pinch of salt

    Instructions
     

    • Prep the pans: Heat oven to 350°F (175°C). Grease and line two 9-inch round cake pans with parchment.
    • Mix dry ingredients: In a large bowl, whisk flour, sugar, cocoa, baking powder, baking soda, and salt until evenly combined.
    • Mix wet ingredients: In a second bowl, whisk eggs, milk, oil, and vanilla until smooth.
    • Combine and add coffee: Add wet to dry and whisk just until smooth. Stir in hot coffee. The batter will be thin—this is right.
    • Bake: Divide batter between pans and bake 28–32 minutes, or until a toothpick comes out with a few moist crumbs. Cool 10 minutes, then turn out onto racks. Cool completely.
    • Make the cream filling: Beat cream cheese and butter until smooth. Add powdered sugar, vanilla, and salt; beat until fluffy. In a separate bowl, whip the cold cream to stiff peaks. Fold the whipped cream into the cream-cheese mixture until light and uniform. Chill 15 minutes to firm up.
    • Assemble layers: Level cake tops if needed. Place one layer on a plate. Spread the cream filling evenly, leaving a ½-inch border so it doesn’t squish out. Top with the second layer and press gently.
    • Chill before glazing: Refrigerate the stacked cake 20–30 minutes to set the filling.
    • Make ganache: Heat cream until steaming (not boiling). Pour over chocolate, add butter and salt, and let sit 2 minutes. Stir from the center outward until glossy and smooth. Cool 5–8 minutes until slightly thickened.
    • Glaze the cake: Pour ganache over the chilled cake, letting it drip down the sides. Smooth the top with an offset spatula. Chill 30–45 minutes until the ganache sets.
    • Slice and serve: For clean slices, use a warm knife (dip in hot water, wipe, slice).
  • Best Tres Leches Cake With Cake Mix Recipe You’ll Ever Try – Easy, Moist, and Crowd-Pleasing

    Best Tres Leches Cake With Cake Mix Recipe You’ll Ever Try – Easy, Moist, and Crowd-Pleasing

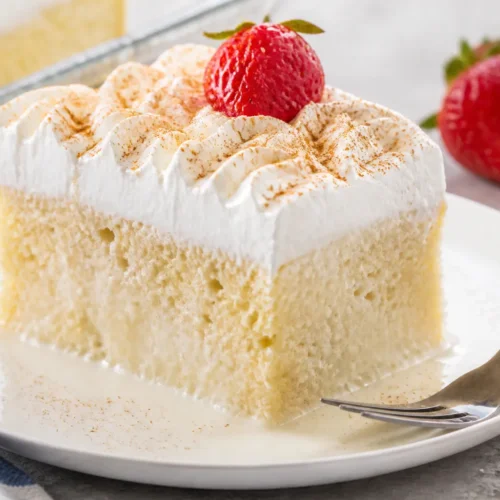
    If you want a no-fuss dessert that still feels special, this tres leches cake hits the mark. It starts with a humble box of cake mix, but ends up rich, creamy, and totally irresistible. The texture is soft and spongey, with that classic milky soak in every bite.

    It’s perfect for birthdays, potlucks, or any night you want something sweet without spending hours in the kitchen.

    What Makes This Recipe So Good

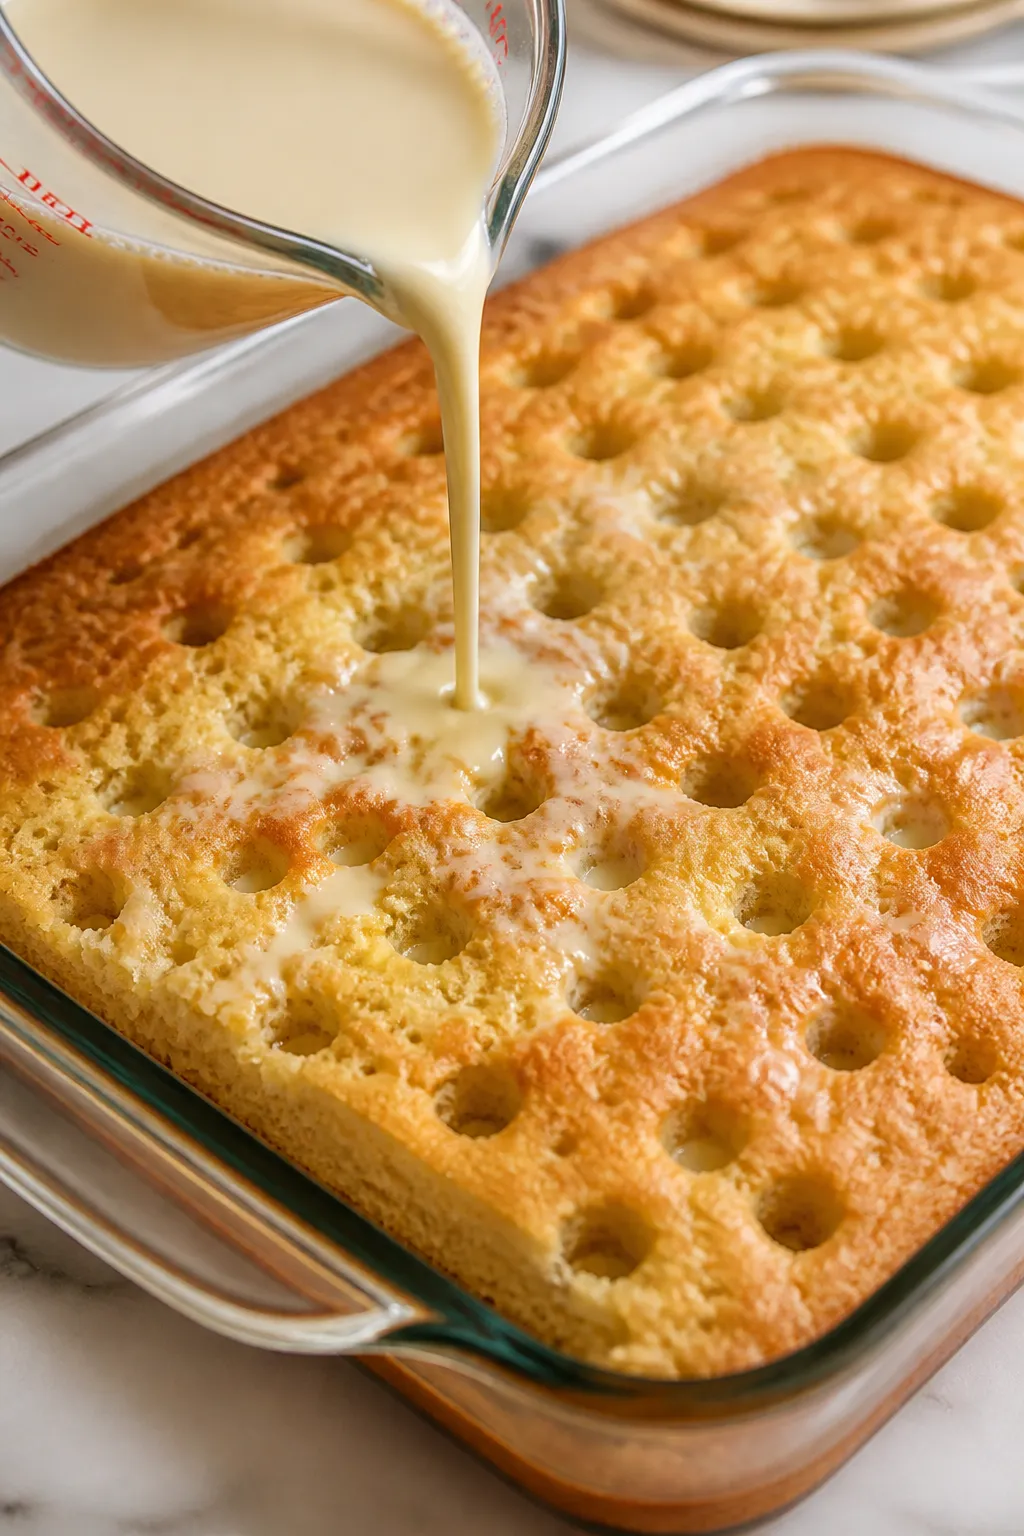
    Close-up process shot: Warm, freshly baked 9x13 tres leches cake in a glass pan with straight sides,
    • Time-saving shortcut: Using a boxed cake mix keeps it simple while still delivering great flavor and texture.
    • Perfectly soaked, not soggy: The method ensures the cake absorbs the milk mixture evenly for a lush, tender crumb.
    • Light topping: Fresh whipped cream makes it airy and not overly sweet.
    • Make-ahead friendly: It actually tastes better the next day, after the milk fully settles in.
    • Customizable: Add cinnamon, citrus zest, or a splash of rum for your own twist.

    What You’ll Need

    • For the cake:
      • 1 box white or yellow cake mix (15.25 oz)
      • 3 large eggs (or as box directs)
      • 1/2 cup vegetable oil (or as box directs)
      • 1 cup milk or water (follow box; milk gives richer flavor)
      • 1 teaspoon vanilla extract
      • Optional: 1/2 teaspoon ground cinnamon
    • For the tres leches soak:
      • 1 can (14 oz) sweetened condensed milk
      • 1 can (12–13.5 oz) evaporated milk
      • 1 cup whole milk or half-and-half
      • 1 teaspoon vanilla extract
      • Pinch of salt
    • For the topping:
      • 2 cups heavy whipping cream
      • 3 tablespoons powdered sugar
      • 1 teaspoon vanilla extract
      • Ground cinnamon, fresh berries, or toasted coconut for garnish (optional)

    Instructions

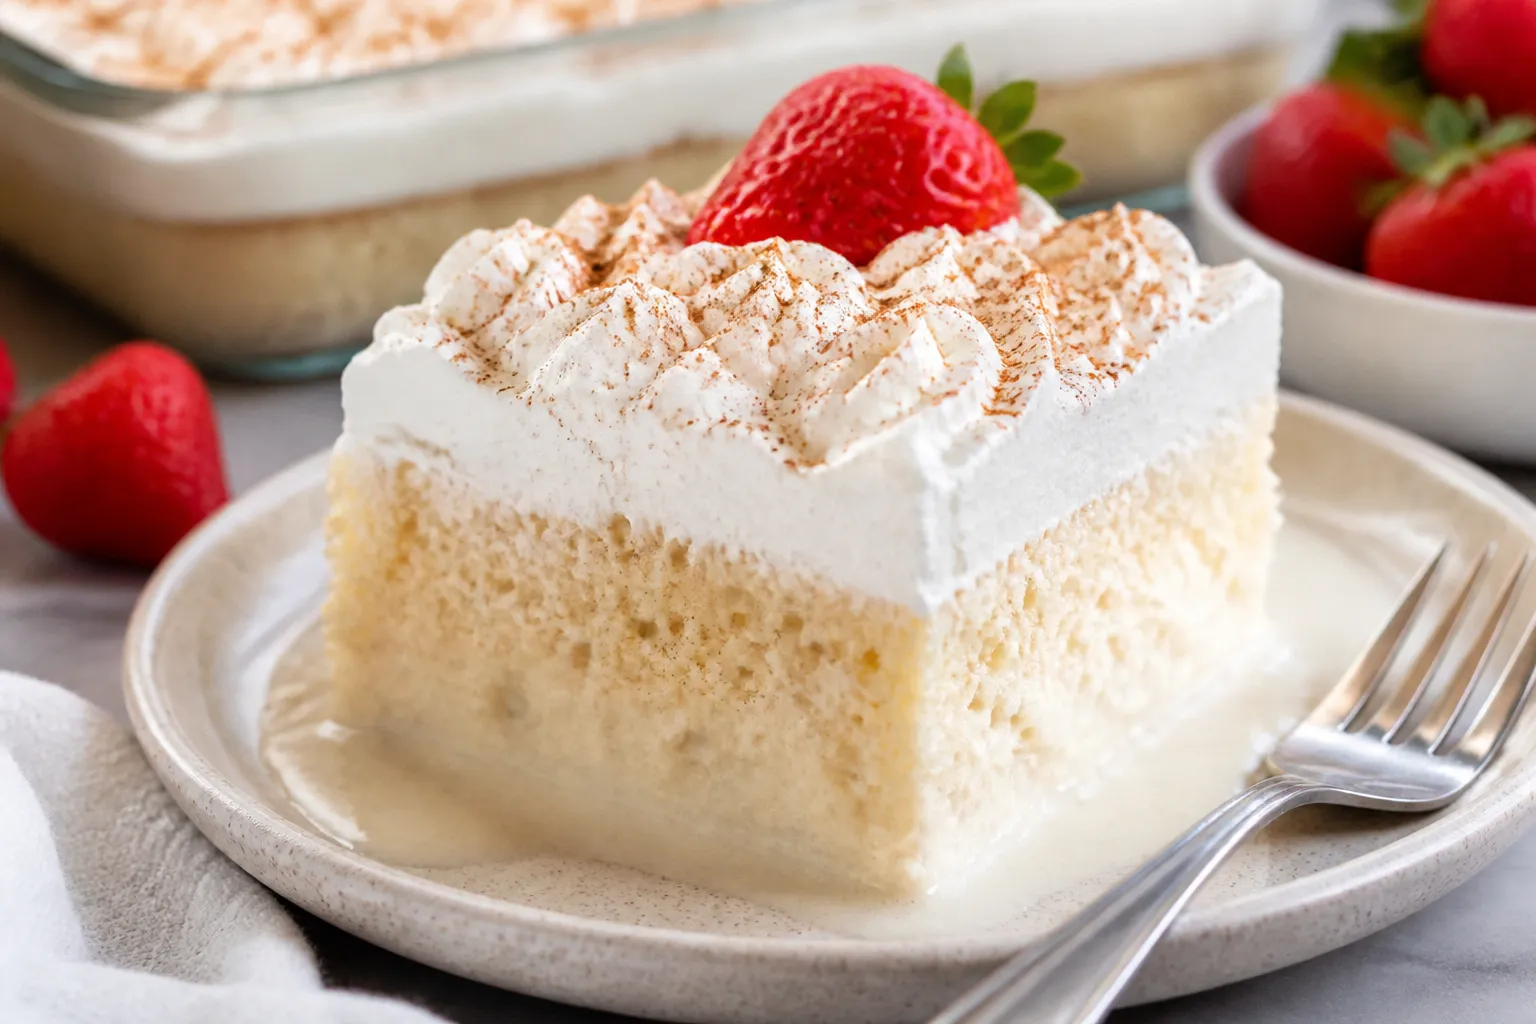
    Final plated overhead: Chilled and finished tres leches cake slice on a white rimmed dessert plate,
    1. Preheat your oven to 350°F (175°C). Grease a 9×13-inch baking pan. For easiest serving, use a metal or glass pan with straight sides.
    2. Prepare the cake: In a large bowl, combine the cake mix, eggs, oil, and milk (or water) per the box directions.

      Add vanilla and cinnamon if using. Mix until smooth and no dry pockets remain.

    3. Bake: Pour the batter into the prepared pan and bake 25–30 minutes, or until the top springs back and a toothpick comes out clean. Do not overbake.
    4. Cool briefly: Let the cake rest 15–20 minutes.

      It should still be warm, not hot.

    5. Make the soak: In a bowl or measuring pitcher, whisk together sweetened condensed milk, evaporated milk, whole milk (or half-and-half), vanilla, and a pinch of salt until smooth.
    6. Poke the cake: Using a fork or skewer, poke holes all over the surface, spacing about 1/2 inch apart. Go deep, but avoid tearing.
    7. Soak: Slowly pour the milk mixture evenly over the cake, letting it absorb as you go. If it pools, pause for a minute, then continue until you’ve used it all.
    8. Chill: Cover and refrigerate at least 4 hours, preferably overnight, to allow full absorption and flavor development.
    9. Whip the topping: Beat heavy cream, powdered sugar, and vanilla on medium-high until medium-stiff peaks form.

      Don’t overwhip.

    10. Finish: Spread whipped cream over the chilled cake. Dust with cinnamon or add berries or coconut if you like.
    11. Serve: Slice cold. The cake should be moist with a gentle, creamy soak in every bite.

    How to Store

    • Refrigerate: Cover and keep in the fridge for up to 4 days.
    • Make ahead: Bake and soak the cake a day in advance.

      Whip and add the topping the day you plan to serve.

    • Freezing: Freeze the soaked cake (without whipped cream) well-wrapped for up to 1 month. Thaw overnight in the fridge, then top with fresh whipped cream.

    Health Benefits

    • Protein and calcium: Dairy in the soak and cream provides both, which support bones and muscles.
    • Portion control: The cake is rich, so smaller slices satisfy. Pair with berries for freshness and fiber.
    • Customizable dairy: You can use reduced-fat milk in the soak to slightly cut calories while keeping flavor.

    Pitfalls to Watch Out For

    • Overbaking the cake: A dry cake won’t absorb well.

      Pull it as soon as a toothpick tests clean.

    • Not poking enough holes: Without enough pathways, the milk won’t spread evenly. Be generous.
    • Pouring too fast: Add the soak slowly so it has time to sink in.
    • Warm topping: Whipped cream needs a cold cake to hold up. Always chill first.
    • Overwhipped cream: It can turn grainy.

      Stop at medium-stiff peaks.

    Alternatives

    • Flavor boosts: Add 1 tablespoon dark rum or 1 teaspoon almond extract to the soak. Orange or lime zest in the batter is great too.
    • Spice it up: Fold 1 teaspoon cinnamon and a pinch of nutmeg into the batter for a warm twist.
    • Dairy-light: Swap whole milk with lactose-free milk. Keep condensed and evaporated milks for best texture, or use their lactose-free versions if available.
    • Topping swap: Stabilize whipped cream with 1 tablespoon instant vanilla pudding mix for longer hold, or use a light cream cheese whip.
    • Cupcake format: Bake as cupcakes, poke, spoon in soak, then top.

      Great for parties.

    FAQ

    Can I use a different cake mix flavor?

    Yes. White, yellow, and vanilla are classic. A butter or French vanilla mix also works.

    Avoid chocolate if you want a traditional taste, but it can be a fun twist.

    Why is my cake soggy?

    It might be underbaked or the pan was too small. Also, pouring the soak too fast can create puddles. Bake until just done and let the cake absorb slowly.

    Can I make it the day before?

    Absolutely.

    It’s even better the next day. Just add the whipped cream right before serving for the freshest look.

    How do I prevent the whipped cream from weeping?

    Use cold bowl and beaters, don’t overwhip, and serve within 24 hours. For extra stability, beat in 1 tablespoon instant pudding mix or 1 teaspoon gelatin bloomed in warm water and cooled.

    What toppings go well?

    Cinnamon, strawberries, raspberries, toasted coconut, or a drizzle of dulce de leche.

    Keep it simple to let the cake shine.

    Wrapping Up

    This tres leches cake delivers bakery-level results with weeknight effort. The boxed mix keeps it easy, while the rich three-milk soak and fresh whipped cream make it unforgettable. Keep a can of condensed and evaporated milk in the pantry, and you’ll be ready to impress any time a sweet craving hits.

    Best Tres Leches Cake With Cake Mix Recipe You’ll Ever Try – Easy, Moist, and Crowd-Pleasing

    Prep Time 15 minutes
    Cook Time 30 minutes
    Total Time 45 minutes
    Servings 12 servings

    Ingredients
      

    • For the cake: 1 box white or yellow cake mix (15.25 oz)
    • 3 large eggs (or as box directs)
    • 1/2 cup vegetable oil (or as box directs)
    • 1 cup milk or water (follow box; milk gives richer flavor)
    • 1 teaspoon vanilla extract
    • Optional: 1/2 teaspoon ground cinnamon
    • For the tres leches soak: 1 can (14 oz) sweetened condensed milk
    • 1 can (12–13.5 oz) evaporated milk
    • 1 cup whole milk or half-and-half
    • 1 teaspoon vanilla extract
    • Pinch of salt
    • For the topping: 2 cups heavy whipping cream
    • 3 tablespoons powdered sugar
    • 1 teaspoon vanilla extract
    • Ground cinnamon, fresh berries, or toasted coconut for garnish (optional)

    Instructions
     

    • Preheat your oven to 350°F (175°C). Grease a 9×13-inch baking pan. For easiest serving, use a metal or glass pan with straight sides.
    • Prepare the cake: In a large bowl, combine the cake mix, eggs, oil, and milk (or water) per the box directions. Add vanilla and cinnamon if using. Mix until smooth and no dry pockets remain.
    • Bake: Pour the batter into the prepared pan and bake 25–30 minutes, or until the top springs back and a toothpick comes out clean. Do not overbake.
    • Cool briefly: Let the cake rest 15–20 minutes. It should still be warm, not hot.
    • Make the soak: In a bowl or measuring pitcher, whisk together sweetened condensed milk, evaporated milk, whole milk (or half-and-half), vanilla, and a pinch of salt until smooth.
    • Poke the cake: Using a fork or skewer, poke holes all over the surface, spacing about 1/2 inch apart. Go deep, but avoid tearing.
    • Soak: Slowly pour the milk mixture evenly over the cake, letting it absorb as you go. If it pools, pause for a minute, then continue until you’ve used it all.
    • Chill: Cover and refrigerate at least 4 hours, preferably overnight, to allow full absorption and flavor development.
    • Whip the topping: Beat heavy cream, powdered sugar, and vanilla on medium-high until medium-stiff peaks form. Don’t overwhip.
    • Finish: Spread whipped cream over the chilled cake. Dust with cinnamon or add berries or coconut if you like.
    • Serve: Slice cold. The cake should be moist with a gentle, creamy soak in every bite.
  • Tres Leches Cake Recipe with Box Cake That Everyone Asks For – Easy, Moist, Crowd-Pleasing Dessert

    Tres Leches Cake Recipe with Box Cake That Everyone Asks For – Easy, Moist, Crowd-Pleasing Dessert

    This Tres Leches Cake starts with a simple box mix, but it tastes like you baked it from scratch. It’s outrageously moist, creamy, and sweet in the best way. Every time you bring it to a party, expect someone to ask for the recipe.

    The milk soak seeps into every bite, and the whipped topping keeps it light. If you want a guaranteed hit with minimal effort, this is it.

    What Makes This Special

    Cooking process close-up: Warm tres leches sheet cake in a 9x13 pan right after baking, covered with
    • Box mix convenience, bakery taste: No fussy steps, just dependable results.
    • Stays moist for days: The three-milk soak only gets better overnight.
    • Customizable topping: Keep it classic with cinnamon or add fruit like strawberries or mango.
    • Perfect for feeding a crowd: Bakes in a 9×13 pan and serves 12–16.

    Ingredients

    • Cake:
      • 1 box white or yellow cake mix (15.25 oz)
      • Ingredients called for on the box (usually eggs, oil, and water)
      • 1 teaspoon vanilla extract (optional but recommended)
    • Three-Milk Soak:
      • 1 can (12 oz) evaporated milk
      • 1 can (14 oz) sweetened condensed milk
      • 1 cup whole milk (or half-and-half for extra richness)
      • 1 teaspoon vanilla extract
      • Pinch of salt
    • Topping:
      • 2 cups heavy whipping cream
      • 3 tablespoons powdered sugar
      • 1 teaspoon vanilla extract
      • Ground cinnamon, for dusting
      • Optional fruit: sliced strawberries, peaches, or berries

    How to Make It

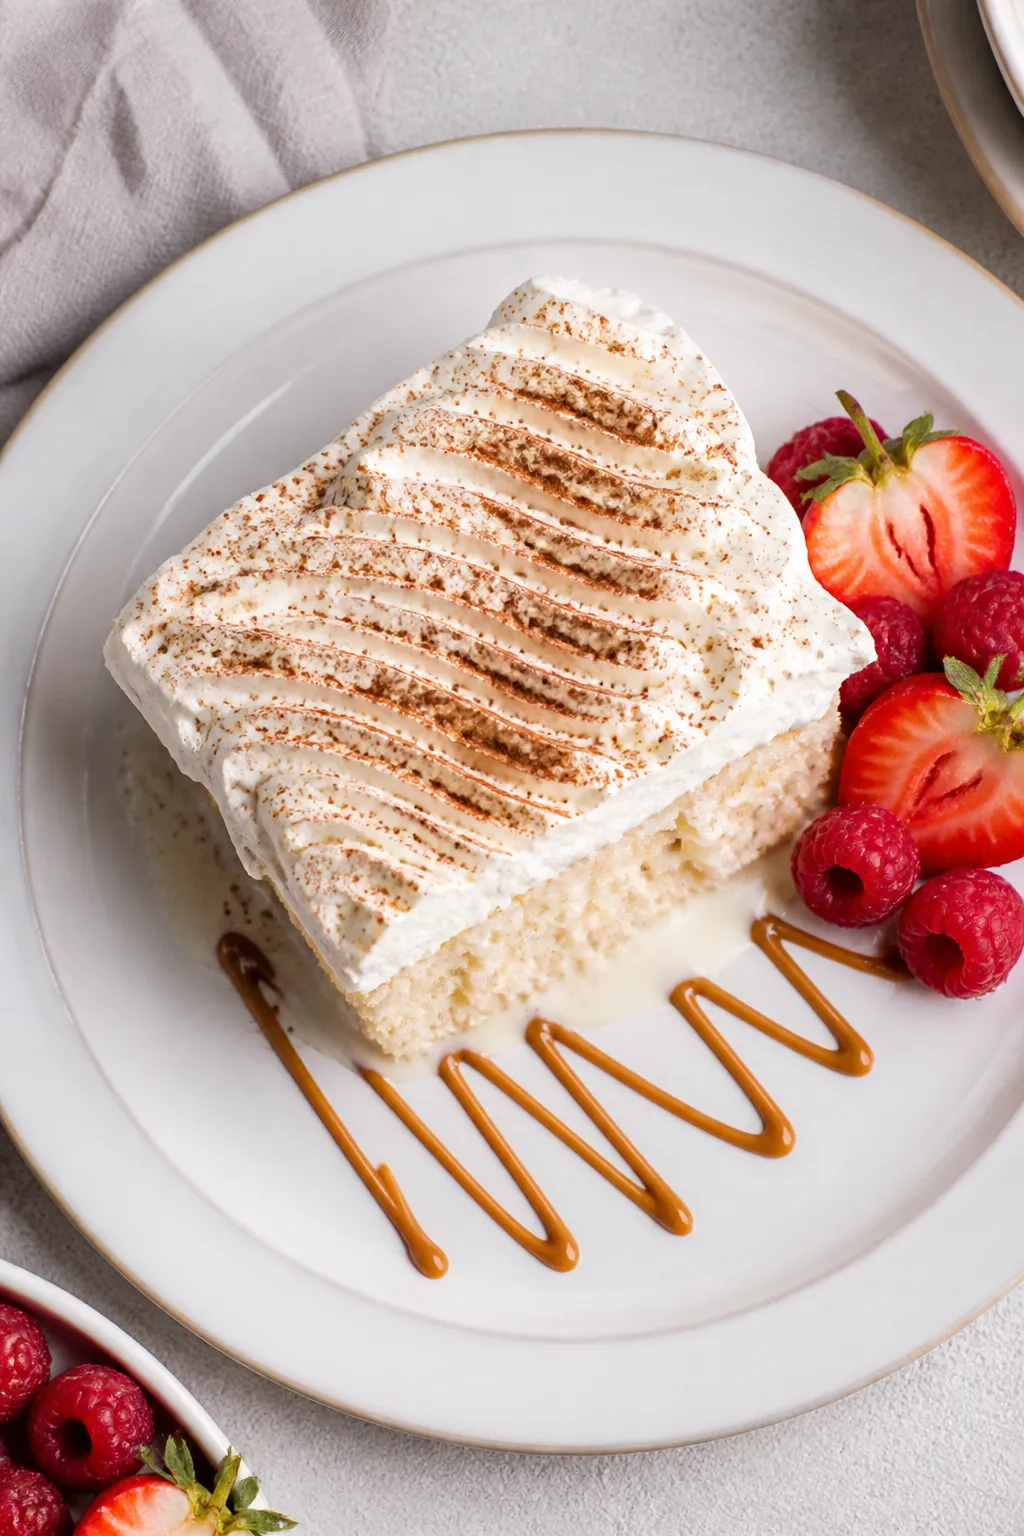
    Final dish overhead: Chilled tres leches cake sliced and served cold, topped with a billowy layer of
    1. Preheat and prep: Heat the oven to 350°F (or as directed on your cake mix). Grease a 9×13-inch baking pan.
    2. Mix the cake: Prepare the cake batter according to the box instructions.

      Stir in 1 teaspoon vanilla for extra flavor.

    3. Bake: Pour the batter into the pan and bake until a toothpick comes out clean, about 25–30 minutes. Do not overbake.
    4. Cool slightly: Let the cake cool in the pan for 15–20 minutes. It should still be warm, not hot.
    5. Poke holes: Using a fork or skewer, poke holes all over the cake, going almost to the bottom.

      Space them about 1/2 inch apart.

    6. Make the milk soak: In a bowl, whisk evaporated milk, sweetened condensed milk, whole milk, vanilla, and a pinch of salt until smooth.
    7. Soak the cake: Slowly pour the milk mixture over the cake, covering every inch. Go in passes so it absorbs evenly.
    8. Chill: Cover and refrigerate for at least 4 hours, preferably overnight, to let the milk fully absorb.
    9. Whip the topping: Beat heavy cream, powdered sugar, and vanilla to soft, billowy peaks.
    10. Finish and serve: Spread whipped cream over the chilled cake. Dust with cinnamon and top with fruit if you like.

      Slice and serve cold.

    Storage Instructions

    • Refrigerate: Cover tightly and store in the fridge for up to 4 days.
    • Make-ahead: You can bake, soak, and chill the cake a day ahead. Add whipped topping the day you serve.
    • Freezing: Freeze the soaked cake (without whipped cream) tightly wrapped for up to 2 months. Thaw in the fridge overnight, then top and serve.

    Benefits of This Recipe

    • Fail-safe method: Box mix ensures consistent texture.
    • Time saver: Minimal prep and simple steps.
    • Budget-friendly: Pantry staples and common dairy.
    • Crowd appeal: Sweet, creamy, and light—people come back for seconds.

    Pitfalls to Watch Out For

    • Overbaking the cake: Dry cake won’t absorb well.

      Pull it as soon as the center sets.

    • Not enough holes: If you skip poking thoroughly, the milk won’t soak evenly.
    • Pouring too fast: Add the milk mixture slowly in layers to prevent pooling.
    • Warm topping: Whipped cream won’t hold if the cake is warm. Chill first.

    Alternatives

    • Flavor swaps: Use French vanilla or butter cake mix; add 1 teaspoon almond or coconut extract to the soak.
    • Dairy tweaks: Replace whole milk with coconut milk for a coconut twist; top with toasted coconut.
    • Lightened version: Use 2% milk and reduce condensed milk to 3/4 can; the texture will be a bit less rich.
    • Topping options: Stabilize whipped cream with 1 tablespoon instant vanilla pudding mix or use a light layer of cream cheese frosting.
    • Party-perfect: Bake as cupcakes; poke, spoon milk over each, and top individually.

    FAQ

    Can I use a different pan size?

    Yes. A 9×13-inch pan is standard, but you can use two 8-inch rounds.

    Reduce baking time slightly and watch closely. For cupcakes, bake 15–18 minutes, then spoon the milk mixture over each cupcake.

    Why add a pinch of salt to the milk mixture?

    A small amount of salt sharpens the sweet, milky flavors and keeps the cake from tasting flat. It won’t make it salty.

    Do I need to prick holes all the way to the bottom?

    Aim for almost all the way down.

    Deep holes help the milk reach the base so every bite is soaked and tender.

    How long should I chill it?

    At least 4 hours, but overnight gives the best texture. The cake becomes evenly moist and sliceable.

    Can I use whipped topping instead of fresh cream?

    Absolutely. Use about 3–4 cups thawed whipped topping if you want a shortcut.

    Fresh whipped cream tastes richer, but both work.

    What fruits pair best?

    Strawberries, raspberries, blueberries, peaches, mango, or a tropical mix. Keep slices thin so they don’t weigh down the topping.

    Final Thoughts

    This Tres Leches Cake checks all the boxes: easy, impressive, and irresistibly moist. Using a box mix keeps it simple, while the classic milk soak and fresh whipped cream make it taste bakery-made.

    Make it the night before, slice it cold, and watch it disappear. Don’t be surprised when people ask for the recipe—just send them this one.

    Tres Leches Cake Recipe with Box Cake That Everyone Asks For – Easy, Moist, Crowd-Pleasing Dessert

    Prep Time 15 minutes
    Cook Time 30 minutes
    Total Time 45 minutes
    Servings 12 servings

    Ingredients
      

    • Cake: 1 box white or yellow cake mix (15.25 oz)
    • Ingredients called for on the box (usually eggs, oil, and water)
    • 1 teaspoon vanilla extract (optional but recommended)
    • Three-Milk Soak: 1 can (12 oz) evaporated milk
    • 1 can (14 oz) sweetened condensed milk
    • 1 cup whole milk (or half-and-half for extra richness)
    • 1 teaspoon vanilla extract
    • Pinch of salt
    • Topping: 2 cups heavy whipping cream
    • 3 tablespoons powdered sugar
    • 1 teaspoon vanilla extract
    • Ground cinnamon, for dusting
    • Optional fruit: sliced strawberries, peaches, or berries

    Instructions
     

    • Preheat and prep: Heat the oven to 350°F (or as directed on your cake mix). Grease a 9×13-inch baking pan.
    • Mix the cake: Prepare the cake batter according to the box instructions. Stir in 1 teaspoon vanilla for extra flavor.
    • Bake: Pour the batter into the pan and bake until a toothpick comes out clean, about 25–30 minutes. Do not overbake.
    • Cool slightly: Let the cake cool in the pan for 15–20 minutes. It should still be warm, not hot.
    • Poke holes: Using a fork or skewer, poke holes all over the cake, going almost to the bottom. Space them about 1/2 inch apart.
    • Make the milk soak: In a bowl, whisk evaporated milk, sweetened condensed milk, whole milk, vanilla, and a pinch of salt until smooth.
    • Soak the cake: Slowly pour the milk mixture over the cake, covering every inch. Go in passes so it absorbs evenly.
    • Chill: Cover and refrigerate for at least 4 hours, preferably overnight, to let the milk fully absorb.
    • Whip the topping: Beat heavy cream, powdered sugar, and vanilla to soft, billowy peaks.
    • Finish and serve: Spread whipped cream over the chilled cake. Dust with cinnamon and top with fruit if you like. Slice and serve cold.
  • Moist Pumpkin Muffins That Stay Soft for Days – A Cozy, Reliable Fall Treat

    Moist Pumpkin Muffins That Stay Soft for Days – A Cozy, Reliable Fall Treat

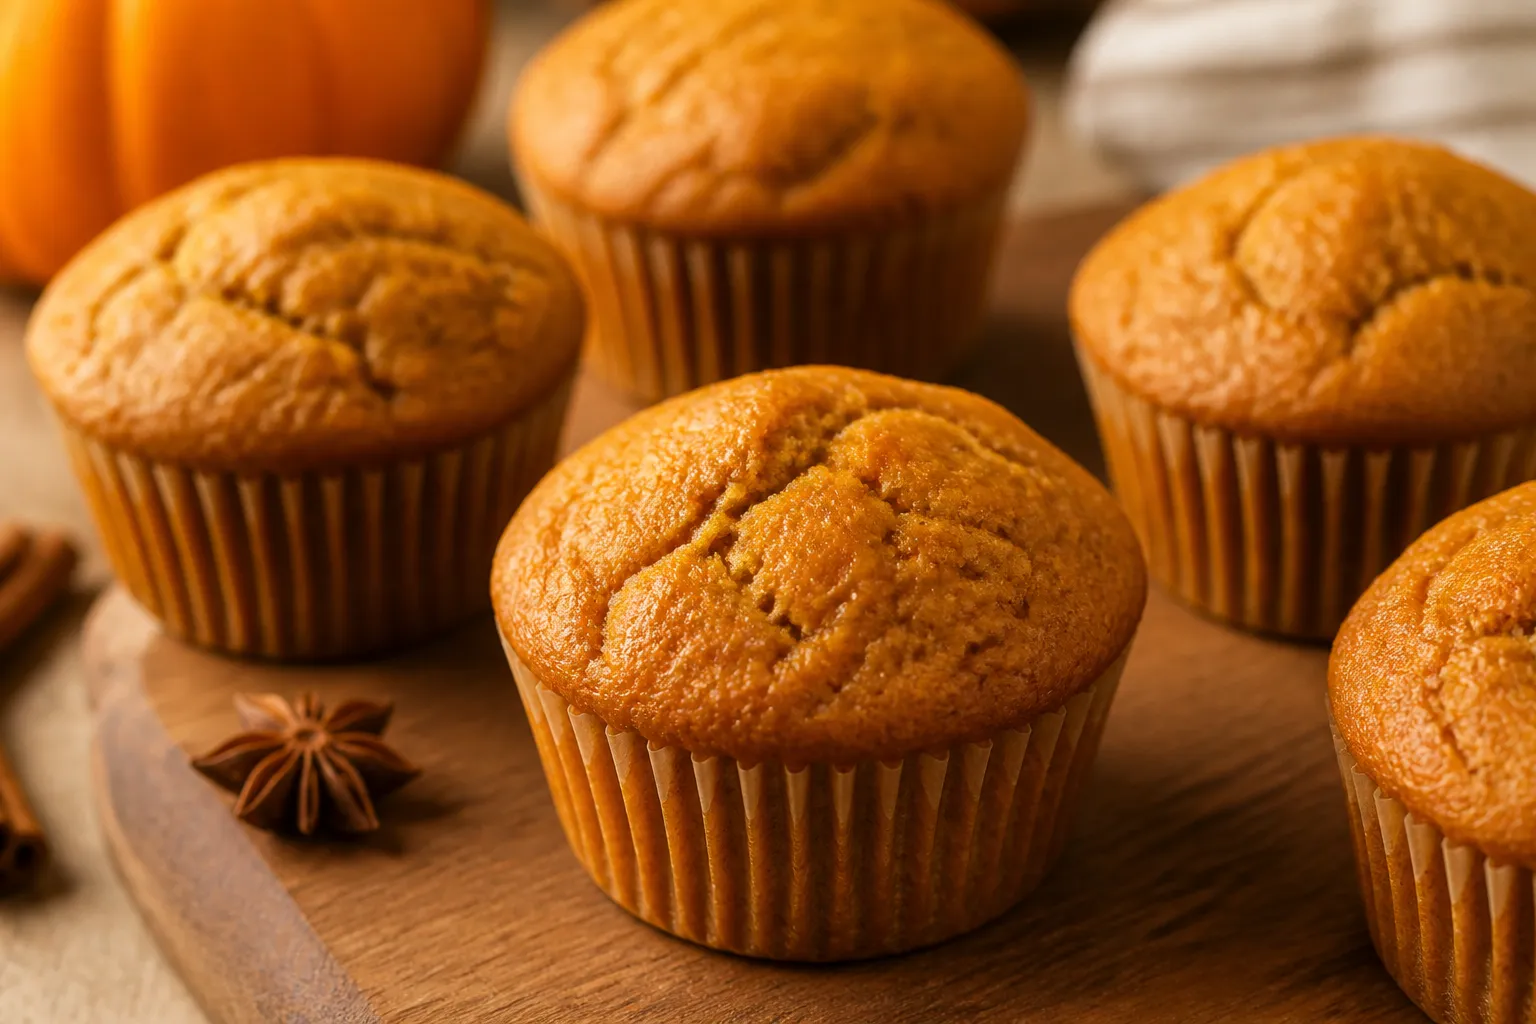
    These pumpkin muffins are the kind you make once and then keep sneaking from the container all week. They’re tender, full of warm spice, and surprisingly soft even on day three. No tricky steps, no special tools—just a bowl, a whisk, and a can of pumpkin.

    Whether you’re baking for a quick breakfast, a lunchbox treat, or a cozy afternoon snack, this recipe shows up every time. Expect bakery-style muffins with domed tops and a texture that stays moist longer than most.

    What Makes This Recipe So Good

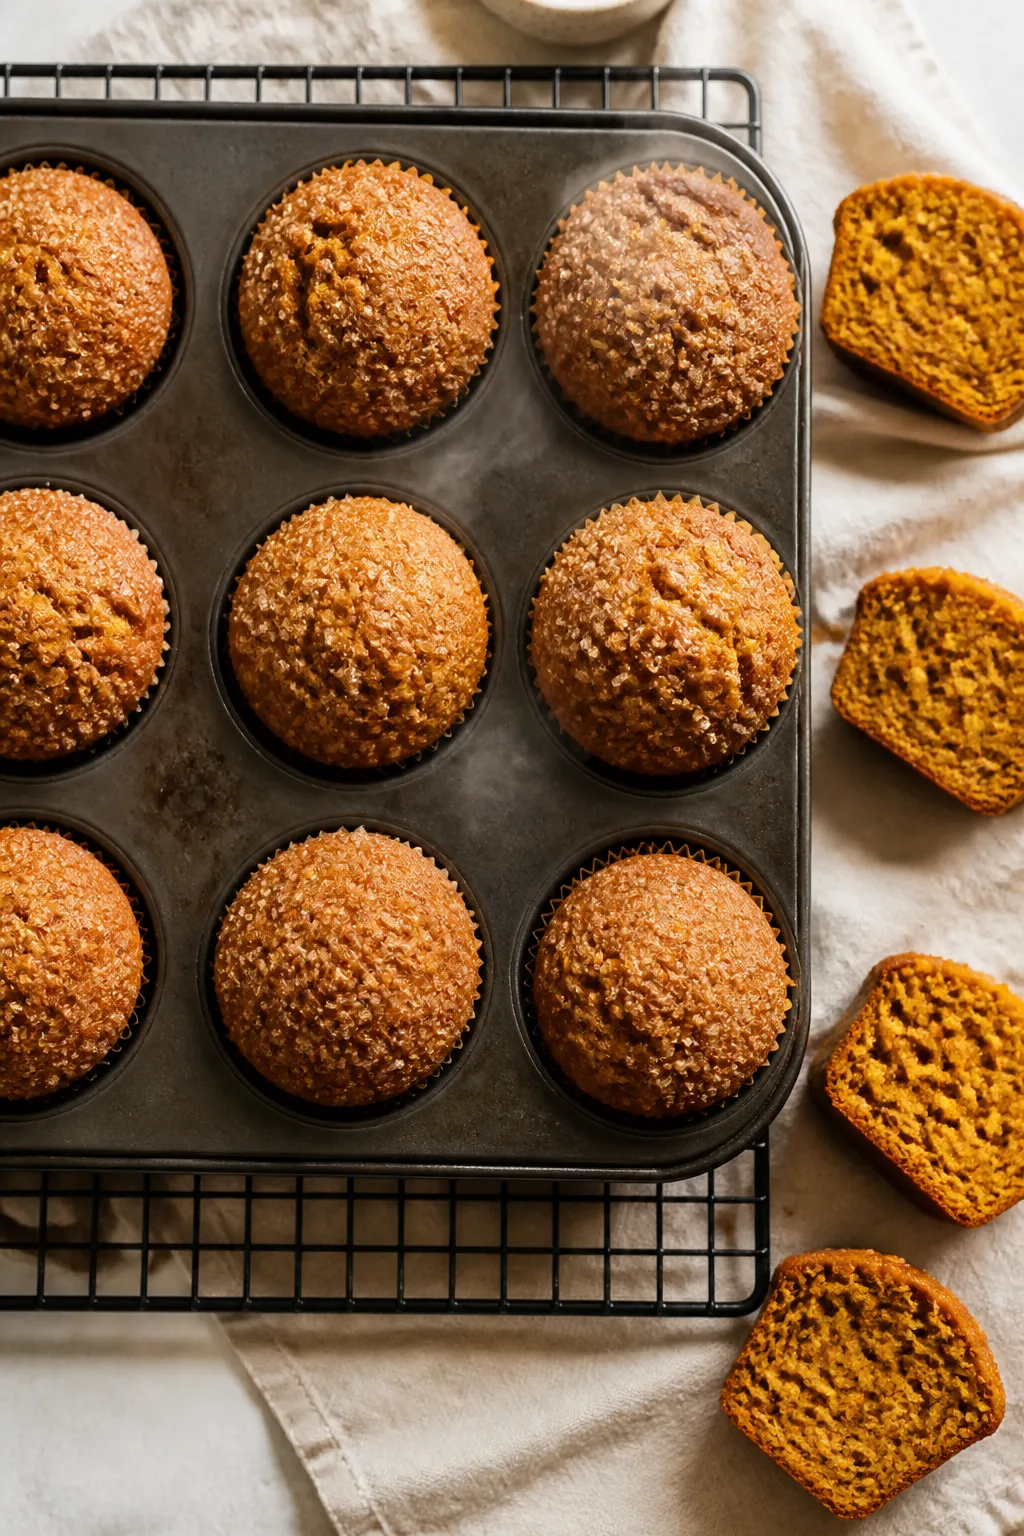
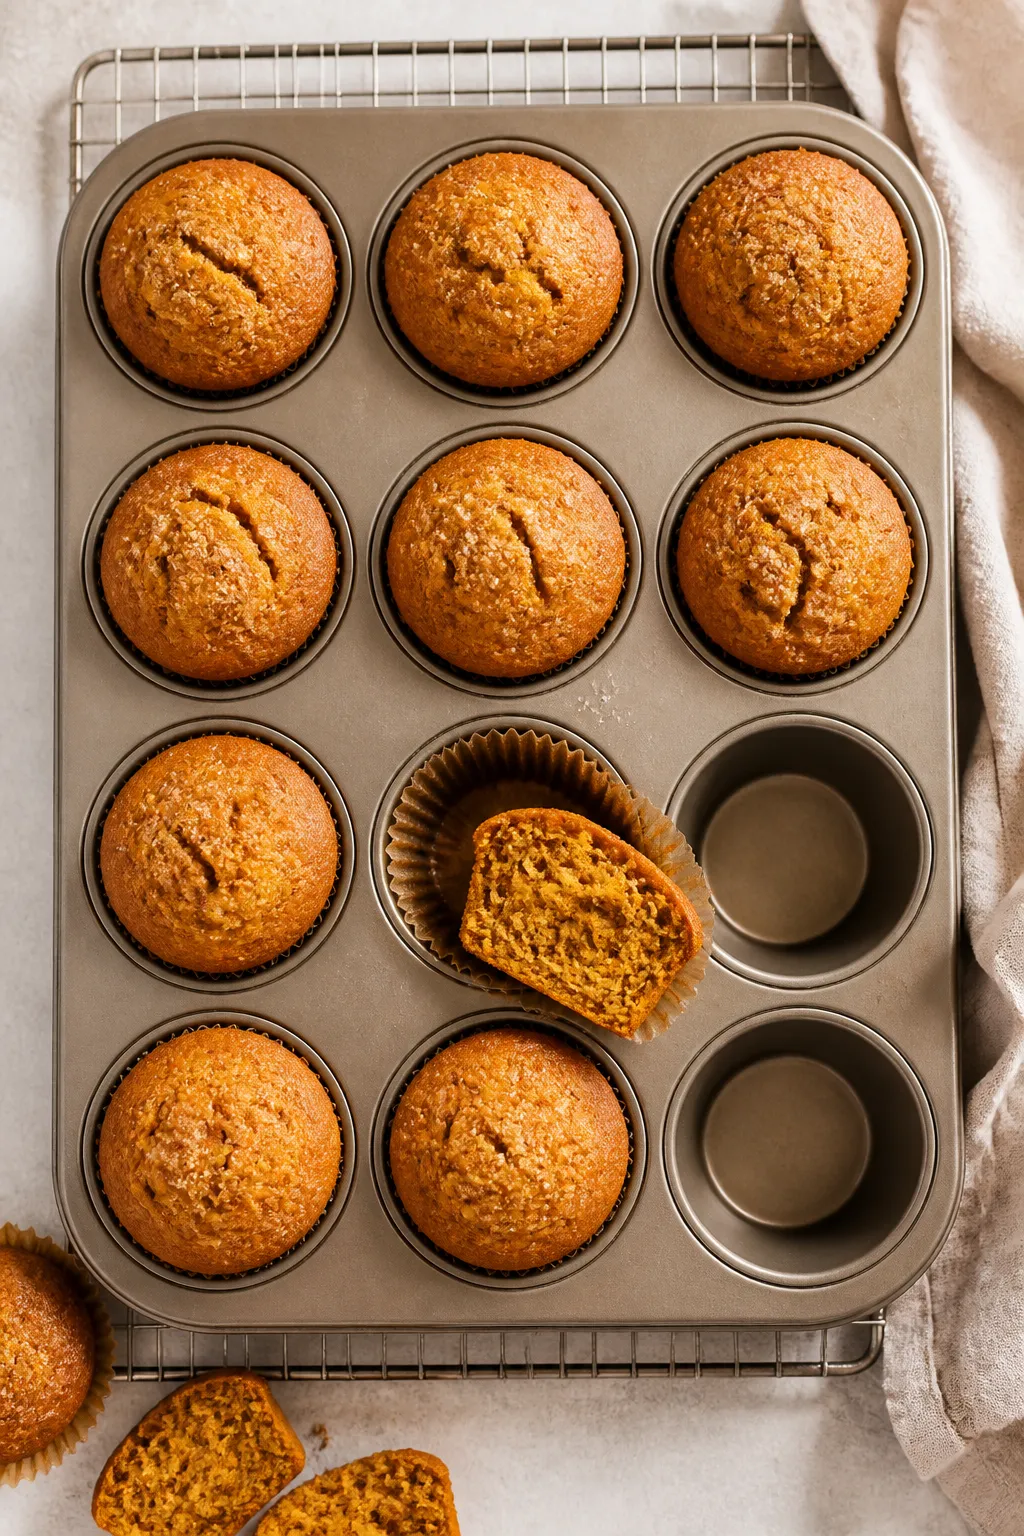
    Overhead shot of freshly baked pumpkin muffins with domed tops cooling in a muffin pan on a wire rac
    • Extra Moisture from Pumpkin: The pumpkin puree adds natural moisture, keeping the crumb soft for days.
    • Oil, Not Butter: Using oil helps the muffins stay tender and prevents them from drying out.
    • Just the Right Sweetness: A blend of brown and white sugar gives sweetness and a little caramel depth.
    • Warm Spices: Cinnamon, nutmeg, ginger, and cloves create that classic pumpkin flavor without overpowering it.
    • One-Bowl Friendly: Minimal mess and easy cleanup—great for weekday baking.

    What You’ll Need

    • 1 3/4 cups (220 g) all-purpose flour
    • 1 cup (200 g) granulated sugar
    • 1/2 cup (100 g) packed light brown sugar
    • 1 teaspoon baking soda
    • 1/2 teaspoon baking powder
    • 1/2 teaspoon fine salt
    • 2 teaspoons ground cinnamon
    • 1/2 teaspoon ground ginger
    • 1/4 teaspoon ground nutmeg
    • 1/8 teaspoon ground cloves (optional but great)
    • 2 large eggs, room temperature
    • 1 cup (240 ml) canned pumpkin puree (not pumpkin pie filling)
    • 1/2 cup (120 ml) neutral oil (canola, vegetable, or light olive oil)
    • 1/4 cup (60 ml) milk (dairy or unsweetened non-dairy)
    • 2 teaspoons vanilla extract
    • Optional add-ins: 1/2 cup chocolate chips, chopped pecans or walnuts, or raisins
    • Optional topping: Coarse sugar for a light crunch

    Instructions

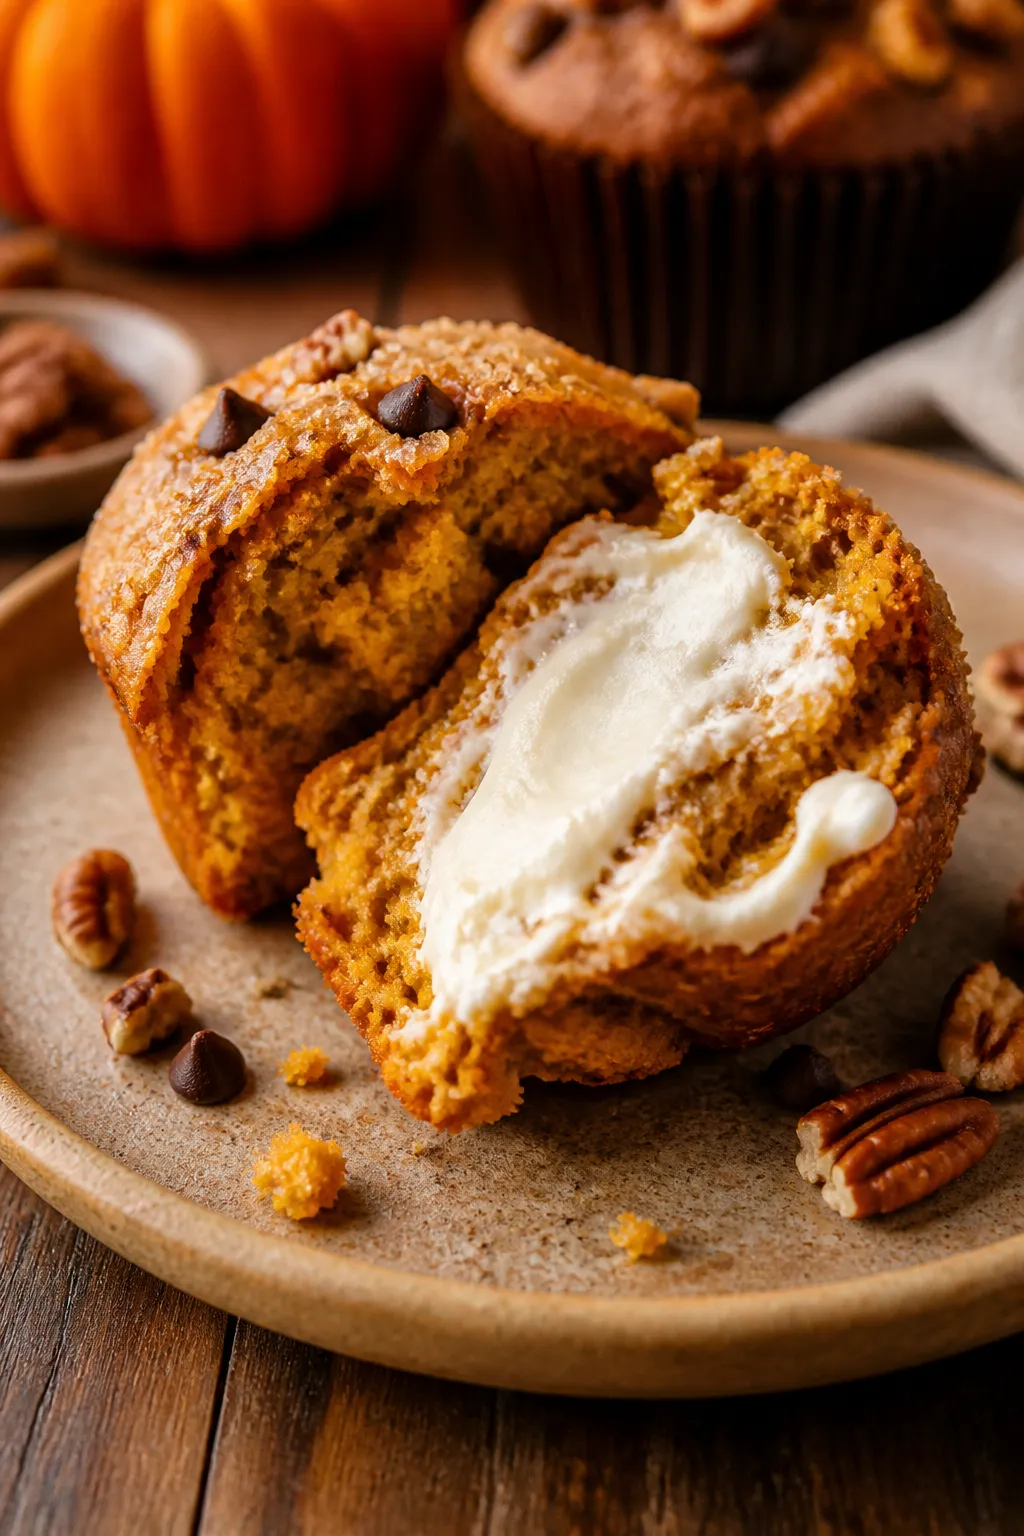
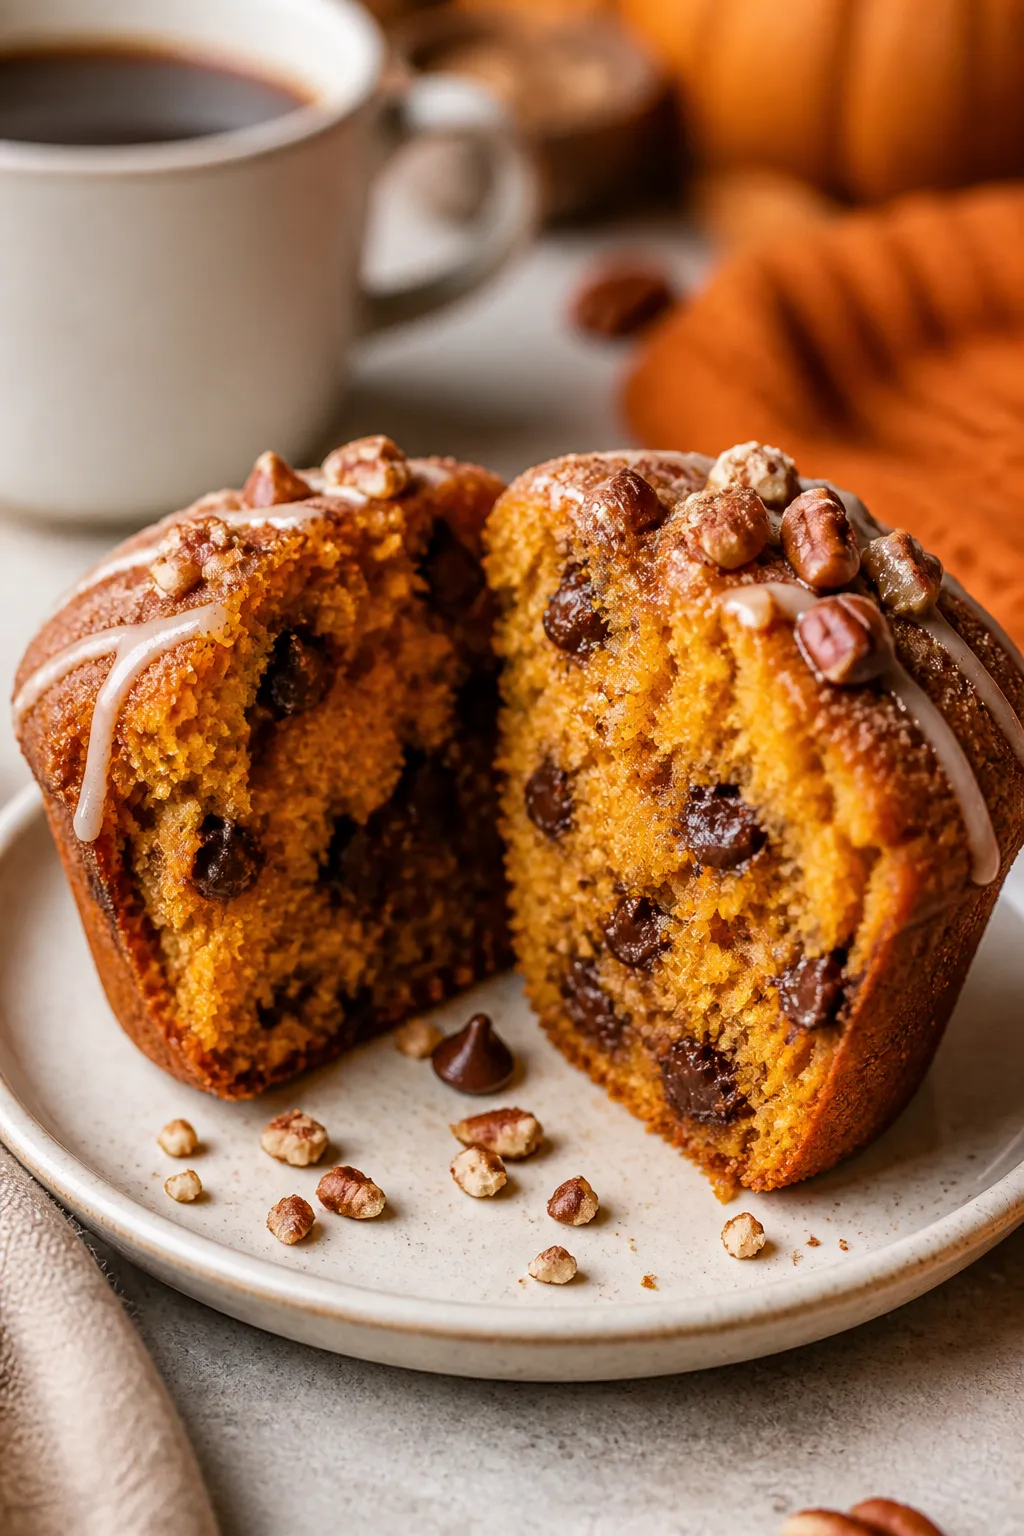
    Close-up detail of a plated pumpkin muffin split open and slathered lightly with softened cream chee
    1. Prep the pan and oven: Heat oven to 375°F (190°C). Line a 12-cup muffin pan with liners or grease well.
    2. Whisk dry ingredients: In a large bowl, whisk flour, both sugars, baking soda, baking powder, salt, cinnamon, ginger, nutmeg, and cloves until evenly combined.
    3. Mix wet ingredients: In a separate bowl or large measuring cup, whisk eggs, pumpkin puree, oil, milk, and vanilla until smooth.
    4. Combine gently: Pour wet ingredients into dry.

      Stir with a spatula just until you no longer see dry streaks. Do not overmix. Fold in any add-ins.

    5. Fill the cups: Divide batter evenly among the muffin cups, filling each about 3/4 full. Sprinkle with coarse sugar if using.
    6. Bake with a head start: Bake at 375°F (190°C) for 6 minutes, then reduce heat to 350°F (175°C) without opening the door. Bake another 10–12 minutes, until a toothpick comes out clean or with a few moist crumbs.
    7. Cool: Let muffins cool in the pan 5 minutes, then move to a rack.

      They’ll continue to set as they cool and stay very soft.

    Storage Instructions

    • Room temperature: Store cooled muffins in an airtight container for 3–4 days. Add a paper towel on the bottom and top to absorb excess moisture.
    • Refrigerator: Not necessary, but if your kitchen is warm, refrigerate up to 1 week. Warm briefly in the microwave to soften.
    • Freezer: Wrap each muffin and place in a freezer bag for up to 2 months.

      Thaw at room temp or microwave 20–30 seconds.

    Why This is Good for You

    • Pumpkin is nutrient-dense: It’s a good source of vitamin A and fiber, which supports eye health and digestion.
    • Balanced sweetness: You get a satisfying treat without going overboard on sugar.
    • Heart-friendly fats: Using oil instead of butter keeps the crumb tender and provides unsaturated fats.

    Common Mistakes to Avoid

    • Using pumpkin pie filling: It’s pre-sweetened and spiced, which throws off the recipe. Use pure pumpkin puree.
    • Overmixing: This makes muffins tough. Stir just until combined.
    • Overbaking: Check early.

      Pull them when a toothpick has moist crumbs, not a dry stick.

    • Skipping the temperature change: The initial higher heat helps create domed tops and a tender interior.
    • Storing while warm: Traps steam and turns the tops soggy. Cool completely first.

    Variations You Can Try

    • Chocolate Chip: Fold in 1/2–3/4 cup semi-sweet or dark chips.
    • Pecan Streusel: Top with a quick mix of chopped pecans, brown sugar, flour, and a little melted butter.
    • Cream Cheese Swirl: Dollop sweetened cream cheese (softened cream cheese, sugar, vanilla) and swirl lightly.
    • Whole-Wheat Boost: Swap 1/2 cup all-purpose flour for whole-wheat pastry flour for extra fiber.
    • Gluten-Free: Use a 1:1 gluten-free baking blend and add 1 tablespoon milk if the batter seems thick.
    • Dairy-Free: Choose non-dairy milk and verify add-ins are dairy-free.

    FAQ

    Can I use fresh pumpkin instead of canned?

    Yes. Roast, puree, and drain well to remove excess water.

    Aim for a thick, canned-like texture so the muffins aren’t gummy.

    Why did my muffins sink?

    Usually it’s from underbaking or an old leavening agent. Check your baking soda and powder are fresh, and bake until the centers spring back lightly.

    Can I reduce the sugar?

    You can cut the granulated sugar by 1/4 cup without hurting texture. Any more and the muffins may be less moist and won’t brown as well.

    How do I get taller muffin tops?

    Fill the cups 3/4 full and use the high-then-lower oven temperature method.

    Also avoid overmixing, which deflates the batter.

    Can I make mini muffins?

    Yes. Bake at 375°F (190°C) for 4 minutes, then 350°F (175°C) for 6–8 minutes total, or until set.

    Final Thoughts

    These moist pumpkin muffins bring all the cozy flavor with none of the hassle. They’re simple, reliable, and truly stay soft for days, making them perfect for make-ahead breakfasts and snacks.

    Keep a batch on the counter, and you’ll have a little taste of fall ready whenever you want it.

    Moist Pumpkin Muffins That Stay Soft for Days – A Cozy, Reliable Fall Treat

    Prep Time 15 minutes
    Cook Time 20 minutes
    Total Time 35 minutes
    Servings 12 servings

    Ingredients
      

    • 1 3/4 cups (220 g) all-purpose flour
    • 1 cup (200 g) granulated sugar
    • 1/2 cup (100 g) packed light brown sugar
    • 1 teaspoon baking soda
    • 1/2 teaspoon baking powder
    • 1/2 teaspoon fine salt
    • 2 teaspoons ground cinnamon
    • 1/2 teaspoon ground ginger
    • 1/4 teaspoon ground nutmeg
    • 1/8 teaspoon ground cloves (optional but great)
    • 2 large eggs, room temperature
    • 1 cup (240 ml) canned pumpkin puree (not pumpkin pie filling)
    • 1/2 cup (120 ml) neutral oil (canola, vegetable, or light olive oil)
    • 1/4 cup (60 ml) milk (dairy or unsweetened non-dairy)
    • 2 teaspoons vanilla extract
    • Optional add-ins: 1/2 cup chocolate chips, chopped pecans or walnuts, or raisins
    • Optional topping: Coarse sugar for a light crunch

    Instructions
     

    • Prep the pan and oven: Heat oven to 375°F (190°C). Line a 12-cup muffin pan with liners or grease well.
    • Whisk dry ingredients: In a large bowl, whisk flour, both sugars, baking soda, baking powder, salt, cinnamon, ginger, nutmeg, and cloves until evenly combined.
    • Mix wet ingredients: In a separate bowl or large measuring cup, whisk eggs, pumpkin puree, oil, milk, and vanilla until smooth.
    • Combine gently: Pour wet ingredients into dry. Stir with a spatula just until you no longer see dry streaks. Do not overmix. Fold in any add-ins.
    • Fill the cups: Divide batter evenly among the muffin cups, filling each about 3/4 full. Sprinkle with coarse sugar if using.
    • Bake with a head start: Bake at 375°F (190°C) for 6 minutes, then reduce heat to 350°F (175°C) without opening the door. Bake another 10–12 minutes, until a toothpick comes out clean or with a few moist crumbs.
    • Cool: Let muffins cool in the pan 5 minutes, then move to a rack. They’ll continue to set as they cool and stay very soft.
  • Homemade Pumpkin Spice Muffins for Fall – Cozy, Moist, and Easy

    Homemade Pumpkin Spice Muffins for Fall – Cozy, Moist, and Easy

    Nothing says fall like a warm kitchen and the sweet smell of pumpkin spice. These homemade pumpkin spice muffins are soft, tender, and full of flavor without being overly sweet. They’re easy enough for a weekday breakfast yet special enough for a weekend treat.

    You’ll only need pantry basics and one bowl for the wet ingredients and one for the dry. Bake a batch, and your home will smell like autumn in under 30 minutes.

    Why This Recipe Works

    Close-up detail shot: A just-baked pumpkin spice muffin torn open to reveal its ultra-moist, tender
    • Moist texture: Pumpkin puree adds natural moisture, so the muffins stay soft for days.
    • Balanced spice: A blend of cinnamon, nutmeg, ginger, and cloves gives warmth without overpowering the pumpkin.
    • Simple method: Two bowls, no mixer. Stir, scoop, and bake—great for busy mornings.
    • Just-sweet-enough: Brown sugar deepens flavor and keeps the muffins tender.
    • Flexible batter: Add chocolate chips, nuts, or a streusel topping if you want extra flair.

    Ingredients

    • 1 3/4 cups (220 g) all-purpose flour
    • 1 teaspoon baking powder
    • 1/2 teaspoon baking soda
    • 1/2 teaspoon fine salt
    • 2 teaspoons ground cinnamon
    • 1/2 teaspoon ground nutmeg
    • 1/2 teaspoon ground ginger
    • 1/4 teaspoon ground cloves (or allspice)
    • 3/4 cup (150 g) packed light brown sugar
    • 2 large eggs, room temperature
    • 1 cup (240 g) pumpkin puree (not pumpkin pie filling)
    • 1/2 cup (120 ml) neutral oil (such as canola or vegetable) or melted coconut oil
    • 1/4 cup (60 ml) milk (dairy or non-dairy)
    • 1 teaspoon pure vanilla extract
    • Optional mix-ins: 1/2 cup chocolate chips, chopped pecans, or walnuts
    • Optional topping: coarse sugar or simple cinnamon-sugar (1 tablespoon sugar + 1/4 teaspoon cinnamon)

    How to Make It

    Tasty top view, process-in-action: Overhead shot of a 12-cup muffin tin fresh from the oven with dom
    1. Preheat and prep: Heat oven to 375°F (190°C).

      Line a 12-cup muffin tin with paper liners or grease lightly.

    2. Whisk dry ingredients: In a large bowl, whisk flour, baking powder, baking soda, salt, cinnamon, nutmeg, ginger, and cloves until well combined.
    3. Mix wet ingredients: In a separate bowl, whisk brown sugar and eggs until smooth. Add pumpkin puree, oil, milk, and vanilla. Whisk until just blended.
    4. Combine: Pour wet ingredients into the dry.

      Stir with a spatula until the flour disappears. Do not overmix. Fold in any mix-ins.

    5. Fill the cups: Divide batter evenly among the 12 cups, filling about 3/4 full. Sprinkle tops with coarse sugar or cinnamon-sugar if using.
    6. Bake: Bake 17–20 minutes, or until a toothpick inserted in the center comes out clean or with a few moist crumbs.
    7. Cool: Let muffins rest in the pan for 5 minutes, then transfer to a rack to cool.

      Enjoy warm or at room temperature.

    Storage Instructions

    • Room temperature: Store in an airtight container for up to 3 days. Add a paper towel inside the container to absorb excess moisture.
    • Refrigerator: Keeps for 5–6 days. Warm briefly in the microwave to refresh.
    • Freezer: Freeze individually wrapped muffins for up to 3 months.

      Thaw at room temperature or microwave 20–30 seconds.

    Benefits of This Recipe

    • Nutrient boost: Pumpkin adds fiber, vitamin A, and a little natural sweetness.
    • Great for meal prep: Bakes quickly and stores well for grab-and-go breakfasts or snacks.
    • Kid-friendly: Soft texture and warm spice make these a hit with picky eaters.
    • Customizable: Easily adapt for different tastes or dietary needs.

    Pitfalls to Watch Out For

    • Overmixing the batter: This can make muffins tough. Stir just until combined.
    • Using pumpkin pie filling: It’s pre-sweetened and spiced. Use plain pumpkin puree.
    • Overbaking: Even a few extra minutes can dry them out.

      Start checking at 17 minutes.

    • Skipping salt: A little salt sharpens the spice and balances sweetness.

    Variations You Can Try

    • Chocolate chip: Fold in 1/2 cup semi-sweet or dark chocolate chips.
    • Pecan streusel: Mix 2 tablespoons cold butter, 1/4 cup flour, 2 tablespoons brown sugar, cinnamon, and chopped pecans. Crumble on top before baking.
    • Maple glaze: Whisk 1/2 cup powdered sugar with 1–2 tablespoons pure maple syrup. Drizzle over cooled muffins.
    • Whole wheat boost: Swap half the all-purpose flour for white whole wheat flour.

      Add 1–2 tablespoons extra milk if needed.

    • Dairy-free: Use non-dairy milk and ensure your chocolate chips are dairy-free.
    • Less sugar: Reduce brown sugar to 1/2 cup for a lightly sweet breakfast muffin.

    FAQ

    Can I use fresh pumpkin instead of canned?

    Yes. Roast and puree sugar pumpkin or kabocha, then drain excess liquid with a paper towel-lined sieve. Aim for a thick, smooth puree for the best texture.

    What if I don’t have all the spices?

    Use 2–2 1/2 teaspoons pumpkin pie spice and reduce or omit individual spices.

    The flavor will still be warm and cozy.

    How do I make them gluten-free?

    Use a 1:1 gluten-free all-purpose flour blend with xanthan gum. The muffins may be slightly more delicate, but still tasty.

    Why did my muffins sink?

    They may have been underbaked, overmixed, or your leaveners were old. Check baking powder and soda freshness and bake until the tops spring back.

    Can I double the recipe?

    Absolutely.

    Bake in two muffin tins or in batches. Avoid overfilling cups, and rotate pans halfway for even baking.

    How can I get taller muffin tops?

    Fill cups 3/4 full and bake at 375°F. A slightly higher initial heat helps the batter lift and set.

    Are these good for lunchboxes?

    Yes.

    They hold up well and don’t crumble easily. Skip the glaze to keep them less messy.

    Wrapping Up

    These homemade pumpkin spice muffins are everything you want in a fall bake: moist, warmly spiced, and wonderfully simple. With pantry ingredients and a quick mix, you’ll have a cozy treat ready in under half an hour.

    Make a batch today and enjoy that perfect autumn bite all week long.

    Homemade Pumpkin Spice Muffins for Fall – Cozy, Moist, and Easy

    Prep Time 15 minutes
    Cook Time 20 minutes
    Total Time 35 minutes
    Servings 12 servings

    Ingredients
      

    • 1 3/4 cups (220 g) all-purpose flour
    • 1 teaspoon baking powder
    • 1/2 teaspoon baking soda
    • 1/2 teaspoon fine salt
    • 2 teaspoons ground cinnamon
    • 1/2 teaspoon ground nutmeg
    • 1/2 teaspoon ground ginger
    • 1/4 teaspoon ground cloves (or allspice)
    • 3/4 cup (150 g) packed light brown sugar
    • 2 large eggs, room temperature
    • 1 cup (240 g) pumpkin puree (not pumpkin pie filling)
    • 1/2 cup (120 ml) neutral oil (such as canola or vegetable) or melted coconut oil
    • 1/4 cup (60 ml) milk (dairy or non-dairy)
    • 1 teaspoon pure vanilla extract
    • Optional mix-ins: 1/2 cup chocolate chips, chopped pecans, or walnuts
    • Optional topping: coarse sugar or simple cinnamon-sugar (1 tablespoon sugar + 1/4 teaspoon cinnamon)

    Instructions
     

    • Preheat and prep: Heat oven to 375°F (190°C). Line a 12-cup muffin tin with paper liners or grease lightly.
    • Whisk dry ingredients: In a large bowl, whisk flour, baking powder, baking soda, salt, cinnamon, nutmeg, ginger, and cloves until well combined.
    • Mix wet ingredients: In a separate bowl, whisk brown sugar and eggs until smooth. Add pumpkin puree, oil, milk, and vanilla. Whisk until just blended.
    • Combine: Pour wet ingredients into the dry. Stir with a spatula until the flour disappears. Do not overmix. Fold in any mix-ins.
    • Fill the cups: Divide batter evenly among the 12 cups, filling about 3/4 full. Sprinkle tops with coarse sugar or cinnamon-sugar if using.
    • Bake: Bake 17–20 minutes, or until a toothpick inserted in the center comes out clean or with a few moist crumbs.
    • Cool: Let muffins rest in the pan for 5 minutes, then transfer to a rack to cool. Enjoy warm or at room temperature.
  • Easy Gluten Free Pumpkin Muffins Recipe – Soft, Spiced, and Ready Fast

    Easy Gluten Free Pumpkin Muffins Recipe – Soft, Spiced, and Ready Fast

    These gluten free pumpkin muffins are soft, warmly spiced, and come together with simple pantry staples. No fancy equipment, just a bowl, a whisk, and a muffin pan. They bake up tender and moist, with that cozy pumpkin flavor everyone loves.

    Whether you’re gluten free or baking for someone who is, this recipe is friendly, flexible, and reliably good. Make a batch for breakfast, snacks, or your coffee break.

    What Makes This Special

    Overhead shot of freshly baked gluten free pumpkin muffins cooling in a 12-cup muffin tin on a wire
    • One-bowl batter: Quick prep and easy cleanup.
    • Great texture: Moist, tender crumb without gumminess.
    • Balanced spice: Pumpkin shines without being overly sweet.
    • Freezer-friendly: Stash extras for busy mornings.
    • Customizable: Works with mix-ins like chocolate chips or nuts.

    Ingredients

    • 1 3/4 cups gluten free all-purpose flour blend (with xanthan gum)
    • 1 teaspoon baking powder
    • 1/2 teaspoon baking soda
    • 1/2 teaspoon fine sea salt
    • 1 1/2 teaspoons ground cinnamon
    • 1/2 teaspoon ground ginger
    • 1/4 teaspoon ground nutmeg
    • 1/8 teaspoon ground cloves (optional)
    • 3/4 cup light brown sugar, packed
    • 2 large eggs, room temperature
    • 1 cup canned pumpkin puree (not pumpkin pie filling)
    • 1/3 cup neutral oil (such as avocado or canola) or melted coconut oil
    • 1/3 cup milk of choice (dairy or unsweetened almond/oat), room temperature
    • 2 teaspoons pure vanilla extract
    • Optional mix-ins: 1/2 cup mini chocolate chips, chopped pecans, or dried cranberries
    • Optional topping: 2 tablespoons coarse sugar or a light cinnamon sugar sprinkle

    How to Make It

    Close-up detail of a split gluten free pumpkin muffin on a small ceramic plate, interior crumb moist
    1. Heat the oven: Preheat to 350°F (175°C). Line a 12-cup muffin tin with paper liners or grease well.
    2. Whisk dry ingredients: In a large bowl, whisk the gluten free flour, baking powder, baking soda, salt, cinnamon, ginger, nutmeg, and cloves.
    3. Mix wet ingredients: Add brown sugar, eggs, pumpkin puree, oil, milk, and vanilla to the bowl.

      Whisk until smooth and combined. Do not overmix.

    4. Add mix-ins: If using chocolate chips or nuts, fold them in gently with a spatula.
    5. Fill the pan: Divide batter evenly among the cups, about 3/4 full. Sprinkle tops with coarse sugar if you like a slight crunch.
    6. Bake: Bake for 18–22 minutes, until the tops spring back and a toothpick comes out clean or with a few moist crumbs.
    7. Cool: Let muffins cool in the pan for 5 minutes, then transfer to a wire rack to cool completely.

      This helps set the structure.

    Keeping It Fresh

    Store cooled muffins in an airtight container at room temperature for up to 2 days. For longer storage, refrigerate up to 5 days; warm briefly in the microwave to soften.

    To freeze: Wrap muffins individually and freeze up to 2 months. Thaw at room temperature or reheat from frozen for 25–30 seconds in the microwave or 8–10 minutes in a 300°F (150°C) oven.

    Why This is Good for You

    • Pumpkin power: Naturally rich in vitamin A, fiber, and antioxidants.
    • Moderate sweetness: Balanced sugar so flavor, not just sweetness, leads.
    • Gluten free done right: A solid flour blend and proper leavening deliver a satisfying, bakery-style texture.

    What Not to Do

    • Don’t use pumpkin pie filling: It’s pre-sweetened and spiced, which throws off the recipe.
    • Don’t skip xanthan gum if your blend lacks it: You’ll get crumbly muffins.

      Add 1/2 teaspoon if needed.

    • Don’t overmix: Stir just until combined to avoid dense, rubbery muffins.
    • Don’t overbake: Check at 18 minutes. Dry muffins happen fast with gluten free batter.
    • Don’t fill liners to the brim: Aim for 3/4 full to prevent spillover and uneven domes.

    Variations You Can Try

    • Chocolate Chip Pumpkin: Fold in 1/2–3/4 cup mini chocolate chips.
    • Pecan Streusel: Mix 2 tablespoons brown sugar, 2 tablespoons gluten free flour, 1 tablespoon cold butter, and 1/4 cup chopped pecans. Crumble on top before baking.
    • Maple Glaze: Whisk 1/2 cup powdered sugar with 1–2 tablespoons pure maple syrup and a pinch of salt.

      Drizzle over cooled muffins.

    • Dairy-Free: Use plant milk and coconut oil. Choose dairy-free chocolate if adding chips.
    • Higher Fiber: Replace 1/4 cup of the flour with certified gluten free oat flour.
    • Extra Spice: Add 1/2 teaspoon pumpkin pie spice for a bolder flavor.

    FAQ

    Can I make these egg-free?

    Yes. Replace each egg with a flax egg (1 tablespoon ground flaxseed mixed with 2 1/2 tablespoons warm water, rested 5 minutes).

    Expect a slightly denser crumb but still moist and tasty.

    Which gluten free flour works best?

    A 1:1 gluten free all-purpose blend with xanthan gum works best. Popular store blends labeled “cup for cup” or “measure for measure” are ideal. Avoid straight rice flour.

    Can I cut the sugar?

    You can reduce brown sugar to 1/2 cup without major texture issues.

    The muffins will be less sweet and the spice may feel stronger.

    How do I get taller domes?

    Start baking at 400°F (205°C) for 5 minutes, then reduce to 350°F (175°C) for the remaining time. This heat boost encourages lift. Watch closely to avoid overbaking.

    Is fresh pumpkin better than canned?

    Canned pumpkin is consistent and dependable.

    If using homemade puree, drain excess moisture with paper towels so the batter isn’t too wet.

    Can I make mini muffins?

    Yes. Bake at 350°F (175°C) for 10–13 minutes. Check early; minis cook fast.

    Wrapping Up

    These easy gluten free pumpkin muffins deliver cozy flavor, a soft crumb, and simple steps you can trust.

    Keep the ingredients on hand and you’ll have a warm batch ready any time cravings hit. Once you make them, don’t be surprised if they become your go-to fall bake—or an anytime favorite.

    Easy Gluten Free Pumpkin Muffins Recipe – Soft, Spiced, and Ready Fast

    Prep Time 10 minutes
    Cook Time 20 minutes
    Total Time 30 minutes
    Servings 12 servings

    Ingredients
      

    • 1 3/4 cups gluten free all-purpose flour blend (with xanthan gum)
    • 1 teaspoon baking powder
    • 1/2 teaspoon baking soda
    • 1/2 teaspoon fine sea salt
    • 1 1/2 teaspoons ground cinnamon
    • 1/2 teaspoon ground ginger
    • 1/4 teaspoon ground nutmeg
    • 1/8 teaspoon ground cloves (optional)
    • 3/4 cup light brown sugar, packed
    • 2 large eggs, room temperature
    • 1 cup canned pumpkin puree (not pumpkin pie filling)
    • 1/3 cup neutral oil (such as avocado or canola) or melted coconut oil
    • 1/3 cup milk of choice (dairy or unsweetened almond/oat), room temperature
    • 2 teaspoons pure vanilla extract
    • Optional mix-ins: 1/2 cup mini chocolate chips, chopped pecans, or dried cranberries
    • Optional topping: 2 tablespoons coarse sugar or a light cinnamon sugar sprinkle

    Instructions
     

    • Heat the oven: Preheat to 350°F (175°C). Line a 12-cup muffin tin with paper liners or grease well.
    • Whisk dry ingredients: In a large bowl, whisk the gluten free flour, baking powder, baking soda, salt, cinnamon, ginger, nutmeg, and cloves.
    • Mix wet ingredients: Add brown sugar, eggs, pumpkin puree, oil, milk, and vanilla to the bowl. Whisk until smooth and combined. Do not overmix.
    • Add mix-ins: If using chocolate chips or nuts, fold them in gently with a spatula.
    • Fill the pan: Divide batter evenly among the cups, about 3/4 full. Sprinkle tops with coarse sugar if you like a slight crunch.
    • Bake: Bake for 18–22 minutes, until the tops spring back and a toothpick comes out clean or with a few moist crumbs.
    • Cool: Let muffins cool in the pan for 5 minutes, then transfer to a wire rack to cool completely. This helps set the structure.