Blog

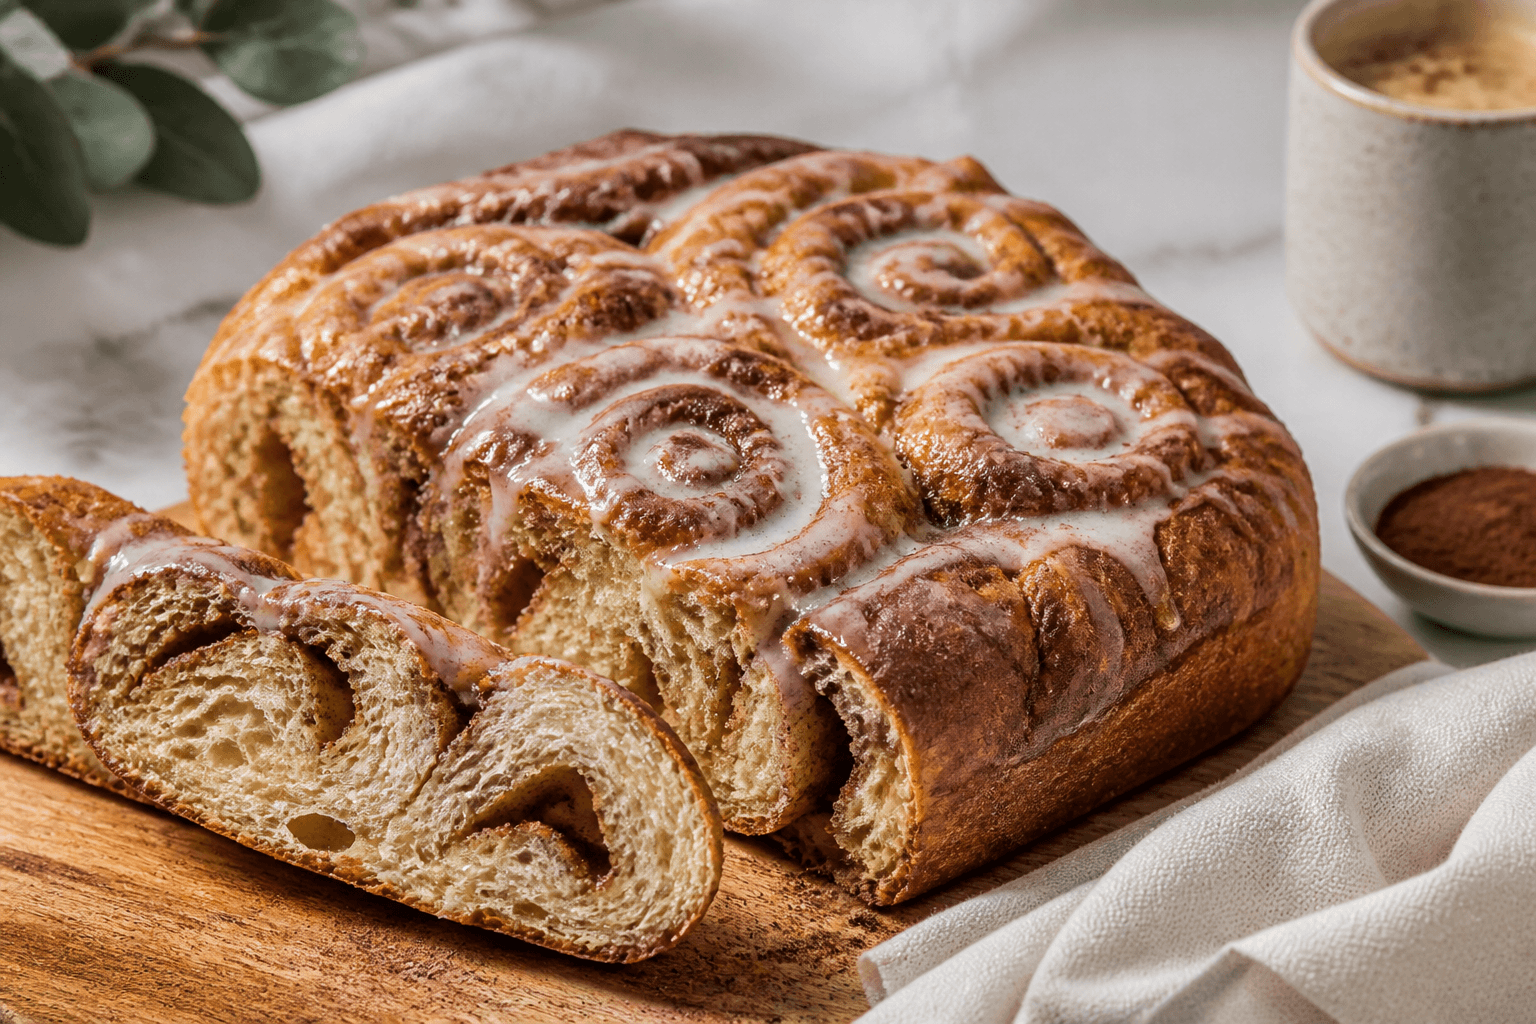
  • Cinnamon Roll Focaccia Sourdough – Soft, Swirled, and Gently Sweet

    Cinnamon Roll Focaccia Sourdough – Soft, Swirled, and Gently Sweet

    This cinnamon roll focaccia sourdough brings two comfort bakes together: the crackly-edged chew of focaccia and the gooey swirl of a cinnamon roll. It’s not too sweet, so it works for breakfast, brunch, or a cozy dessert. The sourdough tang balances the buttery cinnamon sugar and keeps the crumb light.

    If you’re new to enriched sourdough, this is a forgiving place to start. You’ll mix, rest, swirl, and bake—no fancy shaping required.

    What Makes This Special

    • Focaccia texture, cinnamon roll flavor: Airy crumb, golden crust, and a ribbon of cinnamon sugar in every bite.
    • No heavy frosting needed: A simple glaze or honey drizzle keeps it bright and not cloying.
    • Sourdough you can schedule: Long, slow fermentation builds flavor and fits around your day.
    • Easy pan bake: No tight shaping—just press, swirl, and bake in a well-oiled pan.

    Ingredients

    • For the dough:
      • 400 g bread flour
      • 50 g whole wheat flour
      • 350 g water, room temperature
      • 100 g active sourdough starter (100% hydration, bubbly and doubling)
      • 8 g fine sea salt
      • 30 g olive oil (plus more for the pan and dimpling)
      • 25 g granulated sugar or light brown sugar
      • 1 tsp vanilla extract (optional)
    • For the cinnamon swirl:
      • 70 g softened unsalted butter
      • 110 g light brown sugar
      • 2–2.5 tsp ground cinnamon
      • Pinch of salt
    • For the glaze (optional):
      • 80 g powdered sugar
      • 1–2 tbsp milk or cream
      • 1/2 tsp vanilla extract
      • Pinch of salt

    How to Make It

    1. Mix the dough: In a large bowl, whisk water, starter, sugar, olive oil, and vanilla. Add flours and mix until no dry spots remain.

      Rest 30 minutes, then sprinkle in salt and squish it through the dough until incorporated.

    2. Strengthen with folds: Over the next 60–90 minutes, do 3 sets of stretch-and-folds every 20–30 minutes. The dough should become smoother and bouncy.
    3. Bulk ferment: Cover and rest at warm room temp (75–78°F/24–26°C) until puffy and roughly doubled, about 3–4 hours total from mix, depending on your starter and room temp.
    4. Cold retard (optional but recommended): Chill the covered dough 8–16 hours. This boosts flavor and makes handling easier.
    5. Prep the pan: Generously oil a 9×13-inch pan or two 8–9 inch round pans.

      Pour in 2–3 tbsp olive oil and tilt to coat.

    6. Pan the dough: Gently ease the dough into the pan. Let it relax 20 minutes, then press it toward the corners with oiled fingers. If it springs back, rest another 15 minutes and try again.
    7. Make the cinnamon filling: Stir butter, brown sugar, cinnamon, and a pinch of salt into a spreadable paste.
    8. Dimple and swirl: With oiled fingertips, deeply dimple the dough.

      Dot or pipe the cinnamon paste into the dimples and in loose swirls across the top. Don’t overdo it in one spot or it may burn.

    9. Final proof: Let the dough rise, uncovered, until noticeably puffy and jiggly, 45–90 minutes depending on temperature. It should rise around the edges of the pan and hold dimples.
    10. Bake: Preheat the oven to 425°F (220°C).

      Bake 22–28 minutes until the top is deep golden and the cinnamon swirls are bubbling but not scorched. If browning fast, tent loosely with foil for the last 5–8 minutes.

    11. Cool and glaze: Cool in the pan 15–20 minutes. Whisk glaze ingredients to a thick drizzle and streak it over the warm bread.

      Slice into squares once set.

    Storage Instructions

    • Room temperature: Keep covered at cool room temp for up to 2 days. Rewarm slices at 300°F (150°C) for 6–8 minutes.
    • Freeze: Wrap individual pieces tightly and freeze up to 2 months. Thaw at room temp, then refresh in a warm oven.
    • Avoid the fridge: Refrigeration dries the crumb.

      Freeze instead if storing longer than 2 days.

    Why This is Good for You

    • Sourdough fermentation: Longer proofing can make wheat easier to digest for some and develops complex flavor without excessive sugar.
    • Balanced sweetness: You get a satisfying treat with less icing and more spice-driven flavor.
    • Olive oil fat: Swapping part of the butter load for olive oil keeps things light yet tender.

    Pitfalls to Watch Out For

    • Underproofing: Dense crumb and tight bubbles. Look for a puffy, wobbly dough that slowly springs back when poked.
    • Overloading cinnamon paste: Thick pockets can burn or leave gummy spots. Spread and swirl evenly.
    • Too little pan oil: Focaccia loves oil.

      Skimping can cause sticking and a pale bottom.

    • Rushing the bake: Pulling too soon leads to a damp center. Aim for deep golden edges and bubbling swirls.

    Alternatives

    • Cardamom-maple: Swap half the cinnamon for cardamom and use maple sugar.
    • Cream cheese drizzle: Mix softened cream cheese with powdered sugar, vanilla, and a splash of milk for a tangy topping.
    • Raisin or pecan add-ins: Scatter 1/2 cup over the top before baking for extra texture.
    • Dairy-free: Use vegan butter in the swirl and plant milk in the glaze.
    • No whole wheat: Replace with bread flour and reduce water by 10–15 g if needed.

    FAQ

    Can I make this same day without the cold retard?

    Yes. Let the dough rise at warm room temp until puffy, then proceed.

    Flavor will be milder and the dough a bit softer to handle, but it will still be delicious.

    How do I know my starter is ready?

    It should be active, bubbly, and doubled within 4–6 hours of feeding at room temp. A small spoonful should float in water, though the float test isn’t perfect.

    Can I use instant yeast instead of sourdough?

    You can. Use 7 g instant yeast, reduce water to 330 g, and skip the long bulk.

    Proof until doubled, then proceed with shaping and baking.

    Will the sugar kill my starter?

    No. The sugar is diluted in the dough and mainly feeds the yeast. Extremely sugary doughs can slow fermentation, but this formula is balanced.

    How do I prevent burnt sugar on top?

    Don’t pile the filling in thick mounds.

    Swirl thinly, bake on the middle rack, and tent with foil if it darkens too quickly.

    What pan size works best?

    A 9×13-inch pan gives a nice thickness with big bubbles. Two round 8–9 inch pans also work and bake slightly faster.

    In Conclusion

    Cinnamon roll focaccia sourdough is cozy, easy, and not fussy. You get the best of both bakes: open-crumb focaccia and the warm spice of a cinnamon roll.

    Mix it the night before, swirl in the morning, and you’ve got a crowd-pleaser with minimal effort. Keep it simple, keep it golden, and enjoy it warm.

  • Cinnamon Focaccia – A Soft, Sweet Twist on a Classic

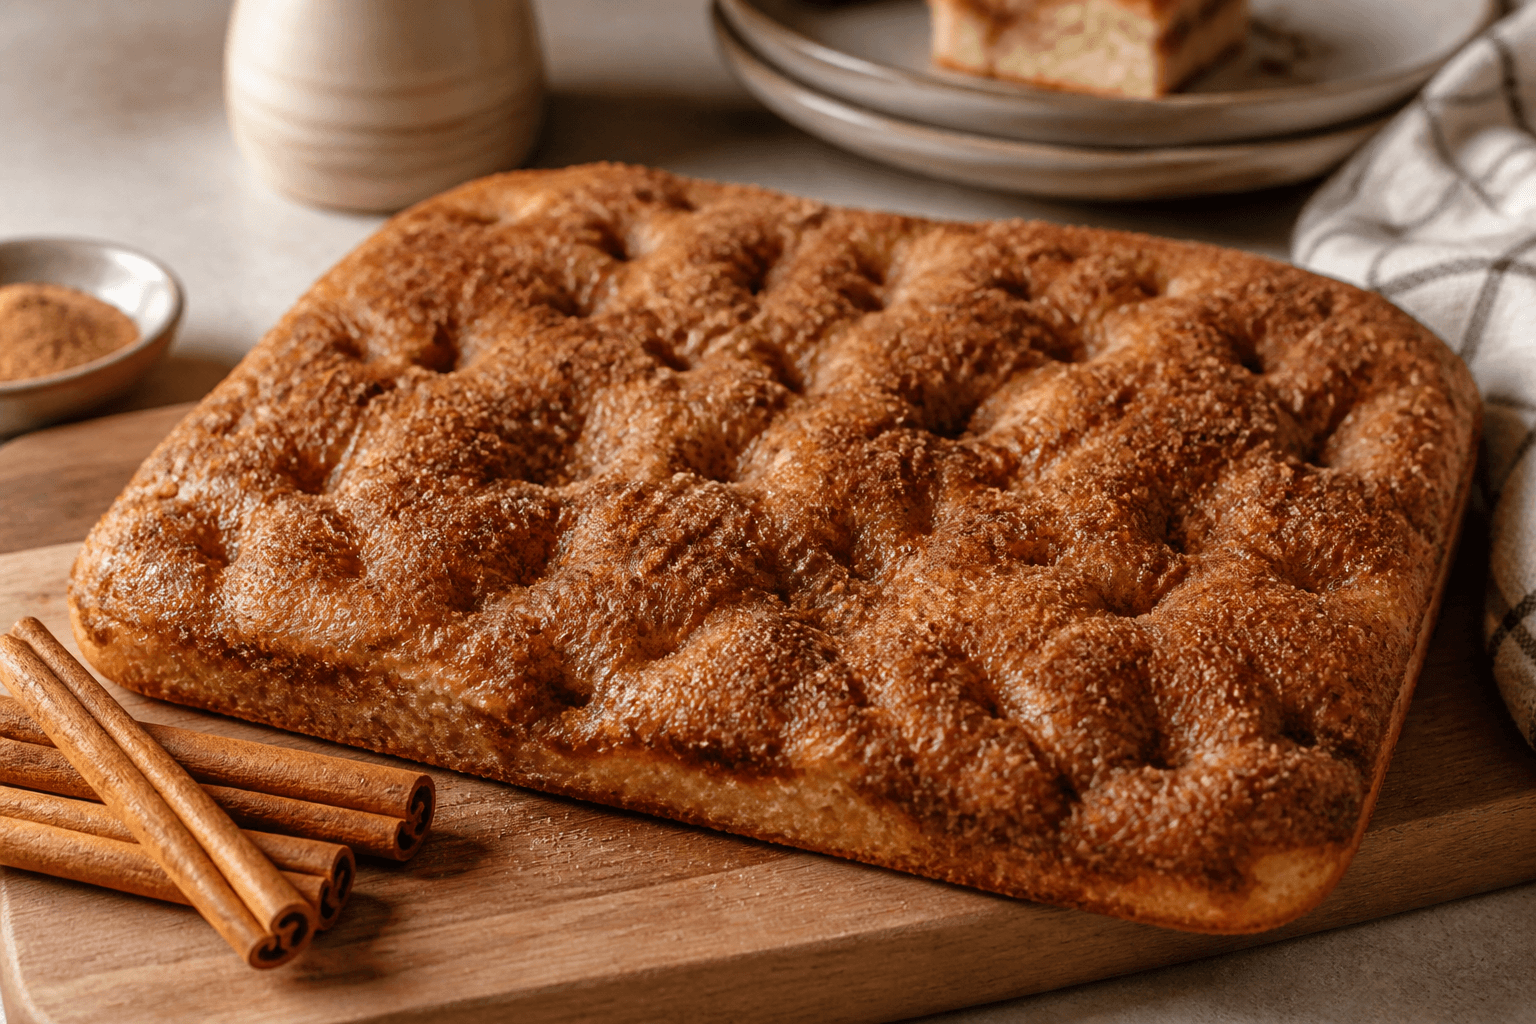
    Cinnamon Focaccia – A Soft, Sweet Twist on a Classic

    This cinnamon focaccia brings the comfort of warm spice and a hint of sweetness to a beloved Italian bread. It’s soft, airy, and finished with a buttery cinnamon-sugar crust that makes the kitchen smell like a bakery. Think of it as a cross between breakfast bread and dessert—perfect with coffee, tea, or a scoop of vanilla ice cream.

    The dough is simple, the technique is relaxing, and the results feel special without being fussy.

    Why This Recipe Works

    • High hydration dough creates that signature focaccia fluff and open crumb.
    • Olive oil in the dough and pan ensures a crisp, golden bottom and a tender interior.
    • Overnight cold rise builds flavor and makes the dough easier to handle.
    • Cinnamon-sugar topping caramelizes in the dimples, giving pockets of sweetness without making the bread heavy.
    • Optional honey glaze adds shine and a bakery-style finish.

    What You’ll Need

    • Bread flour (3 1/2 cups / 440 g) for chew and structure; all-purpose works in a pinch.
    • Warm water (1 3/4 cups / 415 g), about 100–105°F.
    • Instant or active dry yeast (2 1/4 tsp).
    • Granulated sugar (2 tbsp) for the dough.
    • Kosher salt (2 tsp) for flavor.
    • Olive oil (1/4 cup for the dough + more for the pan and drizzling).
    • Unsalted butter (3 tbsp), melted, for brushing.
    • Ground cinnamon (2–3 tsp), to taste.
    • Brown sugar (1/3 cup) plus granulated sugar (2 tbsp) for topping.
    • Flaky sea salt for finishing (optional but recommended).
    • Honey or maple syrup (1–2 tbsp) for optional glaze.

    Instructions

    1. Mix the dough: In a large bowl, whisk warm water, yeast, and 2 tbsp sugar. Stir in 1/4 cup olive oil. Add flour and salt.

      Mix with a spatula until shaggy and no dry spots remain.

    2. Knead briefly: Switch to a wet hand and fold the dough over itself 8–10 times in the bowl. It will be sticky—that’s good.
    3. First rise: Cover and let rise at room temperature until puffy and doubled, 1–2 hours (or refrigerate 8–24 hours for deeper flavor; bring back to room temp before shaping).
    4. Pan and oil: Generously oil a 9×13-inch pan or a large sheet pan (about 2–3 tbsp olive oil). Pour the dough into the pan and turn to coat.
    5. Stretch and rest: Gently stretch the dough toward the corners.

      If it springs back, rest 10–15 minutes and try again until it fills most of the pan.

    6. Second rise: Cover and let rise until visibly puffy, 30–45 minutes. Preheat oven to 425°F (220°C).
    7. Make cinnamon sugar: Mix brown sugar, granulated sugar, and cinnamon in a small bowl.
    8. Dimple and top: Drizzle 1–2 tbsp olive oil over the dough. Using oiled fingertips, press deep dimples all over.

      Brush with melted butter. Sprinkle cinnamon sugar evenly; let some fall into the dimples. Add a pinch of flaky salt if you like a sweet-salty note.

    9. Bake: Bake 18–22 minutes, until the top is golden and the edges are crisp.

      Rotate the pan once for even color.

    10. Optional glaze: Warm honey with a splash of water and brush lightly over the hot focaccia for shine.
    11. Cool and serve: Cool 10–15 minutes, then cut into squares. Serve warm or at room temperature.

    Keeping It Fresh

    • Room temperature: Store in an airtight container for up to 2 days. Rewarm at 325°F for 5–7 minutes to refresh.
    • Freeze: Wrap pieces tightly and freeze up to 2 months.

      Thaw at room temp, then crisp in a 350°F oven for 8–10 minutes.

    • Avoid the fridge: It dries out bread faster than room temp.

    Health Benefits

    • Olive oil provides heart-friendly monounsaturated fats and helps keep the crumb moist.
    • Cinnamon brings natural warmth and offers antioxidants along with gentle blood-sugar support.
    • Homemade control lets you manage sugar and salt levels, and choose higher-quality flour.
    • Serving balance: Pair with yogurt, fruit, or nuts to add protein and fiber to a sweet-leaning snack.

    Common Mistakes to Avoid

    • Too little oil in the pan: You’ll miss the crisp bottom and risk sticking.
    • Rushing the rise: Underproofed dough won’t dimple well and bakes dense.
    • Overloading with sugar: Excess sugar can burn and toughen the crust. Stick to the amounts listed.
    • Skimping on dimples: Deep dimples hold the cinnamon sugar in place and prevent big bubbles.
    • Cutting too hot: Let it rest briefly so the crumb sets and stays fluffy.

    Recipe Variations

    • Cinnamon Raisin: Fold in 1/2 cup plump raisins during the last minute of mixing.
    • Apple Crunch: Scatter finely diced apple and a few chopped pecans on top before baking.
    • Vanilla Sugar: Add 1 tsp vanilla extract to the melted butter and use vanilla sugar for topping.
    • Maple Pecan: Swap brown sugar for maple sugar and finish with toasted pecans.
    • Cardamom Twist: Mix 1/2 tsp ground cardamom with the cinnamon for a bakery-style aroma.

    FAQ

    Can I make this with all-purpose flour?

    Yes. The texture will be slightly less chewy but still soft and airy.

    Use the same weight and add a tablespoon more flour if the dough feels very slack.

    Do I have to do an overnight rise?

    No. The bread is great with a same-day rise. The cold rise just adds more flavor and makes the dough easier to stretch.

    How do I know it’s baked through?

    Look for deep golden edges and a firm top.

    If you tap the center, it should feel set, not squishy. Internal temp should be around 200–205°F if you use a thermometer.

    Can I reduce the sugar?

    Absolutely. Cut the topping by a third for a lightly sweet version.

    You can also skip the glaze and rely on the cinnamon alone.

    What pan works best?

    A metal 9×13 gives the best bottom crust. A sheet pan yields a thinner focaccia with extra crisp edges. Glass pans run cooler; add a couple minutes if using one.

    Final Thoughts

    Cinnamon focaccia keeps the soul of classic focaccia while leaning sweet and cozy.

    It’s easy enough for a relaxed weekend bake, yet special enough for brunch or a simple dessert. With a short list of ingredients and a forgiving method, this recipe is the kind you’ll return to whenever you want warm, fragrant comfort straight from the oven.

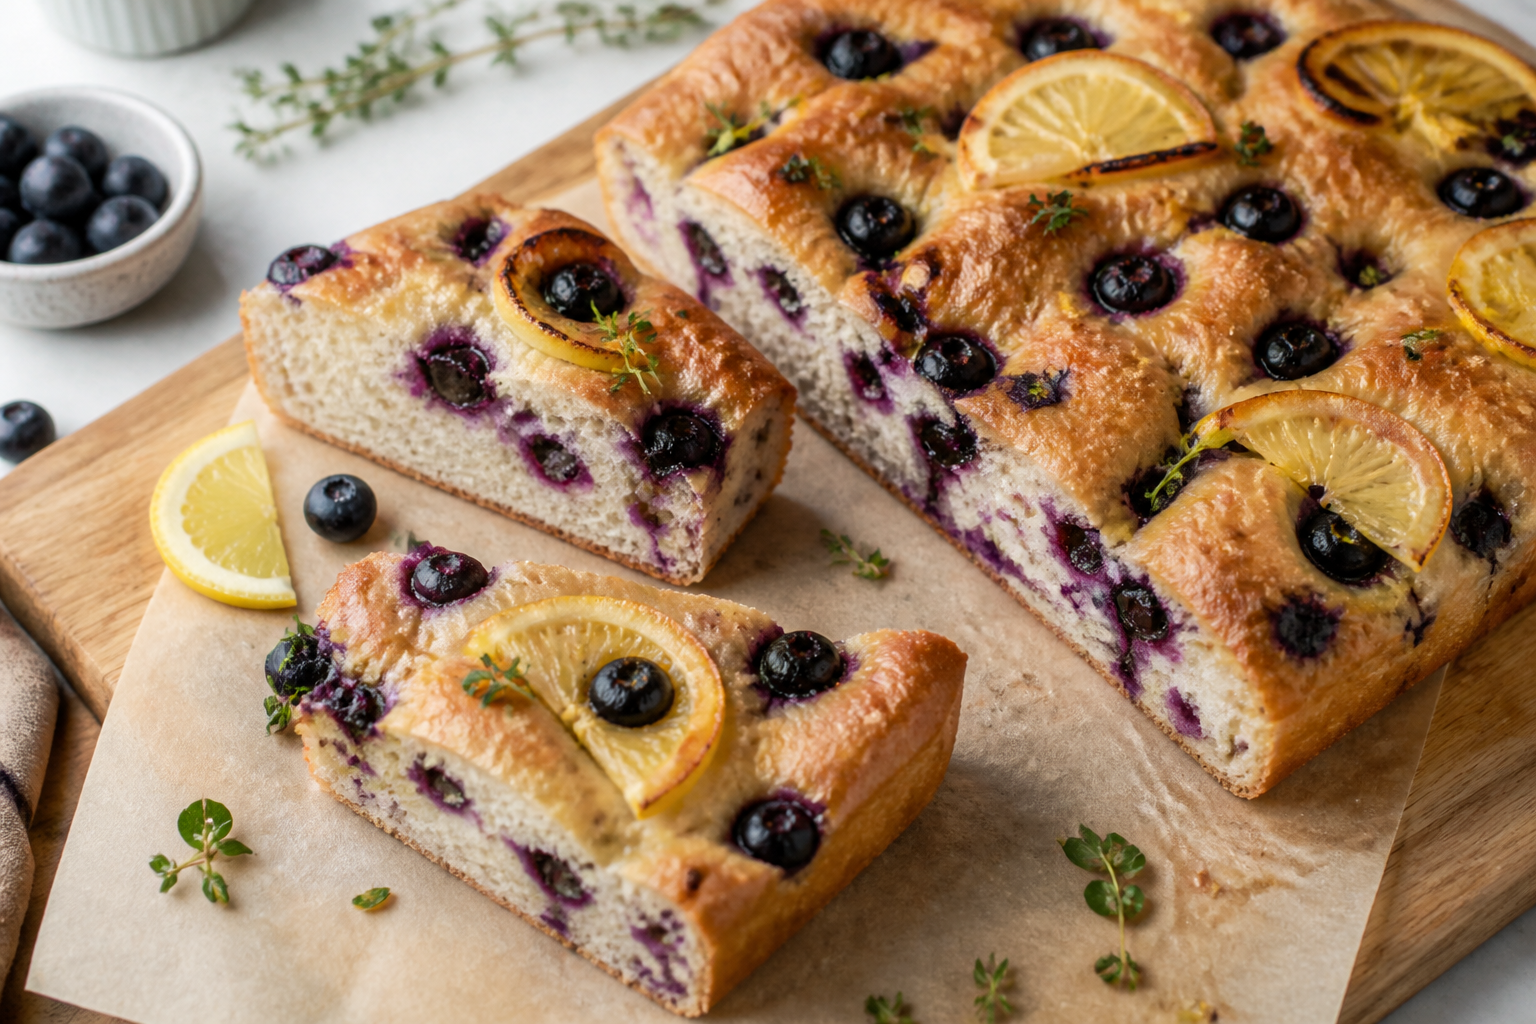
  • Sourdough Blueberry Focaccia – Light, Juicy, and Perfectly Crisp

    Sourdough Blueberry Focaccia – Light, Juicy, and Perfectly Crisp

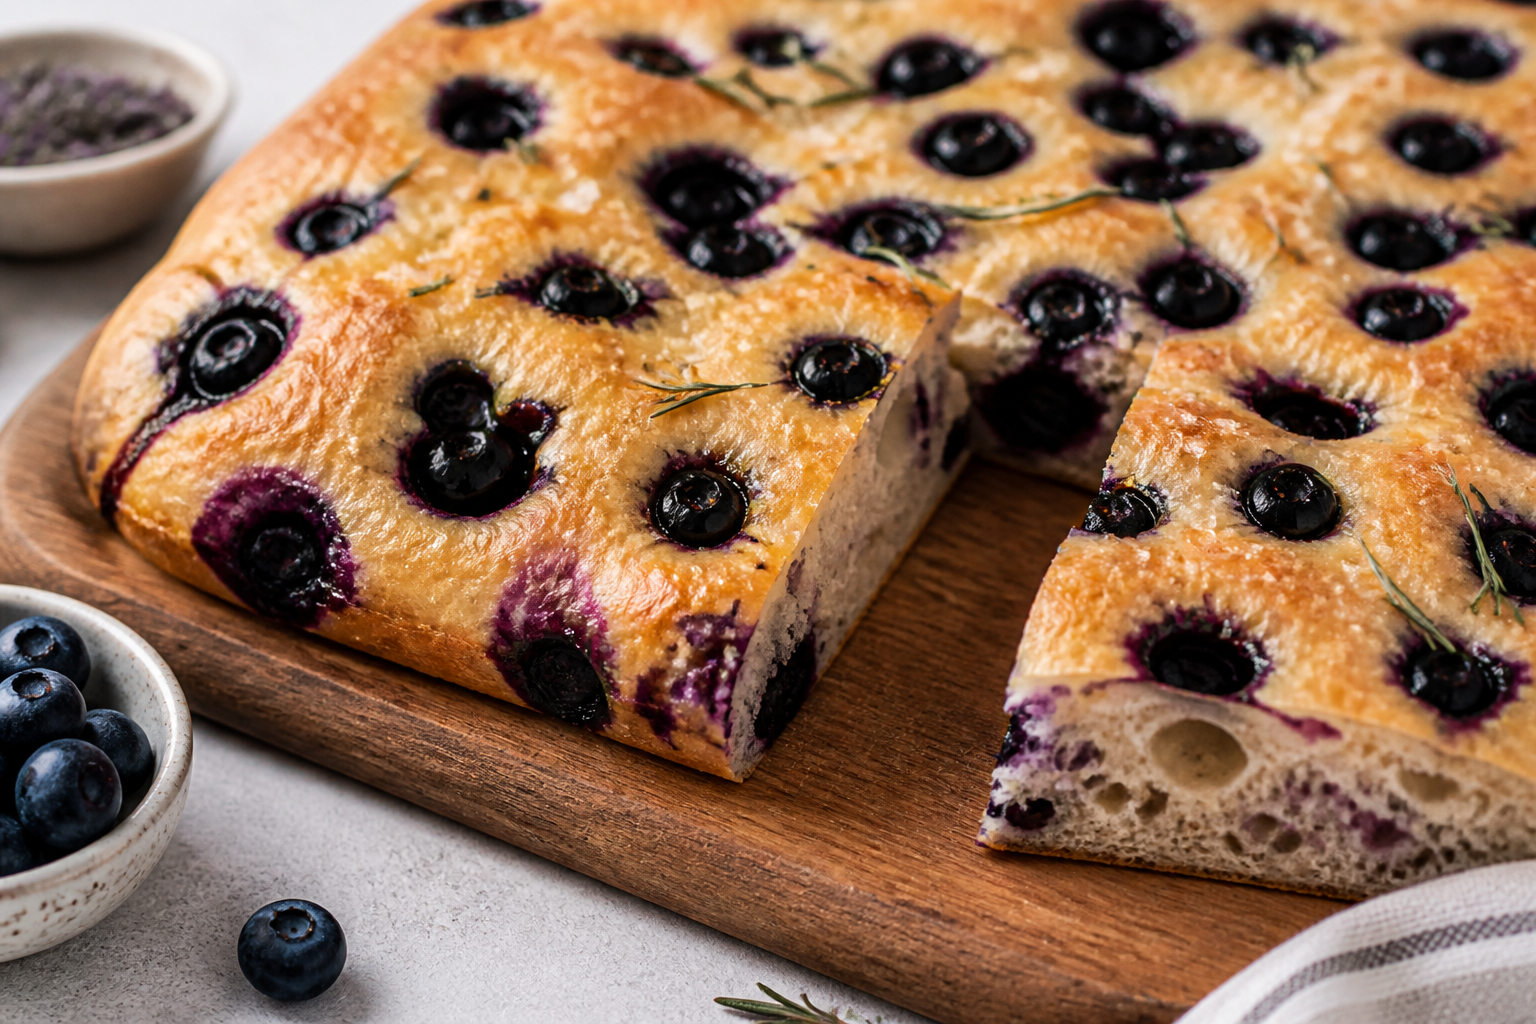
    This sweet-meets-savory focaccia brings together the tang of sourdough and the burst of warm blueberries. The edges turn golden and crisp, while the center stays airy and tender. A sprinkle of sugar and lemon makes the fruit shine, and a drizzle of olive oil keeps everything plush.

    It’s just as good for brunch as it is for an afternoon snack. Serve it warm and watch it disappear.

    Why This Recipe Works

    • Sourdough starter adds flavor and lift without relying on commercial yeast, giving the dough depth and a gentle tang.
    • High hydration creates an open, bubbly crumb and that signature focaccia lightness.
    • Cold ferment builds flavor and makes the dough easier to handle, while improving oven spring.
    • Olive oil and sugar balance the savory dough with fruity sweetness and crisp edges.
    • Lemon zest and flaky salt brighten the blueberries and keep the overall flavor lively.

    Ingredients

    • 425 g (3 1/3 cups) bread flour
    • 325 g (1 1/3 cups) room-temperature water
    • 120 g active, bubbly sourdough starter (100% hydration)
    • 10 g fine sea salt
    • 40 g extra-virgin olive oil, plus more for the pan and drizzling
    • 200–250 g fresh blueberries (about 1 1/2 cups)
    • 2–3 tbsp granulated sugar, divided
    • Zest of 1 lemon
    • 1 tsp vanilla extract (optional)
    • Flaky sea salt, to finish

    Instructions

    1. Mix the dough: In a large bowl, whisk the water and starter until mostly combined. Add flour and salt.

      Stir with a spatula until no dry bits remain. Rest 20–30 minutes (autolyse).

    2. Add the oil: Pour in 30 g olive oil and fold it into the dough with damp hands. It will feel slippery at first, then start to absorb.

      Cover and rest 20 minutes.

    3. Strengthen the dough: Perform 3–4 sets of stretch-and-folds every 20–30 minutes. To do this, grab one edge of the dough, stretch up, and fold over. Rotate the bowl and repeat 4–6 times per set.

      The dough should become smoother and bouncy.

    4. Bulk ferment: Cover and let rise at room temperature until puffy and increased by about 60–75%, 2–4 hours depending on temperature. It should jiggle and show bubbles at the edges.
    5. Cold proof (optional but recommended): Lightly oil the bowl, cover, and refrigerate 8–12 hours for flavor and easier handling.
    6. Prepare the pan: Generously oil a 9×13-inch pan (or a large sheet pan for thinner focaccia) with 2–3 tbsp olive oil. Turn the dough into the pan and gently stretch it.

      If it resists, rest 10 minutes and stretch again until it reaches the corners.

    7. Top with blueberries: Toss blueberries with 1–2 tbsp sugar, lemon zest, and vanilla if using. Dimple the dough with oiled fingertips, pressing straight down to create pockets. Scatter the blueberries evenly, letting some nestle into the dimples.

      Sprinkle another 1 tbsp sugar over the top.

    8. Final proof: Let the dough rise, uncovered, until very puffy and bubbly, 45–75 minutes depending on room temp. It should shake like a soft pillow when you jiggle the pan.
    9. Bake: Preheat oven to 425°F (220°C). Drizzle 1–2 tbsp olive oil over the top and finish with a pinch of flaky salt.

      Bake 22–28 minutes, until the top is golden and the edges are deeply crisp. Rotate once for even color.

    10. Cool and serve: Rest in the pan 10 minutes, then transfer to a rack. Serve warm.

      Optional: dust with a touch more lemon zest or a light drizzle of honey right before serving.

    How to Store

    • Room temperature: Keep in an airtight container for up to 2 days. Recrisp in a 350°F (175°C) oven for 8–10 minutes.
    • Freezer: Wrap tightly and freeze for up to 1 month. Reheat from frozen at 375°F (190°C) for 12–15 minutes.
    • Avoid the fridge: It dries out bread.

      Freeze instead if storing longer than 2 days.

    Why This is Good for You

    • Sourdough fermentation can make gluten easier to digest for some people and may improve mineral absorption.
    • Blueberries bring antioxidants, fiber, and natural sweetness, reducing the need for heavy sugar.
    • Olive oil adds heart-friendly fats and helps you feel satisfied with smaller portions.

    Common Mistakes to Avoid

    • Underproofing: If the dough isn’t puffy before baking, it will be dense. Wait for visible bubbles and a jiggly feel.
    • Too little oil: Skimping on oil leads to sticking and a dry crust. The pan should be well-coated.
    • Overloading fruit: Too many blueberries can weigh down the dough and make soggy spots.

      Stick to about 1 1/2 cups.

    • Cold berries on cold dough: If both are very cold, you’ll slow oven spring. Let the dough warm slightly during final proof.
    • Cutting too soon: Let it rest at least 10 minutes so the crumb sets and juices settle.

    Alternatives

    • Flour swap: Use up to 20% whole wheat or spelt for nuttier flavor. Add a splash more water if needed.
    • Citrus twist: Try orange zest instead of lemon for a warmer note.
    • Herb upgrade: Add fresh thyme or rosemary leaves with the berries for a sweet-savory vibe.
    • Sugar finish: Sprinkle turbinado sugar on top for extra crunch.
    • No sourdough: Use 7 g instant yeast, increase water to 360 g, and skip the cold proof.

      Rise times will shorten.

    FAQ

    How do I know my starter is ready?

    It should be bubbly, doubled in volume, and pass the float test in water. If it’s sluggish or smells overly sour, give it a feeding and wait a few hours.

    Can I use frozen blueberries?

    Yes. Use them straight from the freezer and toss with sugar and zest.

    Work quickly to avoid staining the dough and expect a minute or two more bake time.

    Why is my focaccia pale?

    You likely need a hotter oven or a bit more sugar and oil on top. Make sure the oven is fully preheated and bake until deep golden around the edges.

    Can I bake this in a cast-iron skillet?

    Absolutely. Use a 12-inch well-oiled skillet.

    The crust will be extra crisp, and bake time may be a touch shorter.

    Is this more sweet or savory?

    It’s lightly sweet with a savory backbone from olive oil and salt. Think of it as a fruit-studded bread that works with coffee or cheese.

    Final Thoughts

    Sourdough blueberry focaccia is simple, joyful baking: minimal shaping, big flavor, and a stunning pan of golden bubbles and juicy berries. With a little time and a healthy pour of olive oil, you’ll get a bakery-style result at home.

    Serve it warm for brunch, pack it for picnics, or enjoy a square with tea in the afternoon. It’s the kind of recipe you’ll make once and keep coming back to.

  • 23 No Carb Snacks for Weight Loss Success on Keto: Quick Bites

    23 No Carb Snacks for Weight Loss Success on Keto: Quick Bites

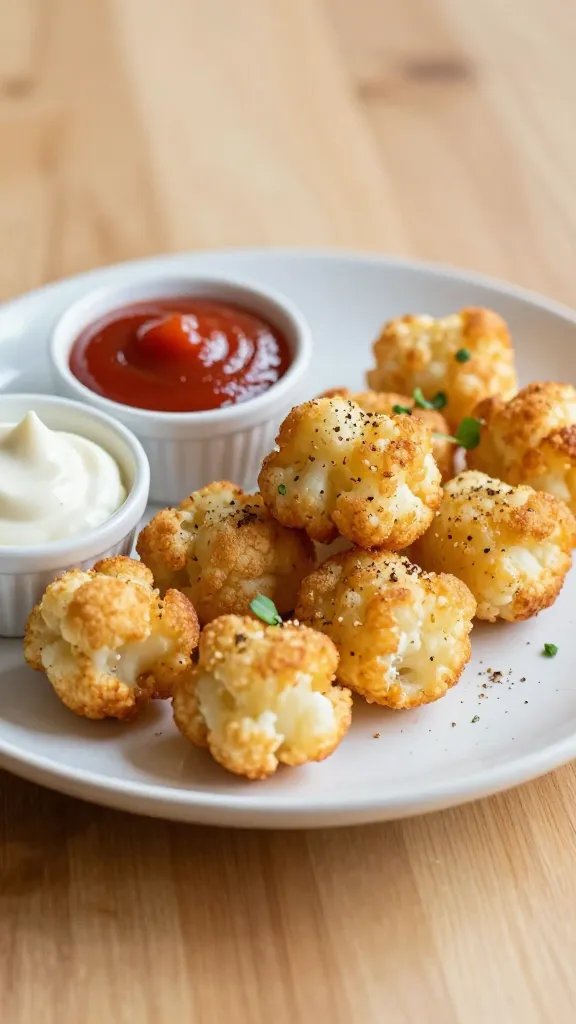
    These bite-sized wonders prove you can snack hard on keto without derailing your goals. They’re quick, tasty, and shockingly satisfying. FYI, you’ll want to snack again as soon as you finish each one.

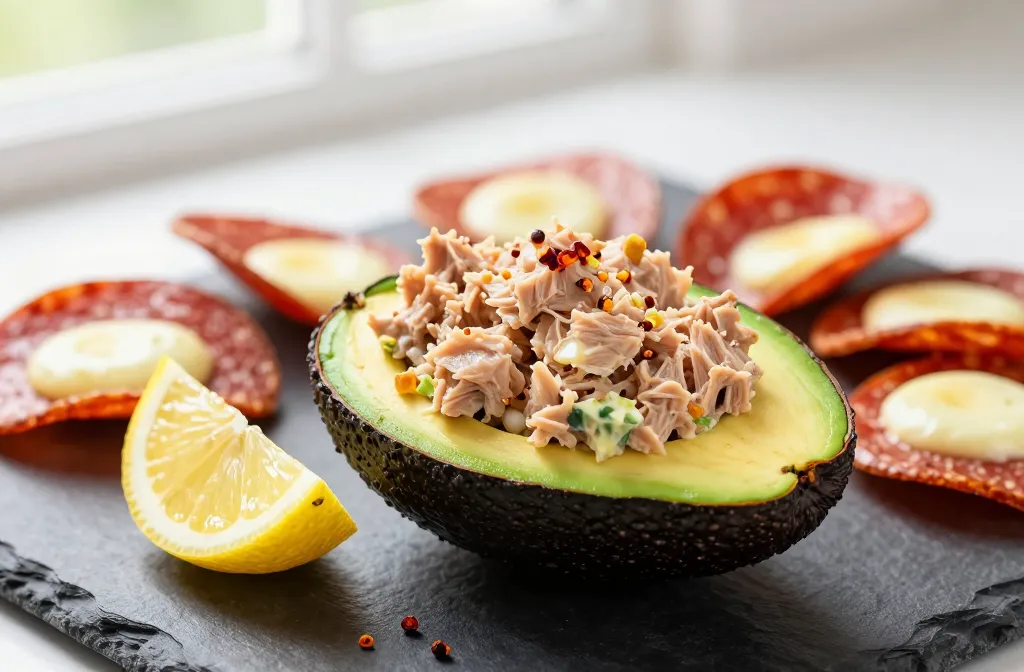
    1. Creamy Avocado Tuna Boats That Conquer Snack Cravings
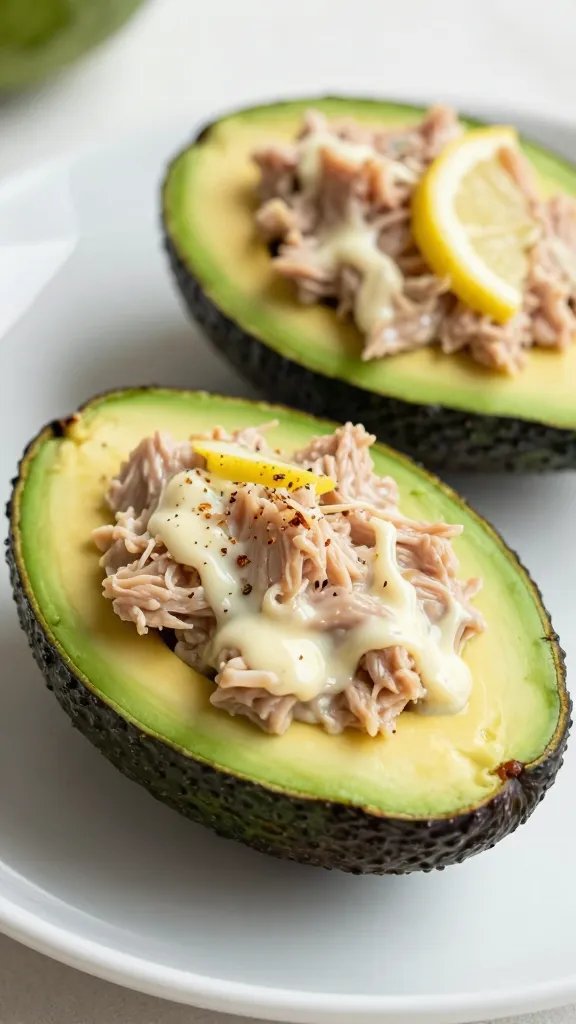
    Item 1

    This mini tuna boat brings big flavors with virtually zero carbs. It’s perfect for busy days and late-night cravings alike. Seriously, you’ll reach for this every time.

    Ingredients:

    • 1 ripe avocado
    • 1/2 cup canned tuna, drained
    • 2 tbsp mayonnaise
    • 1 tsp lemon juice
    • Salt and pepper to taste
    • Chili flakes (optional)

    Instructions:

    1. Spoon tuna into a bowl and mix with mayonnaise and lemon juice.
    2. Halve the avocado and scoop a bit more out if needed to create a boat.
    3. Fill each half with the tuna mix, sprinkle with salt, pepper, and chili flakes if you like heat.
    4. Serve immediately or chill for 10 minutes for a firmer bite.

    Pro tip: swap tuna for shrimp salad to switch flavors without adding carbs. Trust me, it slaps.

    2. Crispy Pepperoni Snack Cups That Mizzle-Settle Your Cravings

    Item 2

    Crunchy, salty, and ridiculously easy, these cups are a party in your mouth. They’re great as a quick bite or a game-day nibble. You’ll be hooked after the first bite.

    Ingredients:

    • 40-50 pepperoni slices
    • 1 cup shredded mozzarella
    • 1/4 cup grated parmesan
    • Fresh parsley for garnish

    Instructions:

    1. Line a muffin tin with pepperoni slices to create cups.
    2. Stuff with mozzarella and a pinch of parmesan.
    3. Bake at 375°F (190°C) for 8-10 minutes until bubbling and crispy.
    4. Garnish with parsley and serve hot.

    Tip: double the batch and store in the fridge for a few days. They reheat surprisingly well.

    3. Zesty Garlic Butter Shrimp Skewers For Quick Keto Wins
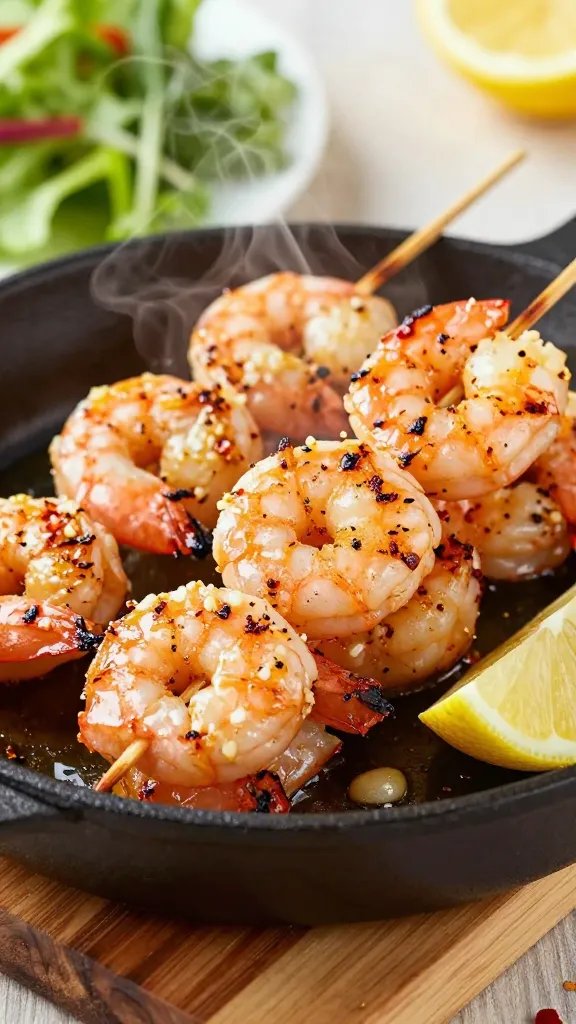
    Item 3

    These skewers are flavor bombs that cook in minutes. They’re so versatile you can serve them as a snack or a light bite with a side salad. Do not skip the garlic butter—major key.

    Ingredients:

    • 12 large shrimp, peeled and deveined
    • 2 tbsp unsalted butter
    • 2 cloves garlic, minced
    • 1 tbsp lemon juice
    • Salt, pepper, red pepper flakes to taste
    • Skewers

    Instructions:

    1. Thread shrimp onto skewers and pat dry.
    2. In a skillet, melt butter, add garlic until fragrant.
    3. Cook shrimp 2-3 minutes per side, finish with lemon juice and seasonings.
    4. Serve with a squeeze of lemon and a sprinkle of red pepper flakes.

    Serving idea: pair with cucumber ribbons for a refreshing contrast. IMO, you’ll crave this weekly.

    4. Stuffed Mini Cucumbers With Cream Cheese & Chives
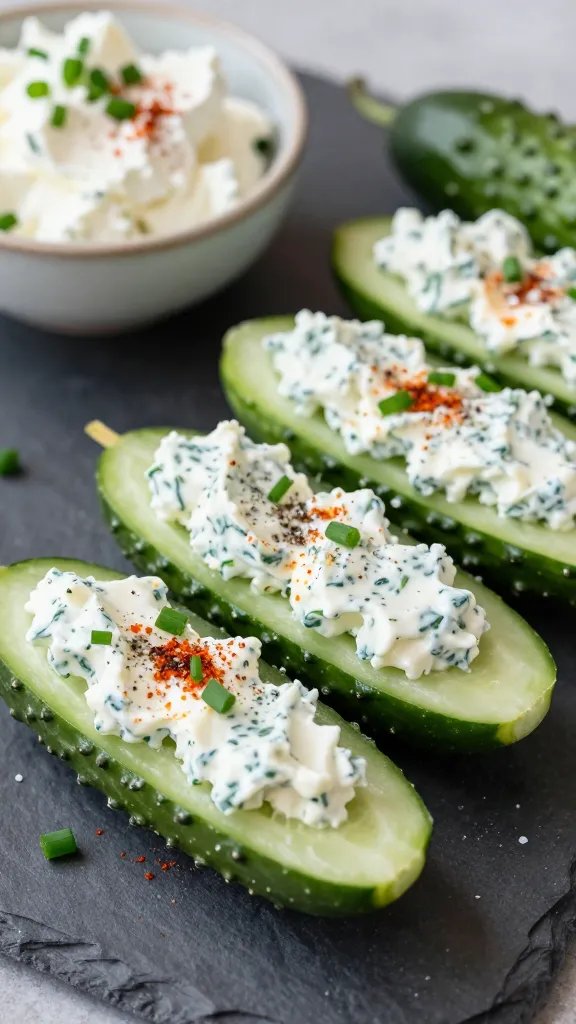
    Item 4

    Crunchy, cool, and bite-sized perfection. These are the perfect “just one more bite” snack that won’t derail your macros. Seriously addictive.

    Ingredients:

    • 6 mini cucumbers
    • 4 oz cream cheese, softened
    • 1/4 cup chopped chives
    • Salt and pepper to taste
    • Paprika for garnish

    Instructions:

    1. Slice cucumbers in half lengthwise and scoop out seeds to create boats.
    2. Mix cream cheese with chives, salt, and pepper.
    3. Fill cucumber boats and sprinkle with paprika.

    Variation: add crispy bacon bits for extra crunch. It’s a winner in the chat group.

    5. Parmesan Garlic Roasted Almonds That Grab Your Attention
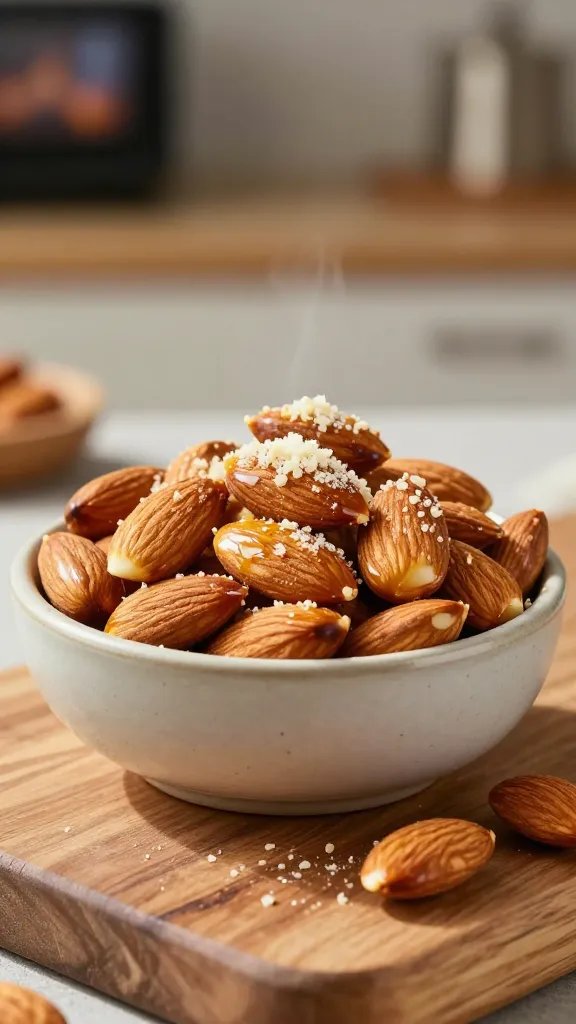
    Item 5

    Savory, crunchy, and incredibly satisfying. These almonds disappear fast at gatherings or movie nights. FYI, they’re suspiciously moreish.

    Ingredients:

    • 2 cups raw almonds
    • 1 tbsp olive oil
    • 1/2 cup grated parmesan
    • 1 tsp garlic powder
    • Salt to taste

    Instructions:

    1. Toss almonds with olive oil and spread on a baking sheet.
    2. Roast at 350°F (175°C) for 10-12 minutes until golden.
    3. Shake with parmesan, garlic powder, and salt while warm.

    Pro-tip: store in an airtight container; they stay crispy for days. Seriously, minutes turn into snack-time bliss.

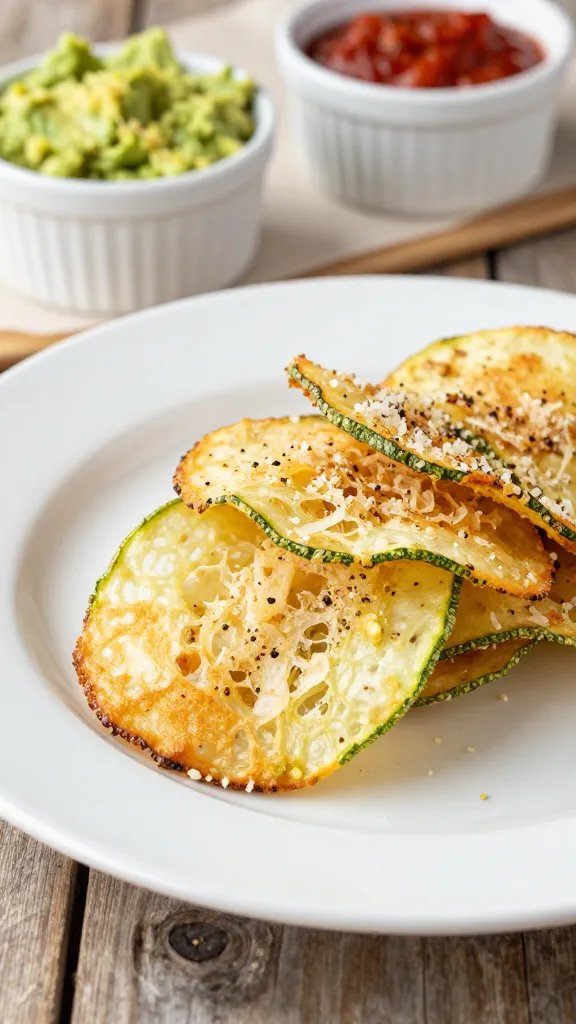
    6. Cheesy Baked Zucchini Chips Nobody Believes Are Keto
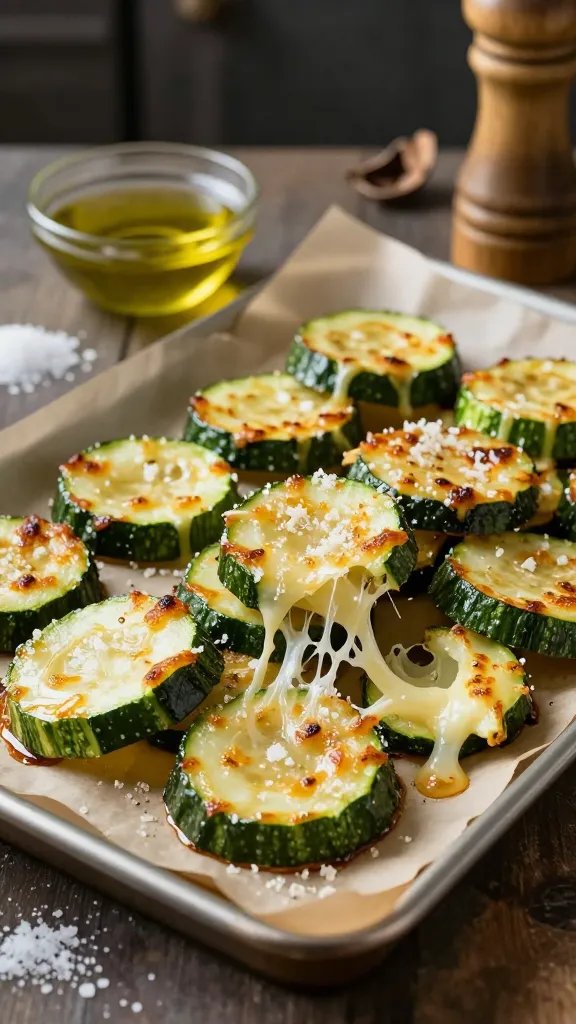
    Item 6

    Thin, crisp, and cheesy—these zucchini chips feel indulgent but stay firmly on keto rails. They’re the kind of snack you pretend you’re sharing, then steal half the batch.

    Ingredients:

    • 2 medium zucchini, thinly sliced
    • 2 tbsp olive oil
    • 1/2 cup shredded mozzarella
    • 1/4 cup grated parmesan
    • Salt and pepper to taste

    Instructions:

    1. Toss zucchini slices with olive oil, salt, and pepper.
    2. Lay on a parchment-lined sheet and sprinkle with cheeses.
    3. Bake at 425°F (220°C) for 12-15 minutes until crisp.

    Serve with a quick marinara for dipping if you’re feeling extra fancy. Trust me, dip lovers unite.

    7. Egg Muffin Bites With Bacon & Spinach

    Item 7

    Breakfast-for-snack vibes that work any time of day. They reheat beautifully and stay fluffy. You’ll wonder how you ever lived without these.

    Ingredients:

    • 6 eggs
    • 1/4 cup chopped spinach
    • 4 slices cooked bacon, crumbled
    • 1/4 cup shredded cheddar
    • Salt and pepper to taste

    Instructions:

    1. Whisk eggs with salt, pepper, and spinach.
    2. Stir in bacon and cheddar.
    3. Pour into a greased mini muffin tin and bake at 350°F (175°C) for 12-15 minutes.

    Delivery idea: grab-and-go protein punch when you’re racing between meetings. You’ll thank yourself later.

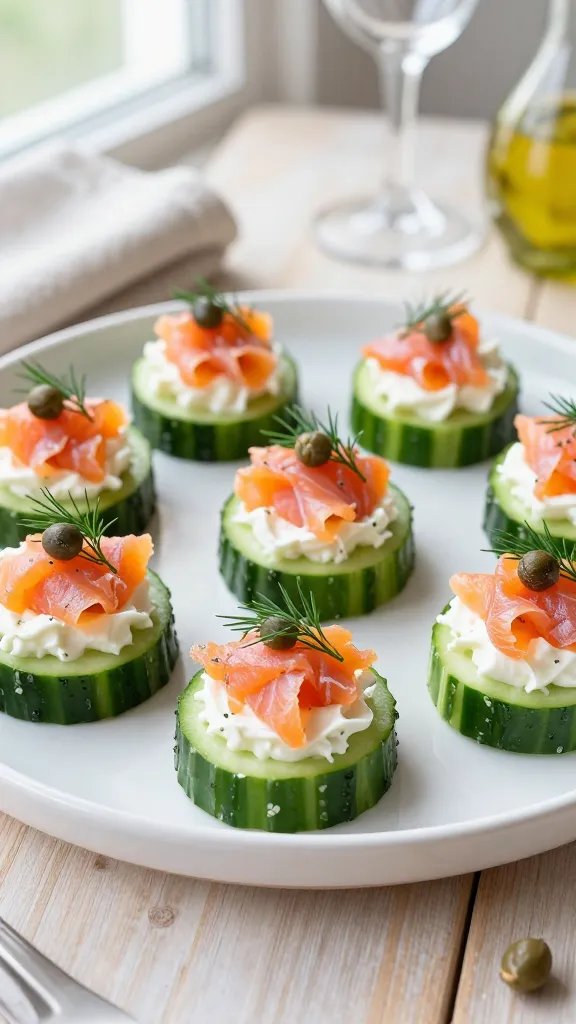
    8. Smoked Salmon Cucumber Cups For Elegant Snacking
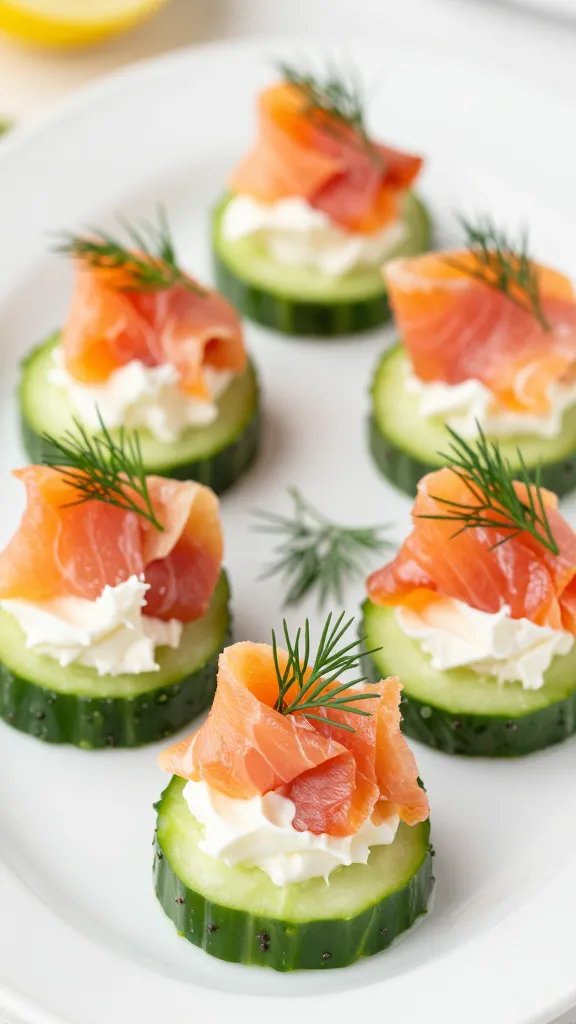
    Item 8

    Bright, delicate, and incredibly fancy-feeling. These cups elevate any nibble platter while staying gluten-free and keto-friendly.

    Ingredients:

    • 6 cucumber rounds, thickly sliced
    • 4 oz smoked salmon, cut into ribbons
    • 2 oz cream cheese
    • Dill spears for garnish

    Instructions:

    1. Top cucumber rounds with small dollops of cream cheese.
    2. Wrap with smoked salmon ribbons and garnish with dill.

    Tip: add a squeeze of lemon for a fresh zing. Seriously refreshing and elegant.

    9. Garlic Herb Chicken Salad Lettuce Cups
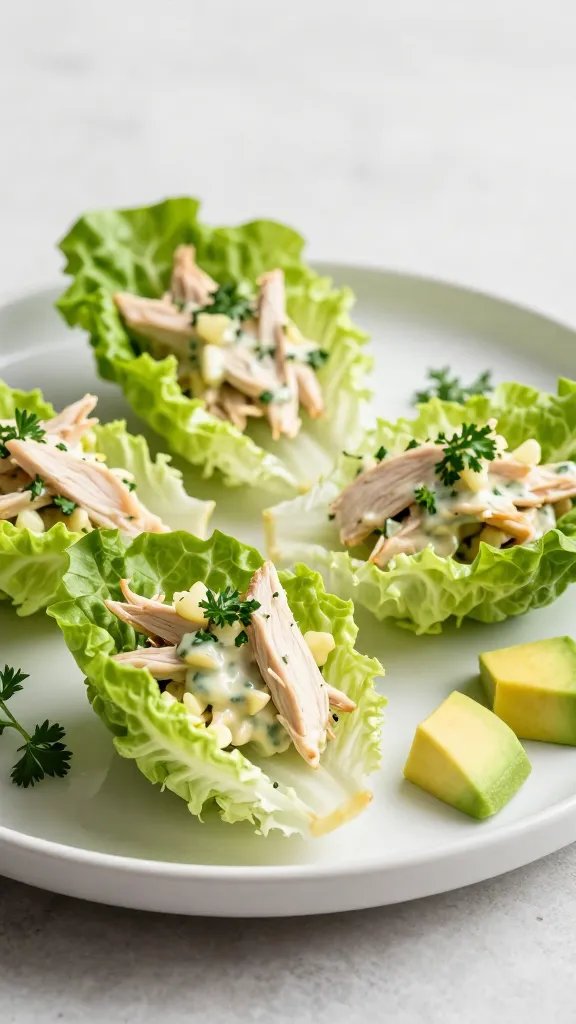
    Item 9

    Pokey-flavored, protein-packed, and delightfully crunchy. These cups keep you full long after the snack. IMO, they’re the “adult” snack you’ve been craving.

    Ingredients:

    • 1 cup cooked chicken, shredded
    • 2 tbsp mayonnaise
    • 1 tsp minced garlic
    • 1 tsp fresh herbs (parsley or chives)
    • Butter lettuce leaves

    Instructions:

    1. Mix chicken with mayo, garlic, and herbs.
    2. Spoon into lettuce cups and fold the leaf over the filling.

    Serving idea: add a little avocado dice for creaminess and extra healthy fats.

    10. Buffalo Ranch Cauliflower Bites
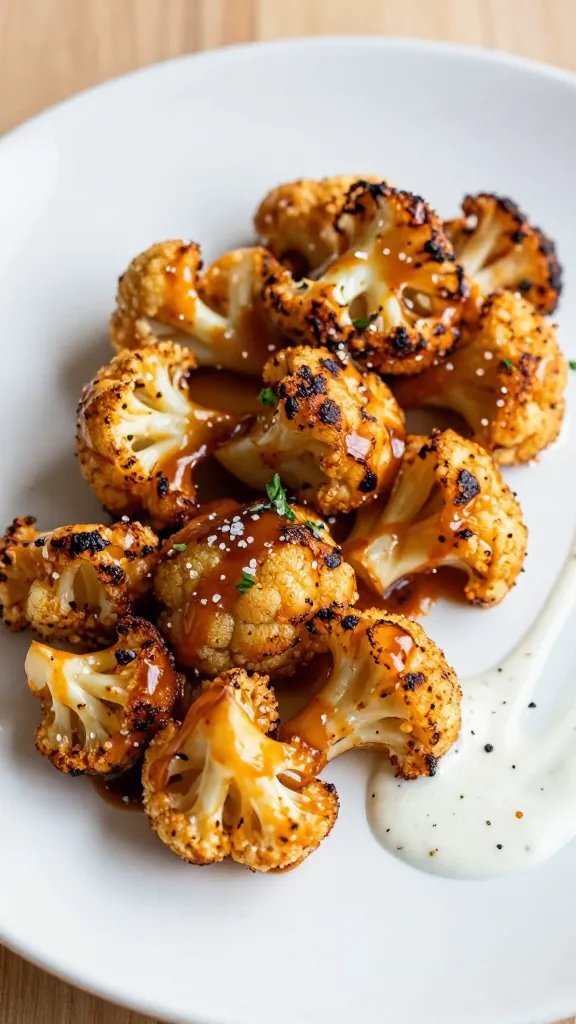
    Item 10

    A spicy, creamy twist on veg snacking. These bites are incredibly addictive and surprisingly filling for their size. Serious flavor payoff without the carbs.

    Ingredients:

    • 2 cups cauliflower florets
    • 1/4 cup buffalo sauce
    • 2 tbsp ranch dressing
    • Salt to taste

    Instructions:

    1. Toss cauliflower with buffalo sauce and spread on a sheet.
    2. Bake at 400°F (205°C) for 15-18 minutes until edges crisp.
    3. Drizzle with ranch dressing and serve warm.

    Variation: swap buffalo for garlic parmesan if you want a milder bite. Either way, you’re winning.

    11. Prosciutto-Wrapped Asparagus Spears
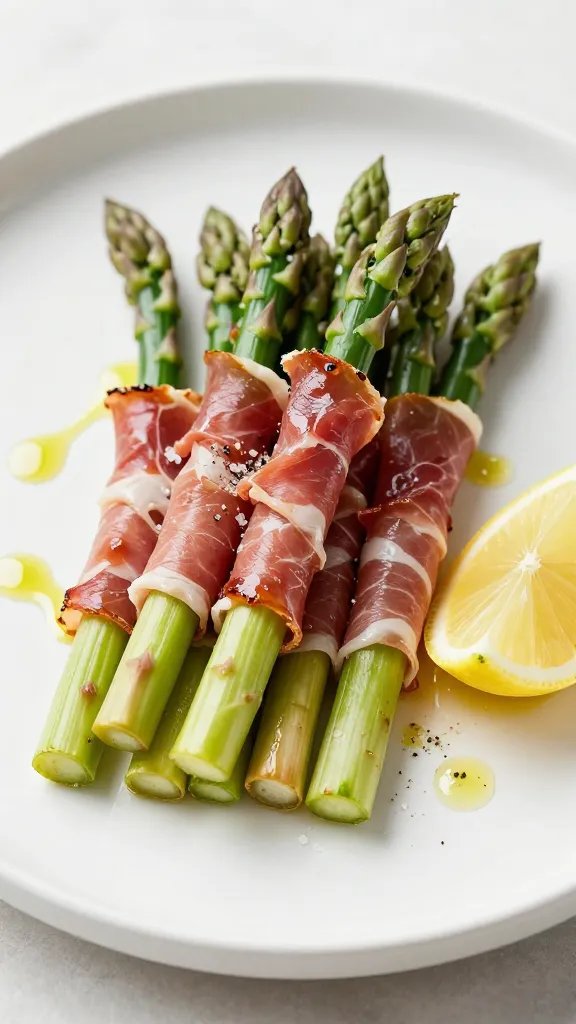
    Item 11

    Light, salty, and irresistibly chic. A perfect grab-and-go snack that feels fancy without the fuss. Pro tip: use thin asparagus for the best bite.

    Ingredients:

    • 12 asparagus spears
    • 6 slices prosciutto, halved
    • Olive oil spray
    • Salt and pepper

    Instructions:

    1. Wrap each asparagus spear with a half slice of prosciutto.
    2. Spritz with olive oil, season, and bake at 400°F (205°C) for 8-10 minutes.

    Serve warm with a squeeze of lemon if you’re feeling fancy. People will ask for your secret.

    12. Caprese Skewers With Balsamic Glaze
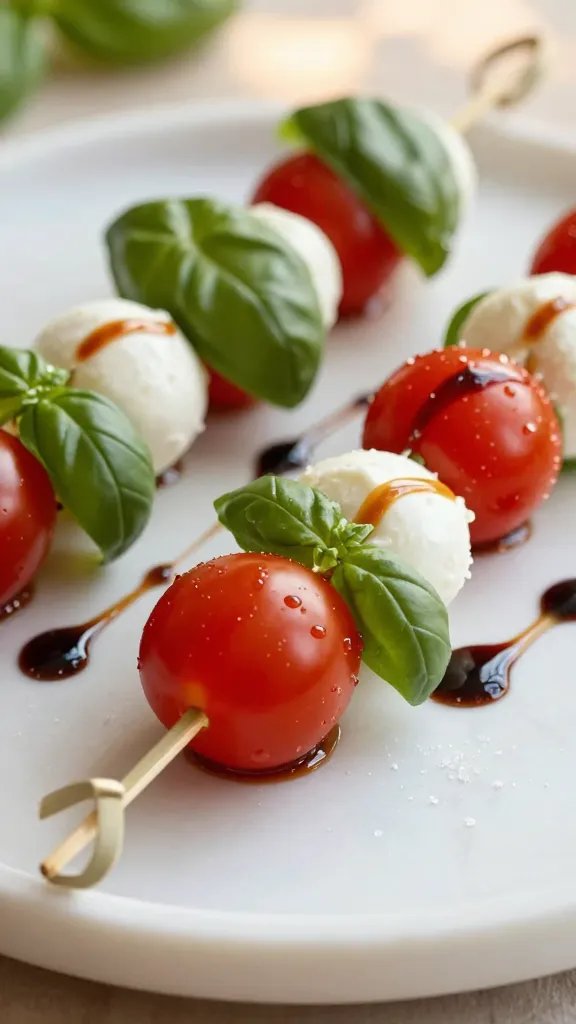
    Item 12

    Fresh, juicy, and ridiculously simple. These skewers taste like a mini sunny Italian day in every bite.

    Ingredients:

    • 1 cup cherry tomatoes
    • 8 oz fresh mozzarella balls
    • Fresh basil leaves
    • 1/4 cup balsamic glaze

    Instructions:

    1. Assemble tomatoes, mozzarella, and basil on small skewers.
    2. Drizzle with balsamic glaze before serving.

    Variation: sprinkle with flaky salt for an extra pop. FYI, glaze is key for that dramatic finish.

    13. Spicy Ranch Zucchini Poppers
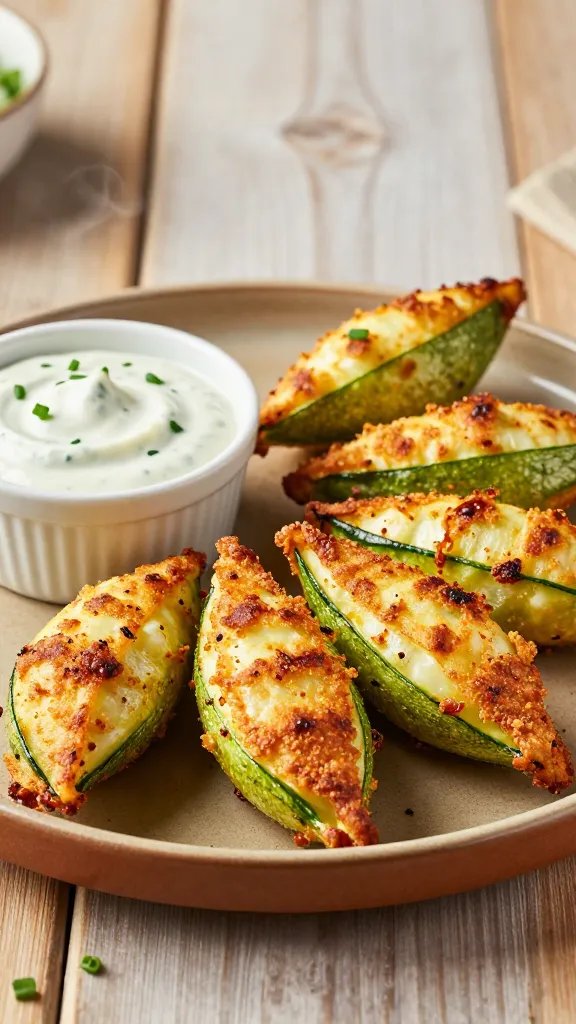
    Item 13

    Soft inside, crispy outside, with a kick. These poppers disappear in minutes at any hangout. Seriously addictive and keto-friendly.

    Ingredients:

    • 2 medium zucchini, grated
    • 2 oz cream cheese, softened
    • 1 tbsp ranch seasoning
    • 1/4 cup shredded mozzarella

    Instructions:

    1. Mix zucchini with cream cheese, ranch seasoning, and mozzarella.
    2. Shape into bite-sized balls and bake at 425°F (220°C) for 12-15 minutes.

    Serve with extra ranch for dipping if you’re feeling extra bold.

    14. Smoked Turkey & Cream Cheese Roll-Ups
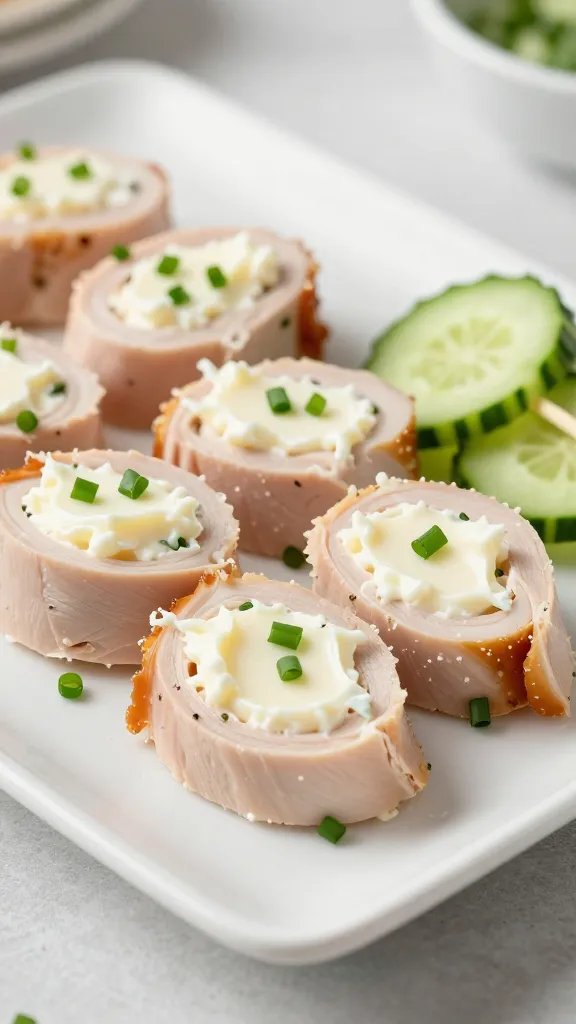
    Item 14

    Simple, satisfying, and portable. These roll-ups feel like a fancy lunch but work as a snack, too.

    Ingredients:

    • 6 slices smoked turkey
    • 3 oz cream cheese, softened
    • Chives or scallions, chopped

    Instructions:

    1. Spread cream cheese on turkey slices.
    2. Sprinkle with chives and roll tightly.
    3. Slice into bite-size rounds and serve.

    Variation: add cucumber matchsticks for crunch and hydration. Trust me, texture matters.

    15. Chicken Satay Bites With Peanut Dipping Sauce (Low-Carb)
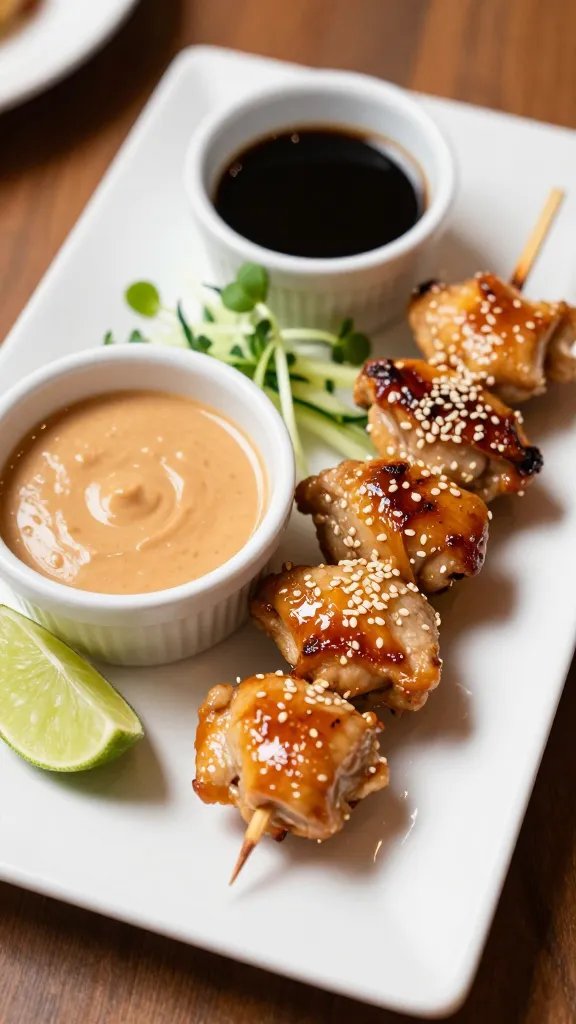
    Item 15

    Sticky, savory, and perfectly snackable. The peanut sauce brings a creamy punch without turning into a carb disaster.

    Ingredients:

    • 1 cup cooked chicken, shredded
    • 1 tbsp soy sauce (or tamari)
    • 1 tsp sesame oil
    • Peanut sauce (1/4 cup peanut butter, soy sauce, lime juice, water to thin)

    Instructions:

    1. Season chicken with soy sauce and sesame oil.
    2. Shape into small bites and serve with peanut sauce on the side.

    Tip: warm sauce gently before dipping to keep everything smooth and luscious.

    16. Olive Tapenade Cucumber Rounds
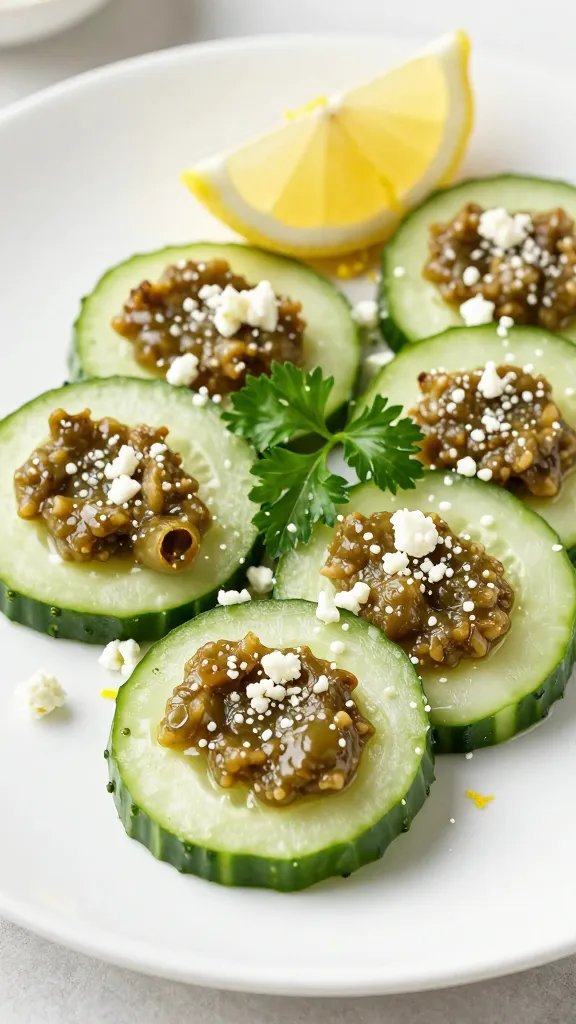
    Item 16

    Briny, bright, and a touch of sophistication. These rounds are snack-time elegance with minimal effort.

    Ingredients:

    • 1 cucumber, sliced
    • 2 tbsp olive tapenade
    • 1 tbsp crumbled feta (optional)

    Instructions:

    1. Spread a thin layer of tapenade on each cucumber slice.
    2. Top with feta if using and serve.

    Pairs well with a splash of lemon and a sprinkle of parsley. Simple, stylish, satisfying.

    17. Baked Ham & Double-Cheese Stuffed Mushrooms

    Item 17

    Meaty, cheesy, and deeply comforting. These mushrooms are the kind of snack that makes you feel indulgent without blowing your macros.

    Ingredients:

    • 8 large button mushrooms, stems removed
    • 4 oz ham, diced
    • 4 oz cream cheese, softened
    • 1/2 cup shredded cheddar

    Instructions:

    1. Mix ham, cream cheese, and cheddar.
    2. Stuff into mushroom caps and bake at 375°F (190°C) for 15 minutes.

    Serve hot as a quick side or a stand-alone snack. Seriously comforting bite.

    18. Herbed Ricotta Stuffed Mini Peppers
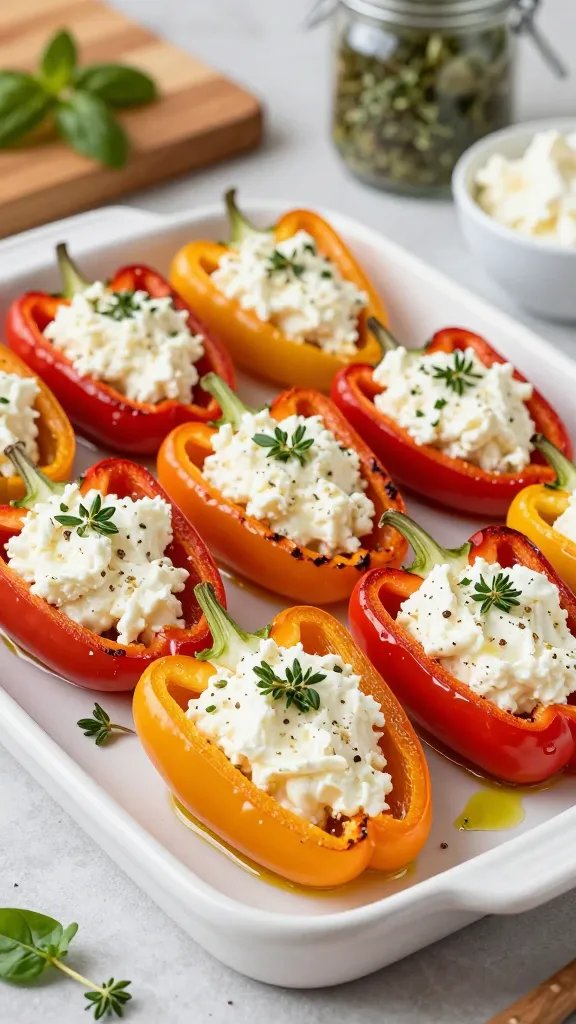
    Item 18

    Colorful, creamy, and totally snackable. These peppers are like little edible bouquets—except tastier.

    Ingredients:

    • 8 mini bell peppers
    • 1 cup ricotta
    • 1 tbsp chopped herbs (basil, thyme)
    • Salt and pepper to taste

    Instructions:

    1. Halve peppers and remove seeds.
    2. Mix ricotta with herbs, salt, and pepper; fill peppers.
    3. Roast at 400°F (205°C) for 8-10 minutes until peppers soften.

    Variation: add a few drops of hot sauce if you like it spicy. Kick it up a notch, why not?

    19. Cajun Air-Fryer Ballz With Cream Cheese Center

    Item 19

    Crave-worthy crunch and a creamy surprise in the middle. They cook fast and disappear faster. FYI, air-frying is the secret here.

    Ingredients:

    • 1 cup shredded chicken (cooked)
    • 2 oz cream cheese, softened
    • 1 tsp Cajun seasoning
    • 1/4 cup pork rinds, crushed

    Instructions:

    1. Mix chicken, cream cheese, and Cajun seasoning.
    2. Roll into small balls and coat with crushed pork rinds.
    3. Air-fry at 380°F (190°C) for 8-10 minutes until crisp.

    Serve with a cooling yogurt dip if you’re feeling fancy. The spice level is perfect as is.

    20. Eggplant Fries With Garlic Mayo
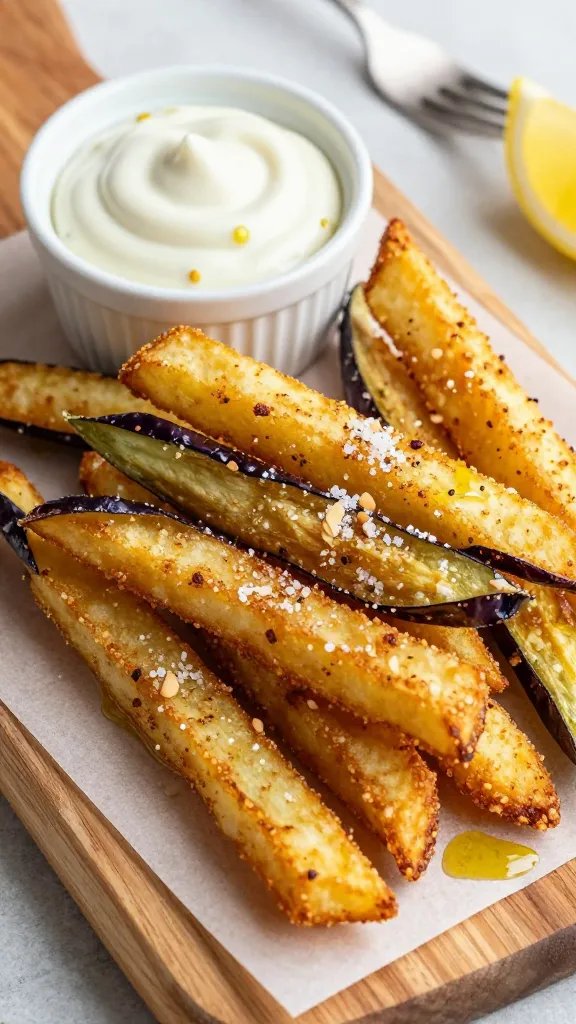
    Item 20

    Golden, crisp sticks that somehow taste like legit fries. Dip in garlic mayo and pretend you’re at a fry shack—guilt-free.

    Ingredients:

    • 1 medium eggplant, cut into sticks
    • 1 egg, beaten
    • 1/2 cup almond flour
    • Salt, pepper, garlic powder
    • 1/4 cup mayonnaise
    • 1 tsp minced garlic

    Instructions:

    1. Dust eggplant sticks in almond flour seasoned with salt and garlic powder.
    2. Dip in egg, then return to almond flour. Place on a sheet.
    3. Bake at 425°F (220°C) for 15-20 minutes until crisp.
    4. Mix mayo with garlic for a quick dip.

    Variation: add paprika for extra color and a smoky finish. Seriously worth it.

    21. Pepper Jack Stuffed Mini Peppers

    Item 21

    Peppery crunch with a creamy kick. They’re the snack you want when you crave something bold and spicy.

    Ingredients:

    • 8 mini bell peppers
    • 4 oz cream cheese, softened
    • 1/2 cup shredded pepper jack
    • 1 tsp hot sauce (optional)

    Instructions:

    1. Mix cream cheese with pepper jack and hot sauce.
    2. Stuff into peppers and bake at 375°F (190°C) for 10-12 minutes until melty.

    Serve immediately for melty goodness. Bold flavor without the carb hangover.

    22. Olive & Feta Stuffed Mini Tomatoes
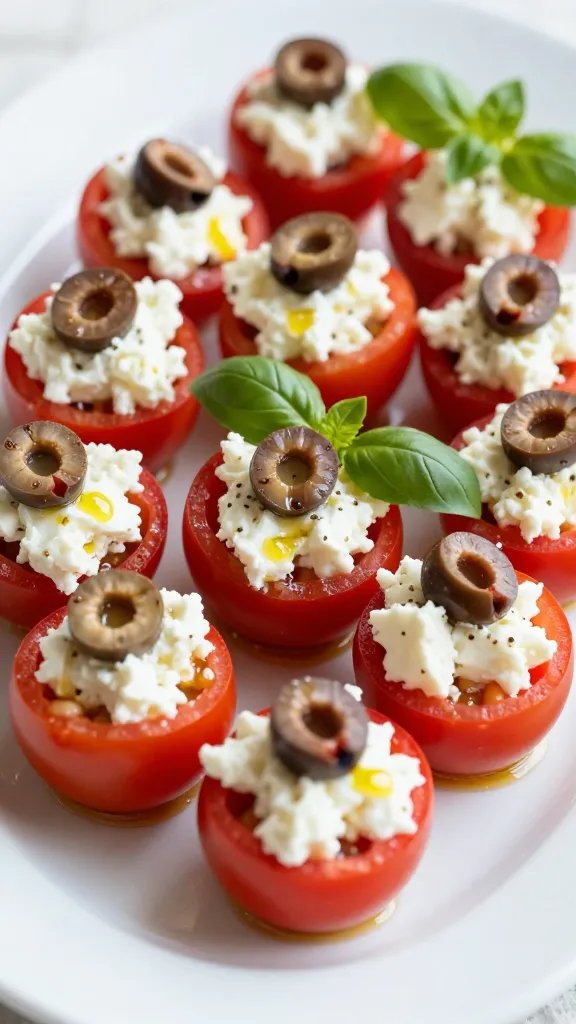
    Item 22

    Bright, briny, and perfectly bite-sized. These are ready in minutes and make you look fancy without trying too hard.

    Ingredients:

    • 12 cherry tomatoes, tops cut off
    • 2 oz feta, crumbled
    • 6 olives, chopped
    • 1 tsp olive oil

    Instructions:

    1. Mix feta with olives and olive oil.
    2. Stuff tomatoes and chill for 15 minutes if you can wait.

    Tip: garnish with a tiny basil leaf for a polished look. Seriously cute snack vibes.

    23. Sesame-Crab Dip Cups For Lazy Sundays
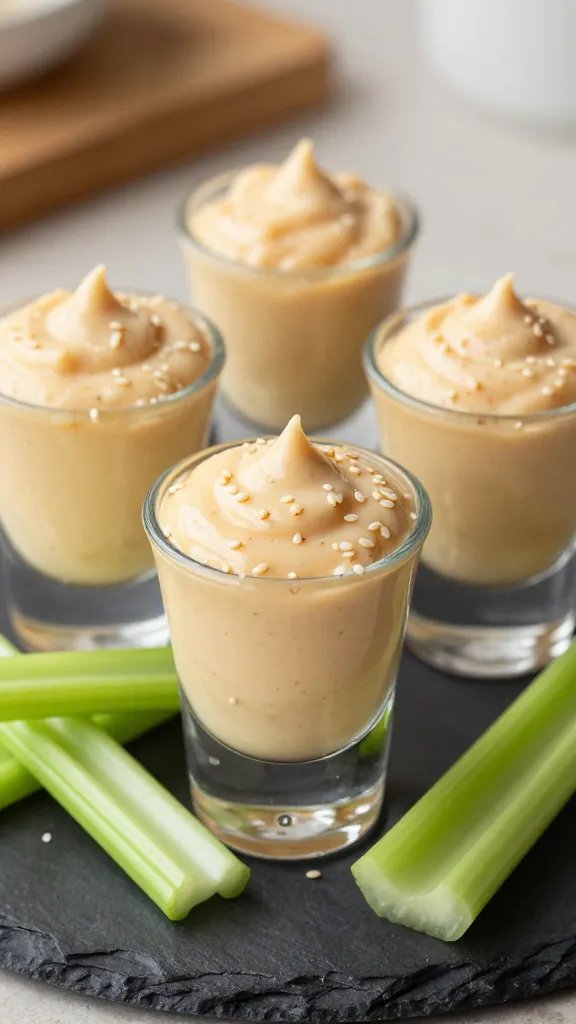
    Item 23

    Rich, creamy, and dangerously good. This dip-in-a-cup approach makes snacking feel fancy without any extra effort.

    Ingredients:

    • 4 oz crab meat
    • 3 oz cream cheese
    • 1 tbsp mayonnaise
    • 1 tsp sesame seeds
    • Celery sticks for dipping

    Instructions:

    1. Combine crab, cream cheese, mayo, and sesame seeds until smooth.
    2. Scoop into small cups or serve with celery sticks.

    Pro tip: chill the dip for 20 minutes to let the flavors mingle. Seriously, it makes a difference.

    Ready to dive in? These 23 no-carb snacks prove keto can be deliciously wicked. Grab a plate, pick a few, and snack with confidence. You’ve earned it.

    Conclusion: You’ve got a toolbox full of crave-worthy, no-carb snacks that fit your weight loss journey on keto. Time to snack smarter, not harder, and enjoy every bite along the way. Let’s snack boldly, friend!
  • 23 Keto Snack Recipes for Work and Home: Quick Crunch Wins

    23 Keto Snack Recipes for Work and Home: Quick Crunch Wins

    Snack time just got upgraded. These keto-worthy bites keep you fueled at the desk and satisfied at home, without the boring sacrifice. Ready to crush cravings and stay in ketosis with a smile?

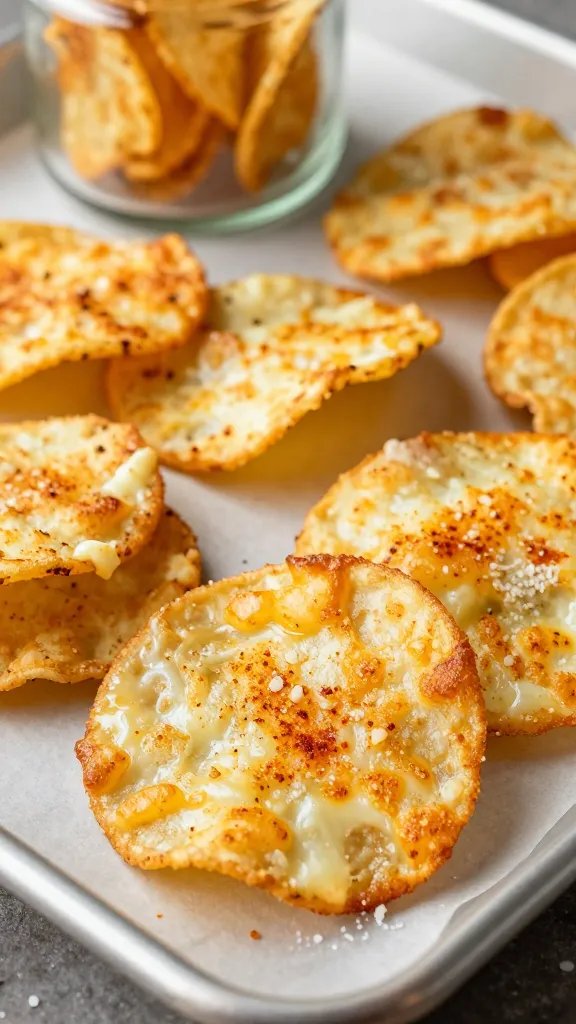
    1. Crispy Garlic Parmesan Cheese Chips That Solve Mogul-Level Snacking

    Item 1

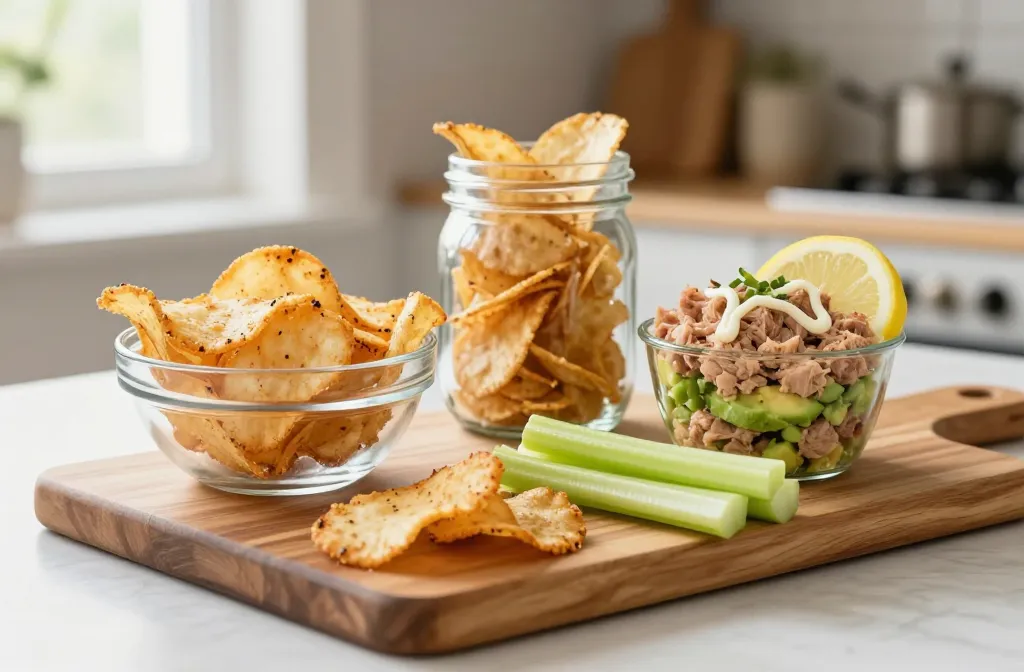
    These wafer-thin chips disappear faster than your coffee order. They’re salty, garlicky, impossibly crunchy, and you can pop them in a little mason jar for easy desk munching.

    Ingredients:

    • 2 cups shredded part-skim mozzarella
    • 1/4 cup grated Parmesan
    • 1/2 teaspoon garlic powder
    • 1/4 teaspoon paprika
    • Salt to taste

    Instructions:

    1. Preheat oven to 400°F (200°C) and line a baking sheet with parchment.
    2. Mix mozzarella, Parmesan, garlic powder, paprika, and a pinch of salt in a bowl.
    3. Spread thin circles on the sheet and bake 6–8 minutes until edges are golden.
    4. Let cool on the sheet for crispier texture.

    Dip these in a quick ranch or marinara for extra zing. FYI, they’re dangerously addictive.

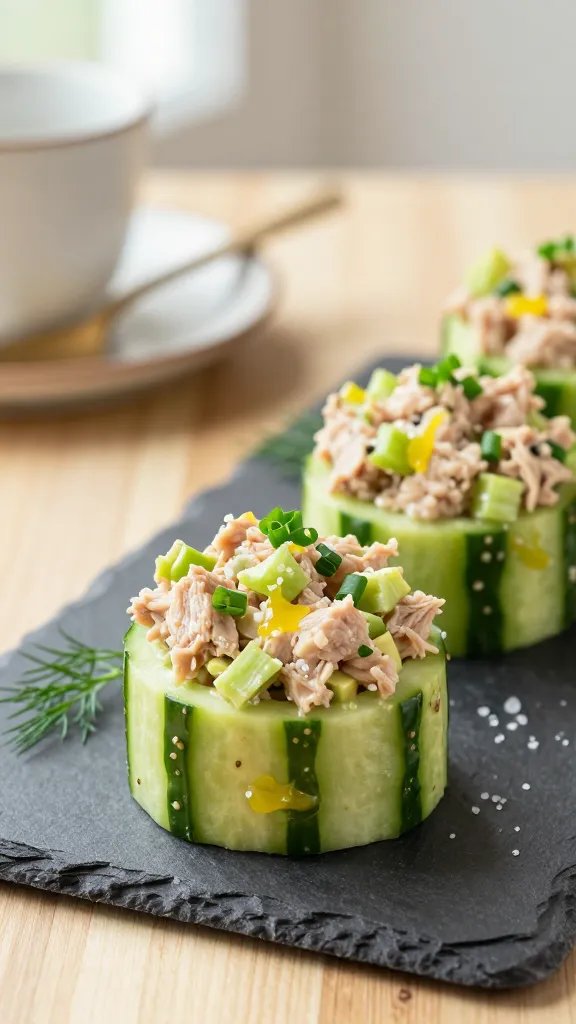
    2. Creamy Avocado Tuna Salad Cups That Travel Well

    Item 2

    High-protein, creamy, and portable. These cups are your new desk buddy and perfect for early morning meal-prep Sundays.

    Ingredients:

    • 1 ripe avocado, mashed
    • 2 cans tuna in water, drained
    • 2 tablespoons mayo
    • 1 tablespoon lemon juice
    • 1 celery stalk, finely diced
    • Salt and pepper

    Instructions:

    1. Combine avocado, tuna, mayo, lemon juice, and celery in a bowl.
    2. Season with salt and pepper to taste.
    3. Scoop into small cups or hollowed cucumber boats for serving.

    Top with chopped chives or dill for a fresh finish. Seriously versatile for lunchboxes too.

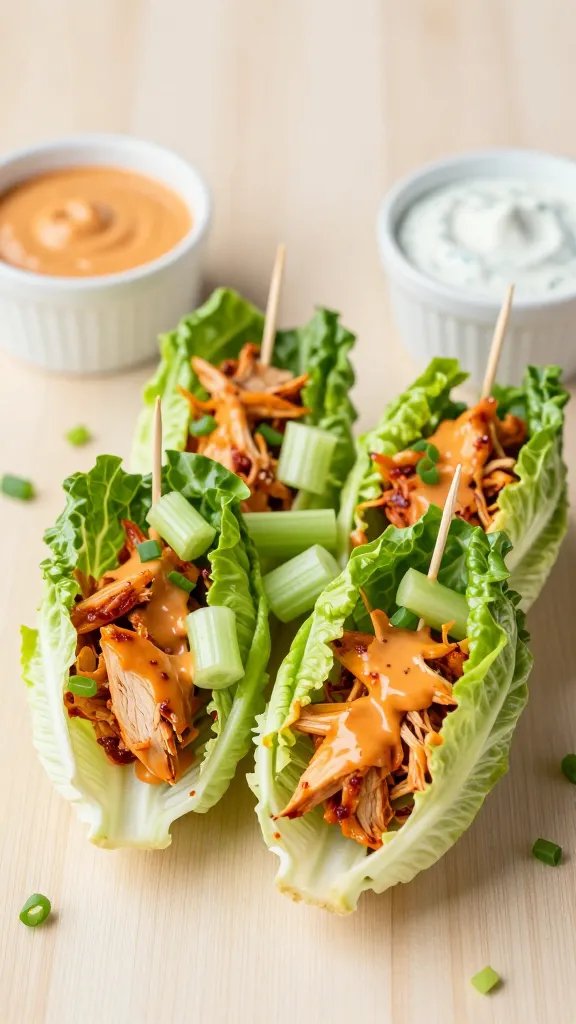
    3. Buffalo Chicken Lettuce Wraps That Snappy-crunch Your Cravings

    Item 3

    Spicy, tangy, and crunchy, these wraps skip the bun and keep you full long after you swallow. Perfect for a lunch break showdown.

    Ingredients:

    • 1 cup shredded chicken (pre-cooked)
    • 2 tablespoons buffalo sauce
    • 2 tablespoons ranch or blue cheese dressing
    • 4 large romaine or butter lettuce leaves
    • 1 tablespoon diced celery

    Instructions:

    1. Toss chicken with buffalo sauce and dressing until coated.
    2. Place a scoop in each lettuce leaf.
    3. Top with celery and roll up. Secure with a toothpick if needed.

    Serve with extra hot sauce on the side for dipping. Trust me, you’ll want seconds.

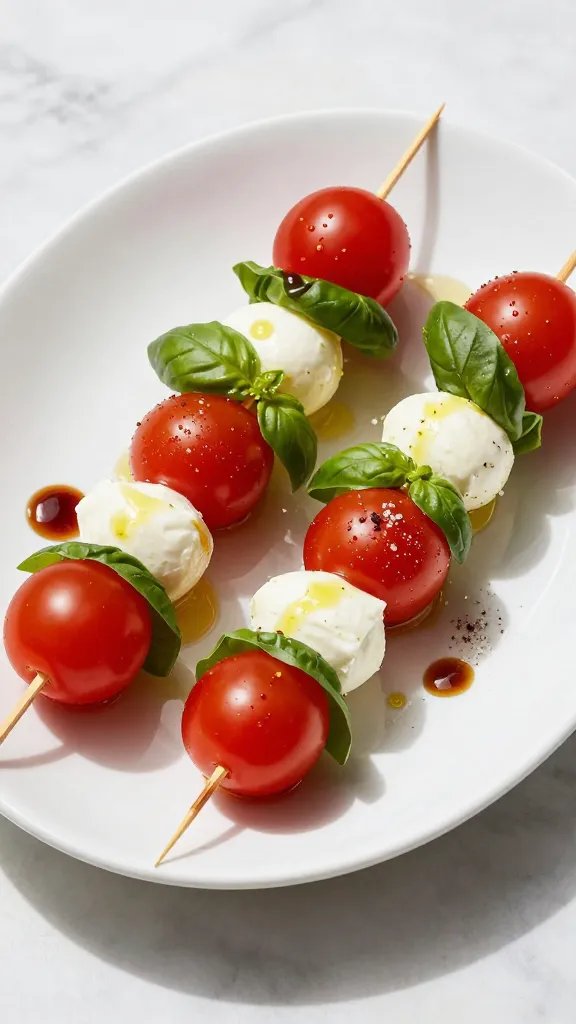
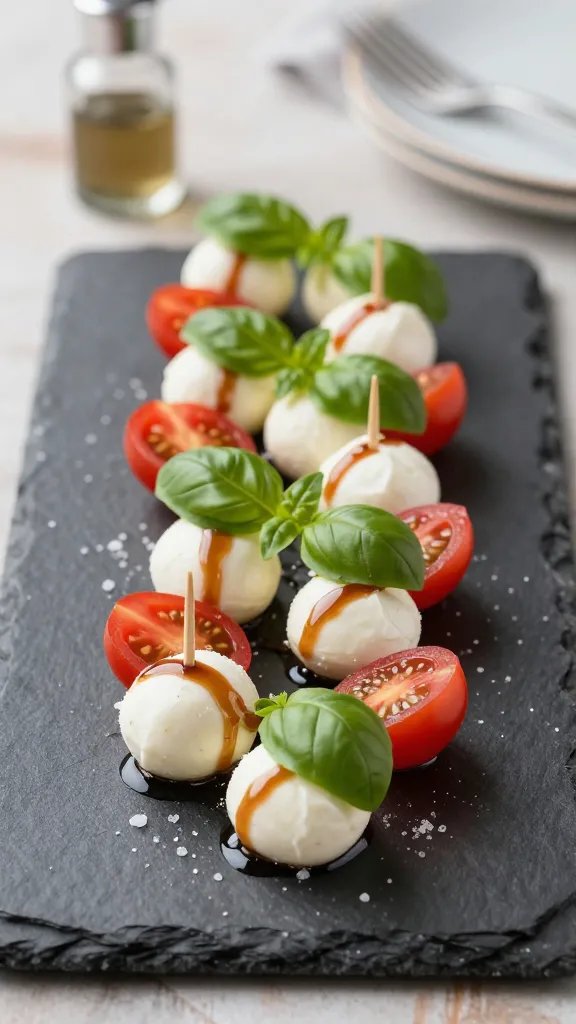
    4. Caprese Skewers With Balsamic Glaze That Smile Back

    Item 4

    All the summer vibes on a stick, minus the bread. These are bright, fresh, and shockingly easy to assemble.

    Ingredients:

    • 1 cup cherry tomatoes
    • 8 fresh mozzarella balls (bocconcini)
    • 8 fresh basil leaves
    • 1 tablespoon balsamic glaze
    • 1 tablespoon olive oil

    Instructions:

    1. Skewer tomato, mozzarella, and basil in an alternating pattern.
    2. Drizzle with olive oil and balsamic glaze.
    3. Season with a pinch of salt and pepper to taste.

    Great as an hors d’oeuvre or quick desk snack. Pretty, bite-sized perfection.

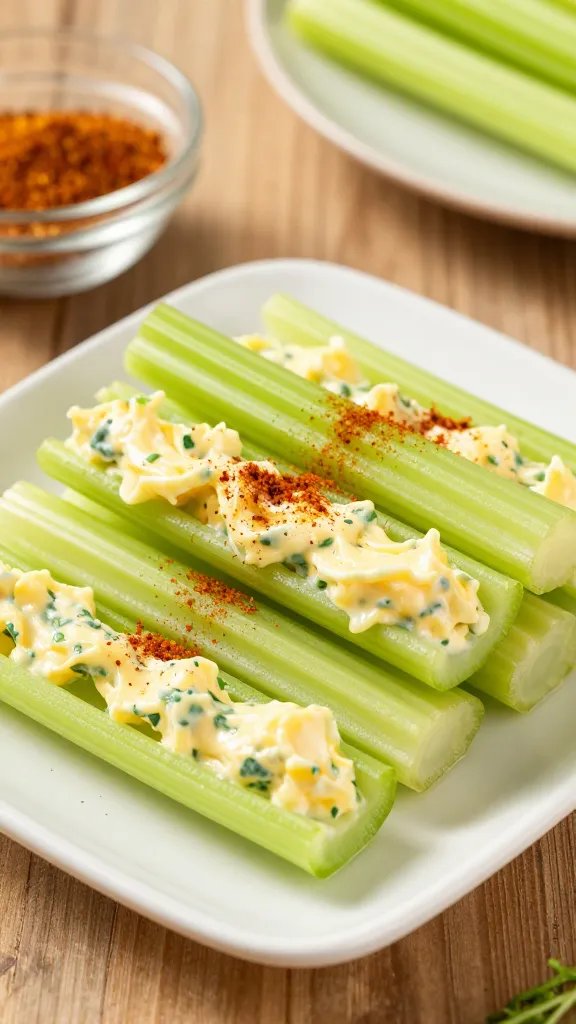
    5. Egg Salad Stuffed Celery Sticks That Beat Plain Snacks

    Item 5

    Cills you up with protein and crunch. These are ideal for make-ahead lunches or a fast brunch.

    Ingredients:

    • 4 large eggs, hard-boiled and chopped
    • 2 tablespoons mayo
    • 1 teaspoon Dijon mustard
    • 1 stalk celery, finely diced
    • Salt and pepper

    Instructions:

    1. Mix eggs, mayo, Dijon, celery, salt, and pepper in a bowl.
    2. Fill celery sticks with the mixture using a spoon or piping bag.
    3. Chill for 15 minutes before serving for a crisper texture.

    Tip: add paprika on top for a smoky flourish. FYI, the celery crunch stays great all afternoon.

    6. Parmesan Zucchini Chips That Fold Into Any Snack Plate

    Item 6

    Thin, cheesy, and crisp without deep-frying. These chips vanish in seconds and pair with a zingy dip.

    Ingredients:

    • 2 large zucchini, sliced thin
    • 1 cup grated Parmesan
    • 1/2 teaspoon garlic powder
    • Salt

    Instructions:

    1. Preheat oven to 425°F (220°C) and line a sheet with parchment.
    2. Dip zucchini slices in Parmesan seasoned with garlic powder and salt.
    3. Lay flat on sheet and bake 8–12 minutes until crisp and golden.

    Cool on rack to keep them extra crisp. They’re great with guac or marinara.

    7. Smoked Salmon Cucumber Rounds That Feel Gourmet

    Item 7

    Luxurious flavor with minimal effort. These rounds feel fancy but come together in minutes.

    Ingredients:

    • 1 cucumber, sliced into rounds
    • 4 oz smoked salmon, cut into small pieces
    • 2 oz cream cheese, softened
    • Capers and dill for garnish

    Instructions:

    1. Spread cream cheese on cucumber rounds.
    2. Top with smoked salmon, capers, and dill.
    3. Serve immediately or chill for 20 minutes for firmer bites.

    Fancy on a budget and super refreshing. IMO, a brunch staple these days.

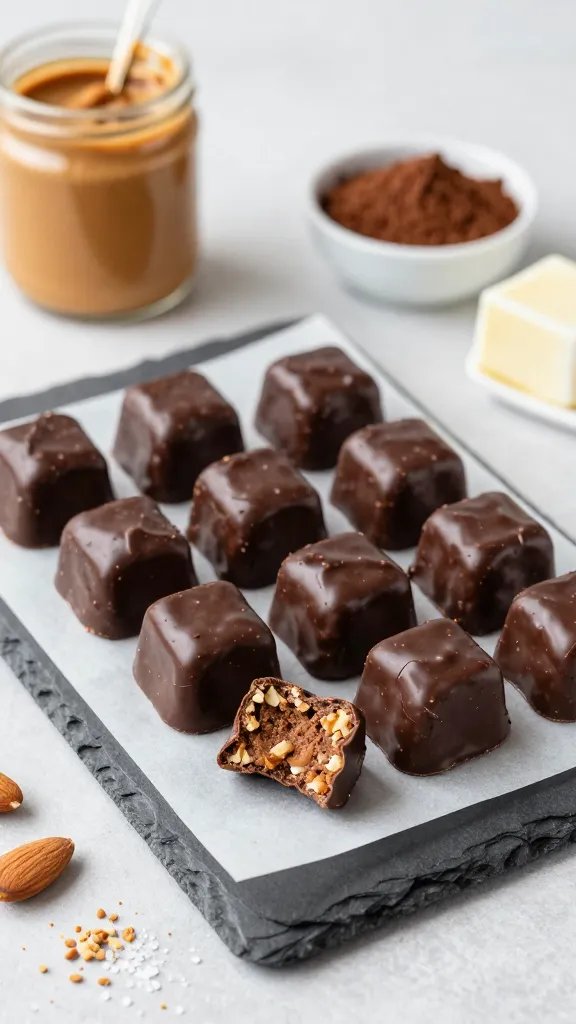
    8. Keto Nut Butter Fat Bombs That Travel Well

    Item 8

    Chewy, rich, and surprisingly filling. These little bites are your secret weapon for long meetings or road trips.

    Ingredients:

    • 1 cup almond butter
    • 1/4 cup coconut oil
    • 2 tablespoons cocoa powder
    • 1 tablespoon erythritol or preferred sweetener
    • Pinch of sea salt

    Instructions:

    1. Warm almond butter and coconut oil until smooth.
    2. Whisk in cocoa powder, sweetener, and salt.
    3. Pour into a lined tray and freeze 1–2 hours; cut into squares.

    Keep refrigerated for best texture. FYI, you can roll them in chopped nuts for extra crunch.

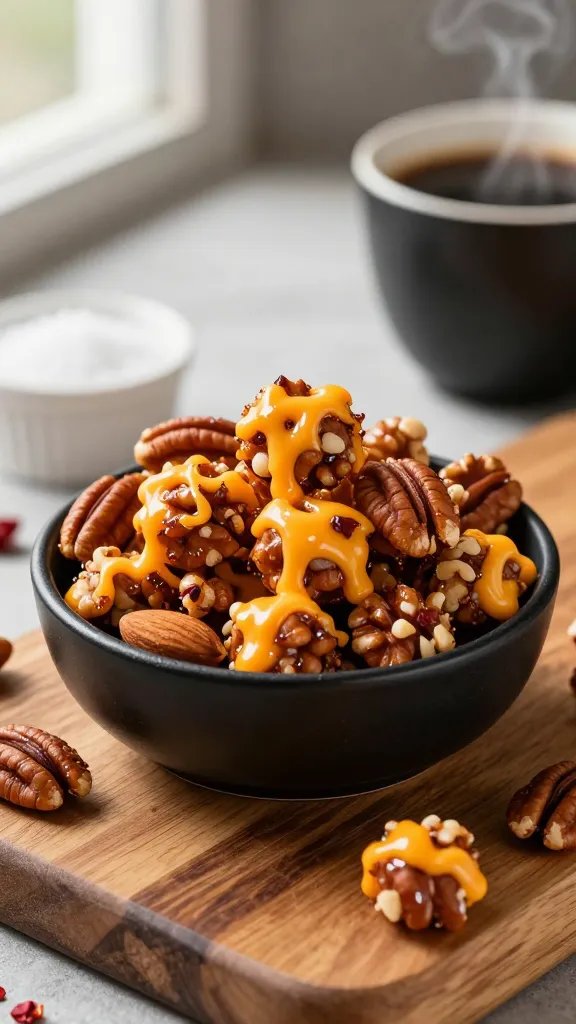
    9. Spicy Nut Mix With Cheddar Bites That Crush Cravings

    Item 9

    Savory, spicy, and ridiculously satisfying. A trail mix that won’t derail your macros.

    Ingredients:

    • 1 cup almonds
    • 1 cup pecans
    • 1 cup walnuts
    • 1/2 cup shredded cheddar cheese
    • 1/2 teaspoon chili powder
    • Salt to taste

    Instructions:

    1. Toast nuts in a dry pan until fragrant.
    2. Stir in cheese and chili powder until melted and clinging to nuts.
    3. Spread on parchment to cool and harden into bites.

    Store in an airtight container for a week. Seriously addicting with a coffee.

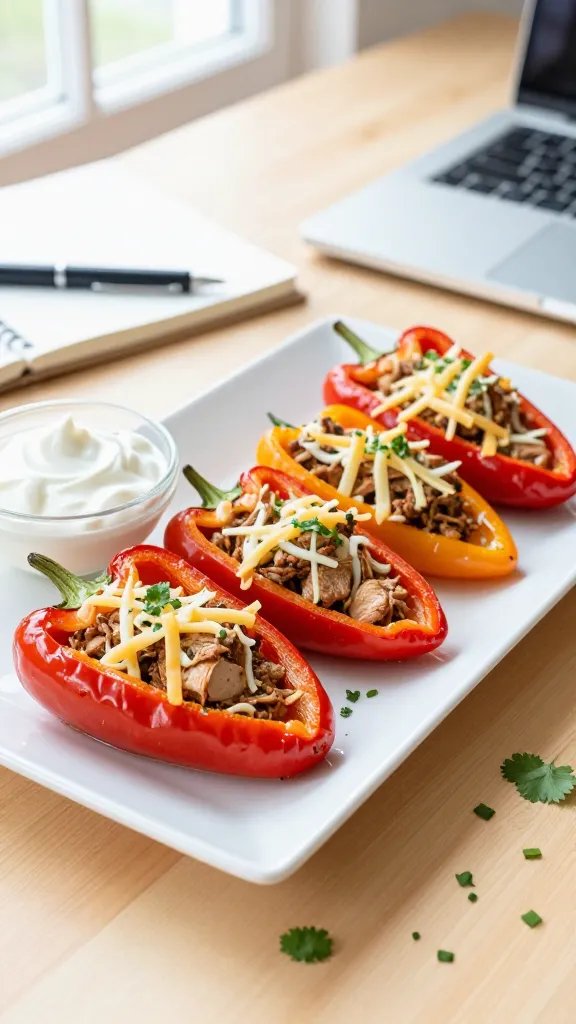
    10. Baked Turkey Stuffed Mini Peppers That Brighten Any Desk Lunch

    Item 10

    Colorful, crunchy, and protein-packed. These pepper boats are a crowd pleaser at any event or office potluck.

    Ingredients:

    • 12 mini bell peppers
    • 1 cup ground turkey, cooked
    • 1/4 cup shredded cheese
    • 1 tablespoon taco seasoning

    Instructions:

    1. Halve peppers and remove seeds.
    2. Mix turkey with cheese and seasoning; fill peppers.
    3. Bake at 375°F (190°C) for 15–18 minutes until peppers are tender.

    Serve with a dollop of sour cream or Greek yogurt. Simple, cute, and satisfying.

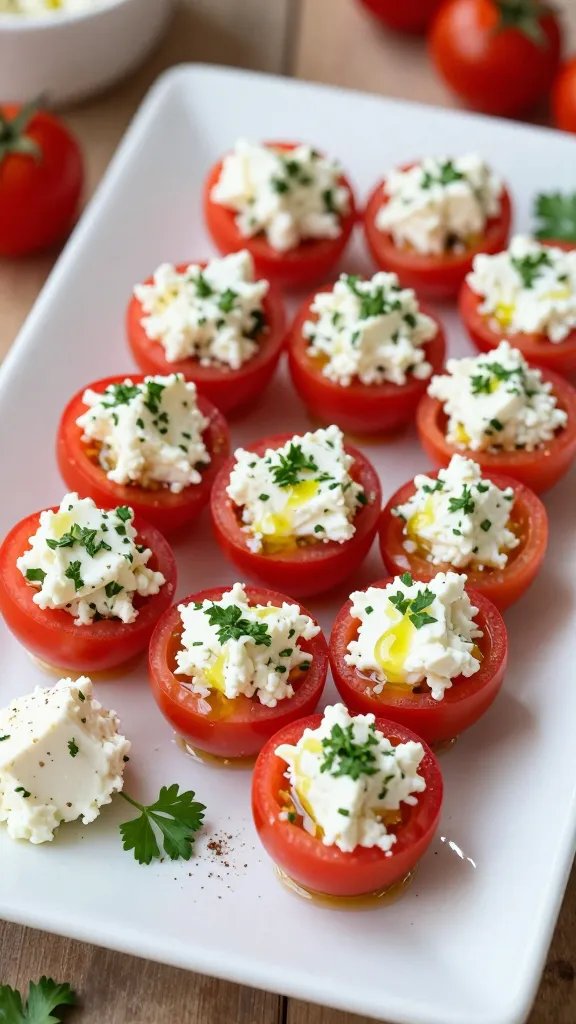
    11. Herby Feta Stuffed Cherry Tomatoes That Brighten Any Snack Plate

    Item 11

    Bright, bite-sized, and so dang flavorful. A veggie-forward win for busy days.

    Ingredients:

    • 20 cherry tomatoes
    • 1/2 cup feta, crumbled
    • 1 tablespoon finely chopped parsley
    • Drizzle of olive oil

    Instructions:

    1. Slice tops off tomatoes and scoop out centers with a small spoon.
    2. Mix feta with parsley and a drizzle of olive oil.
    3. Stuff mixture into tomatoes and chill for 10 minutes to set.

    Garnish with cracked pepper for a fancy touch. FYI, make a bunch to snack through the week.

    12. Mini Caprese Bites With Balsamic Drizzle That Dazzle

    Item 12

    Same idea as the skewers, but handheld and ready in minutes. A classic comeback for keto snacking.

    Ingredients:

    • 12 mini mozzarella balls
    • 12 cherry tomatoes
    • Fresh basil leaves
    • Balsamic glaze for drizzling

    Instructions:

    1. Skewer tomato, mozzarella, and basil in order.
    2. Drizzle with balsamic glaze.
    3. Season with salt if desired and serve.

    Perfect for entertaining or a sophisticated snack break at work.

    13. Cheesy Spinach Stuffed Mushrooms That Win Potlucks

    Item 13

    Earthy mushrooms meet creamy cheese—simple, elegant, and incredibly satisfying.

    Ingredients:

    • 12 button mushrooms, stems removed
    • 1 cup spinach, chopped
    • 1/2 cup cream cheese
    • 1/4 cup grated parmesan

    Instructions:

    1. Preheat oven to 375°F (190°C).
    2. Sauté spinach until wilted; mix with cream cheese and parmesan.
    3. Stuff into mushroom caps and bake 15 minutes until bubbly.

    Finish under the broiler for 1–2 minutes if you want a bubbly top. Fancy yet easy.

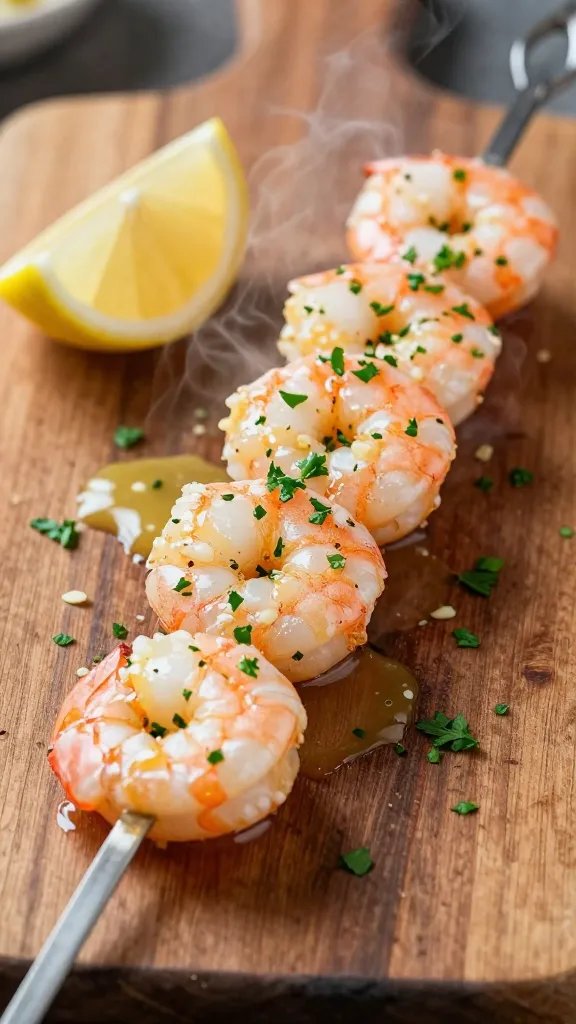
    14. Garlic Butter Shrimp Skewers That Sizzle

    Item 14

    Seafood done in a few minutes, with a buttery garlic kiss. Perfect for a quick dinner or late-night snack craving.

    Ingredients:

    • 12 shrimp, peeled and deveined
    • 2 tablespoons butter
    • 2 cloves garlic, minced
    • Chopped parsley for garnish

    Instructions:

    1. Melt butter and sauté garlic until fragrant.
    2. Add shrimp and cook 2–3 minutes per side until pink.
    3. Garnish with parsley and serve hot.

    Tip: serve with a squeeze of lemon for brightness. Seriously, lemon makes everything better.

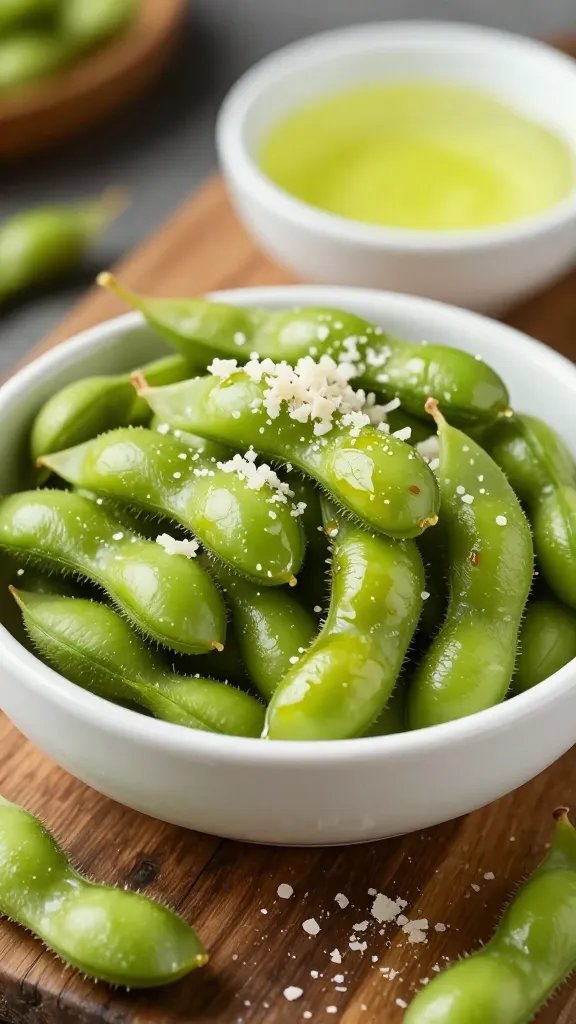
    15. Parmesan Garlic Edamame That Disappears Fast

    Item 15

    Green, crunchy, and irresistibly salty. A high-protein snack you’ll reach for again and again.

    Ingredients:

    • 2 cups shelled edamame
    • 1 tablespoon olive oil
    • 1/3 cup grated Parmesan
    • 1/2 teaspoon garlic powder

    Instructions:

    1. Boil or steam edamame until tender, then drain.
    2. Toss with olive oil, Parmesan, and garlic powder while warm.
    3. Spread on a sheet to cool and crisp slightly.

    Pair with a quick soy-lime dip if you’re feeling fancy. FYI, it’s like a playground snack for adults.

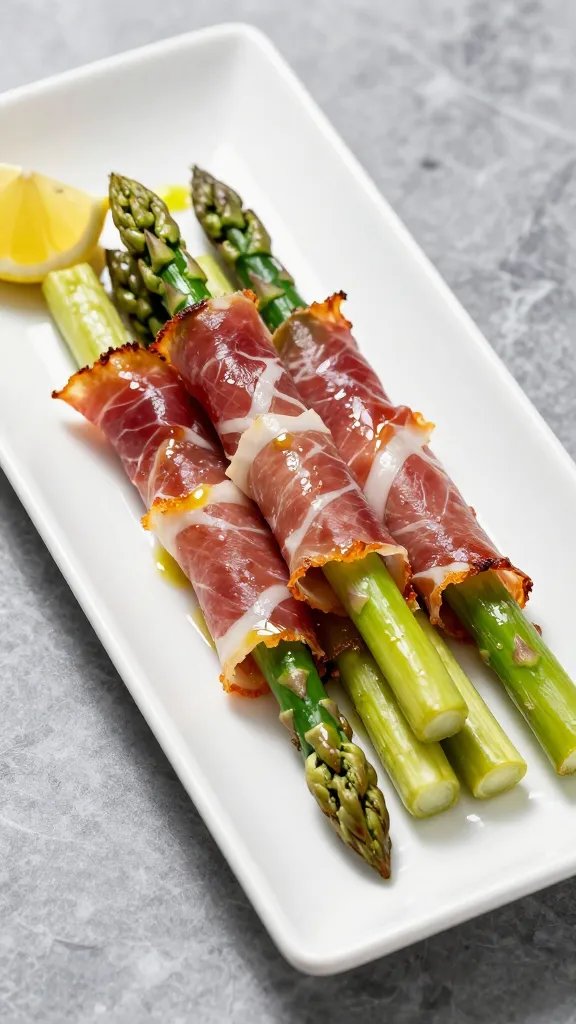
    16. Prosciutto Wrapped Asparagus Sticks That Look Gourmet

    Item 16

    Salty meets green in a classy little bite. These feel fancy without the fuss.

    Ingredients:

    • 12 asparagus spears, trimmed
    • 6 slices prosciutto, halved
    • Drizzle of olive oil

    Instructions:

    1. Wrap each asparagus spear with a half slice of prosciutto.
    2. Bake at 400°F (200°C) for 10–12 minutes until crisp.
    3. Finish with a light drizzle of olive oil.

    Serve warm with a squeeze of lemon. Seriously elegant for a quick snack.

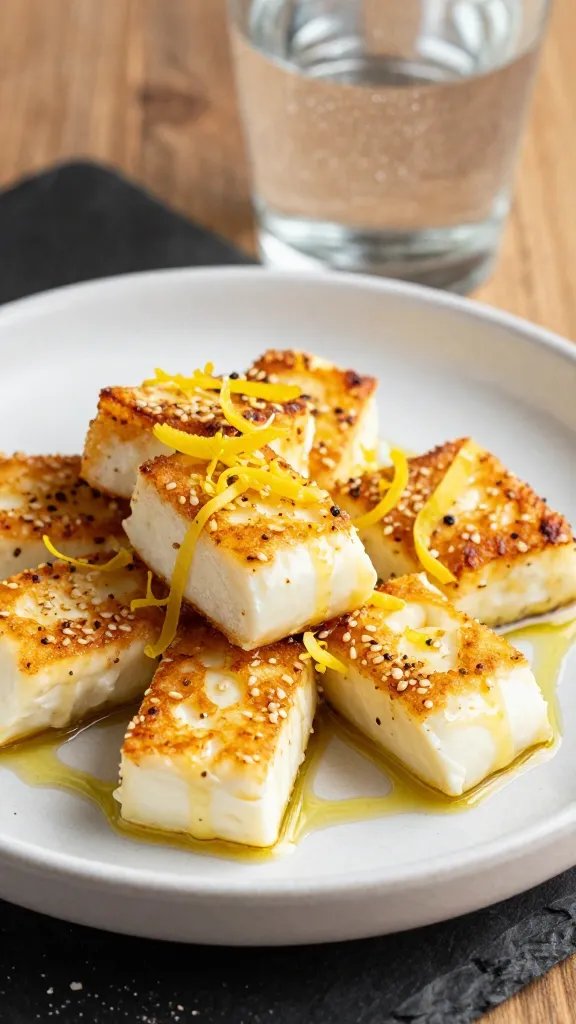
    17. Haloumi Cheese Bites With Lemon Zest That Spark Joy

    Item 17

    Salty, squeaky cheese that snacks like popcorn. Lemon zest adds a sunny zing you didn’t know you needed.

    Ingredients:

    • 250 g halloumi, cubed
    • 1 tablespoon olive oil
    • Zest of 1 lemon

    Instructions:

    1. Pan-fry halloumi cubes in olive oil until golden.
    2. Top with lemon zest and a pinch of pepper.

    Best served warm with a cold drink. FYI, they reheat surprisingly well in a skillet.

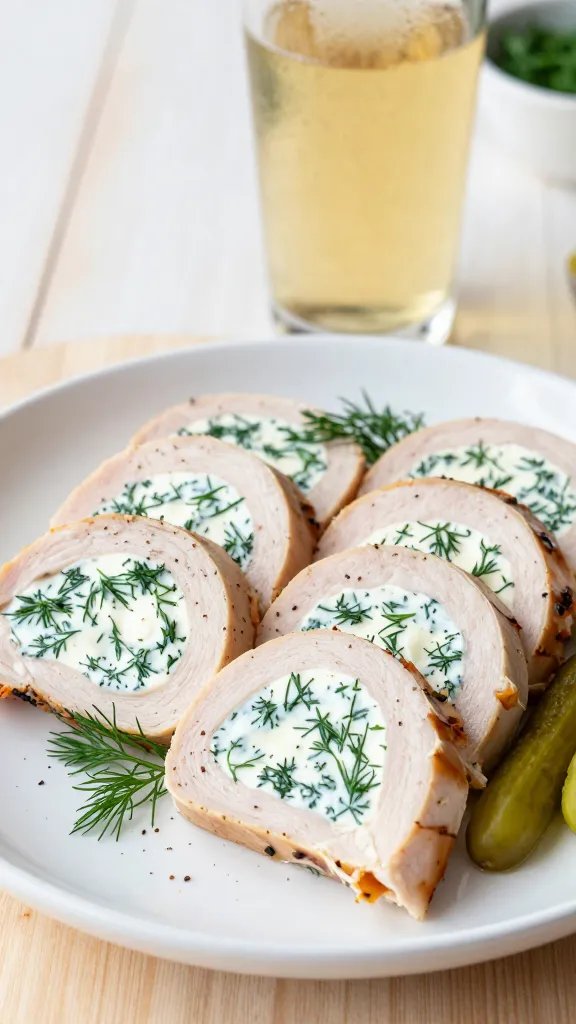
    18. Smoked Turkey Roll-Ups With Cream Cheese Dill

    Item 18

    Low-carb, protein-packed, and cute as a button. Roll-ups for days, seriously.

    Ingredients:

    • 6 slices smoked turkey
    • 3 tablespoons cream cheese, softened
    • 1 tablespoon chopped dill

    Instructions:

    1. Spread cream cheese on turkey slices.
    2. Sprinkle dill and roll up tightly.
    3. Chill 10 minutes for easier slicing, then cut in half.

    Great with pickles on the side. IMO, they pair perfectly with a crisp hard cider.

    19. Cauliflower Tater Tots That Actually Taste Like Real Tots

    Item 19

    A sneaky veggie win that mimics the classic crunch. Kids and adults both approve.

    Ingredients:

    • 2 cups riced cauliflower
    • 1 egg
    • 1/4 cup shredded cheese
    • Salt and pepper

    Instructions:

    1. Steam cauliflower until tender; squeeze out moisture.
    2. Mix with egg, cheese, salt, and pepper; form into tots.
    3. Bake at 425°F (220°C) for 15–18 minutes until crisp.

    Serve with sugar-free ketchup or a spicy mayo. FYI, you’ll crave more than one batch.

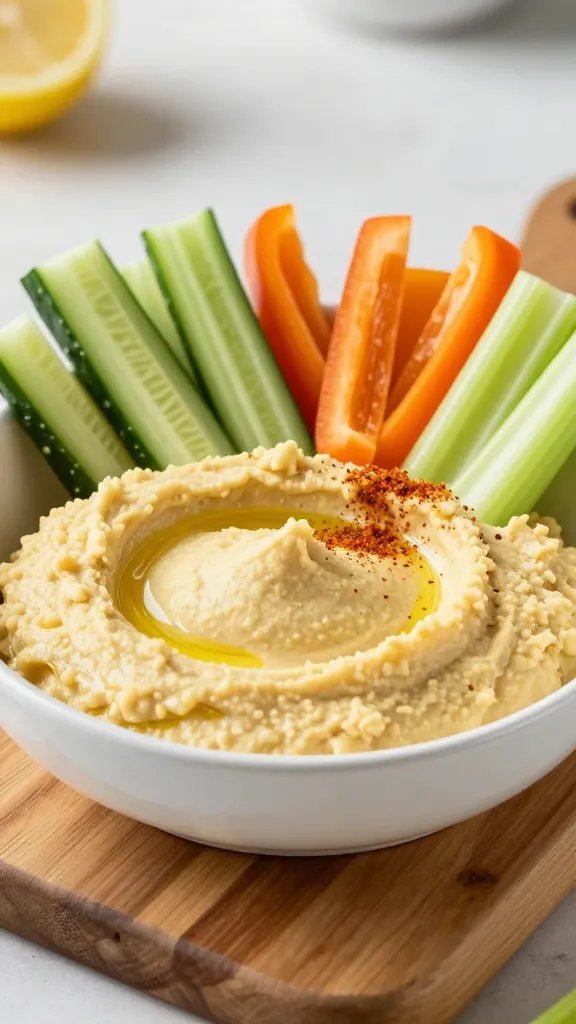
    20. Zesty Lemon Garlic Hummus Lepers (Keto-Friendly) With Veggie Sticks

    Item 20

    Hummus that barely crosses into keto if you skip the chickpeas? This lemony version keeps the soul and cuts the carbs.

    Ingredients:

    • 1 cup sour cream
    • 1/2 cup mayonnaise
    • 2 tablespoons lemon juice
    • 2 cloves garlic, minced
    • Salt and pepper

    Instructions:

    1. Whisk all ingredients until smooth.
    2. Chill 20 minutes to let flavors meld.
    3. Serve with cucumber and bell pepper sticks.

    FYI, you can add a pinch of paprika for a smoky finish. Seriously delicious with raw veggies.

    21. Pesto Cheese Palmiers That Make You Look Pro

    Item 21

    Flaky, herby, and impossibly cute. They feel fancy but are surprisingly simple to assemble.

    Ingredients:

    • 1 sheet puff pastry (low-carb if you can find it)
    • 4 tablespoons pesto
    • 1/2 cup shredded mozzarella

    Instructions:

    1. Spread pesto over pastry; sprinkle mozzarella.
    2. Roll from both sides to meet in the middle; slice into rounds.
    3. Bake at 400°F (200°C) for 12–15 minutes until golden and puffed.

    Cool slightly before serving. These disappear before your eyes at gatherings.

    22. Almond Flour Mini Quiches That Work Squared Away

    Item 22

    No crust panic here—these bite-sized quiches keep you full and focused. Great for workweek mornings or a quick dinner.

    Ingredients:

    • 3 eggs
    • 1/2 cup almond flour
    • 1/4 cup shredded cheese
    • 1/4 cup chopped veggies (bell pepper, spinach, onions)

    Instructions:

    1. Whisk eggs and almond flour; stir in cheese and veggies.
    2. Pour into greased mini muffin tin.
    3. Bake at 350°F (175°C) for 15–18 minutes until set.

    Cool 5 minutes before removing. A perfect grab-and-go bite.

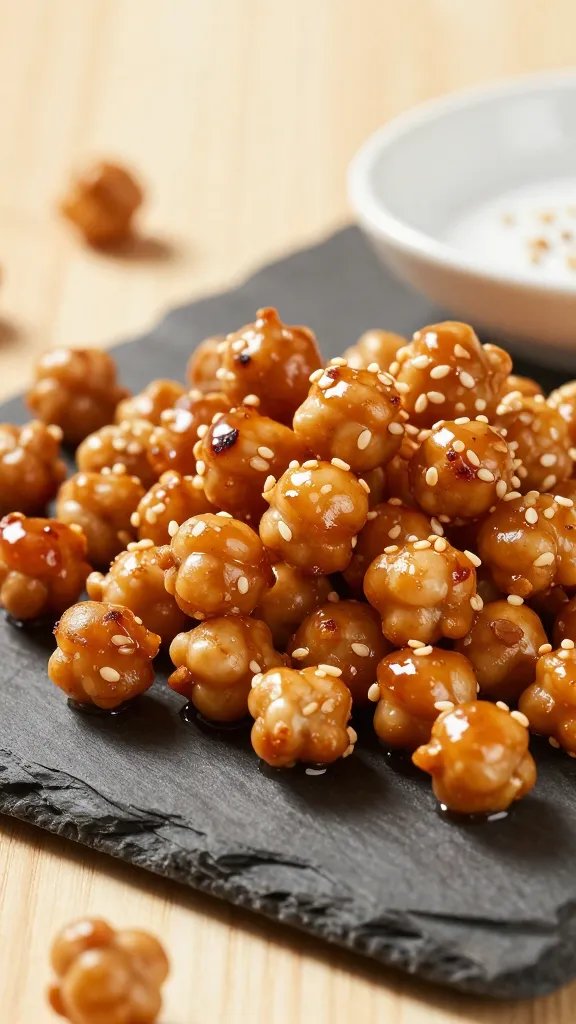
    23. Sesame Miso Roasted Chickpeas That Don’t Taste Like Desk Snack Hell

    Item 23

    Crunchy, toasty, and strangely addictive. A savory bite that keeps you away from the candy jar.

    Ingredients:

    • 2 cups canned chickpeas, drained and dried
    • 1 tablespoon miso paste
    • 1 teaspoon sesame oil
    • 1 teaspoon sesame seeds

    Instructions:

    1. Toss chickpeas with miso and sesame oil until evenly coated.
    2. Spread on a baking sheet and roast at 400°F (200°C) for 20–25 minutes, stirring halfway.
    3. Sprinkle with sesame seeds after removing from oven.

    Let cool for crisp texture. FYI, they stay crunchy for days in an airtight jar.

    Ready to stock your snack shelf with these keto-friendly bites? You’ve got 23 bold options that fit workdays and home nights alike. Mix and match based on what you’re craving, and you’ll never fall back on boring snacks again.

    Crave more tips or want to share your favorite combo? IMO, shoot me your top pick and I’ll tailor a week-long snack plan just for you. Seriously, you’ve got this—snack time just got epic.

  • Lemon Blueberry Sourdough Focaccia – Bright, Juicy, and Soft

    Lemon Blueberry Sourdough Focaccia – Bright, Juicy, and Soft

    This focaccia brings sunshine to your table with zesty lemon, bursty blueberries, and a tender, olive-oil-rich crumb. It’s familiar enough to feel comforting, but the sweet-tart twist makes it special. If you love sourdough and simple baking projects, this one’s a keeper.

    The dough is forgiving, the rise is slow and flavorful, and the result is perfect for brunch or an afternoon treat.

    Why This Recipe Works

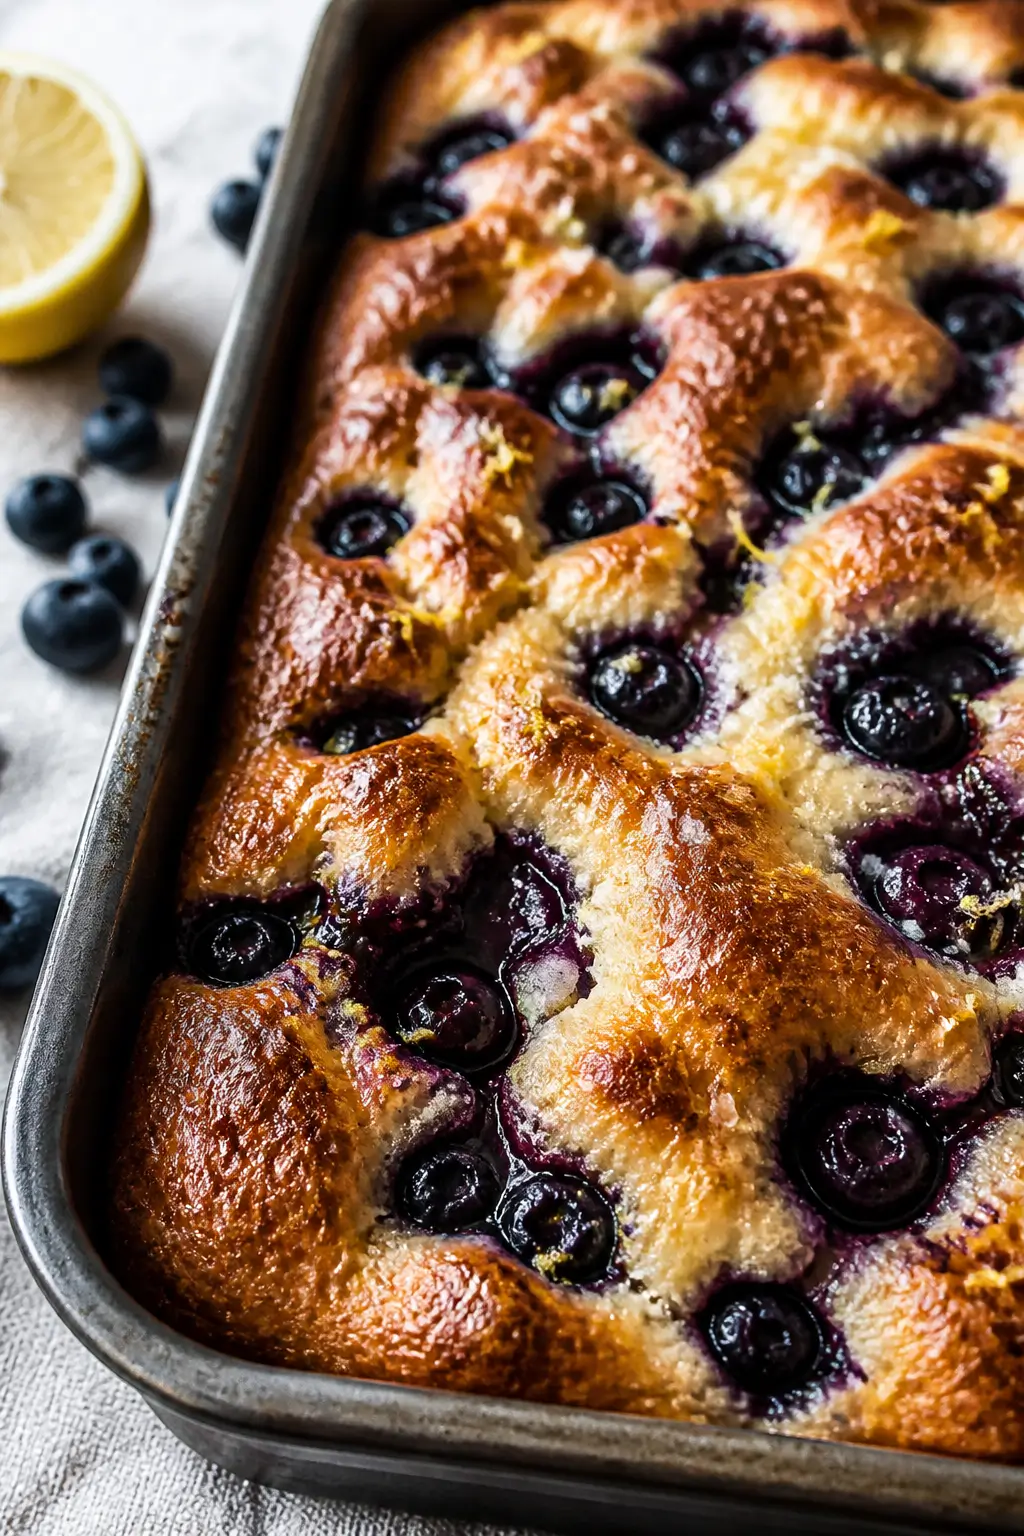
    Close-up detail of freshly baked lemon blueberry sourdough focaccia just out of the oven, edges deep

    This recipe uses active sourdough starter for flavor and a gentle rise, which gives the focaccia a light, airy interior. A high-hydration dough keeps the crumb soft and open, ideal for soaking up olive oil and lemon syrup. Blueberries nestle into the dimples and bake into jammy pockets.

    A quick lemon syrup brushed on top at the end adds shine and a bright finish without making the bread soggy.

    Shopping List

    • Active sourdough starter (100% hydration)
    • Bread flour (all-purpose works in a pinch)
    • Warm water
    • Fine sea salt
    • Extra-virgin olive oil
    • Fresh blueberries
    • Lemon (you’ll use zest and juice)
    • Granulated sugar or honey (for the lemon syrup)
    • Optional: vanilla extract, flaky salt

    Step-by-Step Instructions

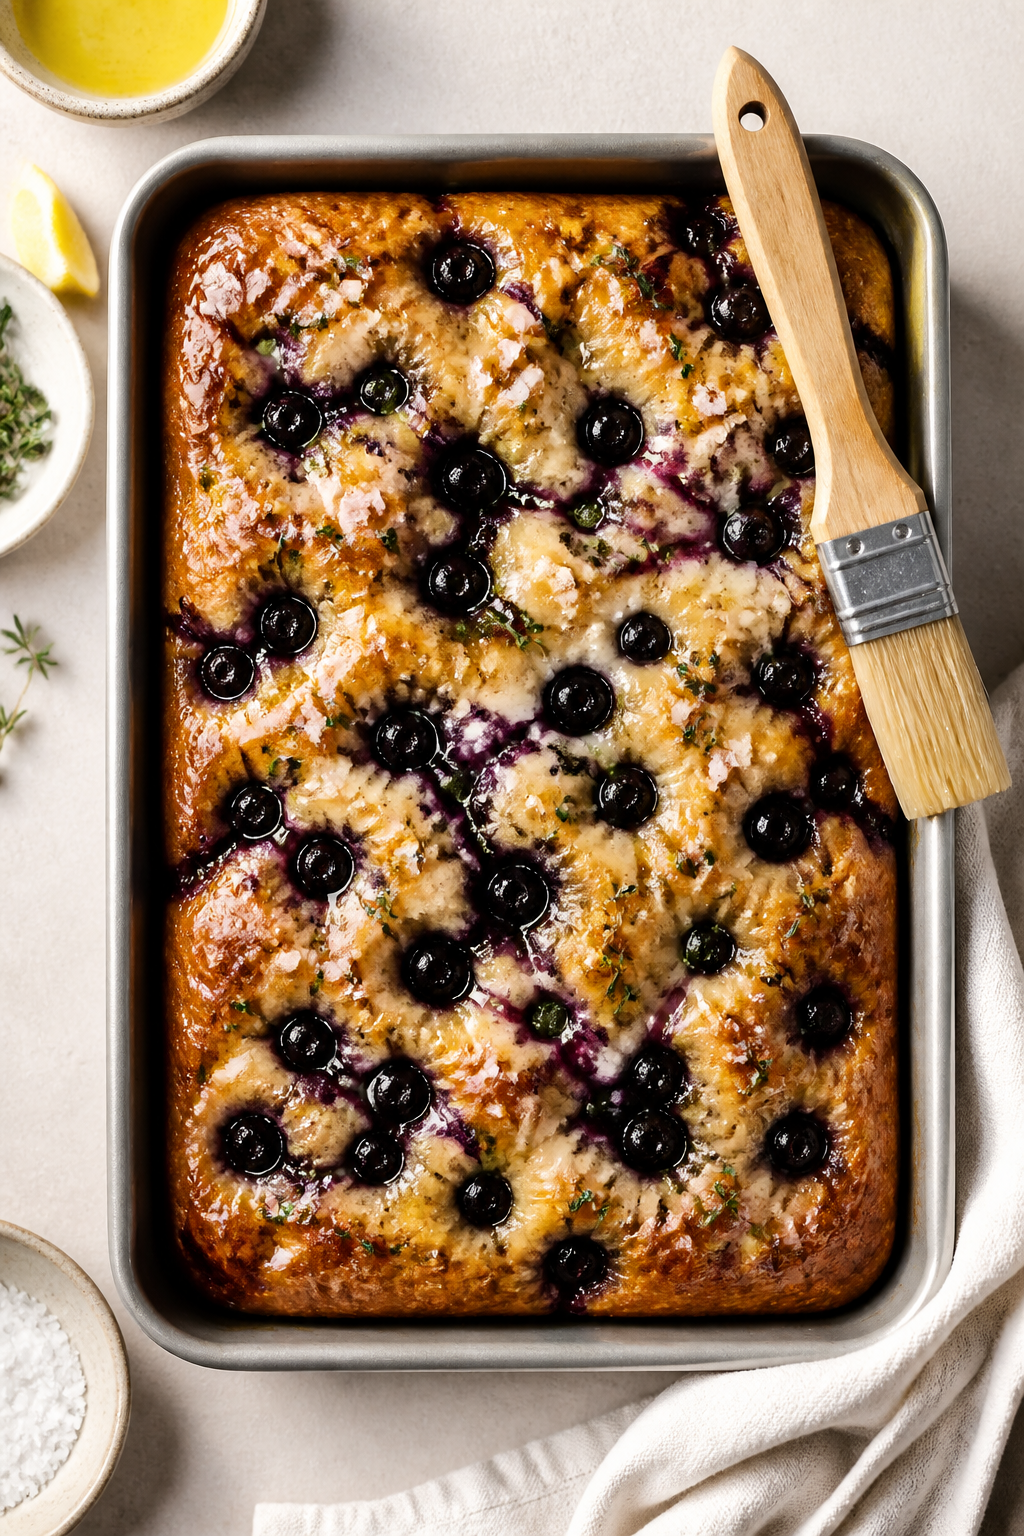
    Overhead final presentation shot of sliced lemon blueberry sourdough focaccia on a dark slate board,
    1. Feed your starter. Make sure it’s bubbly and active. It should double within 4–6 hours and pass the float test.
    2. Mix the dough. In a large bowl, combine 100 g active starter, 425 g warm water, and 500 g bread flour. Stir until no dry bits remain.

      Rest 20–30 minutes (autolyse).

    3. Add salt and oil. Sprinkle in 10 g fine sea salt and 1 tablespoon olive oil. Pinch and fold the dough until incorporated. The dough will be sticky—that’s good.
    4. Bulk fermentation with folds. Over 2 hours at room temp, perform 3–4 sets of stretch-and-folds every 30 minutes.

      Cover and let it rise until puffy and about 50% larger, another 1–2 hours depending on kitchen temperature.

    5. Pan and cold proof. Generously oil a 9×13-inch pan (or a large cast-iron skillet). Gently tip in the dough, fold edges to create a rough rectangle, and coat the surface with more olive oil. Cover and refrigerate 8–12 hours for flavor and easy handling.
    6. Warm up and preheat. Remove from the fridge and let the dough sit at room temp 45–60 minutes.

      Preheat oven to 425°F (220°C).

    7. Dimple and top. Oil your fingertips and press deep dimples across the dough. Sprinkle on lemon zest (from 1 lemon) and press in 1 to 1 1/2 cups blueberries. Drizzle with 1–2 tablespoons olive oil and a pinch of flaky salt if using.
    8. Bake. Bake 22–28 minutes, until the edges are deeply golden and the top has caramelized spots.

      Rotate the pan once for even color.

    9. Make lemon syrup. While it bakes, simmer 2 tablespoons lemon juice with 2 tablespoons sugar (or honey) for 1–2 minutes until slightly thickened. Add a few drops vanilla if you like.
    10. Finish. Brush warm focaccia with lemon syrup. Cool 10–15 minutes before slicing so the crumb sets and the berries don’t burst out.

    How to Store

    • Room temperature: Keep in an airtight container for up to 2 days.

      Re-crisp in a 350°F (175°C) oven for 6–8 minutes.

    • Freezer: Wrap slices tightly and freeze up to 2 months. Thaw at room temp, then warm in the oven.
    • Avoid the fridge: It dries out bread faster and dulls the flavor.

    Health Benefits

    • Sourdough fermentation can make gluten easier to digest for some people and may improve mineral absorption.
    • Olive oil provides heart-healthy fats and keeps the crumb tender without butter.
    • Blueberries offer antioxidants and natural sweetness, reducing the need for heavy sugar.
    • Lemon adds vitamin C and bright flavor with minimal calories.

    What Not to Do

    • Don’t use an inactive starter. If it’s sluggish, your focaccia will be dense.
    • Don’t skimp on oiling the pan. It prevents sticking and creates that signature crisp bottom.
    • Don’t overload with berries. Too many can weigh down the dough and make soggy pockets.
    • Don’t skip the rest after baking. Cutting too soon releases steam and collapses the crumb.

    Variations You Can Try

    • Lemon-thyme: Add fresh thyme leaves with the zest for an herby note.
    • Lemon-ricotta: Dollop ricotta after baking, then drizzle with honey.
    • Mixed berries: Swap in raspberries or blackberries, keeping the total fruit amount the same.
    • Poppy seed crunch: Sprinkle poppy seeds over the top with the zest.
    • Lemon glaze: Skip syrup and whisk powdered sugar with lemon juice for a light drizzle once cool.

    FAQ

    Can I use instant yeast instead of sourdough?

    Yes. Use 2 teaspoons instant yeast, increase water to 450 g, and skip the long cold proof—rise until doubled, then proceed.

    You’ll lose some tang but keep the texture.

    Do frozen blueberries work?

    They do. Use from frozen, and don’t thaw. Toss lightly with a teaspoon of flour to reduce bleeding, then press into the dough.

    What if my dough is too sticky to handle?

    Sticky dough is normal.

    Oil your hands, use a bench scraper, and trust the folds and cold proof. Resist adding extra flour, which tightens the crumb.

    How do I know it’s fully baked?

    The edges should be deep golden and crisp, and the center should spring back when pressed. An internal temp around 200–205°F (93–96°C) is ideal.

    Can I make it same-day?

    Yes.

    After bulk fermentation, let it rise in the pan at room temp until puffy (45–75 minutes), then bake. Flavor is better with an overnight chill, but it’s still delicious.

    In Conclusion

    Lemon blueberry sourdough focaccia is bright, plush, and surprisingly easy. With a lively starter, plenty of olive oil, and a touch of lemon syrup, you get a bakery-quality bake at home.

    Serve it warm for brunch, snack on it with tea, or pair it with a simple salad. It’s the kind of bread that makes an ordinary day feel special.

    Lemon Blueberry Sourdough Focaccia – Bright, Juicy, and Soft

    Prep Time 20 minutes
    Cook Time 25 minutes
    Total Time 45 minutes
    Servings: 8 servings

    Ingredients
      

    • Active sourdough starter (100% hydration)
    • Bread flour (all-purpose works in a pinch)
    • Warm water
    • Fine sea salt
    • Extra-virgin olive oil
    • Fresh blueberries
    • Lemon (you’ll use zest and juice)
    • Granulated sugar or honey (for the lemon syrup)
    • Optional: vanilla extract, flaky salt

    Method
     

    1. Feed your starter. Make sure it’s bubbly and active. It should double within 4–6 hours and pass the float test.
    2. Mix the dough. In a large bowl, combine 100 g active starter, 425 g warm water, and 500 g bread flour. Stir until no dry bits remain. Rest 20–30 minutes (autolyse).
    3. Add salt and oil. Sprinkle in 10 g fine sea salt and 1 tablespoon olive oil. Pinch and fold the dough until incorporated. The dough will be sticky—that’s good.
    4. Bulk fermentation with folds. Over 2 hours at room temp, perform 3–4 sets of stretch-and-folds every 30 minutes. Cover and let it rise until puffy and about 50% larger, another 1–2 hours depending on kitchen temperature.
    5. Pan and cold proof. Generously oil a 9×13-inch pan (or a large cast-iron skillet). Gently tip in the dough, fold edges to create a rough rectangle, and coat the surface with more olive oil. Cover and refrigerate 8–12 hours for flavor and easy handling.
    6. Warm up and preheat. Remove from the fridge and let the dough sit at room temp 45–60 minutes. Preheat oven to 425°F (220°C).
    7. Dimple and top. Oil your fingertips and press deep dimples across the dough. Sprinkle on lemon zest (from 1 lemon) and press in 1 to 1 1/2 cups blueberries. Drizzle with 1–2 tablespoons olive oil and a pinch of flaky salt if using.
    8. Bake. Bake 22–28 minutes, until the edges are deeply golden and the top has caramelized spots. Rotate the pan once for even color.
    9. Make lemon syrup. While it bakes, simmer 2 tablespoons lemon juice with 2 tablespoons sugar (or honey) for 1–2 minutes until slightly thickened. Add a few drops vanilla if you like.
    10. Finish. Brush warm focaccia with lemon syrup. Cool 10–15 minutes before slicing so the crumb sets and the berries don’t burst out.
  • Lemon Blueberry Focaccia – Bright, Juicy, and Perfect for Brunch

    Lemon Blueberry Focaccia – Bright, Juicy, and Perfect for Brunch

    This lemon blueberry focaccia is the kind of bake that makes your kitchen smell like sunshine. It’s soft, airy, and dotted with juicy berries that burst into the dough. A hint of lemon lifts everything and keeps it from being too sweet.

    Drizzle on a simple honey-lemon glaze, and you’ve got a beautiful, bakery-style treat. Serve it warm for brunch, afternoon coffee, or as an easy dessert.

    What Makes This Special

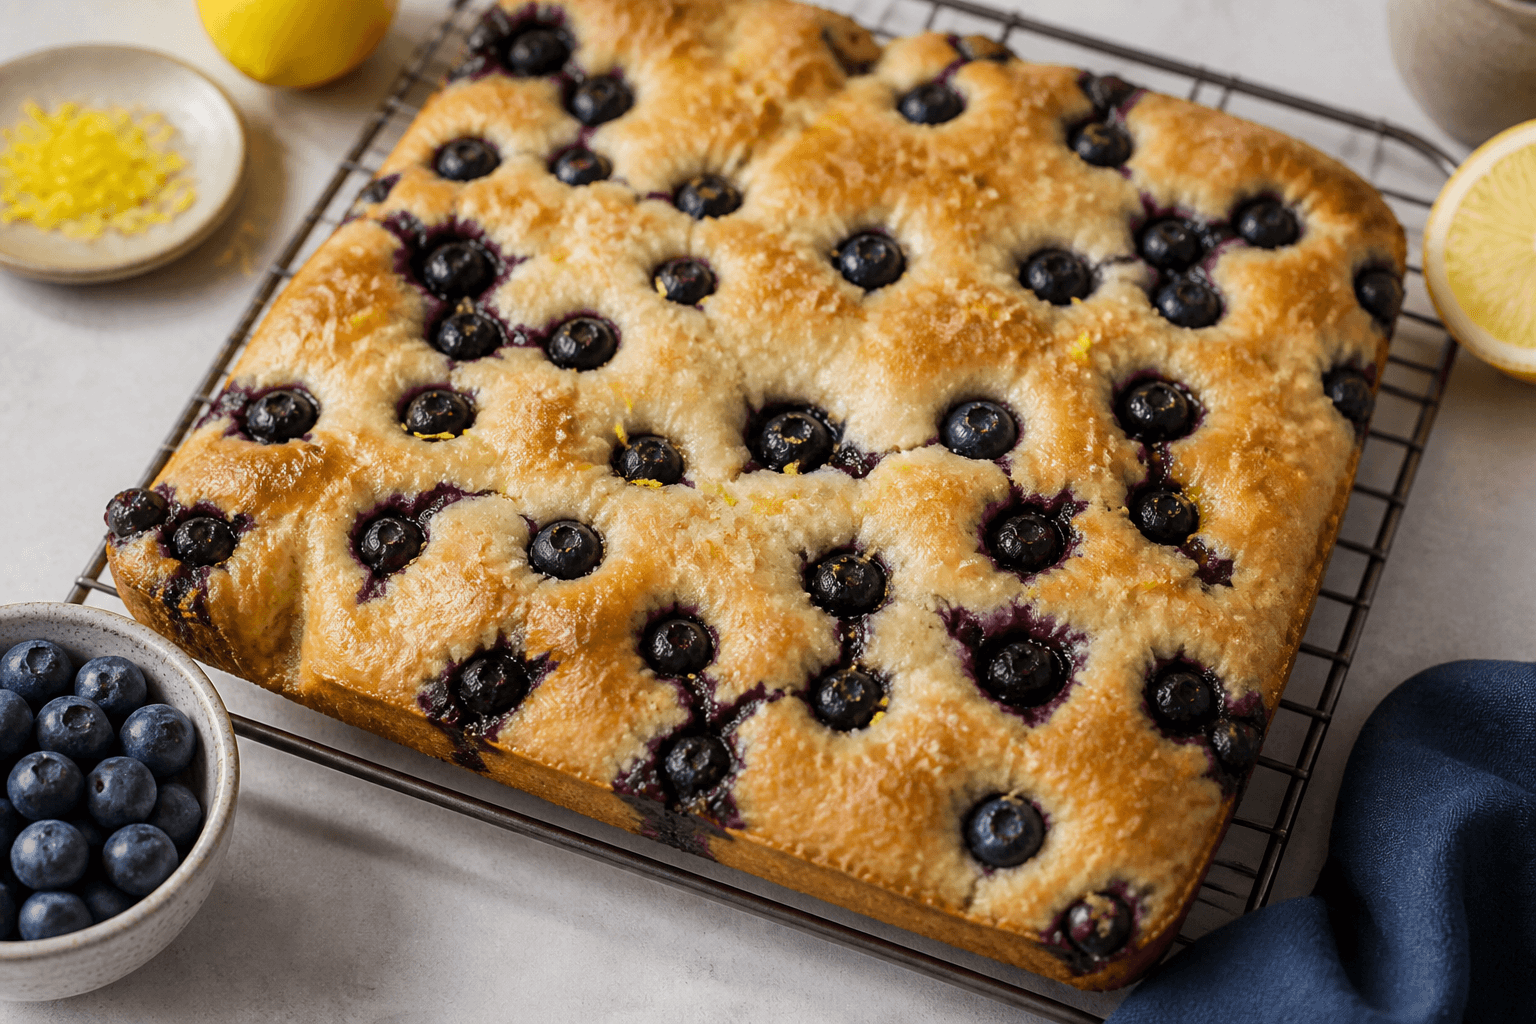
    Overhead shot of freshly baked lemon blueberry focaccia cooling in a 9x13 metal pan, golden edges wi

    This focaccia leans sweet but stays balanced thanks to lemon zest and a pinch of salt. The dough is classic focaccia—light, springy, and full of flavor from a slow rise.

    Blueberries tuck into the dimples and create jammy pockets as they bake. It’s easier than it looks, and most of the time is hands-off. Plus, it works year-round with fresh or frozen berries.

    What You’ll Need

    • Bread flour (or all-purpose), 3 1/2 cups (440 g)
    • Warm water, 1 1/2 cups (355 ml), about 105–110°F
    • Instant or active dry yeast, 2 1/4 tsp (1 packet)
    • Granulated sugar, 2 tbsp (plus 1 tsp for activating yeast if using active dry)
    • Kosher salt, 1 1/2 tsp
    • Extra-virgin olive oil, 1/3 cup, plus more for the pan and finishing
    • Fresh lemon zest, from 1–2 lemons (about 2 tsp), plus 2 tbsp lemon juice
    • Fresh or frozen blueberries, 1 1/2–2 cups
    • Honey, 2–3 tbsp (for optional glaze)
    • Flaky sea salt, for sprinkling
    • Optional add-ins: vanilla extract (1 tsp), chopped fresh thyme (1–2 tsp)

    How to Make It

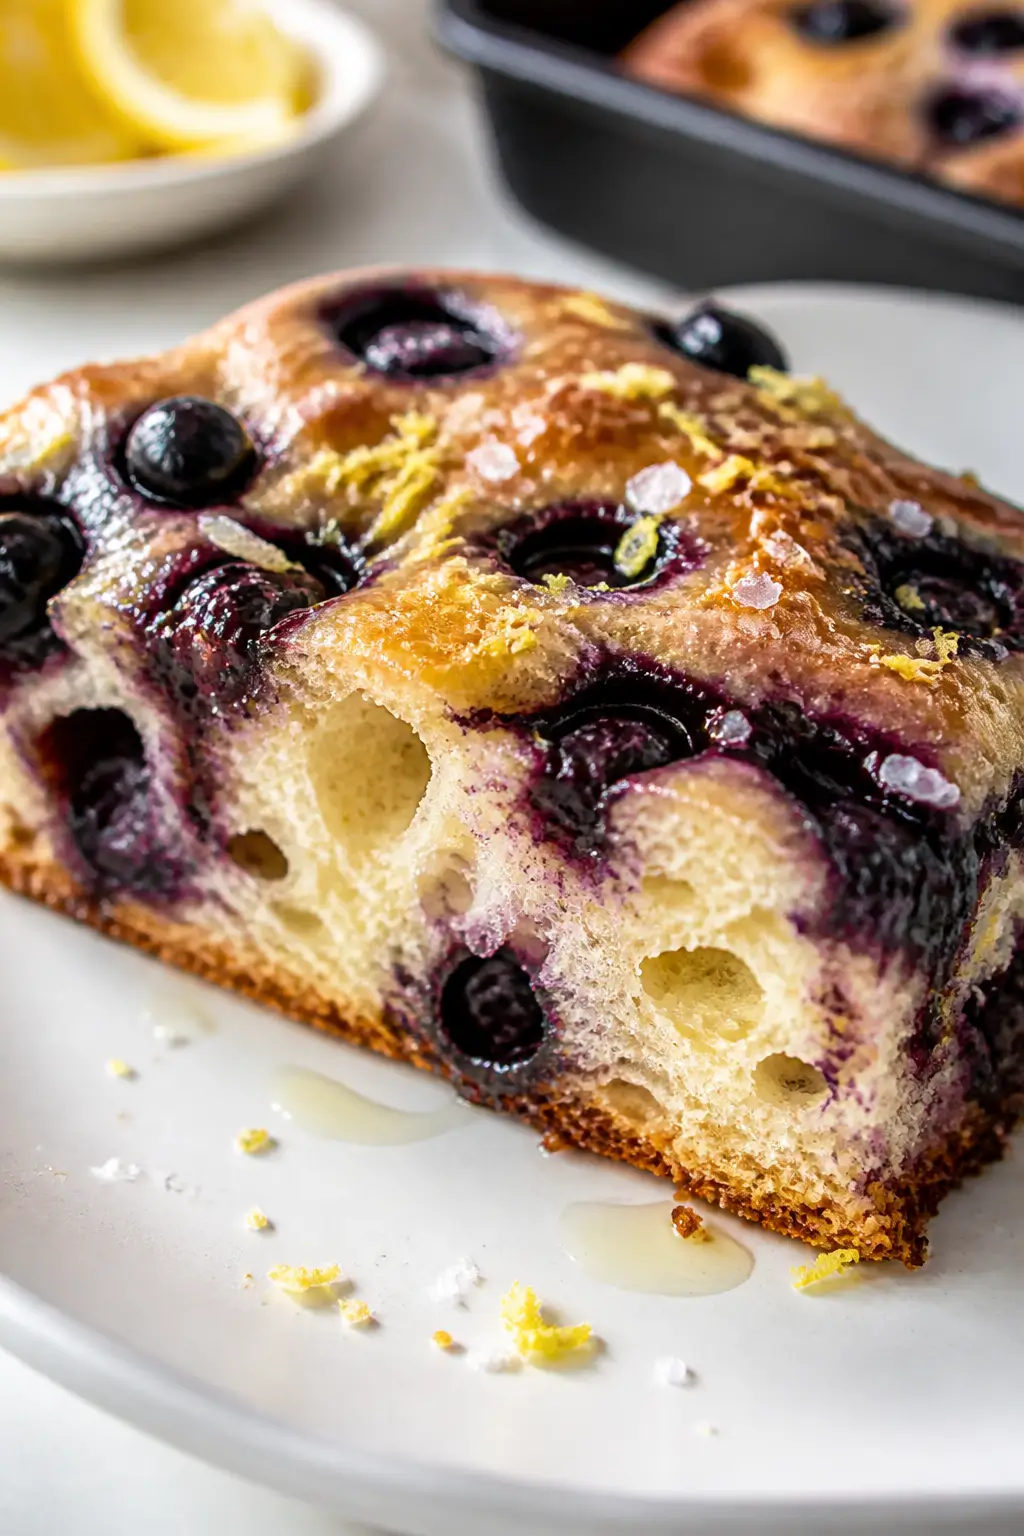
    Close-up detail of a warm slice of lemon blueberry focaccia on a simple white plate, showing the air
    1. Bloom the yeast (if using active dry): In a small bowl, mix warm water with 1 tsp sugar and yeast.Let it sit 5–10 minutes until foamy. If using instant yeast, skip this step and add it directly to the flour.
    2. Mix the dough: In a large bowl, whisk flour, sugar, and salt. Add warm water, yeast (bloomed or instant), 1/4 cup olive oil, lemon zest, and optional vanilla.Stir with a spoon until a shaggy dough forms.
    3. Knead briefly: Turn the dough onto a lightly oiled surface and knead 2–3 minutes until smooth-ish and tacky. It should be soft and slightly sticky.
    4. First rise: Oil a clean bowl, add the dough, and turn to coat. Cover and let rise at room temperature until doubled, about 60–90 minutes.
    5. Pan and rest: Generously oil a 9×13-inch pan (or a large sheet pan for thinner focaccia).Gently stretch the dough to fit. If it springs back, rest 10 minutes, then finish stretching.
    6. Dimple and top: Drizzle 1–2 tbsp olive oil over the dough. With oiled fingers, press deep dimples all over.Scatter blueberries evenly, pressing some lightly into the dough. Sprinkle with a pinch of flaky sea salt and, if using, fresh thyme.
    7. Second rise: Let the topped dough rest 20–30 minutes until puffy. Meanwhile, preheat the oven to 425°F (220°C).
    8. Bake: Bake 20–25 minutes, until golden at the edges and lightly browned on top.If berries release lots of juice, that’s fine—those spots will be jammy.
    9. Finish with lemon-honey glaze: In a small bowl, whisk honey with lemon juice. While the focaccia is warm, brush or drizzle the glaze over the top. Add a final swirl of olive oil and a few pinches of flaky salt.
    10. Cool and slice: Let it rest 10–15 minutes before cutting into squares or strips.

    How to Store

    • Room temperature: Keep in an airtight container for up to 2 days.
    • Refrigerate: Not ideal, but it works for 3–4 days; rewarm to soften.
    • Freeze: Wrap slices tightly and freeze up to 2 months.Thaw at room temp, then warm in a 350°F oven for 8–10 minutes.

    Why This is Good for You

    Blueberries bring antioxidants and fiber, while lemon adds brightness without a lot of sugar. Olive oil provides heart-healthy fats and keeps the crumb tender. Compared to frosted cakes, this is a lighter, fruit-forward bake.

    Portion it small for a not-too-sweet breakfast or snack.

    Common Mistakes to Avoid

    • Water that’s too hot: It can kill the yeast. Aim for warm bath temperature.
    • Under-oiling the pan: Focaccia needs that olive oil barrier for crisp edges and easy release.
    • Rushing the rise: If the dough isn’t puffy, the crumb will be dense. Give it time.
    • Overloading with berries: Too many can sog out the center.Stick to about 1 1/2–2 cups.
    • Skipping the salt finish: A few flakes make the flavors pop and balance the sweetness.

    Recipe Variations

    • Herby Citrus: Add chopped rosemary or thyme with the lemon zest.
    • Lemon Ricotta: Dollop fresh ricotta on top after baking and finish with extra zest.
    • Almond Crunch: Sprinkle sliced almonds and a dusting of turbinado sugar before baking.
    • Meyer Lemon Twist: Use Meyer lemons for a softer, floral citrus note.
    • Orange Blueberry: Swap lemon for orange zest and juice for a warmer citrus vibe.

    FAQ

    Can I use frozen blueberries?

    Yes. Use them straight from the freezer. Don’t thaw, or they’ll bleed too much color into the dough.

    Do I need bread flour?

    No.

    All-purpose flour works well. Bread flour gives a chewier texture, while all-purpose is a bit softer.

    How do I make it sweeter?

    Add 2–3 extra tablespoons of sugar to the dough and finish with a thicker honey glaze.

    Can I make the dough ahead?

    Yes. After mixing, cover and chill up to 24 hours.

    Bring to room temp, then stretch, top, and bake.

    What pan should I use?

    A 9×13 metal pan gives thick, plush focaccia. A half-sheet pan makes a thinner, crisper version.

    Wrapping Up

    Lemon blueberry focaccia is simple to make and easy to love. The dough is forgiving, the flavors are bright, and the texture hits that sweet spot between tender and chewy.

    Bake it for brunch, bring it to a picnic, or cut it into bite-size squares for dessert. One pan goes a long way—and it disappears fast.

    Lemon Blueberry Focaccia – Bright, Juicy, and Perfect for Brunch

    Prep Time 20 minutes
    Cook Time 25 minutes
    Total Time 45 minutes
    Servings: 8 servings

    Ingredients
      

    • Bread flour (or all-purpose), 3 1/2 cups (440 g)
    • Warm water, 1 1/2 cups (355 ml), about 105–110°F
    • Instant or active dry yeast, 2 1/4 tsp (1 packet)
    • Granulated sugar, 2 tbsp (plus 1 tsp for activating yeast if using active dry)
    • Kosher salt, 1 1/2 tsp
    • Extra-virgin olive oil, 1/3 cup, plus more for the pan and finishing
    • Fresh lemon zest, from 1–2 lemons (about 2 tsp), plus 2 tbsp lemon juice
    • Fresh or frozen blueberries, 1 1/2–2 cups
    • Honey, 2–3 tbsp (for optional glaze)
    • Flaky sea salt, for sprinkling
    • Optional add-ins: vanilla extract (1 tsp), chopped fresh thyme (1–2 tsp)

    Method
     

    1. Bloom the yeast (if using active dry): In a small bowl, mix warm water with 1 tsp sugar and yeast. Let it sit 5–10 minutes until foamy. If using instant yeast, skip this step and add it directly to the flour.
    2. Mix the dough: In a large bowl, whisk flour, sugar, and salt. Add warm water, yeast (bloomed or instant), 1/4 cup olive oil, lemon zest, and optional vanilla. Stir with a spoon until a shaggy dough forms.
    3. Knead briefly: Turn the dough onto a lightly oiled surface and knead 2–3 minutes until smooth-ish and tacky. It should be soft and slightly sticky.
    4. First rise: Oil a clean bowl, add the dough, and turn to coat. Cover and let rise at room temperature until doubled, about 60–90 minutes.
    5. Pan and rest: Generously oil a 9×13-inch pan (or a large sheet pan for thinner focaccia). Gently stretch the dough to fit. If it springs back, rest 10 minutes, then finish stretching.
    6. Dimple and top: Drizzle 1–2 tbsp olive oil over the dough. With oiled fingers, press deep dimples all over. Scatter blueberries evenly, pressing some lightly into the dough. Sprinkle with a pinch of flaky sea salt and, if using, fresh thyme.
    7. Second rise: Let the topped dough rest 20–30 minutes until puffy. Meanwhile, preheat the oven to 425°F (220°C).
    8. Bake: Bake 20–25 minutes, until golden at the edges and lightly browned on top. If berries release lots of juice, that’s fine—those spots will be jammy.
    9. Finish with lemon-honey glaze: In a small bowl, whisk honey with lemon juice. While the focaccia is warm, brush or drizzle the glaze over the top. Add a final swirl of olive oil and a few pinches of flaky salt.
    10. Cool and slice: Let it rest 10–15 minutes before cutting into squares or strips.
  • Sweet Focaccia Bread – Soft, Golden, and Gently Sugared

    Sweet Focaccia Bread – Soft, Golden, and Gently Sugared

    Sweet focaccia bread is the kind of treat that feels special without being fussy. It’s soft, slightly chewy, and kissed with a crunchy sugar top that caramelizes in the oven. Think of it as a cross between a tender brioche and a classic Italian flatbread.

    It’s perfect for slow mornings, afternoon snacks, or an easy dessert with fruit. You don’t need expert baking skills—just a little time and a good olive oil.

    What Makes This Special

    Cooking process close-up: Puffy sweet focaccia just out of the oven in a 9x13 metal pan, golden top

    This sweet focaccia has the signature airy crumb and dimpled top you expect, but with a lightly sweet dough and a sparkling sugar crust. A touch of honey boosts flavor without making it cloying.

    Olive oil keeps it moist for days and adds a lovely, rounded richness. It’s flexible, too—top it with berries, thin-sliced apples, or leave it simple and serve with mascarpone.

    What You’ll Need

    • All-purpose flour – 4 cups (500 g)
    • Warm water – 1 3/4 cups (415 ml), about 105–110°F
    • Active dry yeast – 2 1/4 tsp (1 packet)
    • Granulated sugar – 1/4 cup (plus extra for topping)
    • Honey – 2 tbsp
    • Kosher salt – 1 1/2 tsp (plus flaky salt for topping, optional)
    • Extra-virgin olive oil – 1/3 cup (plus more for pan and drizzling)
    • Vanilla extract – 1 tsp
    • Optional toppings – thin-sliced apples or pears, blueberries, raspberries, lemon zest, orange zest, cinnamon sugar

    Instructions

    Final dish top view: Overhead shot of sliced sweet focaccia arranged on a parchment-lined board, sho
    1. Activate the yeast: In a large bowl, whisk warm water, honey, and yeast. Let sit until foamy, 5–10 minutes.

      If it doesn’t foam, your yeast may be expired or the water too hot/cold.

    2. Make the dough: Stir in sugar, vanilla, and salt. Add flour and olive oil. Mix with a spatula until a shaggy dough forms.

      It will be sticky—that’s good.

    3. Knead briefly: Knead in the bowl or on a lightly oiled surface for 2–3 minutes, just until smooth. Avoid adding extra flour. The dough should feel soft and slightly tacky.
    4. First rise: Oil a clean bowl, add the dough, and turn to coat.

      Cover and let rise in a warm spot until doubled, about 60–90 minutes.

    5. Pan and rest: Generously oil a 9×13-inch pan or a large sheet pan. Gently transfer dough to the pan, stretching it toward the edges. If it springs back, rest 10 minutes and stretch again until it fits.
    6. Second rise: Cover and let rise 30–45 minutes, until puffy.

      Meanwhile, heat oven to 400°F (200°C).

    7. Dimple and top: Drizzle 2–3 tbsp olive oil over the dough. With oiled fingers, press deep dimples all over. Sprinkle generously with sugar (2–3 tbsp).

      Add fruit, zest, or a light dusting of cinnamon sugar, if using. For a sweet-salty edge, add a pinch of flaky salt.

    8. Bake: Bake 20–25 minutes, until golden with caramelized edges. The top should feel set and lightly crisp.
    9. Finish and cool: Drizzle a final thread of olive oil while warm.

      Cool 10–15 minutes before slicing so the crumb sets.

    Storage Instructions

    • Room temperature: Wrap loosely in parchment or store in an airtight container for up to 2 days.
    • Reheating: Warm slices at 325°F (165°C) for 5–7 minutes to refresh the crust.
    • Freezer: Wrap slices tightly and freeze for up to 2 months. Thaw at room temperature, then reheat.
    • Avoid the fridge: Refrigeration can dry it out and dull the flavor.

    Benefits of This Recipe

    • Approachable: No special equipment needed and very forgiving dough.
    • Make-ahead friendly: Stays moist thanks to olive oil.
    • Customizable sweetness: Sugar on top lets you control how sweet it tastes.
    • Versatile: Works for breakfast, brunch, dessert, or gifting.

    Pitfalls to Watch Out For

    • Water too hot or cold: Yeast won’t bloom if the temperature is off.
    • Adding too much flour: The dough should be sticky; extra flour makes it dense.
    • Under-dimpling: Deep dimples help hold oil and sugar and prevent uneven bubbles.
    • Overbaking: It should be golden, not dark brown; watch in the last 5 minutes.

    Recipe Variations

    • Lemon Sugar Focaccia: Mix zest of 1–2 lemons with sugar before sprinkling.
    • Berry Burst: Press blueberries or raspberries into the dough before baking.
    • Apple-Cinnamon: Fan thin apple slices on top; dust with cinnamon sugar.
    • Orange & Almond: Add orange zest and sprinkle sliced almonds for crunch.
    • Chocolate Drizzle: After baking, drizzle melted dark chocolate and finish with flaky salt.
    • Vanilla Bean: Swap vanilla extract for seeds from 1 vanilla pod for deeper aroma.

    Can I make the dough the night before?

    Yes. After the first rise, press into the oiled pan, cover tightly, and refrigerate up to 18 hours.

    Bring to room temperature for 30–45 minutes, dimple, top, and bake.

    Can I use instant yeast instead of active dry?

    Absolutely. Use the same amount. Skip the bloom step and mix it directly with the dry ingredients, then add warm water and oil.

    Is there a vegan option?

    Yes.

    Replace honey with maple syrup or extra sugar. Everything else is already plant-based.

    How do I keep the fruit from sinking?

    Use small, firm pieces and press them lightly into the top right before baking. Avoid heavy fruit piles in one spot.

    Why is my focaccia pale?

    It may need a few more minutes, or your oven runs cool.

    A darker pan also promotes better browning. Don’t skip the olive oil—it helps caramelization.

    In Conclusion

    Sweet focaccia bread brings together a soft, airy crumb and a lightly caramelized top that feels special any time of day. With simple steps and flexible toppings, it’s a no-stress bake that tastes bakery-fresh.

    Keep it plain and golden, or dress it up with fruit and spice—you can’t go wrong. Slice warm, share generously, and enjoy the gentle sweetness in every bite.

    Sweet Focaccia Bread – Soft, Golden, and Gently Sugared

    Prep Time 20 minutes
    Cook Time 25 minutes
    Total Time 45 minutes
    Servings: 8 servings

    Ingredients
      

    • All-purpose flour – 4 cups (500 g)
    • Warm water – 1 3/4 cups (415 ml), about 105–110°F
    • Active dry yeast – 2 1/4 tsp (1 packet)
    • Granulated sugar – 1/4 cup (plus extra for topping)
    • Honey – 2 tbsp
    • Kosher salt – 1 1/2 tsp (plus flaky salt for topping, optional)
    • Extra-virgin olive oil – 1/3 cup (plus more for pan and drizzling)
    • Vanilla extract – 1 tsp
    • Optional toppings – thin-sliced apples or pears, blueberries, raspberries, lemon zest, orange zest, cinnamon sugar

    Method
     

    1. Activate the yeast: In a large bowl, whisk warm water, honey, and yeast. Let sit until foamy, 5–10 minutes. If it doesn’t foam, your yeast may be expired or the water too hot/cold.
    2. Make the dough: Stir in sugar, vanilla, and salt. Add flour and olive oil. Mix with a spatula until a shaggy dough forms. It will be sticky—that’s good.
    3. Knead briefly: Knead in the bowl or on a lightly oiled surface for 2–3 minutes, just until smooth. Avoid adding extra flour. The dough should feel soft and slightly tacky.
    4. First rise: Oil a clean bowl, add the dough, and turn to coat. Cover and let rise in a warm spot until doubled, about 60–90 minutes.
    5. Pan and rest: Generously oil a 9×13-inch pan or a large sheet pan. Gently transfer dough to the pan, stretching it toward the edges. If it springs back, rest 10 minutes and stretch again until it fits.
    6. Second rise: Cover and let rise 30–45 minutes, until puffy. Meanwhile, heat oven to 400°F (200°C).
    7. Dimple and top: Drizzle 2–3 tbsp olive oil over the dough. With oiled fingers, press deep dimples all over. Sprinkle generously with sugar (2–3 tbsp). Add fruit, zest, or a light dusting of cinnamon sugar, if using. For a sweet-salty edge, add a pinch of flaky salt.
    8. Bake: Bake 20–25 minutes, until golden with caramelized edges. The top should feel set and lightly crisp.
    9. Finish and cool: Drizzle a final thread of olive oil while warm. Cool 10–15 minutes before slicing so the crumb sets.
  • Same Day Focaccia Bread – Golden, Chewy, and Ready Tonight

    Same Day Focaccia Bread – Golden, Chewy, and Ready Tonight

    If you’re craving fresh, bakery-style focaccia but don’t want to wait overnight, this same day version has your back. It’s light, chewy, and packed with olive oil and herb flavor. You’ll get those classic dimples, a crisp golden crust, and a tender interior without a long ferment.

    Perfect for dunking in soup, building sandwiches, or just tearing and snacking. If you can set aside a few hours this afternoon, you can have warm focaccia on the table by dinner.

    What Makes This Recipe So Good

    Overhead shot of freshly baked same-day focaccia in a 9x13 metal pan right out of the oven, deeply g
    • Fast but flavorful: A few simple tricks—warm water, a touch more yeast, and a good olive oil soak—give you great flavor the same day.
    • Foolproof texture: High hydration yields that signature airy crumb and bubbly top.
    • Hands-off rising: Most of the time is inactive proofing, so you can go about your day.
    • Endlessly customizable: Add tomatoes, olives, onions, or keep it classic with rosemary and sea salt.
    • Works with basic equipment: No stand mixer required—just a bowl, a sheet pan, and your fingers.

    What You’ll Need

    • 4 cups (500 g) bread flour (all-purpose works, but bread flour gives better chew)
    • 1 3/4 cups (420 ml) warm water (about 100–105°F / 38–41°C)
    • 2 1/4 tsp (7 g) instant or rapid-rise yeast
    • 2 tsp (10 g) fine sea salt
    • 2 tbsp (25 g) sugar or honey (helps speed fermentation and browning)
    • 6 tbsp (90 ml) extra-virgin olive oil, divided
    • Flaky sea salt, for finishing
    • Fresh herbs like rosemary or thyme (optional)
    • Toppings (optional): sliced cherry tomatoes, thin red onion, olives, garlic, or parmesan

    Step-by-Step Instructions

    Close-up process shot of the dimpling stage: puffy, well-proofed focaccia dough stretched to the pan
    1. Mix the dough: In a large bowl, whisk warm water, yeast, and sugar. Add flour and fine sea salt.

      Stir with a spatula until shaggy and no dry patches remain. The dough will be sticky—this is good.

    2. First rest (15 minutes): Cover the bowl and let it sit for 15 minutes. This brief rest hydrates the flour and makes mixing easier.
    3. Fold for strength: Drizzle in 2 tbsp olive oil.

      With wet hands, perform 3–4 sets of stretch-and-folds around the dough, turning the bowl as you go. You’re building gluten without kneading.

    4. First rise (45–60 minutes): Cover and let rise in a warm spot until noticeably puffy, about 1 hour. If your kitchen is cool, give it up to 75 minutes.
    5. Prepare the pan: Generously oil a 9×13-inch sheet pan or similarly sized metal pan with 2 tbsp olive oil.

      You want an even oil coat for that crisp bottom.

    6. Transfer and stretch: Gently scrape the dough into the pan. Oil your fingertips and press it outward. If it springs back, let it rest 10 minutes, then finish stretching to the edges.
    7. Second rise (30–45 minutes): Cover loosely and let it rise again until puffy and slightly jiggly when you shake the pan.
    8. Dimple and top: Heat oven to 450°F (232°C).

      Oil your hands and press your fingertips straight down into the dough to create deep dimples. Drizzle 1–2 tbsp olive oil over the top, add flaky salt, herbs, and any toppings.

    9. Bake: Place on the center rack and bake 20–25 minutes, until deep golden with crisp edges. For an extra-crisp bottom, bake the last 2–3 minutes on the lowest rack.
    10. Finish and cool: Brush or drizzle the remaining olive oil over the hot focaccia.

      Cool in the pan 10 minutes, then transfer to a rack. Slice or tear and serve warm.

    How to Store

    • Room temperature: Wrap loosely in foil or store in a paper bag for up to 2 days. Re-crisp in a 375°F (190°C) oven for 8–10 minutes.
    • Freezer: Cool completely, slice, wrap well, and freeze up to 2 months.

      Reheat from frozen at 375°F (190°C) for 12–15 minutes.

    • Avoid the fridge: Refrigeration dries out bread and dulls flavor.

    Benefits of This Recipe

    • Same-day payoff: Enjoy bakery-quality bread without waiting overnight.
    • Great texture: High hydration and olive oil give a tender crumb and crisp crust.
    • Budget-friendly: Pantry staples become an impressive side or main.
    • Meal-friendly: Works for appetizers, sandwiches, or as a base for flatbread-style pizzas.

    Pitfalls to Watch Out For

    • Water too hot: Anything above 115°F (46°C) can kill yeast. Aim for warm bath temperature.
    • Under-proofing: If it isn’t puffy before baking, you’ll get a dense crumb. Give it time.
    • Too little oil: Skimping reduces crispness and flavor.

      Oil the pan well and finish on top.

    • Overloading toppings: Heavy toppings can weigh down the rise. Keep them light and evenly spaced.
    • Cutting too soon: Let it rest at least 10 minutes so the crumb sets.

    Variations You Can Try

    • Tomato-Rosemary: Halved cherry tomatoes, rosemary, and flaky salt.
    • Olive and Lemon: Sliced kalamatas with thin lemon zest strips and thyme.
    • Caramelized Onion: Sweet onions, black pepper, and a dusting of parmesan.
    • Garlic-Herb Butter: Melted butter with grated garlic and parsley brushed on after baking.
    • Spicy Chili: Calabrian chili paste or red pepper flakes with oregano.

    FAQ

    Can I use active dry yeast instead of instant?

    Yes. Bloom 2 1/4 tsp active dry yeast in the warm water with the sugar for 5–10 minutes until foamy, then proceed.

    Do I need a stand mixer?

    No.

    This is a no-knead style dough. A spatula and a few sets of folds are enough to build structure.

    Why is my dough so sticky?

    High hydration creates a light, airy crumb. Keep your hands oiled or wet and resist adding extra flour unless it’s truly unmanageable.

    Can I bake this in a cast-iron skillet?

    Absolutely.

    Oil the skillet well and follow the same rise and bake times. The crust will be extra crisp.

    How do I know it’s done?

    Look for a deep golden top and browned edges. The bottom should be crisp and sound hollow when tapped.

    Wrapping Up

    Same day focaccia bread brings bakery results to your kitchen tonight with minimal fuss.

    With a few pantry staples, plenty of olive oil, and some patient rises, you’ll get a golden, airy loaf that’s perfect for any meal. Keep the toppings simple, don’t rush the proof, and enjoy that first warm, salty bite. Once you try it, this will become your go-to weeknight bread.

    Same Day Focaccia Bread – Golden, Chewy, and Ready Tonight

    Prep Time 20 minutes
    Cook Time 20 minutes
    Total Time 40 minutes
    Servings: 12 servings

    Ingredients
      

    • 4 cups (500 g) bread flour (all-purpose works, but bread flour gives better chew)
    • 1 3/4 cups (420 ml) warm water (about 100–105°F / 38–41°C)
    • 2 1/4 tsp (7 g) instant or rapid-rise yeast
    • 2 tsp (10 g) fine sea salt
    • 2 tbsp (25 g) sugar or honey (helps speed fermentation and browning)
    • 6 tbsp (90 ml) extra-virgin olive oil, divided
    • Flaky sea salt, for finishing
    • Fresh herbs like rosemary or thyme (optional)
    • Toppings (optional): sliced cherry tomatoes, thin red onion, olives, garlic, or parmesan

    Method
     

    1. Mix the dough: In a large bowl, whisk warm water, yeast, and sugar. Add flour and fine sea salt. Stir with a spatula until shaggy and no dry patches remain. The dough will be sticky—this is good.
    2. First rest (15 minutes): Cover the bowl and let it sit for 15 minutes. This brief rest hydrates the flour and makes mixing easier.
    3. Fold for strength: Drizzle in 2 tbsp olive oil. With wet hands, perform 3–4 sets of stretch-and-folds around the dough, turning the bowl as you go. You’re building gluten without kneading.
    4. First rise (45–60 minutes): Cover and let rise in a warm spot until noticeably puffy, about 1 hour. If your kitchen is cool, give it up to 75 minutes.
    5. Prepare the pan: Generously oil a 9×13-inch sheet pan or similarly sized metal pan with 2 tbsp olive oil. You want an even oil coat for that crisp bottom.
    6. Transfer and stretch: Gently scrape the dough into the pan. Oil your fingertips and press it outward. If it springs back, let it rest 10 minutes, then finish stretching to the edges.
    7. Second rise (30–45 minutes): Cover loosely and let it rise again until puffy and slightly jiggly when you shake the pan.
    8. Dimple and top: Heat oven to 450°F (232°C). Oil your hands and press your fingertips straight down into the dough to create deep dimples. Drizzle 1–2 tbsp olive oil over the top, add flaky salt, herbs, and any toppings.
    9. Bake: Place on the center rack and bake 20–25 minutes, until deep golden with crisp edges. For an extra-crisp bottom, bake the last 2–3 minutes on the lowest rack.
    10. Finish and cool: Brush or drizzle the remaining olive oil over the hot focaccia. Cool in the pan 10 minutes, then transfer to a rack. Slice or tear and serve warm.
  • Cinnamon Focaccia Bread – Soft, Fragrant, and Comforting

    Cinnamon Focaccia Bread – Soft, Fragrant, and Comforting

    This cinnamon focaccia bread brings together the best of two worlds: the soft, airy crumb of classic focaccia and the warm sweetness of cinnamon sugar. It’s the kind of bake that makes the whole kitchen smell cozy. The top is dimpled and crisp at the edges, while the inside stays tender and chewy.

    It’s easy enough for a weekend project and special enough to serve for brunch, dessert, or a morning treat with coffee.

    What Makes This Special

    This recipe leans on the simple magic of olive oil and yeast, but adds a gentle sweetness that doesn’t overwhelm. You still get that signature focaccia texture—airy pockets and a golden, olive-oil-kissed crust—but with a fragrant cinnamon swirl and a lightly crunchy sugar topping. It’s less sweet than a cinnamon roll, so it works with breakfast spreads or as a snack. No stand mixer required, and the dough is very forgiving.

    What You’ll Need

    • Bread flour (or all-purpose flour works too)
    • Warm water (about 105–110°F/40–43°C)
    • Active dry yeast or instant yeast
    • Granulated sugar
    • Kosher salt
    • Ground cinnamon
    • Olive oil (extra-virgin for best flavor)
    • Unsalted butter (optional, for extra richness)
    • Vanilla extract (optional, for the topping)
    • Flaky sea salt (optional, for contrast)

    How to Make It

    1. Bloom the yeast. In a large bowl, mix warm water with a teaspoon of sugar.

      Sprinkle in the yeast, stir, and let sit 5–10 minutes until foamy. If nothing happens, start over with fresh yeast.

    2. Make the dough. Add 2 tablespoons olive oil and 1 teaspoon salt to the bowl. Stir in flour, one cup at a time, until a sticky dough forms.

      Switch to your hands and fold until mostly smooth; it should be soft and slightly tacky.

    3. First rise. Grease a clean bowl with oil. Place the dough inside, turn to coat, and cover. Let rise in a warm spot until doubled, about 60–90 minutes.
    4. Prepare the pan. Generously oil a 9×13-inch pan or a large sheet pan with 2–3 tablespoons olive oil.

      This helps create that crisp, golden bottom.

    5. Mix the cinnamon sugar. In a small bowl, combine granulated sugar with ground cinnamon. For extra aroma, stir in a splash of vanilla and 1–2 tablespoons melted butter until sandy.
    6. Pan the dough. Gently turn the dough into the oiled pan. With oiled fingers, press it toward the edges.

      If it springs back, rest 10 minutes, then continue until it fills the pan.

    7. Second rise. Cover loosely and let the dough puff for 20–30 minutes. It should look pillowy.
    8. Dimple and dress. Drizzle 1–2 tablespoons olive oil over the top. Using all your fingertips, press deep dimples across the surface.

      Sprinkle the cinnamon sugar evenly. Add a light pinch of flaky salt for contrast if you like.

    9. Bake. Bake at 425°F (220°C) for 18–24 minutes, until the edges are deep golden and the top is caramelized. Rotate the pan halfway for even color.
    10. Finish. While hot, brush with a little melted butter for shine and softness.

      Cool 10–15 minutes before slicing. Serve warm.

    Storage Instructions

    • Room temperature: Keep tightly wrapped for up to 2 days. Rewarm at 325°F (165°C) for 8–10 minutes to refresh.
    • Freezer: Wrap slices in foil, then a freezer bag.

      Freeze up to 2 months. Reheat from frozen at 350°F (175°C) for 12–15 minutes.

    • Avoid the fridge: Refrigeration dries bread quickly.

    Health Benefits

    Focaccia is an indulgence, but there are a few upsides. Olive oil provides heart-friendly fats and adds satiety. Cinnamon brings antioxidant properties and natural warmth without adding much sugar itself.

    If you choose bread flour, the higher protein supports a satisfying chew and can help you feel fuller, so a smaller slice goes a long way.

    Common Mistakes to Avoid

    • Water too hot: This can kill the yeast. Aim for warm, not hot.
    • Under-oiling the pan: You’ll miss the golden, crisp bottom and risk sticking.
    • Rushing the rise: Dense bread happens when the dough doesn’t double. Give it time.
    • Overbaking: Sugar on top can make you think it’s darker than it is.

      Check the edges—they should be deep golden, not brown-black.

    • Skipping the dimples: They trap oil and sugar, creating flavor pockets and a better crust.

    Recipe Variations

    • Maple Cinnamon: Swap some sugar for maple sugar, or drizzle with maple syrup after baking.
    • Cinnamon Raisin: Fold 1/2 cup soaked raisins into the dough during shaping.
    • Brown Butter Topping: Use browned butter in the cinnamon sugar for a nutty finish.
    • Cardamom Twist: Add 1/2 teaspoon ground cardamom to the cinnamon sugar.
    • Cream Cheese Glaze: Whisk softened cream cheese, a little powdered sugar, and milk. Drizzle lightly once cooled for a brunch-style treat.

    FAQ

    Can I use instant yeast instead of active dry?

    Yes. Use the same amount and skip the blooming step.

    Mix it directly with the flour, then add warm water and proceed.

    Why is my dough so sticky?

    Focaccia dough should be slightly sticky for an airy crumb. Oil your hands instead of adding a lot of extra flour. A sticky dough usually bakes up lighter.

    Can I make the dough ahead?

    Yes.

    After mixing, let it rise briefly at room temp until slightly puffy, then refrigerate overnight. Bring to room temp, press into the pan, let it rise, and bake.

    Do I need bread flour?

    No. All-purpose flour works.

    Bread flour gives extra chew and structure, but both are delicious.

    How do I know it’s done?

    The edges will be deep golden, the top lightly caramelized, and the center will spring back when pressed. If you use a thermometer, the internal temp should be around 200–205°F (93–96°C).

    Final Thoughts

    Cinnamon focaccia bread is comfort baking with very little fuss. It’s simple, aromatic, and endlessly adaptable.

    Whether you serve it warm for brunch or as an afternoon pick-me-up, it brings a cozy sweetness without going over the top. Keep this one in your rotation, and you’ll always have a crowd-pleasing bake up your sleeve.

    Cinnamon Focaccia Bread – Soft, Fragrant, and Comforting

    Prep Time 20 minutes
    Cook Time 25 minutes
    Total Time 45 minutes
    Servings: 8 servings

    Ingredients
      

    • Bread flour (or all-purpose flour works too)
    • Warm water (about 105–110°F/40–43°C)
    • Active dry yeast or instant yeast
    • Granulated sugar
    • Kosher salt
    • Ground cinnamon
    • Olive oil (extra-virgin for best flavor)
    • Unsalted butter (optional, for extra richness)
    • Vanilla extract (optional, for the topping)
    • Flaky sea salt (optional, for contrast)

    Method
     

    1. Bloom the yeast. In a large bowl, mix warm water with a teaspoon of sugar. Sprinkle in the yeast, stir, and let sit 5–10 minutes until foamy. If nothing happens, start over with fresh yeast.
    2. Make the dough. Add 2 tablespoons olive oil and 1 teaspoon salt to the bowl. Stir in flour, one cup at a time, until a sticky dough forms. Switch to your hands and fold until mostly smooth; it should be soft and slightly tacky.
    3. First rise. Grease a clean bowl with oil. Place the dough inside, turn to coat, and cover. Let rise in a warm spot until doubled, about 60–90 minutes.
    4. Prepare the pan. Generously oil a 9×13-inch pan or a large sheet pan with 2–3 tablespoons olive oil. This helps create that crisp, golden bottom.
    5. Mix the cinnamon sugar. In a small bowl, combine granulated sugar with ground cinnamon. For extra aroma, stir in a splash of vanilla and 1–2 tablespoons melted butter until sandy.
    6. Pan the dough. Gently turn the dough into the oiled pan. With oiled fingers, press it toward the edges. If it springs back, rest 10 minutes, then continue until it fills the pan.
    7. Second rise. Cover loosely and let the dough puff for 20–30 minutes. It should look pillowy.
    8. Dimple and dress. Drizzle 1–2 tablespoons olive oil over the top. Using all your fingertips, press deep dimples across the surface. Sprinkle the cinnamon sugar evenly. Add a light pinch of flaky salt for contrast if you like.
    9. Bake. Bake at 425°F (220°C) for 18–24 minutes, until the edges are deep golden and the top is caramelized. Rotate the pan halfway for even color.
    10. Finish. While hot, brush with a little melted butter for shine and softness. Cool 10–15 minutes before slicing. Serve warm.