Category: Breakfast

  • Soft And Moist Gluten Free Carrot Cake Muffins You’ll Love ⭐ – Easy, Everyday Baking

    Soft And Moist Gluten Free Carrot Cake Muffins You’ll Love ⭐ – Easy, Everyday Baking

    Light, tender, and packed with cozy spice, these gluten free carrot cake muffins taste like a bakery treat but are simple enough for a weekday morning. They’re moist without being heavy, and sweet without being cloying. Think warm cinnamon, a hint of vanilla, and soft shreds of carrot in every bite.

    They bake up in under 25 minutes and freeze beautifully. Whether you’re gluten free or just muffin-obsessed, this recipe is a keeper.

    Why This Recipe Works
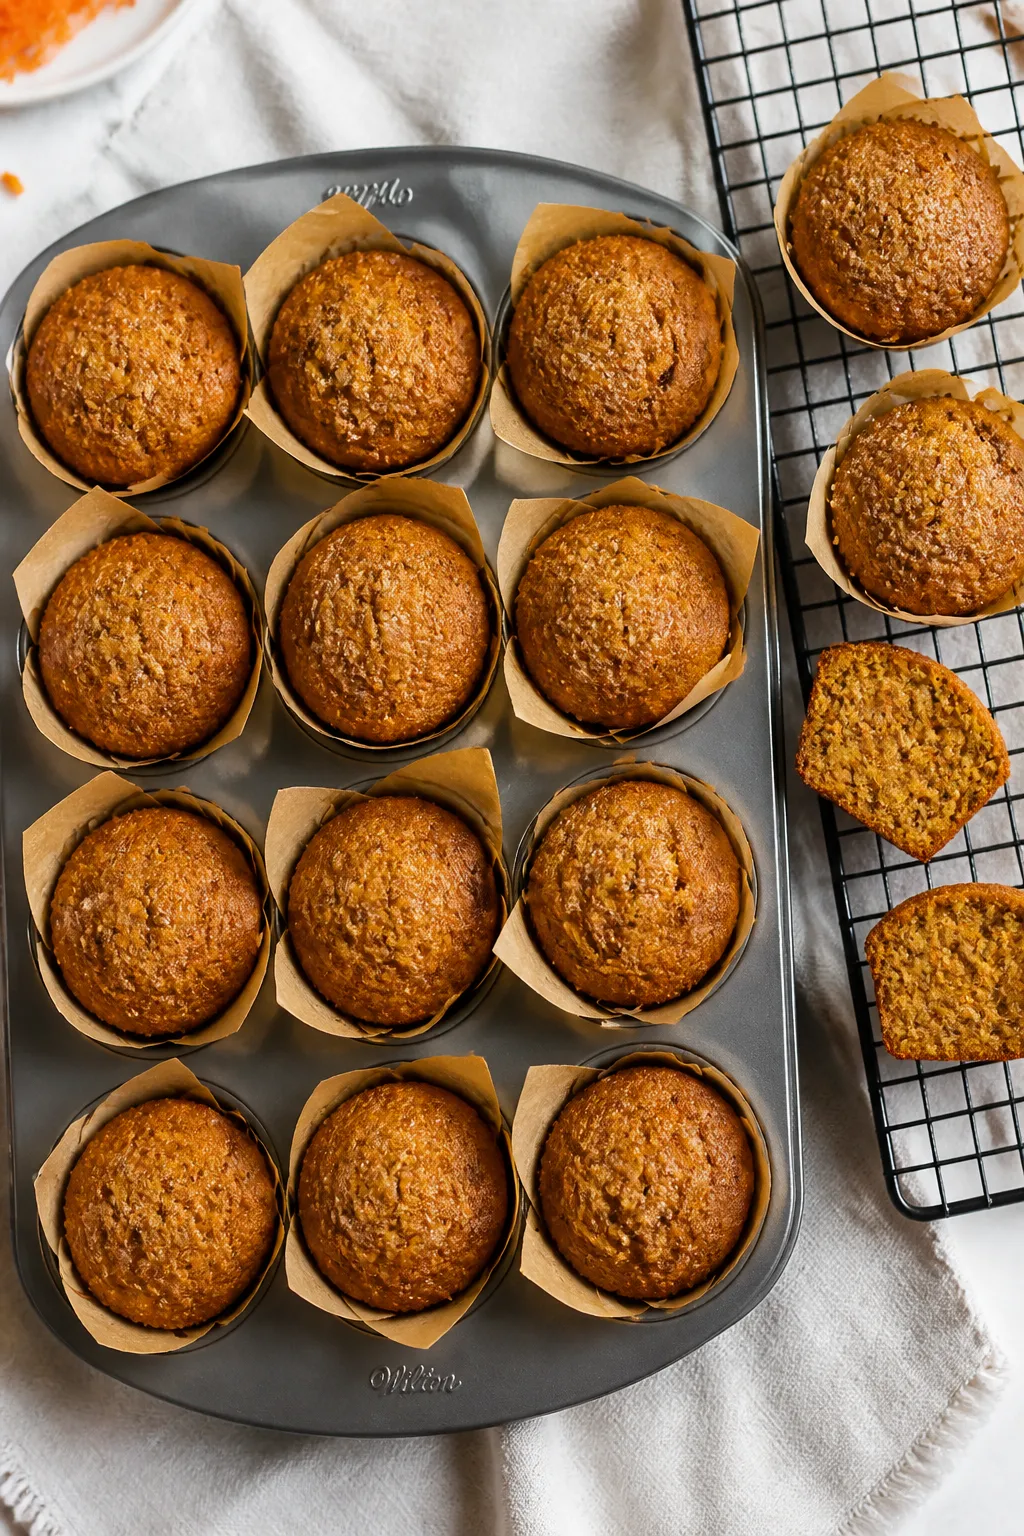
    Overhead shot of freshly baked gluten-free carrot cake muffins resting in a lined 12-cup muffin tin
    • Oil + applesauce keeps the crumb moist without greasiness.
    • Finely grated carrots blend into the batter for even texture and natural sweetness.
    • Almond flour + gluten free all-purpose flour create a tender, bakery-style crumb.
    • Buttermilk (or dairy-free alternative) adds tang and lift for a soft, fluffy interior.
    • Balanced spices (cinnamon and nutmeg) give warm flavor without overpowering the carrots.

    What You’ll Need

    • 1 cup gluten free all-purpose flour blend (with xanthan gum, if possible)
    • 3/4 cup fine almond flour
    • 1 teaspoon baking powder
    • 1/2 teaspoon baking soda
    • 1/2 teaspoon fine sea salt
    • 1 1/2 teaspoons ground cinnamon
    • 1/4 teaspoon ground nutmeg
    • 2 large eggs, room temperature
    • 1/2 cup light brown sugar, packed
    • 1/4 cup granulated sugar
    • 1/3 cup neutral oil (avocado, grapeseed, or light olive)
    • 1/3 cup unsweetened applesauce
    • 1 teaspoon pure vanilla extract
    • 1/2 cup buttermilk (or 1/2 cup dairy-free milk + 1 teaspoon lemon juice)
    • 1 1/2 cups finely grated carrots (about 2 medium carrots, peeled)
    • Optional add-ins: 1/2 cup chopped walnuts or pecans, 1/3 cup raisins, 1/3 cup shredded unsweetened coconut

    Step-by-Step Instructions
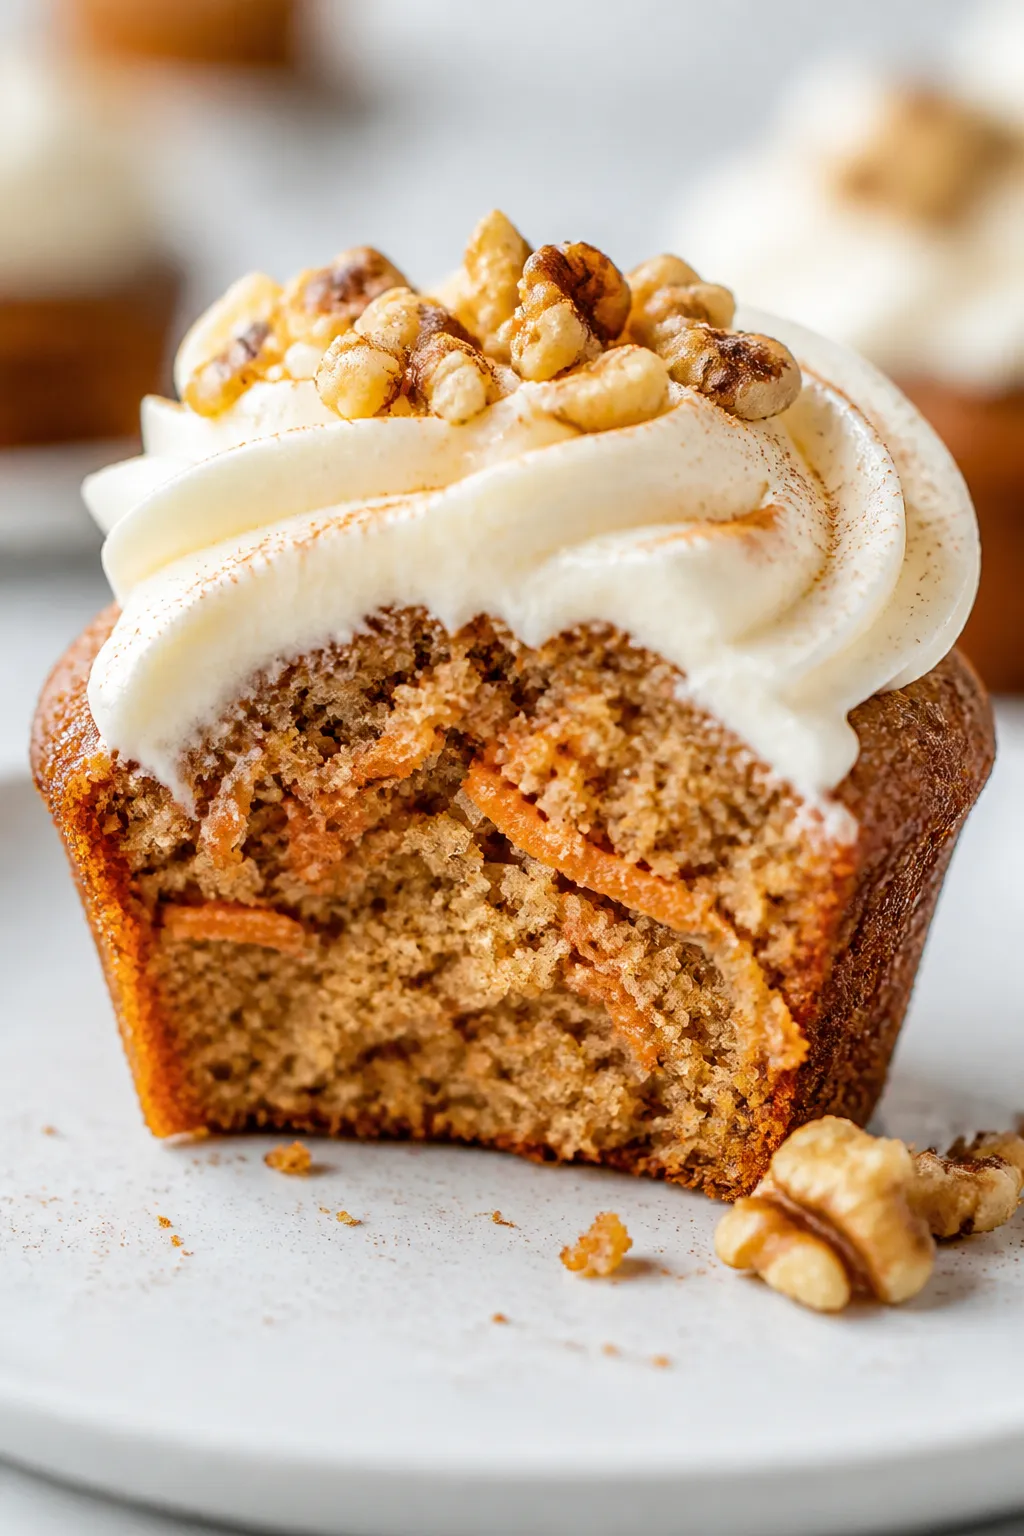
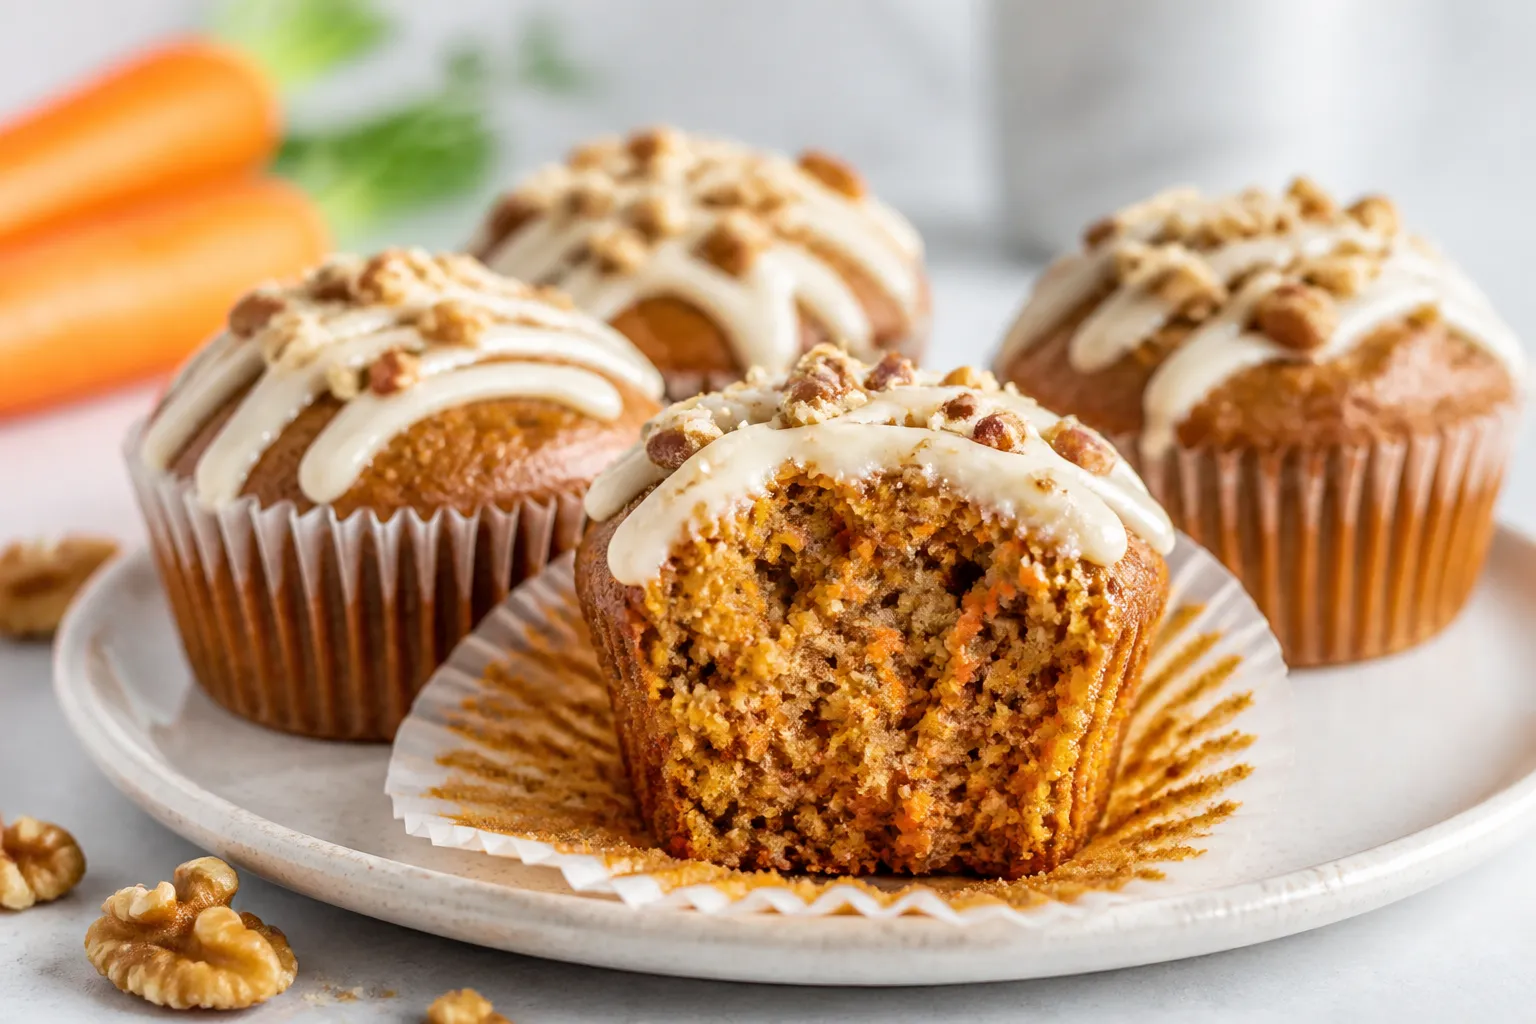
    Close-up detail of a single gluten-free carrot cake muffin cut in half on a matte white plate, showi
    1. Prep the pan: Heat oven to 350°F (175°C). Line a 12-cup muffin tin with liners and lightly mist with oil.
    2. Whisk dry ingredients: In a large bowl, whisk gluten free flour, almond flour, baking powder, baking soda, salt, cinnamon, and nutmeg.
    3. Mix wet ingredients: In a separate bowl, whisk eggs, brown sugar, granulated sugar, oil, applesauce, vanilla, and buttermilk until smooth.
    4. Combine: Pour wet into dry and stir with a spatula until just combined.

      The batter should be thick but scoopable.

    5. Fold in carrots: Gently stir in grated carrots and any optional add-ins. Do not overmix.
    6. Fill and rest: Divide batter evenly among cups (about 3/4 full). Let the filled tray sit for 5 minutes to hydrate the flours.
    7. Bake: Bake 18–22 minutes until tops spring back and a tester comes out with a few moist crumbs.
    8. Cool: Rest in the pan 5 minutes, then transfer to a rack to cool completely.

      This sets the crumb and keeps them tender.

    Storage Instructions

    • Room temperature: Store in an airtight container for up to 2 days.
    • Refrigerator: Keeps well for 4–5 days. Warm briefly in the microwave for that fresh-baked feel.
    • Freezer: Wrap individually and freeze up to 3 months. Thaw at room temperature or reheat from frozen for 20–30 seconds.
    • Frosting note: If adding cream cheese frosting, refrigerate and serve chilled or slightly softened.

    Benefits of This Recipe

    • Naturally moist from carrots, applesauce, and oil—no dry, crumbly texture.
    • Gluten free and flexible, with dairy-free options that still deliver great lift.
    • Make-ahead friendly, perfect for meal prep and lunchboxes.
    • Balanced sweetness that works for breakfast or dessert.

    Pitfalls to Watch Out For

    • Overmixing: Stir just until combined to avoid dense muffins.
    • Too-coarse carrots: Use the fine holes on your grater for even moisture.
    • Skipping rest: Brief resting hydrates gluten free flours for a softer crumb.
    • Overbaking: Pull them when a tester shows moist crumbs, not dry.

    Variations You Can Try

    • Lemon glaze: Whisk powdered sugar with lemon juice and drizzle over cooled muffins.
    • Cream cheese swirl: Dollop lightly sweetened cream cheese on top and swirl before baking.
    • Nutty crunch: Add toasted walnuts or pecans and a sprinkle of turbinado sugar on top.
    • Tropical twist: Fold in raisins and shredded coconut; swap cinnamon for chai spice.
    • No almond flour: Replace almond flour with more gluten free all-purpose and 1 tablespoon oil; texture will be slightly less tender.

    FAQ

    Can I make these dairy-free?

    Yes.

    Use almond milk or oat milk plus 1 teaspoon lemon juice in place of buttermilk, and keep the rest as written. The muffins will still be soft and flavorful.

    Do I need xanthan gum?

    If your gluten free blend already includes xanthan gum, you’re set. If not, add 1/2 teaspoon to the dry ingredients to help with structure and tenderness.

    Can I use coconut sugar instead of brown and white sugar?

    You can swap both sugars for coconut sugar.

    The muffins will be slightly darker with a light caramel note.

    How do I grate the carrots?

    Use the fine side of a box grater or a food processor with a small-hole disc. Finely grated carrots melt into the crumb and keep the texture even.

    Can I make mini muffins?

    Yes. Fill mini tins about 3/4 full and bake 10–13 minutes, checking early.

    They’re great for snacks and kids’ lunches.

    How do I add a cream cheese frosting?

    Beat 4 ounces softened cream cheese with 2 tablespoons butter, 1 cup powdered sugar, and 1/2 teaspoon vanilla until smooth. Spread on cooled muffins and refrigerate.

    In Conclusion

    These gluten free carrot cake muffins are soft, moist, and reliably delicious, with just the right amount of spice. They come together quickly, hold up well for days, and freeze like a dream.

    Keep a batch on hand for easy breakfasts, after-school snacks, or a sweet treat with coffee. Simple ingredients, great texture, and big flavor—what’s not to love?
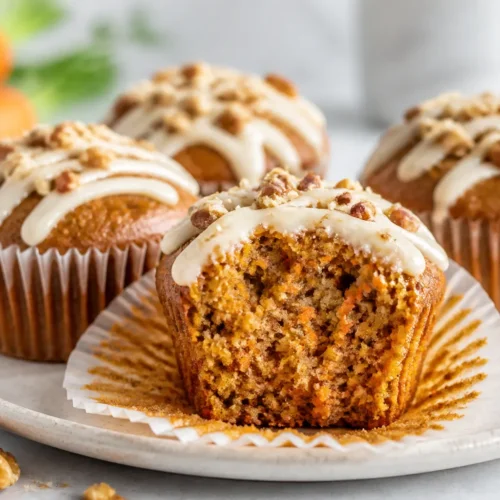
    Soft And Moist Gluten Free Carrot Cake Muffins You’ll Love ⭐ – Easy, Everyday Baking

    Prep Time 15 minutes
    Cook Time 20 minutes
    Total Time 35 minutes
    Servings 12 servings

    Ingredients
      

    • 1 cup gluten free all-purpose flour blend (with xanthan gum, if possible)
    • 3/4 cup fine almond flour
    • 1 teaspoon baking powder
    • 1/2 teaspoon baking soda
    • 1/2 teaspoon fine sea salt
    • 1 1/2 teaspoons ground cinnamon
    • 1/4 teaspoon ground nutmeg
    • 2 large eggs, room temperature
    • 1/2 cup light brown sugar, packed
    • 1/4 cup granulated sugar
    • 1/3 cup neutral oil (avocado, grapeseed, or light olive)
    • 1/3 cup unsweetened applesauce
    • 1 teaspoon pure vanilla extract
    • 1/2 cup buttermilk (or 1/2 cup dairy-free milk + 1 teaspoon lemon juice)
    • 1 1/2 cups finely grated carrots (about 2 medium carrots, peeled)
    • Optional add-ins: 1/2 cup chopped walnuts or pecans, 1/3 cup raisins, 1/3 cup shredded unsweetened coconut

    Instructions
     

    • Prep the pan: Heat oven to 350°F (175°C). Line a 12-cup muffin tin with liners and lightly mist with oil.
    • Whisk dry ingredients: In a large bowl, whisk gluten free flour, almond flour, baking powder, baking soda, salt, cinnamon, and nutmeg.
    • Mix wet ingredients: In a separate bowl, whisk eggs, brown sugar, granulated sugar, oil, applesauce, vanilla, and buttermilk until smooth.
    • Combine: Pour wet into dry and stir with a spatula until just combined. The batter should be thick but scoopable.
    • Fold in carrots: Gently stir in grated carrots and any optional add-ins. Do not overmix.
    • Fill and rest: Divide batter evenly among cups (about 3/4 full). Let the filled tray sit for 5 minutes to hydrate the flours.
    • Bake: Bake 18–22 minutes until tops spring back and a tester comes out with a few moist crumbs.
    • Cool: Rest in the pan 5 minutes, then transfer to a rack to cool completely. This sets the crumb and keeps them tender.
  • The Best Gluten Free Dairy Free Carrot Cake Recipe ⭐ – Moist, Simple, and Crowd-Pleasing

    The Best Gluten Free Dairy Free Carrot Cake Recipe ⭐ – Moist, Simple, and Crowd-Pleasing

    This carrot cake checks every box: tender crumb, warm spices, and a creamy dairy-free frosting that actually tastes like the real deal. It’s the kind of cake you bring to a party and no one guesses it’s gluten and dairy free. The batter comes together with pantry staples and a few smart swaps.

    Best of all, it stays moist for days and slices beautifully. If you’ve been chasing that classic carrot cake flavor without gluten or dairy, this is the one.

    What Makes This Special

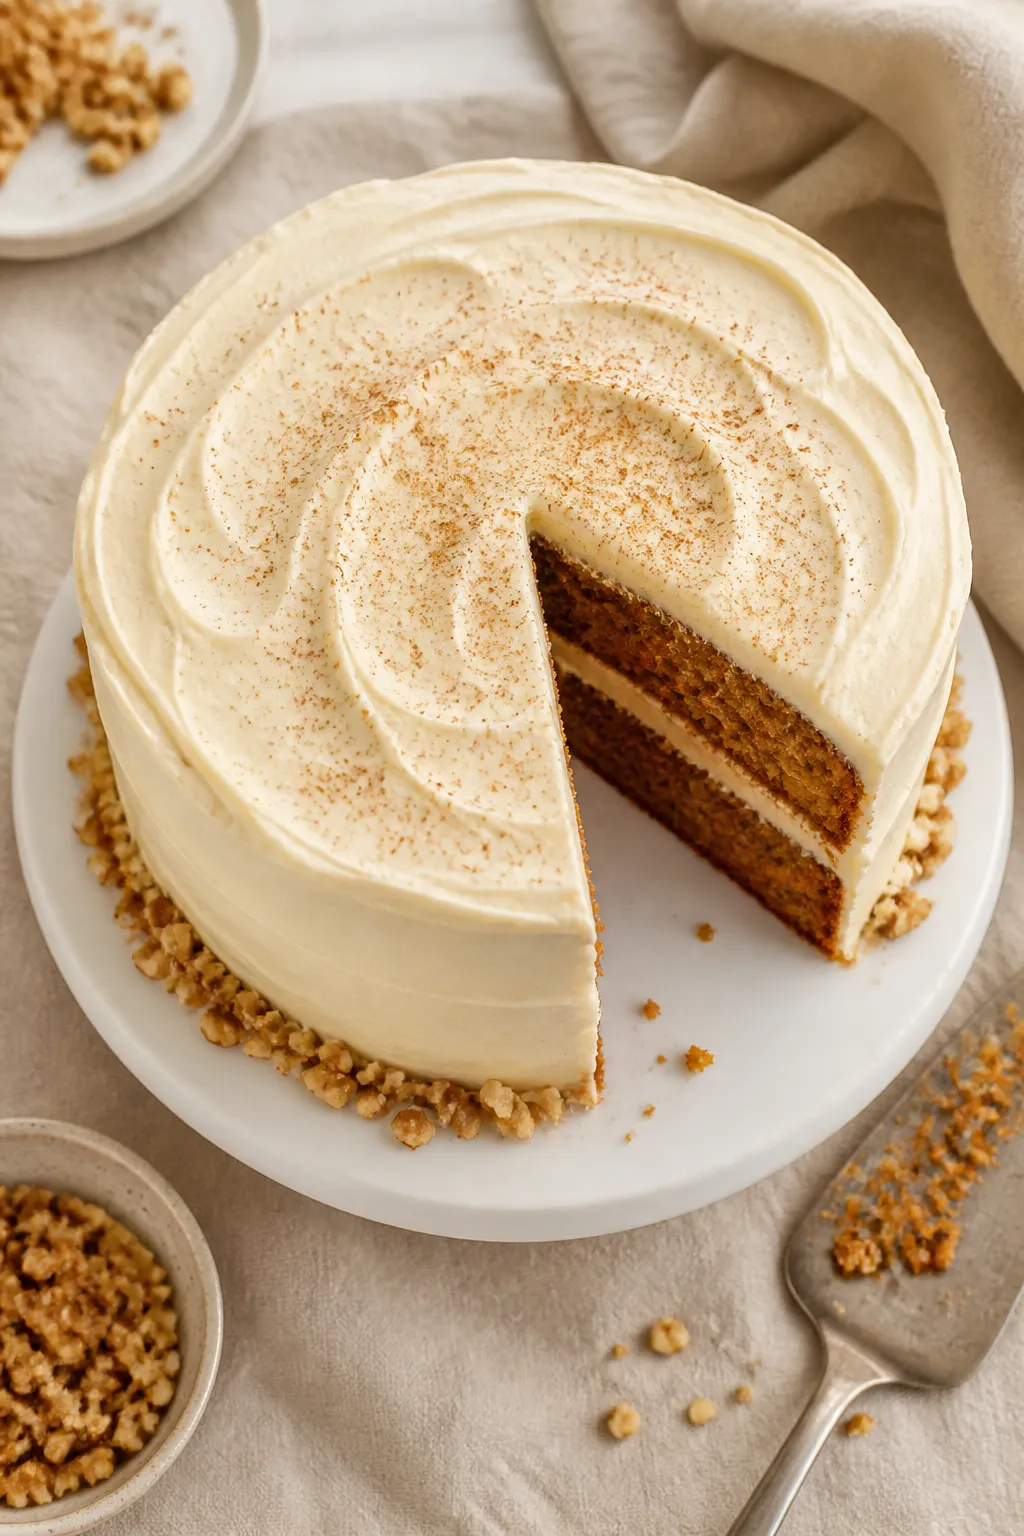
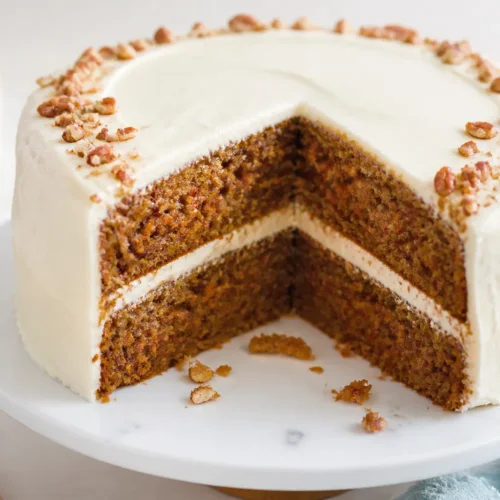
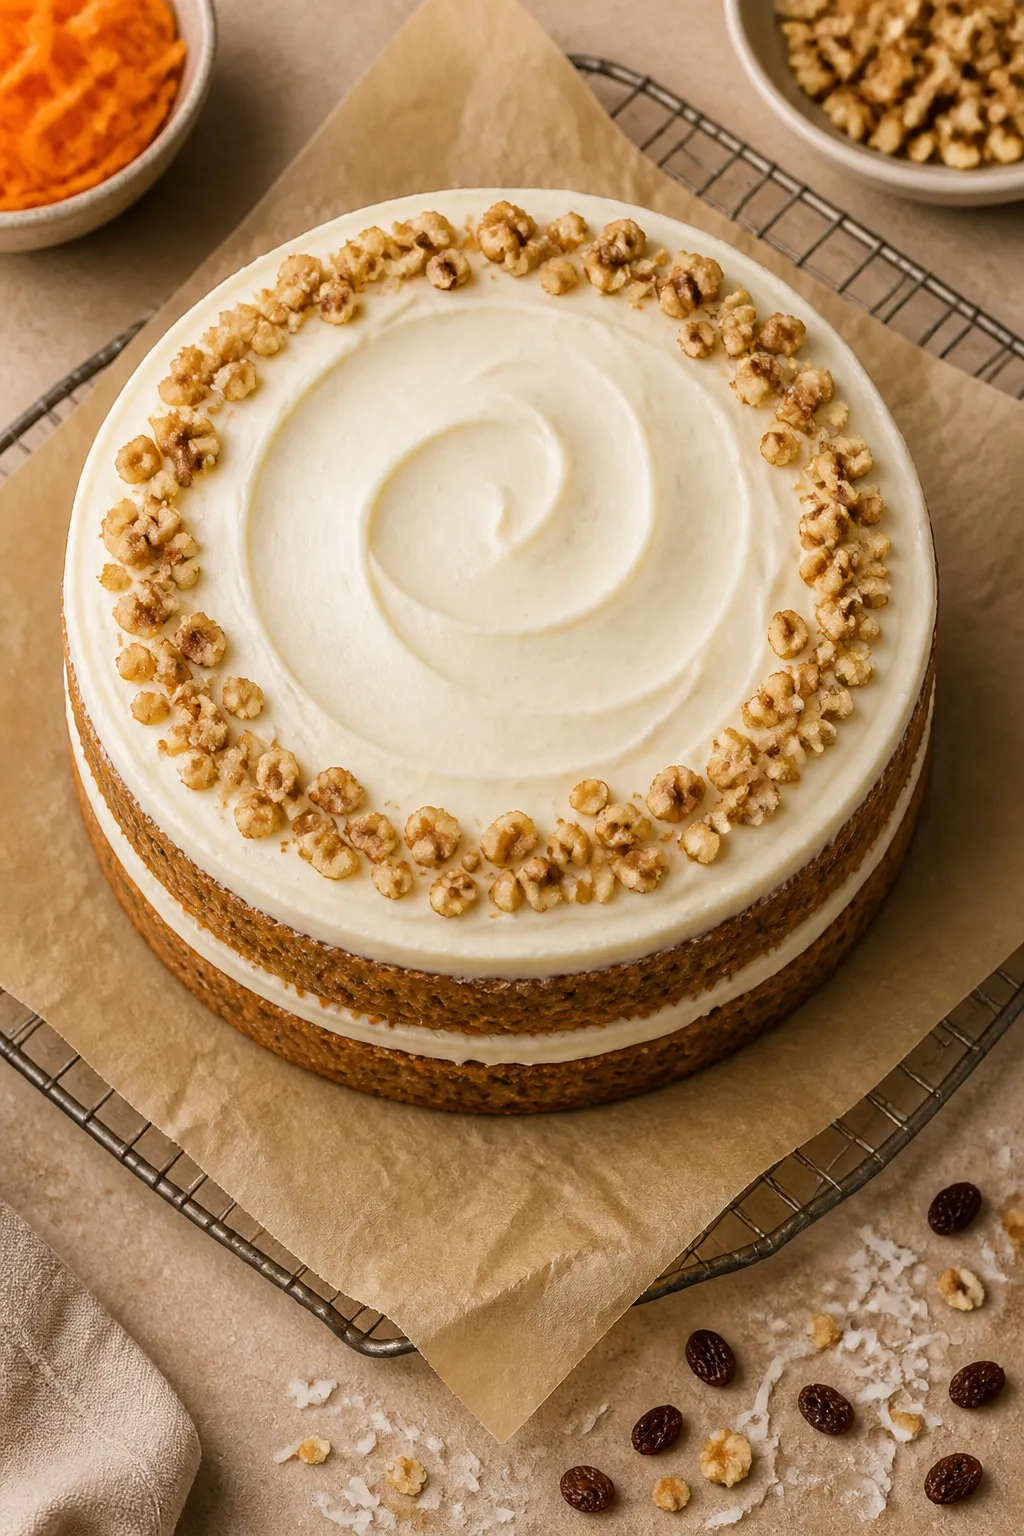
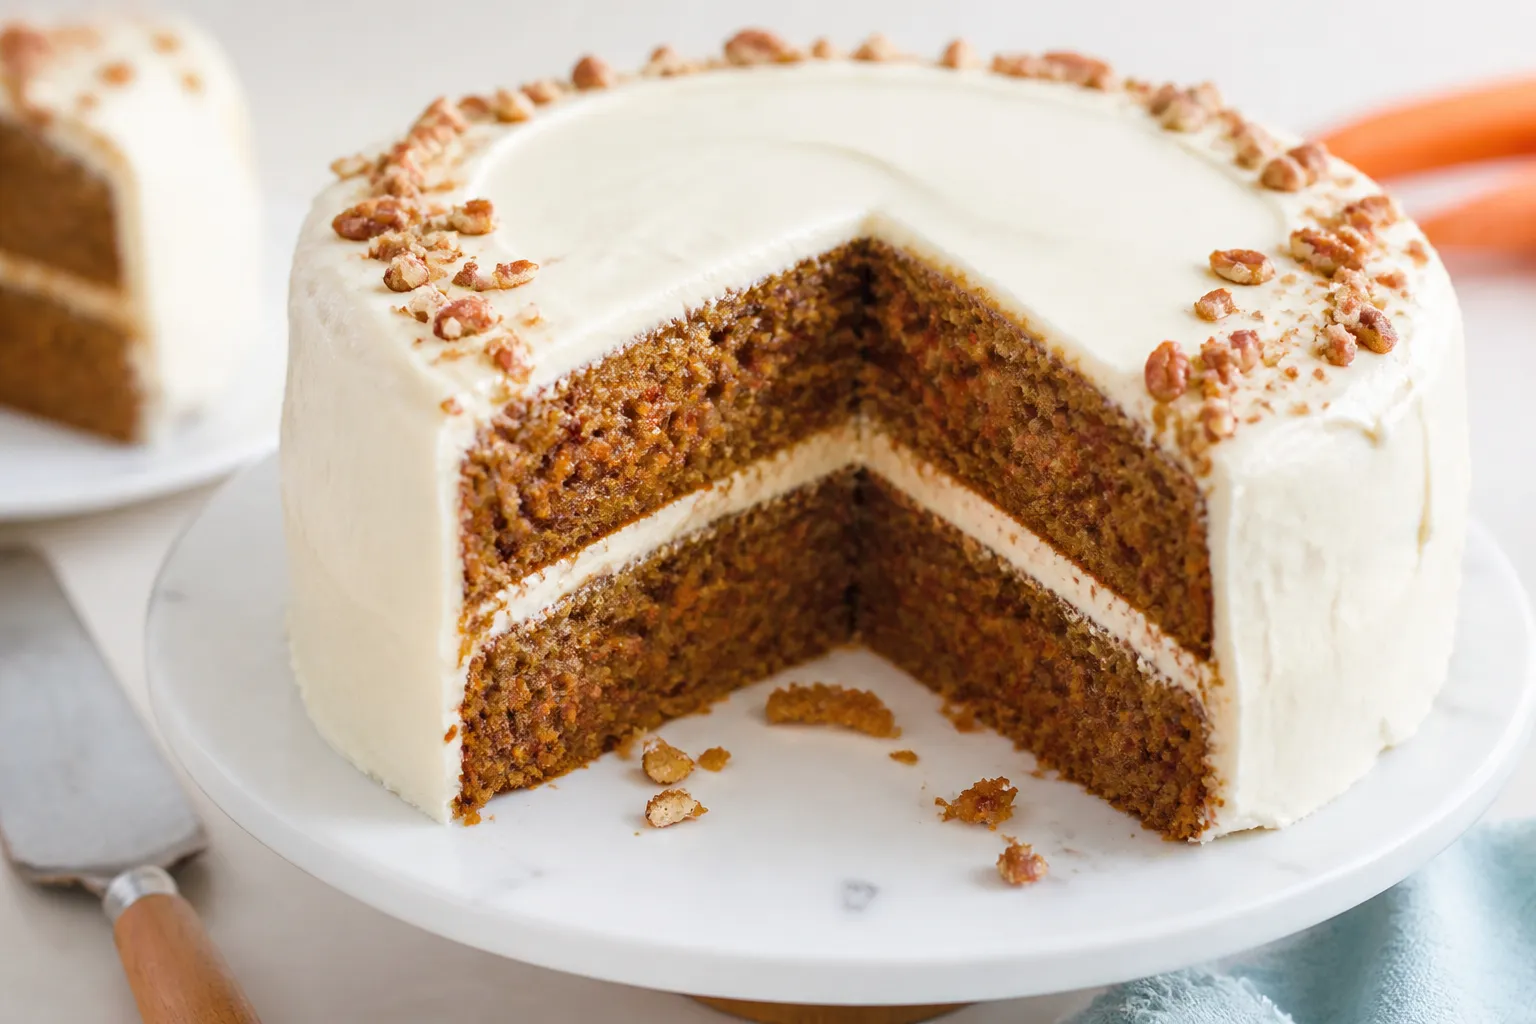
    Overhead shot of a freshly frosted, two-layer gluten-free dairy-free carrot cake on a simple white c
    • Moist without butter or milk: Oil, applesauce, and fresh grated carrots do the heavy lifting.
    • Classic bakery-style flavor: Cinnamon and nutmeg keep it cozy, while vanilla rounds it out.
    • No gritty texture: A good 1:1 gluten-free flour blend keeps the crumb soft and cohesive.
    • Easy dairy-free frosting: A simple “cream cheese” style frosting using plant-based cream cheese and butter.
    • Flexible add-ins: Walnuts, raisins, or shredded coconut if you like texture—leave them out if you don’t.

    What You’ll Need

    • Dry Ingredients:
      • 2 cups gluten-free all-purpose flour (1:1 blend with xanthan gum)
      • 1 cup granulated sugar
      • 1/2 cup light brown sugar, packed
      • 2 teaspoons baking powder
      • 1/2 teaspoon baking soda
      • 1 teaspoon fine sea salt
      • 2 teaspoons ground cinnamon
      • 1/4 teaspoon ground nutmeg
    • Wet Ingredients:
      • 3 large eggs, room temperature
      • 3/4 cup neutral oil (avocado, light olive, or canola)
      • 1/2 cup unsweetened applesauce
      • 2 teaspoons vanilla extract
      • 2 1/2 cups finely grated carrots (about 3–4 medium)
    • Optional Add-Ins:
      • 1/2 cup chopped walnuts or pecans
      • 1/2 cup raisins
      • 1/2 cup unsweetened shredded coconut
    • Dairy-Free “Cream Cheese” Frosting:
      • 8 ounces dairy-free cream cheese, slightly softened
      • 1/2 cup dairy-free butter, room temperature
      • 3–3 1/2 cups powdered sugar, sifted
      • 1 teaspoon vanilla extract
      • Pinch of salt

    How to Make It

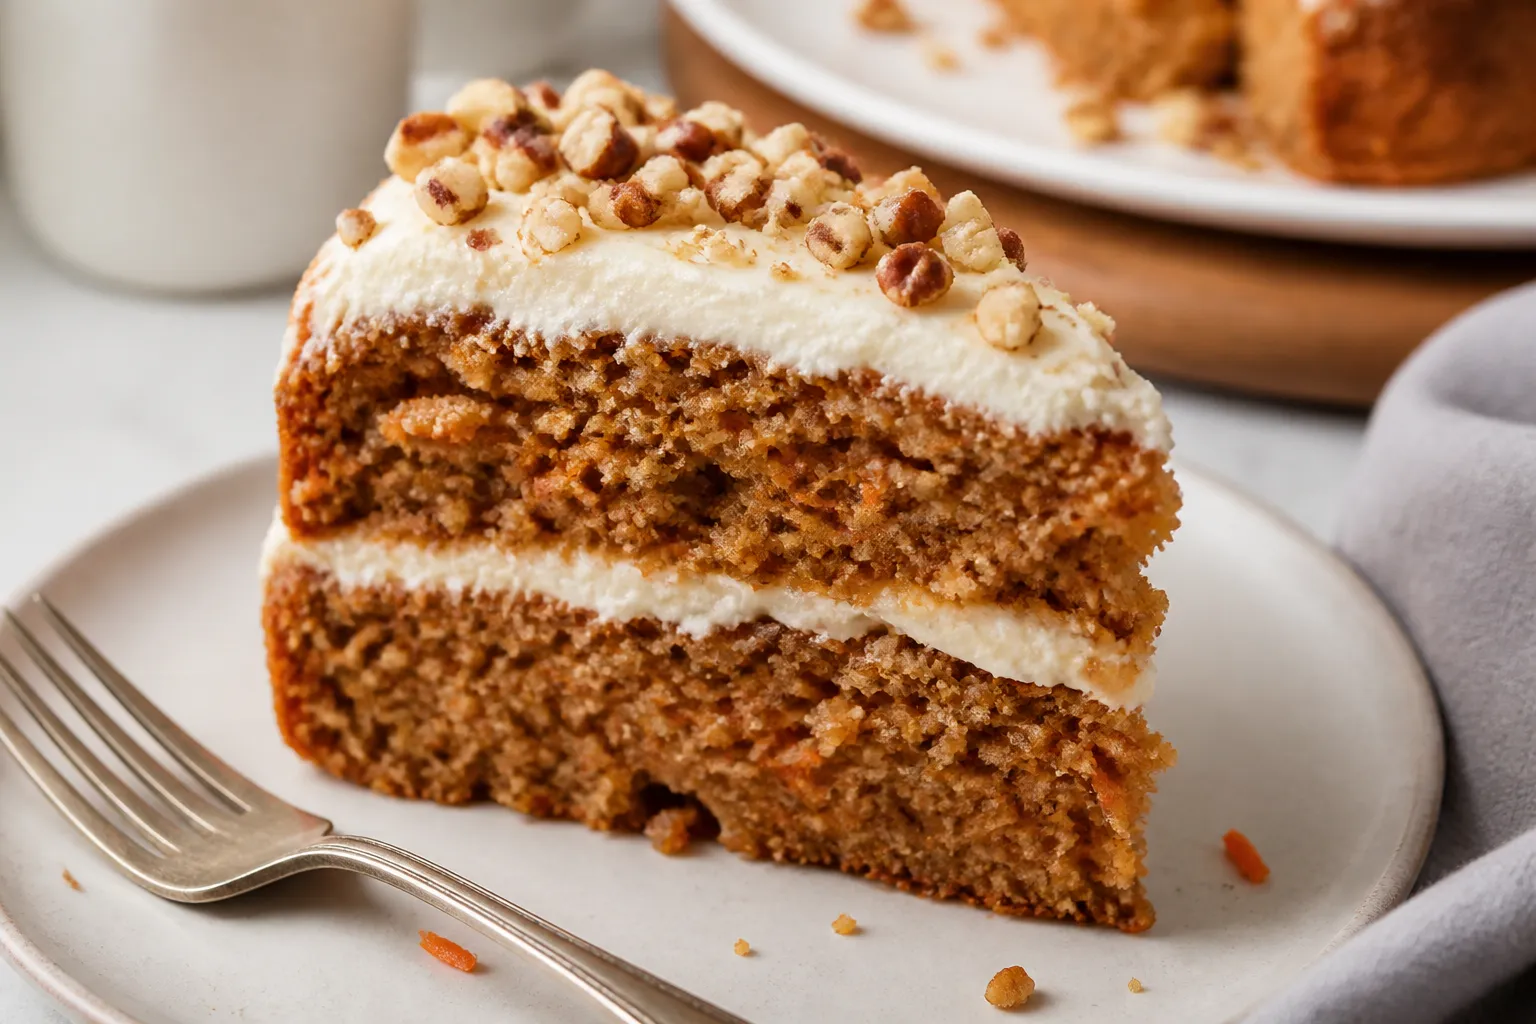
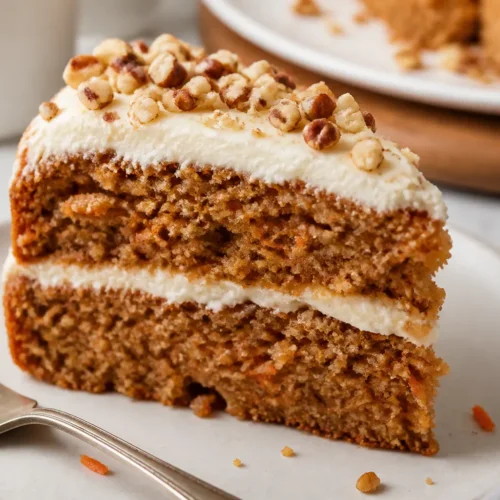
    Close-up, shallow-depth-of-field process shot of a single 8-inch cake layer just out of the pan and
    1. Prep your pans: Heat oven to 350°F (175°C). Line two 8-inch round cake pans with parchment and lightly grease the sides.
    2. Mix dry ingredients: In a large bowl, whisk flour, granulated sugar, brown sugar, baking powder, baking soda, salt, cinnamon, and nutmeg until well combined.
    3. Whisk wet ingredients: In another bowl, whisk eggs, oil, applesauce, and vanilla until smooth.
    4. Combine: Pour wet into dry and stir just until no dry streaks remain.

      Fold in grated carrots and any add-ins. Do not overmix.

    5. Bake: Divide batter between pans. Bake 25–30 minutes, until the centers spring back and a toothpick comes out clean with a few moist crumbs.
    6. Cool completely: Let cakes cool in pans 10 minutes, then transfer to a rack.

      Cool fully before frosting.

    7. Make frosting: Beat dairy-free butter and cream cheese until smooth. Add vanilla and salt. Beat in powdered sugar, starting with 3 cups, until fluffy and spreadable.
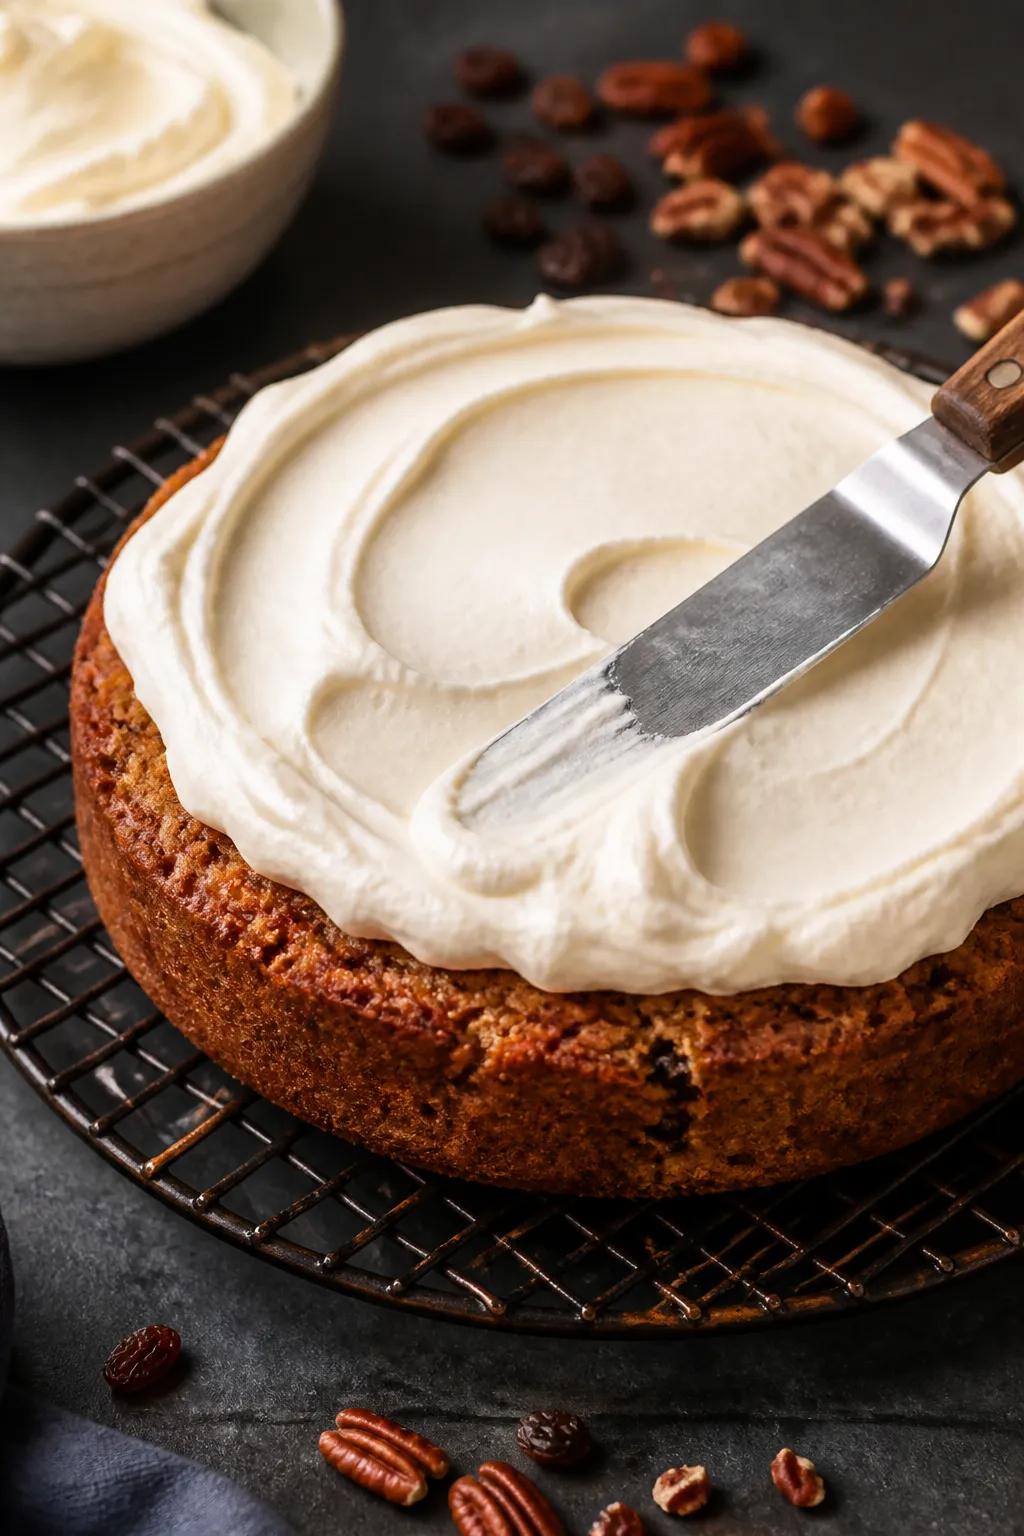
    8. Assemble: Place the first layer on a plate, spread frosting on top, add the second layer, and frost the top and sides.

      Chill 20 minutes to set if needed.

    How to Store

    • Refrigerate: Cover and refrigerate for up to 5 days. The crumb stays moist.
    • Freeze: Wrap unfrosted layers tightly and freeze up to 2 months. Thaw in the fridge overnight, then frost.
    • Room temp (short term): If your kitchen is cool, the frosted cake can sit out for up to 4 hours.

    Benefits of This Recipe

    • Allergy-friendly: Gluten and dairy free with classic taste and texture.
    • Lower fuss: No fancy techniques—just bowls, a whisk, and standard pans.
    • Moist and tender: Applesauce and carrots keep it soft without heaviness.
    • Make-ahead friendly: Layers freeze well and frosting spreads smoothly even after chilling.

    Pitfalls to Watch Out For

    • Overmixing: Can make the cake dense.

      Stir just until combined.

    • Coarse carrot shreds: Use a fine grate so the carrot melts into the batter.
    • Wrong flour blend: Choose a 1:1 gluten-free blend with xanthan gum for best structure.
    • Warm frosting: If frosting feels loose, chill it 10–15 minutes, then re-whip.

    Alternatives

    • Muffins or cupcakes: Bake 18–22 minutes for cupcakes. Great for portion control.
    • Sheet cake: Bake in a 9×13 pan for 30–35 minutes. Easy to transport and frost.
    • Egg-free option: Replace eggs with 3 tablespoons ground flax + 9 tablespoons water (rest 10 minutes).

      Texture will be slightly denser but still moist.

    • Lower sugar: Reduce granulated sugar to 3/4 cup and keep brown sugar at 1/2 cup. Flavor stays balanced.
    • Spice swap: Add 1/4 teaspoon ginger or cardamom for a warmer profile.

    FAQ

    Can I use coconut oil instead of neutral oil?

    Yes. Use melted, slightly cooled coconut oil.

    Expect a faint coconut note and be sure your other ingredients are at room temperature to avoid solidifying the oil.

    Do I need xanthan gum?

    If your gluten-free blend already includes it, you’re set. If not, add 1 teaspoon to the dry ingredients for better structure and sliceability.

    Can I make this without nuts and raisins?

    Absolutely. The cake is excellent plain.

    If you want texture without nuts, try a handful of shredded coconut or leave add-ins out entirely.

    What if I don’t have dairy-free cream cheese?

    Make a vanilla buttercream using dairy-free butter, powdered sugar, vanilla, and a splash of dairy-free milk. Add a teaspoon of lemon juice for tang.

    Why is my cake gummy?

    Common causes are overmixing, underbaking, or too much moisture from coarse carrot shreds. Use a fine grate, bake until the tester has only a few crumbs, and mix gently.

    Final Thoughts

    This gluten free, dairy free carrot cake brings everything you love about the classic—moist crumb, warm spice, and lush frosting—without feeling like a compromise.

    It’s simple enough for a weeknight bake and polished enough for celebrations. Keep this one in your back pocket, because once you share a slice, you’ll be asked for the recipe more than once.

    The Best Gluten Free Dairy Free Carrot Cake Recipe ⭐ – Moist, Simple, and Crowd-Pleasing

    Prep Time 20 minutes
    Cook Time 35 minutes
    Total Time 55 minutes
    Servings 12 servings

    Ingredients
      

    • Dry Ingredients: 2 cups gluten-free all-purpose flour (1:1 blend with xanthan gum)
    • 1 cup granulated sugar
    • 1/2 cup light brown sugar, packed
    • 2 teaspoons baking powder
    • 1/2 teaspoon baking soda
    • 1 teaspoon fine sea salt
    • 2 teaspoons ground cinnamon
    • 1/4 teaspoon ground nutmeg
    • Wet Ingredients: 3 large eggs, room temperature
    • 3/4 cup neutral oil (avocado, light olive, or canola)
    • 1/2 cup unsweetened applesauce
    • 2 teaspoons vanilla extract
    • 2 1/2 cups finely grated carrots (about 3–4 medium)
    • Optional Add-Ins: 1/2 cup chopped walnuts or pecans
    • 1/2 cup raisins
    • 1/2 cup unsweetened shredded coconut
    • Dairy-Free “Cream Cheese” Frosting: 8 ounces dairy-free cream cheese, slightly softened
    • 1/2 cup dairy-free butter, room temperature
    • 3–3 1/2 cups powdered sugar, sifted
    • 1 teaspoon vanilla extract
    • Pinch of salt

    Instructions
     

    • Prep your pans: Heat oven to 350°F (175°C). Line two 8-inch round cake pans with parchment and lightly grease the sides.
    • Mix dry ingredients: In a large bowl, whisk flour, granulated sugar, brown sugar, baking powder, baking soda, salt, cinnamon, and nutmeg until well combined.
    • Whisk wet ingredients: In another bowl, whisk eggs, oil, applesauce, and vanilla until smooth.
    • Combine: Pour wet into dry and stir just until no dry streaks remain. Fold in grated carrots and any add-ins. Do not overmix.
    • Bake: Divide batter between pans. Bake 25–30 minutes, until the centers spring back and a toothpick comes out clean with a few moist crumbs.
    • Cool completely: Let cakes cool in pans 10 minutes, then transfer to a rack. Cool fully before frosting.
    • Make frosting: Beat dairy-free butter and cream cheese until smooth. Add vanilla and salt. Beat in powdered sugar, starting with 3 cups, until fluffy and spreadable.
    • Assemble: Place the first layer on a plate, spread frosting on top, add the second layer, and frost the top and sides. Chill 20 minutes to set if needed.
  • Easy Vegan Gluten Free Carrot Cake That Tastes Just Like Classic Carrot Cake ⭐ – Simple, Moist, and Crowd-Pleasing

    Easy Vegan Gluten Free Carrot Cake That Tastes Just Like Classic Carrot Cake ⭐ – Simple, Moist, and Crowd-Pleasing

    If you love classic carrot cake but need it vegan and gluten free, this version checks every box. It’s tender, perfectly spiced, and topped with tangy cream cheese frosting—no dry crumbs or odd textures. The batter comes together quickly with pantry staples, and you don’t need special equipment.

    Even non-vegans ask for seconds. This is the kind of cake you bring to a party and quietly watch disappear.

    What Makes This Special

    Overhead shot of a freshly frosted two-layer vegan gluten free carrot cake on a parchment-lined cool
    • Classic flavor, modern ingredients: Warm spices, brown sugar, and vanilla give it that familiar bakery taste.
    • Moist without eggs or dairy: Applesauce and oil keep the crumb tender, while shredded carrots add natural sweetness.
    • No gritty texture: A balanced gluten free flour blend bakes up soft and light.
    • Simple method: One bowl for the batter, one pan, and straightforward steps.
    • Foolproof frosting: A creamy, tangy vegan cream cheese frosting that spreads like a dream.

    Ingredients

    • Dry Ingredients:
      • 1 3/4 cups gluten free all-purpose flour (with xanthan gum)
      • 1 cup light brown sugar, packed
      • 1/3 cup organic cane sugar
      • 2 teaspoons baking powder
      • 1/2 teaspoon baking soda
      • 1 teaspoon fine sea salt
      • 2 teaspoons ground cinnamon
      • 1/2 teaspoon ground nutmeg
      • 1/4 teaspoon ground ginger (optional but nice)
    • Wet Ingredients:
      • 1 cup unsweetened applesauce
      • 1/2 cup neutral oil (avocado, sunflower, or light olive)
      • 1/4 cup dairy-free milk (almond, oat, or soy)
      • 2 teaspoons vanilla extract
      • 2 teaspoons apple cider vinegar
    • Add-Ins:
      • 2 cups finely grated carrots (about 3–4 medium, packed but not watery)
      • 1/2 cup chopped walnuts or pecans (optional)
      • 1/2 cup raisins (optional)
      • 1/2 cup unsweetened shredded coconut (optional)
    • Vegan Cream Cheese Frosting:
      • 8 ounces vegan cream cheese, cold
      • 1/2 cup vegan butter, slightly softened
      • 2 1/2–3 cups powdered sugar, sifted
      • 1 teaspoon vanilla extract
      • Pinch of salt

    Step-by-Step Instructions

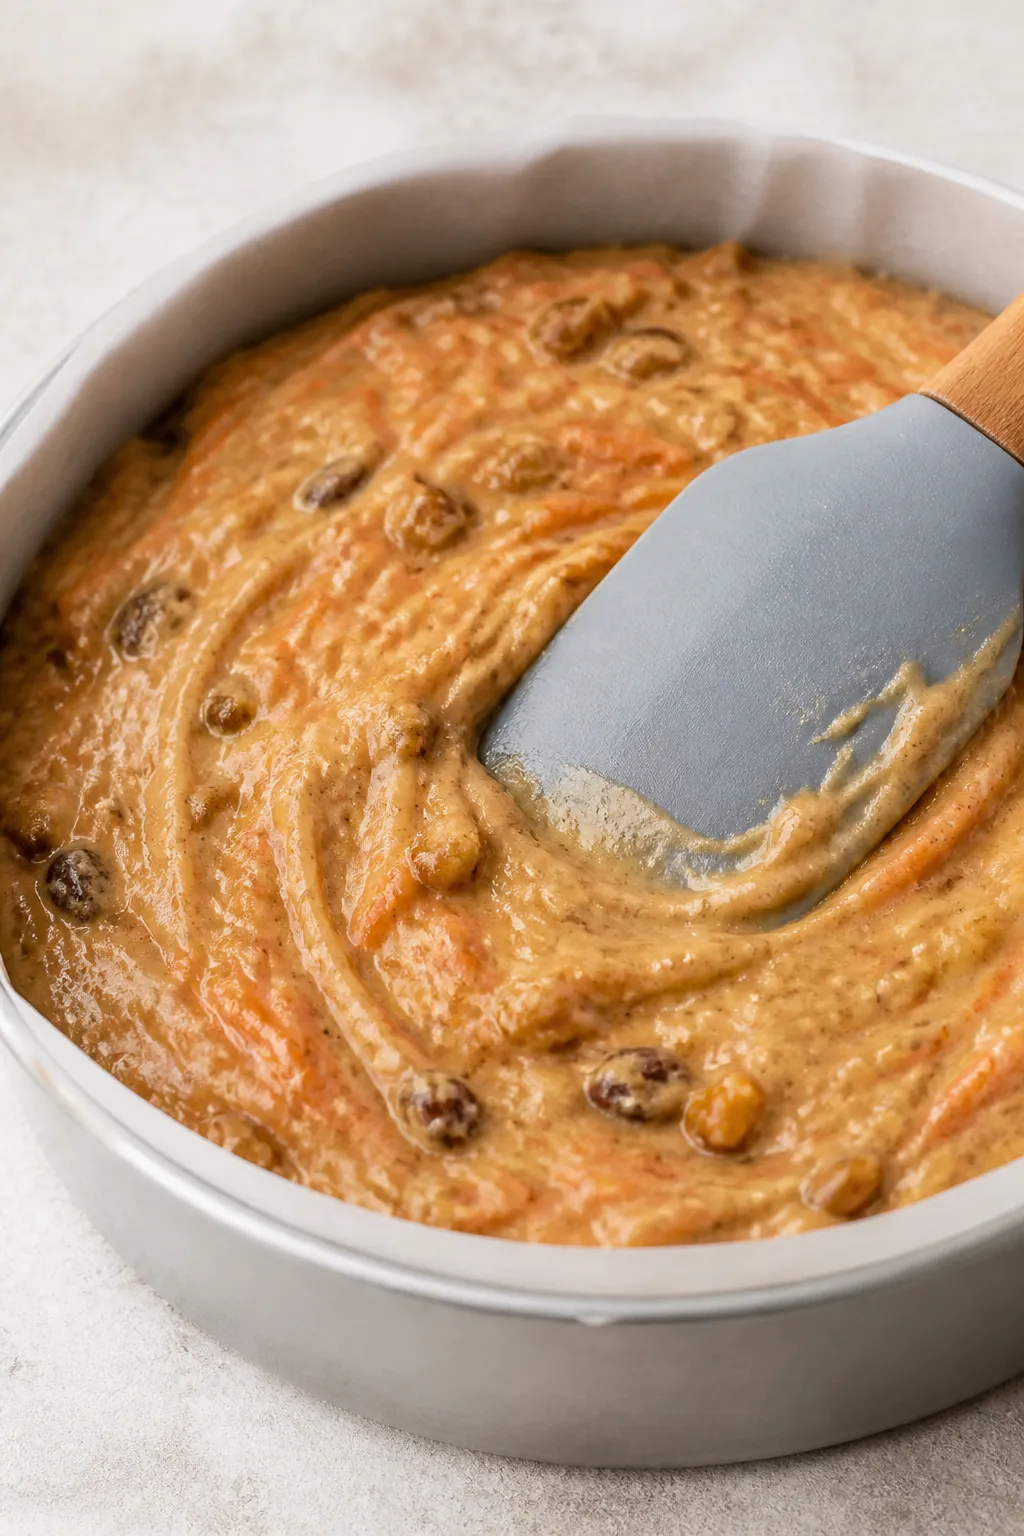
    Close-up process shot of a thick carrot cake batter being spread evenly into an 8-inch round pan wit
    1. Preheat the oven to 350°F (175°C). Line an 8-inch square pan or two 8-inch round pans with parchment and lightly grease.
    2. In a large bowl, whisk the flour, sugars, baking powder, baking soda, salt, and spices until no lumps remain.
    3. In a separate bowl or measuring jug, combine applesauce, oil, dairy-free milk, vanilla, and vinegar.
    4. Pour wet into dry and mix with a spatula until just combined. Do not overmix.
    5. Fold in the grated carrots and any optional add-ins.

      The batter will be thick—this is right.

    6. Spread batter into the prepared pan(s). Smooth the top with a spatula.
    7. Bake for 30–36 minutes (round layers may finish closer to 28–32). A toothpick should come out mostly clean with a few moist crumbs.
    8. Cool in the pan for 10 minutes, then transfer to a wire rack to cool completely before frosting.
    9. Make the frosting: Beat vegan butter until creamy.

      Add vegan cream cheese and beat just until smooth. Mix in vanilla and salt, then gradually add powdered sugar to reach a spreadable consistency.

    10. Frost the cooled cake. For layered cakes, add frosting between layers and on top.

      Garnish with chopped nuts if you like.

    How to Store

    • Refrigerator: Cover and chill for up to 5 days. The crumb stays moist.
    • Room temperature: Unfrosted cake keeps 2 days, covered, in a cool spot.
    • Freezer: Wrap unfrosted layers tightly and freeze up to 2 months. Thaw overnight in the fridge, then frost.

    Why This is Good for You

    • Carrots bring beta-carotene, fiber, and natural sweetness.
    • Applesauce reduces the need for extra oil while keeping moisture high.
    • Dairy-free and egg-free makes it easier on sensitive stomachs and inclusive for guests.
    • Customizable sugar lets you adjust sweetness without losing texture.

    Common Mistakes to Avoid

    • Skipping xanthan gum: If your flour blend doesn’t have it, add 1/2 teaspoon for structure.
    • Overmixing the batter: This can make the cake dense.

      Stir until just combined.

    • Watery carrots: If your carrots are very wet, lightly blot with a paper towel so the cake isn’t soggy.
    • Overbaking: Start checking early. The cake should be set with moist crumbs, not dry.
    • Overbeating frosting with cream cheese: Beat briefly to avoid a runny frosting.

    Variations You Can Try

    • Pineapple Boost: Fold in 1/2 cup well-drained crushed pineapple. Reduce milk by 1 tablespoon.
    • Maple Spice: Swap 1/4 cup cane sugar for maple syrup and add a pinch of clove.
    • Carrot Cupcakes: Bake in a lined muffin tin for 18–22 minutes.

      Yields about 12–14 cupcakes.

    • Nut-Free: Skip nuts and add coconut or extra raisins for texture.
    • Protein Lift: Replace 1/4 cup flour with almond flour if tolerated (not nut-free), and add 2–3 extra minutes of bake time.

    FAQ

    Can I make this without applesauce?

    Yes. Use an equal amount of mashed ripe banana or dairy-free yogurt. Flavor will shift slightly but the texture stays moist.

    What gluten free flour works best?

    A 1:1 gluten free all-purpose blend with xanthan gum gives the most classic crumb.

    Brands vary, so choose one designed for baking cakes.

    Can I reduce the sugar?

    You can cut total sugar by about 1/4 cup without hurting texture. Any more and the cake may bake up drier and less tender.

    How do I keep the frosting from getting runny?

    Use cold vegan cream cheese, slightly softened butter, and sifted powdered sugar. Beat just until smooth, then chill for 10–15 minutes if needed.

    Can I make this as a two-layer cake?

    Absolutely.

    Divide into two 8-inch pans and bake 28–32 minutes. Cool completely before stacking and frosting.

    Do I need eggs or egg replacers?

    No. Applesauce, oil, and vinegar with baking soda create lift and a soft crumb—no flax eggs or powders required.

    In Conclusion

    This easy vegan gluten free carrot cake brings everything you love about the classic—warm spice, tender crumb, and lush frosting—without the allergens.

    It’s simple to make, reliable, and always a hit. Bake it for birthdays, brunch, or anytime you want a feel-good dessert that everyone can enjoy. Slice, savor, and watch it become your new go-to.

    Easy Vegan Gluten Free Carrot Cake That Tastes Just Like Classic Carrot Cake ⭐ – Simple, Moist, and Crowd-Pleasing

    Prep Time 30 minutes
    Cook Time 35 minutes
    Total Time 1 hour 5 minutes
    Servings 12 servings

    Ingredients
      

    • Dry Ingredients: 1 3/4 cups gluten free all-purpose flour (with xanthan gum)
    • 1 cup light brown sugar, packed
    • 1/3 cup organic cane sugar
    • 2 teaspoons baking powder
    • 1/2 teaspoon baking soda
    • 1 teaspoon fine sea salt
    • 2 teaspoons ground cinnamon
    • 1/2 teaspoon ground nutmeg
    • 1/4 teaspoon ground ginger (optional but nice)
    • Wet Ingredients: 1 cup unsweetened applesauce
    • 1/2 cup neutral oil (avocado, sunflower, or light olive)
    • 1/4 cup dairy-free milk (almond, oat, or soy)
    • 2 teaspoons vanilla extract
    • 2 teaspoons apple cider vinegar
    • Add-Ins: 2 cups finely grated carrots (about 3–4 medium, packed but not watery)
    • 1/2 cup chopped walnuts or pecans (optional)
    • 1/2 cup raisins (optional)
    • 1/2 cup unsweetened shredded coconut (optional)
    • Vegan Cream Cheese Frosting: 8 ounces vegan cream cheese, cold
    • 1/2 cup vegan butter, slightly softened
    • 2 1/2–3 cups powdered sugar, sifted
    • 1 teaspoon vanilla extract
    • Pinch of salt

    Instructions
     

    • Preheat the oven to 350°F (175°C). Line an 8-inch square pan or two 8-inch round pans with parchment and lightly grease.
    • In a large bowl, whisk the flour, sugars, baking powder, baking soda, salt, and spices until no lumps remain.
    • In a separate bowl or measuring jug, combine applesauce, oil, dairy-free milk, vanilla, and vinegar.
    • Pour wet into dry and mix with a spatula until just combined. Do not overmix.
    • Fold in the grated carrots and any optional add-ins. The batter will be thick—this is right.
    • Spread batter into the prepared pan(s). Smooth the top with a spatula.
    • Bake for 30–36 minutes (round layers may finish closer to 28–32). A toothpick should come out mostly clean with a few moist crumbs.
    • Cool in the pan for 10 minutes, then transfer to a wire rack to cool completely before frosting.
    • Make the frosting: Beat vegan butter until creamy. Add vegan cream cheese and beat just until smooth. Mix in vanilla and salt, then gradually add powdered sugar to reach a spreadable consistency.
    • Frost the cooled cake. For layered cakes, add frosting between layers and on top. Garnish with chopped nuts if you like.
  • Mini Meatloaf – Comfort Food in a Weeknight-Friendly Size

    Mini Meatloaf – Comfort Food in a Weeknight-Friendly Size

    Mini meatloaf brings all the cozy flavor of the classic, but in a faster, easier format. They bake quickly, portion perfectly, and make great leftovers. If you’ve got a busy schedule but still want a hearty, home-cooked dinner, this is a solid go-to.

    Pair them with mashed potatoes, a green veggie, or tuck one into a sandwich the next day. These are simple, tasty, and friendly for both kids and adults.

    What Makes This Special

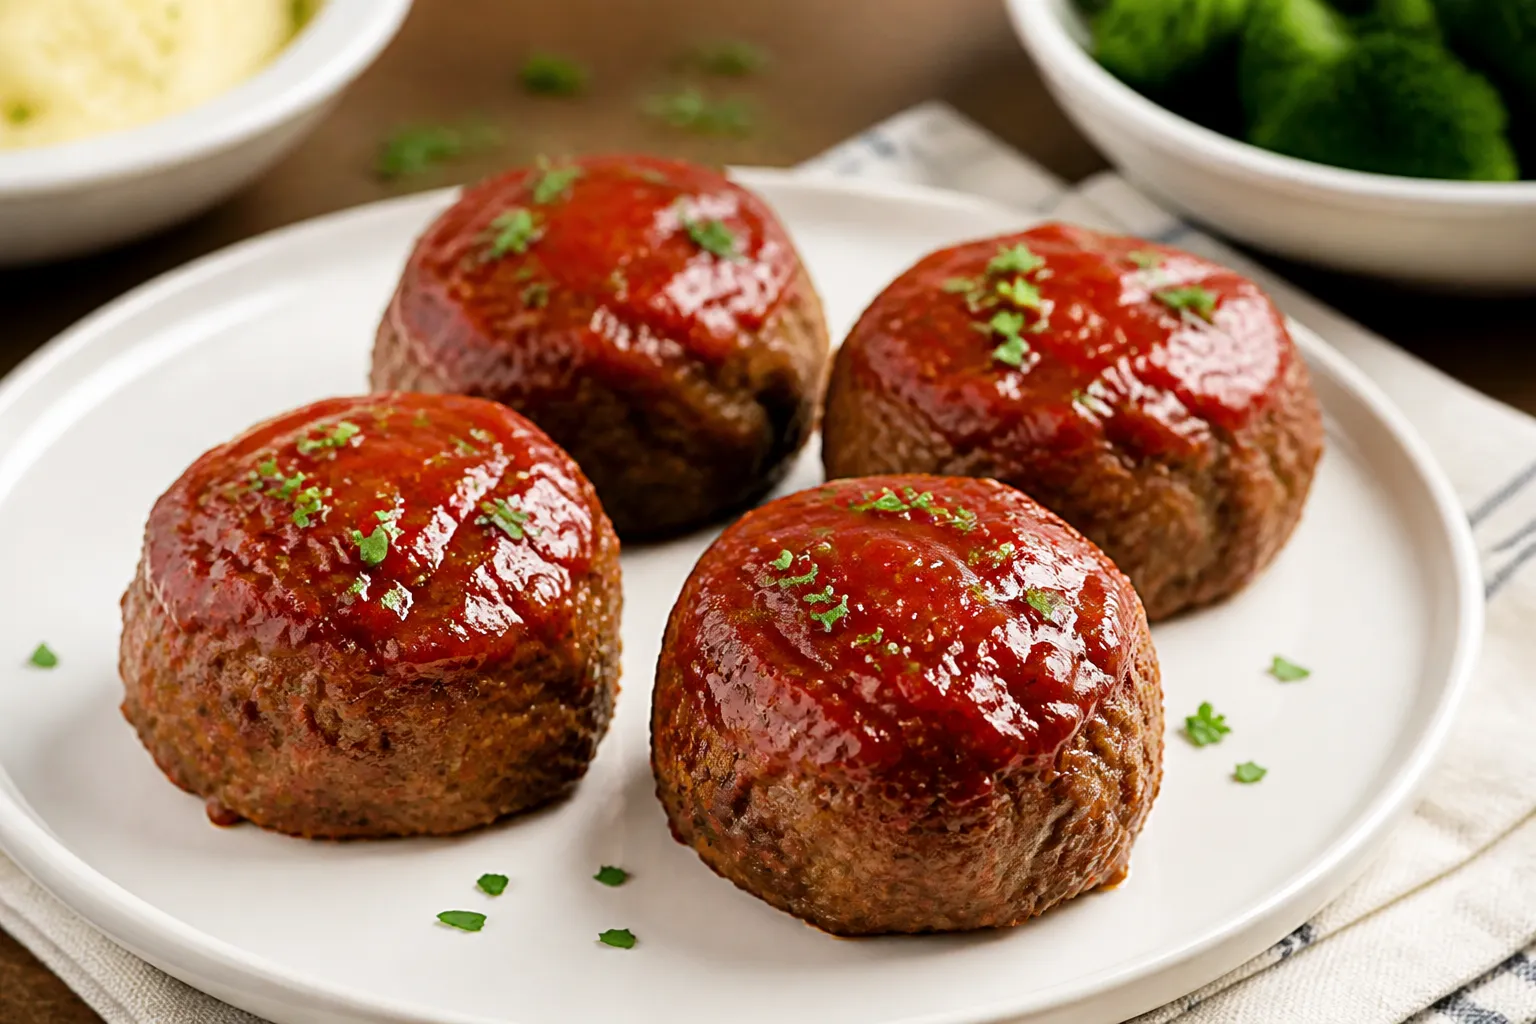
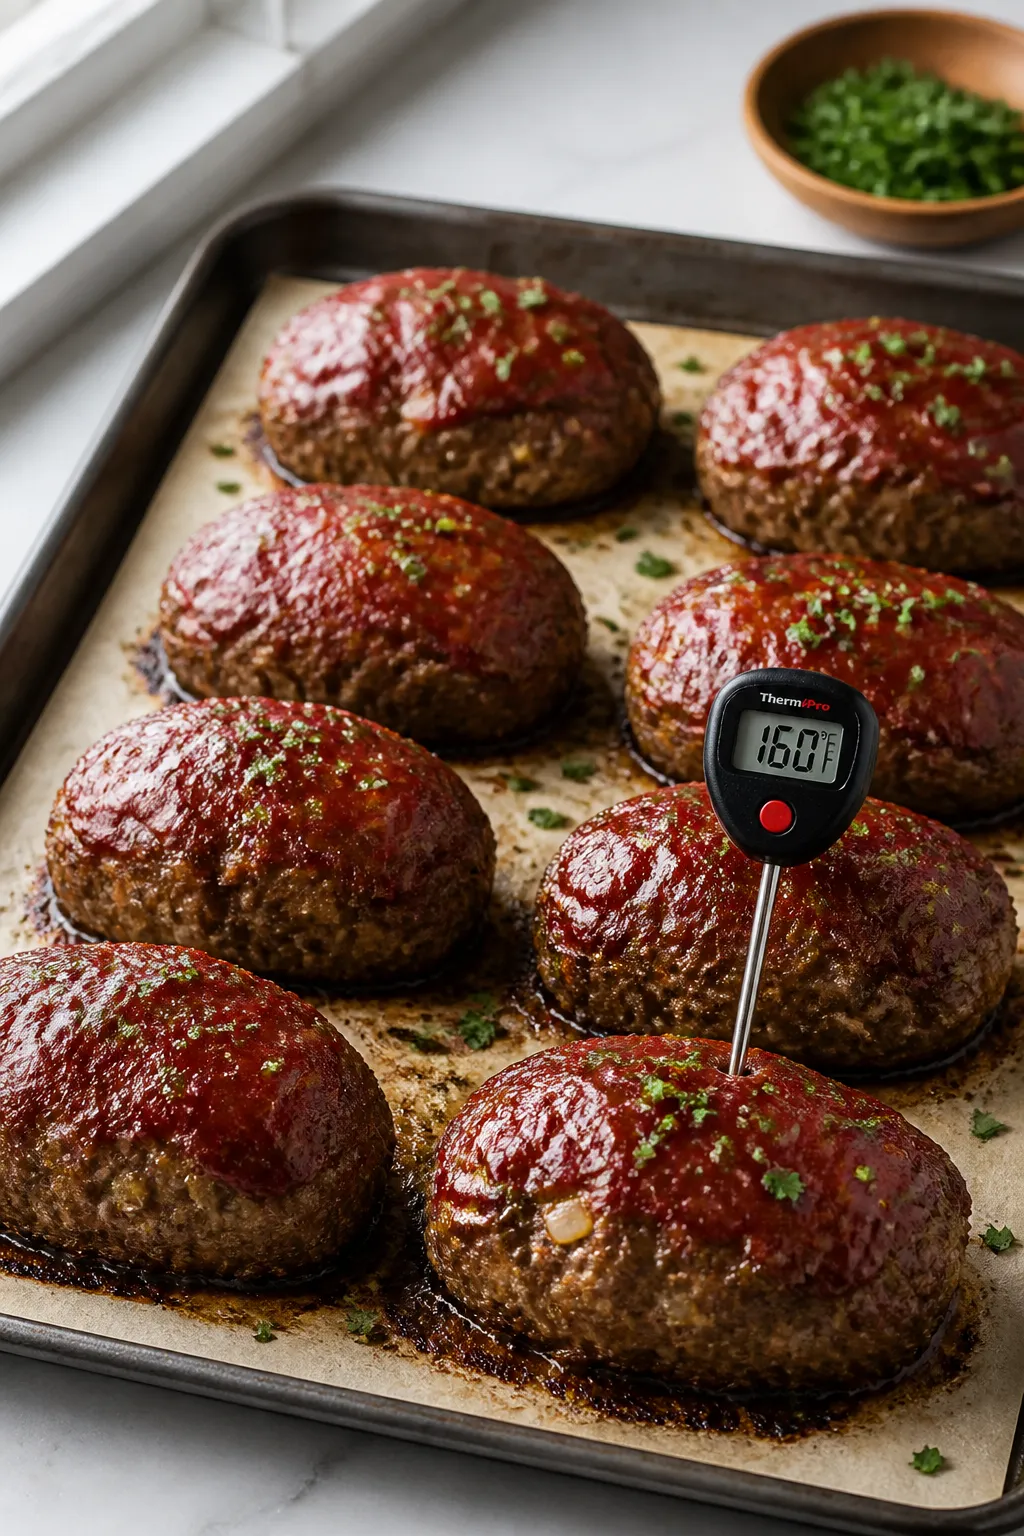
    Cooking process close-up: Mini meatloaves on a parchment-lined sheet pan just out of a 400°F oven,

    Quick cooking time: Smaller loaves bake in half the time of a traditional one.

    Even portions: Everyone gets their own mini, so no fights over the end slice.

    Great texture: The ratio of crusty exterior to juicy interior is just right.

    Flexible flavors: You can tweak seasoning, sauces, and mix-ins easily.

    What You’ll Need

    • 1 lb (450 g) ground beef (80–85% lean for best juiciness)
    • 1/2 lb (225 g) ground pork or turkey (optional, for flavor or lighter texture)
    • 1/2 cup breadcrumbs (panko or regular)
    • 1/3 cup milk
    • 1 large egg
    • 1 small onion, finely minced
    • 2 cloves garlic, minced
    • 1/3 cup ketchup (plus more for topping)
    • 2 tbsp Worcestershire sauce
    • 1 tsp Dijon or yellow mustard
    • 1 tsp salt
    • 1/2 tsp black pepper
    • 1 tsp smoked paprika (optional but tasty)
    • 2 tbsp fresh parsley, chopped (or 1 tsp dried)
    • Olive oil or nonstick spray for the pan

    How to Make It

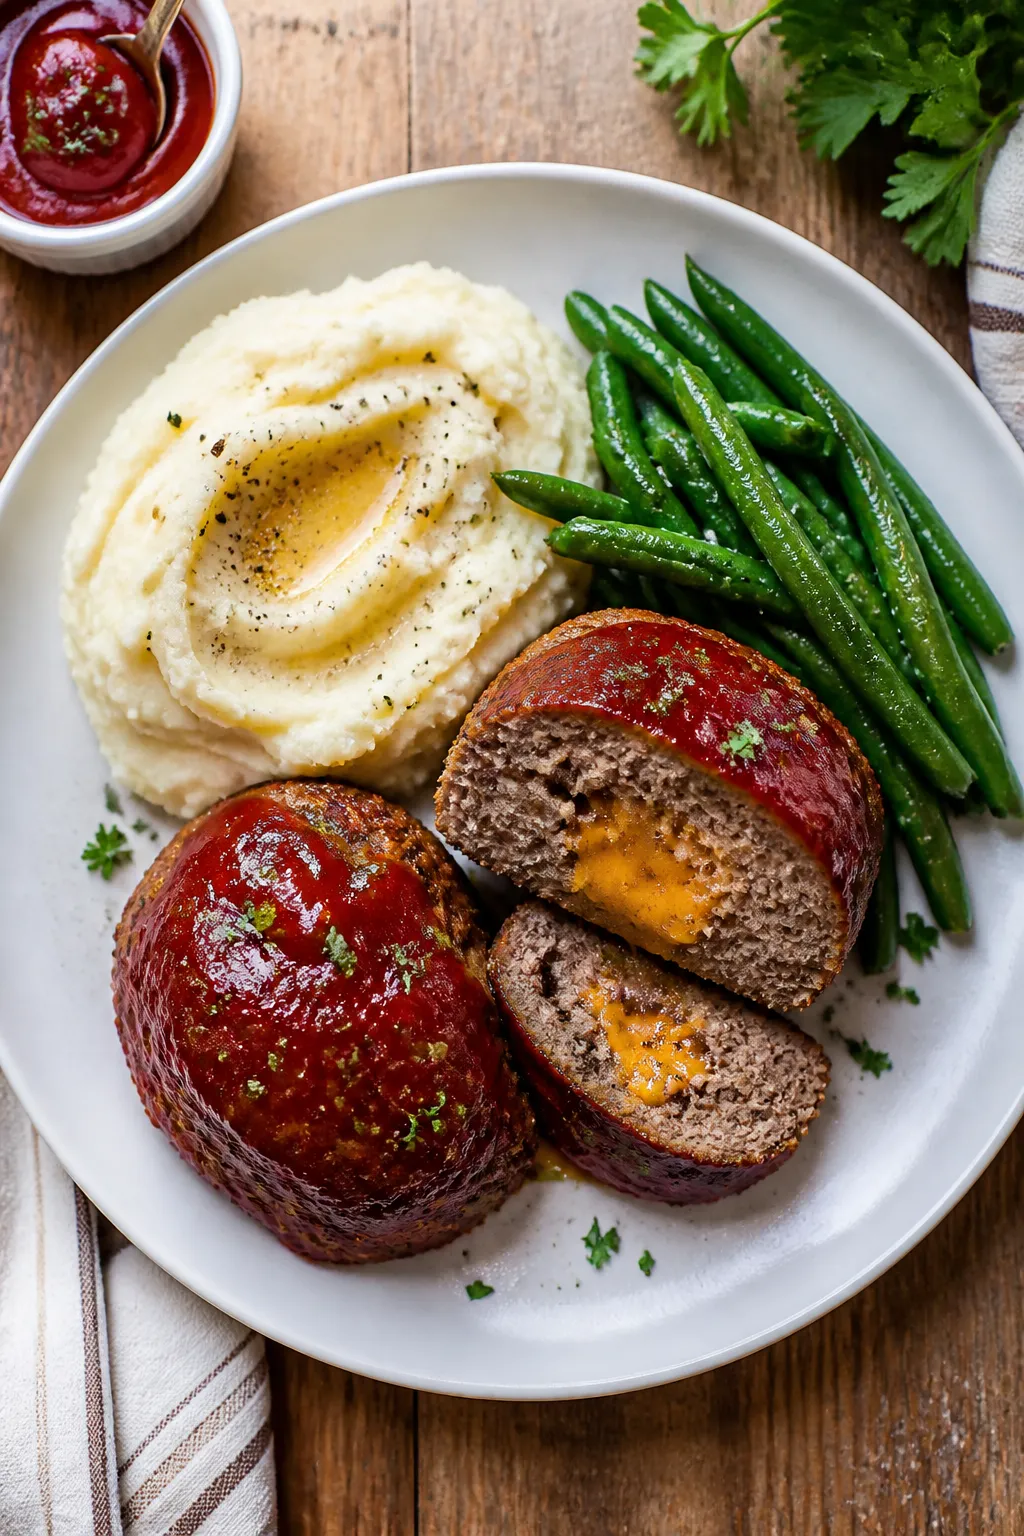
    Final plated overhead: Tasty top-down shot of two mini meatloaves sliced to reveal moist, tender cru
    1. Prep the oven and pan: Heat oven to 400°F (200°C). Lightly oil a sheet pan or line with parchment.

      You can also use a muffin tin for tidy portions.

    2. Soak the breadcrumbs: In a large bowl, mix breadcrumbs and milk. Let sit 2–3 minutes until the crumbs absorb the liquid. This keeps the meatloaf tender.
    3. Add the flavor base: Stir in the egg, onion, garlic, 1/3 cup ketchup, Worcestershire, mustard, salt, pepper, paprika, and parsley.
    4. Mix in the meat: Add ground beef and pork (or turkey).

      Gently mix with your hands or a fork until just combined. Do not overmix or the mini loaves can turn dense.

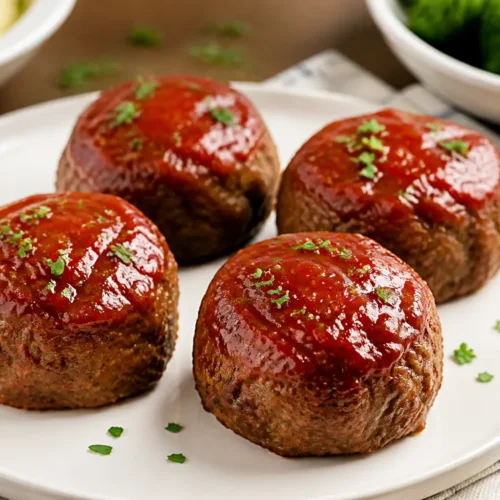
    5. Shape the minis: Divide into 8 even portions. Form small oval loaves (about the size of a large egg, slightly flattened) and place on the pan, leaving space between.
    6. Top with sauce: Brush a thin layer of ketchup over each loaf for a glossy glaze. You can mix in a little brown sugar and vinegar if you like it tangier.
    7. Bake: Cook 18–22 minutes, until the centers reach 160°F (71°C).

      If using turkey, aim for 165°F (74°C). They should be browned with a slight glaze.

    8. Rest and serve: Let them sit 5 minutes to reabsorb juices. Serve with mashed potatoes, roasted veggies, or a simple salad.

    Storage Instructions

    • Refrigerate: Cool completely, then store in an airtight container for up to 4 days.
    • Freeze: Wrap each mini loaf tightly, then freeze in a zip-top bag for up to 3 months.

      Label with the date.

    • Reheat: Thaw overnight in the fridge if frozen. Warm in a 325°F (165°C) oven for 12–15 minutes, or microwave in short bursts with a splash of water and a cover to keep moisture in.

    Why This is Good for You

    Protein-rich: Ground meat delivers steady energy and helps with muscle repair.

    Portion control: Individual loaves make it easier to manage servings without guessing.

    Customizable add-ins: You can fold in veggies like grated carrot or zucchini for extra fiber and nutrients.

    Balanced meal potential: Pair with a veggie and a whole-grain side for a rounded plate.

    Pitfalls to Watch Out For

    • Overmixing: This compacts the meat and leads to a tough texture.
    • Skipping the binder: Breadcrumbs and milk keep the mixture moist and cohesive.
    • Undercooking: Always check internal temperature for safety and doneness.
    • Too lean meat: Ultra-lean meat can be dry. If using lean turkey, add a tablespoon of olive oil or a splash more milk.

    Recipe Variations

    • BBQ Glaze: Swap ketchup for your favorite barbecue sauce.

      Add a pinch of chili powder for heat.

    • Italian Style: Use marinara instead of ketchup, add 1/3 cup grated Parmesan, and a teaspoon of Italian seasoning.
    • Veggie Boost: Fold in 1/2 cup grated zucchini or carrot (squeeze out moisture first) and a handful of chopped spinach.
    • Cheddar-Stuffed: Tuck a small cube of sharp cheddar into each loaf before baking for a melty center.
    • Turkey Maple Mustard: Use ground turkey, brush with a mix of Dijon and a little maple syrup.

    FAQ

    Can I make these in a muffin tin?

    Yes. Lightly grease the tin, fill each cup about three-quarters full, and bake 15–18 minutes. Check for doneness with a thermometer.

    What can I use instead of breadcrumbs?

    Crushed saltine crackers, oats pulsed in a blender, or almond flour all work.

    Keep the liquid to maintain moisture.

    How do I prevent them from falling apart?

    Use a solid binder combo: egg plus soaked breadcrumbs. Shape gently and let them rest after baking so they set up.

    Can I make them ahead?

    Yes. Mix and shape the loaves, cover, and refrigerate up to 24 hours.

    Add the glaze just before baking.

    What sides go best with mini meatloaf?

    Mashed or roasted potatoes, green beans, sautéed broccoli, coleslaw, or a simple arugula salad are all great choices.

    In Conclusion

    Mini meatloaf gives you the comfort of the classic in a smart, weeknight format. They’re quick to bake, easy to portion, and endlessly flexible. Keep the mix gentle, watch the temperature, and you’ll have juicy, flavorful minis every time.

    Make a double batch and freeze a few—you’ll thank yourself on a busy night.

    Mini Meatloaf – Comfort Food in a Weeknight-Friendly Size

    Prep Time 15 minutes
    Cook Time 25 minutes
    Total Time 40 minutes
    Servings 6 servings

    Ingredients
      

    • 1 lb (450 g) ground beef (80–85% lean for best juiciness)
    • 1/2 lb (225 g) ground pork or turkey (optional, for flavor or lighter texture)
    • 1/2 cup breadcrumbs (panko or regular)
    • 1/3 cup milk
    • 1 large egg
    • 1 small onion, finely minced
    • 2 cloves garlic, minced
    • 1/3 cup ketchup (plus more for topping)
    • 2 tbsp Worcestershire sauce
    • 1 tsp Dijon or yellow mustard
    • 1 tsp salt
    • 1/2 tsp black pepper
    • 1 tsp smoked paprika (optional but tasty)
    • 2 tbsp fresh parsley, chopped (or 1 tsp dried)
    • Olive oil or nonstick spray for the pan

    Instructions
     

    • Prep the oven and pan: Heat oven to 400°F (200°C). Lightly oil a sheet pan or line with parchment. You can also use a muffin tin for tidy portions.
    • Soak the breadcrumbs: In a large bowl, mix breadcrumbs and milk. Let sit 2–3 minutes until the crumbs absorb the liquid. This keeps the meatloaf tender.
    • Add the flavor base: Stir in the egg, onion, garlic, 1/3 cup ketchup, Worcestershire, mustard, salt, pepper, paprika, and parsley.
    • Mix in the meat: Add ground beef and pork (or turkey). Gently mix with your hands or a fork until just combined. Do not overmix or the mini loaves can turn dense.
    • Shape the minis: Divide into 8 even portions. Form small oval loaves (about the size of a large egg, slightly flattened) and place on the pan, leaving space between.
    • Top with sauce: Brush a thin layer of ketchup over each loaf for a glossy glaze. You can mix in a little brown sugar and vinegar if you like it tangier.
    • Bake: Cook 18–22 minutes, until the centers reach 160°F (71°C). If using turkey, aim for 165°F (74°C). They should be browned with a slight glaze.
    • Rest and serve: Let them sit 5 minutes to reabsorb juices. Serve with mashed potatoes, roasted veggies, or a simple salad.
  • Blueberry Cream Cheese Frosting – Smooth, Tangy, and Naturally Fruity

    Blueberry Cream Cheese Frosting – Smooth, Tangy, and Naturally Fruity

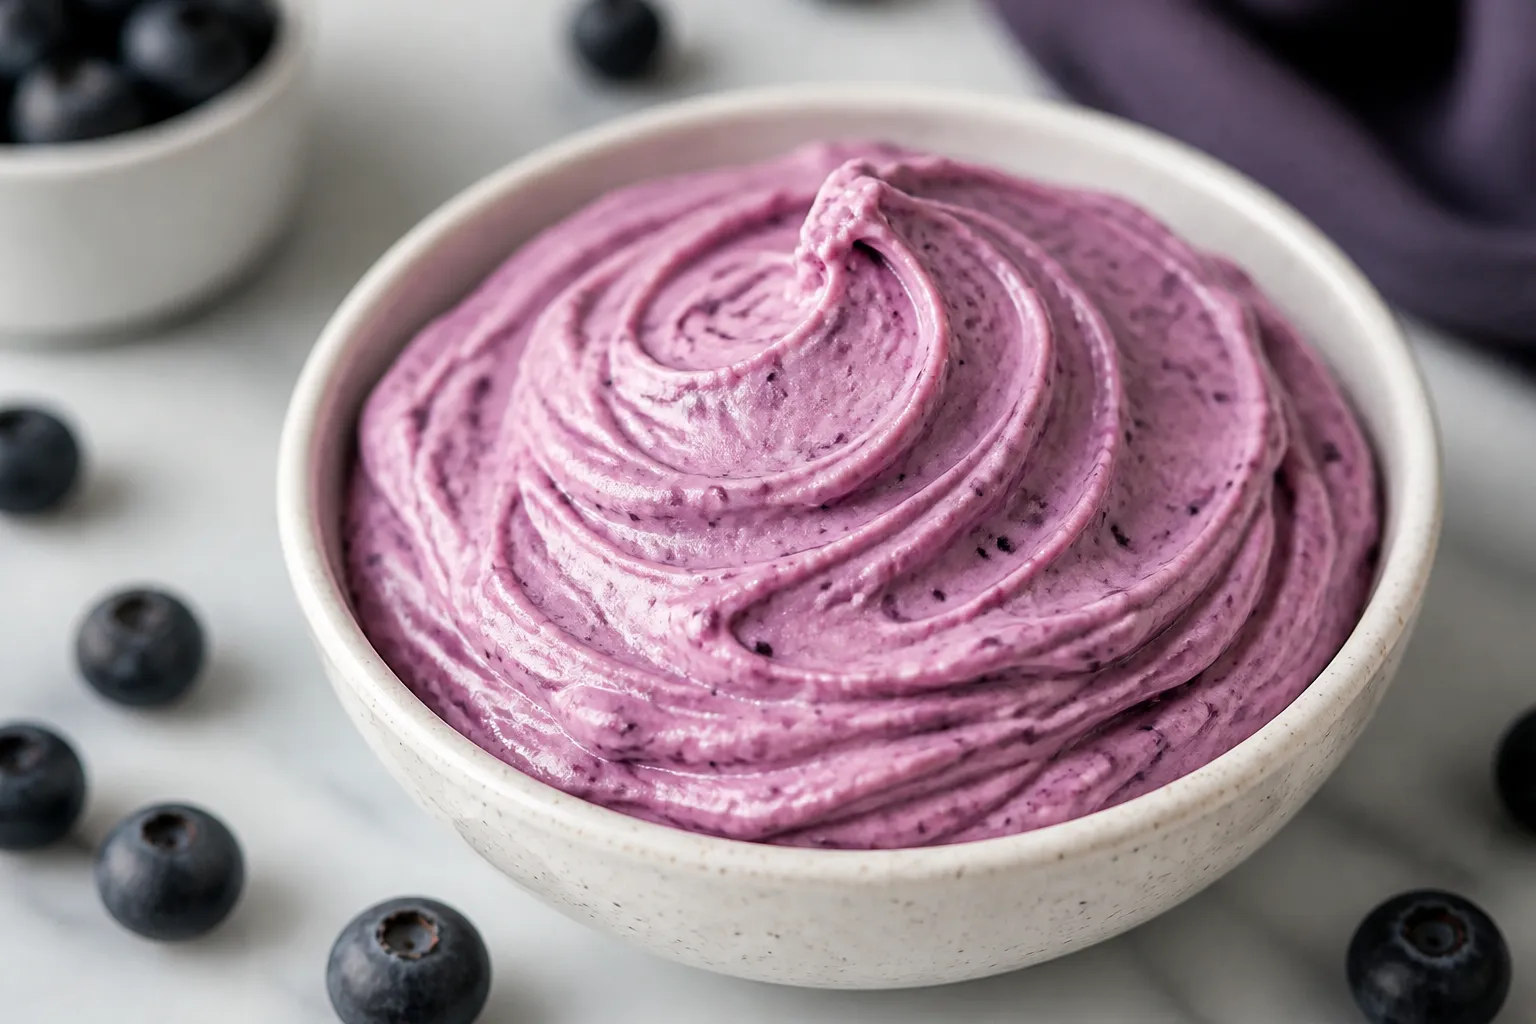
    This blueberry cream cheese frosting brings a pop of color and flavor to any cake or cupcake. It’s silky, lightly tangy, and sweet with a real blueberry finish—not artificial or overpowering. You’ll get a beautiful purple hue without food dye, plus a frosting that actually holds its shape.

    It’s easy to make, fun to use, and perfect for anything from lemon cakes to vanilla cupcakes. If you like cream cheese frosting but want something a little special, this one hits the mark.

    Why This Recipe Works

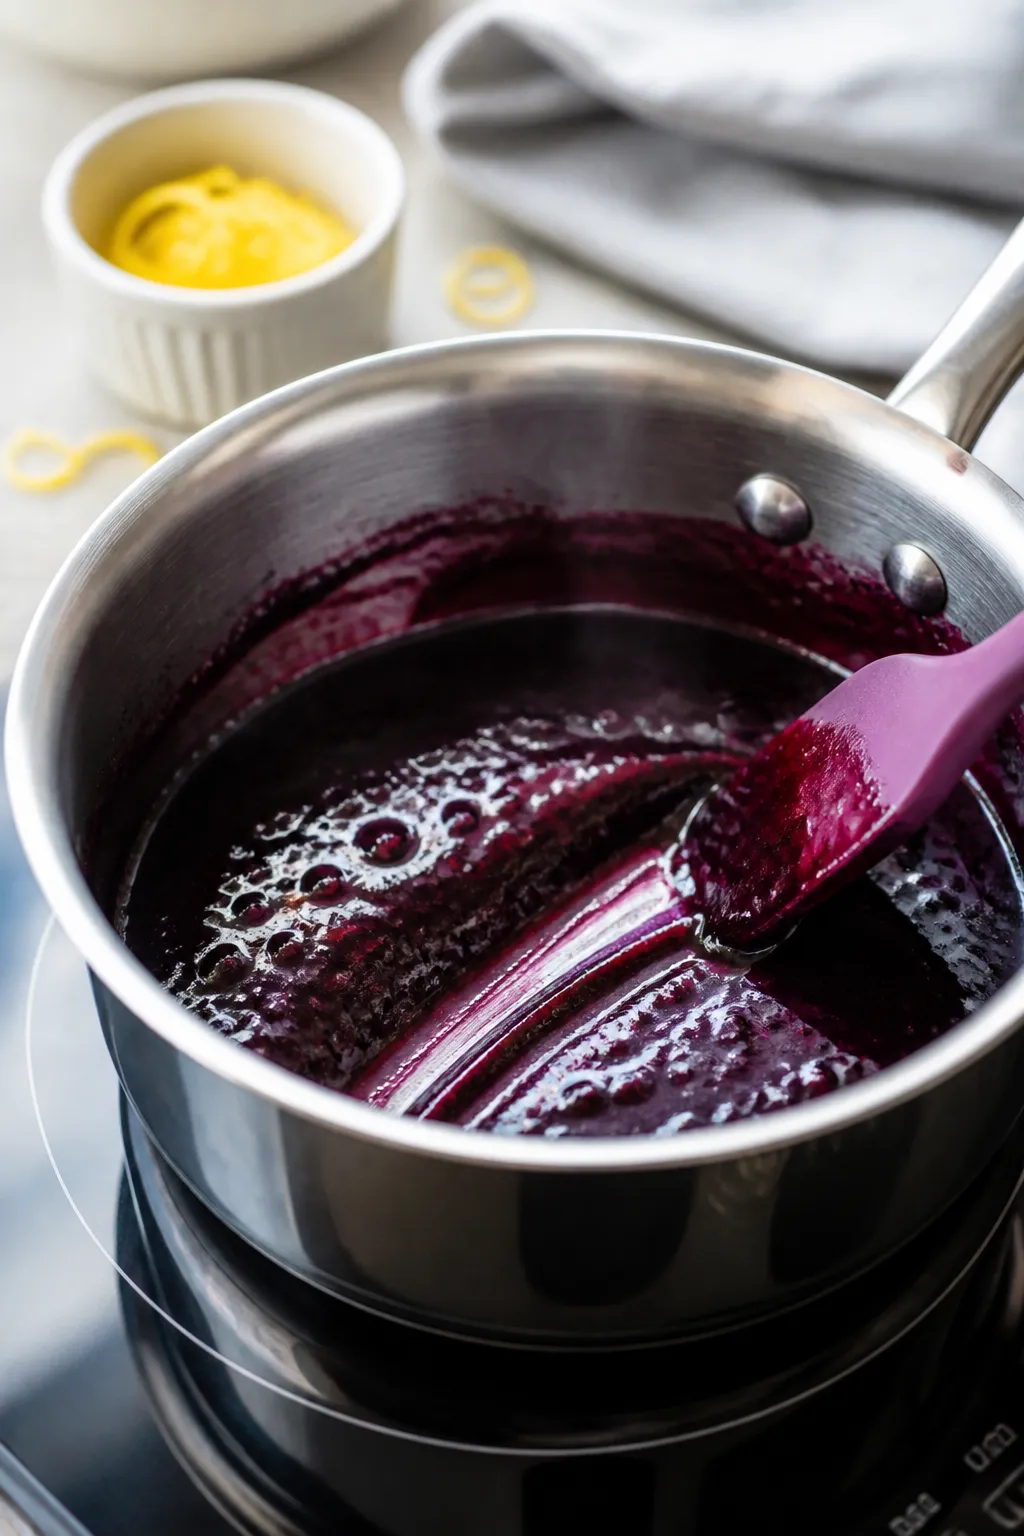
    Cooking process close-up: A small stainless saucepan on a clean stovetop with a thick, glossy bluebe
    • Reduced blueberry puree concentrates the flavor without adding too much liquid, so your frosting stays thick and pipeable.
    • Cold cream cheese and cool butter whip up fluffy while still giving that classic cream cheese tang.
    • Powdered sugar adds body and smoothness, making the frosting easy to spread or pipe.
    • Lemon juice and salt sharpen the flavors and balance the sweetness.

    What You’ll Need

    • 1 cup (150 g) fresh or frozen blueberries (no need to thaw if frozen)
    • 1 tablespoon lemon juice (plus zest if you like a brighter note)
    • 8 ounces (225 g) cream cheese, cold, cut into cubes
    • 1/2 cup (113 g) unsalted butter, slightly cool/room temp (still a bit firm)
    • 3 to 3 1/2 cups (360–420 g) powdered sugar, sifted
    • 1 teaspoon vanilla extract
    • 1/8 teaspoon fine sea salt

    Instructions

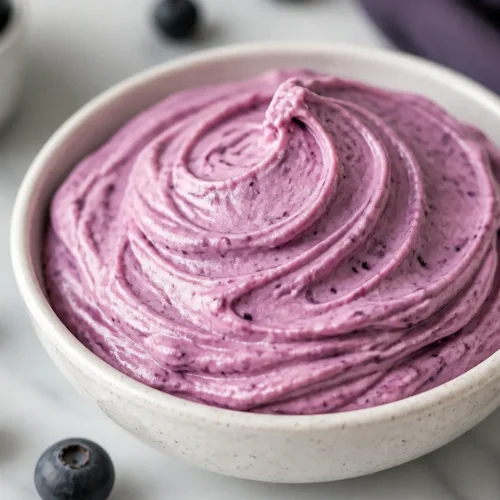
    Final presentation overhead: A neat swirl of blueberry cream cheese frosting piped high onto vanilla
    1. Make the blueberry reduction: Add blueberries and lemon juice to a small saucepan. Cook over medium heat, stirring and mashing, until the berries burst and the mixture thickens to a syrupy jam, about 6–8 minutes.

      You should end up with roughly 1/4 cup.

    2. Blend and cool: Purée the cooked berries with an immersion blender or mash very finely. Press through a fine mesh sieve for an ultra-smooth finish. Cool completely; a warm puree will loosen the frosting.
    3. Beat the fats: In a mixing bowl, beat the butter for 1 minute until creamy.

      Add the cream cheese and beat on medium-high until smooth and fluffy, 1–2 minutes. Do not overbeat or it can get runny.

    4. Add flavorings: Beat in vanilla and salt until combined.
    5. Sweeten gradually: Add powdered sugar 1 cup at a time, mixing on low until incorporated, then on medium until smooth. Start with 3 cups; you can add more later for extra stiffness.
    6. Color and finish: Beat in the cooled blueberry puree a spoonful at a time until you reach a rich purple color and bright blueberry flavor.

      If the frosting softens, add the remaining powdered sugar 1–2 tablespoons at a time until it’s thick and pipeable.

    7. Chill briefly if needed: If your kitchen is warm, chill the bowl for 10–15 minutes, then re-whip for 10–15 seconds to restore a fluffy texture.

    How to Store

    • Refrigerate: Store in an airtight container for up to 5 days.
    • Freeze: Freeze up to 2 months. Thaw overnight in the fridge, then beat briefly to smooth it out.
    • On cake: Frosted cakes or cupcakes can sit at cool room temperature for up to 2 hours. After that, refrigerate.

    Why This Is Good for You

    • Blueberries bring antioxidants and natural color without artificial dyes.
    • Lemon juice adds brightness, helping you use a touch less sugar while keeping flavor vivid.
    • Portion-friendly: A little goes a long way, so you can use just enough to complement your bake.

    What Not to Do

    • Don’t add raw blueberry puree without reducing it; the extra liquid will make your frosting soupy.
    • Don’t overbeat cream cheese; it can turn slack and glossy instead of fluffy.
    • Don’t add warm puree; always cool it completely.
    • Don’t skip the salt; a tiny pinch balances sweetness and makes the berry flavor pop.

    Variations You Can Try

    • Lemon-Blueberry: Add 1 teaspoon lemon zest and an extra teaspoon of lemon juice for a brighter tang.
    • Honey-Sweetened: Replace 1/2 cup powdered sugar with 3 tablespoons honey, then add more powdered sugar as needed to re-thicken.
    • Vanilla Bean: Swap vanilla extract for 1/2 teaspoon vanilla paste for specks and deeper aroma.
    • Mixed Berry: Use half blueberries, half raspberries or blackberries; strain well for smoothness.
    • Sturdier for Piping: Add 2–3 tablespoons milk powder or 1 tablespoon cornstarch with the powdered sugar for extra body.

    FAQ

    Can I use frozen blueberries?

    Yes.

    Use them straight from the freezer. They may release a little more liquid, so cook the reduction a minute or two longer until thick and jammy.

    How do I fix runny frosting?

    First, chill the bowl for 15–20 minutes. Then beat briefly and add powdered sugar 1–2 tablespoons at a time until it firms up.

    If it’s very loose, add a teaspoon of cornstarch and mix well.

    Will this frosting hold up for piping cupcakes?

    It does, especially if you reduce the berries well and use at least 3 1/4 cups powdered sugar. For warm rooms, chill the filled piping bag for 10 minutes before piping.

    Can I make it less sweet?

    Use the lower end of the powdered sugar and amplify flavor with extra lemon zest and a pinch more salt. Keep in mind, less sugar means a softer consistency.

    Do I have to strain the blueberry puree?

    No, but straining removes skins and seeds for a smoother, more professional finish and sharper color.

    It’s worth the extra minute.

    What cakes pair best with this frosting?

    Lemon, vanilla, almond, and coconut cakes are perfect. It’s also great on banana bread, carrot cupcakes, or simple sugar cookies.

    In Conclusion

    Blueberry cream cheese frosting gives you bold color, fresh berry flavor, and that classic tangy creaminess. With a quick blueberry reduction and a few pantry staples, you can make a frosting that spreads beautifully and pipes like a charm.

    Keep it cool, don’t rush the puree, and you’ll have a reliably gorgeous finish for any bake. It’s simple, vibrant, and guaranteed to get compliments.

    Blueberry Cream Cheese Frosting – Smooth, Tangy, and Naturally Fruity

    Prep Time 15 minutes
    Total Time 15 minutes
    Servings 12 servings

    Ingredients
      

    • 1 cup (150 g) fresh or frozen blueberries (no need to thaw if frozen)
    • 1 tablespoon lemon juice (plus zest if you like a brighter note)
    • 8 ounces (225 g) cream cheese, cold, cut into cubes
    • 1/2 cup (113 g) unsalted butter, slightly cool/room temp (still a bit firm)
    • 3 to 3 1/2 cups (360–420 g) powdered sugar, sifted
    • 1 teaspoon vanilla extract
    • 1/8 teaspoon fine sea salt

    Instructions
     

    • Make the blueberry reduction: Add blueberries and lemon juice to a small saucepan. Cook over medium heat, stirring and mashing, until the berries burst and the mixture thickens to a syrupy jam, about 6–8 minutes. You should end up with roughly 1/4 cup.
    • Blend and cool: Purée the cooked berries with an immersion blender or mash very finely. Press through a fine mesh sieve for an ultra-smooth finish. Cool completely; a warm puree will loosen the frosting.
    • Beat the fats: In a mixing bowl, beat the butter for 1 minute until creamy. Add the cream cheese and beat on medium-high until smooth and fluffy, 1–2 minutes. Do not overbeat or it can get runny.
    • Add flavorings: Beat in vanilla and salt until combined.
    • Sweeten gradually: Add powdered sugar 1 cup at a time, mixing on low until incorporated, then on medium until smooth. Start with 3 cups; you can add more later for extra stiffness.
    • Color and finish: Beat in the cooled blueberry puree a spoonful at a time until you reach a rich purple color and bright blueberry flavor. If the frosting softens, add the remaining powdered sugar 1–2 tablespoons at a time until it’s thick and pipeable.
    • Chill briefly if needed: If your kitchen is warm, chill the bowl for 10–15 minutes, then re-whip for 10–15 seconds to restore a fluffy texture.
  • Mint Chocolate Cupcakes – Fresh, Fudgy, and Easy

    Mint Chocolate Cupcakes – Fresh, Fudgy, and Easy

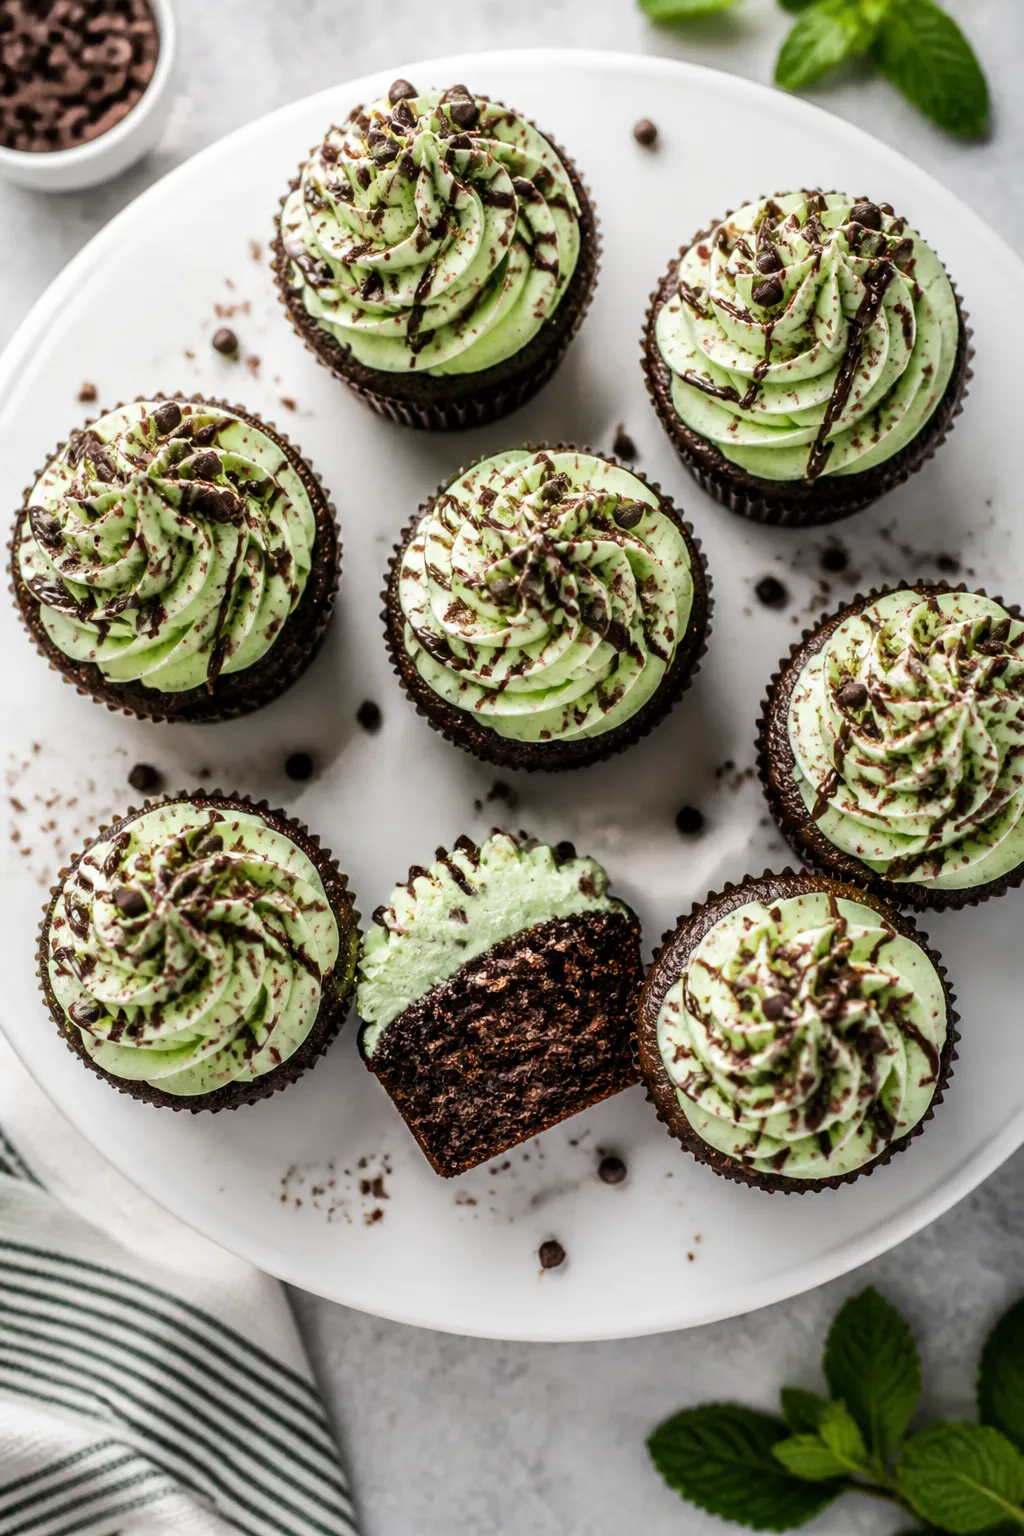
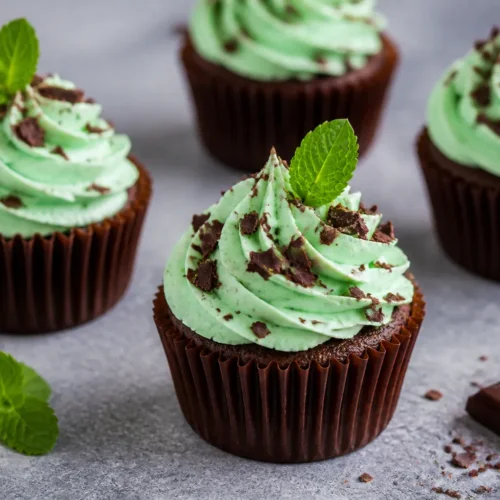
    Mint and chocolate are a classic pair for a reason. These cupcakes are rich and fudgy, with a cool hint of peppermint that keeps every bite light and refreshing. They’re simple enough for a weeknight treat, but special enough for birthdays or holidays.

    The batter comes together in one bowl, and the frosting pipes like a dream. If you love thin mints or mint chip ice cream, this recipe will hit all the right notes.

    What Makes This Recipe So Good

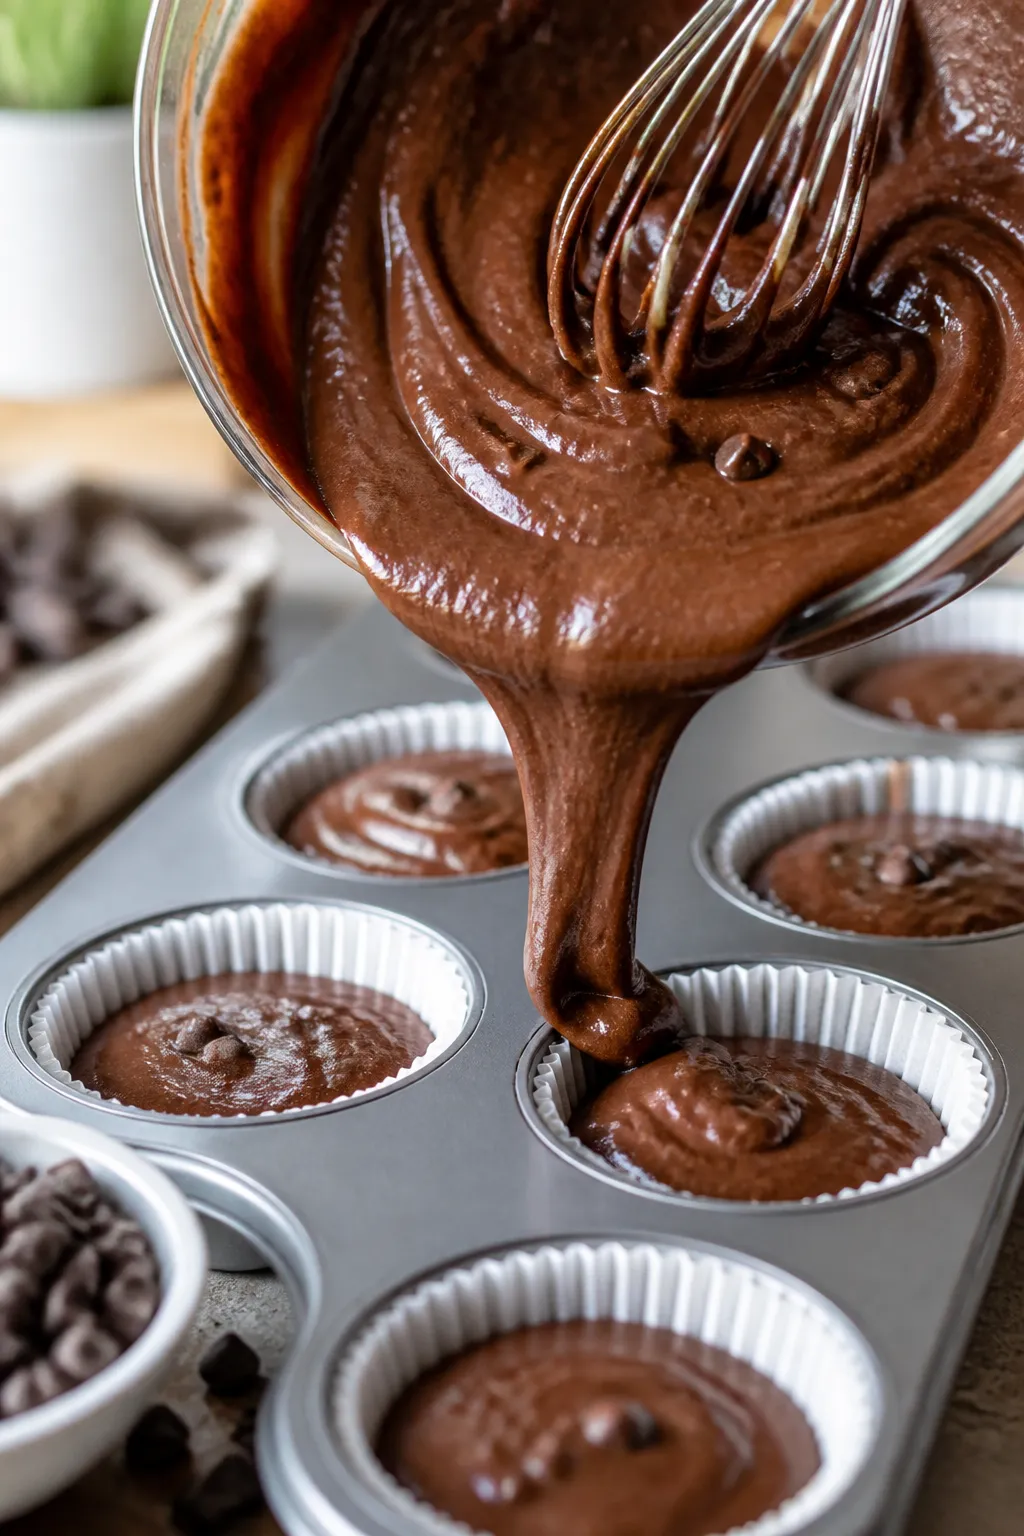
    Close-up detail, cooking process: Silky chocolate cupcake batter being whisked until smooth and glos
    • One-bowl chocolate batter: Minimal dishes and quick prep.
    • Balanced mint flavor: Cool and clean, never overpowering.
    • Moist and tender crumb: Buttermilk and oil keep cupcakes soft for days.
    • Velvety frosting: Silky buttercream with just enough peppermint and a hint of vanilla.
    • Perfect for decorating: Top with chocolate shavings, mini chips, or a drizzle for a bakery look.

    Ingredients

    • For the cupcakes:
      • 1 cup all-purpose flour
      • 1 cup granulated sugar
      • 1/3 cup unsweetened cocoa powder (Dutch-process or natural)
      • 1 teaspoon baking powder
      • 1/2 teaspoon baking soda
      • 1/2 teaspoon fine salt
      • 1/2 cup buttermilk, room temperature
      • 1/2 cup hot brewed coffee or hot water
      • 1/3 cup neutral oil (canola or vegetable)
      • 1 large egg, room temperature
      • 1 teaspoon vanilla extract
      • 1/2 teaspoon peppermint extract
      • 1/2 cup mini chocolate chips (optional, for extra chocolate)
    • For the mint buttercream:
      • 1 cup unsalted butter, softened
      • 3 to 3 1/2 cups powdered sugar, sifted
      • 2–3 tablespoons heavy cream or milk
      • 1 teaspoon vanilla extract
      • 1/2 to 3/4 teaspoon peppermint extract (to taste)
      • Pinch of fine salt
      • 1–2 drops green food coloring (optional)
    • For topping (optional): Mini chocolate chips, chocolate shavings, or a drizzle of melted chocolate

    Instructions

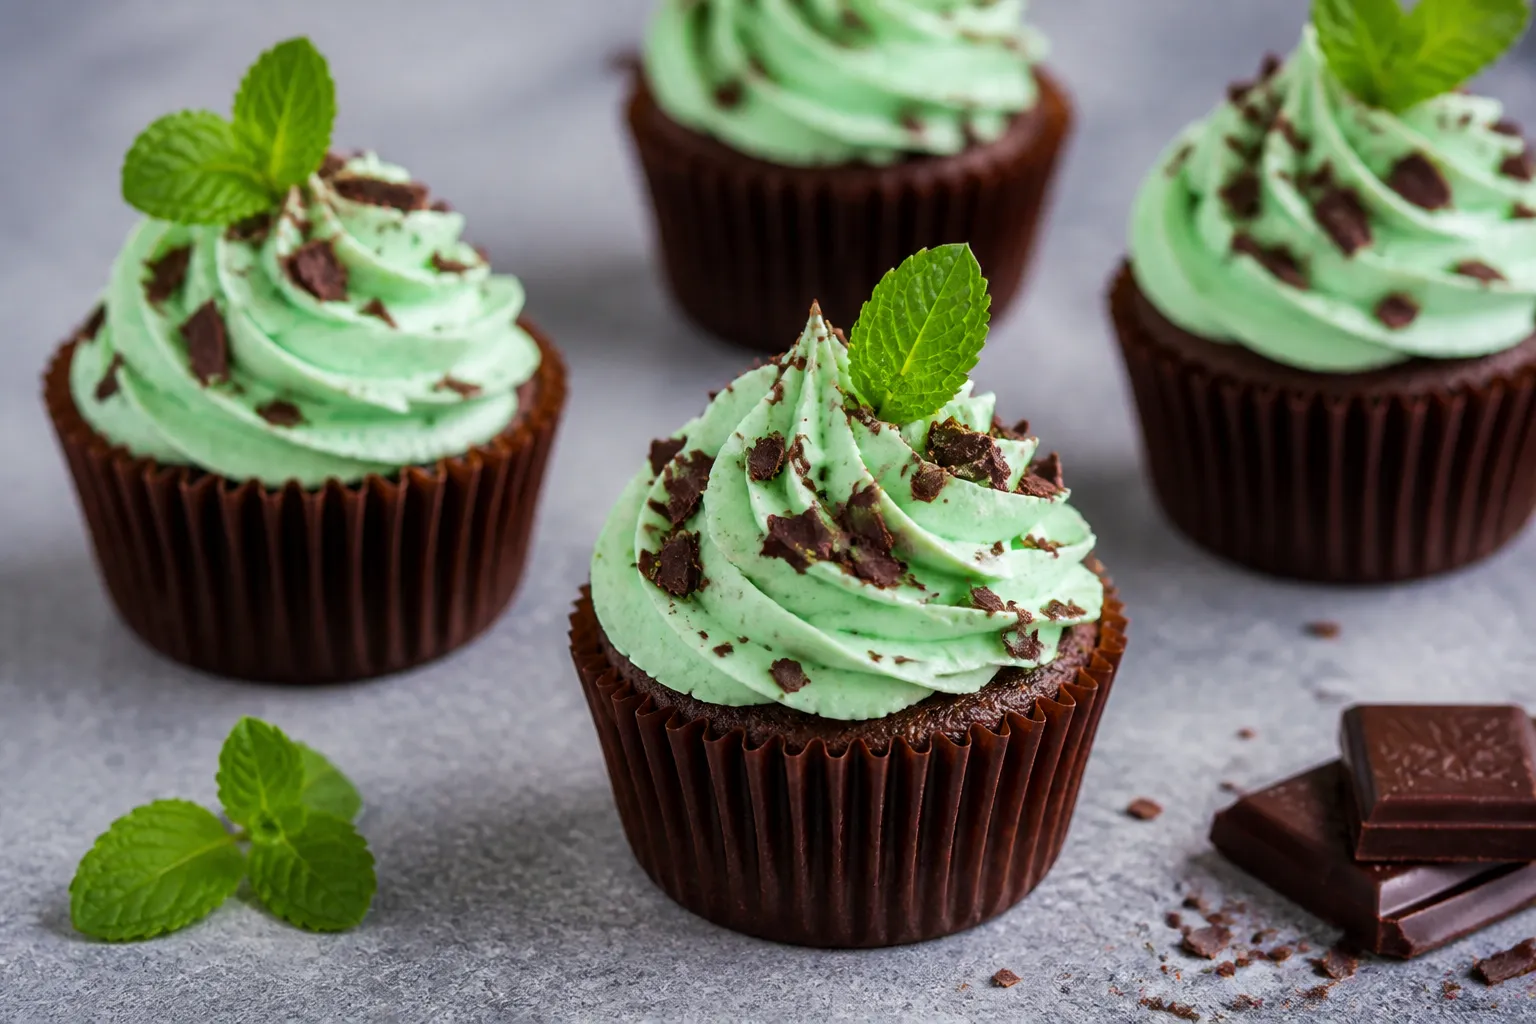
    Final dish, tasty top view: Overhead shot of mint chocolate cupcakes fully baked and cooled, topped
    1. Preheat oven to 350°F (175°C). Line a 12-cup muffin tin with paper liners.
    2. In a large bowl, whisk flour, sugar, cocoa, baking powder, baking soda, and salt until no lumps remain.
    3. Add buttermilk, oil, egg, vanilla, and peppermint extract.

      Whisk until smooth and glossy.

    4. Pour in the hot coffee (or water) and whisk gently until combined. The batter will be thin. Fold in mini chocolate chips if using.
    5. Divide batter evenly among liners, filling each about two-thirds full.
    6. Bake 16–19 minutes, or until a toothpick comes out with a few moist crumbs.

      Do not overbake.

    7. Cool in the pan 5 minutes, then transfer cupcakes to a rack to cool completely before frosting.
    8. Make the frosting: Beat softened butter on medium-high until creamy, about 2 minutes. Add 3 cups powdered sugar, vanilla, peppermint, salt, and 2 tablespoons cream. Beat on low to combine, then on medium-high until fluffy, 2–3 minutes.

      Adjust consistency with more sugar (thicker) or cream (looser). Add food coloring if desired.

    9. Frost cooled cupcakes with a piping bag or offset spatula. Finish with mini chips, shavings, or a drizzle.

    Storage Instructions

    • Room temperature: Store frosted cupcakes in an airtight container up to 2 days.
    • Refrigerator: Keep up to 5 days.

      Bring to room temp before serving for best texture.

    • Freezer: Freeze unfrosted cupcakes up to 2 months. Thaw at room temp, then frost. Buttercream can be frozen up to 1 month; thaw and re-whip.

    Why This is Good for You

    • Cocoa antioxidants: Cocoa offers flavanols that support heart health in moderation.
    • Portion control: Individual cupcakes help you enjoy dessert without overdoing it.
    • Real ingredients: Simple pantry staples and butter-based frosting beat store-bought mixes for cleaner taste.

    Pitfalls to Watch Out For

    • Too much peppermint: Peppermint extract is strong.

      Start small, then taste and adjust.

    • Overbaking: Dry cupcakes happen fast. Check early at 16 minutes.
    • Cold ingredients: Room-temperature egg and buttermilk help the batter emulsify and rise evenly.
    • Runny frosting: If frosting droops, add more powdered sugar a few tablespoons at a time.
    • Skipping the hot liquid: Hot coffee or water blooms the cocoa for deeper flavor. Don’t skip it.

    Recipe Variations

    • Double chocolate mint: Add a square of chocolate or mint chocolate candy to the center before baking.
    • Gluten-free: Use a 1:1 gluten-free all-purpose blend with xanthan gum.
    • Dairy-free: Swap buttermilk with almond milk mixed with 1 teaspoon vinegar; use dairy-free butter for frosting.
    • Mint chip frosting: Fold mini chocolate chips into the buttercream.
    • Thin mint crunch: Top with crushed chocolate-mint cookies for texture.

    FAQ

    Can I use spearmint instead of peppermint?

    Spearmint extract is milder and sweeter.

    You can use it, but you may need a bit more to taste. Start with the same amount and adjust.

    What if I don’t have buttermilk?

    Make a quick substitute by mixing 1/2 cup milk with 1 1/2 teaspoons vinegar or lemon juice. Let it sit for 5 minutes, then use.

    Do I have to use coffee?

    No.

    Hot water works too. Coffee just boosts the chocolate flavor without making the cupcakes taste like coffee.

    How do I get bakery-style swirls?

    Use a large piping tip, like an open star or round tip. Hold the bag straight up, apply steady pressure, and swirl from the outside in.

    Can I make these ahead?

    Yes.

    Bake cupcakes a day in advance and store covered at room temp. Frost the day you plan to serve for the freshest texture.

    Wrapping Up

    These mint chocolate cupcakes bring together rich cocoa and cool peppermint in a treat that’s easy to bake and fun to decorate. The texture stays moist, the frosting is silky, and the flavor balance is spot on.

    Whether it’s a holiday dessert or a weeknight craving, this recipe is a keeper. Enjoy every minty, chocolatey bite.

    Mint Chocolate Cupcakes – Fresh, Fudgy, and Easy

    Prep Time 15 minutes
    Cook Time 20 minutes
    Total Time 35 minutes
    Servings 12 servings

    Ingredients
      

    • For the cupcakes:
    • 1 cup all-purpose flour
    • 1 cup granulated sugar
    • 1/3 cup unsweetened cocoa powder (Dutch-process or natural)
    • 1 teaspoon baking powder
    • 1/2 teaspoon baking soda
    • 1/2 teaspoon fine salt
    • 1/2 cup buttermilk, room temperature
    • 1/2 cup hot brewed coffee or hot water
    • 1/3 cup neutral oil (canola or vegetable)
    • 1 large egg, room temperature
    • 1 teaspoon vanilla extract
    • 1/2 teaspoon peppermint extract
    • 1/2 cup mini chocolate chips (optional, for extra chocolate)
    • For the mint buttercream:
    • 1 cup unsalted butter, softened
    • 3 to 3 1/2 cups powdered sugar, sifted
    • 2–3 tablespoons heavy cream or milk
    • 1 teaspoon vanilla extract
    • 1/2 to 3/4 teaspoon peppermint extract (to taste)
    • Pinch of fine salt
    • 1–2 drops green food coloring (optional)
    • For topping (optional): Mini chocolate chips, chocolate shavings, or a drizzle of melted chocolate

    Instructions
     

    • Preheat oven to 350°F (175°C). Line a 12-cup muffin tin with paper liners.
    • In a large bowl, whisk flour, sugar, cocoa, baking powder, baking soda, and salt until no lumps remain.
    • Add buttermilk, oil, egg, vanilla, and peppermint extract. Whisk until smooth and glossy.
    • Pour in the hot coffee (or water) and whisk gently until combined. The batter will be thin. Fold in mini chocolate chips if using.
    • Divide batter evenly among liners, filling each about two-thirds full.
    • Bake 16–19 minutes, or until a toothpick comes out with a few moist crumbs. Do not overbake.
    • Cool in the pan 5 minutes, then transfer cupcakes to a rack to cool completely before frosting.
    • Make the frosting: Beat softened butter on medium-high until creamy, about 2 minutes. Add 3 cups powdered sugar, vanilla, peppermint, salt, and 2 tablespoons cream. Beat on low to combine, then on medium-high until fluffy, 2–3 minutes. Adjust consistency with more sugar (thicker) or cream (looser). Add food coloring if desired.
    • Frost cooled cupcakes with a piping bag or offset spatula. Finish with mini chips, shavings, or a drizzle.
  • Cinnamon Focaccia Bread – Soft, Fragrant, and Comforting

    Cinnamon Focaccia Bread – Soft, Fragrant, and Comforting

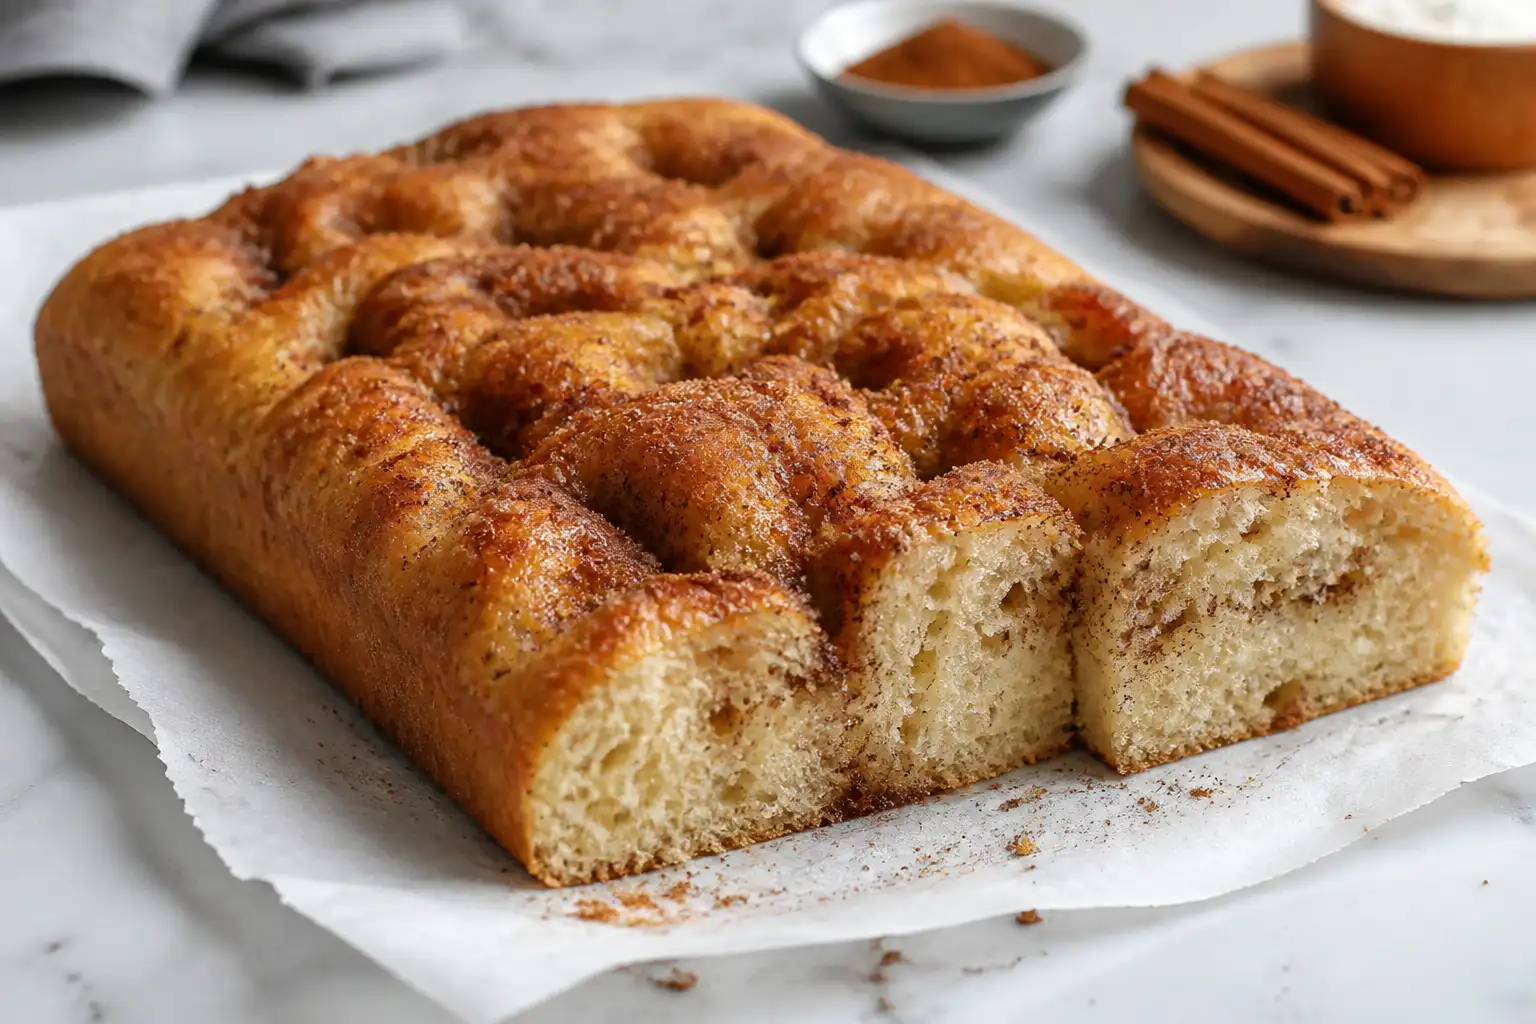
    This cinnamon focaccia bread brings together the best of two worlds: the soft, airy crumb of classic focaccia and the warm sweetness of cinnamon sugar. It’s the kind of bake that makes the whole kitchen smell cozy. The top is dimpled and crisp at the edges, while the inside stays tender and chewy.

    It’s easy enough for a weekend project and special enough to serve for brunch, dessert, or a morning treat with coffee.

    What Makes This Special

    This recipe leans on the simple magic of olive oil and yeast, but adds a gentle sweetness that doesn’t overwhelm. You still get that signature focaccia texture—airy pockets and a golden, olive-oil-kissed crust—but with a fragrant cinnamon swirl and a lightly crunchy sugar topping. It’s less sweet than a cinnamon roll, so it works with breakfast spreads or as a snack. No stand mixer required, and the dough is very forgiving.

    What You’ll Need

    • Bread flour (or all-purpose flour works too)
    • Warm water (about 105–110°F/40–43°C)
    • Active dry yeast or instant yeast
    • Granulated sugar
    • Kosher salt
    • Ground cinnamon
    • Olive oil (extra-virgin for best flavor)
    • Unsalted butter (optional, for extra richness)
    • Vanilla extract (optional, for the topping)
    • Flaky sea salt (optional, for contrast)

    How to Make It

    1. Bloom the yeast. In a large bowl, mix warm water with a teaspoon of sugar.

      Sprinkle in the yeast, stir, and let sit 5–10 minutes until foamy. If nothing happens, start over with fresh yeast.

    2. Make the dough. Add 2 tablespoons olive oil and 1 teaspoon salt to the bowl. Stir in flour, one cup at a time, until a sticky dough forms.

      Switch to your hands and fold until mostly smooth; it should be soft and slightly tacky.

    3. First rise. Grease a clean bowl with oil. Place the dough inside, turn to coat, and cover. Let rise in a warm spot until doubled, about 60–90 minutes.
    4. Prepare the pan. Generously oil a 9×13-inch pan or a large sheet pan with 2–3 tablespoons olive oil.

      This helps create that crisp, golden bottom.

    5. Mix the cinnamon sugar. In a small bowl, combine granulated sugar with ground cinnamon. For extra aroma, stir in a splash of vanilla and 1–2 tablespoons melted butter until sandy.
    6. Pan the dough. Gently turn the dough into the oiled pan. With oiled fingers, press it toward the edges.

      If it springs back, rest 10 minutes, then continue until it fills the pan.

    7. Second rise. Cover loosely and let the dough puff for 20–30 minutes. It should look pillowy.
    8. Dimple and dress. Drizzle 1–2 tablespoons olive oil over the top. Using all your fingertips, press deep dimples across the surface.

      Sprinkle the cinnamon sugar evenly. Add a light pinch of flaky salt for contrast if you like.

    9. Bake. Bake at 425°F (220°C) for 18–24 minutes, until the edges are deep golden and the top is caramelized. Rotate the pan halfway for even color.
    10. Finish. While hot, brush with a little melted butter for shine and softness.

      Cool 10–15 minutes before slicing. Serve warm.

    Storage Instructions

    • Room temperature: Keep tightly wrapped for up to 2 days. Rewarm at 325°F (165°C) for 8–10 minutes to refresh.
    • Freezer: Wrap slices in foil, then a freezer bag.

      Freeze up to 2 months. Reheat from frozen at 350°F (175°C) for 12–15 minutes.

    • Avoid the fridge: Refrigeration dries bread quickly.

    Health Benefits

    Focaccia is an indulgence, but there are a few upsides. Olive oil provides heart-friendly fats and adds satiety. Cinnamon brings antioxidant properties and natural warmth without adding much sugar itself.

    If you choose bread flour, the higher protein supports a satisfying chew and can help you feel fuller, so a smaller slice goes a long way.

    Common Mistakes to Avoid

    • Water too hot: This can kill the yeast. Aim for warm, not hot.
    • Under-oiling the pan: You’ll miss the golden, crisp bottom and risk sticking.
    • Rushing the rise: Dense bread happens when the dough doesn’t double. Give it time.
    • Overbaking: Sugar on top can make you think it’s darker than it is.

      Check the edges—they should be deep golden, not brown-black.

    • Skipping the dimples: They trap oil and sugar, creating flavor pockets and a better crust.

    Recipe Variations

    • Maple Cinnamon: Swap some sugar for maple sugar, or drizzle with maple syrup after baking.
    • Cinnamon Raisin: Fold 1/2 cup soaked raisins into the dough during shaping.
    • Brown Butter Topping: Use browned butter in the cinnamon sugar for a nutty finish.
    • Cardamom Twist: Add 1/2 teaspoon ground cardamom to the cinnamon sugar.
    • Cream Cheese Glaze: Whisk softened cream cheese, a little powdered sugar, and milk. Drizzle lightly once cooled for a brunch-style treat.

    FAQ

    Can I use instant yeast instead of active dry?

    Yes. Use the same amount and skip the blooming step.

    Mix it directly with the flour, then add warm water and proceed.

    Why is my dough so sticky?

    Focaccia dough should be slightly sticky for an airy crumb. Oil your hands instead of adding a lot of extra flour. A sticky dough usually bakes up lighter.

    Can I make the dough ahead?

    Yes.

    After mixing, let it rise briefly at room temp until slightly puffy, then refrigerate overnight. Bring to room temp, press into the pan, let it rise, and bake.

    Do I need bread flour?

    No. All-purpose flour works.

    Bread flour gives extra chew and structure, but both are delicious.

    How do I know it’s done?

    The edges will be deep golden, the top lightly caramelized, and the center will spring back when pressed. If you use a thermometer, the internal temp should be around 200–205°F (93–96°C).

    Final Thoughts

    Cinnamon focaccia bread is comfort baking with very little fuss. It’s simple, aromatic, and endlessly adaptable.

    Whether you serve it warm for brunch or as an afternoon pick-me-up, it brings a cozy sweetness without going over the top. Keep this one in your rotation, and you’ll always have a crowd-pleasing bake up your sleeve.

    Cinnamon Focaccia Bread – Soft, Fragrant, and Comforting

    Prep Time 20 minutes
    Cook Time 25 minutes
    Total Time 45 minutes
    Servings: 8 servings

    Ingredients
      

    • Bread flour (or all-purpose flour works too)
    • Warm water (about 105–110°F/40–43°C)
    • Active dry yeast or instant yeast
    • Granulated sugar
    • Kosher salt
    • Ground cinnamon
    • Olive oil (extra-virgin for best flavor)
    • Unsalted butter (optional, for extra richness)
    • Vanilla extract (optional, for the topping)
    • Flaky sea salt (optional, for contrast)

    Method
     

    1. Bloom the yeast. In a large bowl, mix warm water with a teaspoon of sugar. Sprinkle in the yeast, stir, and let sit 5–10 minutes until foamy. If nothing happens, start over with fresh yeast.
    2. Make the dough. Add 2 tablespoons olive oil and 1 teaspoon salt to the bowl. Stir in flour, one cup at a time, until a sticky dough forms. Switch to your hands and fold until mostly smooth; it should be soft and slightly tacky.
    3. First rise. Grease a clean bowl with oil. Place the dough inside, turn to coat, and cover. Let rise in a warm spot until doubled, about 60–90 minutes.
    4. Prepare the pan. Generously oil a 9×13-inch pan or a large sheet pan with 2–3 tablespoons olive oil. This helps create that crisp, golden bottom.
    5. Mix the cinnamon sugar. In a small bowl, combine granulated sugar with ground cinnamon. For extra aroma, stir in a splash of vanilla and 1–2 tablespoons melted butter until sandy.
    6. Pan the dough. Gently turn the dough into the oiled pan. With oiled fingers, press it toward the edges. If it springs back, rest 10 minutes, then continue until it fills the pan.
    7. Second rise. Cover loosely and let the dough puff for 20–30 minutes. It should look pillowy.
    8. Dimple and dress. Drizzle 1–2 tablespoons olive oil over the top. Using all your fingertips, press deep dimples across the surface. Sprinkle the cinnamon sugar evenly. Add a light pinch of flaky salt for contrast if you like.
    9. Bake. Bake at 425°F (220°C) for 18–24 minutes, until the edges are deep golden and the top is caramelized. Rotate the pan halfway for even color.
    10. Finish. While hot, brush with a little melted butter for shine and softness. Cool 10–15 minutes before slicing. Serve warm.
  • Same Day Focaccia Bread – Golden, Chewy, and Ready Tonight

    Same Day Focaccia Bread – Golden, Chewy, and Ready Tonight

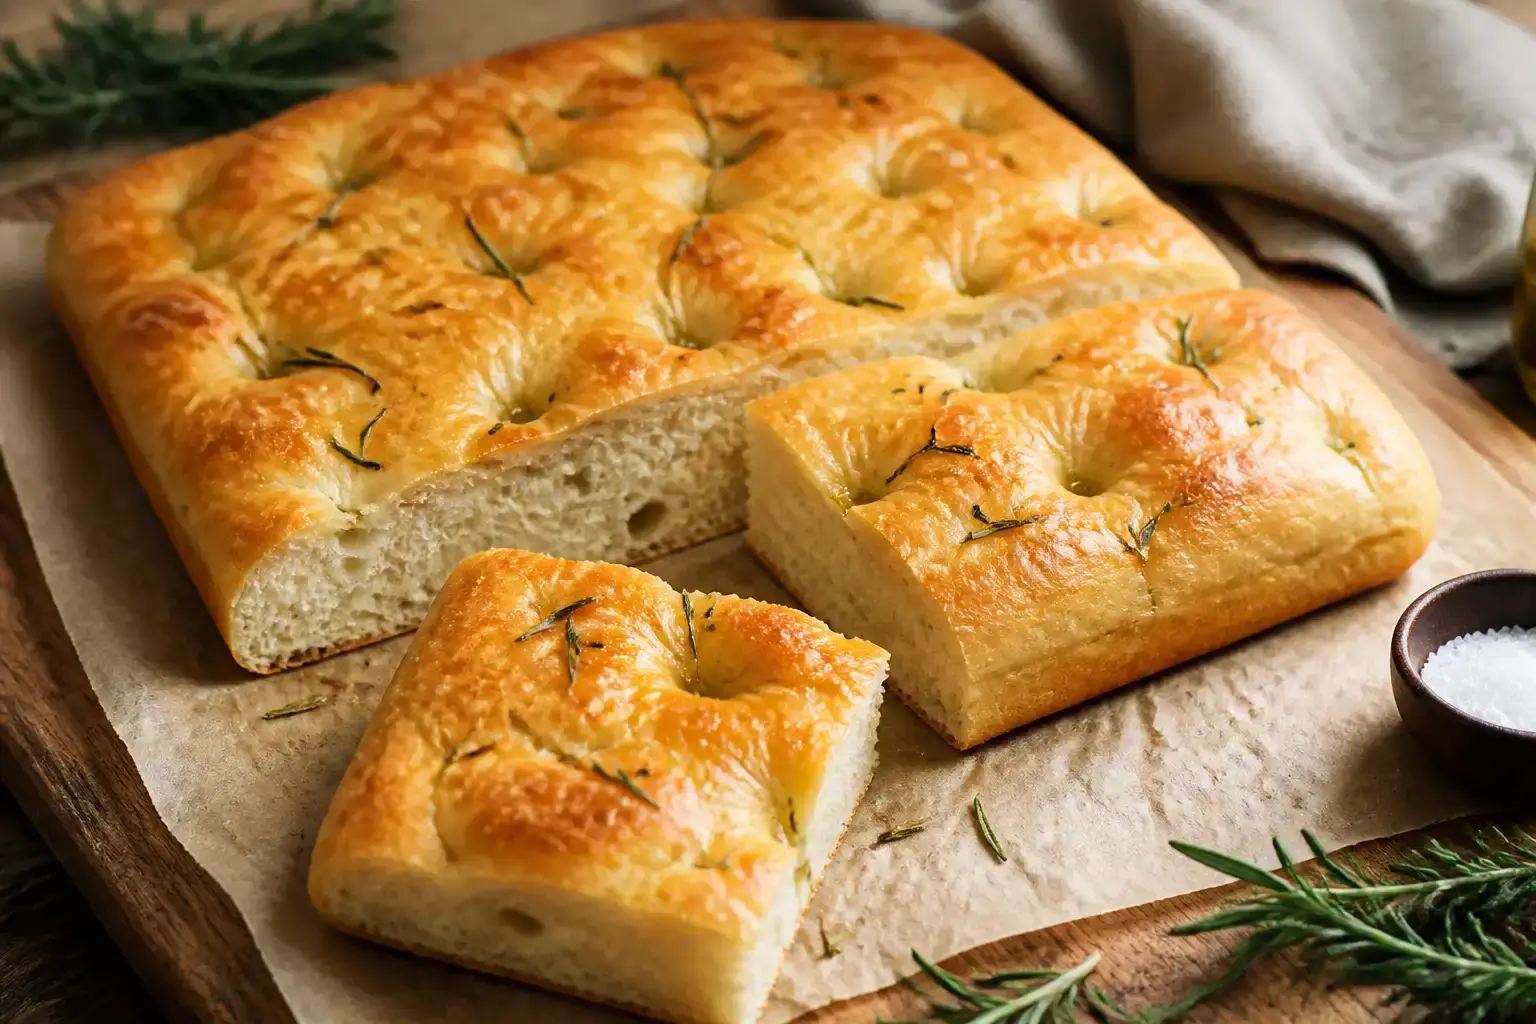
    If you’re craving fresh, bakery-style focaccia but don’t want to wait overnight, this same day version has your back. It’s light, chewy, and packed with olive oil and herb flavor. You’ll get those classic dimples, a crisp golden crust, and a tender interior without a long ferment.

    Perfect for dunking in soup, building sandwiches, or just tearing and snacking. If you can set aside a few hours this afternoon, you can have warm focaccia on the table by dinner.

    What Makes This Recipe So Good

    Overhead shot of freshly baked same-day focaccia in a 9x13 metal pan right out of the oven, deeply g
    • Fast but flavorful: A few simple tricks—warm water, a touch more yeast, and a good olive oil soak—give you great flavor the same day.
    • Foolproof texture: High hydration yields that signature airy crumb and bubbly top.
    • Hands-off rising: Most of the time is inactive proofing, so you can go about your day.
    • Endlessly customizable: Add tomatoes, olives, onions, or keep it classic with rosemary and sea salt.
    • Works with basic equipment: No stand mixer required—just a bowl, a sheet pan, and your fingers.

    What You’ll Need

    • 4 cups (500 g) bread flour (all-purpose works, but bread flour gives better chew)
    • 1 3/4 cups (420 ml) warm water (about 100–105°F / 38–41°C)
    • 2 1/4 tsp (7 g) instant or rapid-rise yeast
    • 2 tsp (10 g) fine sea salt
    • 2 tbsp (25 g) sugar or honey (helps speed fermentation and browning)
    • 6 tbsp (90 ml) extra-virgin olive oil, divided
    • Flaky sea salt, for finishing
    • Fresh herbs like rosemary or thyme (optional)
    • Toppings (optional): sliced cherry tomatoes, thin red onion, olives, garlic, or parmesan

    Step-by-Step Instructions

    Close-up process shot of the dimpling stage: puffy, well-proofed focaccia dough stretched to the pan
    1. Mix the dough: In a large bowl, whisk warm water, yeast, and sugar. Add flour and fine sea salt.

      Stir with a spatula until shaggy and no dry patches remain. The dough will be sticky—this is good.

    2. First rest (15 minutes): Cover the bowl and let it sit for 15 minutes. This brief rest hydrates the flour and makes mixing easier.
    3. Fold for strength: Drizzle in 2 tbsp olive oil.

      With wet hands, perform 3–4 sets of stretch-and-folds around the dough, turning the bowl as you go. You’re building gluten without kneading.

    4. First rise (45–60 minutes): Cover and let rise in a warm spot until noticeably puffy, about 1 hour. If your kitchen is cool, give it up to 75 minutes.
    5. Prepare the pan: Generously oil a 9×13-inch sheet pan or similarly sized metal pan with 2 tbsp olive oil.

      You want an even oil coat for that crisp bottom.

    6. Transfer and stretch: Gently scrape the dough into the pan. Oil your fingertips and press it outward. If it springs back, let it rest 10 minutes, then finish stretching to the edges.
    7. Second rise (30–45 minutes): Cover loosely and let it rise again until puffy and slightly jiggly when you shake the pan.
    8. Dimple and top: Heat oven to 450°F (232°C).

      Oil your hands and press your fingertips straight down into the dough to create deep dimples. Drizzle 1–2 tbsp olive oil over the top, add flaky salt, herbs, and any toppings.

    9. Bake: Place on the center rack and bake 20–25 minutes, until deep golden with crisp edges. For an extra-crisp bottom, bake the last 2–3 minutes on the lowest rack.
    10. Finish and cool: Brush or drizzle the remaining olive oil over the hot focaccia.

      Cool in the pan 10 minutes, then transfer to a rack. Slice or tear and serve warm.

    How to Store

    • Room temperature: Wrap loosely in foil or store in a paper bag for up to 2 days. Re-crisp in a 375°F (190°C) oven for 8–10 minutes.
    • Freezer: Cool completely, slice, wrap well, and freeze up to 2 months.

      Reheat from frozen at 375°F (190°C) for 12–15 minutes.

    • Avoid the fridge: Refrigeration dries out bread and dulls flavor.

    Benefits of This Recipe

    • Same-day payoff: Enjoy bakery-quality bread without waiting overnight.
    • Great texture: High hydration and olive oil give a tender crumb and crisp crust.
    • Budget-friendly: Pantry staples become an impressive side or main.
    • Meal-friendly: Works for appetizers, sandwiches, or as a base for flatbread-style pizzas.

    Pitfalls to Watch Out For

    • Water too hot: Anything above 115°F (46°C) can kill yeast. Aim for warm bath temperature.
    • Under-proofing: If it isn’t puffy before baking, you’ll get a dense crumb. Give it time.
    • Too little oil: Skimping reduces crispness and flavor.

      Oil the pan well and finish on top.

    • Overloading toppings: Heavy toppings can weigh down the rise. Keep them light and evenly spaced.
    • Cutting too soon: Let it rest at least 10 minutes so the crumb sets.

    Variations You Can Try

    • Tomato-Rosemary: Halved cherry tomatoes, rosemary, and flaky salt.
    • Olive and Lemon: Sliced kalamatas with thin lemon zest strips and thyme.
    • Caramelized Onion: Sweet onions, black pepper, and a dusting of parmesan.
    • Garlic-Herb Butter: Melted butter with grated garlic and parsley brushed on after baking.
    • Spicy Chili: Calabrian chili paste or red pepper flakes with oregano.

    FAQ

    Can I use active dry yeast instead of instant?

    Yes. Bloom 2 1/4 tsp active dry yeast in the warm water with the sugar for 5–10 minutes until foamy, then proceed.

    Do I need a stand mixer?

    No.

    This is a no-knead style dough. A spatula and a few sets of folds are enough to build structure.

    Why is my dough so sticky?

    High hydration creates a light, airy crumb. Keep your hands oiled or wet and resist adding extra flour unless it’s truly unmanageable.

    Can I bake this in a cast-iron skillet?

    Absolutely.

    Oil the skillet well and follow the same rise and bake times. The crust will be extra crisp.

    How do I know it’s done?

    Look for a deep golden top and browned edges. The bottom should be crisp and sound hollow when tapped.

    Wrapping Up

    Same day focaccia bread brings bakery results to your kitchen tonight with minimal fuss.

    With a few pantry staples, plenty of olive oil, and some patient rises, you’ll get a golden, airy loaf that’s perfect for any meal. Keep the toppings simple, don’t rush the proof, and enjoy that first warm, salty bite. Once you try it, this will become your go-to weeknight bread.

    Same Day Focaccia Bread – Golden, Chewy, and Ready Tonight

    Prep Time 20 minutes
    Cook Time 20 minutes
    Total Time 40 minutes
    Servings: 12 servings

    Ingredients
      

    • 4 cups (500 g) bread flour (all-purpose works, but bread flour gives better chew)
    • 1 3/4 cups (420 ml) warm water (about 100–105°F / 38–41°C)
    • 2 1/4 tsp (7 g) instant or rapid-rise yeast
    • 2 tsp (10 g) fine sea salt
    • 2 tbsp (25 g) sugar or honey (helps speed fermentation and browning)
    • 6 tbsp (90 ml) extra-virgin olive oil, divided
    • Flaky sea salt, for finishing
    • Fresh herbs like rosemary or thyme (optional)
    • Toppings (optional): sliced cherry tomatoes, thin red onion, olives, garlic, or parmesan

    Method
     

    1. Mix the dough: In a large bowl, whisk warm water, yeast, and sugar. Add flour and fine sea salt. Stir with a spatula until shaggy and no dry patches remain. The dough will be sticky—this is good.
    2. First rest (15 minutes): Cover the bowl and let it sit for 15 minutes. This brief rest hydrates the flour and makes mixing easier.
    3. Fold for strength: Drizzle in 2 tbsp olive oil. With wet hands, perform 3–4 sets of stretch-and-folds around the dough, turning the bowl as you go. You’re building gluten without kneading.
    4. First rise (45–60 minutes): Cover and let rise in a warm spot until noticeably puffy, about 1 hour. If your kitchen is cool, give it up to 75 minutes.
    5. Prepare the pan: Generously oil a 9×13-inch sheet pan or similarly sized metal pan with 2 tbsp olive oil. You want an even oil coat for that crisp bottom.
    6. Transfer and stretch: Gently scrape the dough into the pan. Oil your fingertips and press it outward. If it springs back, let it rest 10 minutes, then finish stretching to the edges.
    7. Second rise (30–45 minutes): Cover loosely and let it rise again until puffy and slightly jiggly when you shake the pan.
    8. Dimple and top: Heat oven to 450°F (232°C). Oil your hands and press your fingertips straight down into the dough to create deep dimples. Drizzle 1–2 tbsp olive oil over the top, add flaky salt, herbs, and any toppings.
    9. Bake: Place on the center rack and bake 20–25 minutes, until deep golden with crisp edges. For an extra-crisp bottom, bake the last 2–3 minutes on the lowest rack.
    10. Finish and cool: Brush or drizzle the remaining olive oil over the hot focaccia. Cool in the pan 10 minutes, then transfer to a rack. Slice or tear and serve warm.
  • Lemon Blueberry Focaccia – Bright, Juicy, and Perfect for Brunch

    Lemon Blueberry Focaccia – Bright, Juicy, and Perfect for Brunch

    This lemon blueberry focaccia is the kind of bake that makes your kitchen smell like sunshine. It’s soft, airy, and dotted with juicy berries that burst into the dough. A hint of lemon lifts everything and keeps it from being too sweet.

    Drizzle on a simple honey-lemon glaze, and you’ve got a beautiful, bakery-style treat. Serve it warm for brunch, afternoon coffee, or as an easy dessert.

    What Makes This Special

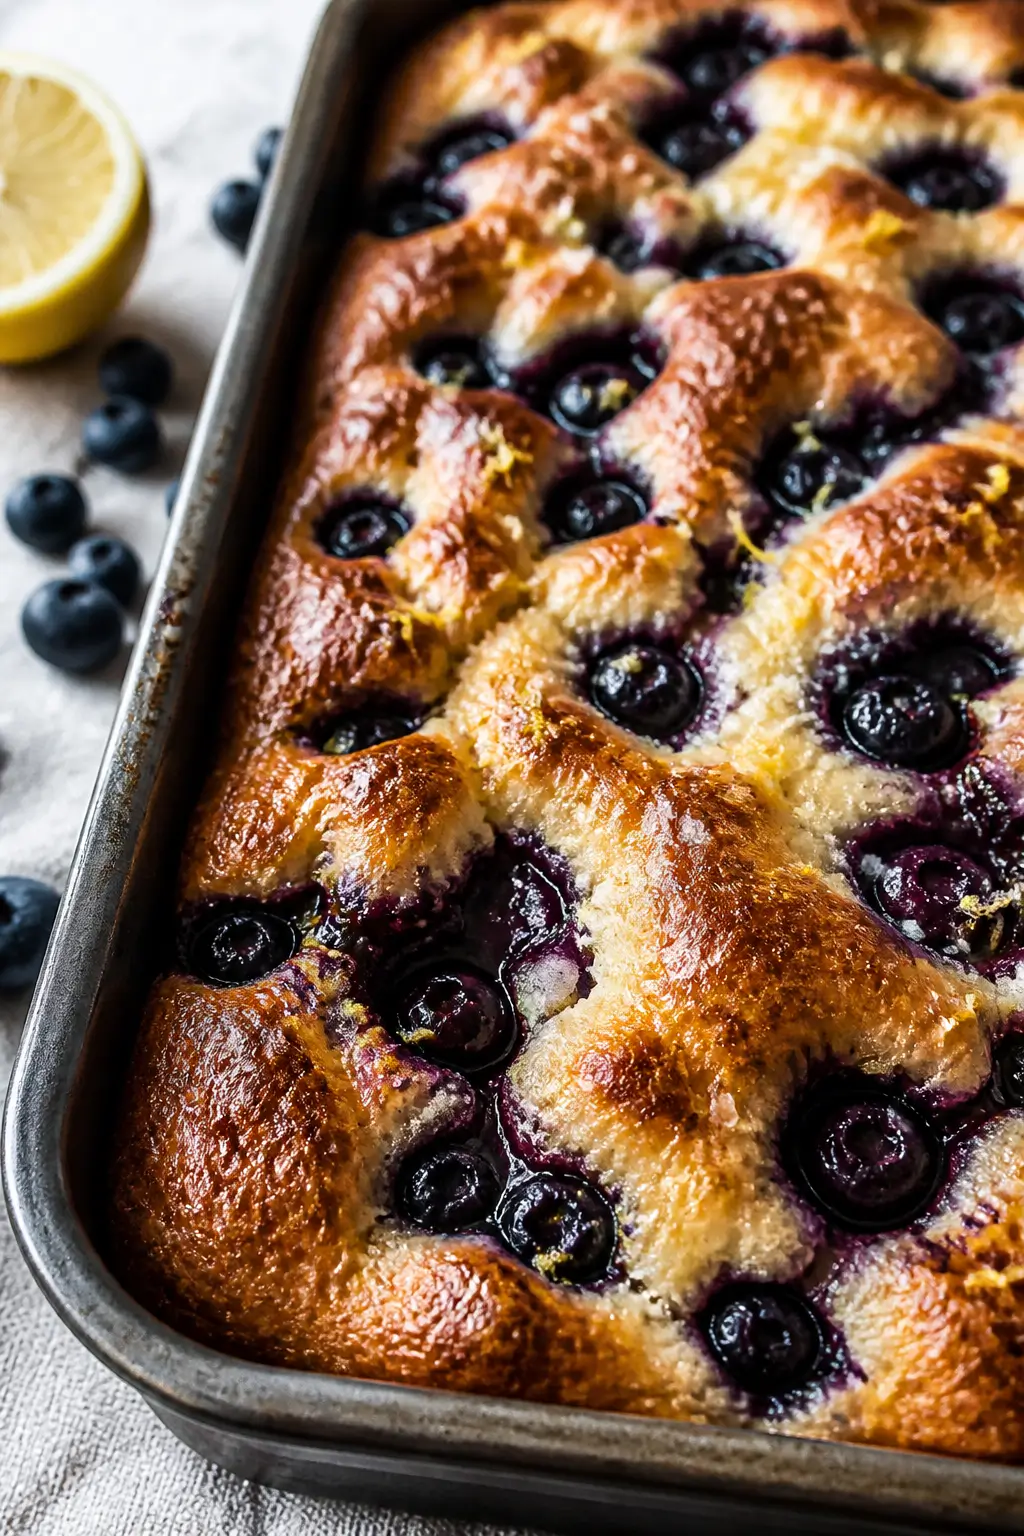
    Overhead shot of freshly baked lemon blueberry focaccia cooling in a 9x13 metal pan, golden edges wi

    This focaccia leans sweet but stays balanced thanks to lemon zest and a pinch of salt. The dough is classic focaccia—light, springy, and full of flavor from a slow rise.

    Blueberries tuck into the dimples and create jammy pockets as they bake. It’s easier than it looks, and most of the time is hands-off. Plus, it works year-round with fresh or frozen berries.

    What You’ll Need

    • Bread flour (or all-purpose), 3 1/2 cups (440 g)
    • Warm water, 1 1/2 cups (355 ml), about 105–110°F
    • Instant or active dry yeast, 2 1/4 tsp (1 packet)
    • Granulated sugar, 2 tbsp (plus 1 tsp for activating yeast if using active dry)
    • Kosher salt, 1 1/2 tsp
    • Extra-virgin olive oil, 1/3 cup, plus more for the pan and finishing
    • Fresh lemon zest, from 1–2 lemons (about 2 tsp), plus 2 tbsp lemon juice
    • Fresh or frozen blueberries, 1 1/2–2 cups
    • Honey, 2–3 tbsp (for optional glaze)
    • Flaky sea salt, for sprinkling
    • Optional add-ins: vanilla extract (1 tsp), chopped fresh thyme (1–2 tsp)

    How to Make It

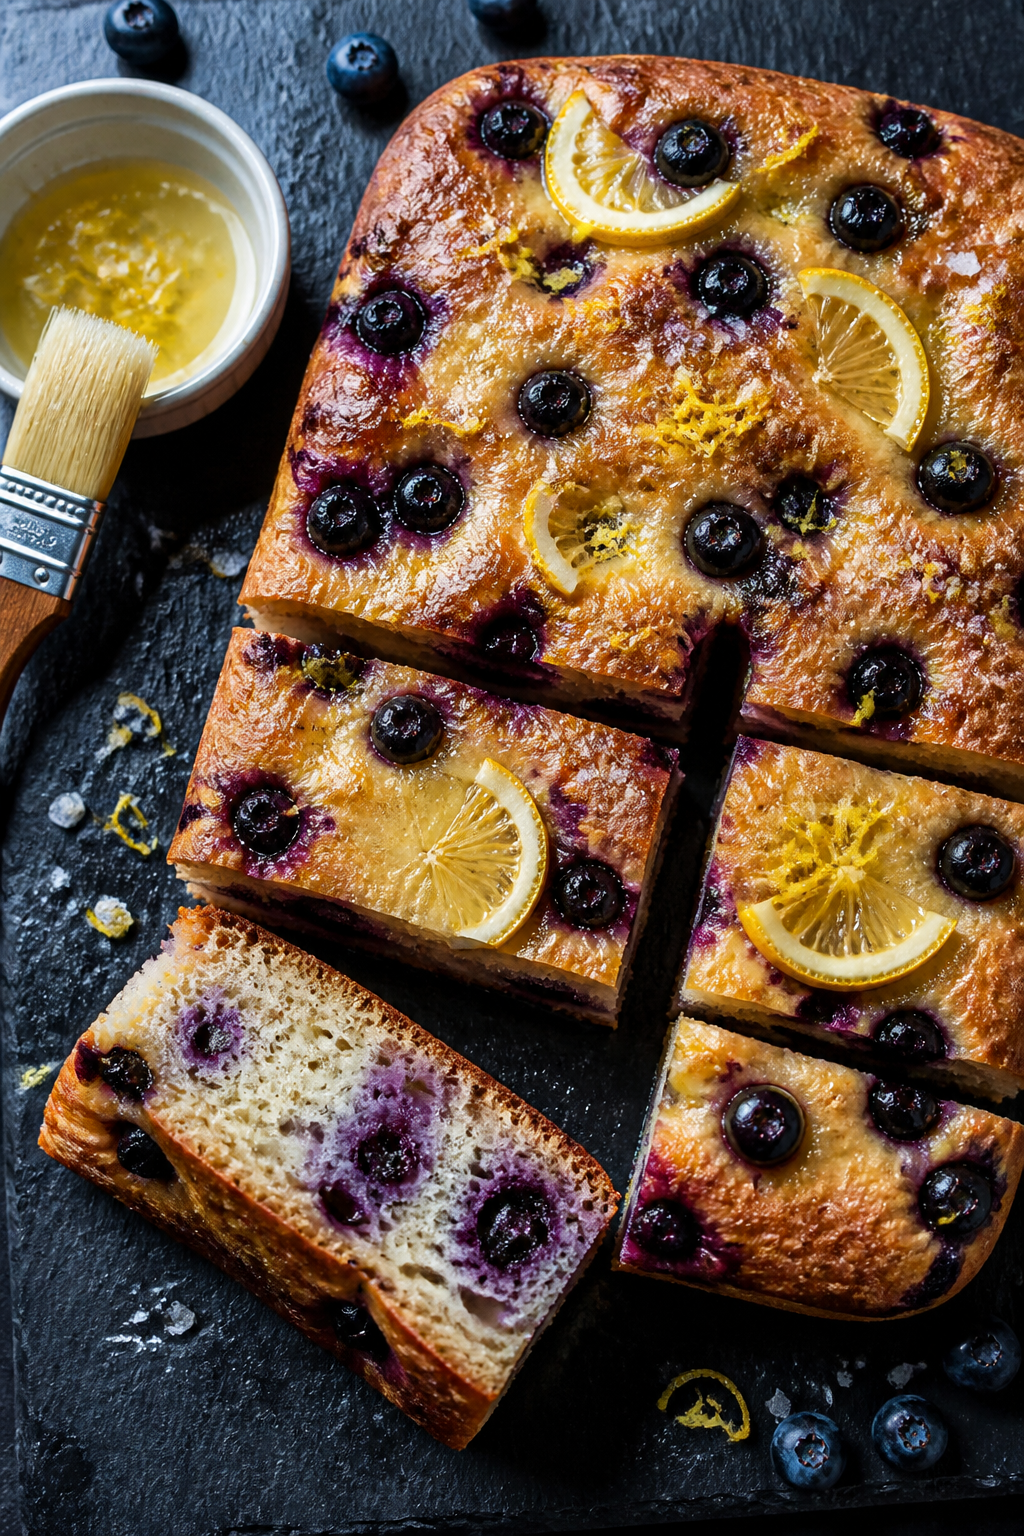
    Close-up detail of a warm slice of lemon blueberry focaccia on a simple white plate, showing the air
    1. Bloom the yeast (if using active dry): In a small bowl, mix warm water with 1 tsp sugar and yeast.Let it sit 5–10 minutes until foamy. If using instant yeast, skip this step and add it directly to the flour.
    2. Mix the dough: In a large bowl, whisk flour, sugar, and salt. Add warm water, yeast (bloomed or instant), 1/4 cup olive oil, lemon zest, and optional vanilla.Stir with a spoon until a shaggy dough forms.
    3. Knead briefly: Turn the dough onto a lightly oiled surface and knead 2–3 minutes until smooth-ish and tacky. It should be soft and slightly sticky.
    4. First rise: Oil a clean bowl, add the dough, and turn to coat. Cover and let rise at room temperature until doubled, about 60–90 minutes.
    5. Pan and rest: Generously oil a 9×13-inch pan (or a large sheet pan for thinner focaccia).Gently stretch the dough to fit. If it springs back, rest 10 minutes, then finish stretching.
    6. Dimple and top: Drizzle 1–2 tbsp olive oil over the dough. With oiled fingers, press deep dimples all over.Scatter blueberries evenly, pressing some lightly into the dough. Sprinkle with a pinch of flaky sea salt and, if using, fresh thyme.
    7. Second rise: Let the topped dough rest 20–30 minutes until puffy. Meanwhile, preheat the oven to 425°F (220°C).
    8. Bake: Bake 20–25 minutes, until golden at the edges and lightly browned on top.If berries release lots of juice, that’s fine—those spots will be jammy.
    9. Finish with lemon-honey glaze: In a small bowl, whisk honey with lemon juice. While the focaccia is warm, brush or drizzle the glaze over the top. Add a final swirl of olive oil and a few pinches of flaky salt.
    10. Cool and slice: Let it rest 10–15 minutes before cutting into squares or strips.

    How to Store

    • Room temperature: Keep in an airtight container for up to 2 days.
    • Refrigerate: Not ideal, but it works for 3–4 days; rewarm to soften.
    • Freeze: Wrap slices tightly and freeze up to 2 months.Thaw at room temp, then warm in a 350°F oven for 8–10 minutes.

    Why This is Good for You

    Blueberries bring antioxidants and fiber, while lemon adds brightness without a lot of sugar. Olive oil provides heart-healthy fats and keeps the crumb tender. Compared to frosted cakes, this is a lighter, fruit-forward bake.

    Portion it small for a not-too-sweet breakfast or snack.

    Common Mistakes to Avoid

    • Water that’s too hot: It can kill the yeast. Aim for warm bath temperature.
    • Under-oiling the pan: Focaccia needs that olive oil barrier for crisp edges and easy release.
    • Rushing the rise: If the dough isn’t puffy, the crumb will be dense. Give it time.
    • Overloading with berries: Too many can sog out the center.Stick to about 1 1/2–2 cups.
    • Skipping the salt finish: A few flakes make the flavors pop and balance the sweetness.

    Recipe Variations

    • Herby Citrus: Add chopped rosemary or thyme with the lemon zest.
    • Lemon Ricotta: Dollop fresh ricotta on top after baking and finish with extra zest.
    • Almond Crunch: Sprinkle sliced almonds and a dusting of turbinado sugar before baking.
    • Meyer Lemon Twist: Use Meyer lemons for a softer, floral citrus note.
    • Orange Blueberry: Swap lemon for orange zest and juice for a warmer citrus vibe.

    FAQ

    Can I use frozen blueberries?

    Yes. Use them straight from the freezer. Don’t thaw, or they’ll bleed too much color into the dough.

    Do I need bread flour?

    No.

    All-purpose flour works well. Bread flour gives a chewier texture, while all-purpose is a bit softer.

    How do I make it sweeter?

    Add 2–3 extra tablespoons of sugar to the dough and finish with a thicker honey glaze.

    Can I make the dough ahead?

    Yes. After mixing, cover and chill up to 24 hours.

    Bring to room temp, then stretch, top, and bake.

    What pan should I use?

    A 9×13 metal pan gives thick, plush focaccia. A half-sheet pan makes a thinner, crisper version.

    Wrapping Up

    Lemon blueberry focaccia is simple to make and easy to love. The dough is forgiving, the flavors are bright, and the texture hits that sweet spot between tender and chewy.

    Bake it for brunch, bring it to a picnic, or cut it into bite-size squares for dessert. One pan goes a long way—and it disappears fast.

    Lemon Blueberry Focaccia – Bright, Juicy, and Perfect for Brunch

    Prep Time 20 minutes
    Cook Time 25 minutes
    Total Time 45 minutes
    Servings: 8 servings

    Ingredients
      

    • Bread flour (or all-purpose), 3 1/2 cups (440 g)
    • Warm water, 1 1/2 cups (355 ml), about 105–110°F
    • Instant or active dry yeast, 2 1/4 tsp (1 packet)
    • Granulated sugar, 2 tbsp (plus 1 tsp for activating yeast if using active dry)
    • Kosher salt, 1 1/2 tsp
    • Extra-virgin olive oil, 1/3 cup, plus more for the pan and finishing
    • Fresh lemon zest, from 1–2 lemons (about 2 tsp), plus 2 tbsp lemon juice
    • Fresh or frozen blueberries, 1 1/2–2 cups
    • Honey, 2–3 tbsp (for optional glaze)
    • Flaky sea salt, for sprinkling
    • Optional add-ins: vanilla extract (1 tsp), chopped fresh thyme (1–2 tsp)

    Method
     

    1. Bloom the yeast (if using active dry): In a small bowl, mix warm water with 1 tsp sugar and yeast. Let it sit 5–10 minutes until foamy. If using instant yeast, skip this step and add it directly to the flour.
    2. Mix the dough: In a large bowl, whisk flour, sugar, and salt. Add warm water, yeast (bloomed or instant), 1/4 cup olive oil, lemon zest, and optional vanilla. Stir with a spoon until a shaggy dough forms.
    3. Knead briefly: Turn the dough onto a lightly oiled surface and knead 2–3 minutes until smooth-ish and tacky. It should be soft and slightly sticky.
    4. First rise: Oil a clean bowl, add the dough, and turn to coat. Cover and let rise at room temperature until doubled, about 60–90 minutes.
    5. Pan and rest: Generously oil a 9×13-inch pan (or a large sheet pan for thinner focaccia). Gently stretch the dough to fit. If it springs back, rest 10 minutes, then finish stretching.
    6. Dimple and top: Drizzle 1–2 tbsp olive oil over the dough. With oiled fingers, press deep dimples all over. Scatter blueberries evenly, pressing some lightly into the dough. Sprinkle with a pinch of flaky sea salt and, if using, fresh thyme.
    7. Second rise: Let the topped dough rest 20–30 minutes until puffy. Meanwhile, preheat the oven to 425°F (220°C).
    8. Bake: Bake 20–25 minutes, until golden at the edges and lightly browned on top. If berries release lots of juice, that’s fine—those spots will be jammy.
    9. Finish with lemon-honey glaze: In a small bowl, whisk honey with lemon juice. While the focaccia is warm, brush or drizzle the glaze over the top. Add a final swirl of olive oil and a few pinches of flaky salt.
    10. Cool and slice: Let it rest 10–15 minutes before cutting into squares or strips.
  • Lemon Blueberry Sourdough Focaccia – Bright, Juicy, and Soft

    Lemon Blueberry Sourdough Focaccia – Bright, Juicy, and Soft

    This focaccia brings sunshine to your table with zesty lemon, bursty blueberries, and a tender, olive-oil-rich crumb. It’s familiar enough to feel comforting, but the sweet-tart twist makes it special. If you love sourdough and simple baking projects, this one’s a keeper.

    The dough is forgiving, the rise is slow and flavorful, and the result is perfect for brunch or an afternoon treat.

    Why This Recipe Works

    Close-up detail of freshly baked lemon blueberry sourdough focaccia just out of the oven, edges deep

    This recipe uses active sourdough starter for flavor and a gentle rise, which gives the focaccia a light, airy interior. A high-hydration dough keeps the crumb soft and open, ideal for soaking up olive oil and lemon syrup. Blueberries nestle into the dimples and bake into jammy pockets.

    A quick lemon syrup brushed on top at the end adds shine and a bright finish without making the bread soggy.

    Shopping List

    • Active sourdough starter (100% hydration)
    • Bread flour (all-purpose works in a pinch)
    • Warm water
    • Fine sea salt
    • Extra-virgin olive oil
    • Fresh blueberries
    • Lemon (you’ll use zest and juice)
    • Granulated sugar or honey (for the lemon syrup)
    • Optional: vanilla extract, flaky salt

    Step-by-Step Instructions

    Overhead final presentation shot of sliced lemon blueberry sourdough focaccia on a dark slate board,
    1. Feed your starter. Make sure it’s bubbly and active. It should double within 4–6 hours and pass the float test.
    2. Mix the dough. In a large bowl, combine 100 g active starter, 425 g warm water, and 500 g bread flour. Stir until no dry bits remain.

      Rest 20–30 minutes (autolyse).

    3. Add salt and oil. Sprinkle in 10 g fine sea salt and 1 tablespoon olive oil. Pinch and fold the dough until incorporated. The dough will be sticky—that’s good.
    4. Bulk fermentation with folds. Over 2 hours at room temp, perform 3–4 sets of stretch-and-folds every 30 minutes.

      Cover and let it rise until puffy and about 50% larger, another 1–2 hours depending on kitchen temperature.

    5. Pan and cold proof. Generously oil a 9×13-inch pan (or a large cast-iron skillet). Gently tip in the dough, fold edges to create a rough rectangle, and coat the surface with more olive oil. Cover and refrigerate 8–12 hours for flavor and easy handling.
    6. Warm up and preheat. Remove from the fridge and let the dough sit at room temp 45–60 minutes.

      Preheat oven to 425°F (220°C).

    7. Dimple and top. Oil your fingertips and press deep dimples across the dough. Sprinkle on lemon zest (from 1 lemon) and press in 1 to 1 1/2 cups blueberries. Drizzle with 1–2 tablespoons olive oil and a pinch of flaky salt if using.
    8. Bake. Bake 22–28 minutes, until the edges are deeply golden and the top has caramelized spots.

      Rotate the pan once for even color.

    9. Make lemon syrup. While it bakes, simmer 2 tablespoons lemon juice with 2 tablespoons sugar (or honey) for 1–2 minutes until slightly thickened. Add a few drops vanilla if you like.
    10. Finish. Brush warm focaccia with lemon syrup. Cool 10–15 minutes before slicing so the crumb sets and the berries don’t burst out.

    How to Store

    • Room temperature: Keep in an airtight container for up to 2 days.

      Re-crisp in a 350°F (175°C) oven for 6–8 minutes.

    • Freezer: Wrap slices tightly and freeze up to 2 months. Thaw at room temp, then warm in the oven.
    • Avoid the fridge: It dries out bread faster and dulls the flavor.

    Health Benefits

    • Sourdough fermentation can make gluten easier to digest for some people and may improve mineral absorption.
    • Olive oil provides heart-healthy fats and keeps the crumb tender without butter.
    • Blueberries offer antioxidants and natural sweetness, reducing the need for heavy sugar.
    • Lemon adds vitamin C and bright flavor with minimal calories.

    What Not to Do

    • Don’t use an inactive starter. If it’s sluggish, your focaccia will be dense.
    • Don’t skimp on oiling the pan. It prevents sticking and creates that signature crisp bottom.
    • Don’t overload with berries. Too many can weigh down the dough and make soggy pockets.
    • Don’t skip the rest after baking. Cutting too soon releases steam and collapses the crumb.

    Variations You Can Try

    • Lemon-thyme: Add fresh thyme leaves with the zest for an herby note.
    • Lemon-ricotta: Dollop ricotta after baking, then drizzle with honey.
    • Mixed berries: Swap in raspberries or blackberries, keeping the total fruit amount the same.
    • Poppy seed crunch: Sprinkle poppy seeds over the top with the zest.
    • Lemon glaze: Skip syrup and whisk powdered sugar with lemon juice for a light drizzle once cool.

    FAQ

    Can I use instant yeast instead of sourdough?

    Yes. Use 2 teaspoons instant yeast, increase water to 450 g, and skip the long cold proof—rise until doubled, then proceed.

    You’ll lose some tang but keep the texture.

    Do frozen blueberries work?

    They do. Use from frozen, and don’t thaw. Toss lightly with a teaspoon of flour to reduce bleeding, then press into the dough.

    What if my dough is too sticky to handle?

    Sticky dough is normal.

    Oil your hands, use a bench scraper, and trust the folds and cold proof. Resist adding extra flour, which tightens the crumb.

    How do I know it’s fully baked?

    The edges should be deep golden and crisp, and the center should spring back when pressed. An internal temp around 200–205°F (93–96°C) is ideal.

    Can I make it same-day?

    Yes.

    After bulk fermentation, let it rise in the pan at room temp until puffy (45–75 minutes), then bake. Flavor is better with an overnight chill, but it’s still delicious.

    In Conclusion

    Lemon blueberry sourdough focaccia is bright, plush, and surprisingly easy. With a lively starter, plenty of olive oil, and a touch of lemon syrup, you get a bakery-quality bake at home.

    Serve it warm for brunch, snack on it with tea, or pair it with a simple salad. It’s the kind of bread that makes an ordinary day feel special.

    Lemon Blueberry Sourdough Focaccia – Bright, Juicy, and Soft

    Prep Time 20 minutes
    Cook Time 25 minutes
    Total Time 45 minutes
    Servings: 8 servings

    Ingredients
      

    • Active sourdough starter (100% hydration)
    • Bread flour (all-purpose works in a pinch)
    • Warm water
    • Fine sea salt
    • Extra-virgin olive oil
    • Fresh blueberries
    • Lemon (you’ll use zest and juice)
    • Granulated sugar or honey (for the lemon syrup)
    • Optional: vanilla extract, flaky salt

    Method
     

    1. Feed your starter. Make sure it’s bubbly and active. It should double within 4–6 hours and pass the float test.
    2. Mix the dough. In a large bowl, combine 100 g active starter, 425 g warm water, and 500 g bread flour. Stir until no dry bits remain. Rest 20–30 minutes (autolyse).
    3. Add salt and oil. Sprinkle in 10 g fine sea salt and 1 tablespoon olive oil. Pinch and fold the dough until incorporated. The dough will be sticky—that’s good.
    4. Bulk fermentation with folds. Over 2 hours at room temp, perform 3–4 sets of stretch-and-folds every 30 minutes. Cover and let it rise until puffy and about 50% larger, another 1–2 hours depending on kitchen temperature.
    5. Pan and cold proof. Generously oil a 9×13-inch pan (or a large cast-iron skillet). Gently tip in the dough, fold edges to create a rough rectangle, and coat the surface with more olive oil. Cover and refrigerate 8–12 hours for flavor and easy handling.
    6. Warm up and preheat. Remove from the fridge and let the dough sit at room temp 45–60 minutes. Preheat oven to 425°F (220°C).
    7. Dimple and top. Oil your fingertips and press deep dimples across the dough. Sprinkle on lemon zest (from 1 lemon) and press in 1 to 1 1/2 cups blueberries. Drizzle with 1–2 tablespoons olive oil and a pinch of flaky salt if using.
    8. Bake. Bake 22–28 minutes, until the edges are deeply golden and the top has caramelized spots. Rotate the pan once for even color.
    9. Make lemon syrup. While it bakes, simmer 2 tablespoons lemon juice with 2 tablespoons sugar (or honey) for 1–2 minutes until slightly thickened. Add a few drops vanilla if you like.
    10. Finish. Brush warm focaccia with lemon syrup. Cool 10–15 minutes before slicing so the crumb sets and the berries don’t burst out.